 BERNINA Corporate Blog -
Sewing mug rugs for Christmas
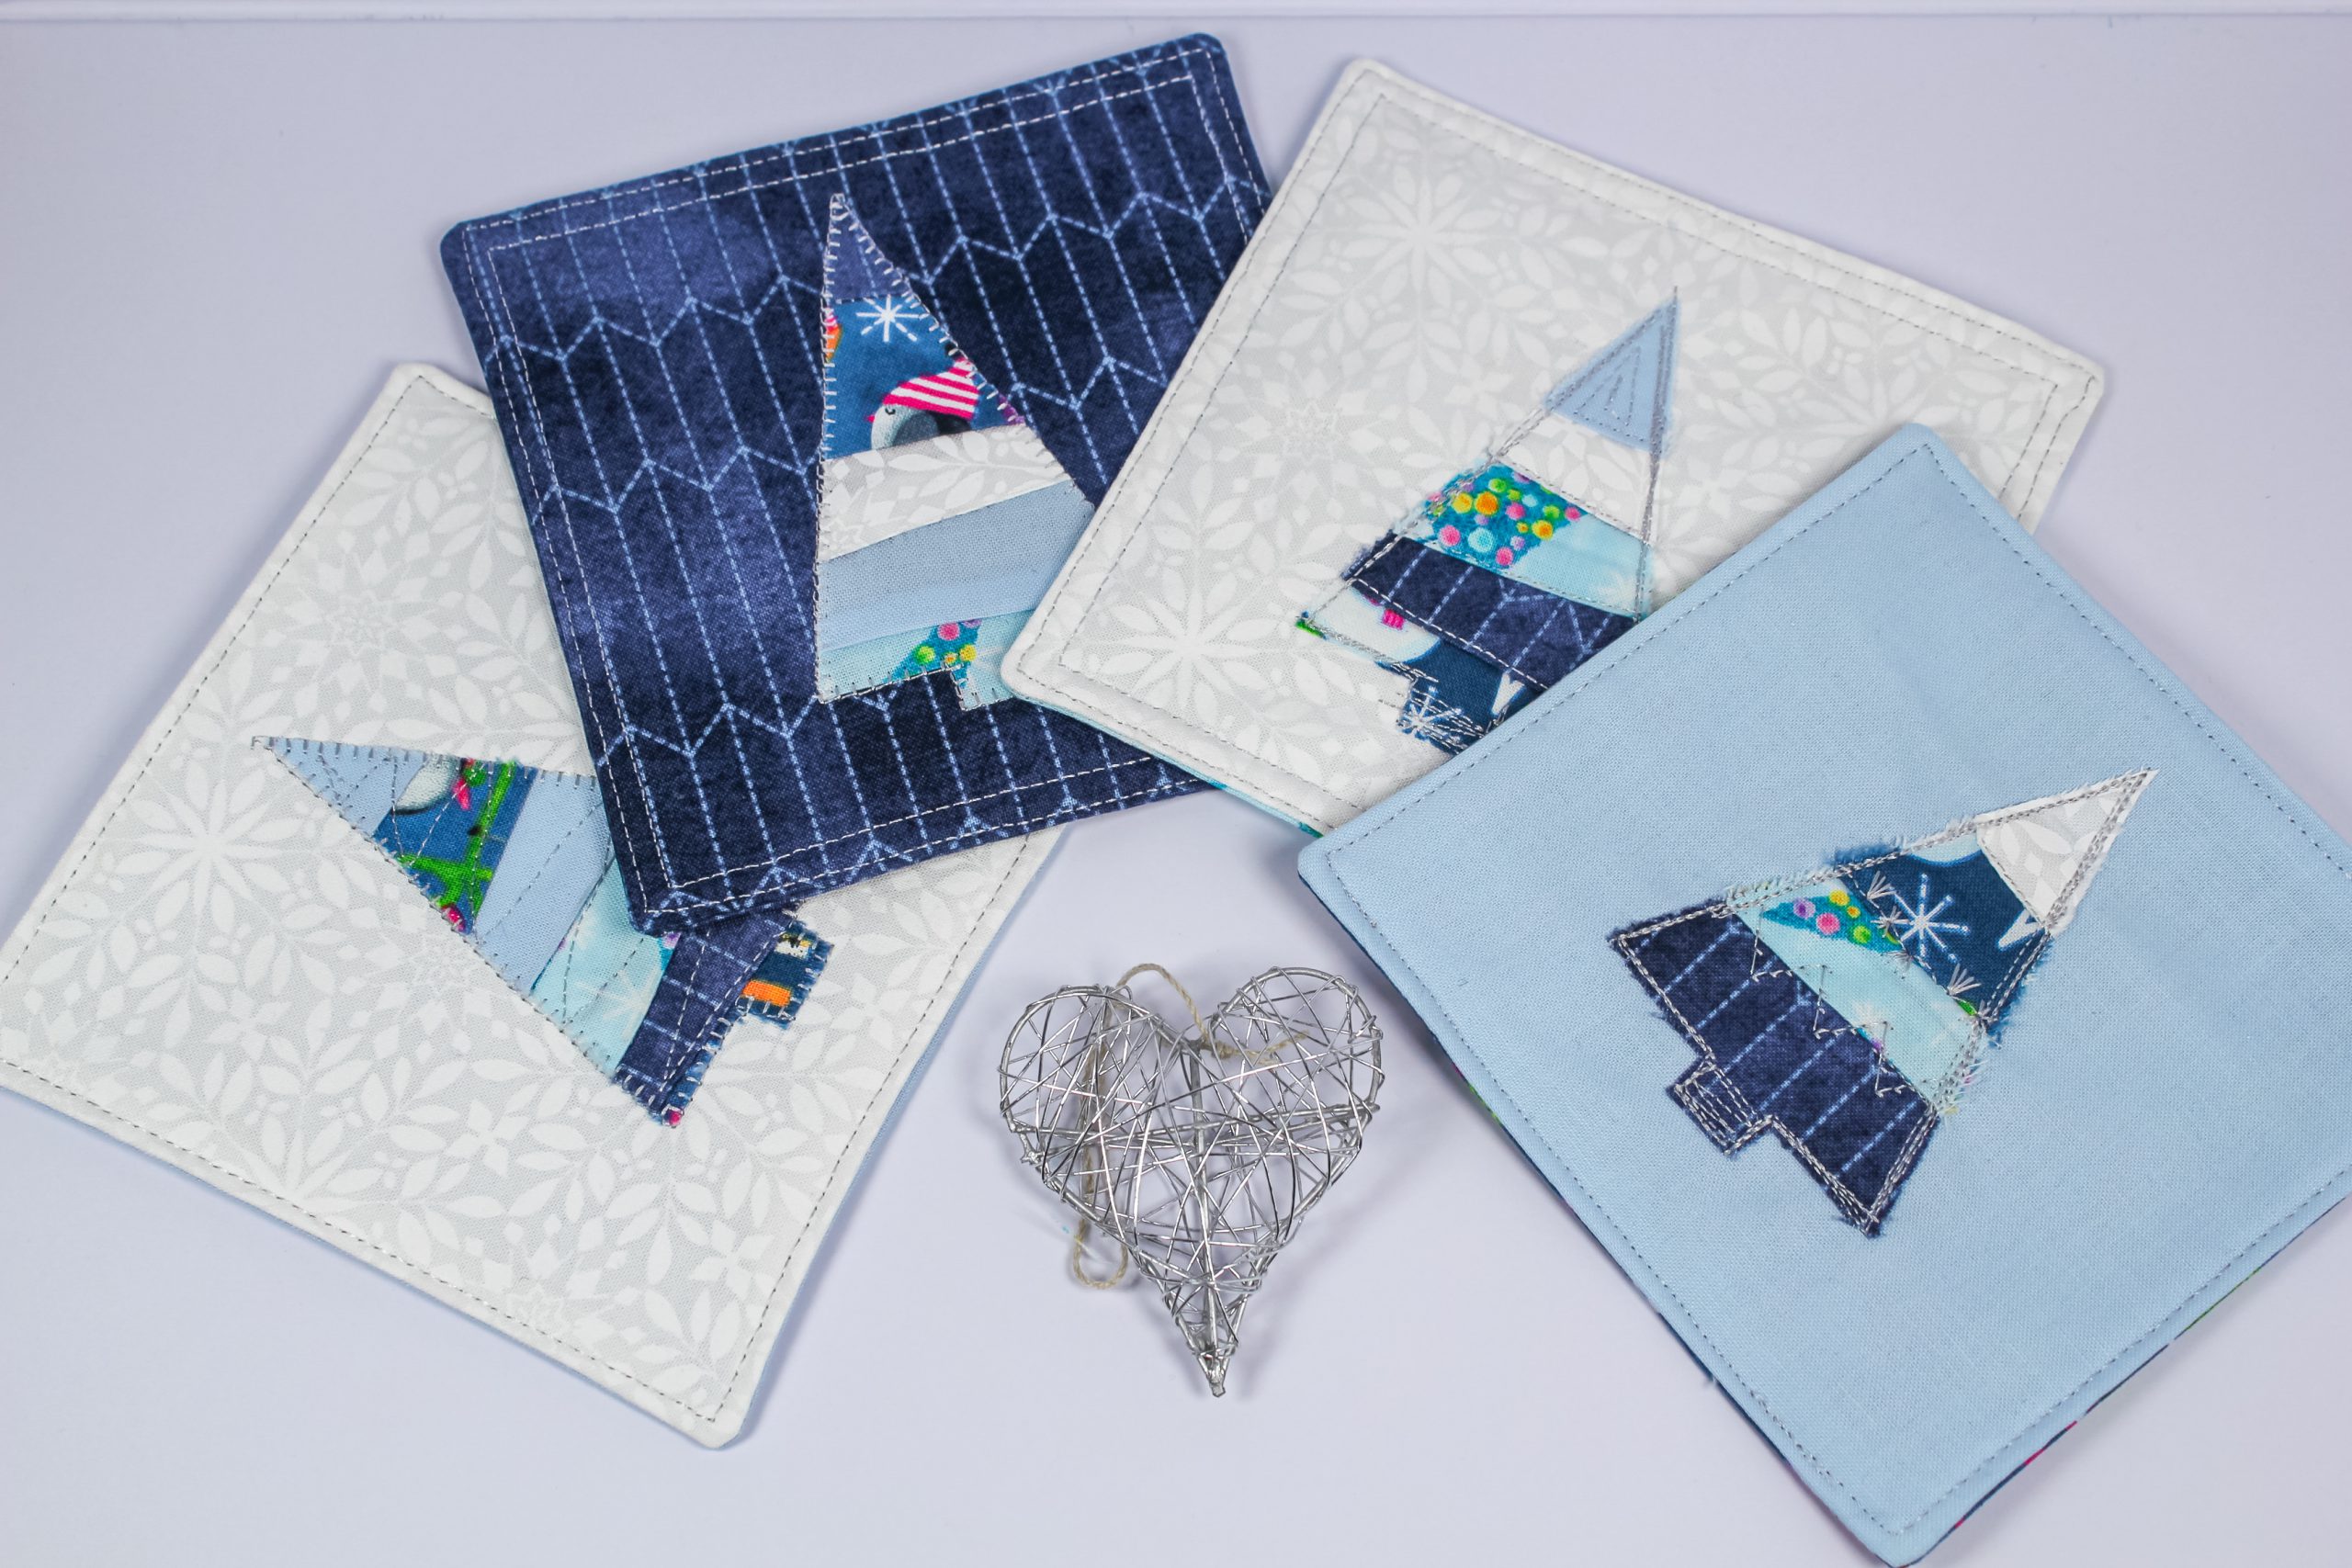
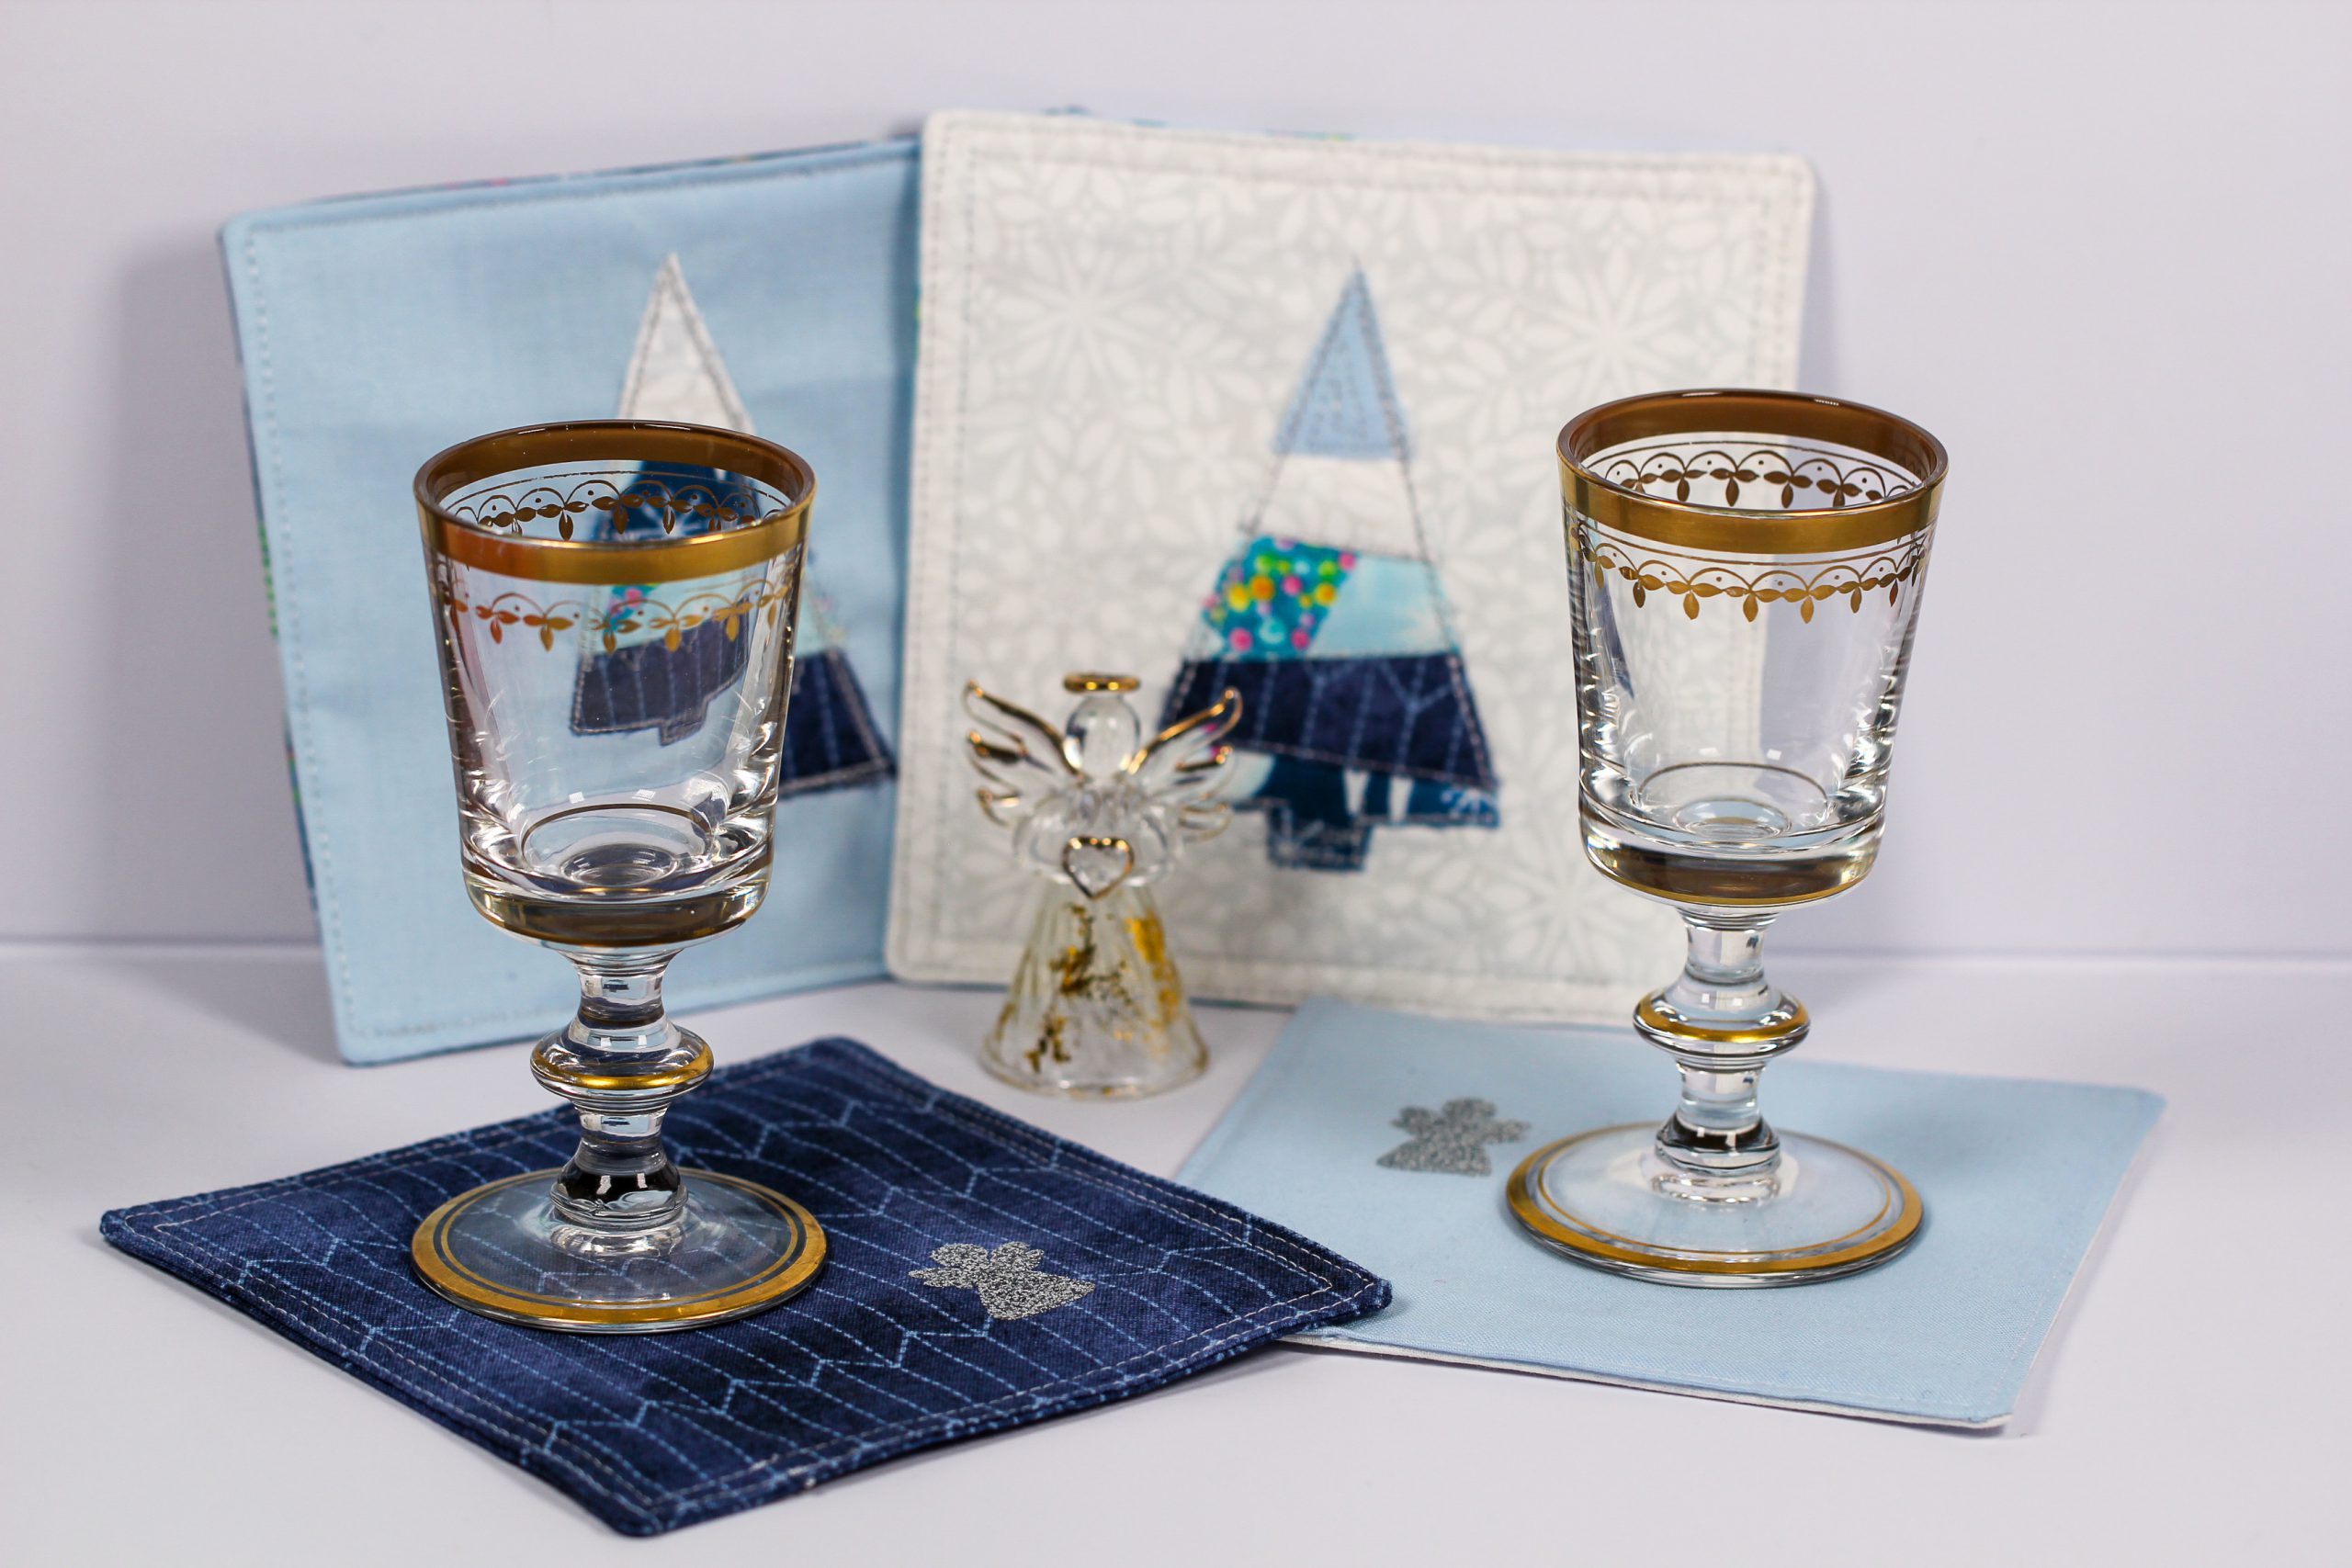
For the 16th window of the advent calendar, today I would like to show you how to sew mug rugs for Christmas using a simple foundation paper piecing method (FPP) and how to decorate them with a Christmas tree appliqué.
The theme of the 2020 blog advent calendar is “From the heart”, so I thought about which sewing instructions on this theme would bring you particular enjoyment. I love sewing coasters. Sometimes they are quick to sew, other times they can be more difficult, depending on the technique, material and size. Sewing a mini-quilt, coaster or mug rug is always a matter that is close to my heart and at the same time provides a meditative break from everyday life. A sewn coaster can be a very personal gift for a loved one or a nice gift for a dinner host during Advent.
Why did I choose a Christmas tree for the appliqué? I associate the Christmas tree with this special season, a time of love, harmony, warmth and peace. I therefore decided to choose it as the theme of my sewing instructions for Christmas. You can take a small sewn coaster like this with you everywhere – to the office or to a sewing course (maybe not right now during the time of coronavirus), to the coffee table or to the bath. Everyone will find a suitable place for their cup or glass. During the season of good will, these mug rugs will of course also look great on the decorated Christmas dining table.
Sewing a simple foundation paper piecing (FPP) project
Step by step, with numerous photos, I will show you how to sew the appliqués for these Christmas mug rugs. This means that you first make the appliqué for the coaster, and this is then ironed onto a piece of fabric, sewn on and embellished with decorative stitching.
Sewing using the foundation paper piecing method is slightly unusual, but once you get the technique down pat, it’s really easy. Essentially, this involves sewing small, roughly cut pieces of fabric onto paper in number order, creating a mirror image. My experience has shown me that it is important to concentrate when doing this type of sewing. Otherwise you may need to use the seam ripper. There are numerous patterns for this technique online and, of course, lots of interesting books. The FPP technique is especially suitable for scraps of fabric.
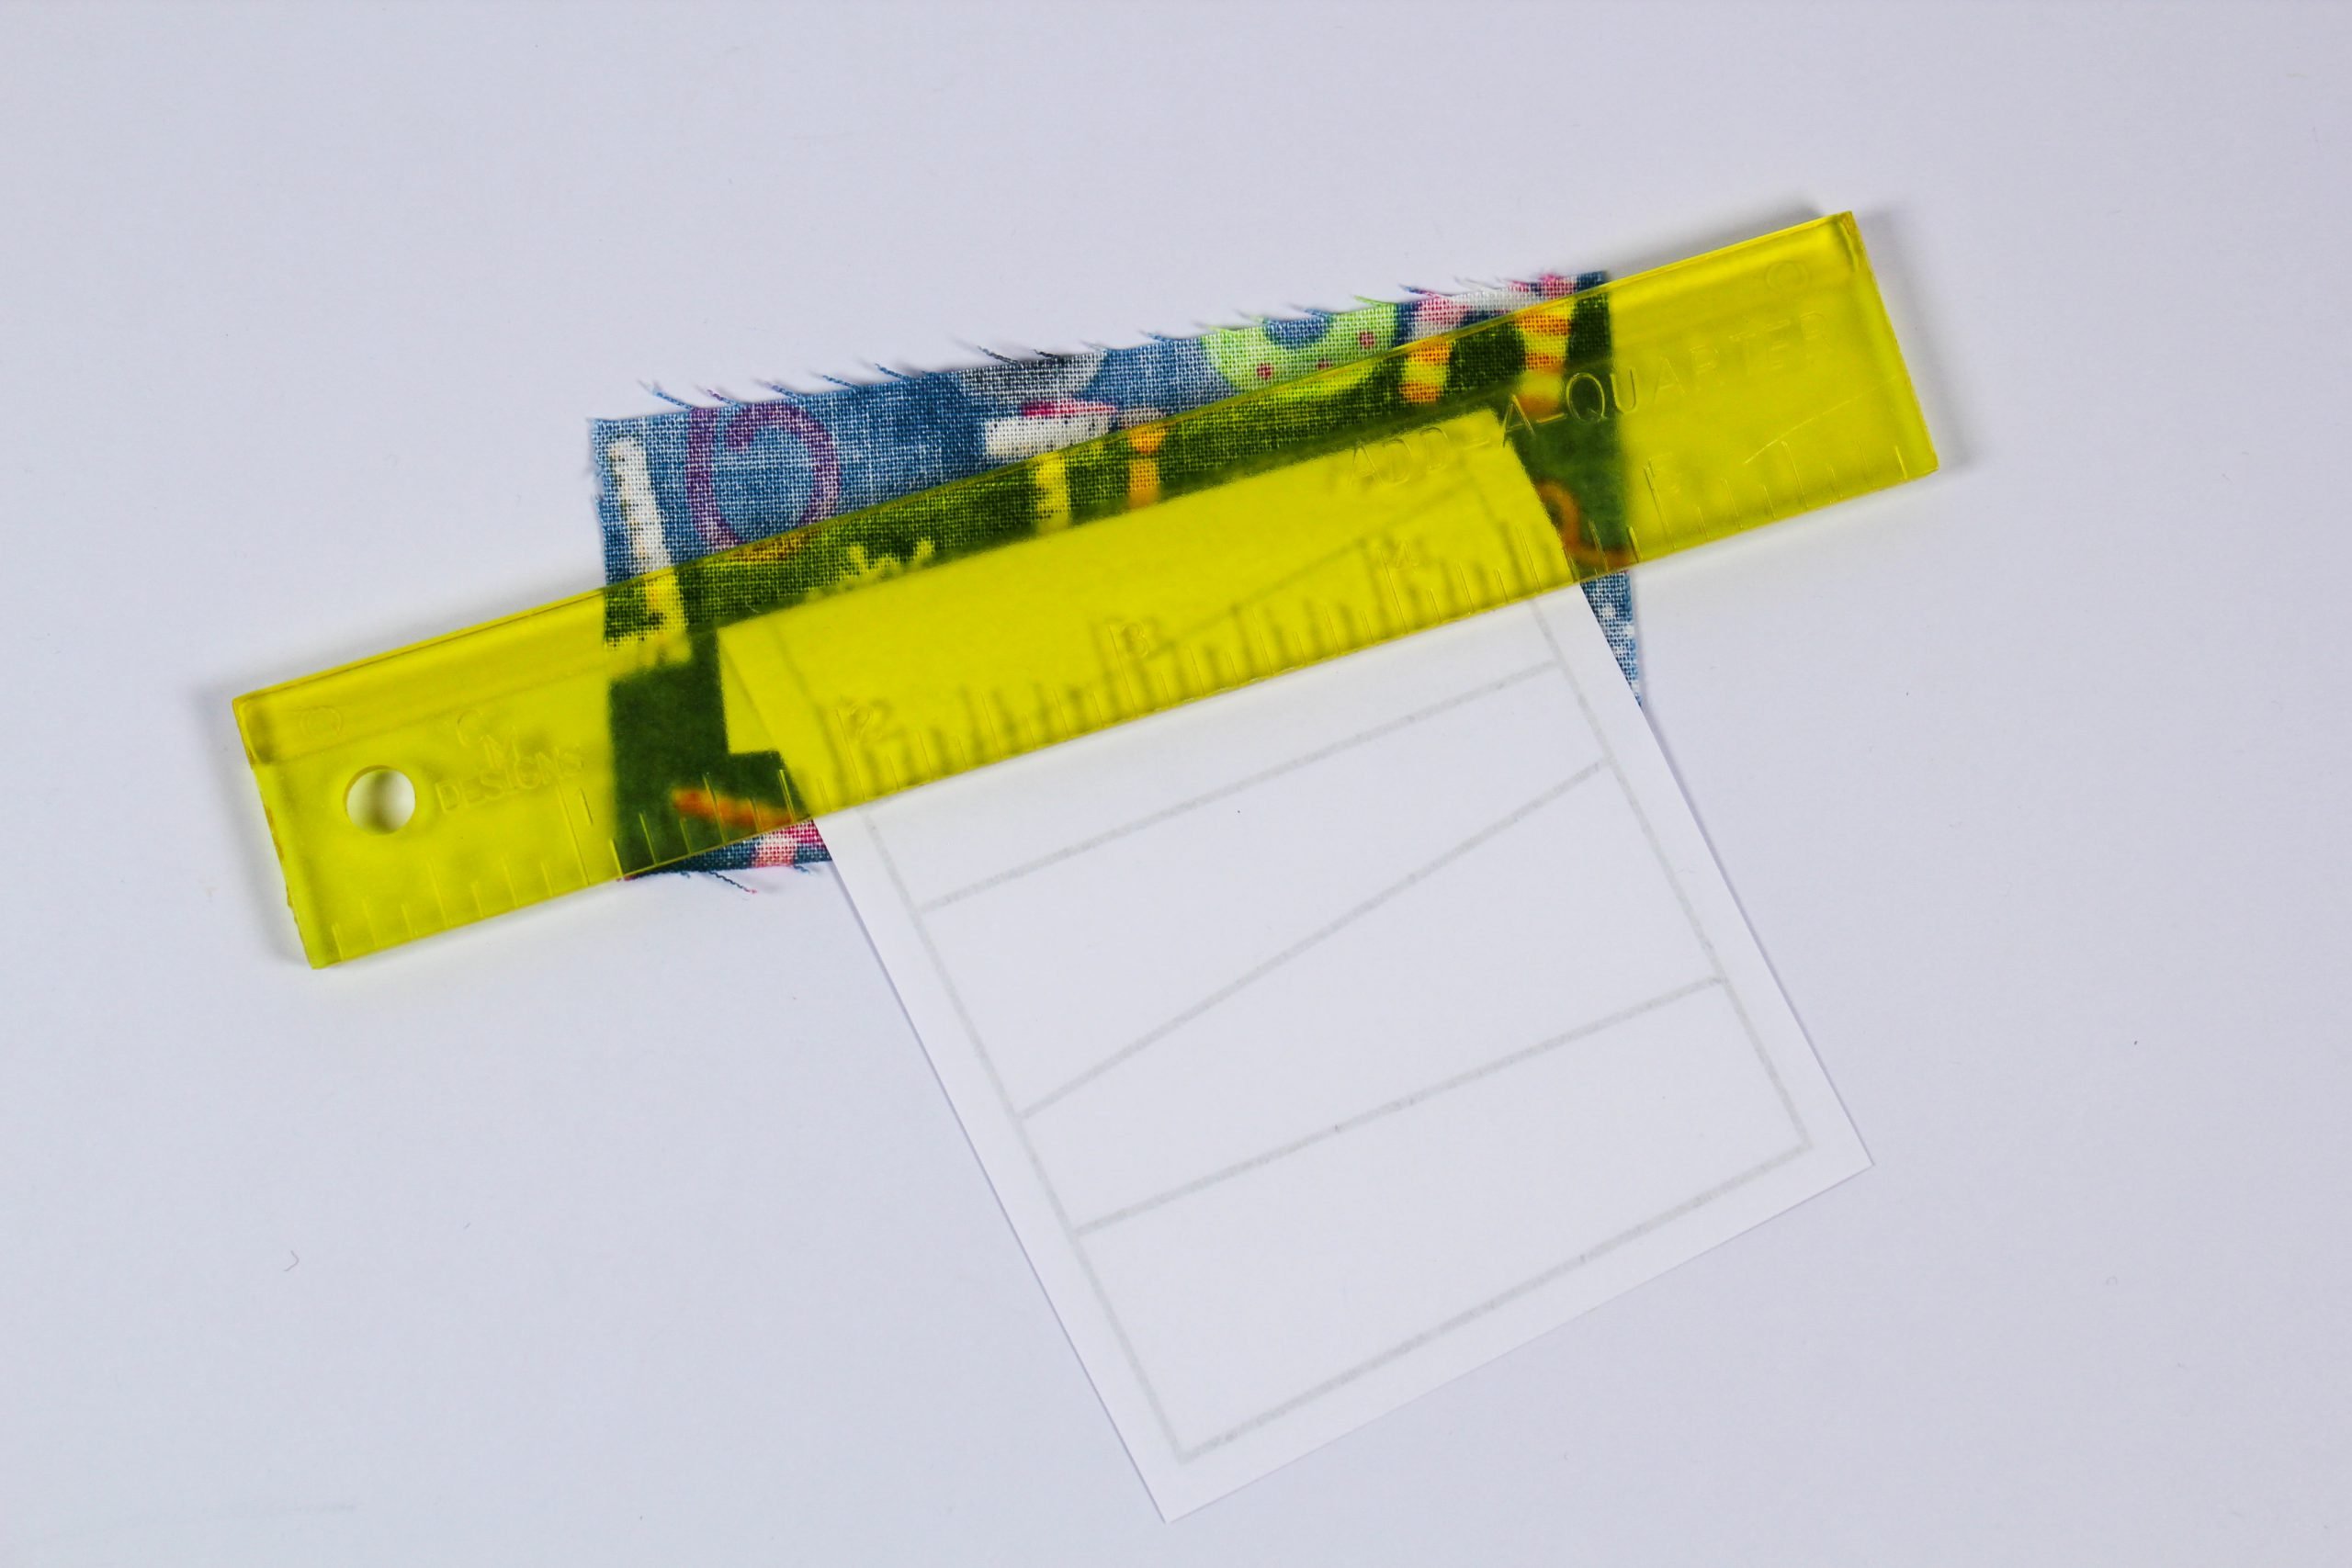
If you like this type of sewing, you will definitely want to get yourself a special ruler, an Add-A-Quarter ruler, if you don’t already have one.
Of course, you can sew this Christmas mug rug using a normal ruler and cutter. There may now be an outcry among the experts, with cries of “You don’t do it like that…”, but I like to keep things simple and I like a little improvisation when sewing. Life is often complicated enough. Of course, this technique is a broad field and, as I said, you can find out more about it online.
Add-A-Quarter ruler
The special thing about this ruler is its raised edge, which you can cut along with the rotary cutter in order to get an exact seam allowance of 1/4 inch.
Sewing mug rugs for Christmas – FPP pattern and template
Of course I have an FPP pattern and a template for appliquéing the mug rugs for you. You can download the Christmas tree mug rug pattern here. Please check that the scaling on your printer is set to 100%. If you want to sew a larger coaster, you can increase the size of the printout to about 110%, but you will then have to keep in mind that the pattern pieces for the front, back and stabilizer will also have to be larger. I drew the lines on the patterns extra thick, because FPP patterns usually have quite thin outlines. You can get special paper for FPP, which is an extra thin, and some people also like to use freezer paper for this technique. However, I normally use regular copy paper.
Materials
- Christmas tree paper pattern
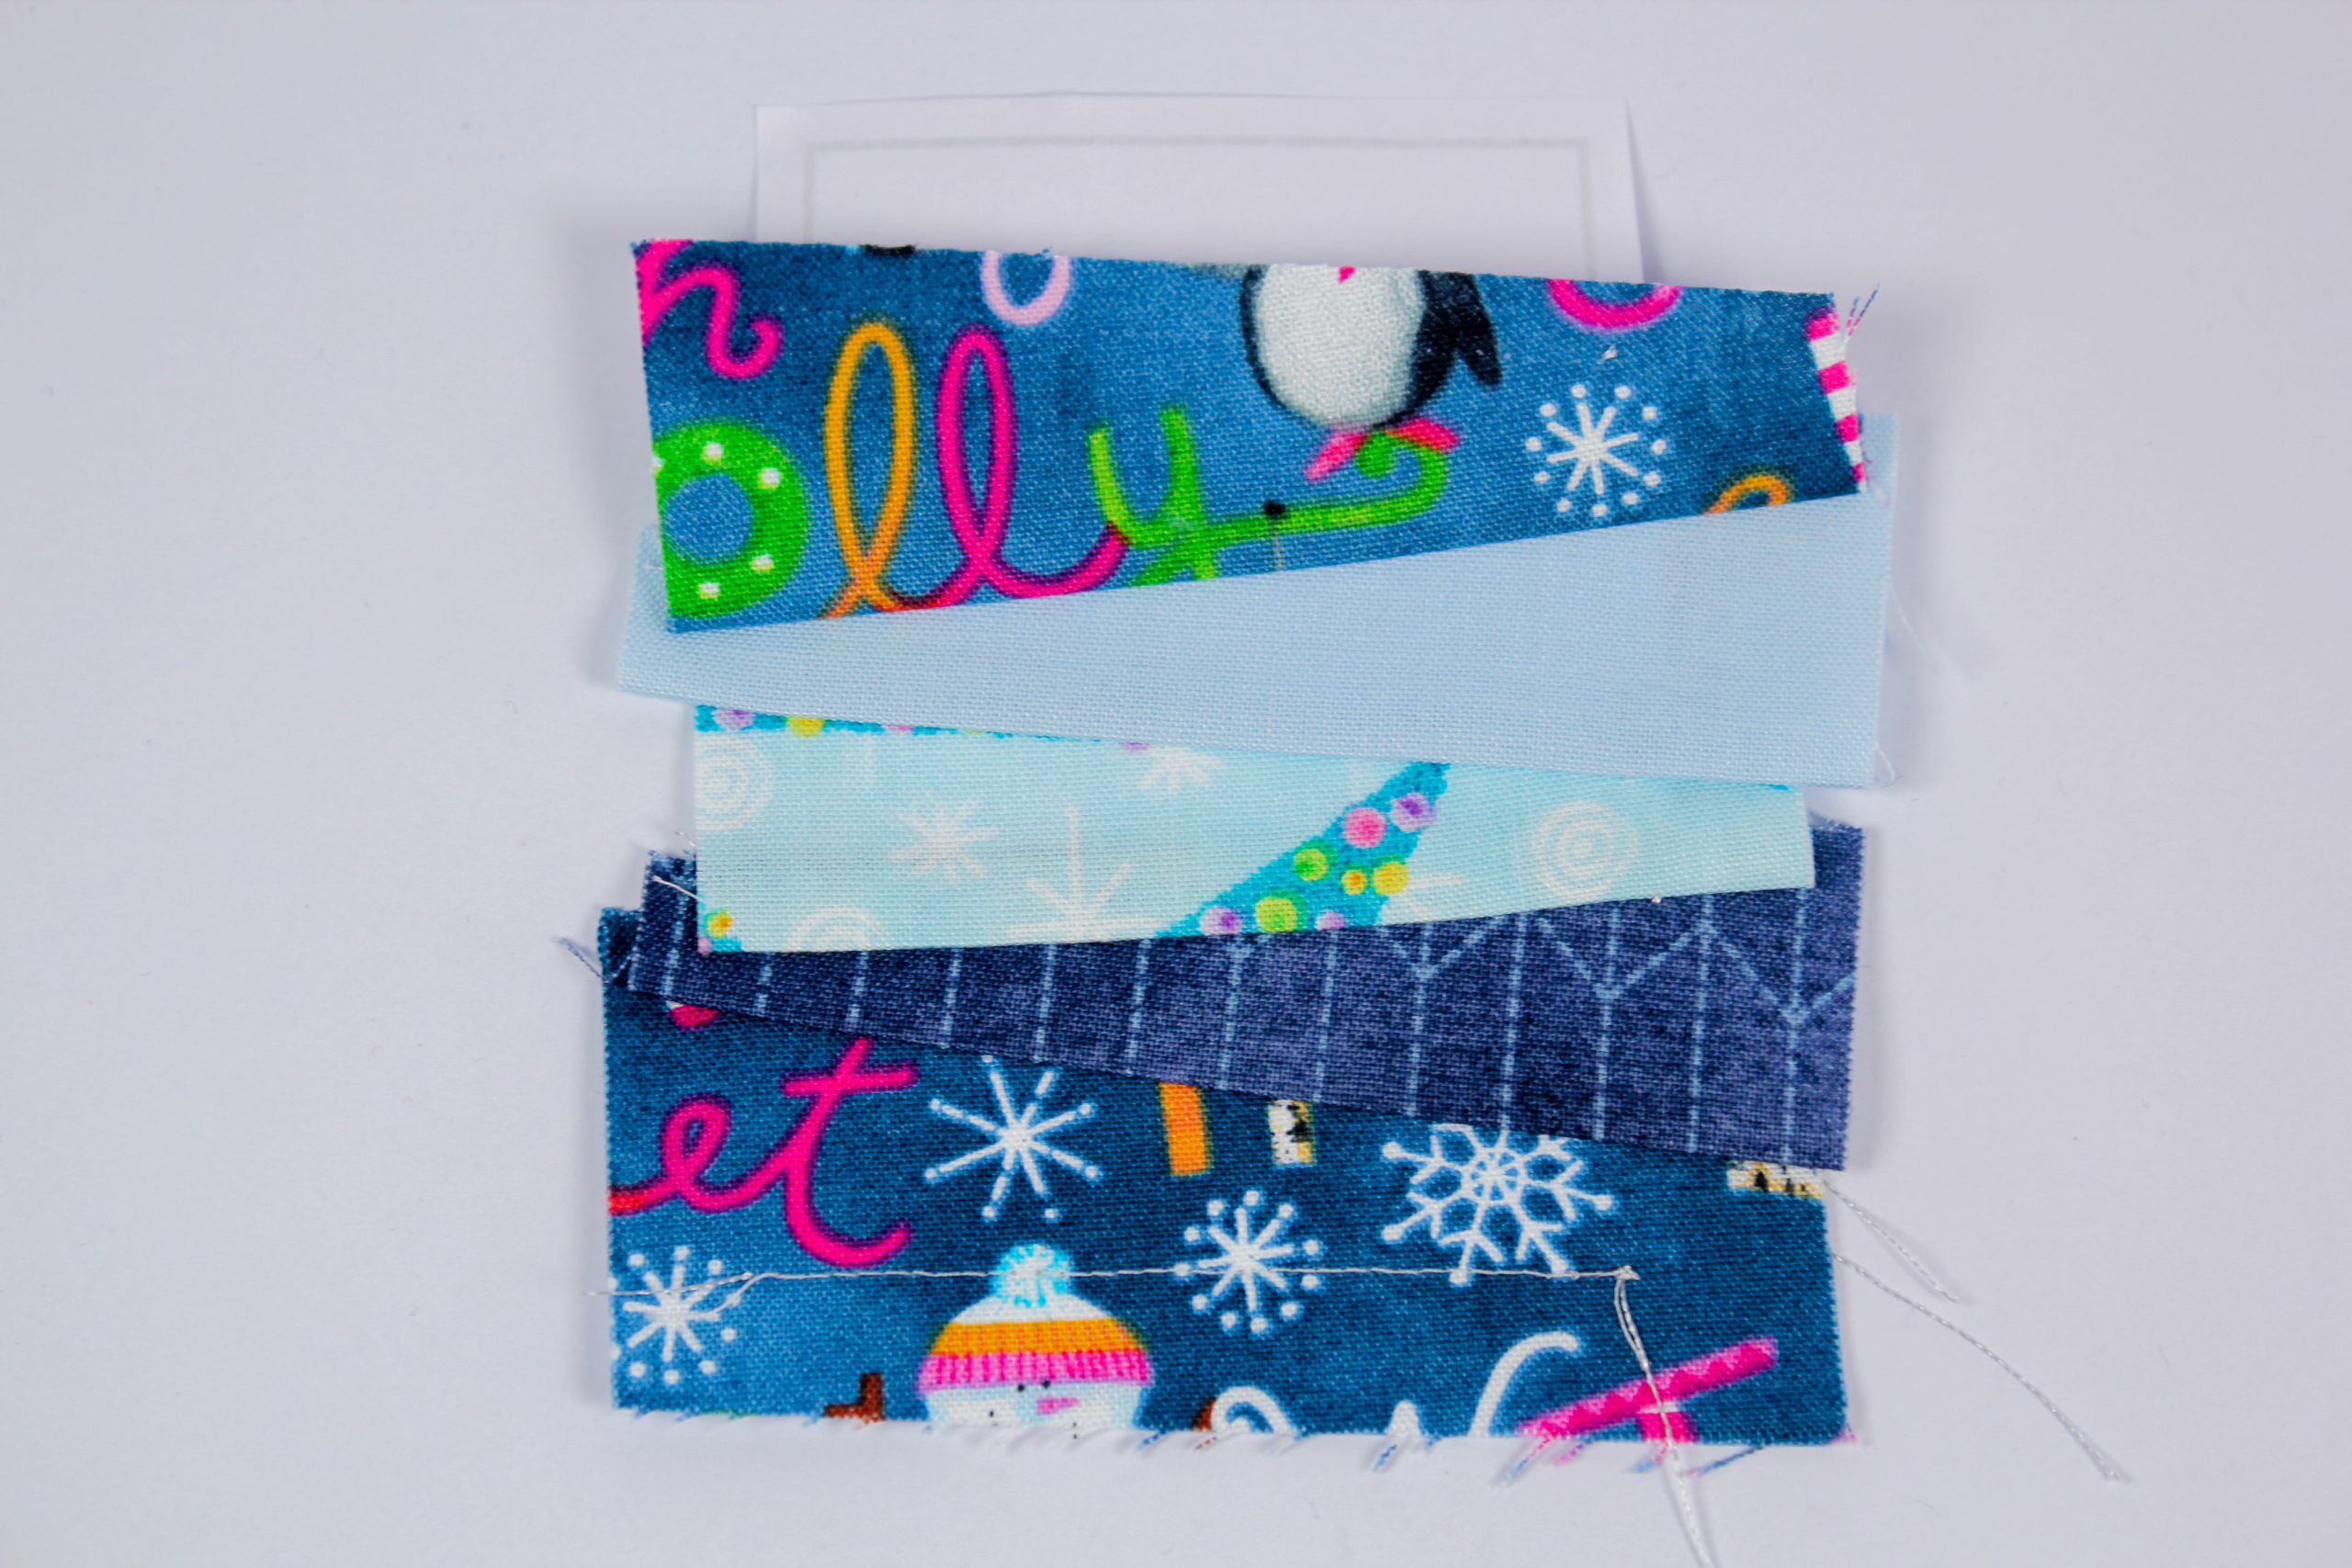
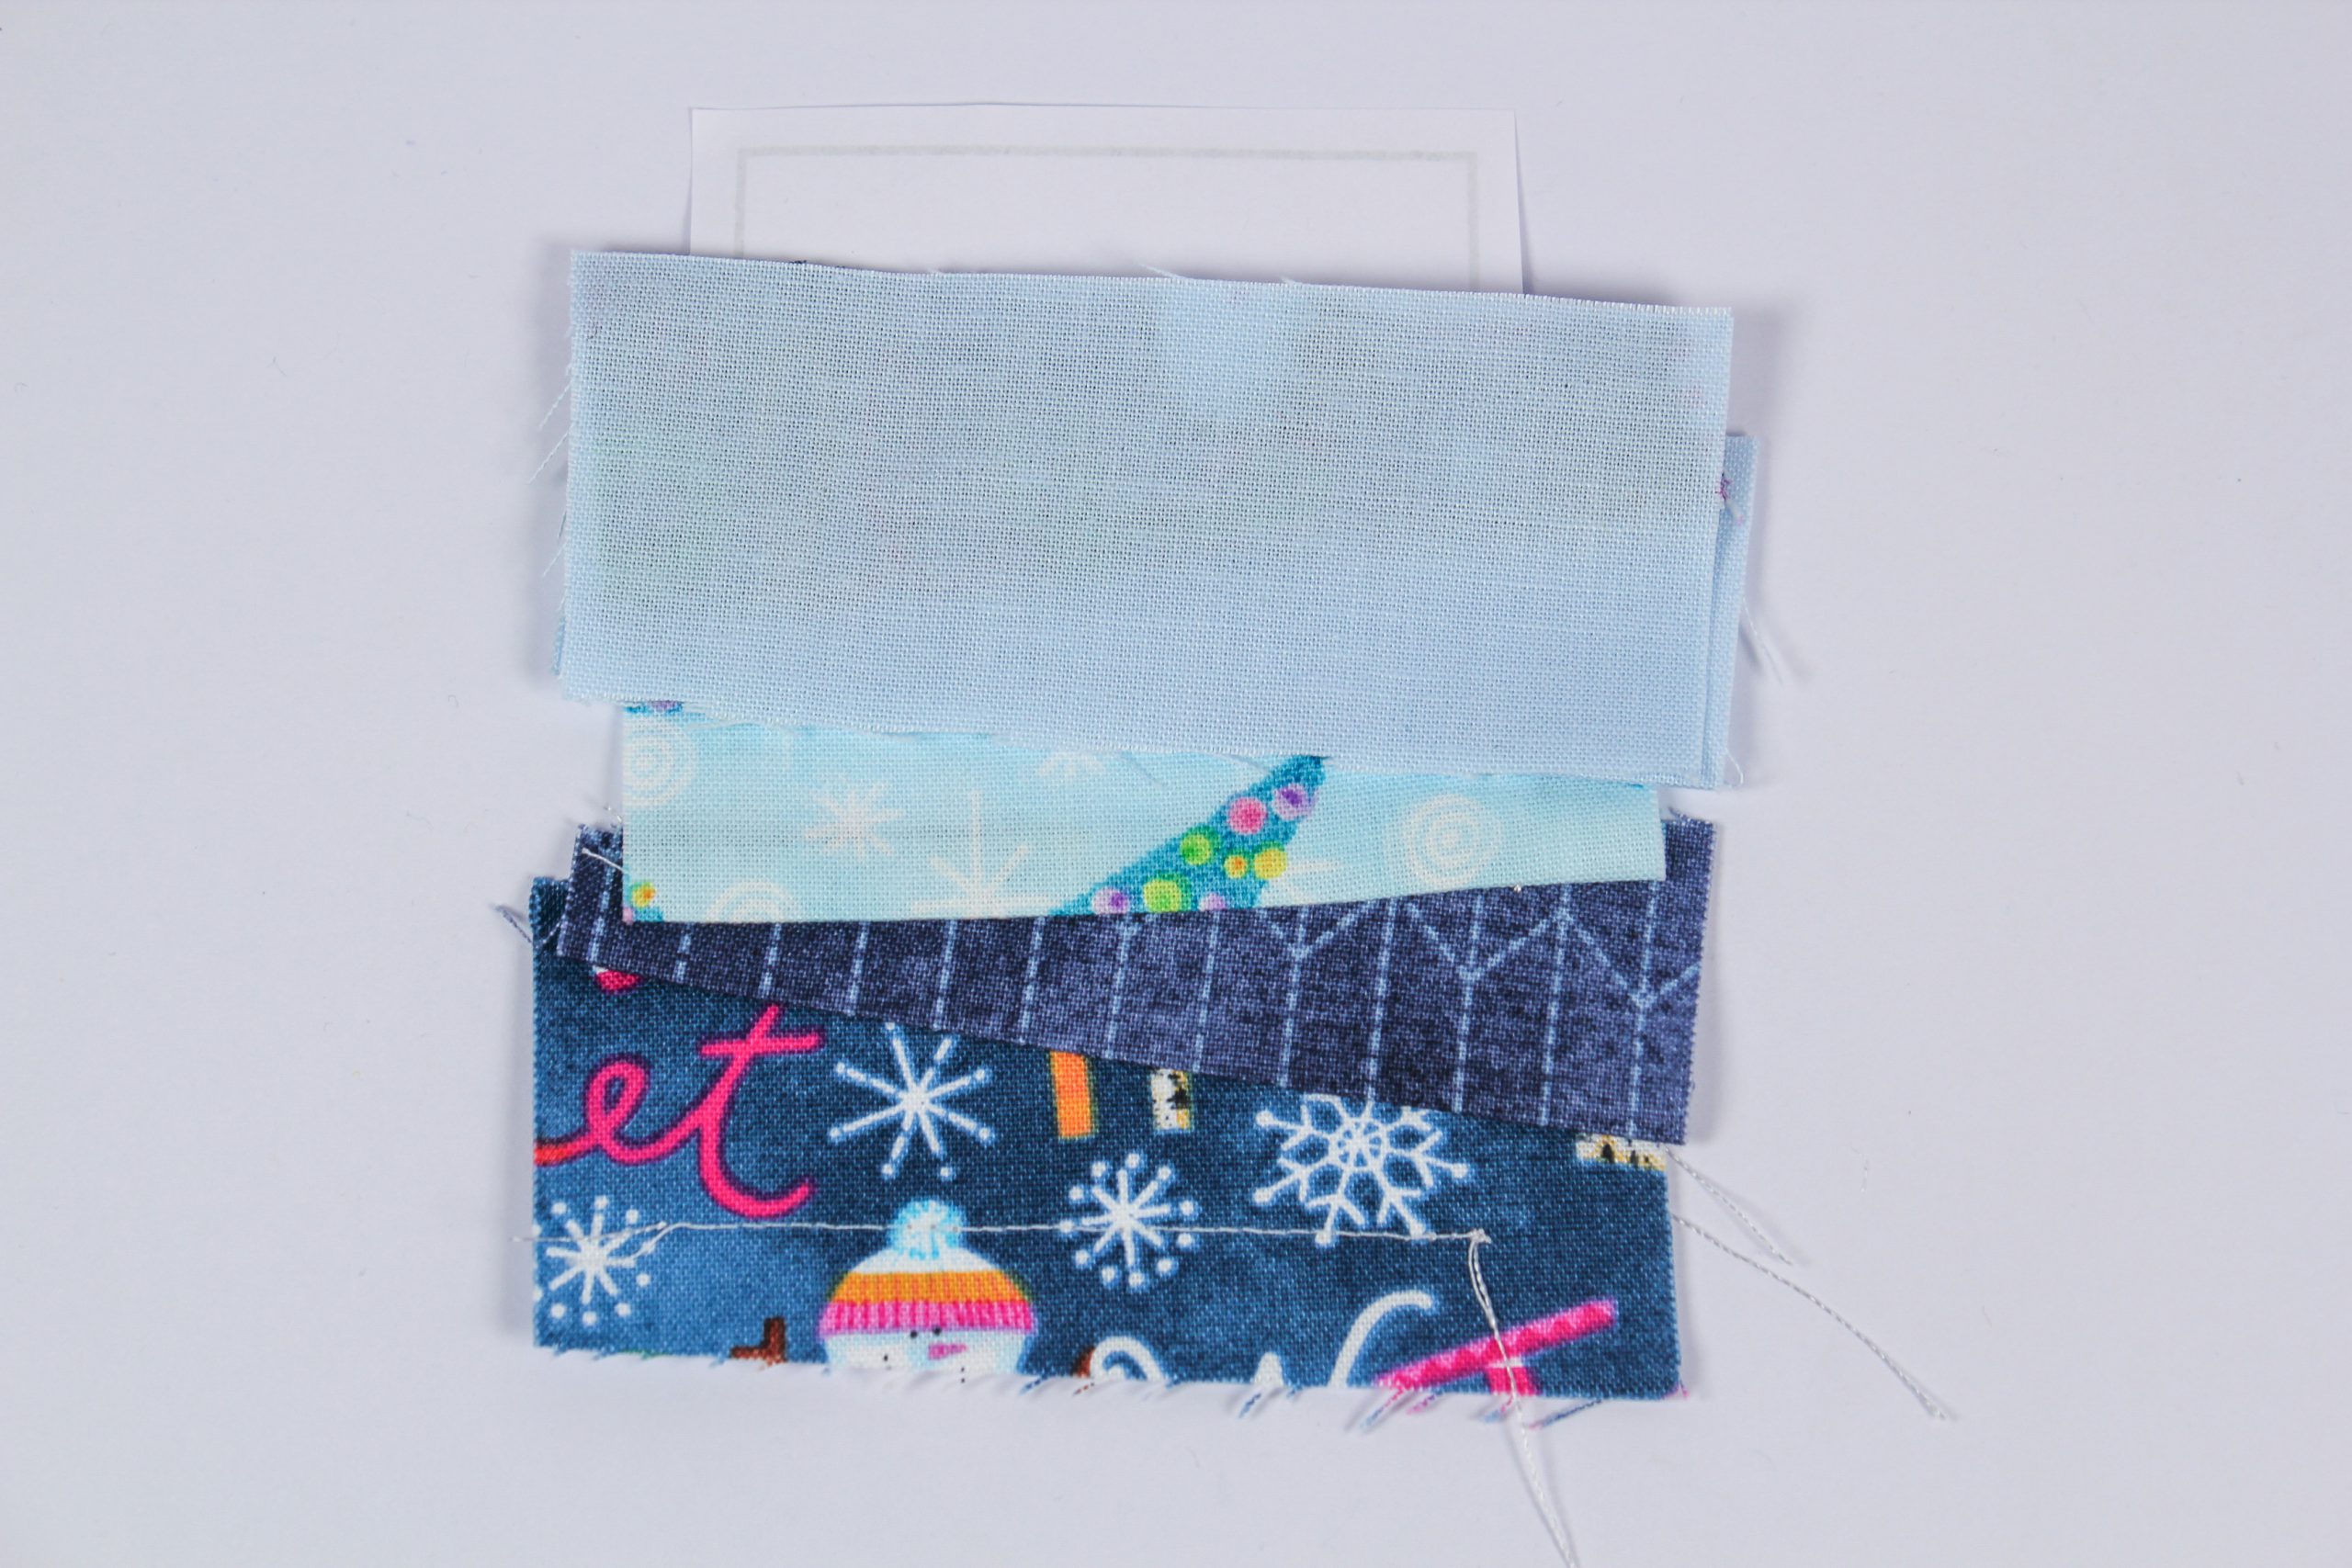
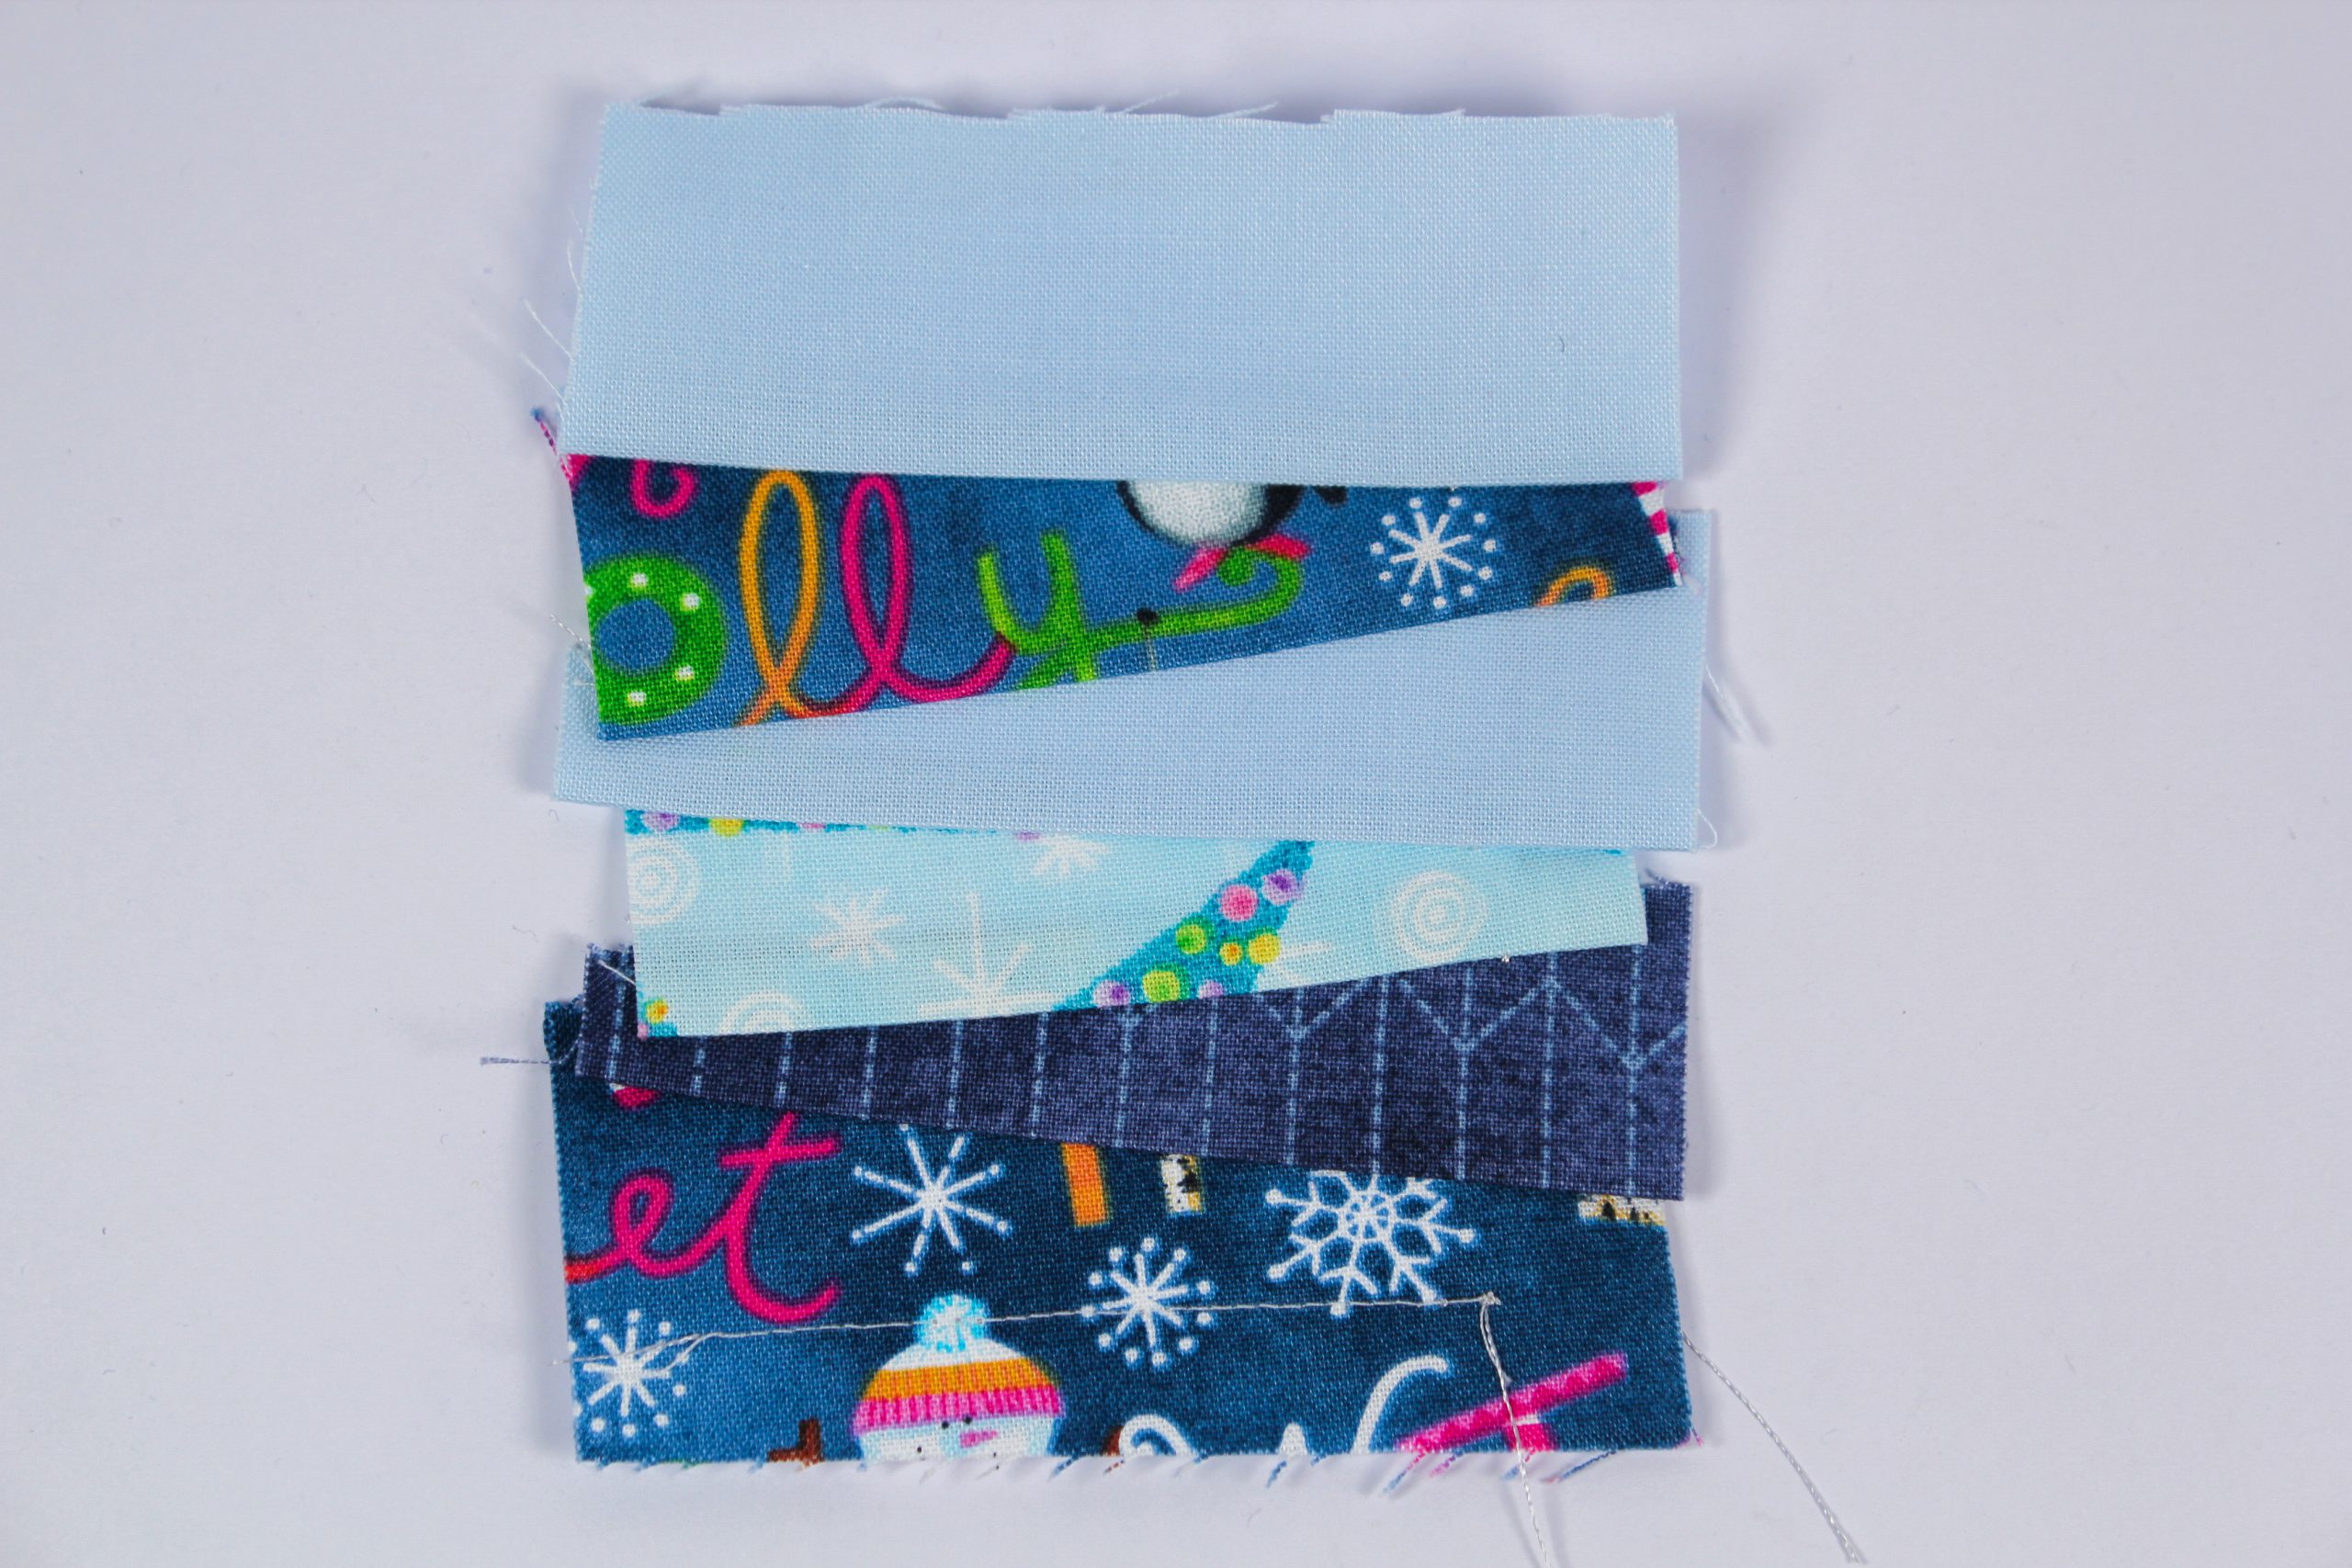
- Various scraps of fabric/cotton fabrics: for one mug rug, you will need 6 strips of 4 cm (height) x approx. 7 cm (width)
- Piece of cotton fabric measuring 14 cm x 14 cm per mug rug for the front
- Piece of cotton fabric measuring 14 cm x 14 cm per mug rug for the back
- Vilene S13 or Thermolam measuring 14 cm x 14 cm per mug rug
- Bondaweb
- Paper scissors
- Fabric scissors
- Cutter
- Cutting mat
- Pins/fabric clips
- Thread
- Iron
- Sewing machine
- 6-inch Add-A-Quarter ruler or small quilting ruler
- Fabric glue stick, optional
Sewing mug rugs for Christmas – instructions
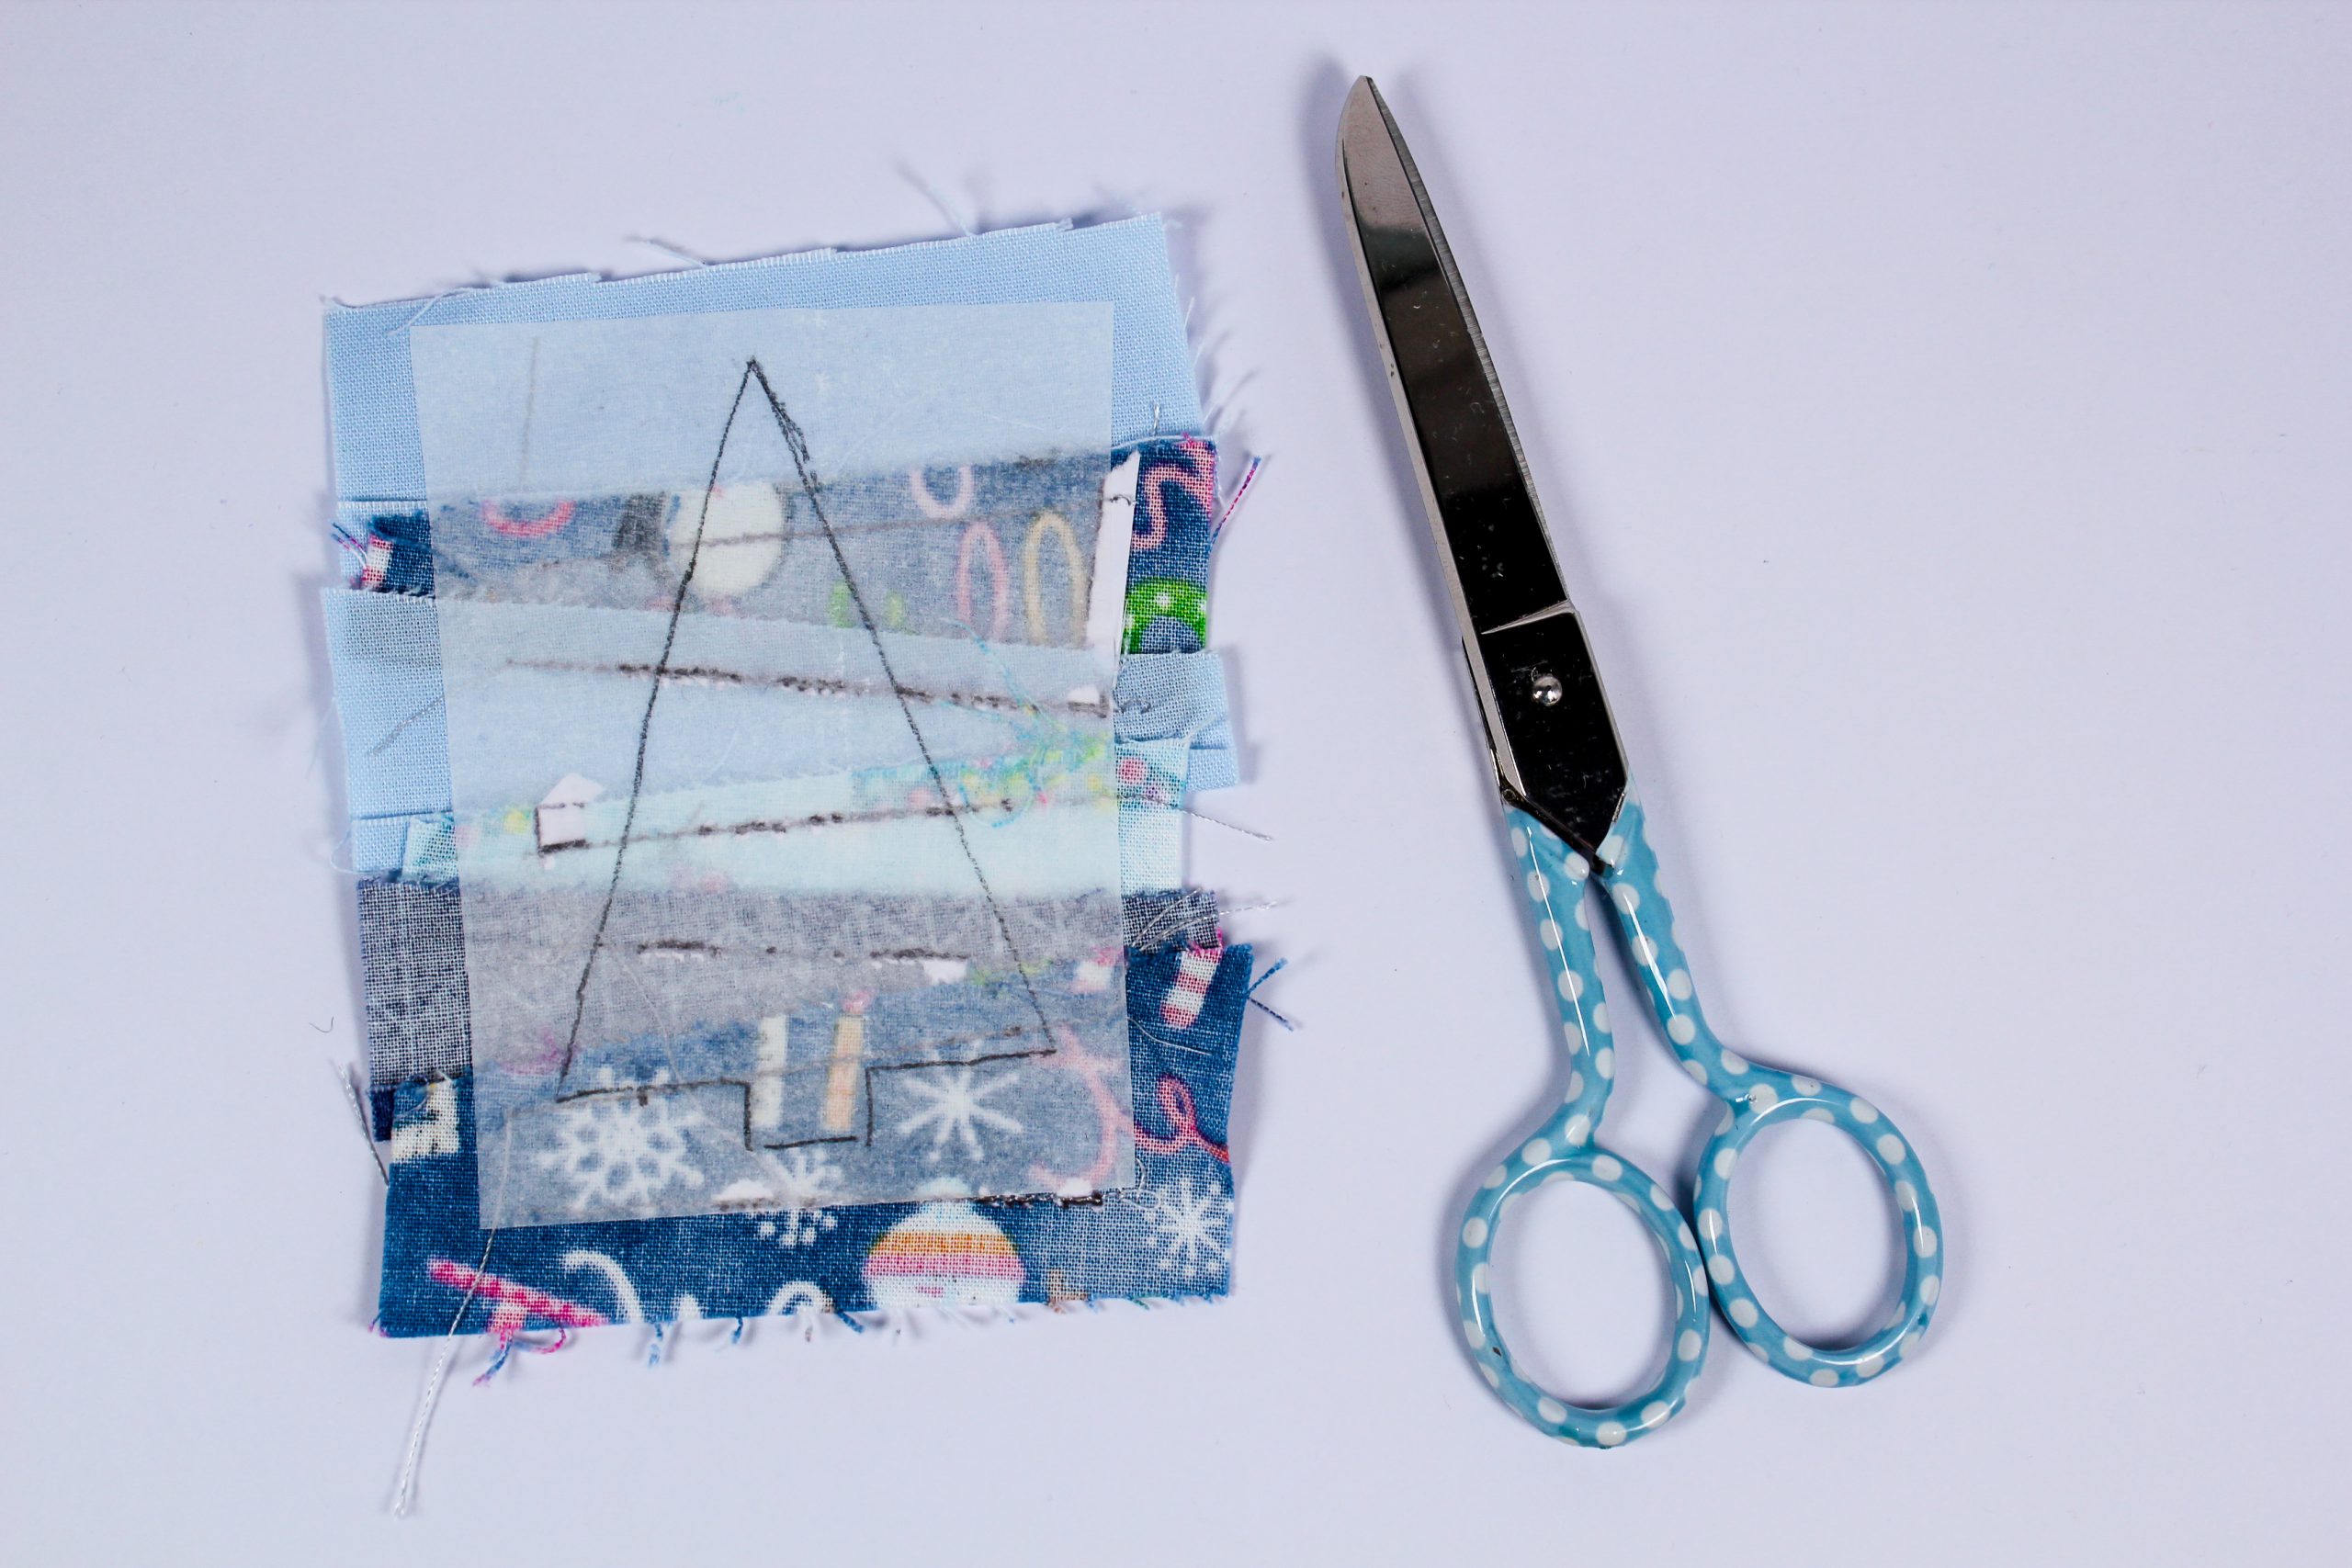
After you have printed out the pattern and template, cut them out with a margin of approx. 3 mm. If you want to sew four coasters, you would have to print out the PDF twice. The template, which you can download, has the numbering of the individual lines from 1 to 6 printed on it, but I have just noticed that they are missing here on my photo below. However, as this is a very simple pattern, I’ll assume that my step-by-step instruction photos are self-explanatory. For the first photo I added the numbering afterwards to get you started. The numbers are of course included on the PDF.
Step 1:
Reduce the size of the straight stitch of your sewing machine to 1.5 – 1.9. The smaller the stitch, the easier it is to tear the paper off the fabric at the end. 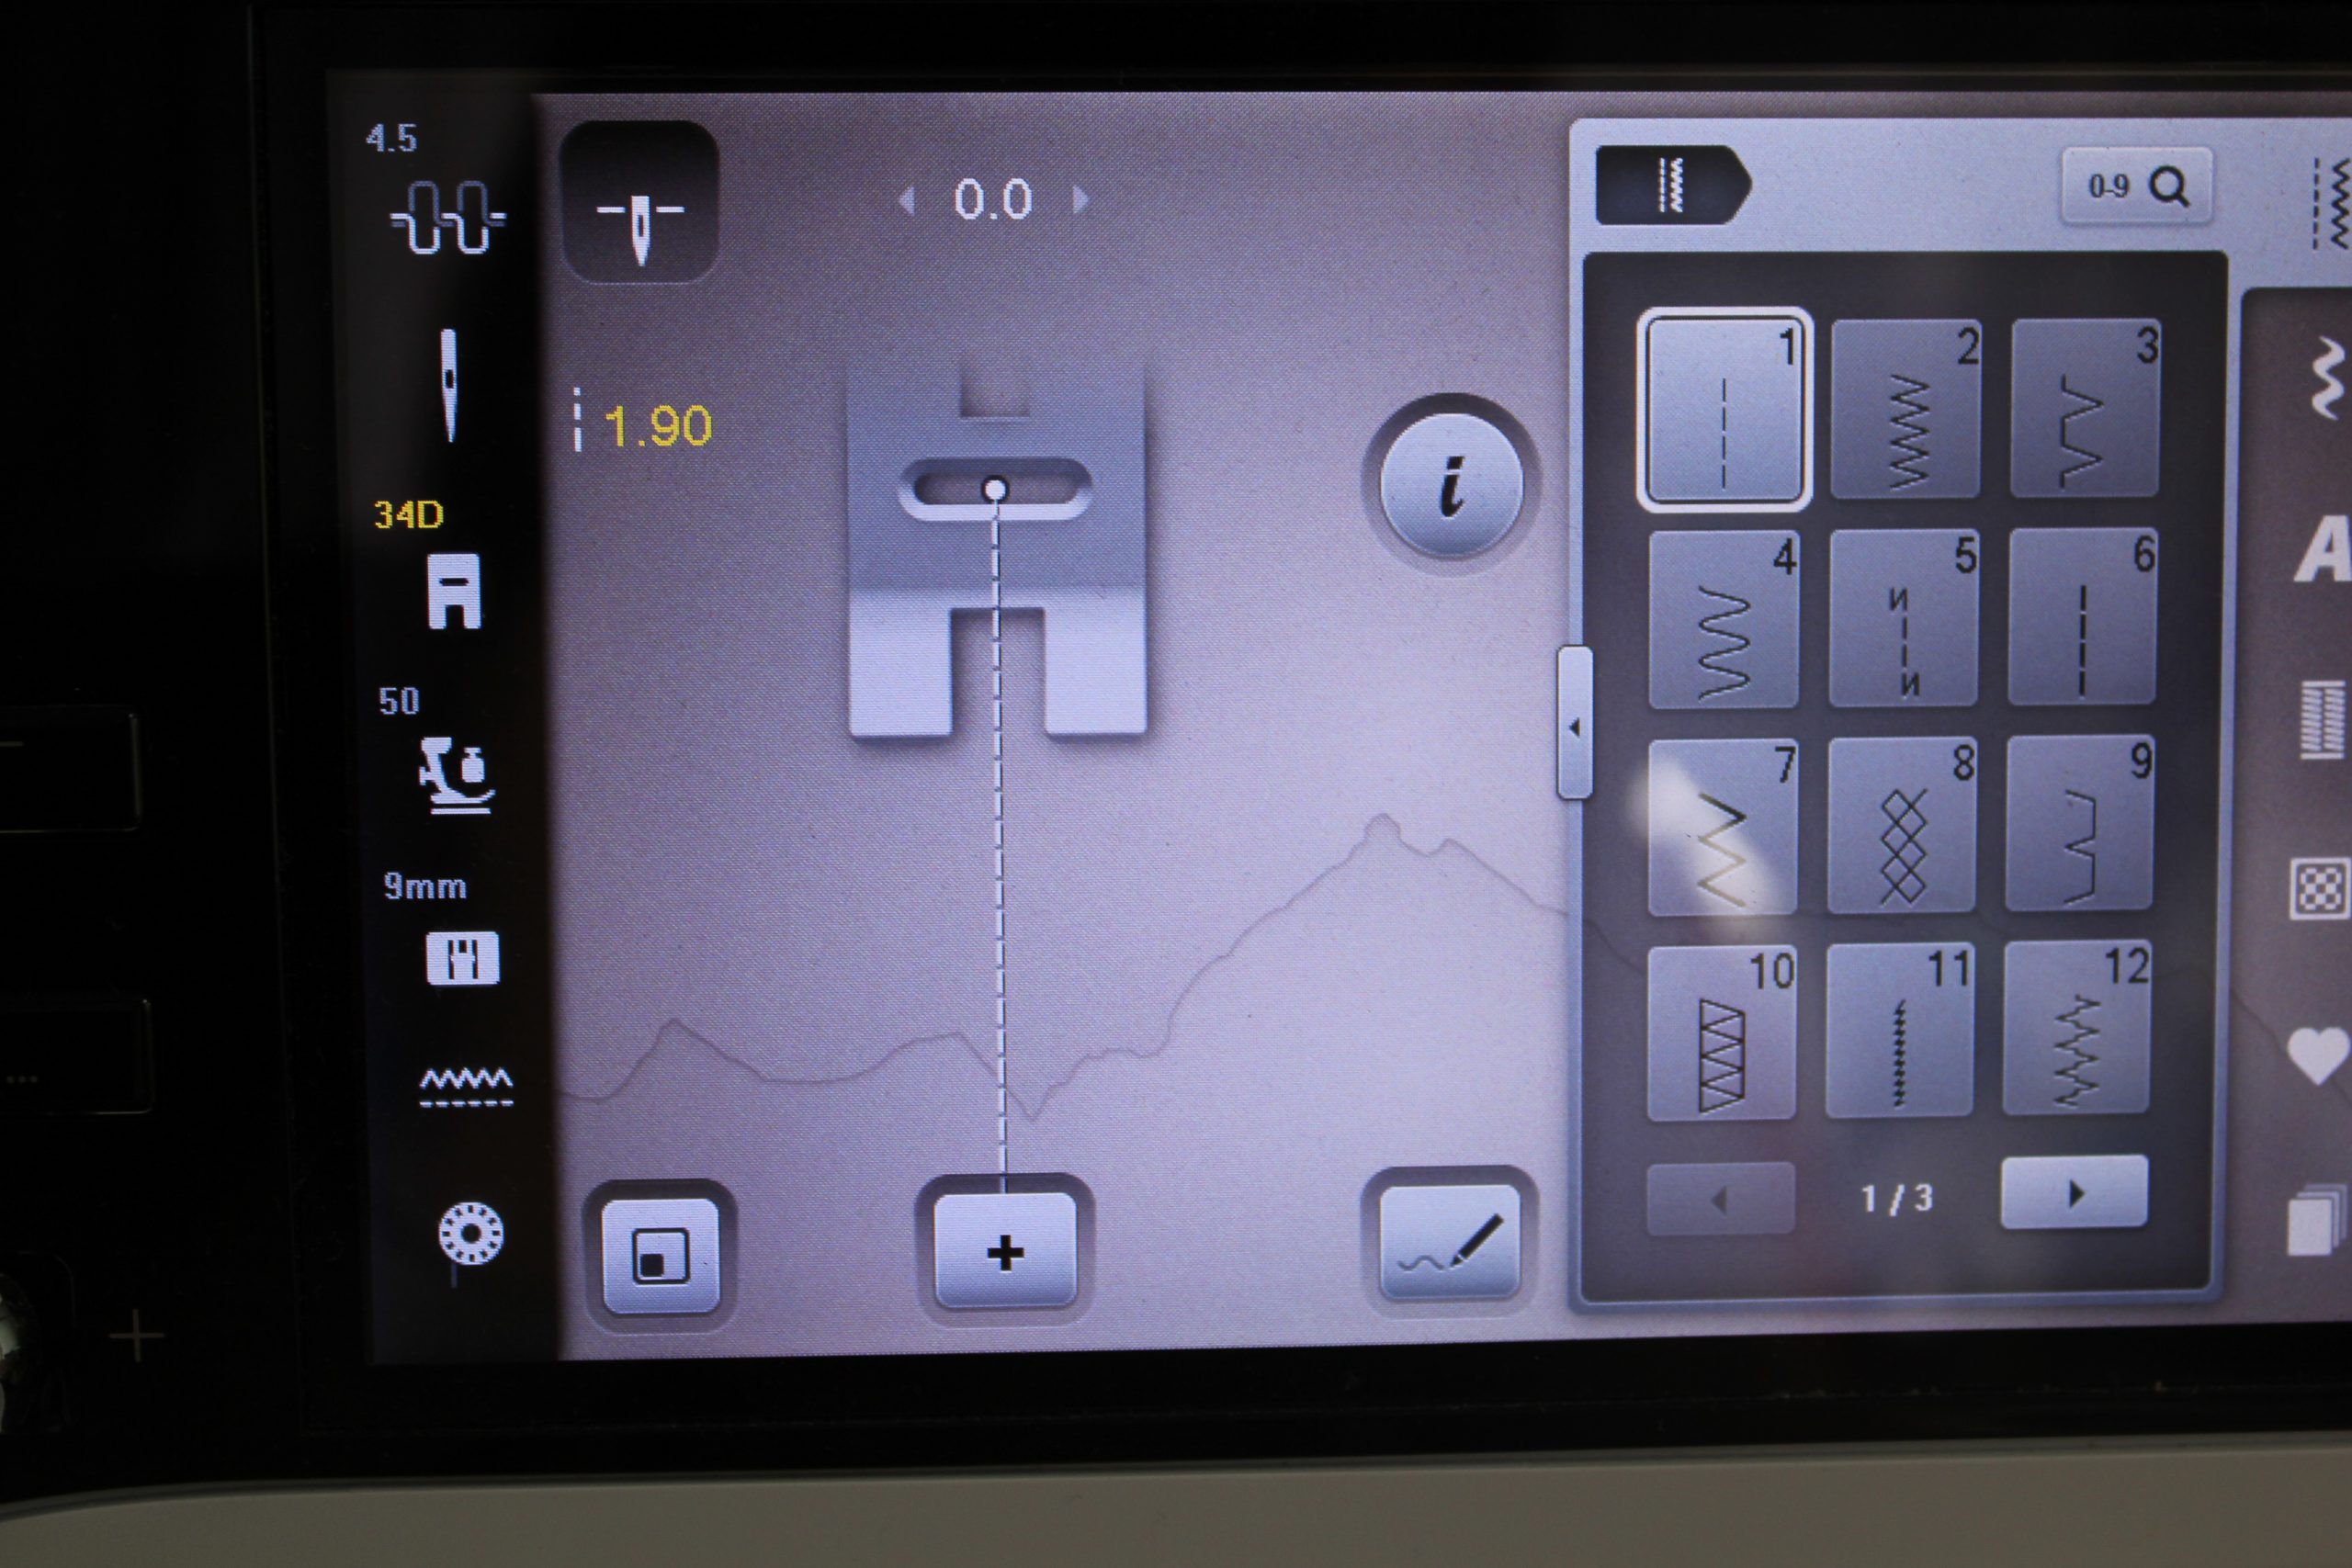
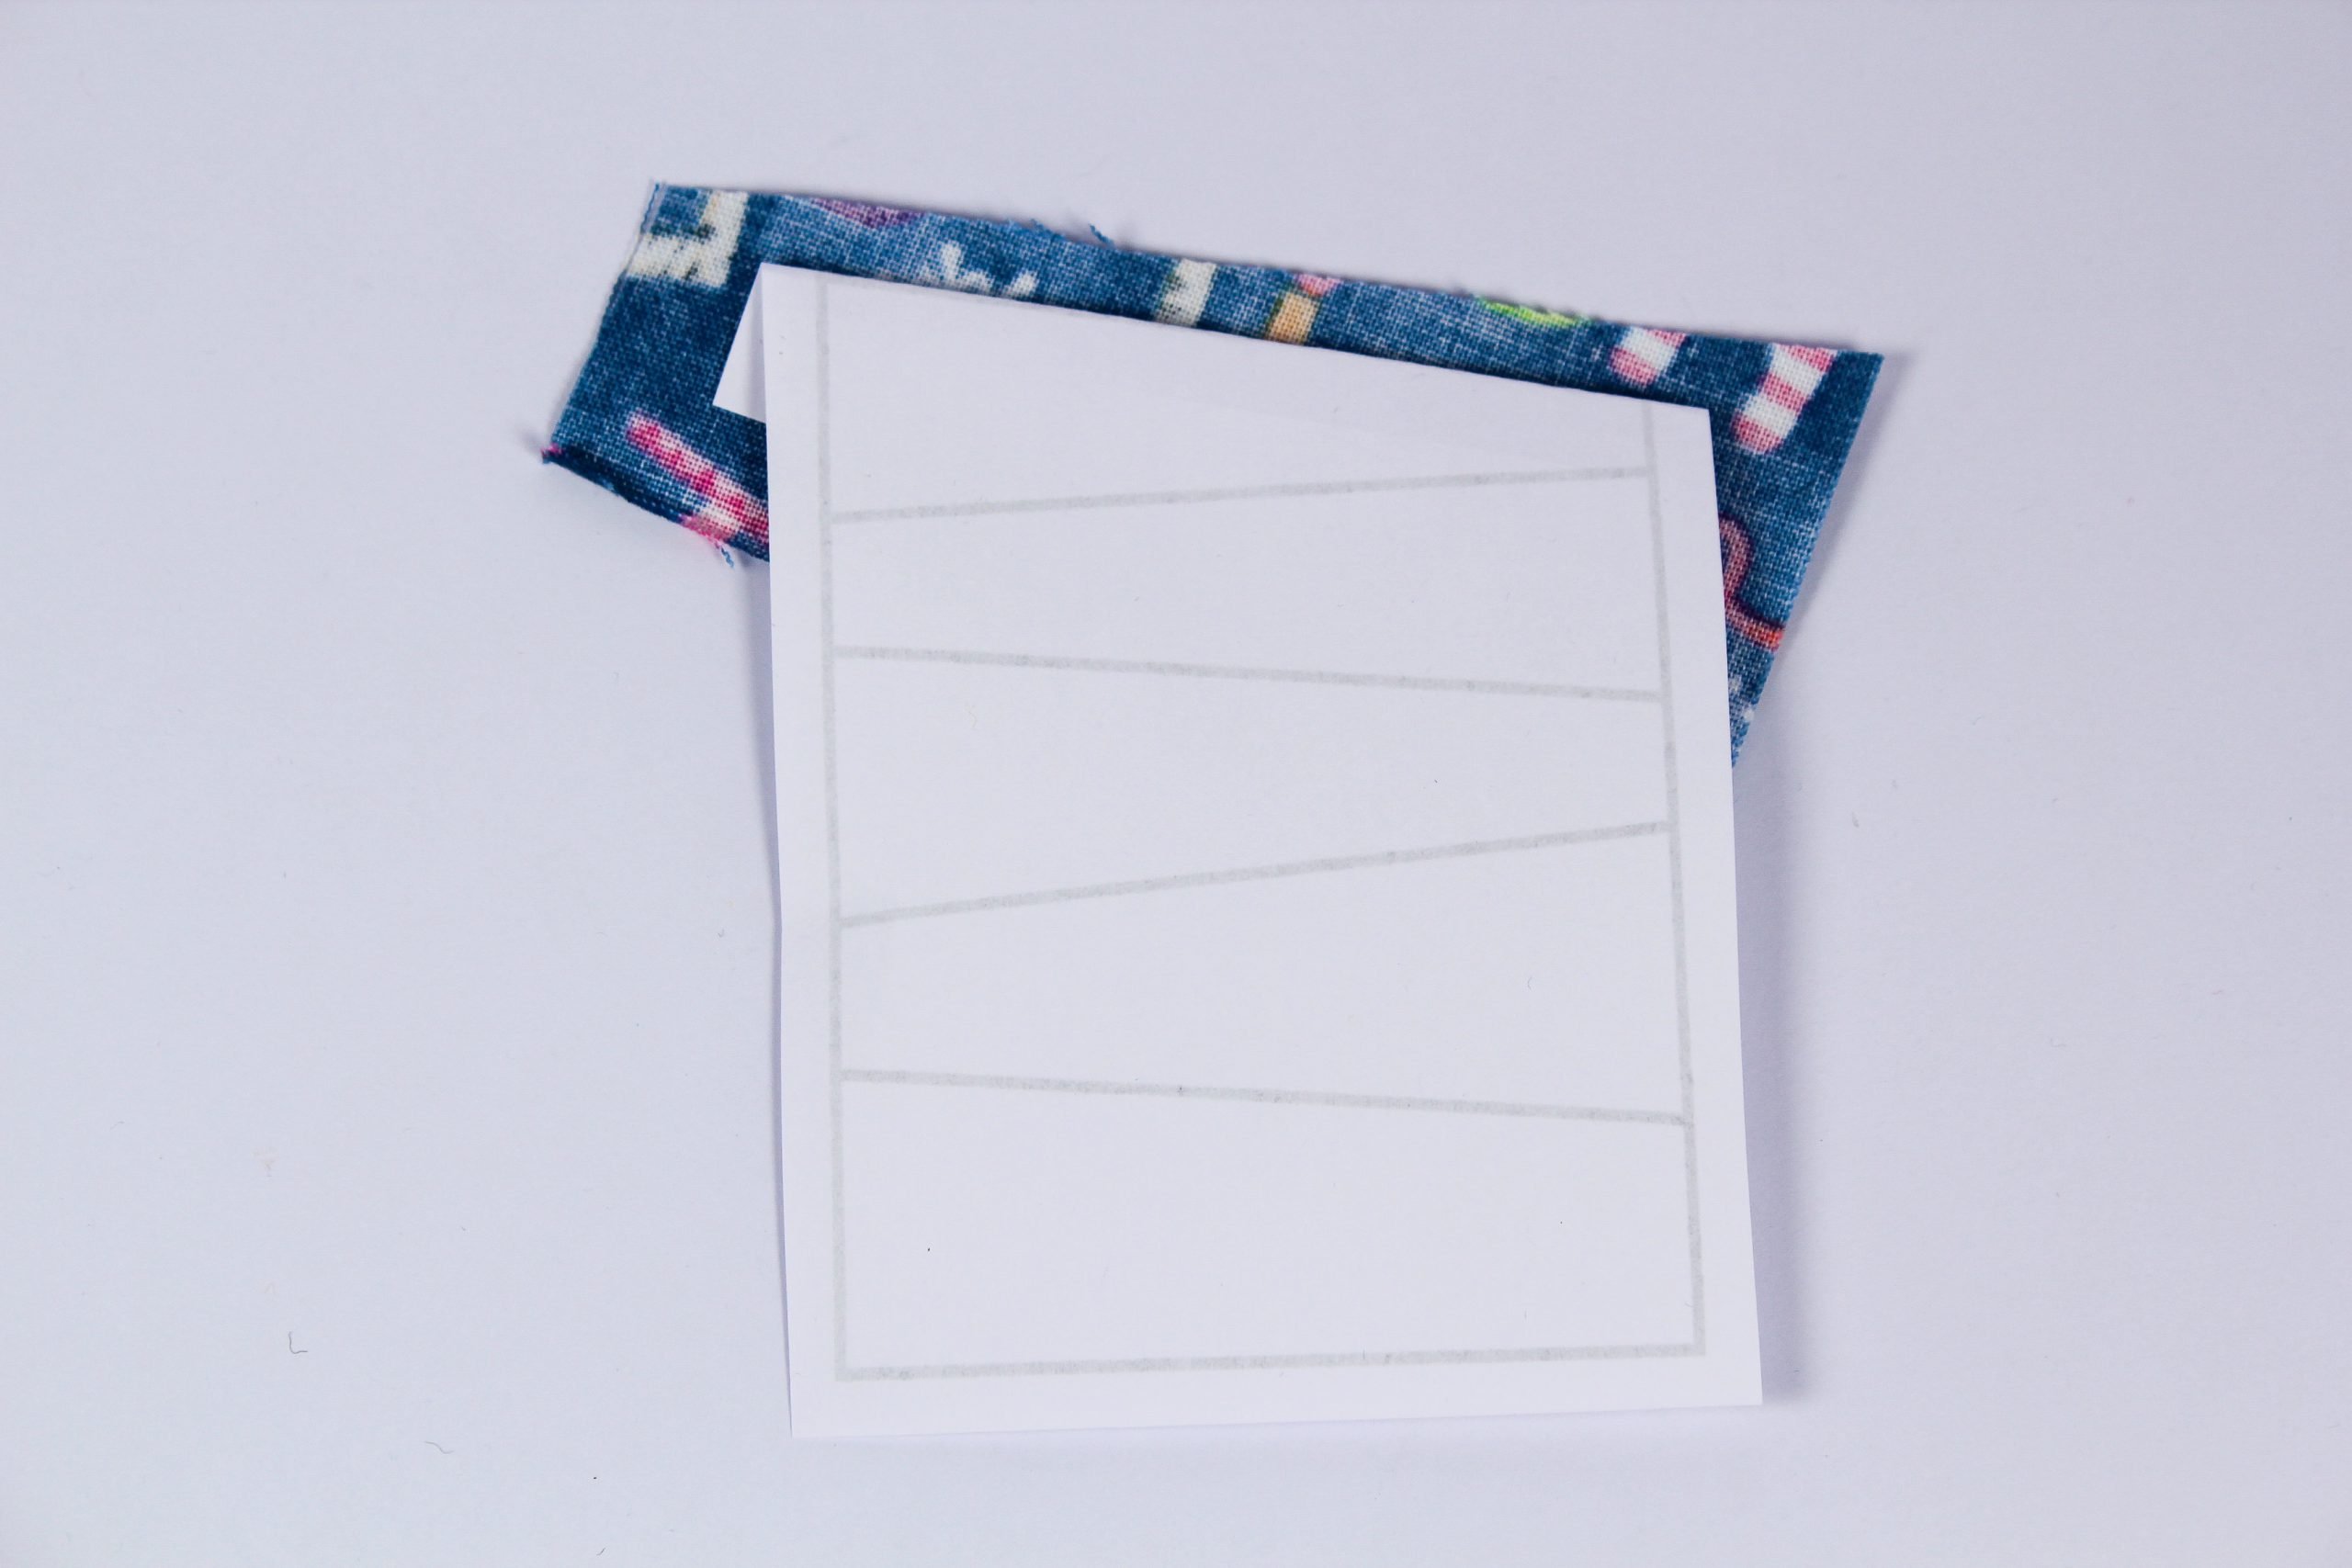
Step 2:
Put the paper pattern in front of you with the writing and the lines facing you. Now place the first strip of fabric with the wrong side behind the paper template. The fabric must fill in the whole of field of no. 1 and extend over the top line no. 2 by at least 0.75 inches. To prevent the fabric strip from slipping, you can optionally glue it to the back of the paper with a fabric glue stick or sew it onto the bottom line no. 1.

Step 3:
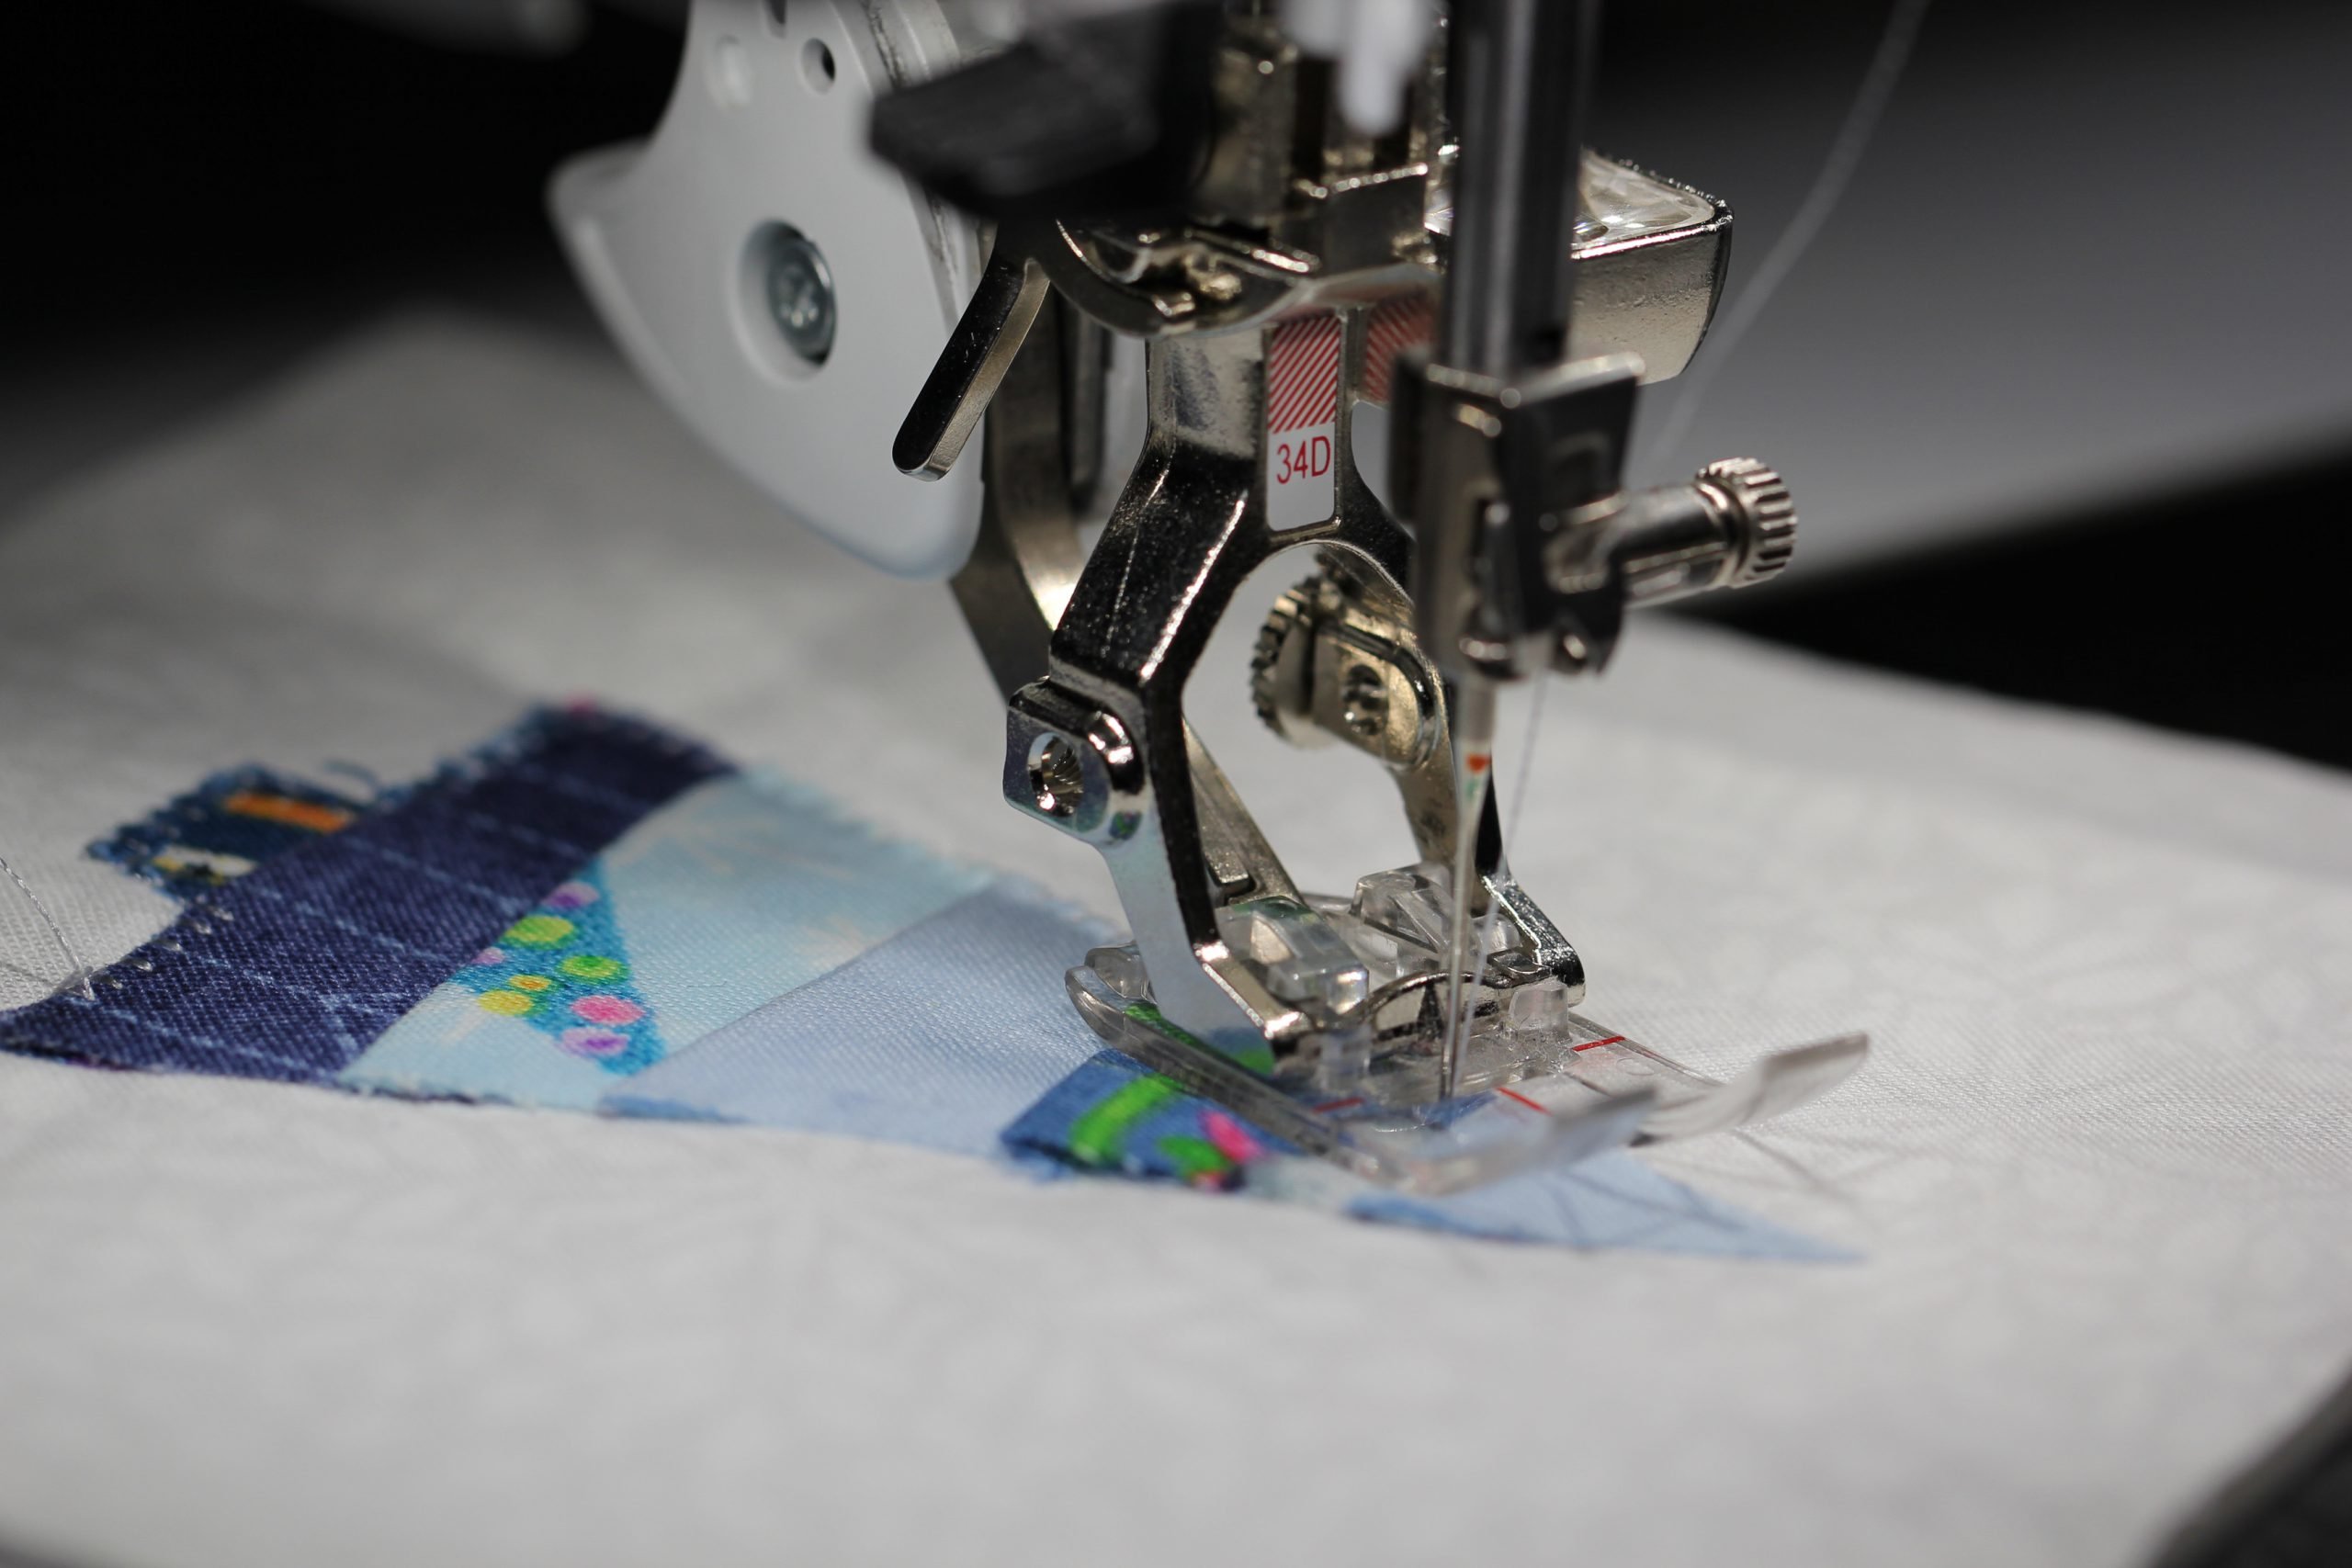
Now we sew the first line.

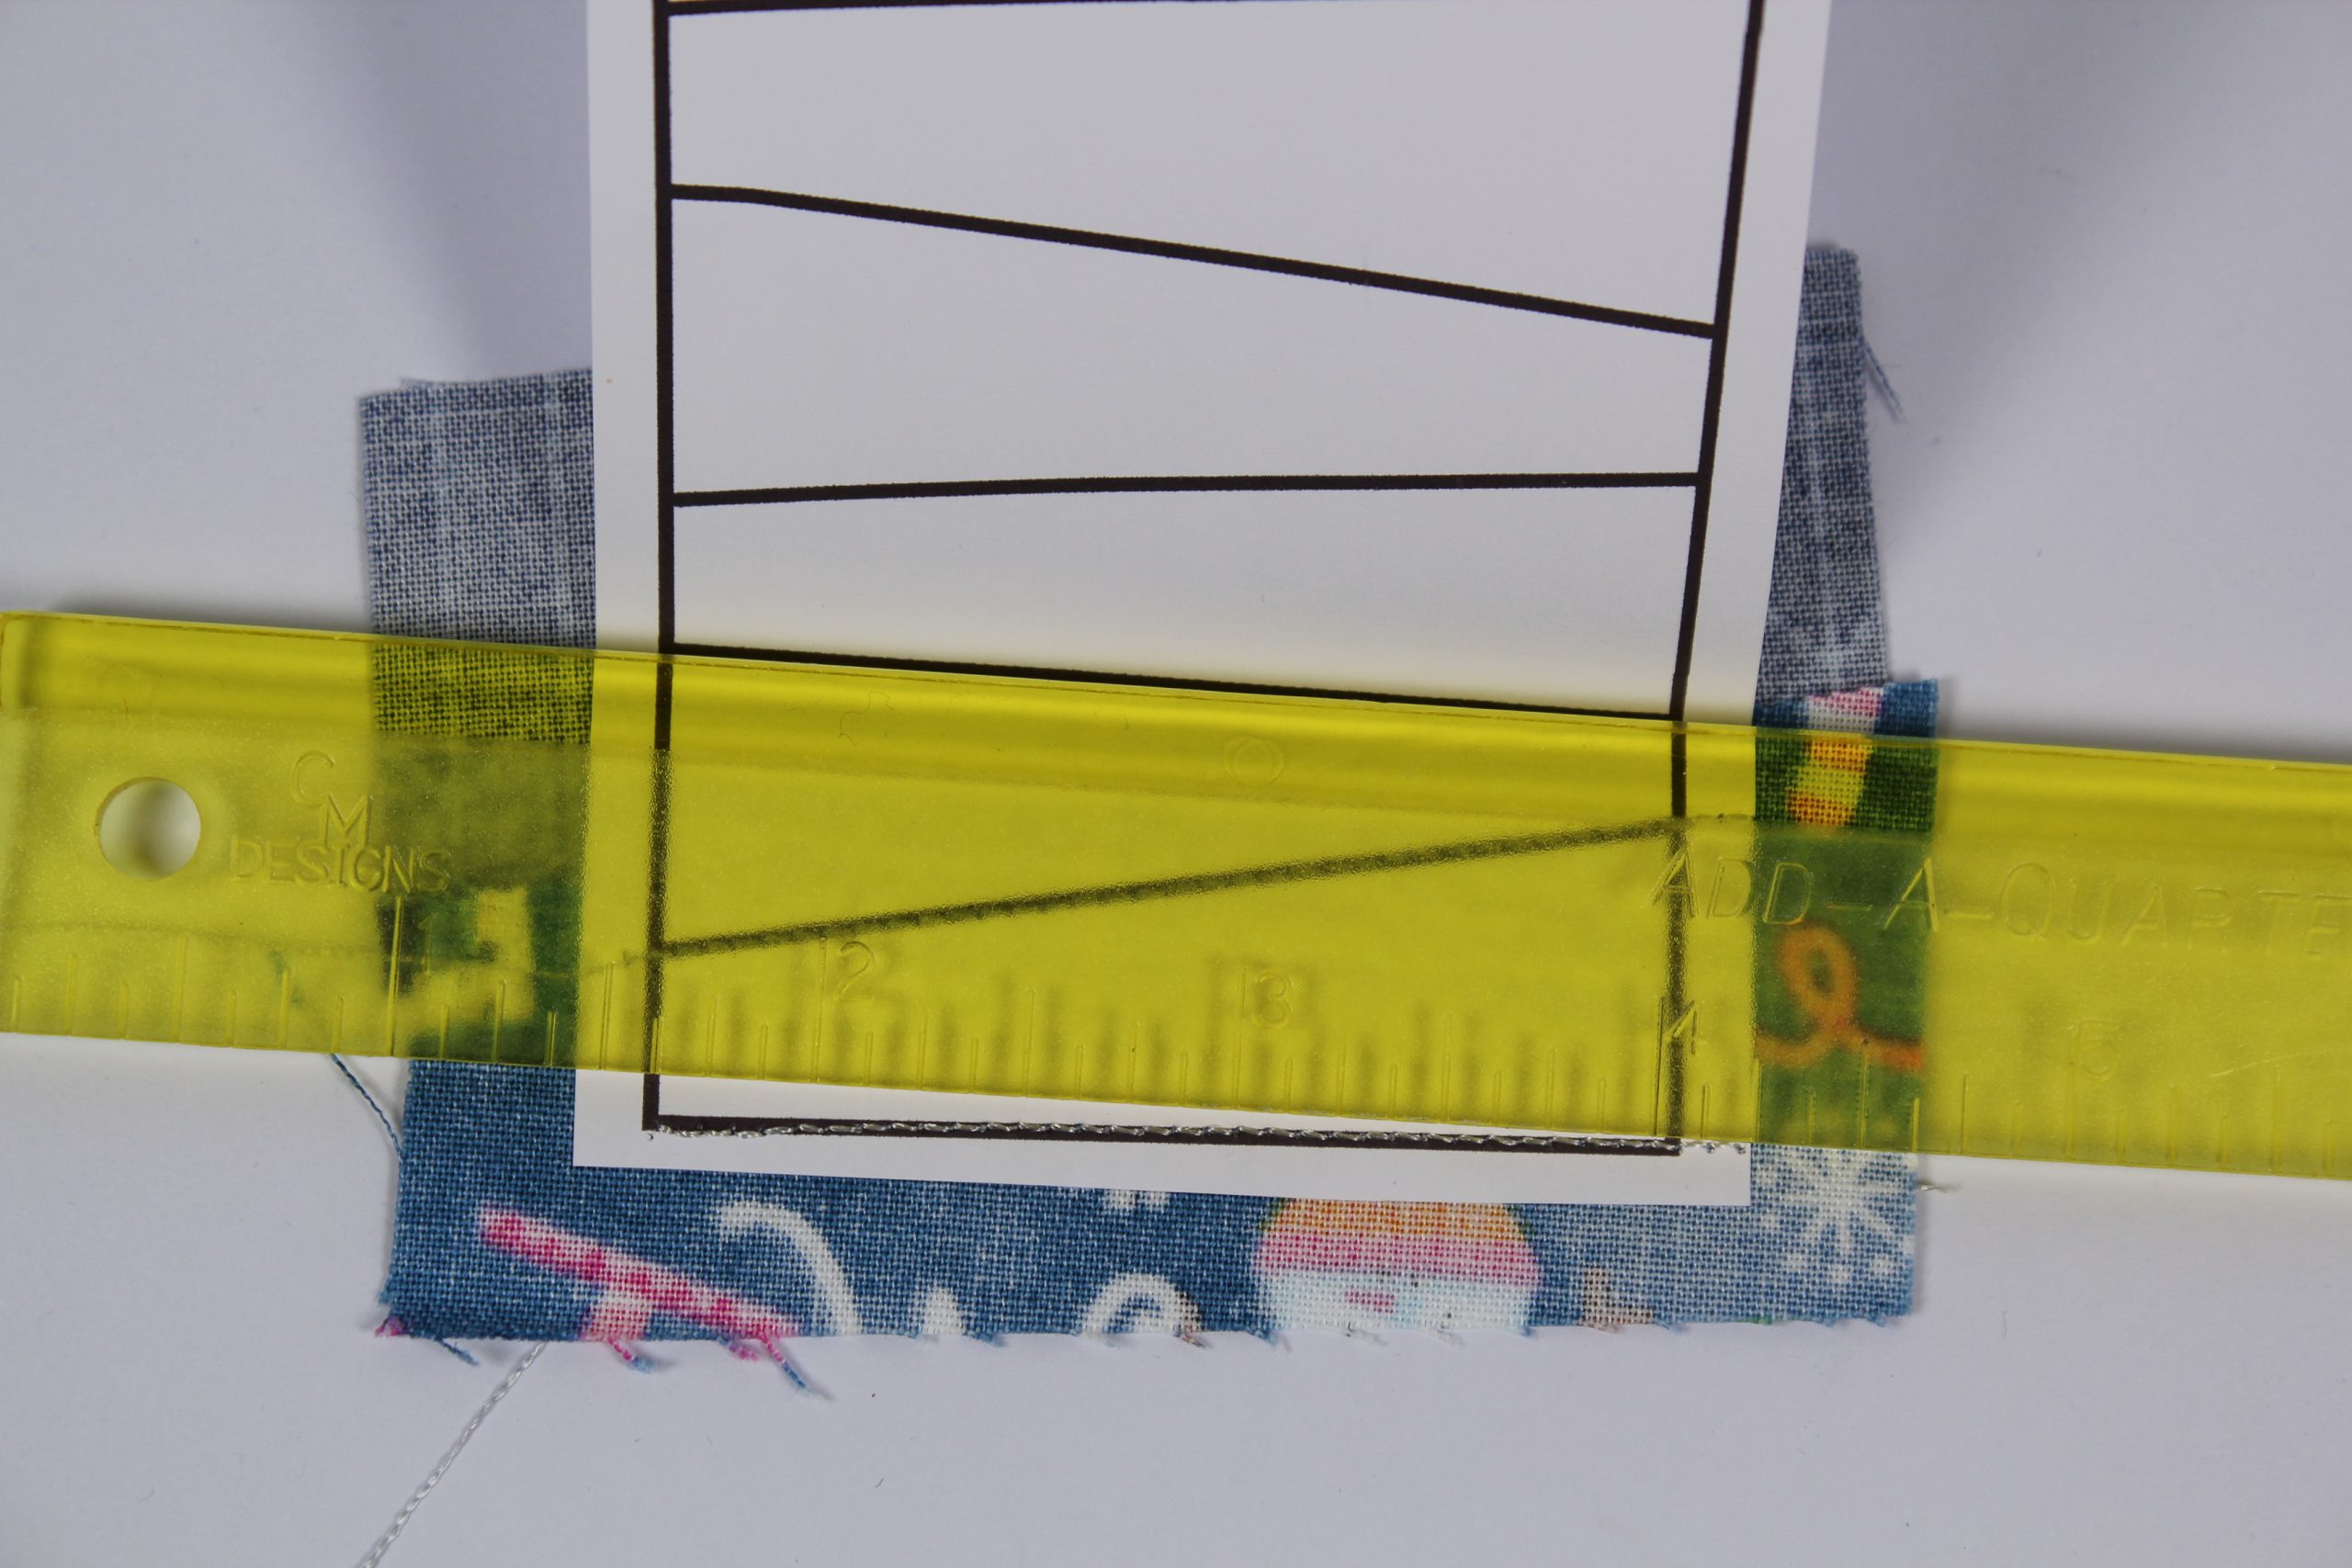
Step 4:
Now put the pattern in front of you and fold the paper over at the seam you just sewed. Using the ruler, in my case the Add-A-Quarter ruler, trim the piece of fabric.
Step 5:
Now turn it over.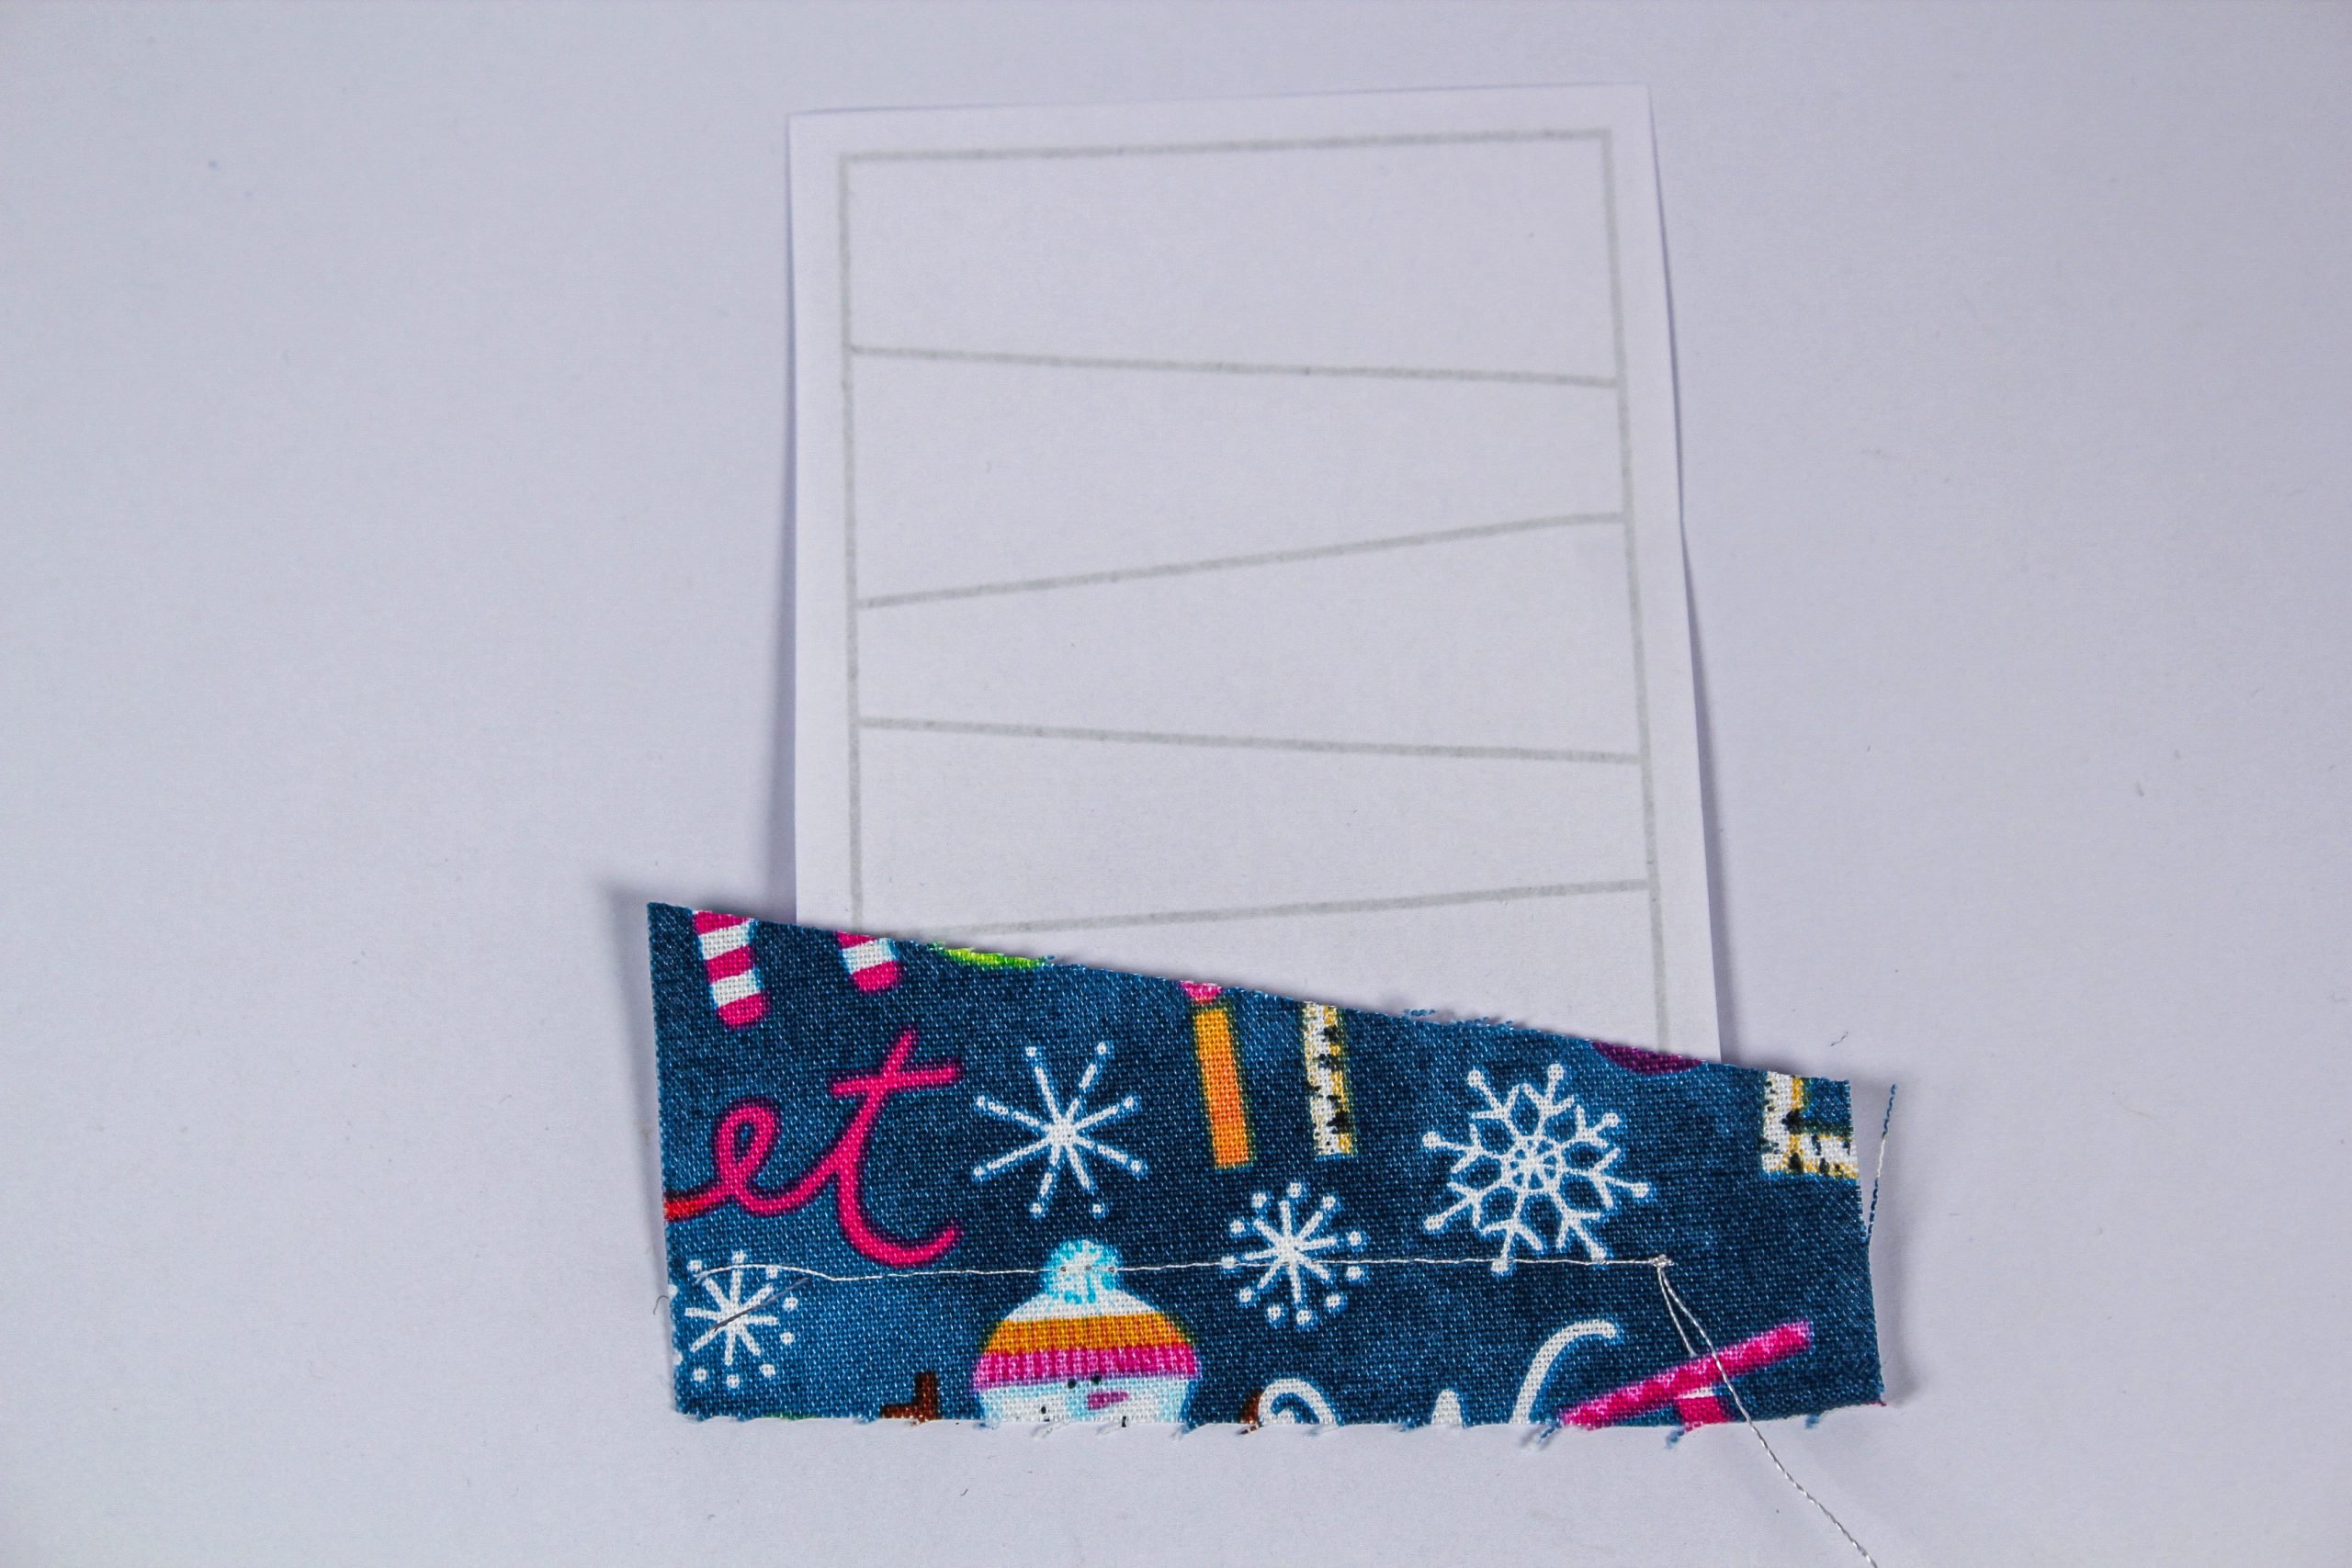
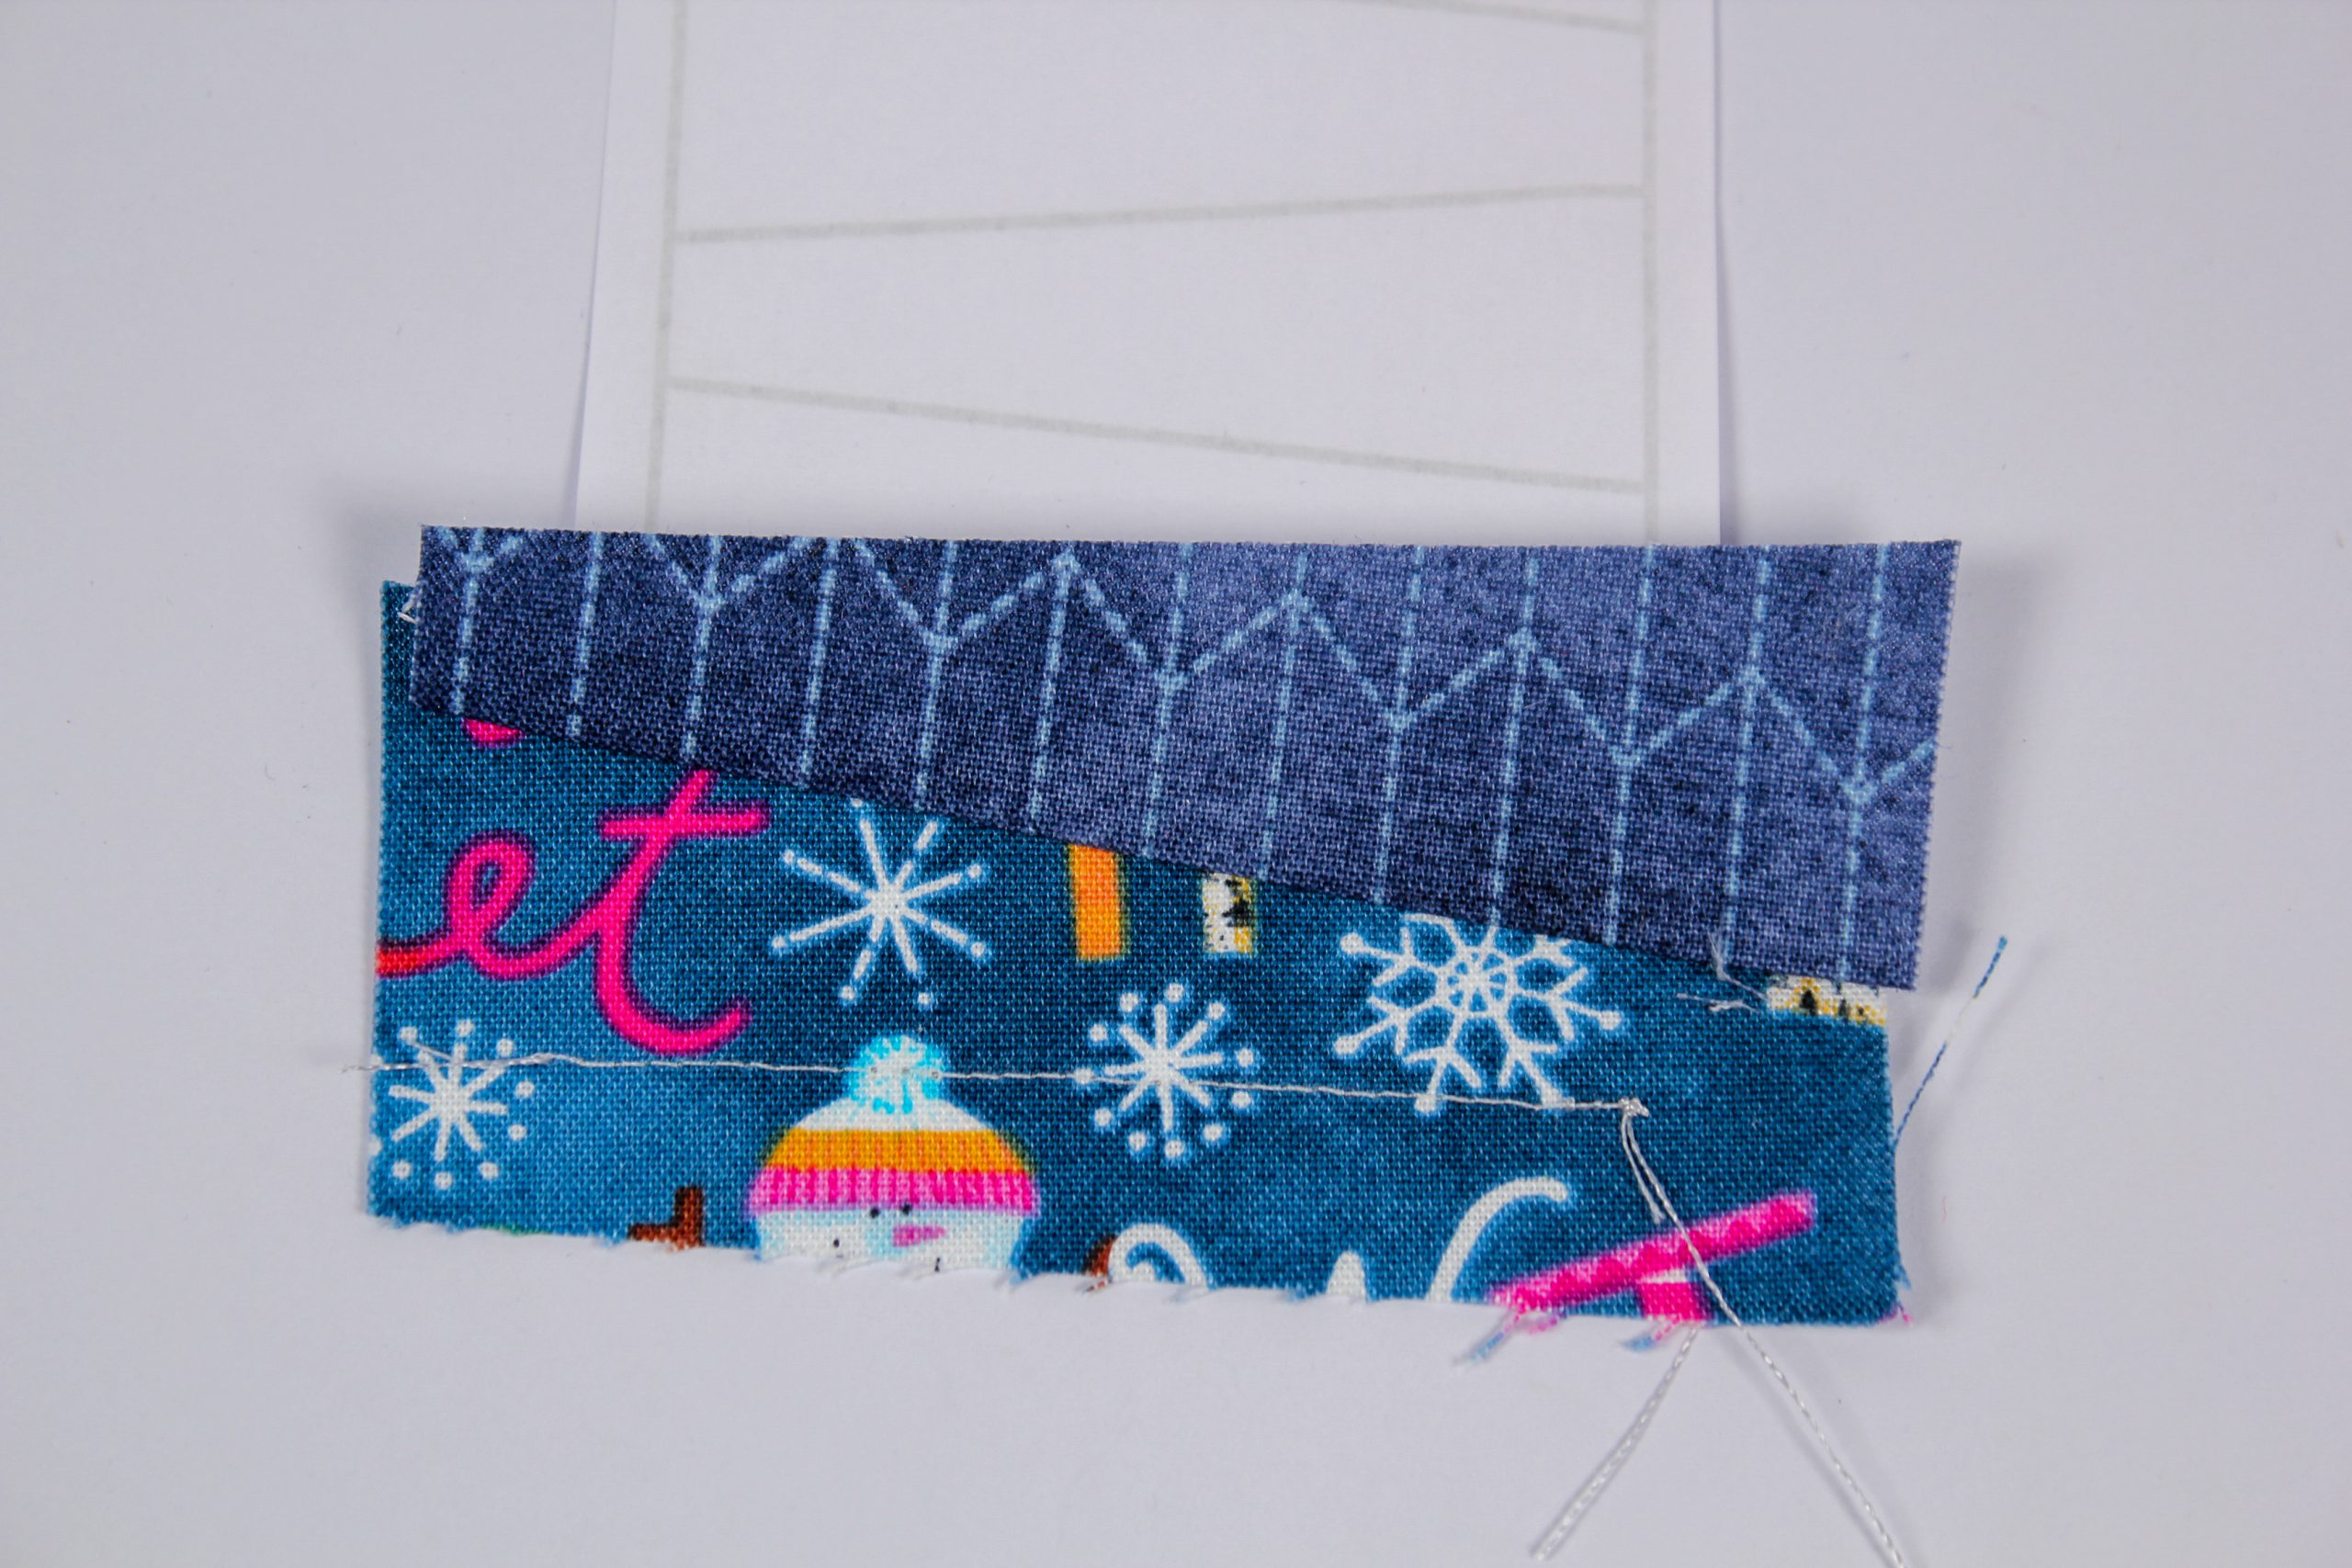
Step 6:
The second strip of fabric is now placed on the edge of the previously trimmed fabric strip with the right sides together. My tip is to always cut all the edges of the fabric pieces straight beforehand.
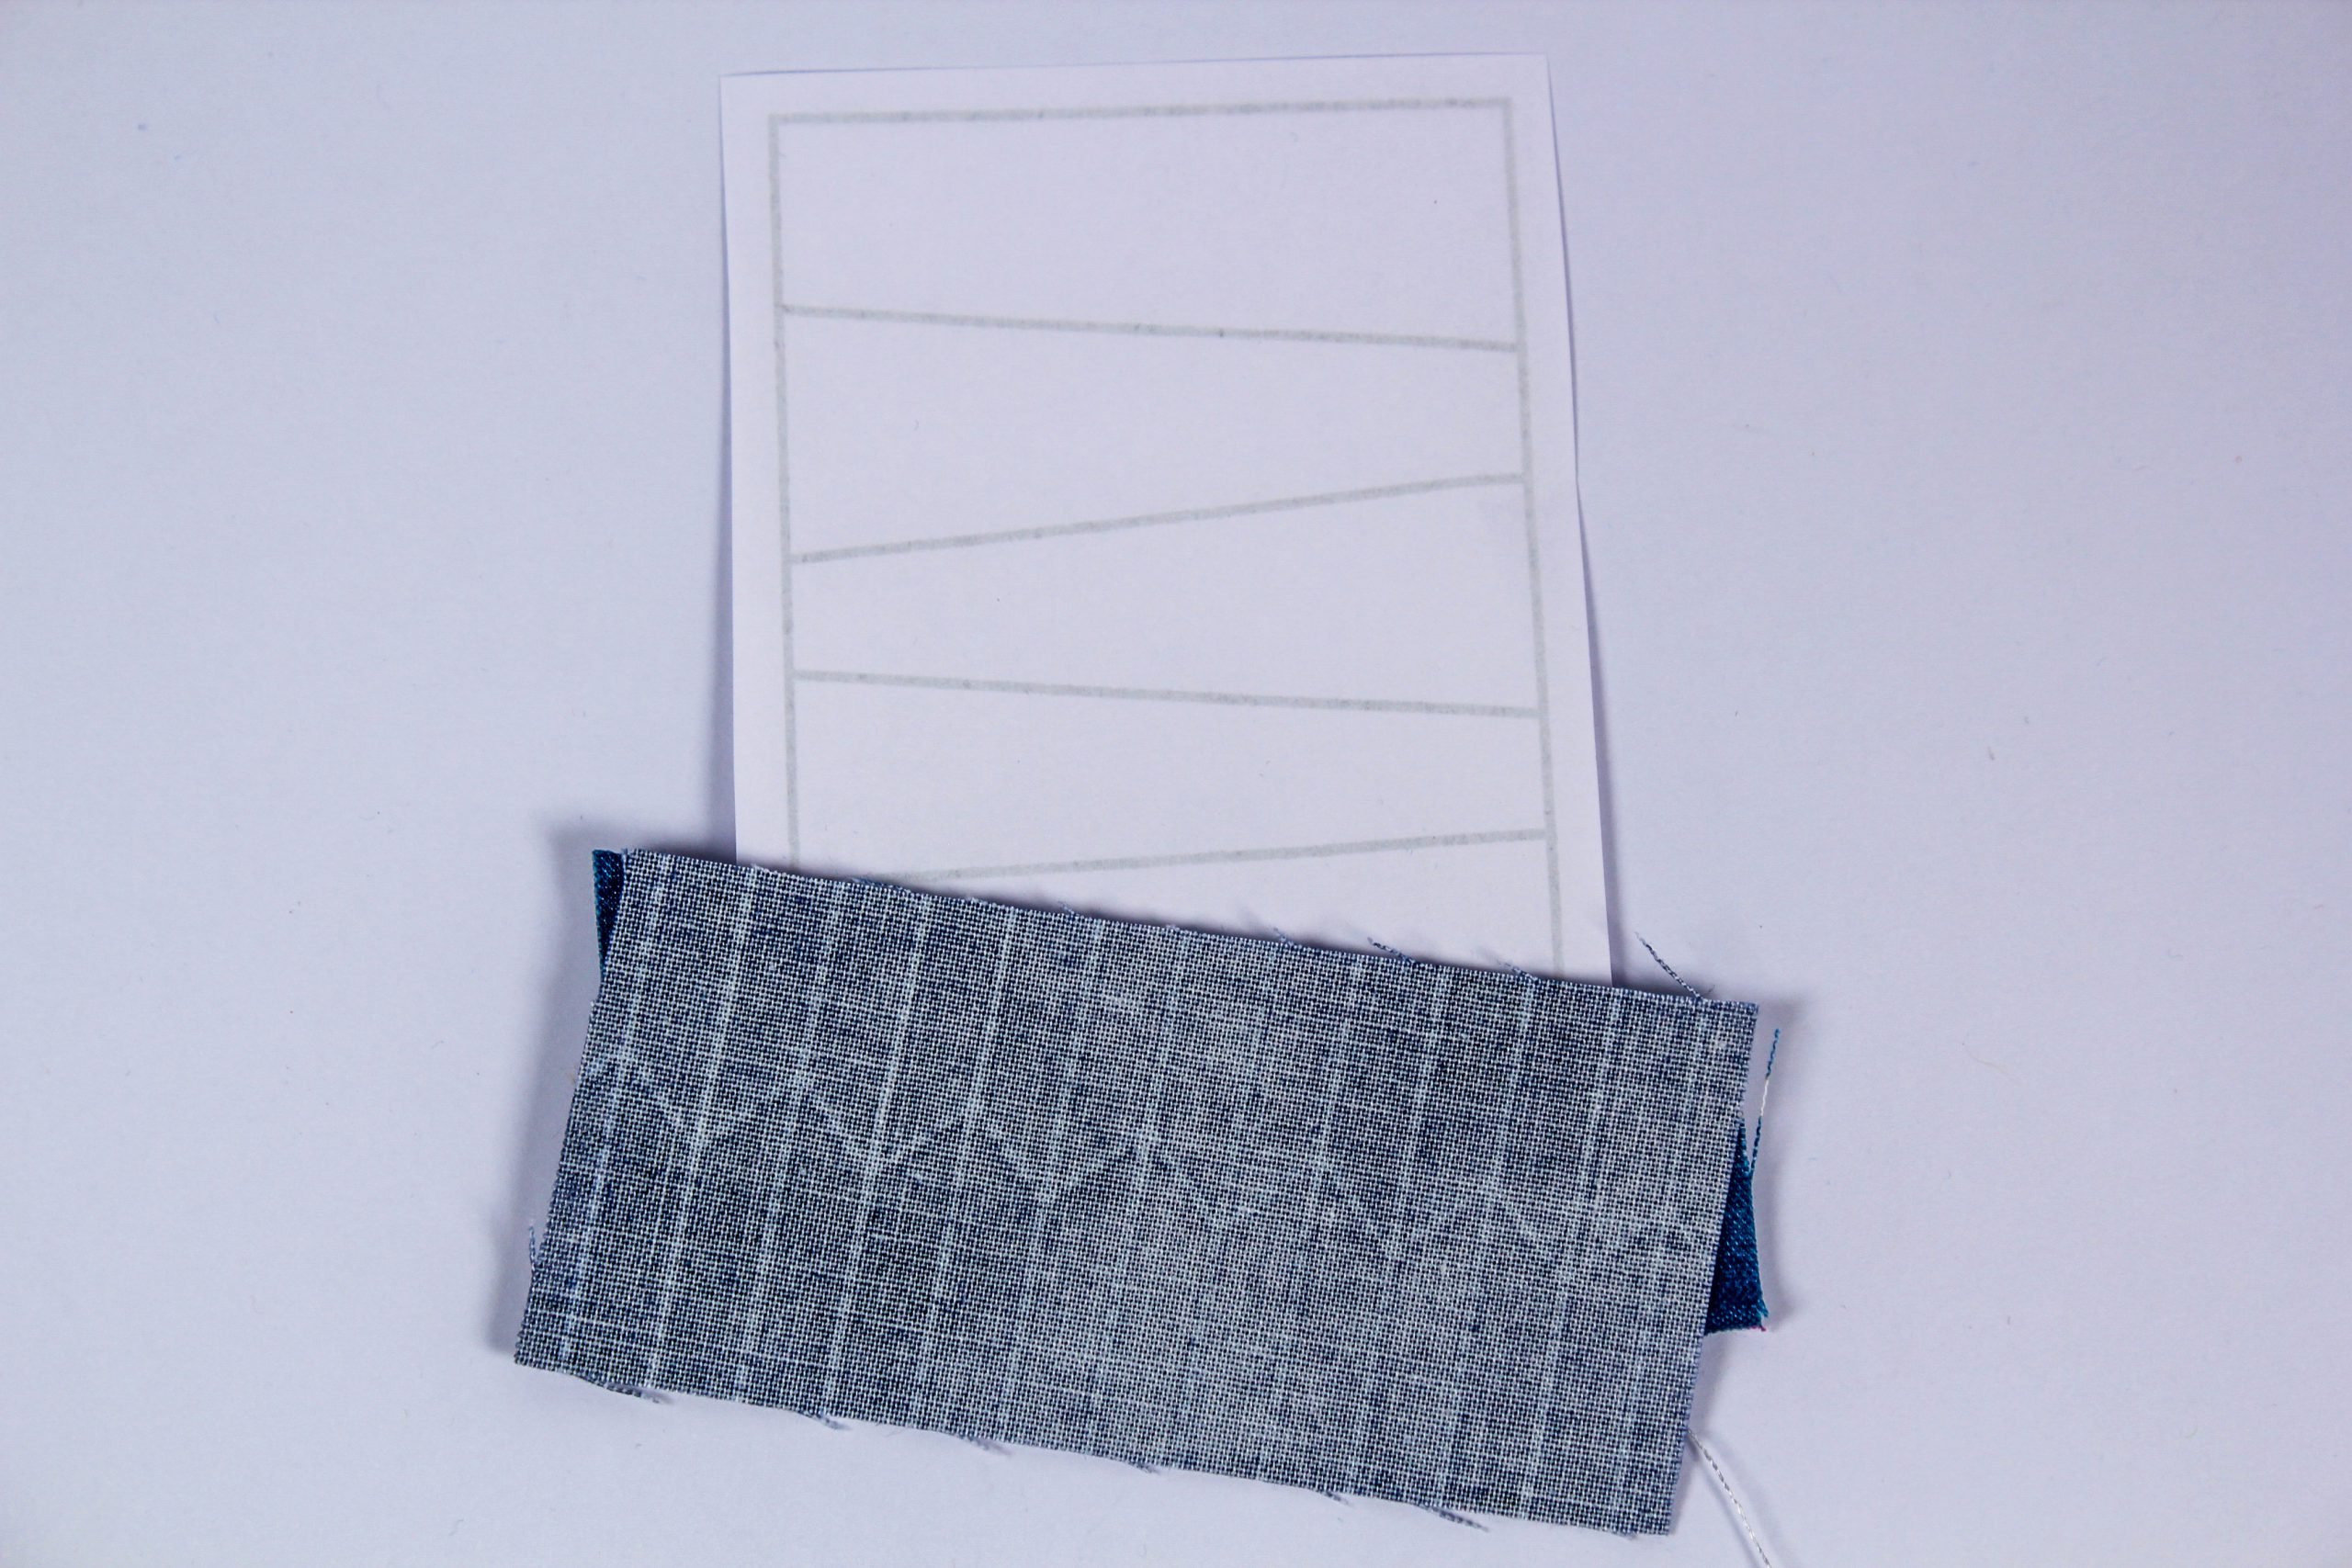
Step 7:
Turn the paper over again and with the next seam, sew the strip of fabric onto the 2nd line of the paper.

Step 8:
Turn the pattern over again, fold the sewn-on piece of fabric up and press it flat with a small iron or with your thumb. There are even little rollers especially for patchwork for pressing seams flat. I normally use my mini iron.
Step 9:
Turn again and fold over the 3rd line of paper at the seam.
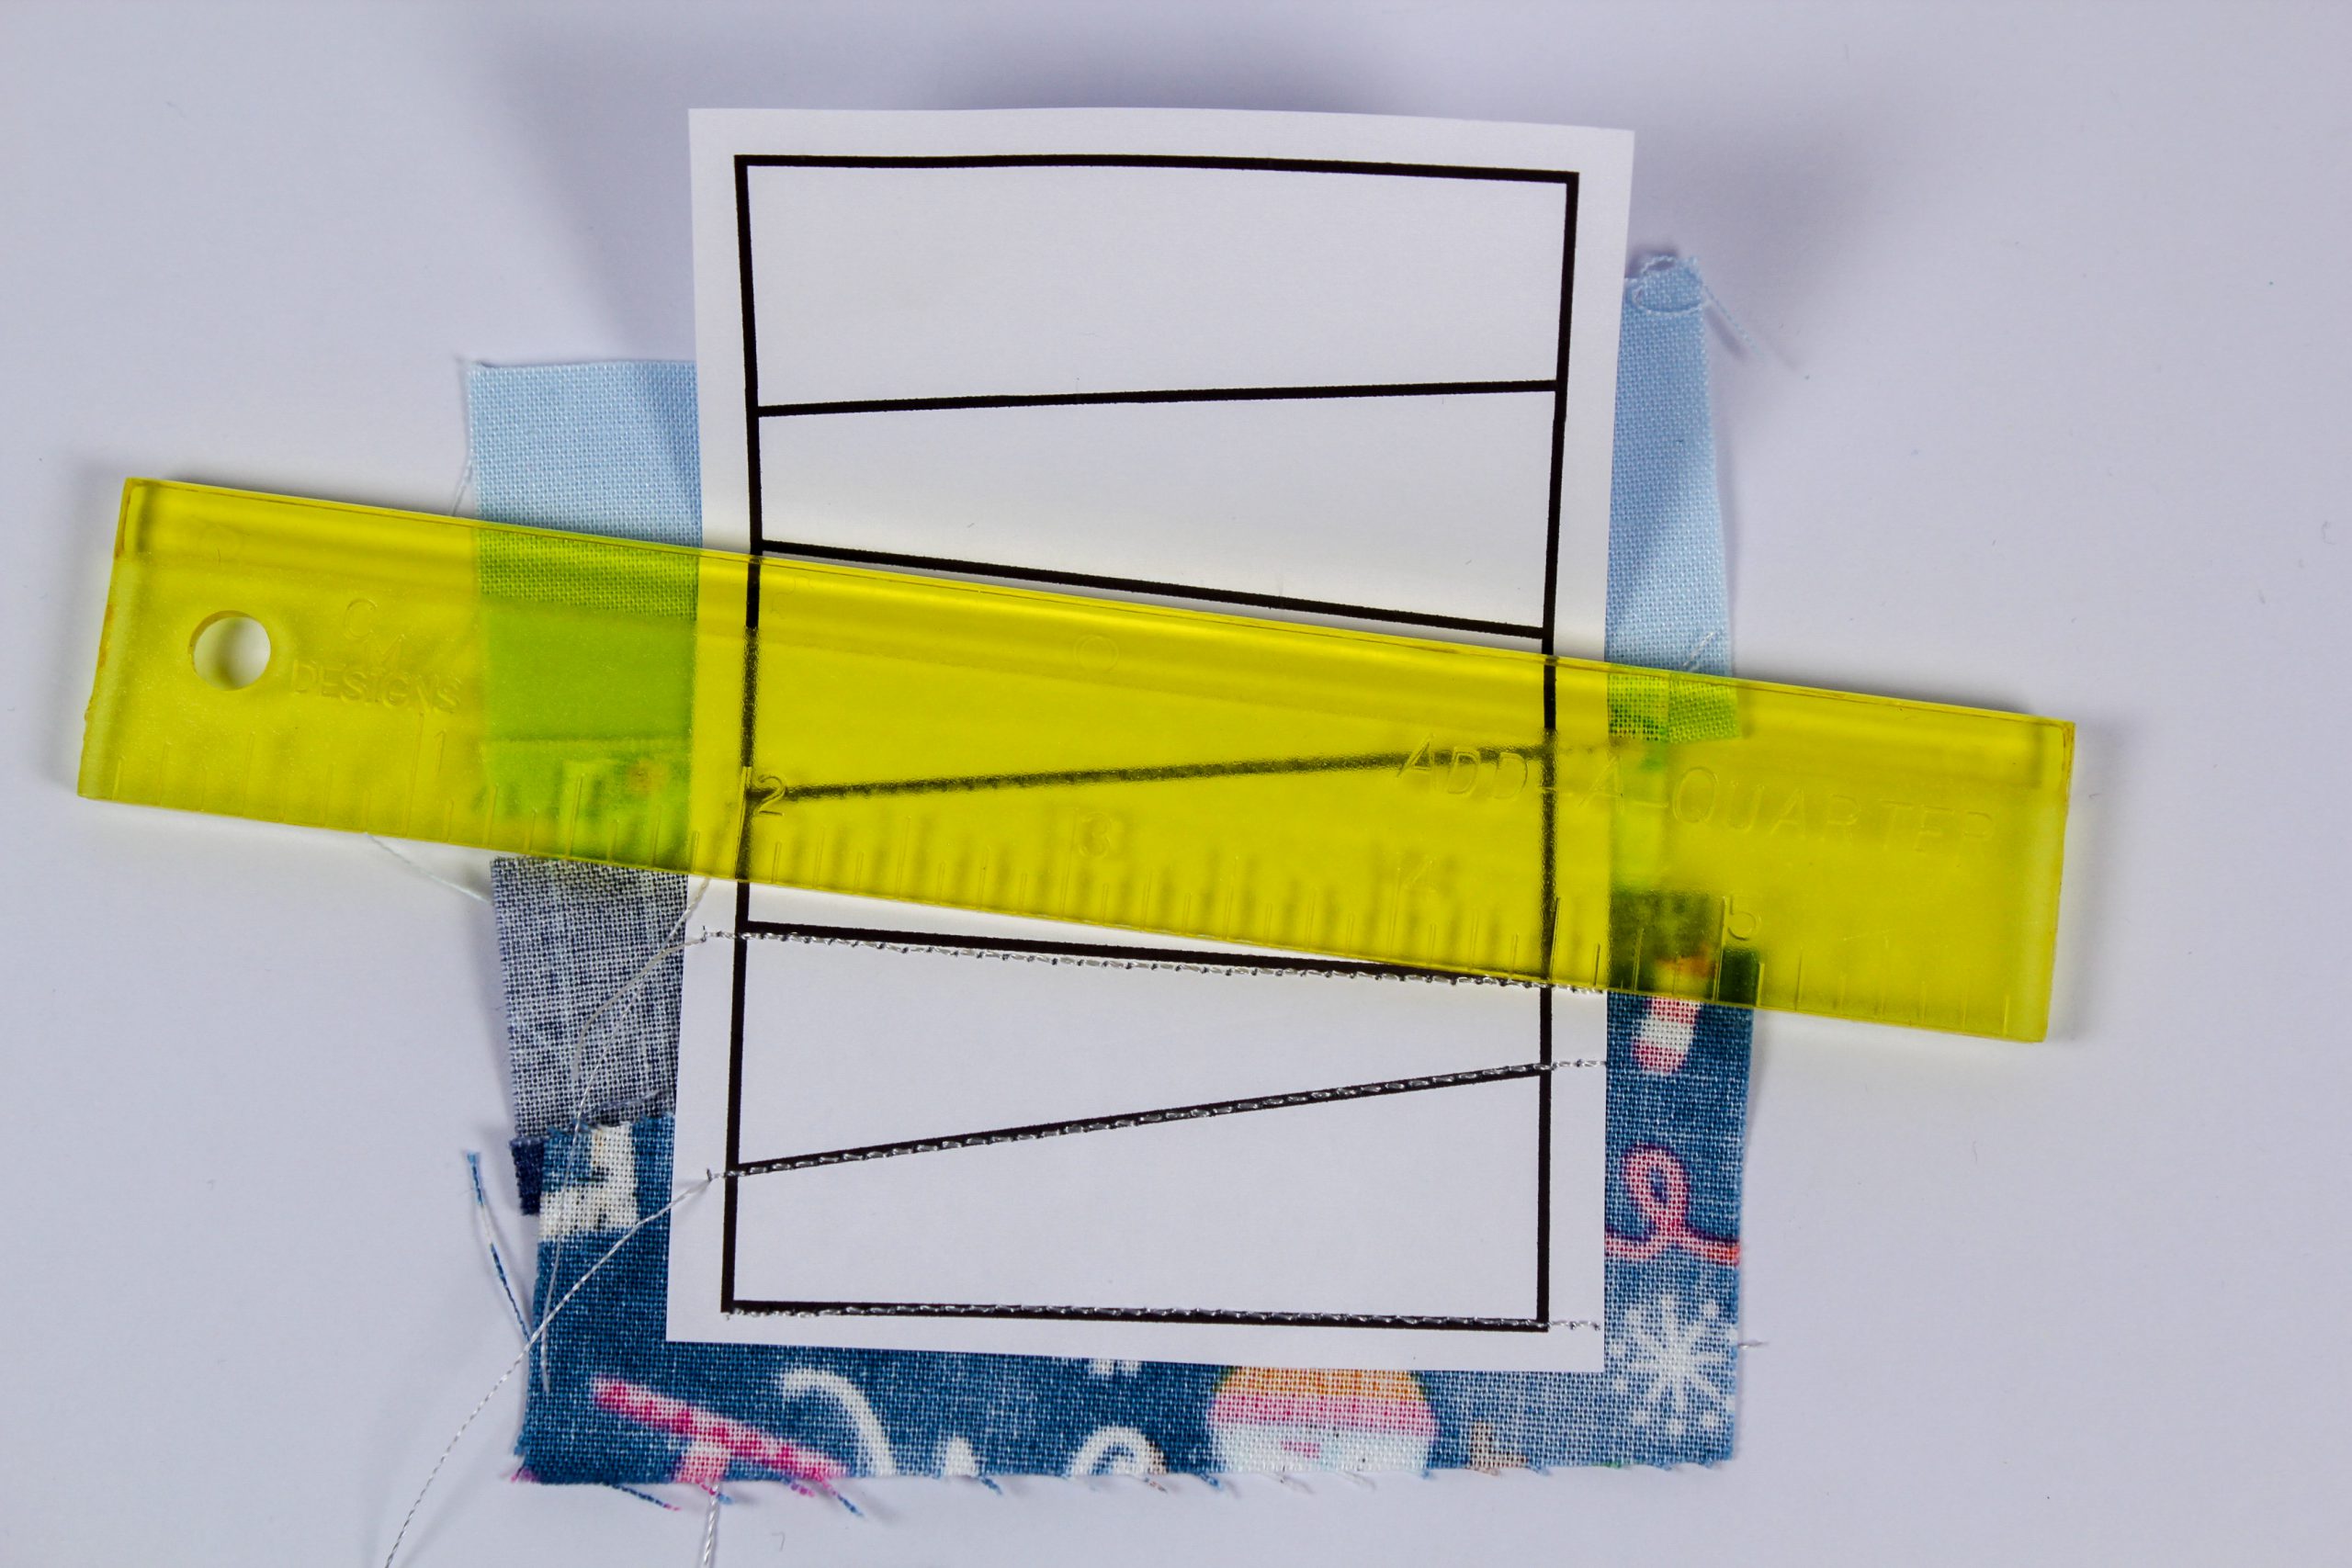
Step 10:
Place the ruler back on the next line and fold the paper over again so that you get a crease line to help you fold the paper more easily. Then put the ruler back on the edge and trim the strip of fabric back to the seam allowance. This sounds more complicated than it is.
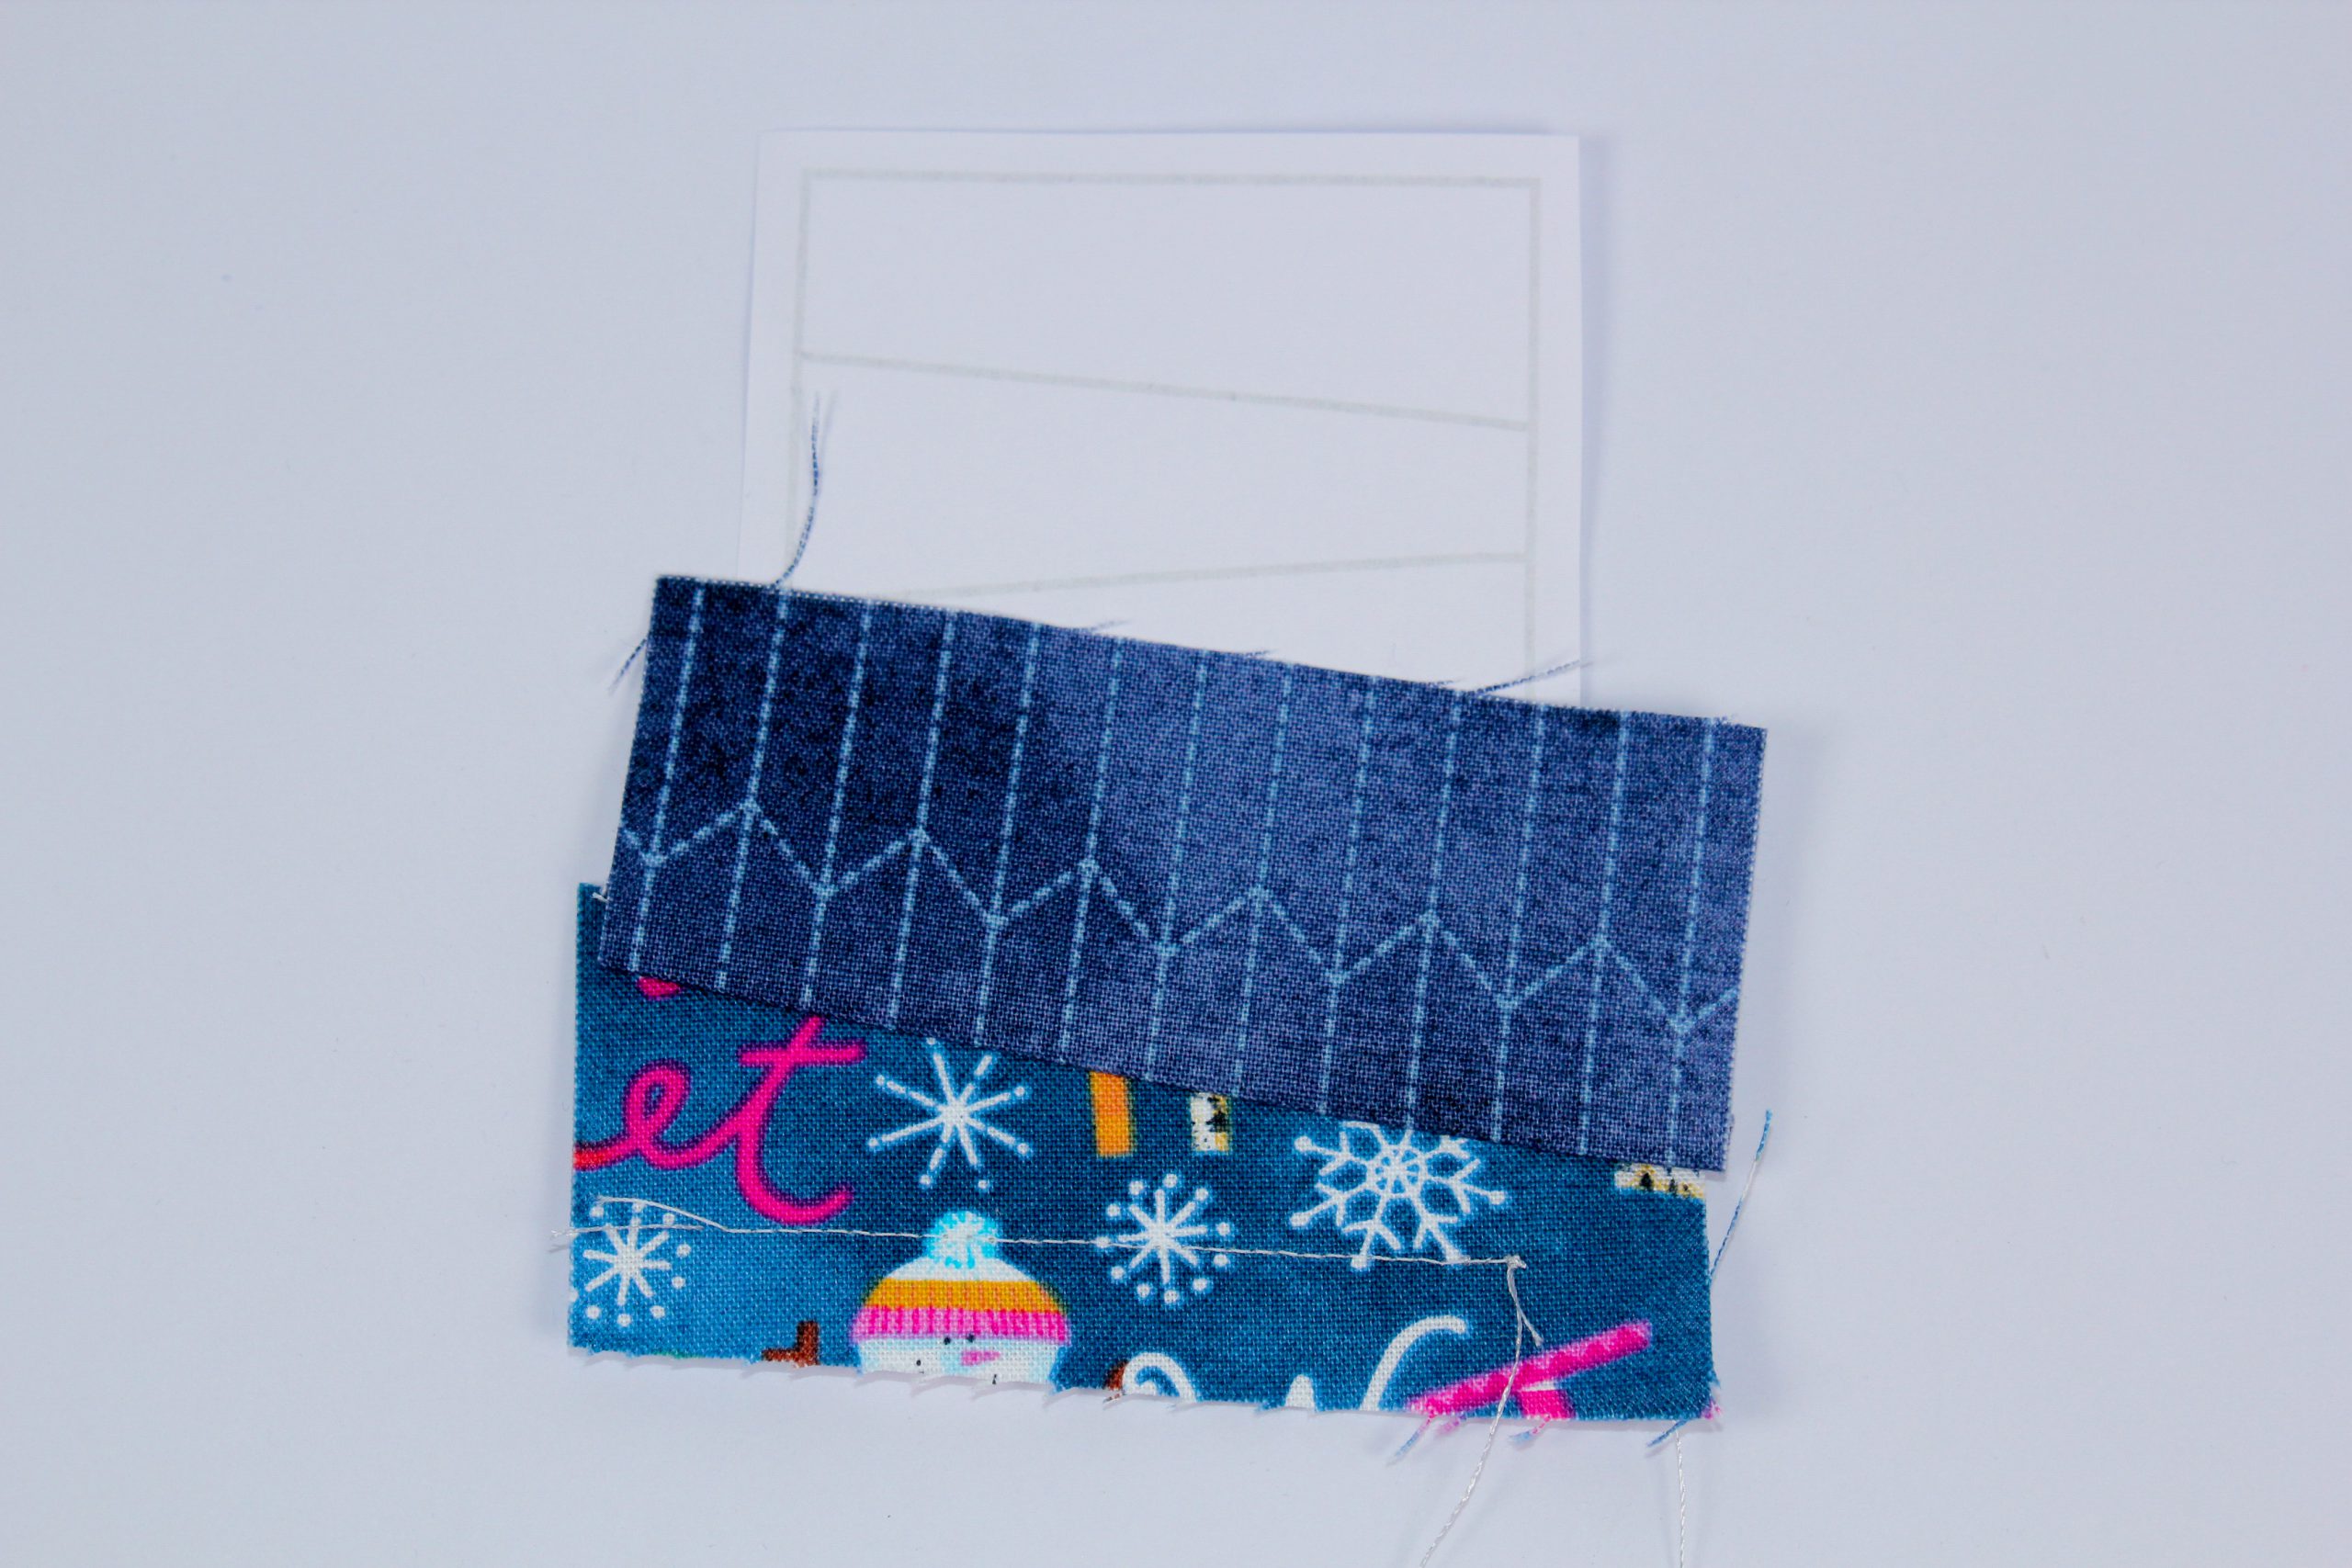
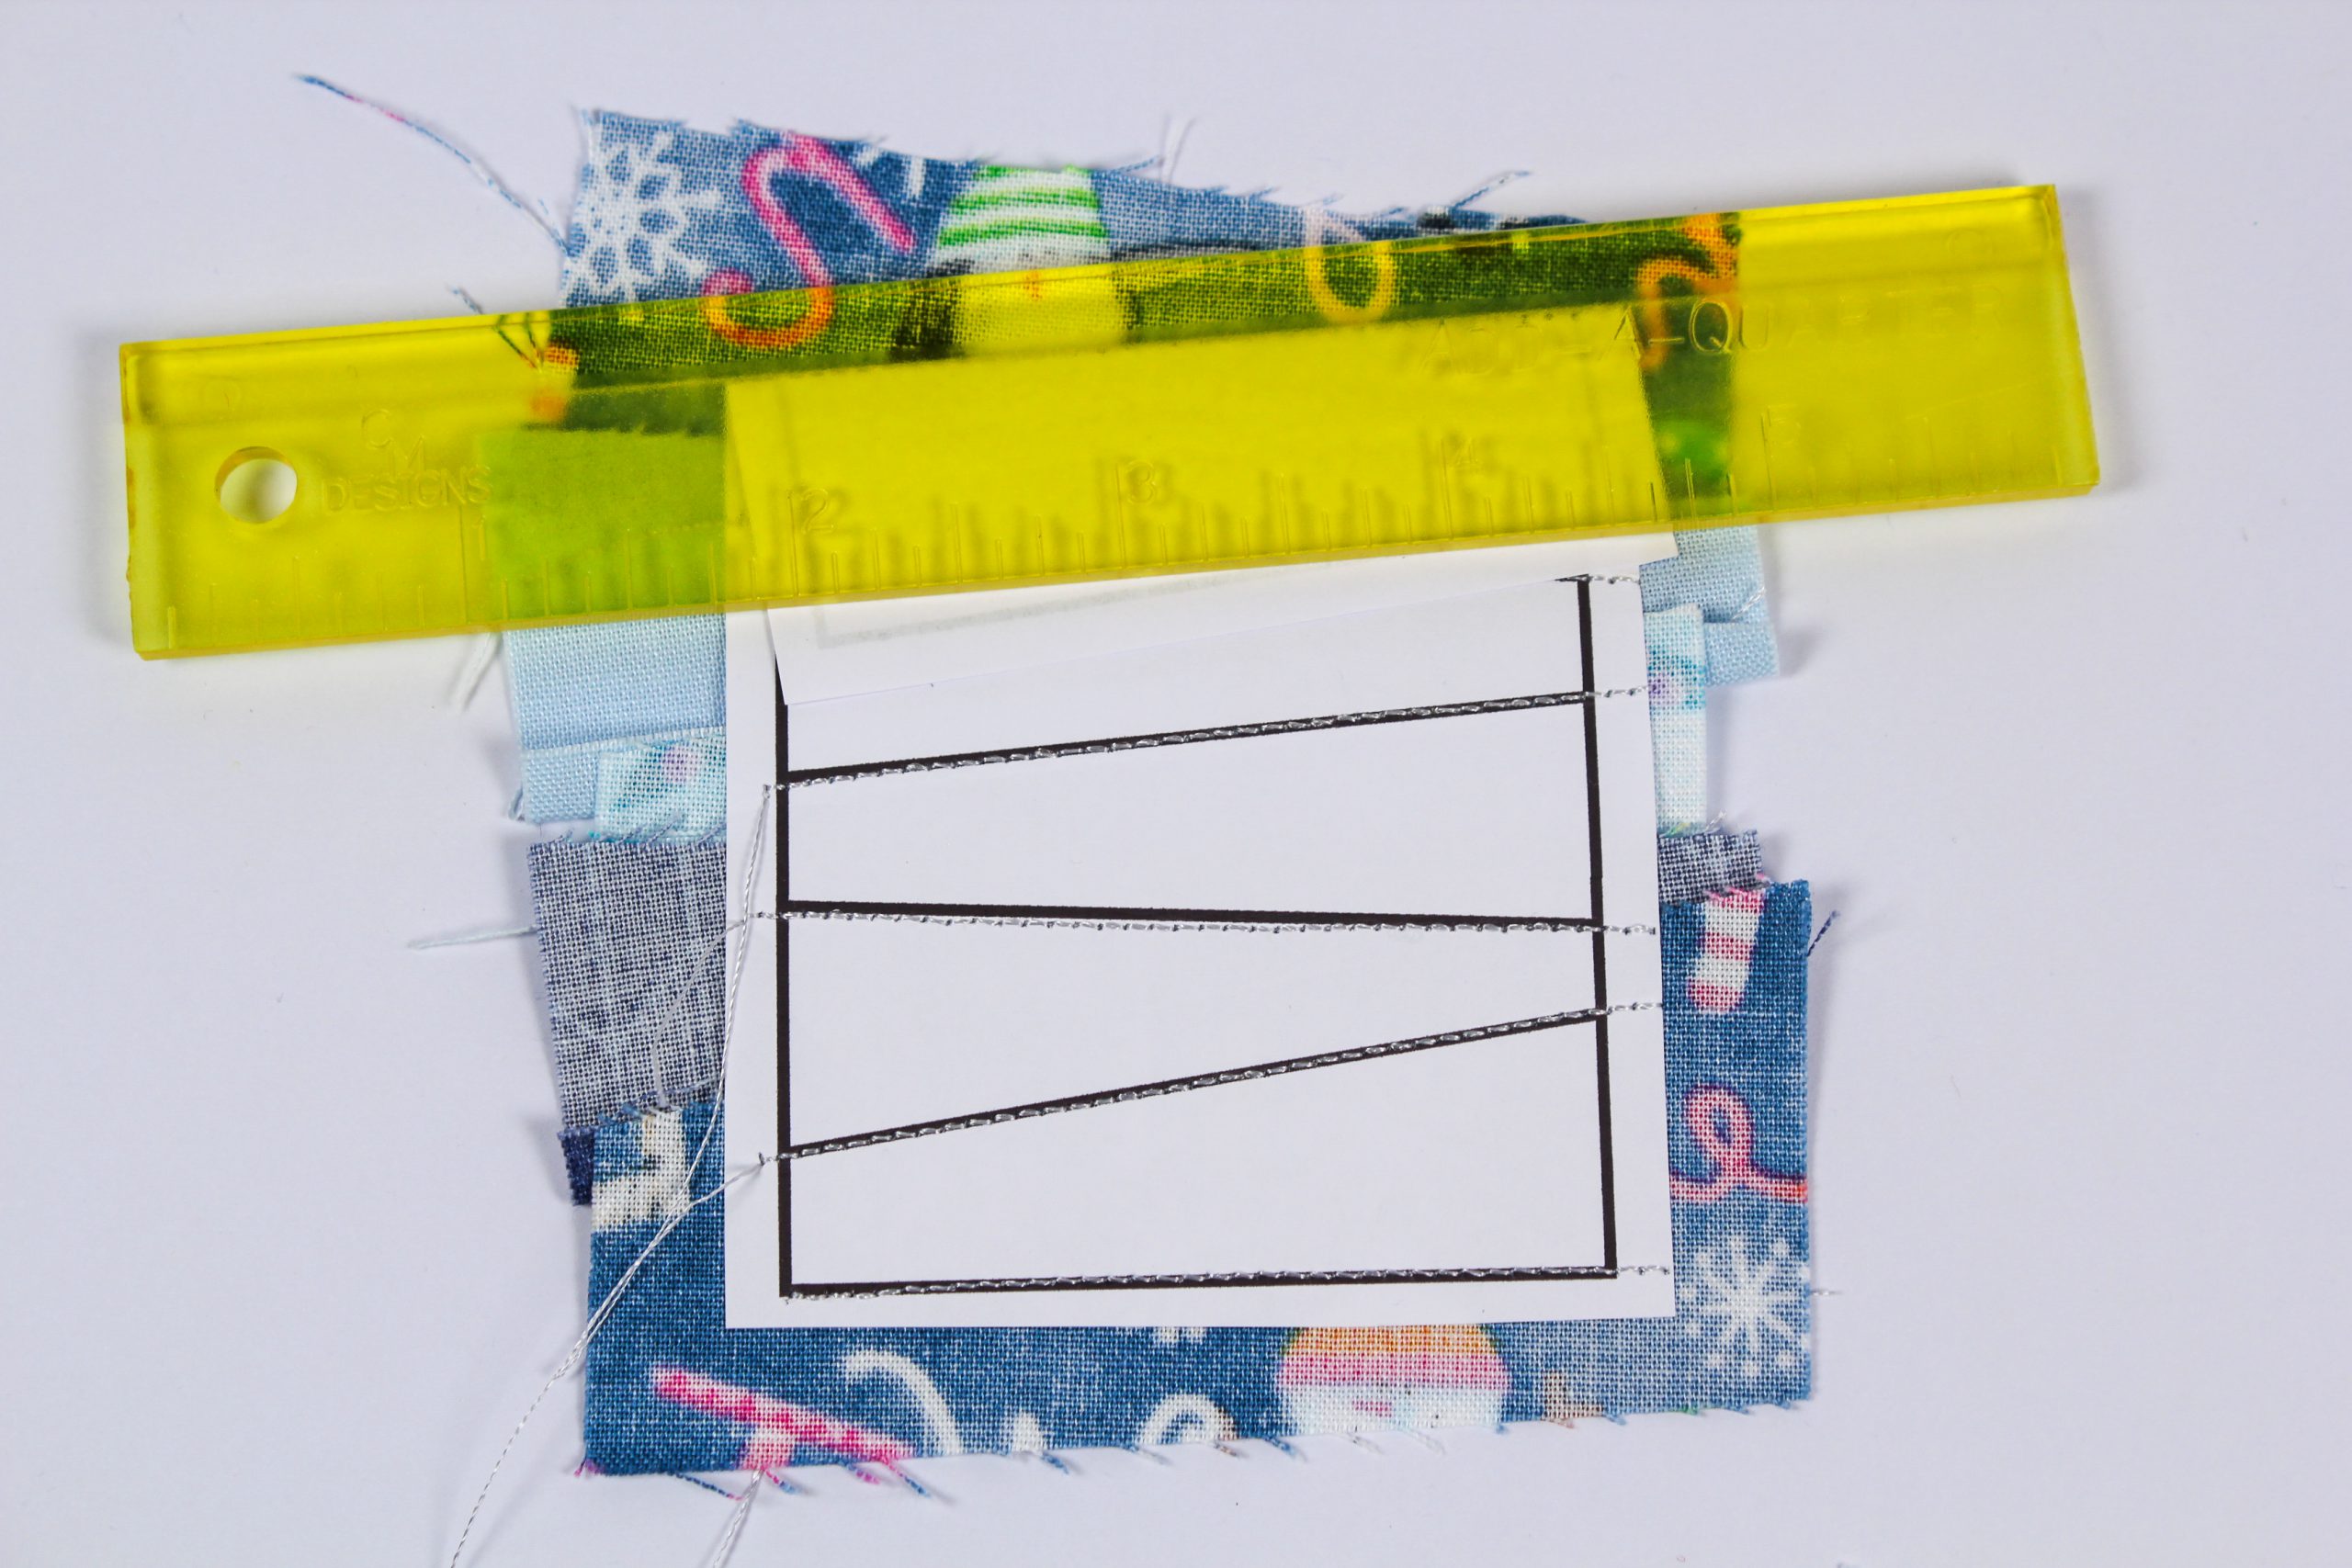
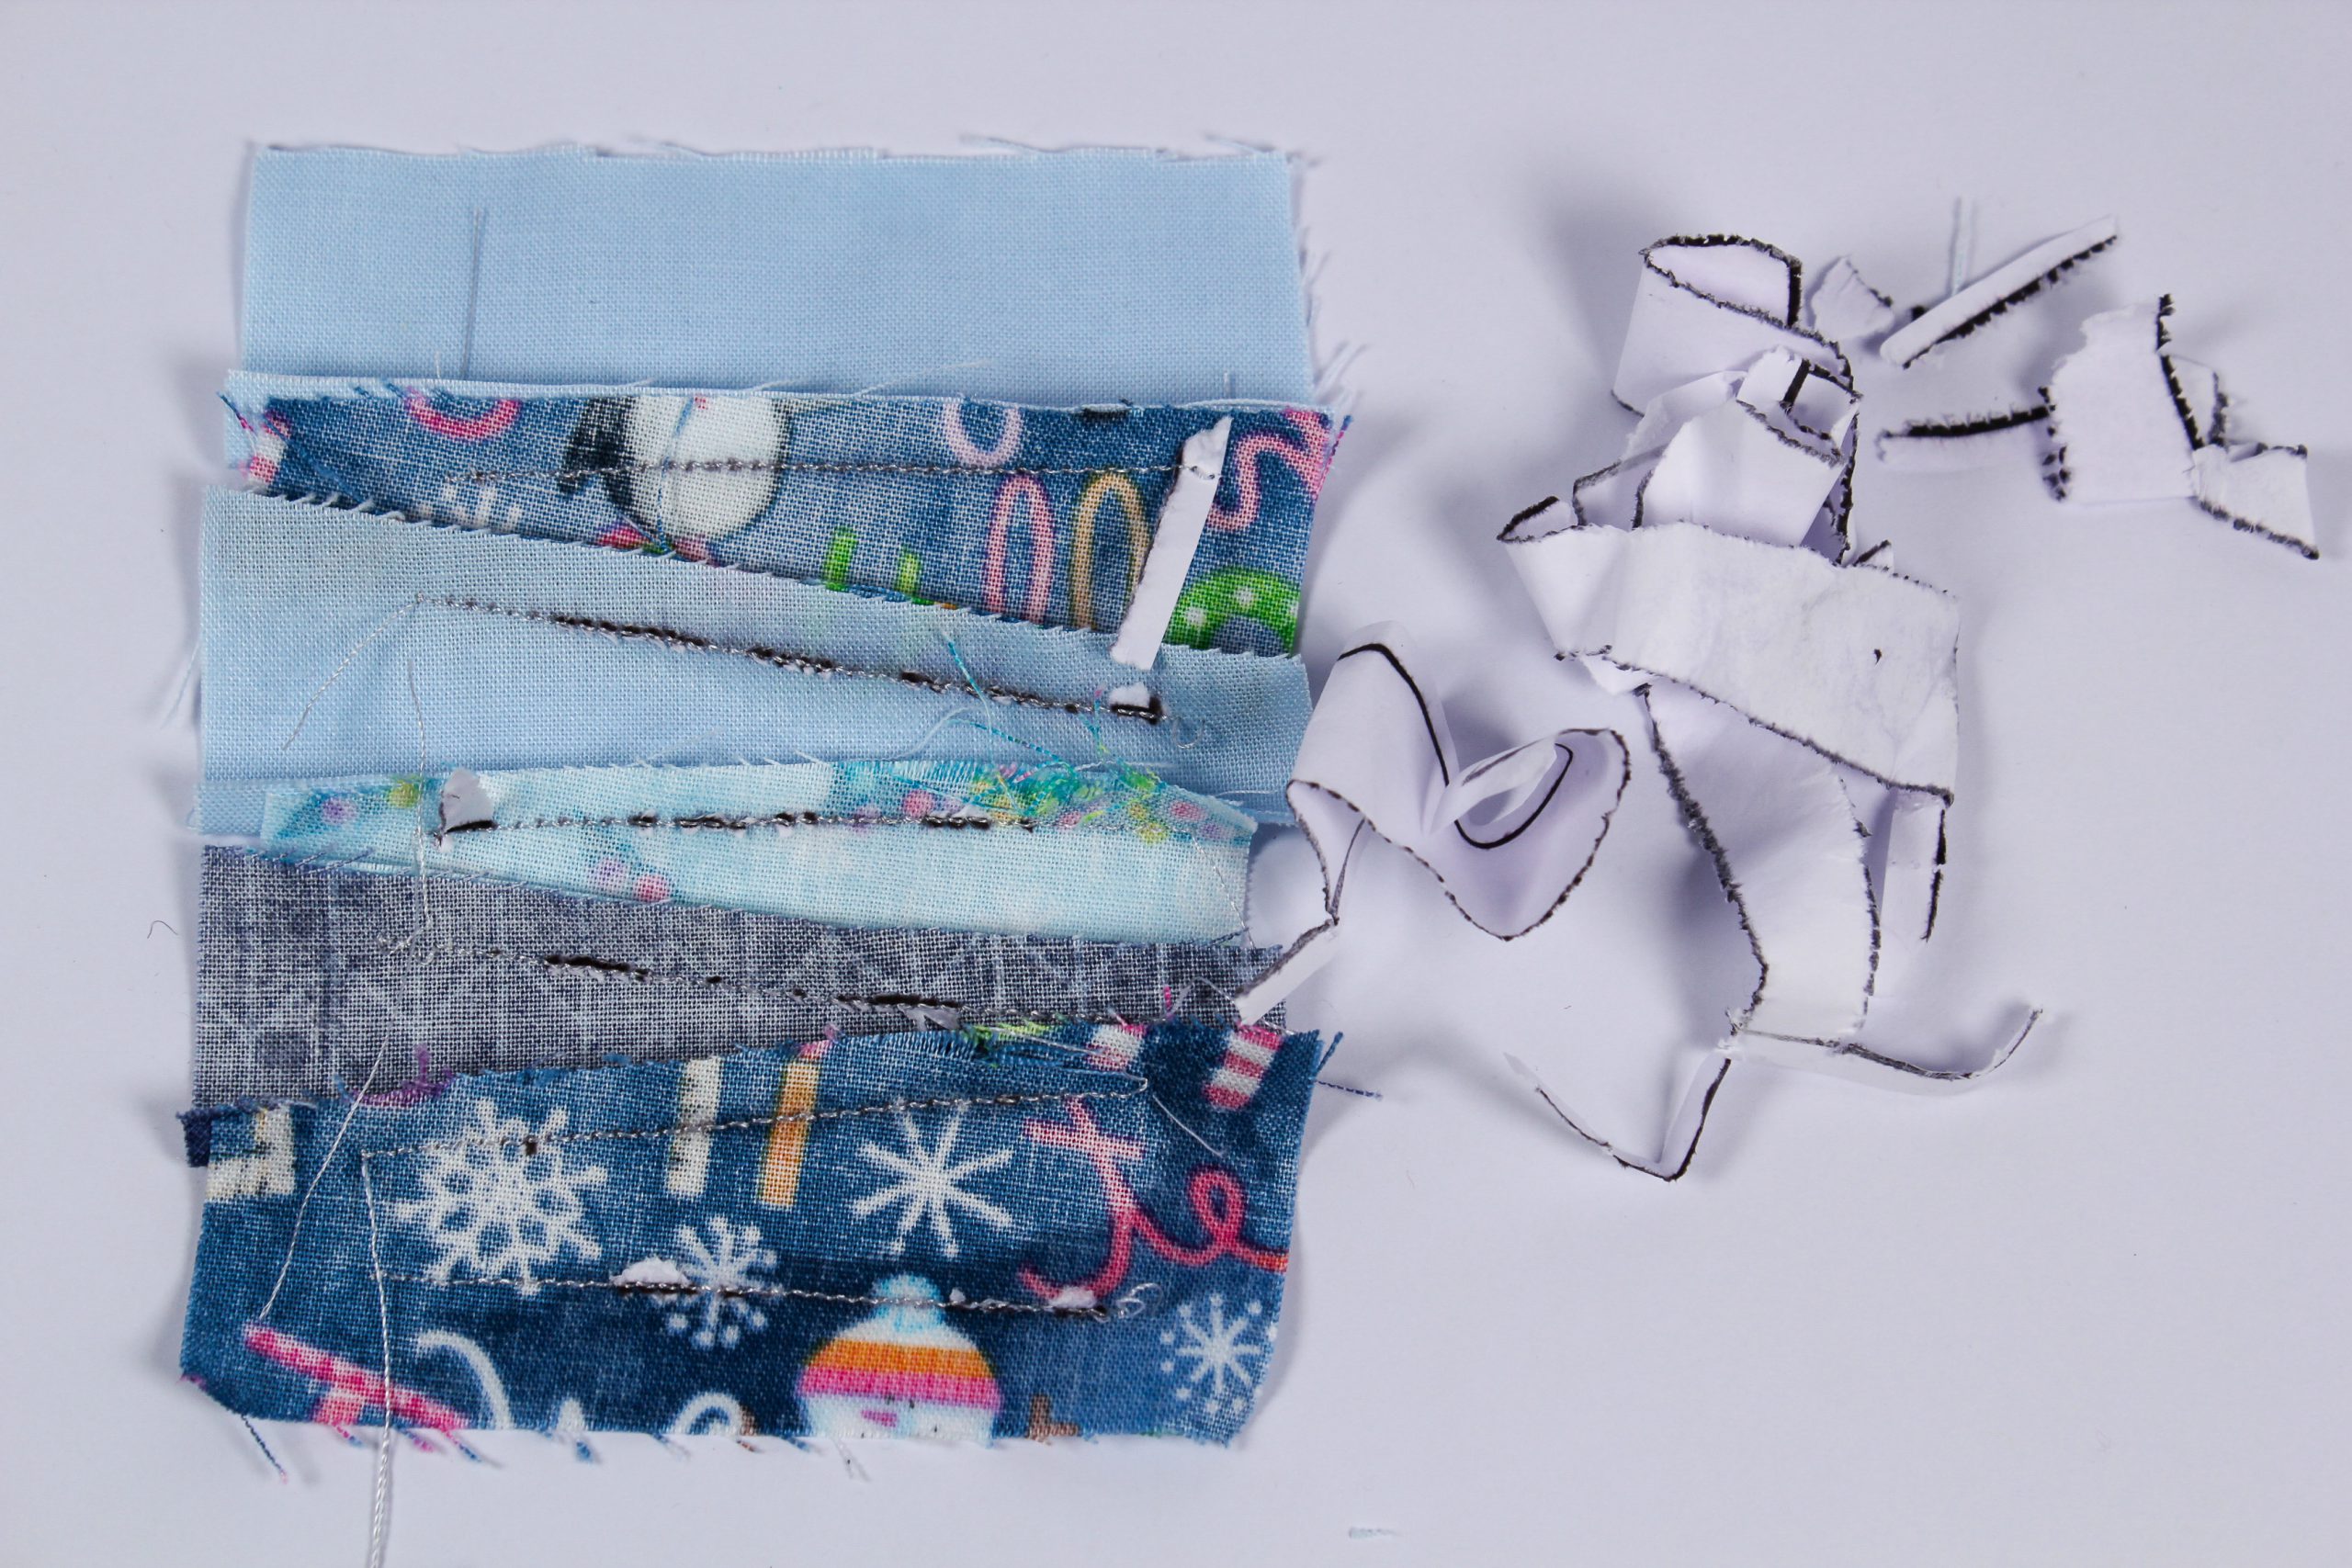
Repeat these steps for each fabric strip until you have sewn the last line, no. 6:

Appliqué
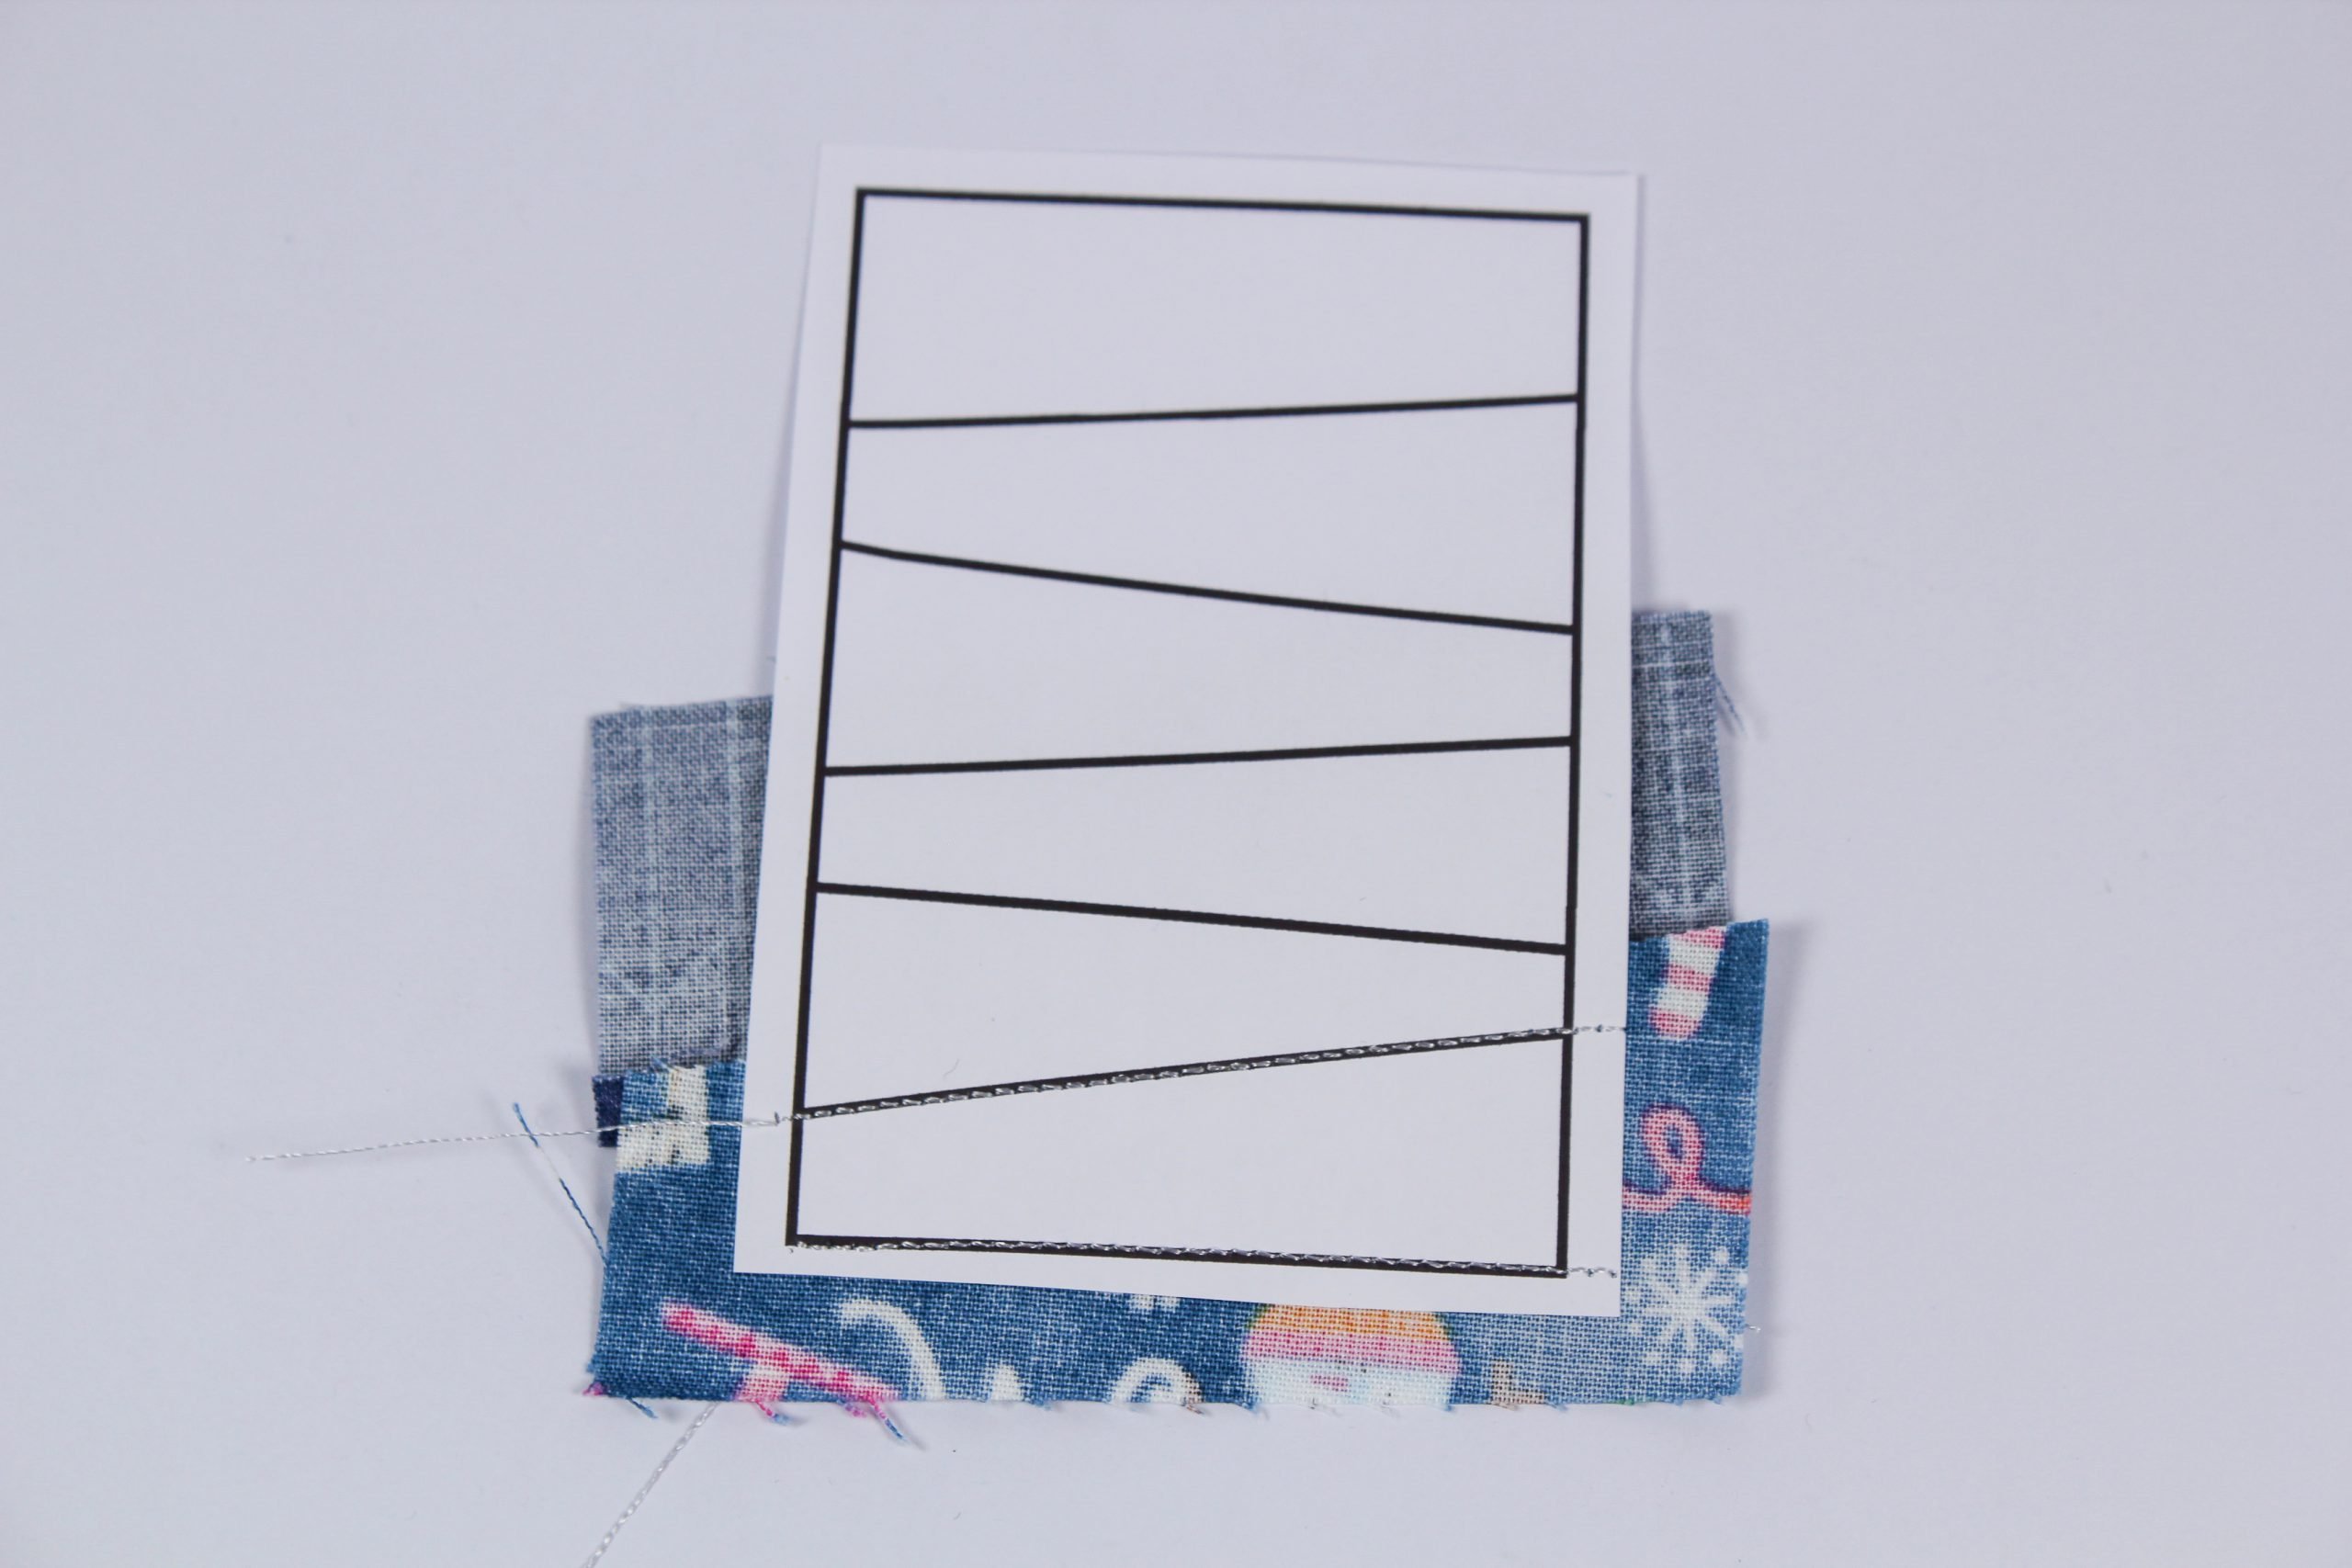
When you have finished sewing all 6 lines, you can separate the backing paper from the fabric. The best way to do this is to take a spray bottle of water and spray it onto the paper. Wait a moment for it to soak in and you will see how easy it is to pull off the paper. Up to now, I haven’t had any problem with printer ink coming off onto the fabric. I don’t know whether this is the case with all printers, so I recommend you do a test beforehand!
Bondaweb
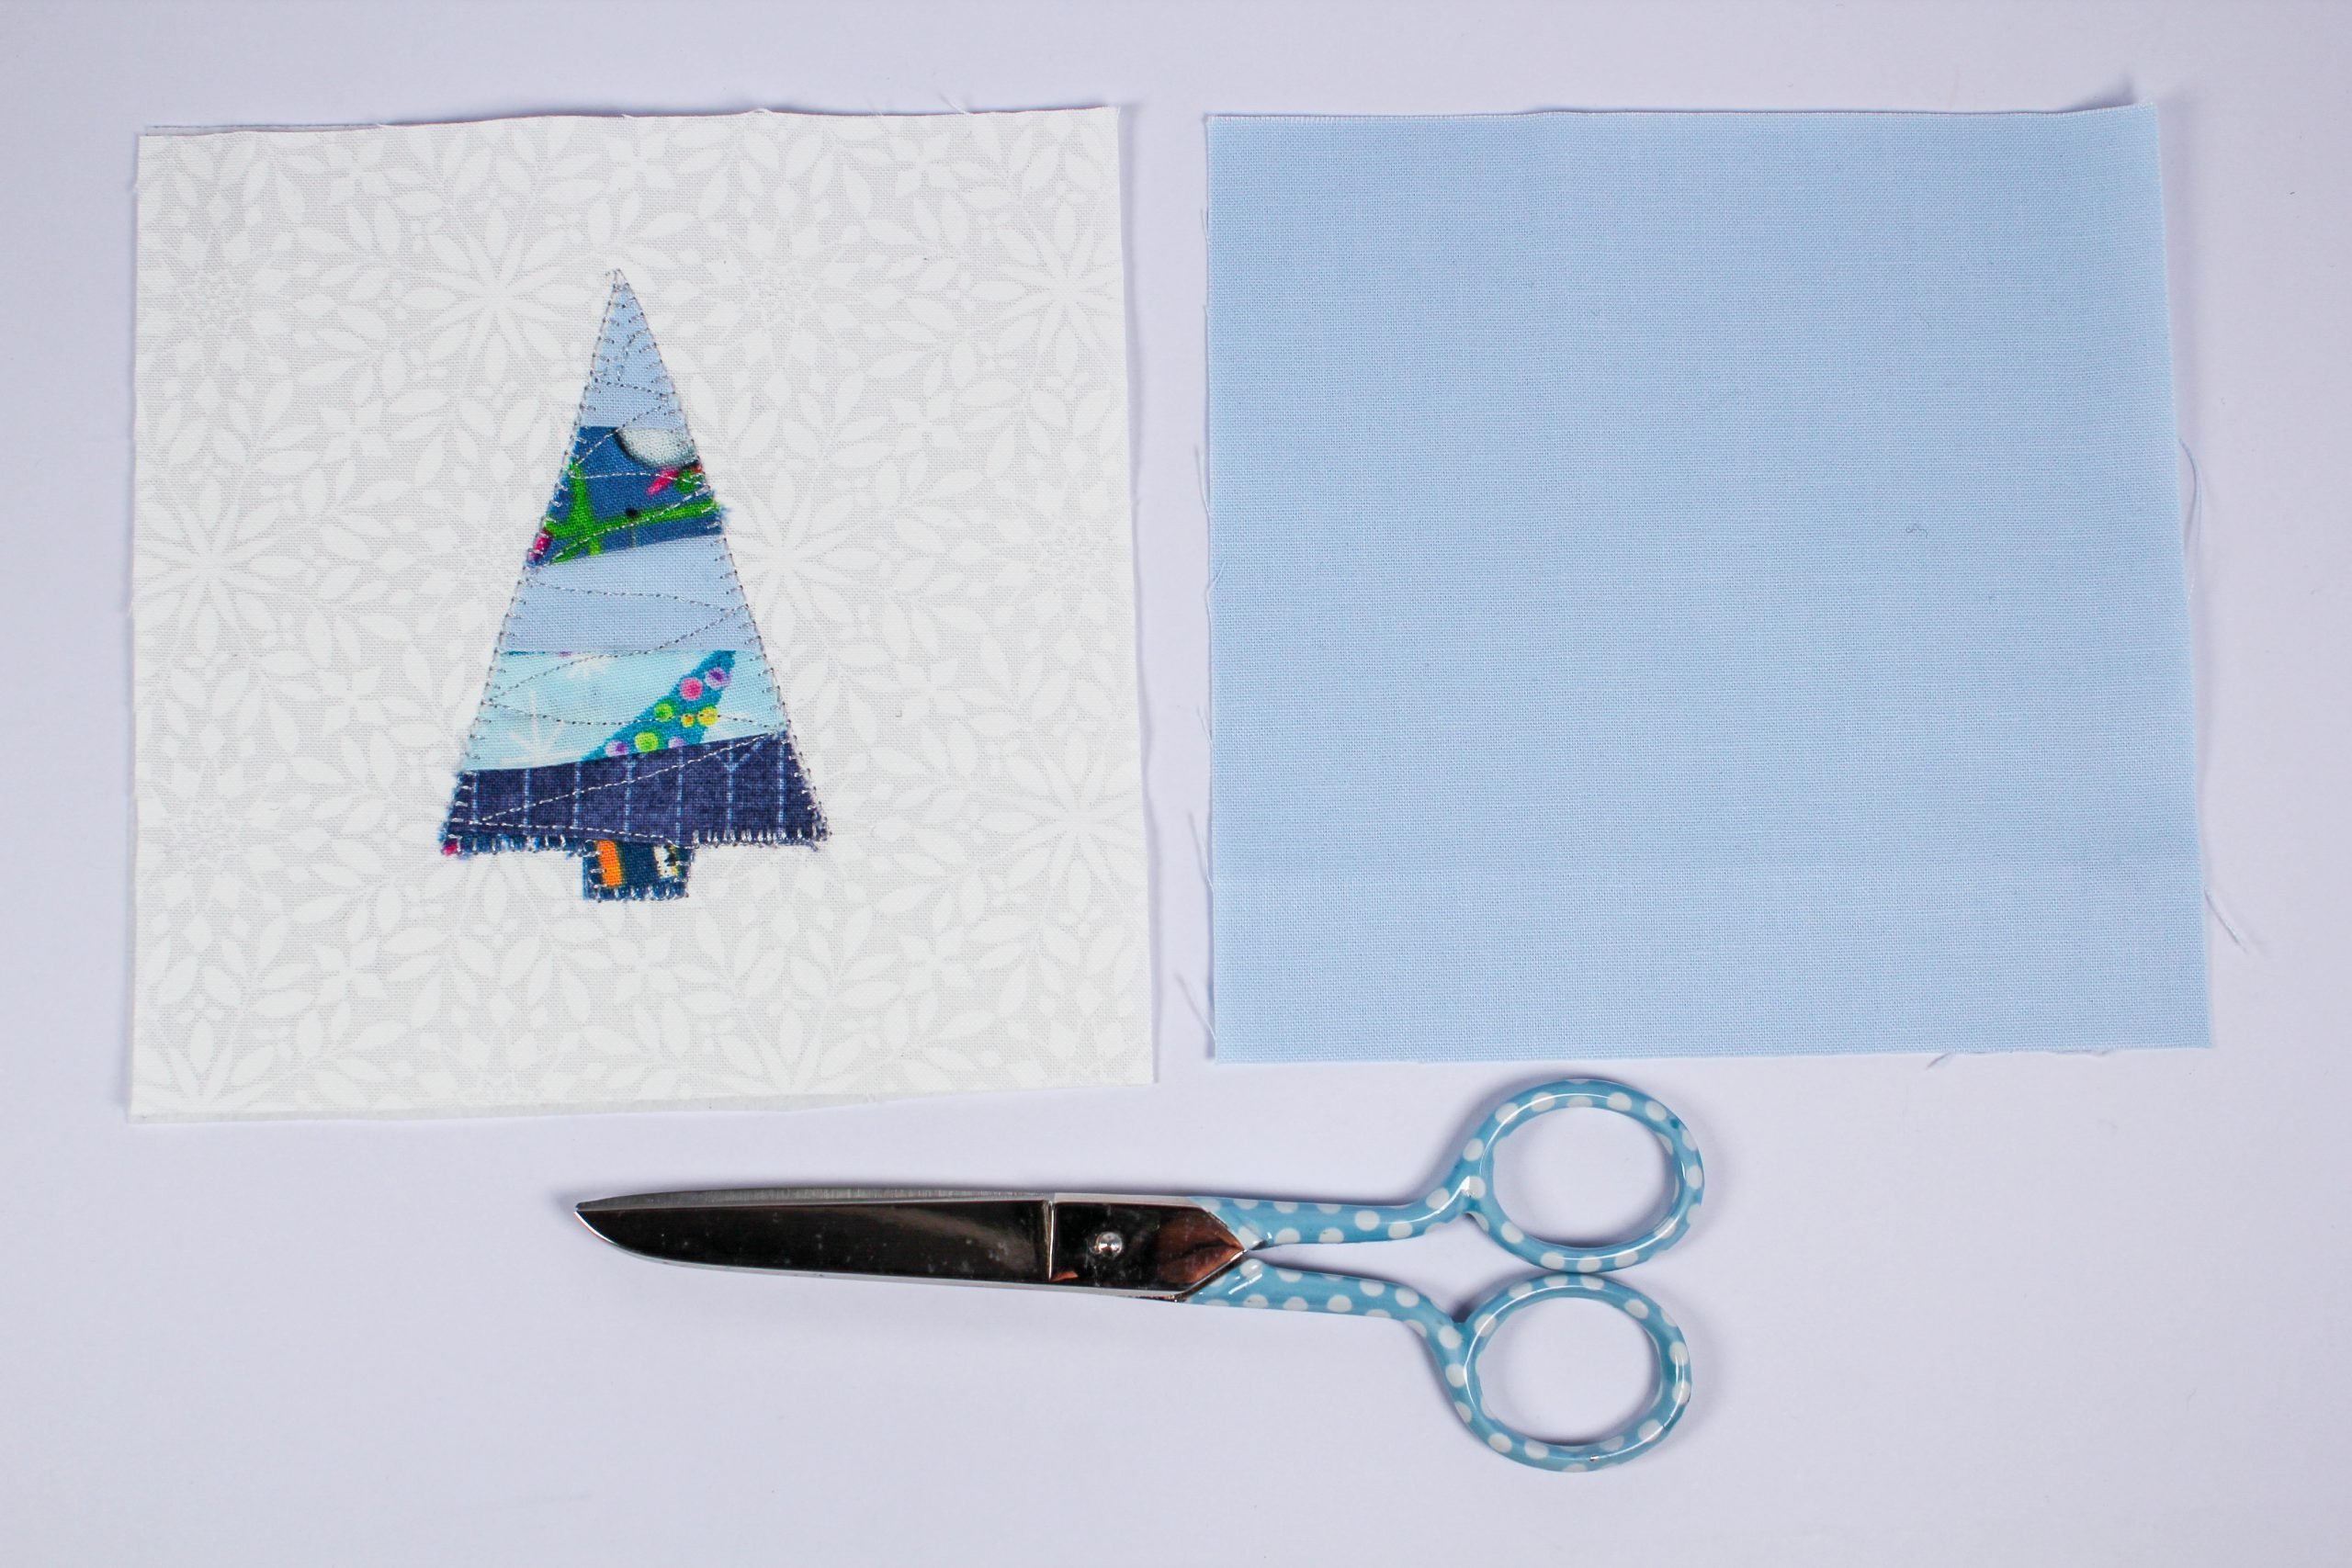
Now use the paper scissors to cut a piece of Bondaweb approximately the same size as the template for the coaster. Use a pencil to transfer the outlines of the tree onto the paper side of the adhesive fleece and iron it with the adhesive side on the back of the appliqué fabric that you created using FPP. Wait until the fleece has cooled down before cutting out the tree.
As soon as the Bondaweb has cooled down, peel off the paper on the back and iron it onto the front of the cut out cotton fabric. You can then put the stabilizer under the front piece, secure it with a couple of pins and take it to the sewing machine, because it’s now time to sew on and embellish the appliqué.

Embellishing
You can choose a special thread for sewing and embellishing your Christmas tree mug rugs. Maybe you want it to sparkle silver or gold, or you chose to use colorful fabrics so you only want to use contrasting threads. You can do everything “as you like it” (Shakespeare). I decided on a silver-colored thread because these are festive mug rugs for Christmas.
Now we come to the back
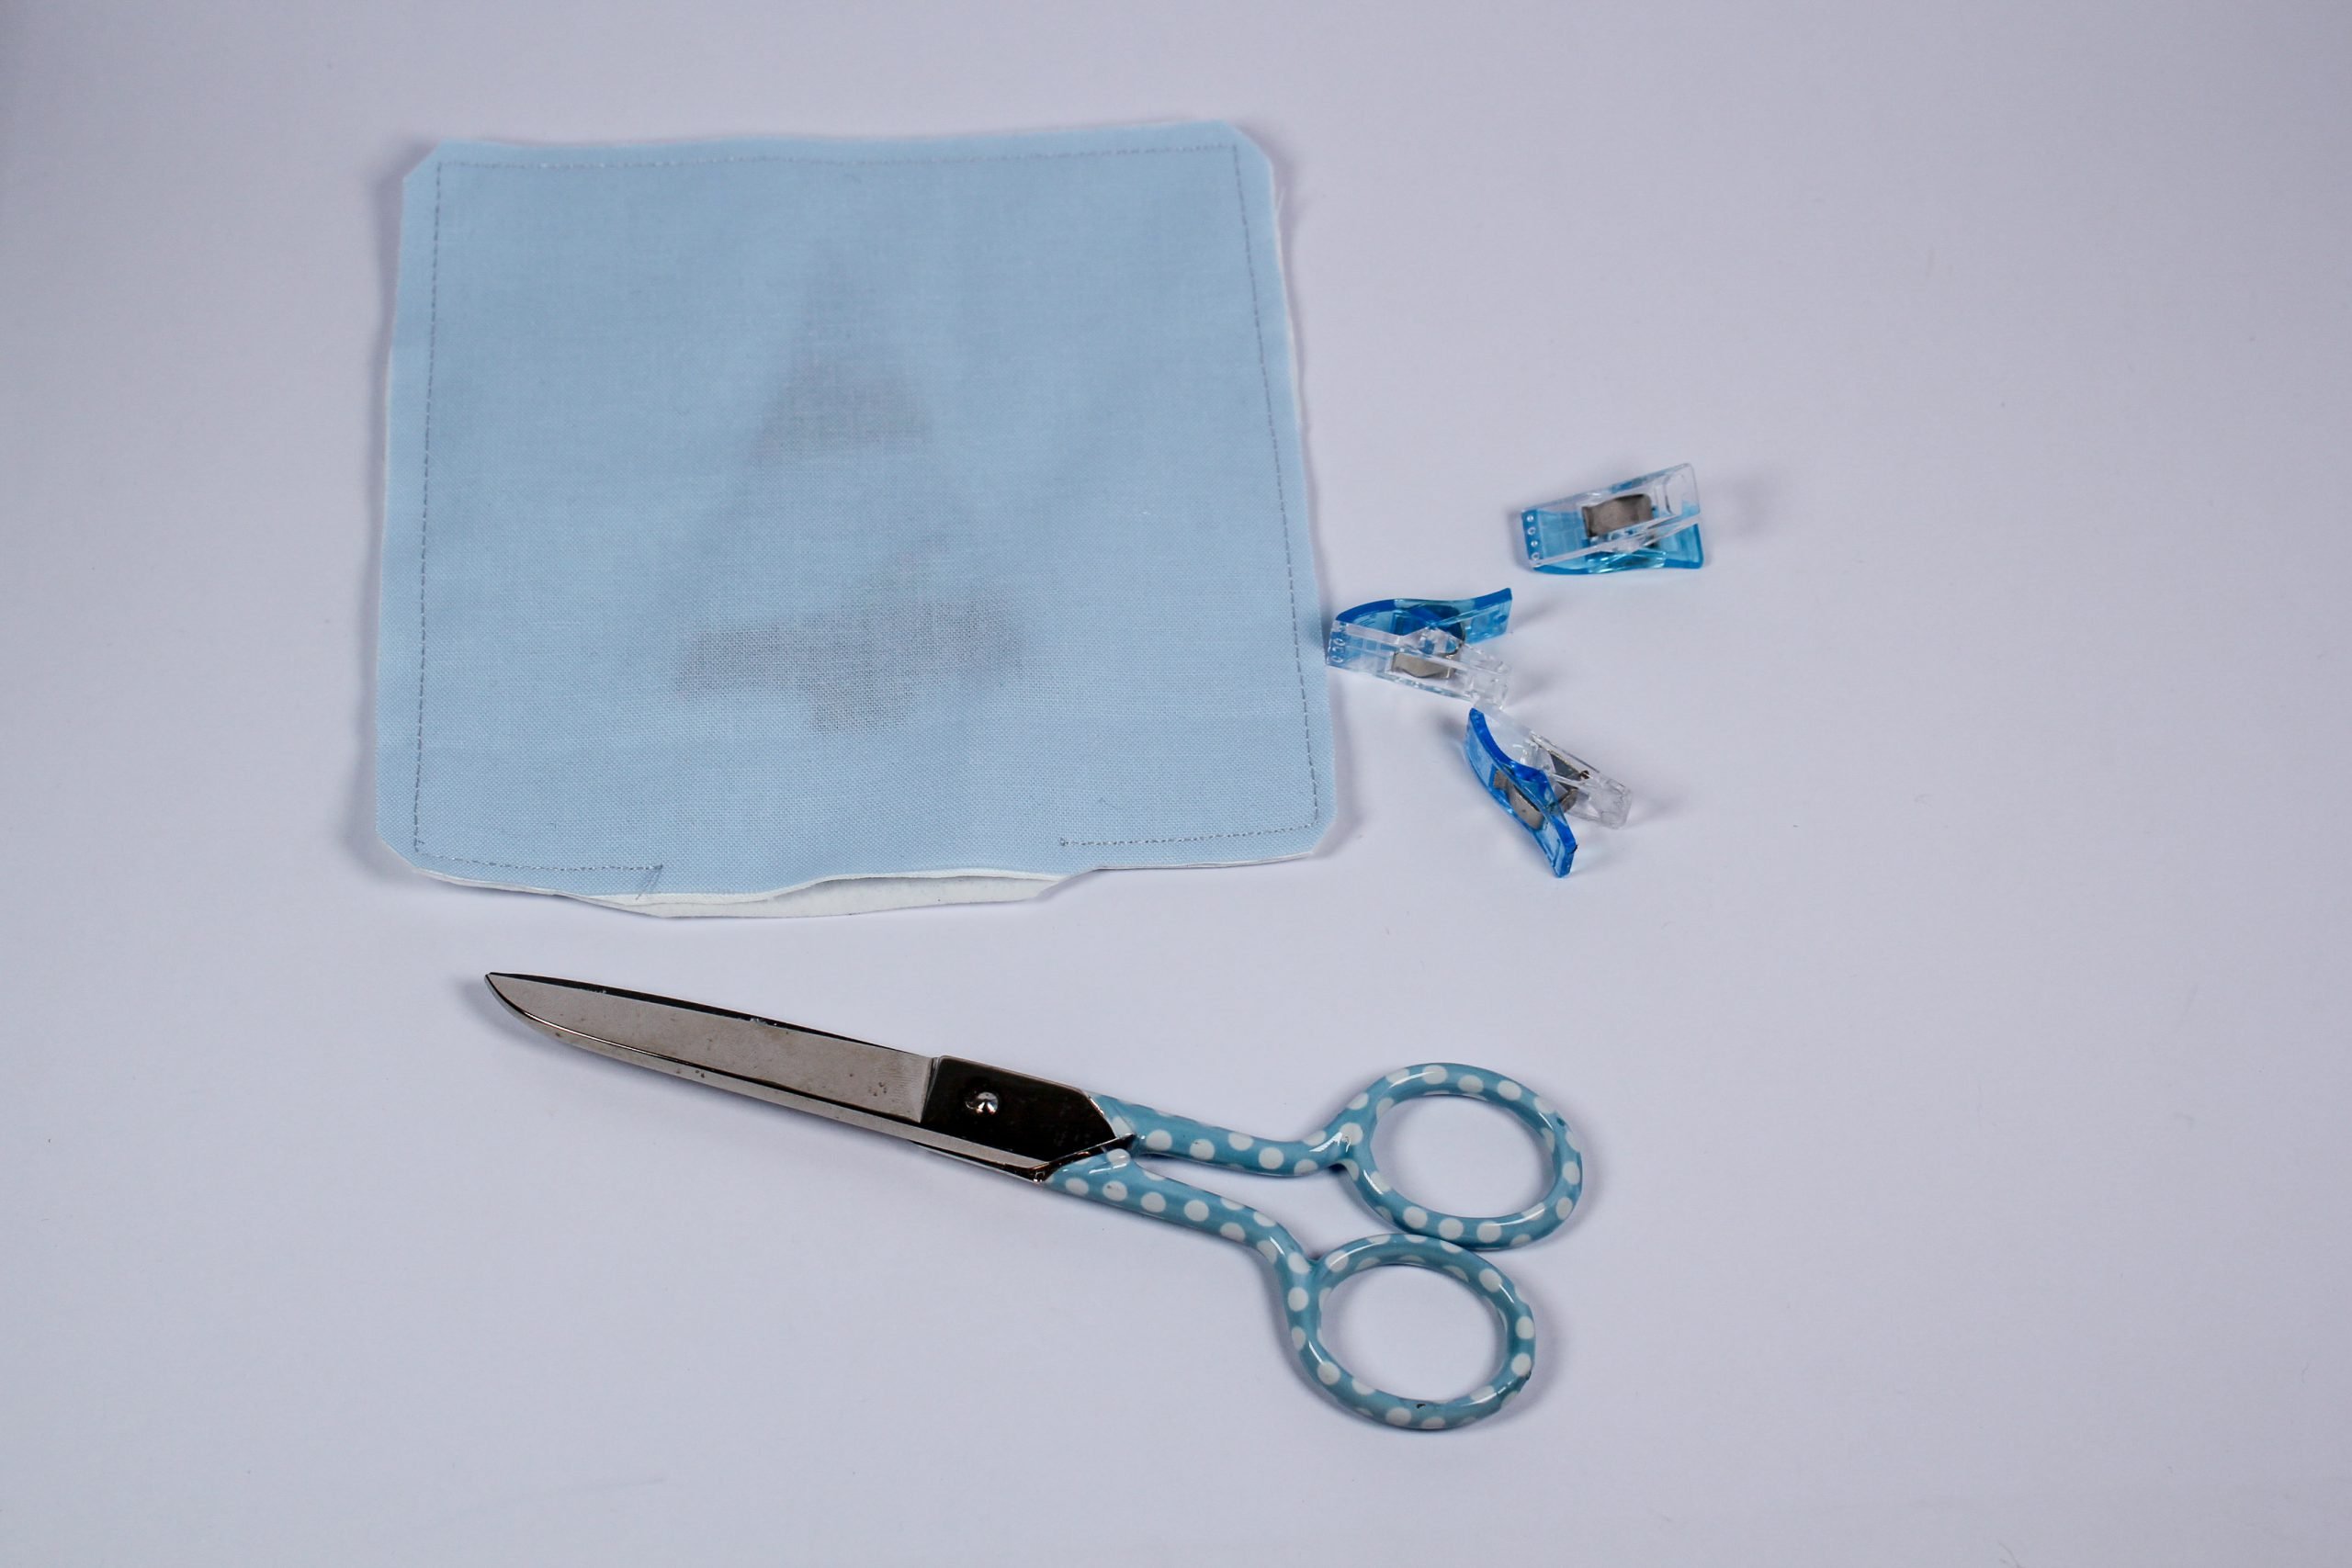
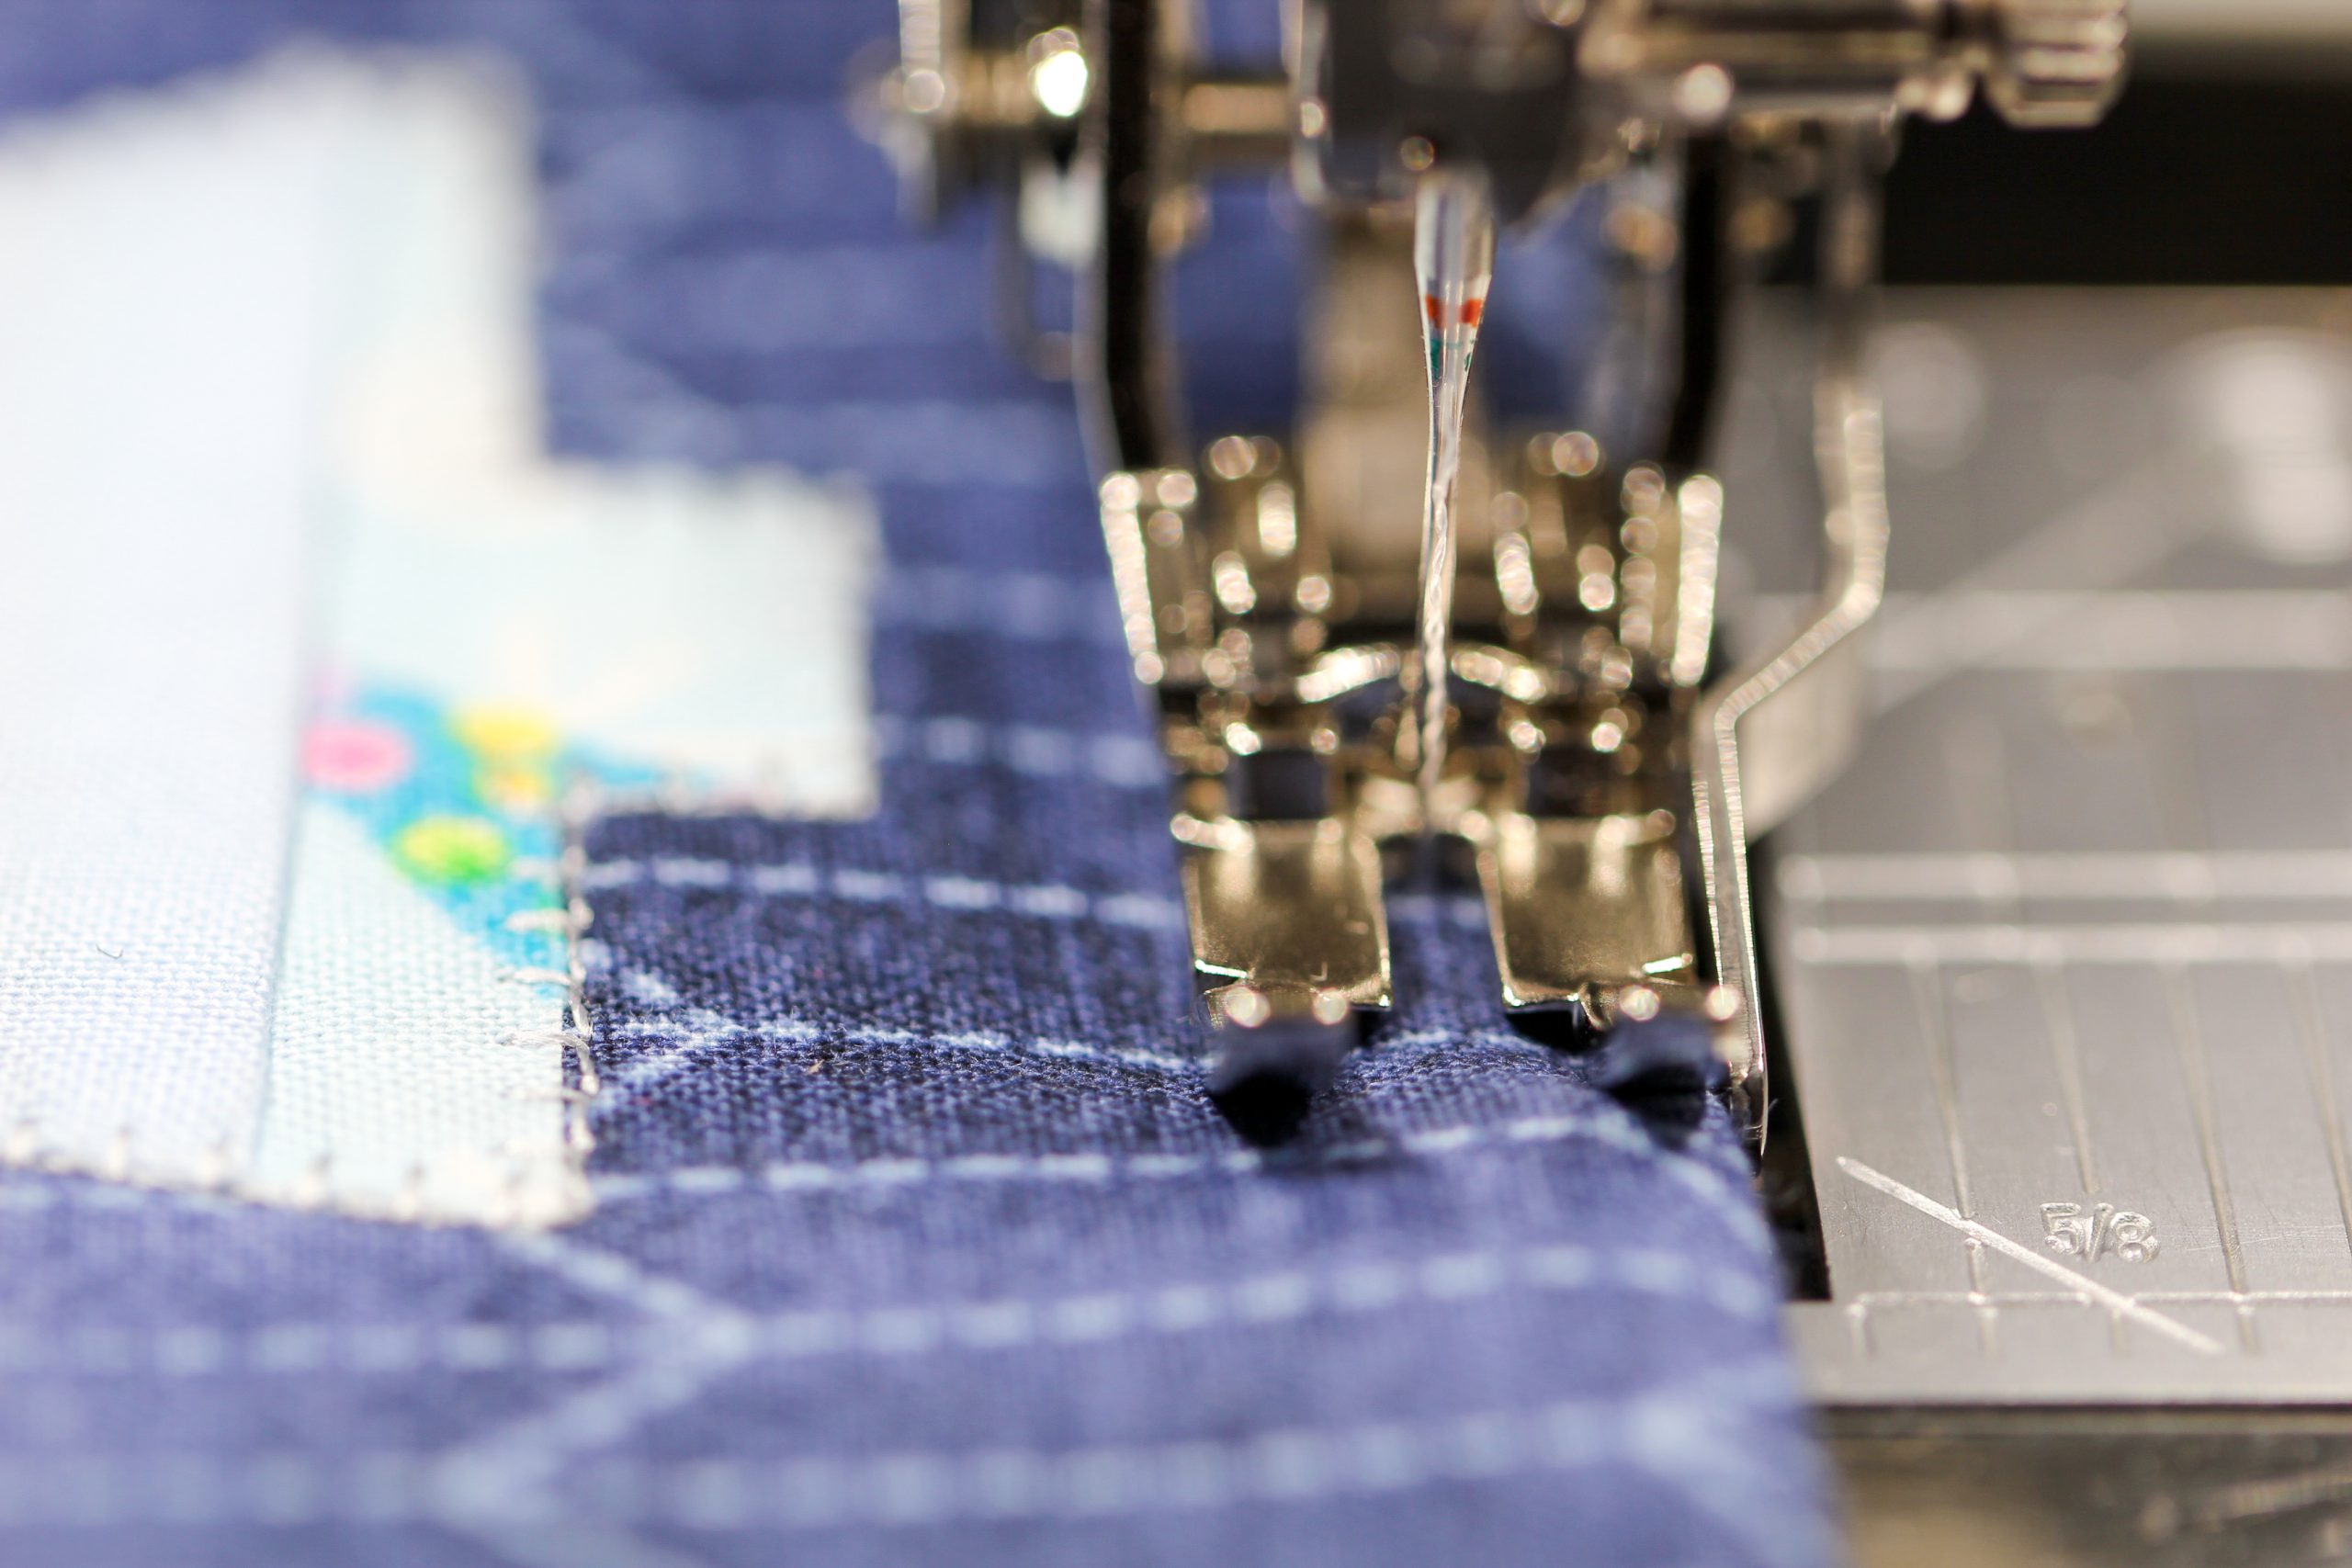
As soon as you have finished sewing and embellishing the appliqué onto the front, place the back piece and the front piece with the right sides together and sew everything together a foot-width from the edge, leaving a turning opening of approx. 6 cm.
After sewing it together, cut off the edges close to the edge at an angle.
After turning, shape the corners well and iron.
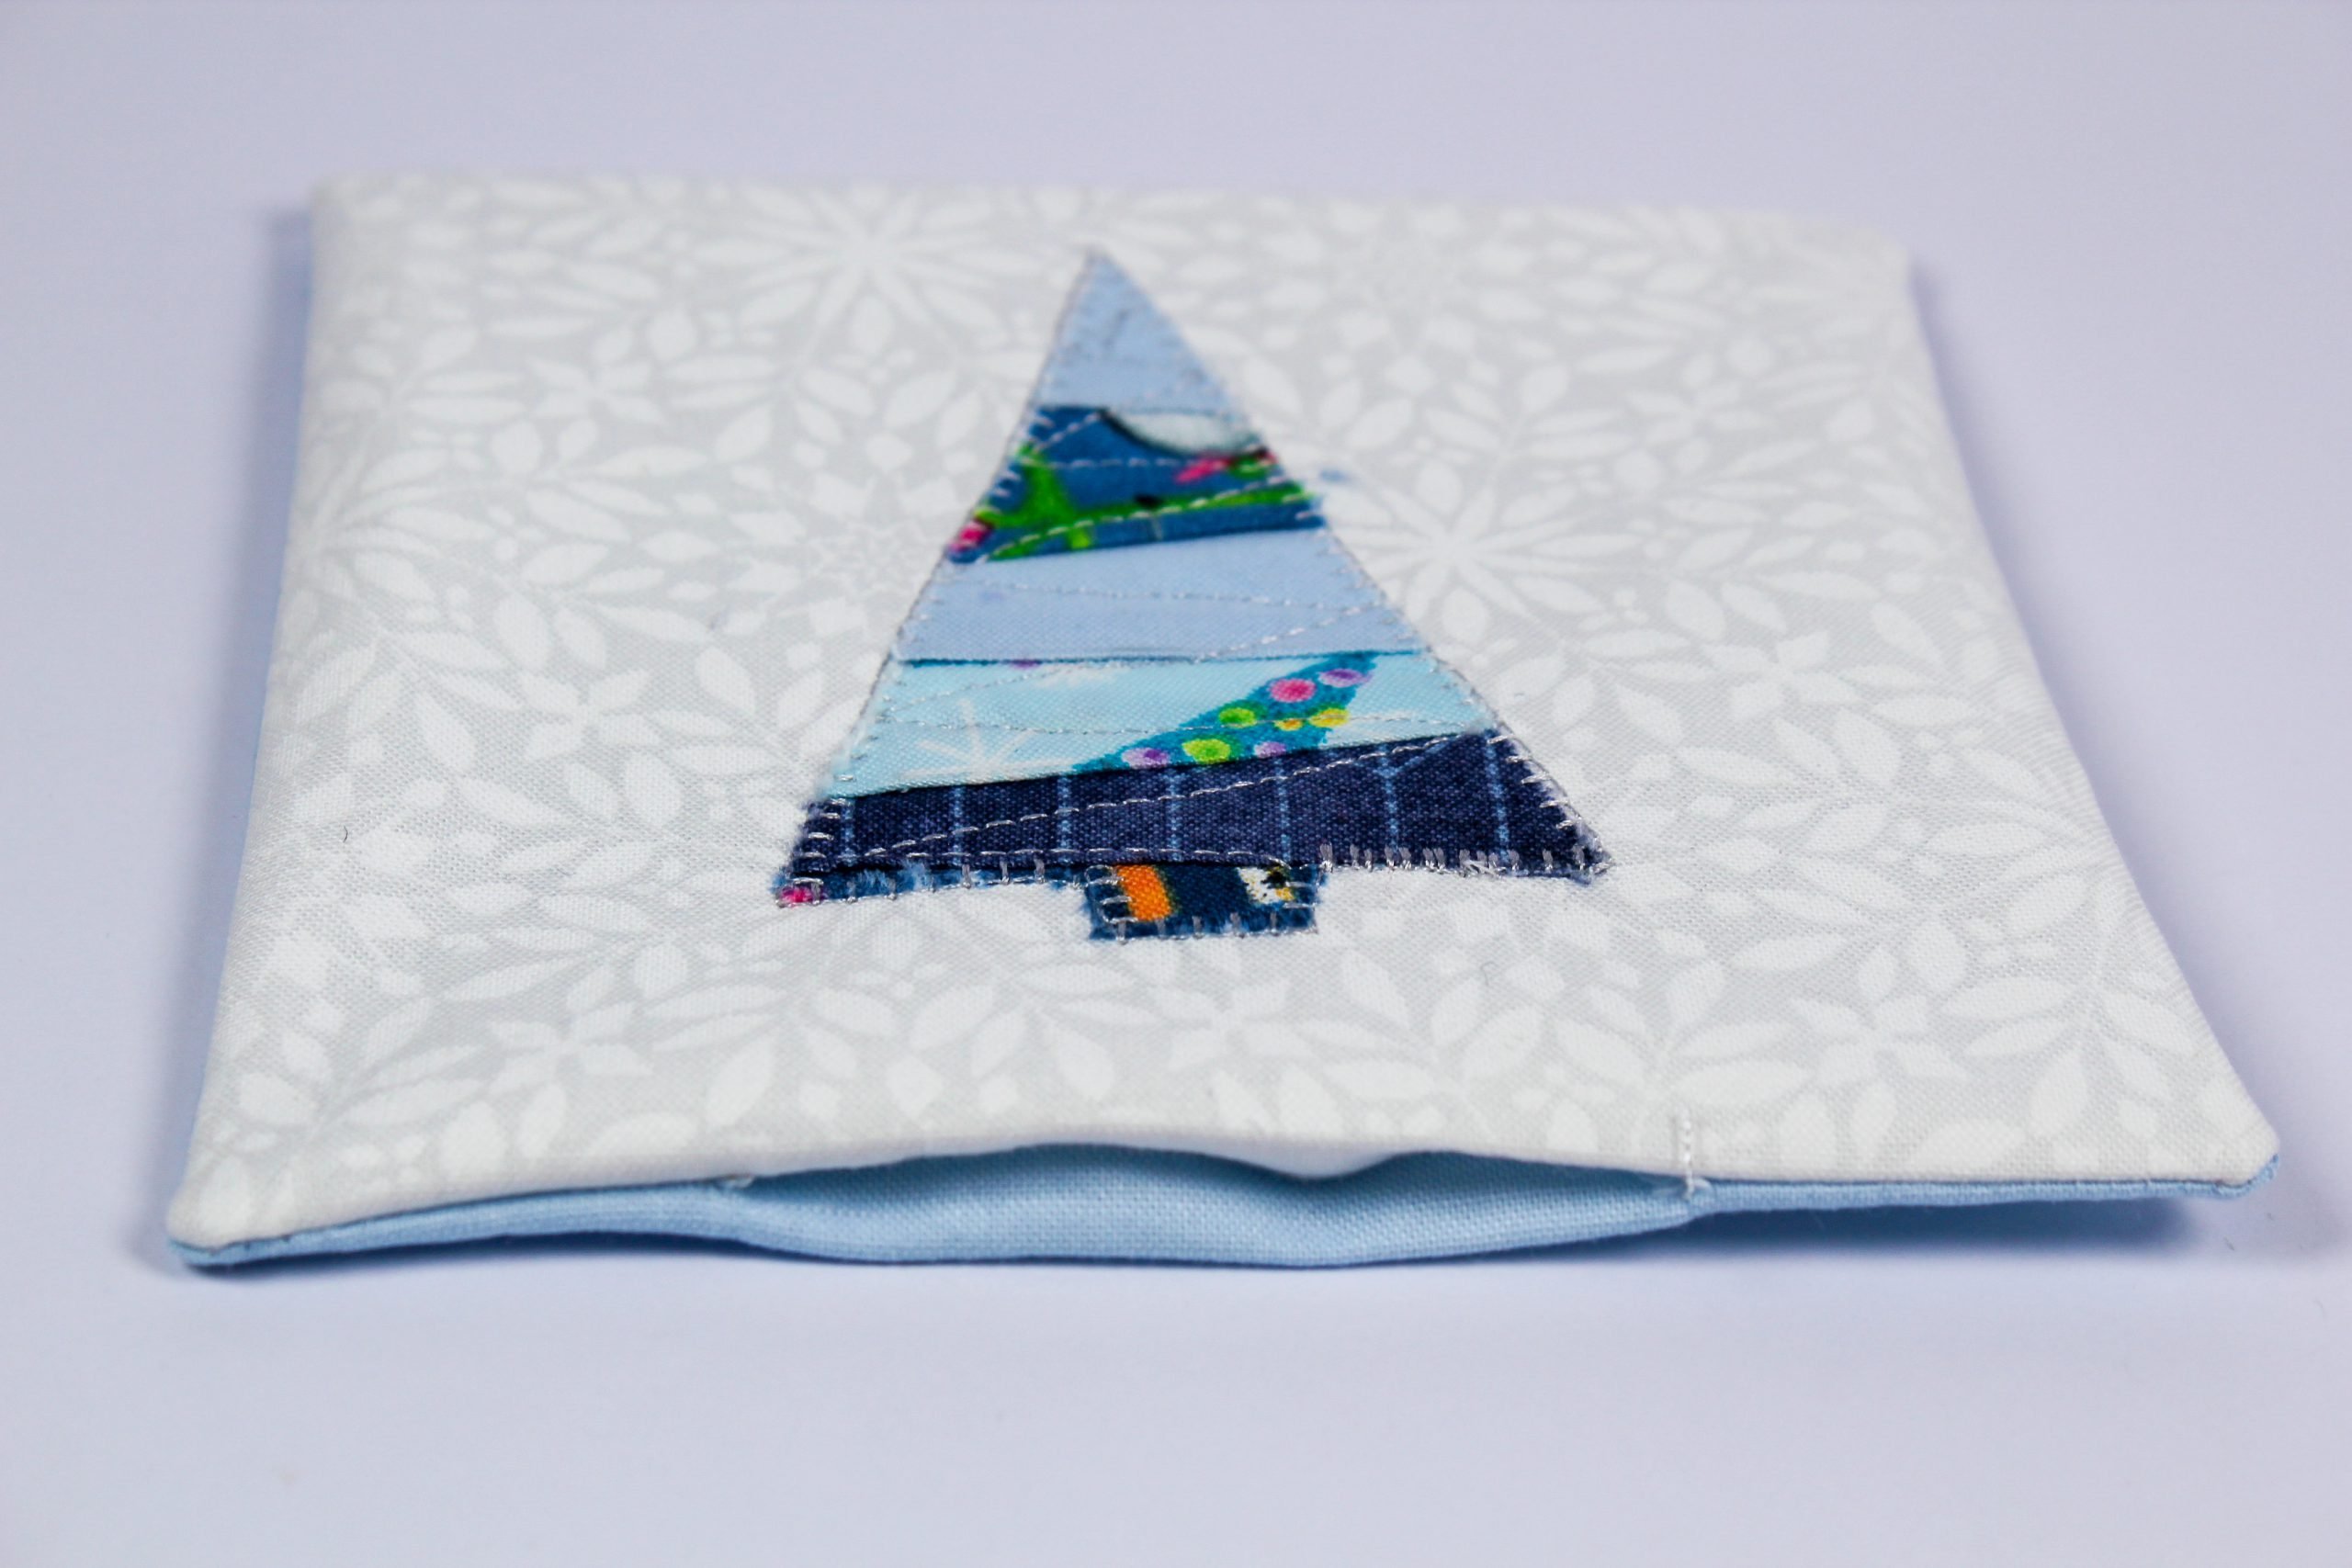
You can now use the sewing machine to topstitch around the mug rug close to the edge. This closes the turning opening and gives the whole thing a nice shape. A second line of topstitching around the edge slightly further in rounds off the coaster.
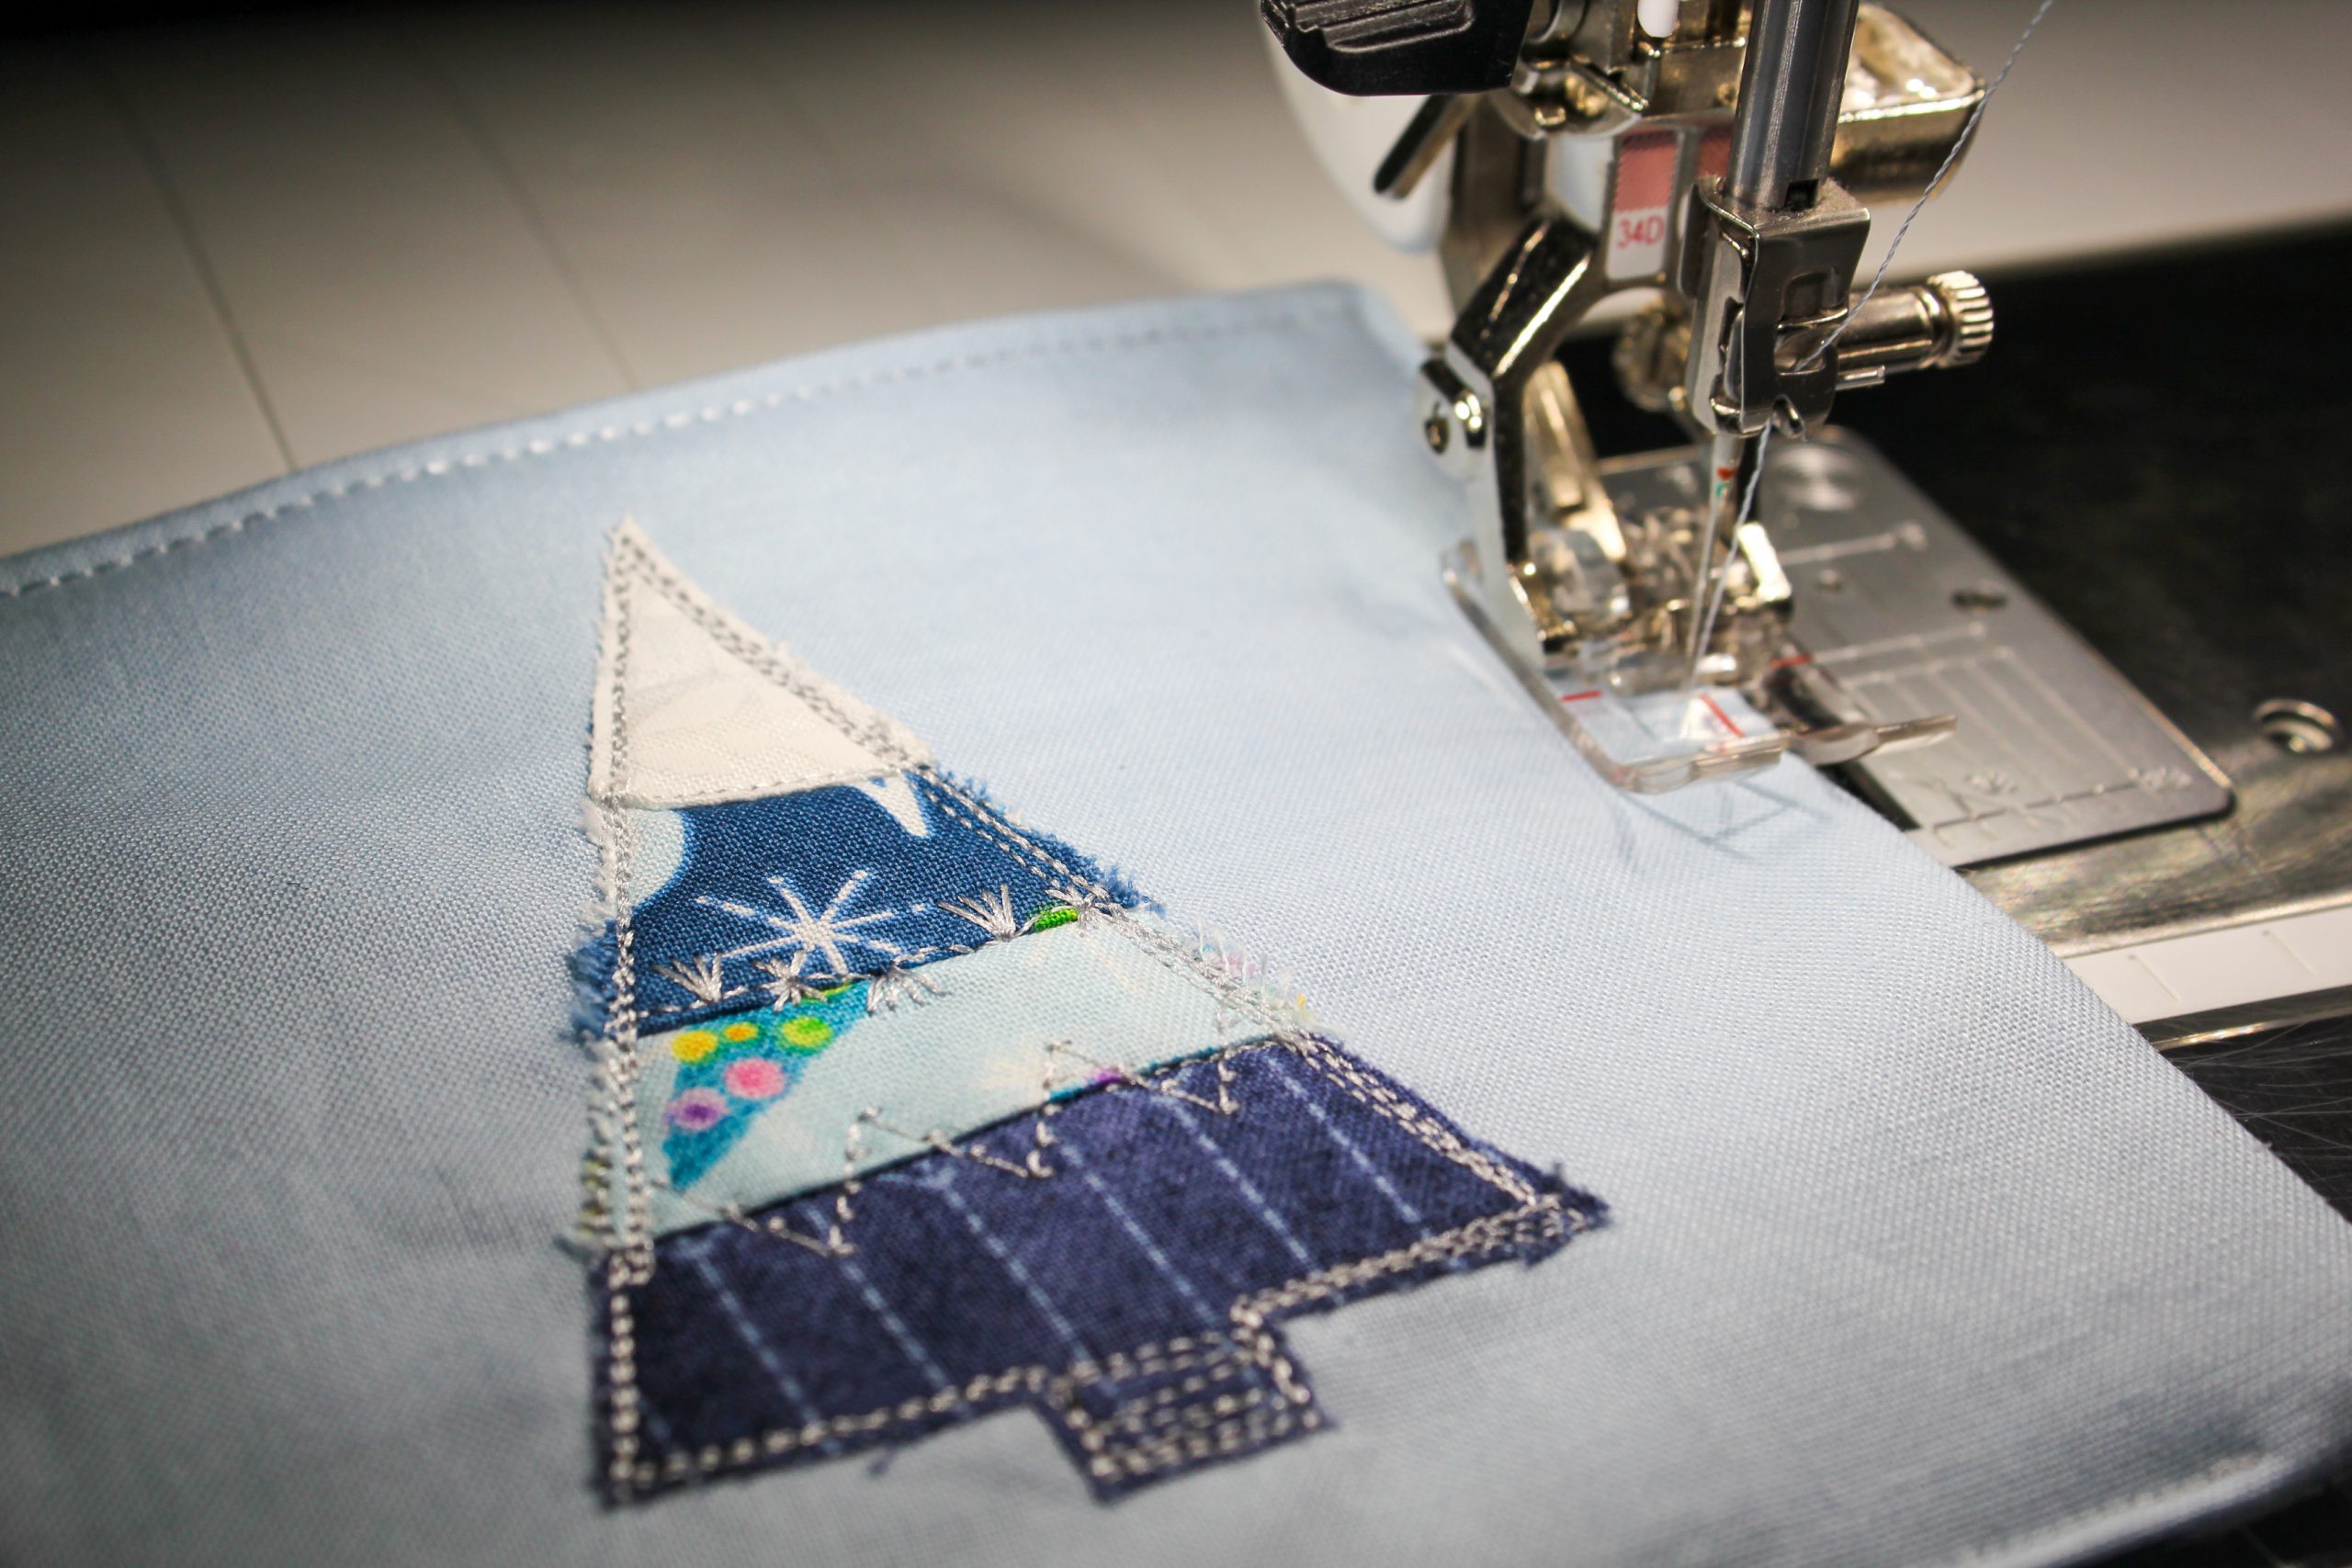
For the first time I used one of my new presser feet, patchwork foot number 57D, to topstitch the edge, and what can I say, I was thrilled!
Do you like it when the back looks nice too?
And you’re done!
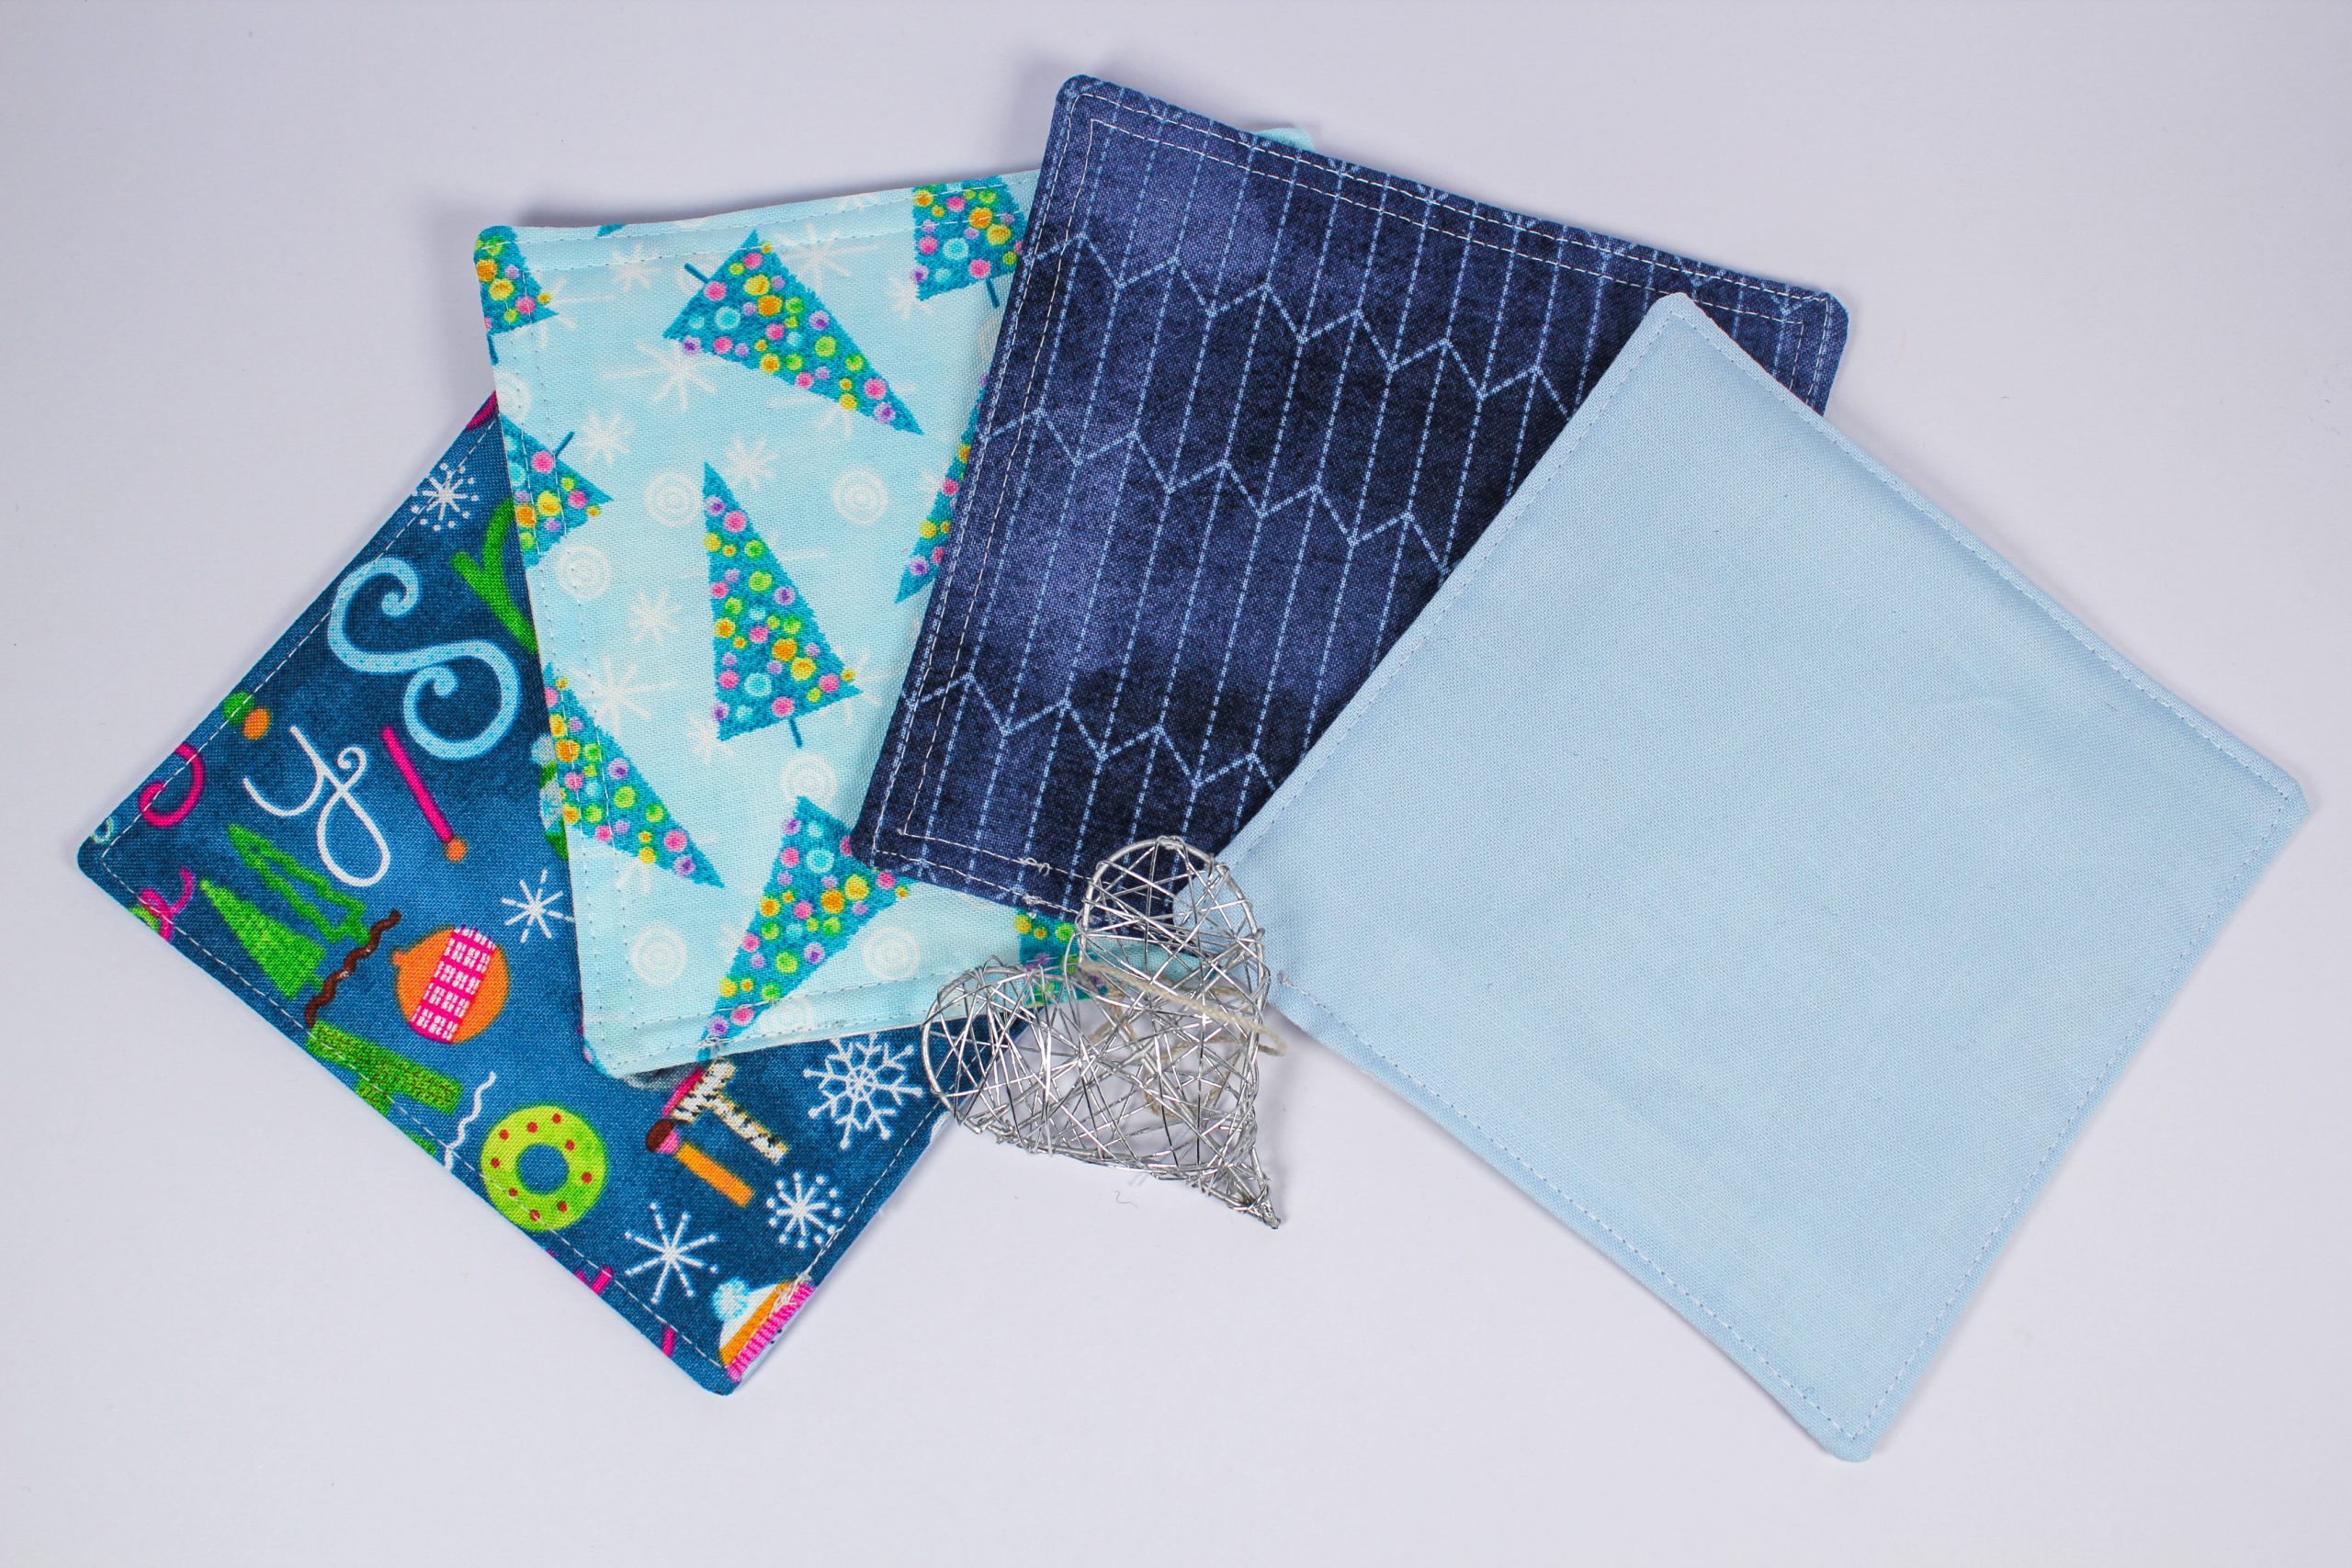
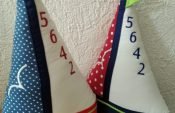
Christmas mug rugs are so easy to sew. It didn’t take long to sew a whole set of these cute coasters. I’m now ready for Advent season.
But I can tell you that I’m not going to wait until Christmas to use these coasters. My sewing table and my cup of tea are already crying out for one of my four sewn trees;-)
We’ve come to the end of the instructions. I hope they have inspired you to sew some mug rugs for Christmas too! I wish you every success, and you know that I am happy to answer any questions you may have. Stay safe and see you for the next sewing instructions!
Warm regards,
Katharina Raab


0 Responses