 BERNINA Corporate Blog -
Beautiful blocks are made, participants are posting them via the COMMUNITY of this BERNINA Blog: pictures of Month 1 and Month 2 are really great, whatever you have done with them. It is great to see how different all blocks are, despite the similarities. And now it is time for Month 3 of this Crazy Crystals Mystery Project 2018.
You can download three pages again for this block, just like the previous ones:
Block 3 – left part
Block 3 – right part
Block 3 – Crystal
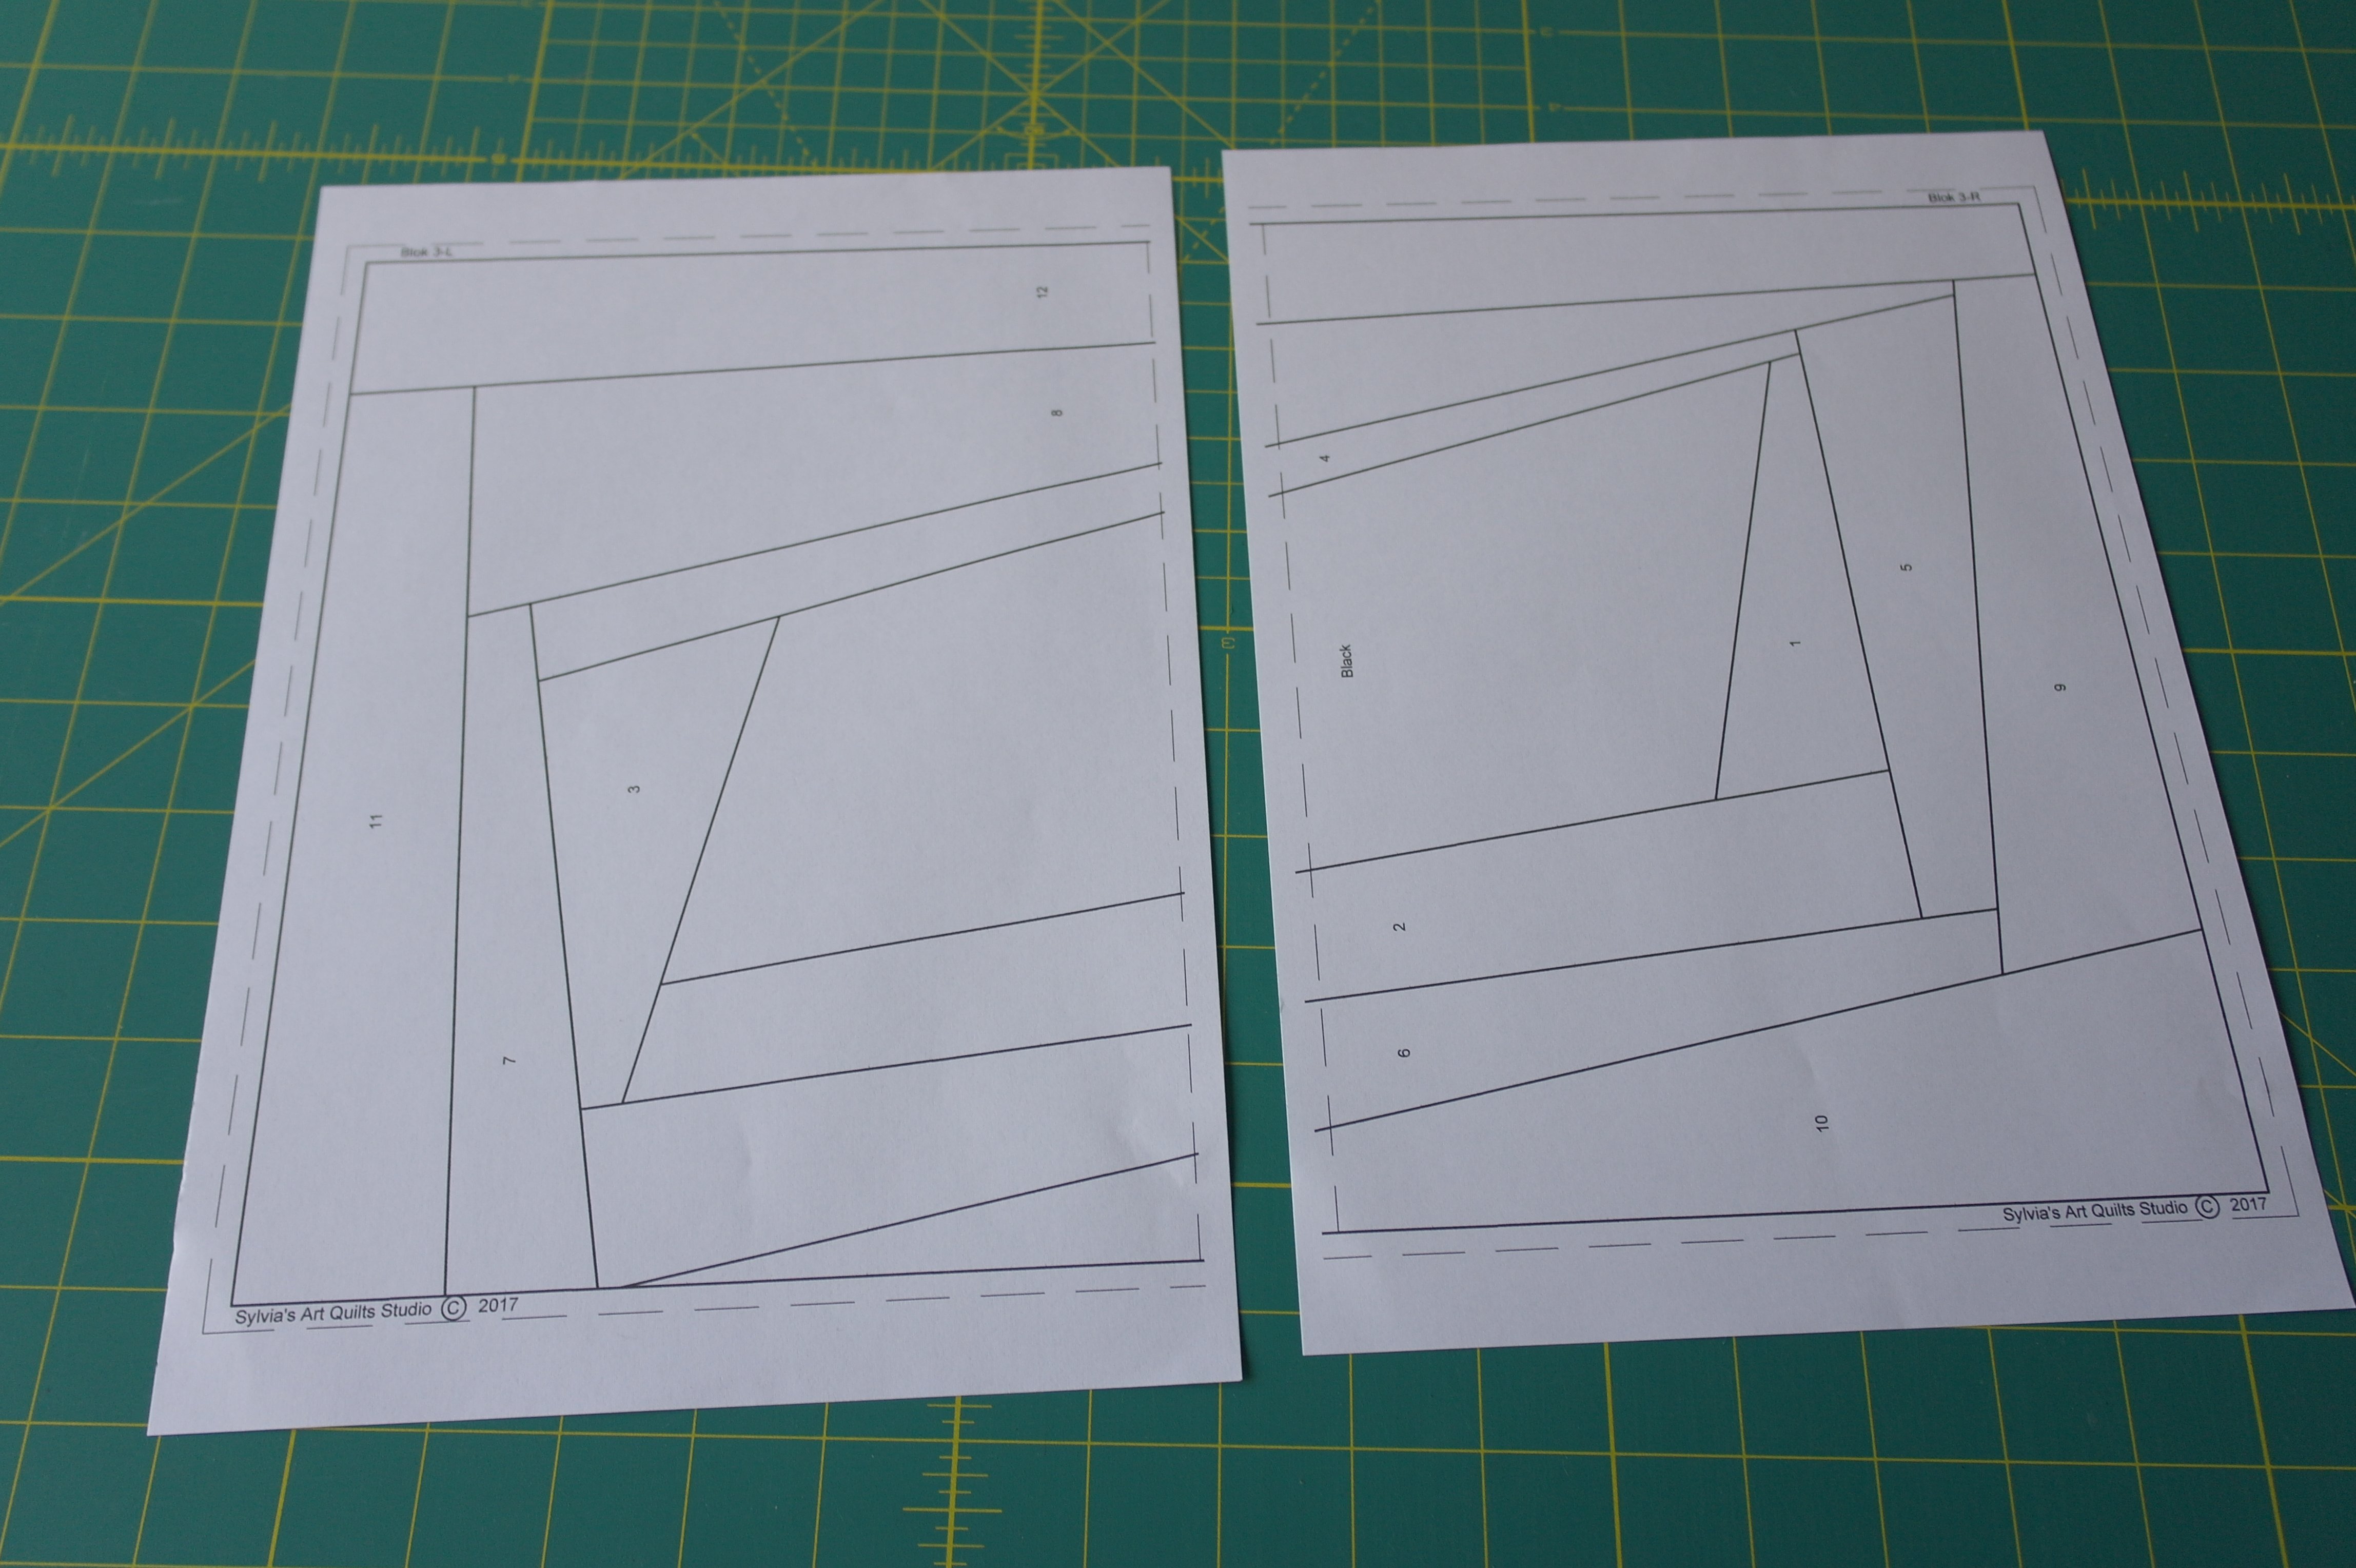
Print the paper patterns: Block 3 has to be made out of two pages: a left and right part.
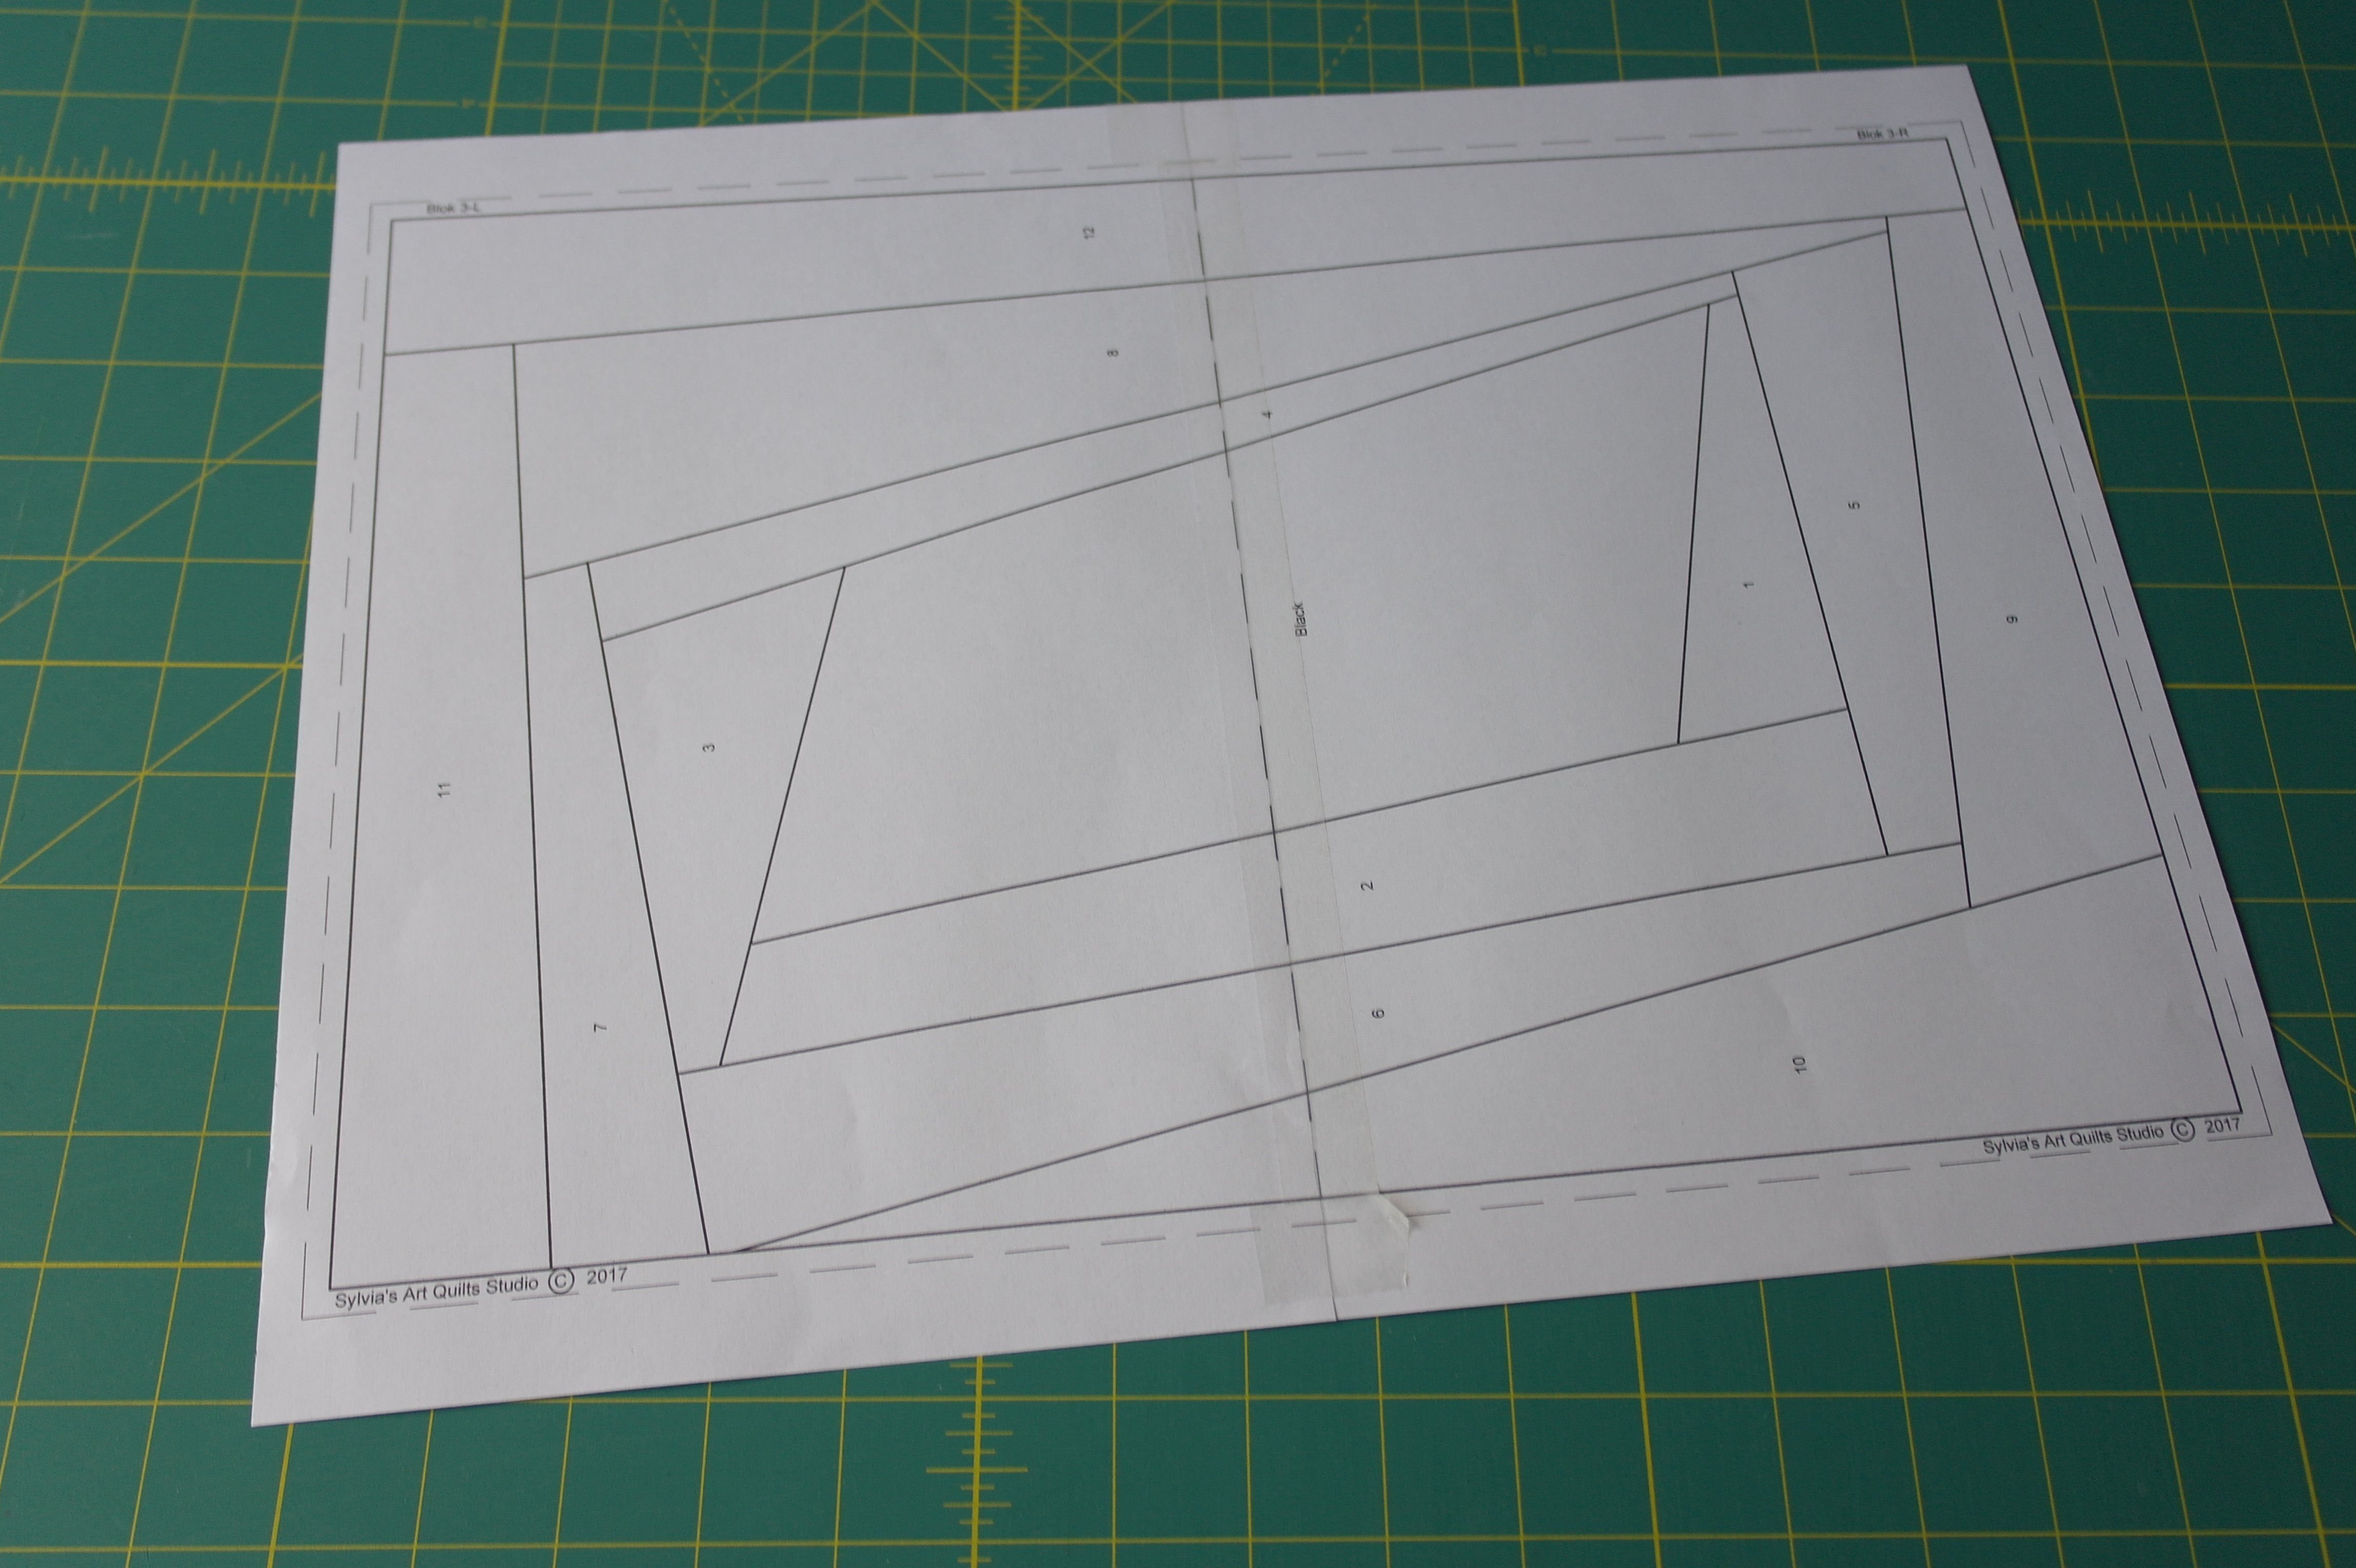
Tape them together, using the dotted line, to make one large pattern.

Use Vlieseline L11 – 32x45cm – and place this on top of the paper pattern. Draw all lines of the Crazy Patchwork. Be sure to extend all lines to the edges.
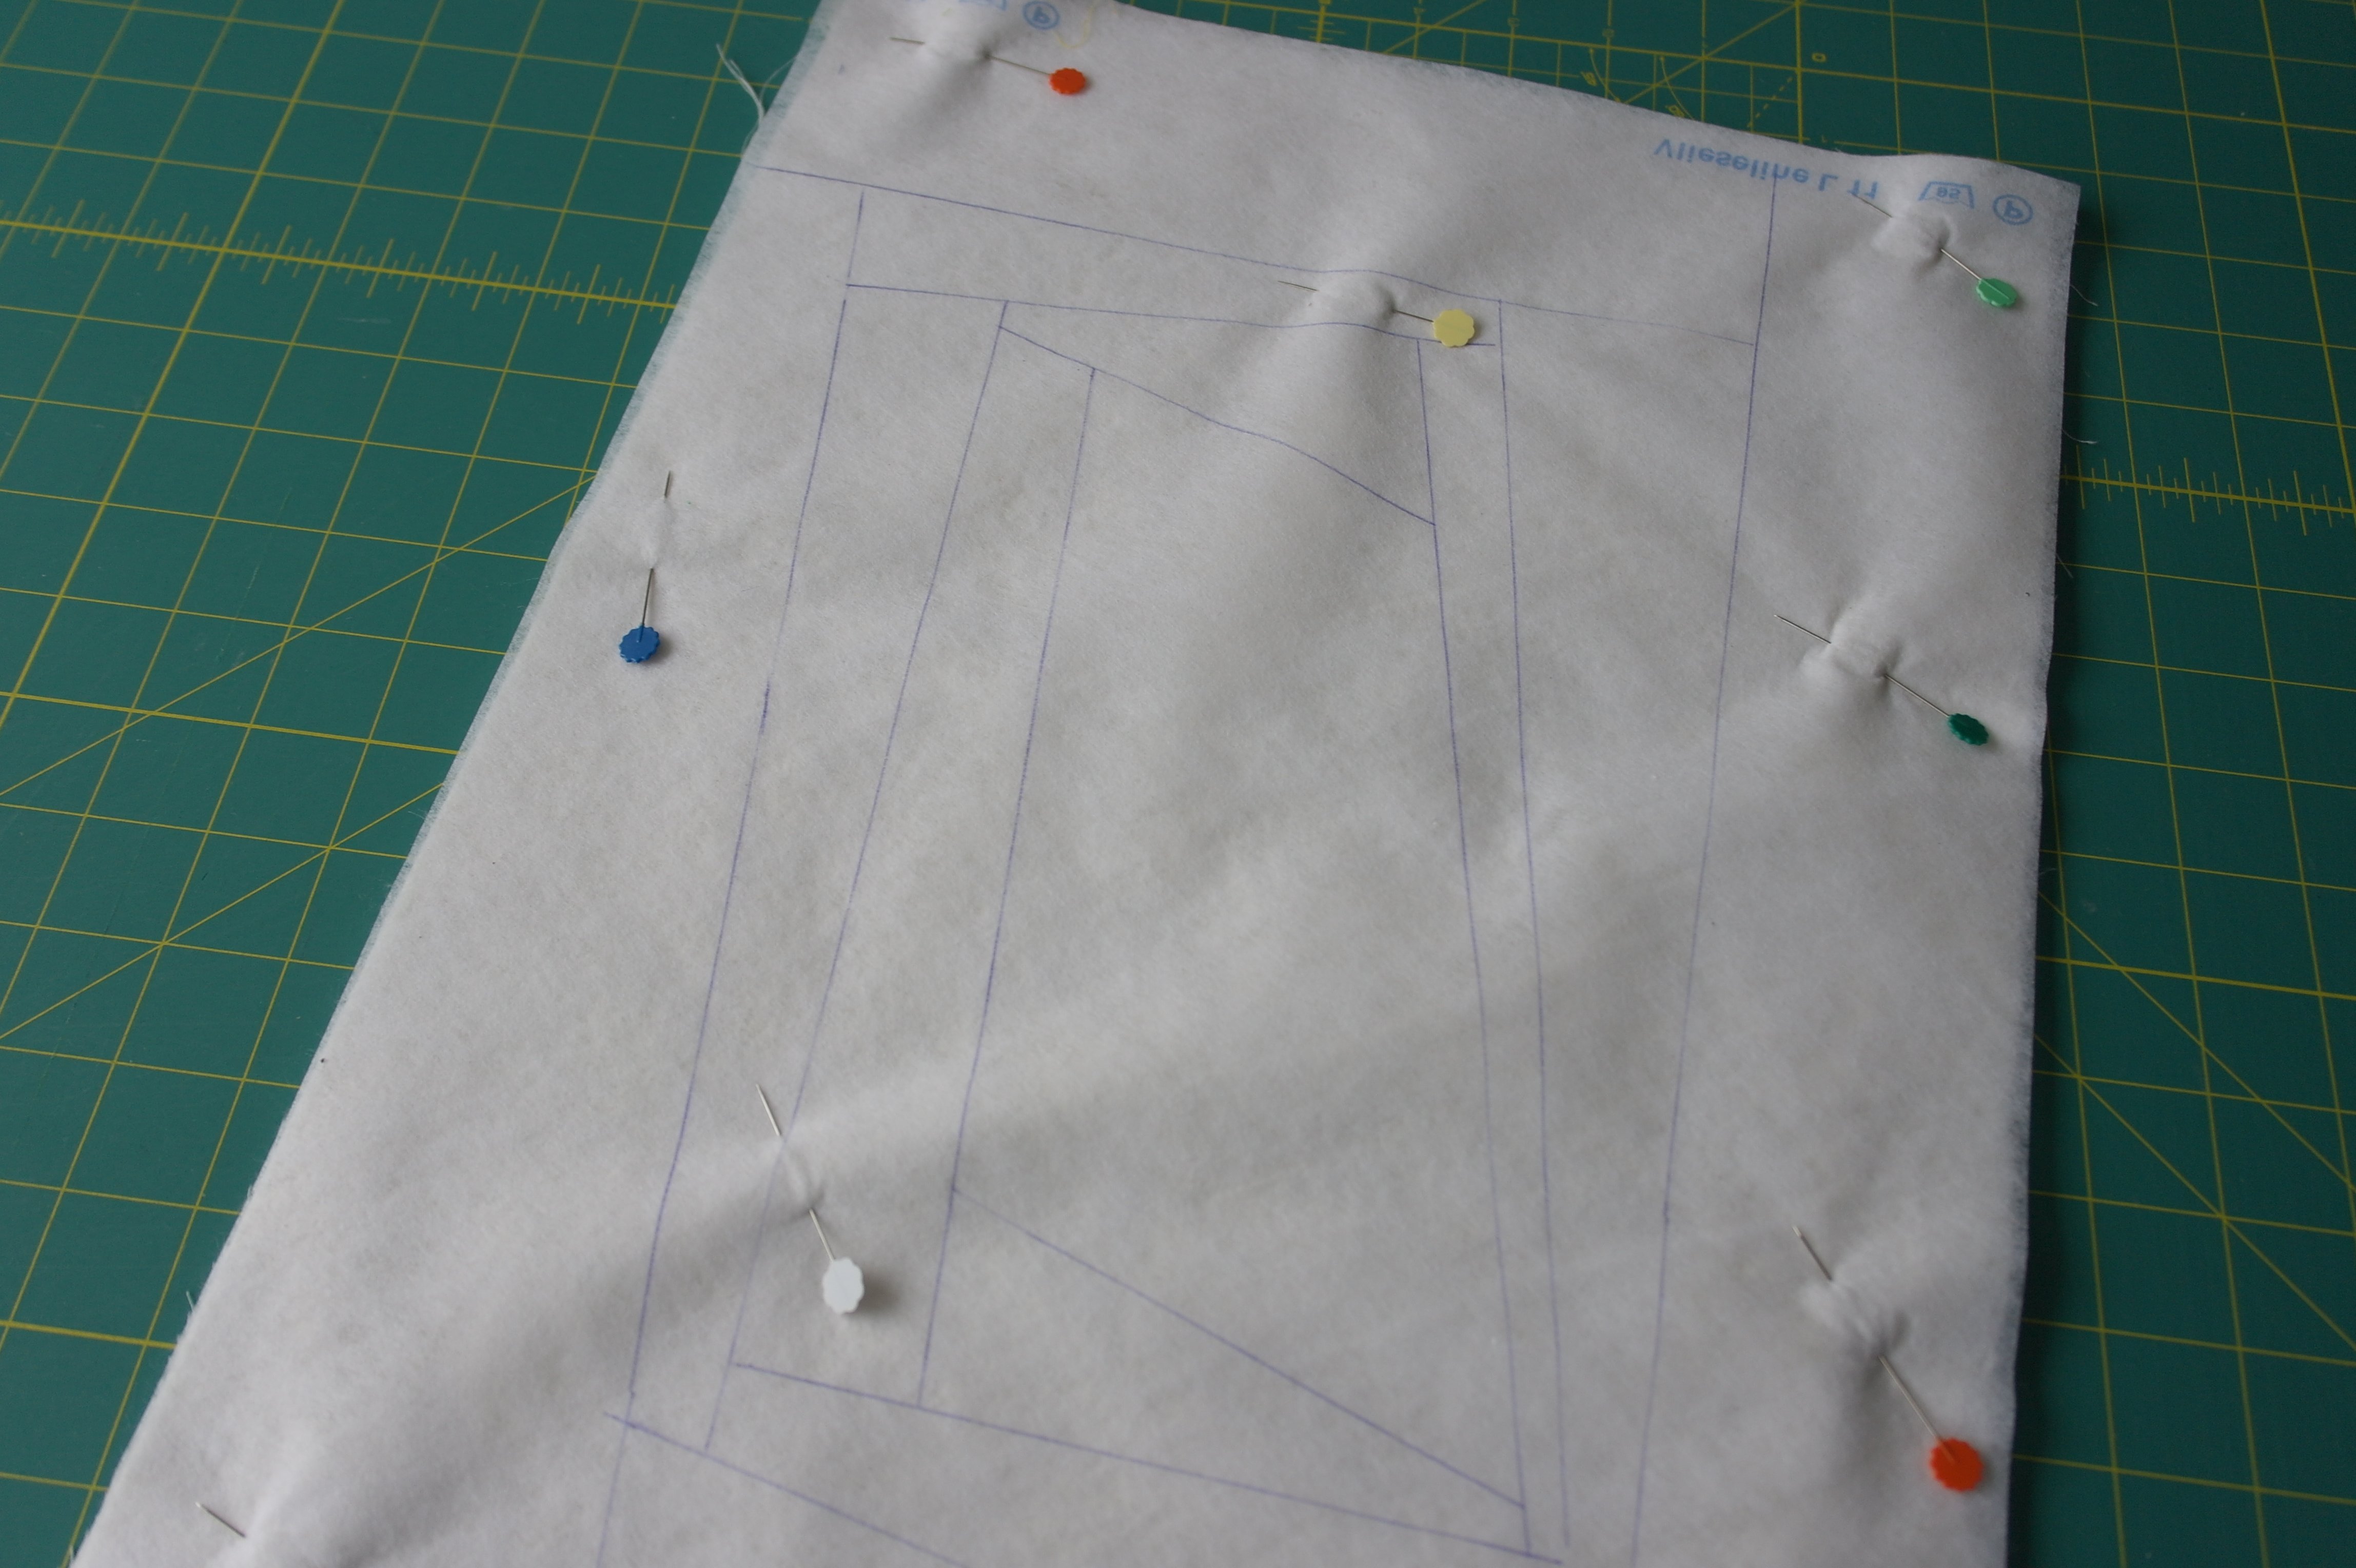
Make a sandwich with off-white backing, batting and Vlieseline L11: pin in place with Flower Pins (large quilting pins).

Tape the pattern of the Crystal for Block to a window/light box:
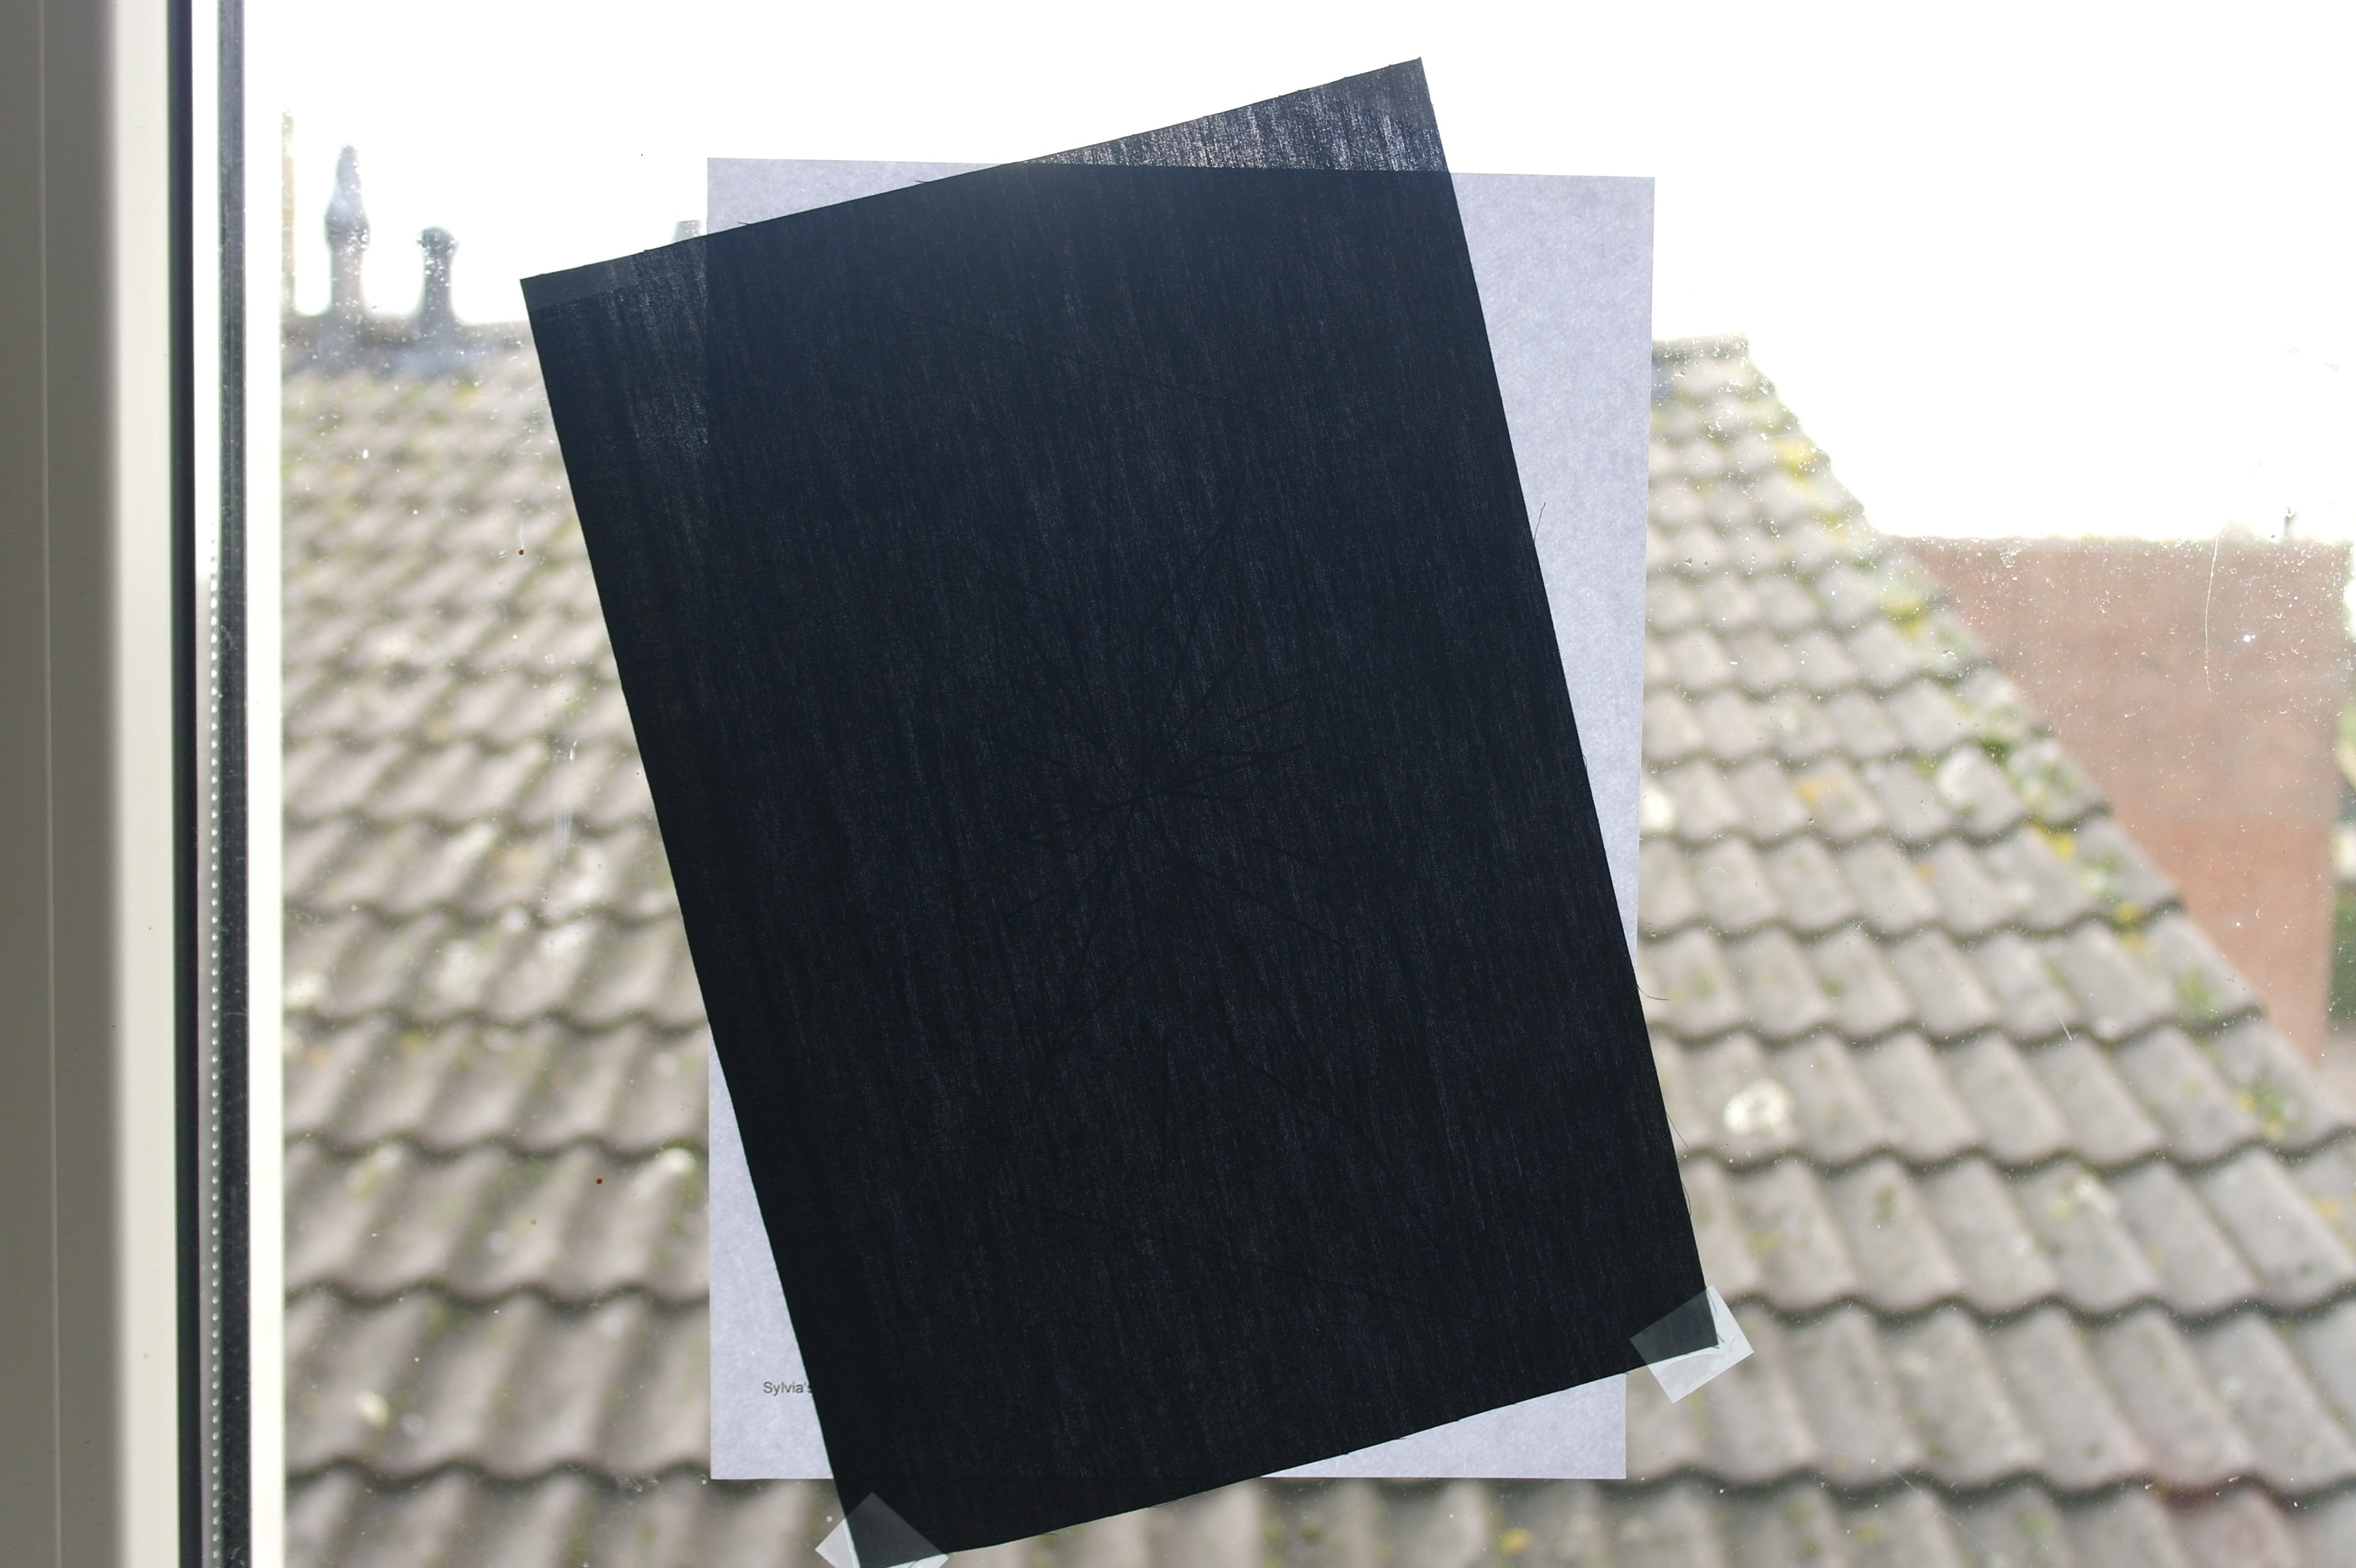
tape the black batik quilt fabric (20 x 30 cm) on top of that. Be sure there is enough fabric around the shape of the Crystal to have a seam allowance of at least 1 cm in all directions (that is why I have tilted my black fabric). Draw all lines with white watersoluble pen (or blue if you use a lighter color of solid fabric for the center). BE SURE to draw thin lines: they have to be removed with water afterwards.
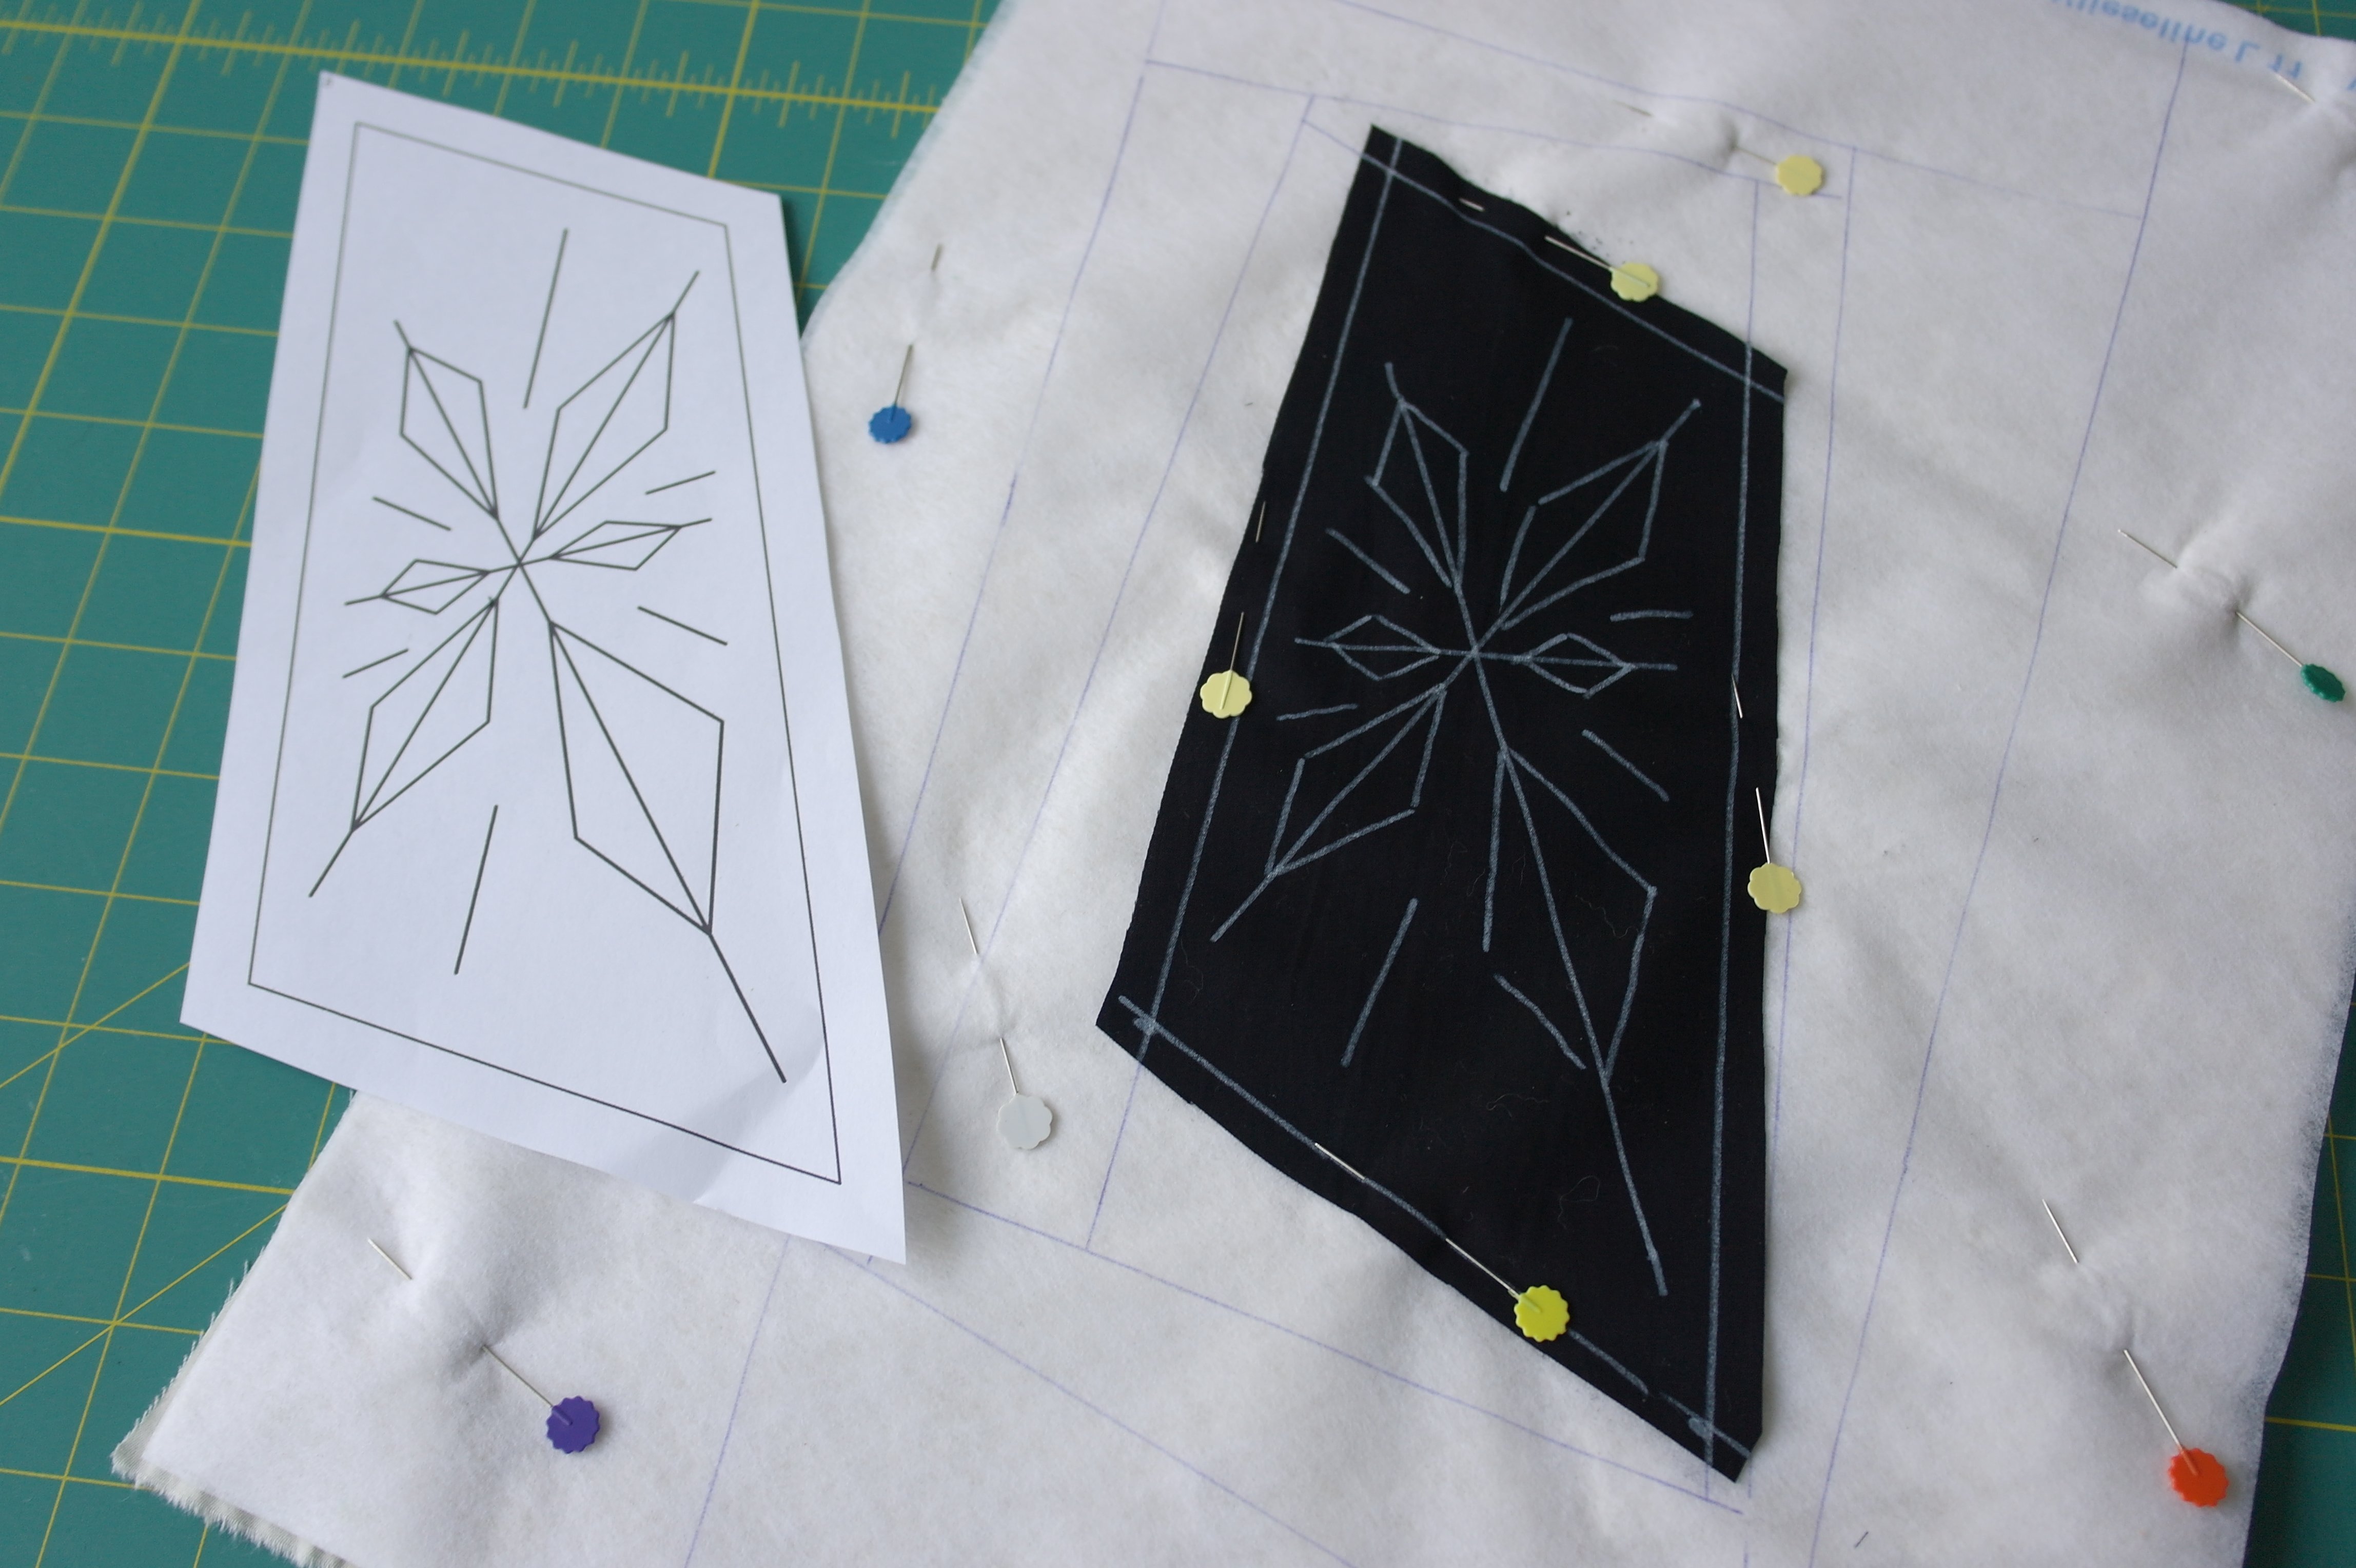
Cut the paper pattern with the Crystal to make a template, be sure to leave a 1 cm seam allowance outside the solid lines. Place the pattern on top of the black batik with the crystal drawn, and cut the black fabric the same size as the paper template. Place the black batik with the Crystal on the right spot, on the ‘center’ of your sandwich, pin in place with Flower Pins. Be sure to draw the solid lines with water soluble pen, to indicate the actual size of the section, inside the seam allowances.
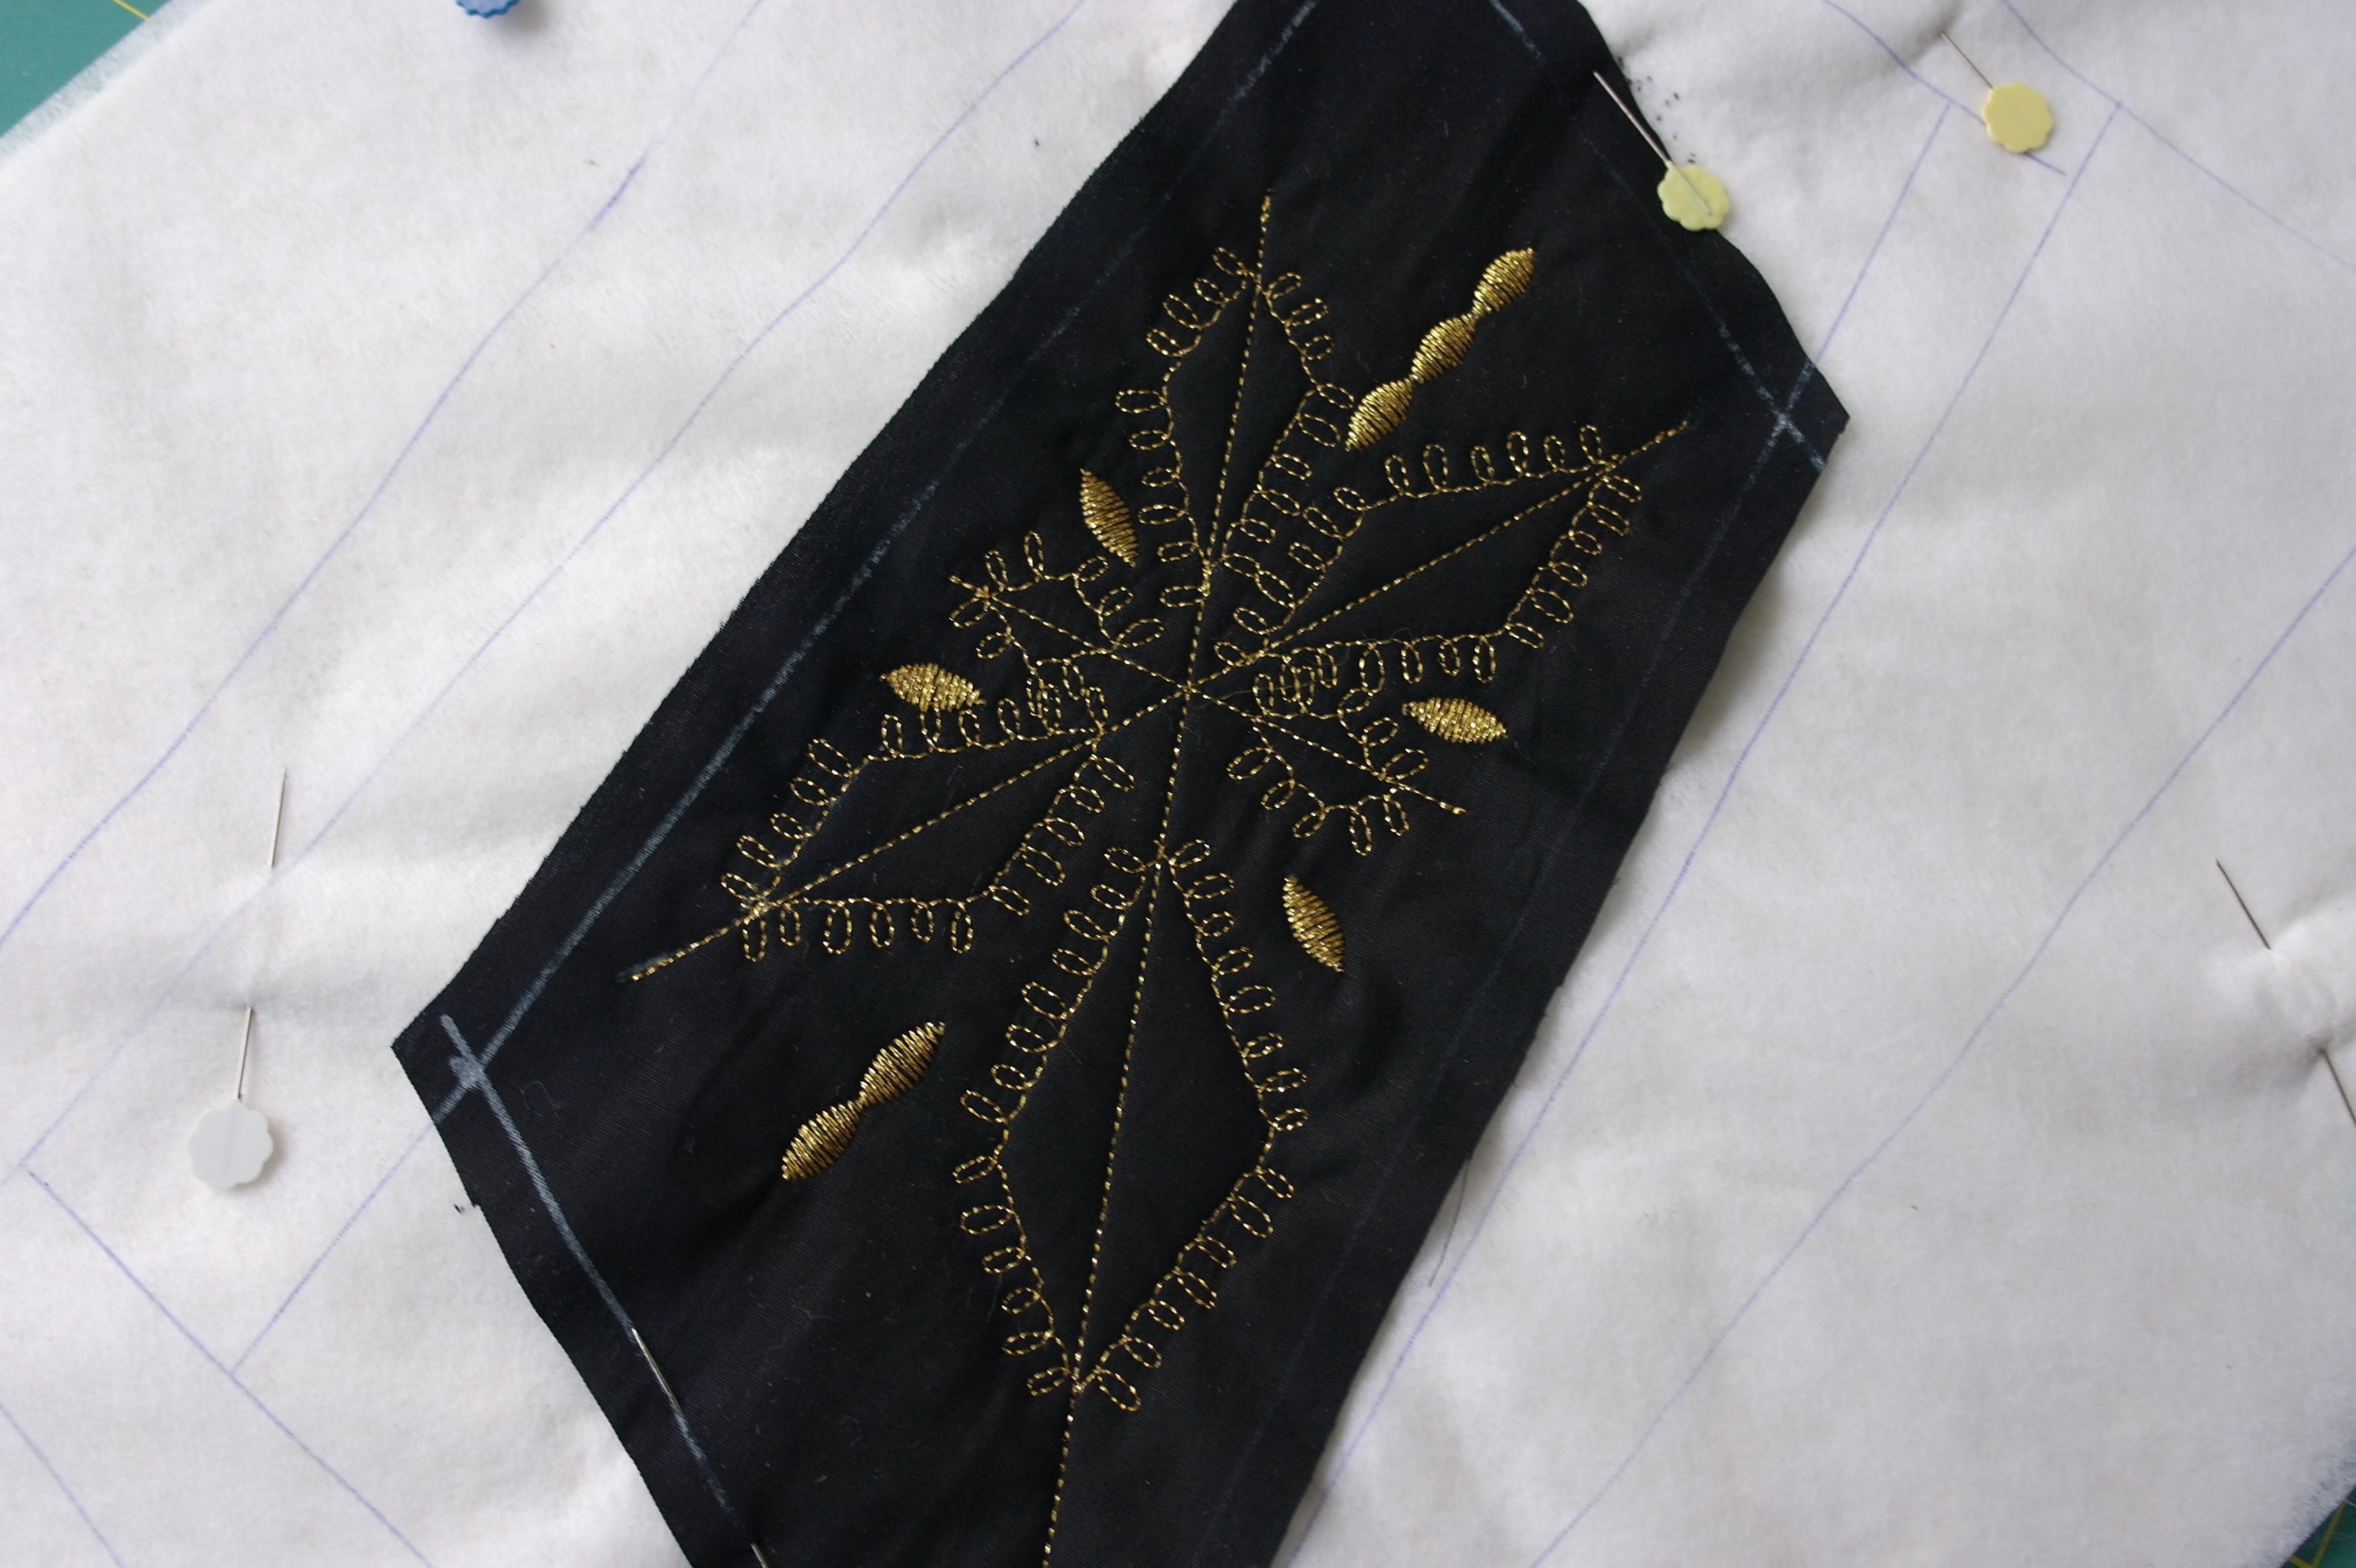
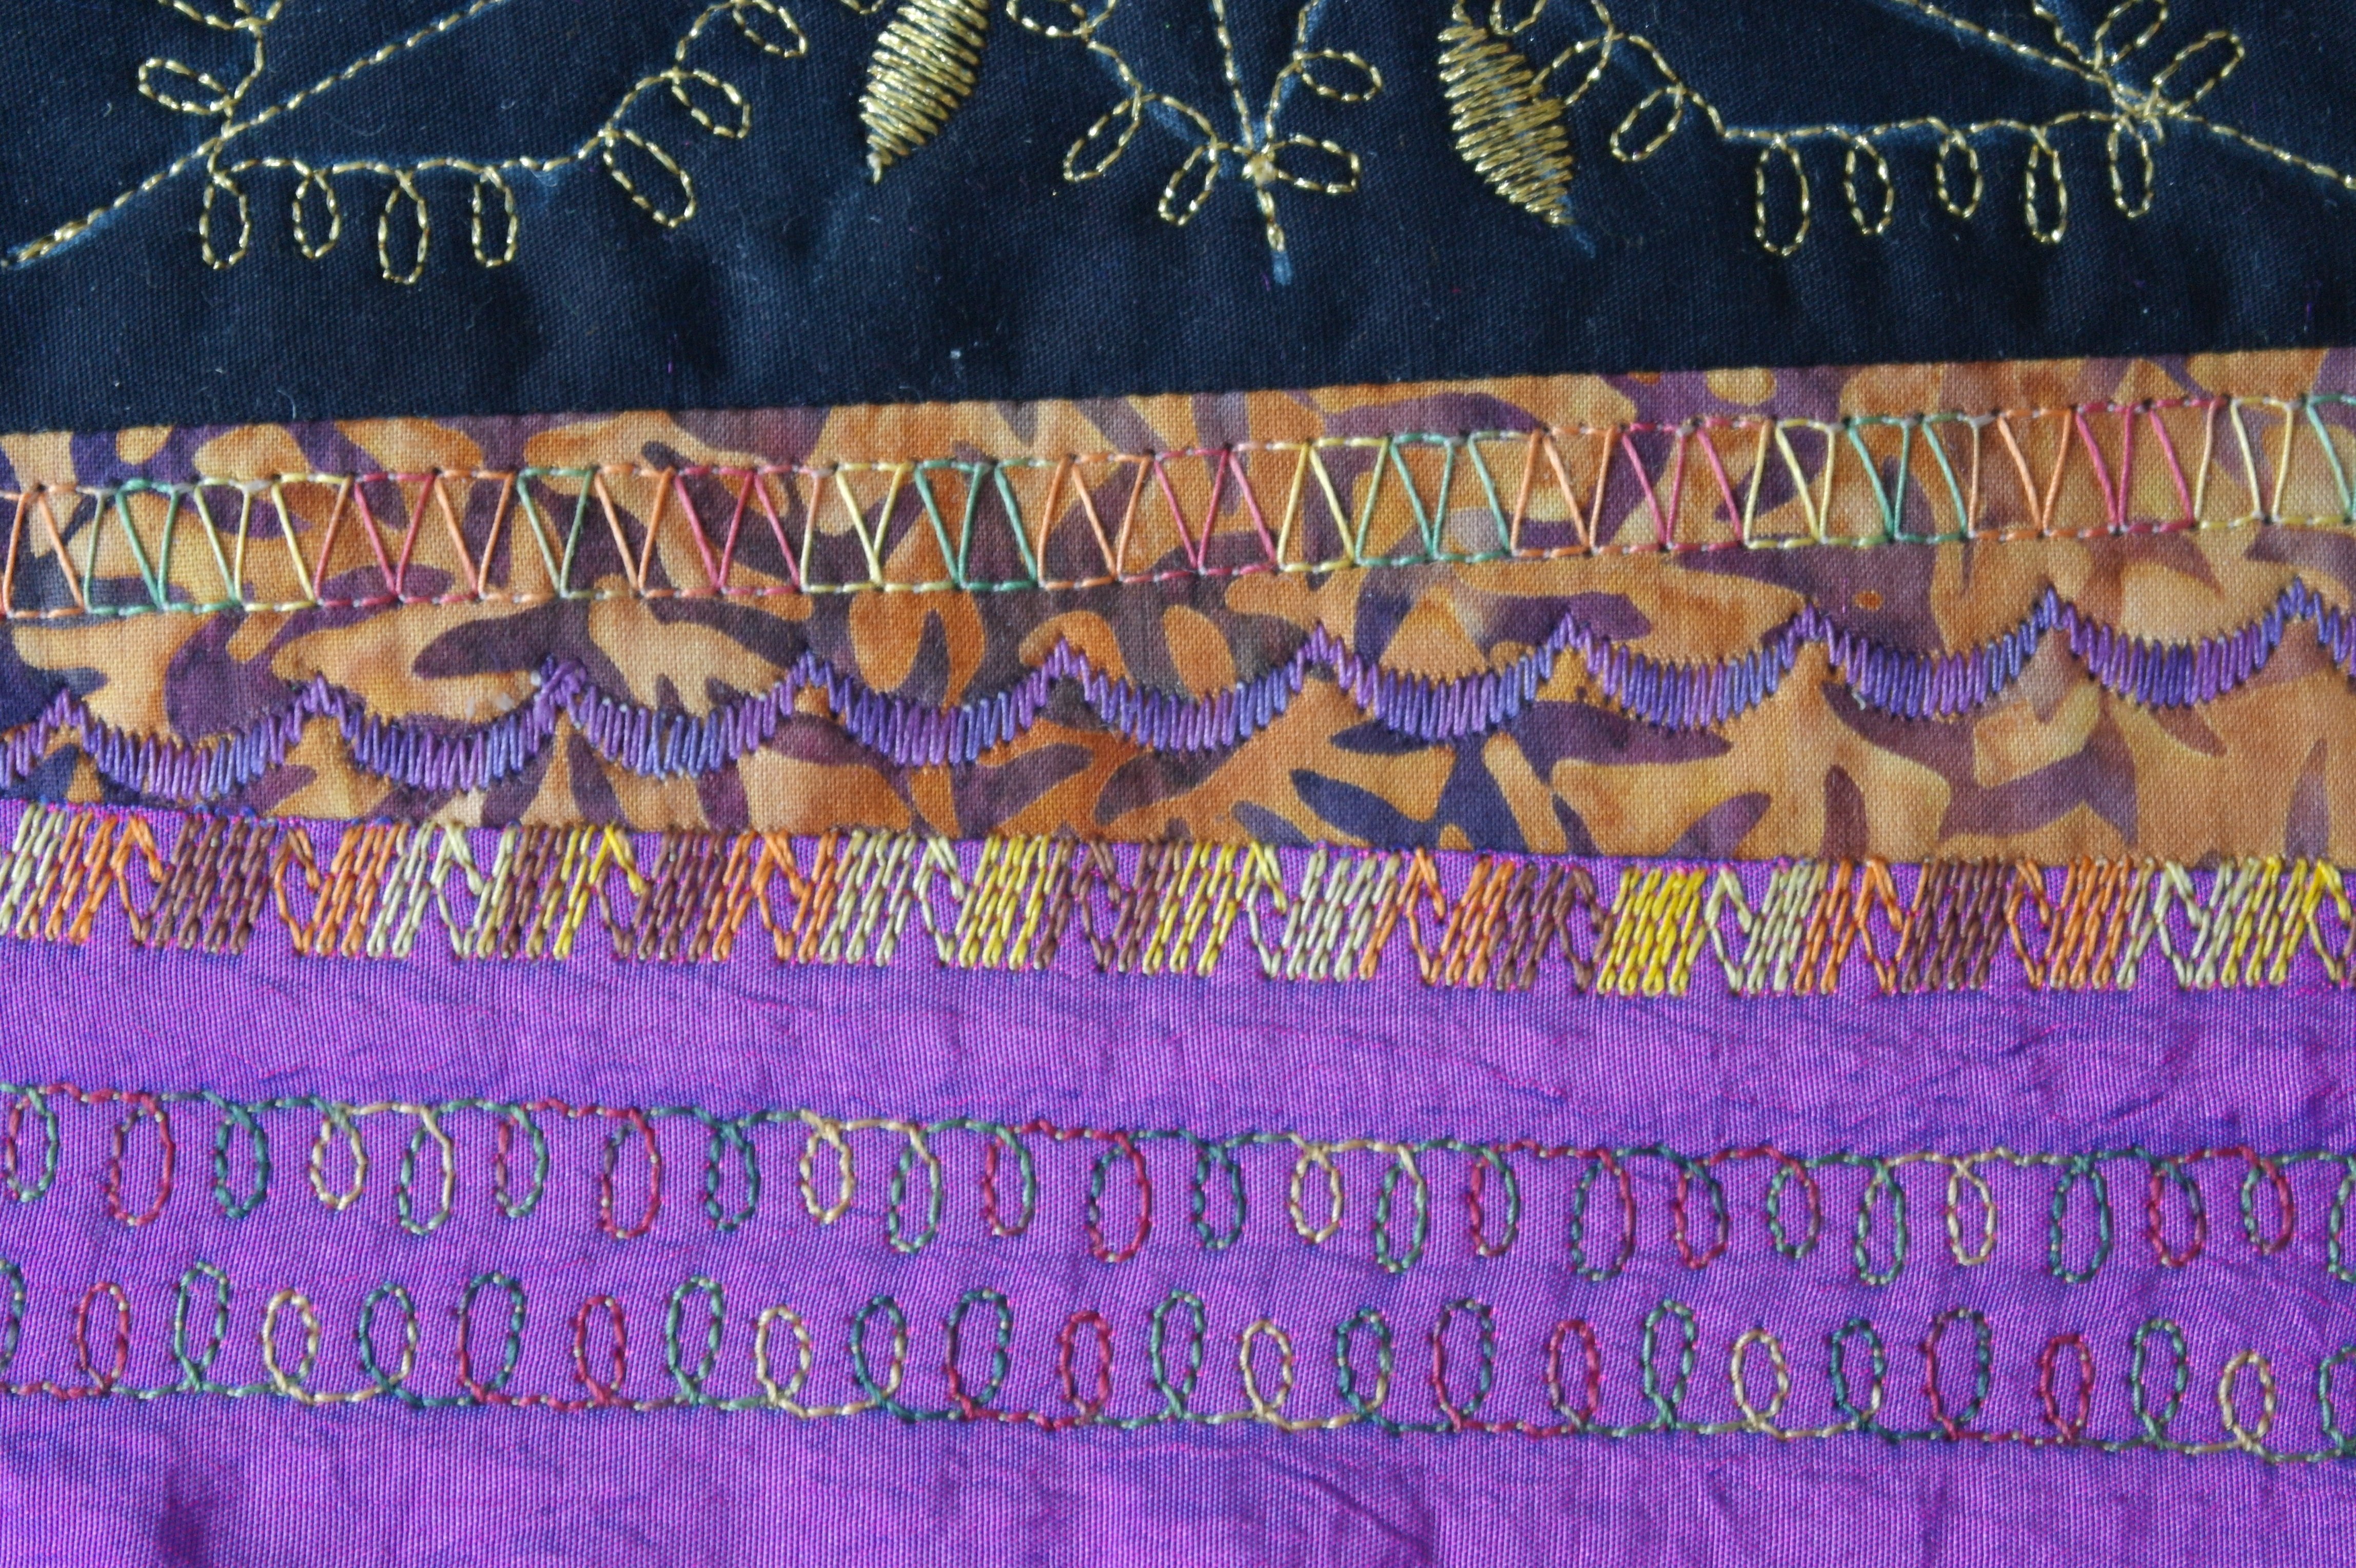
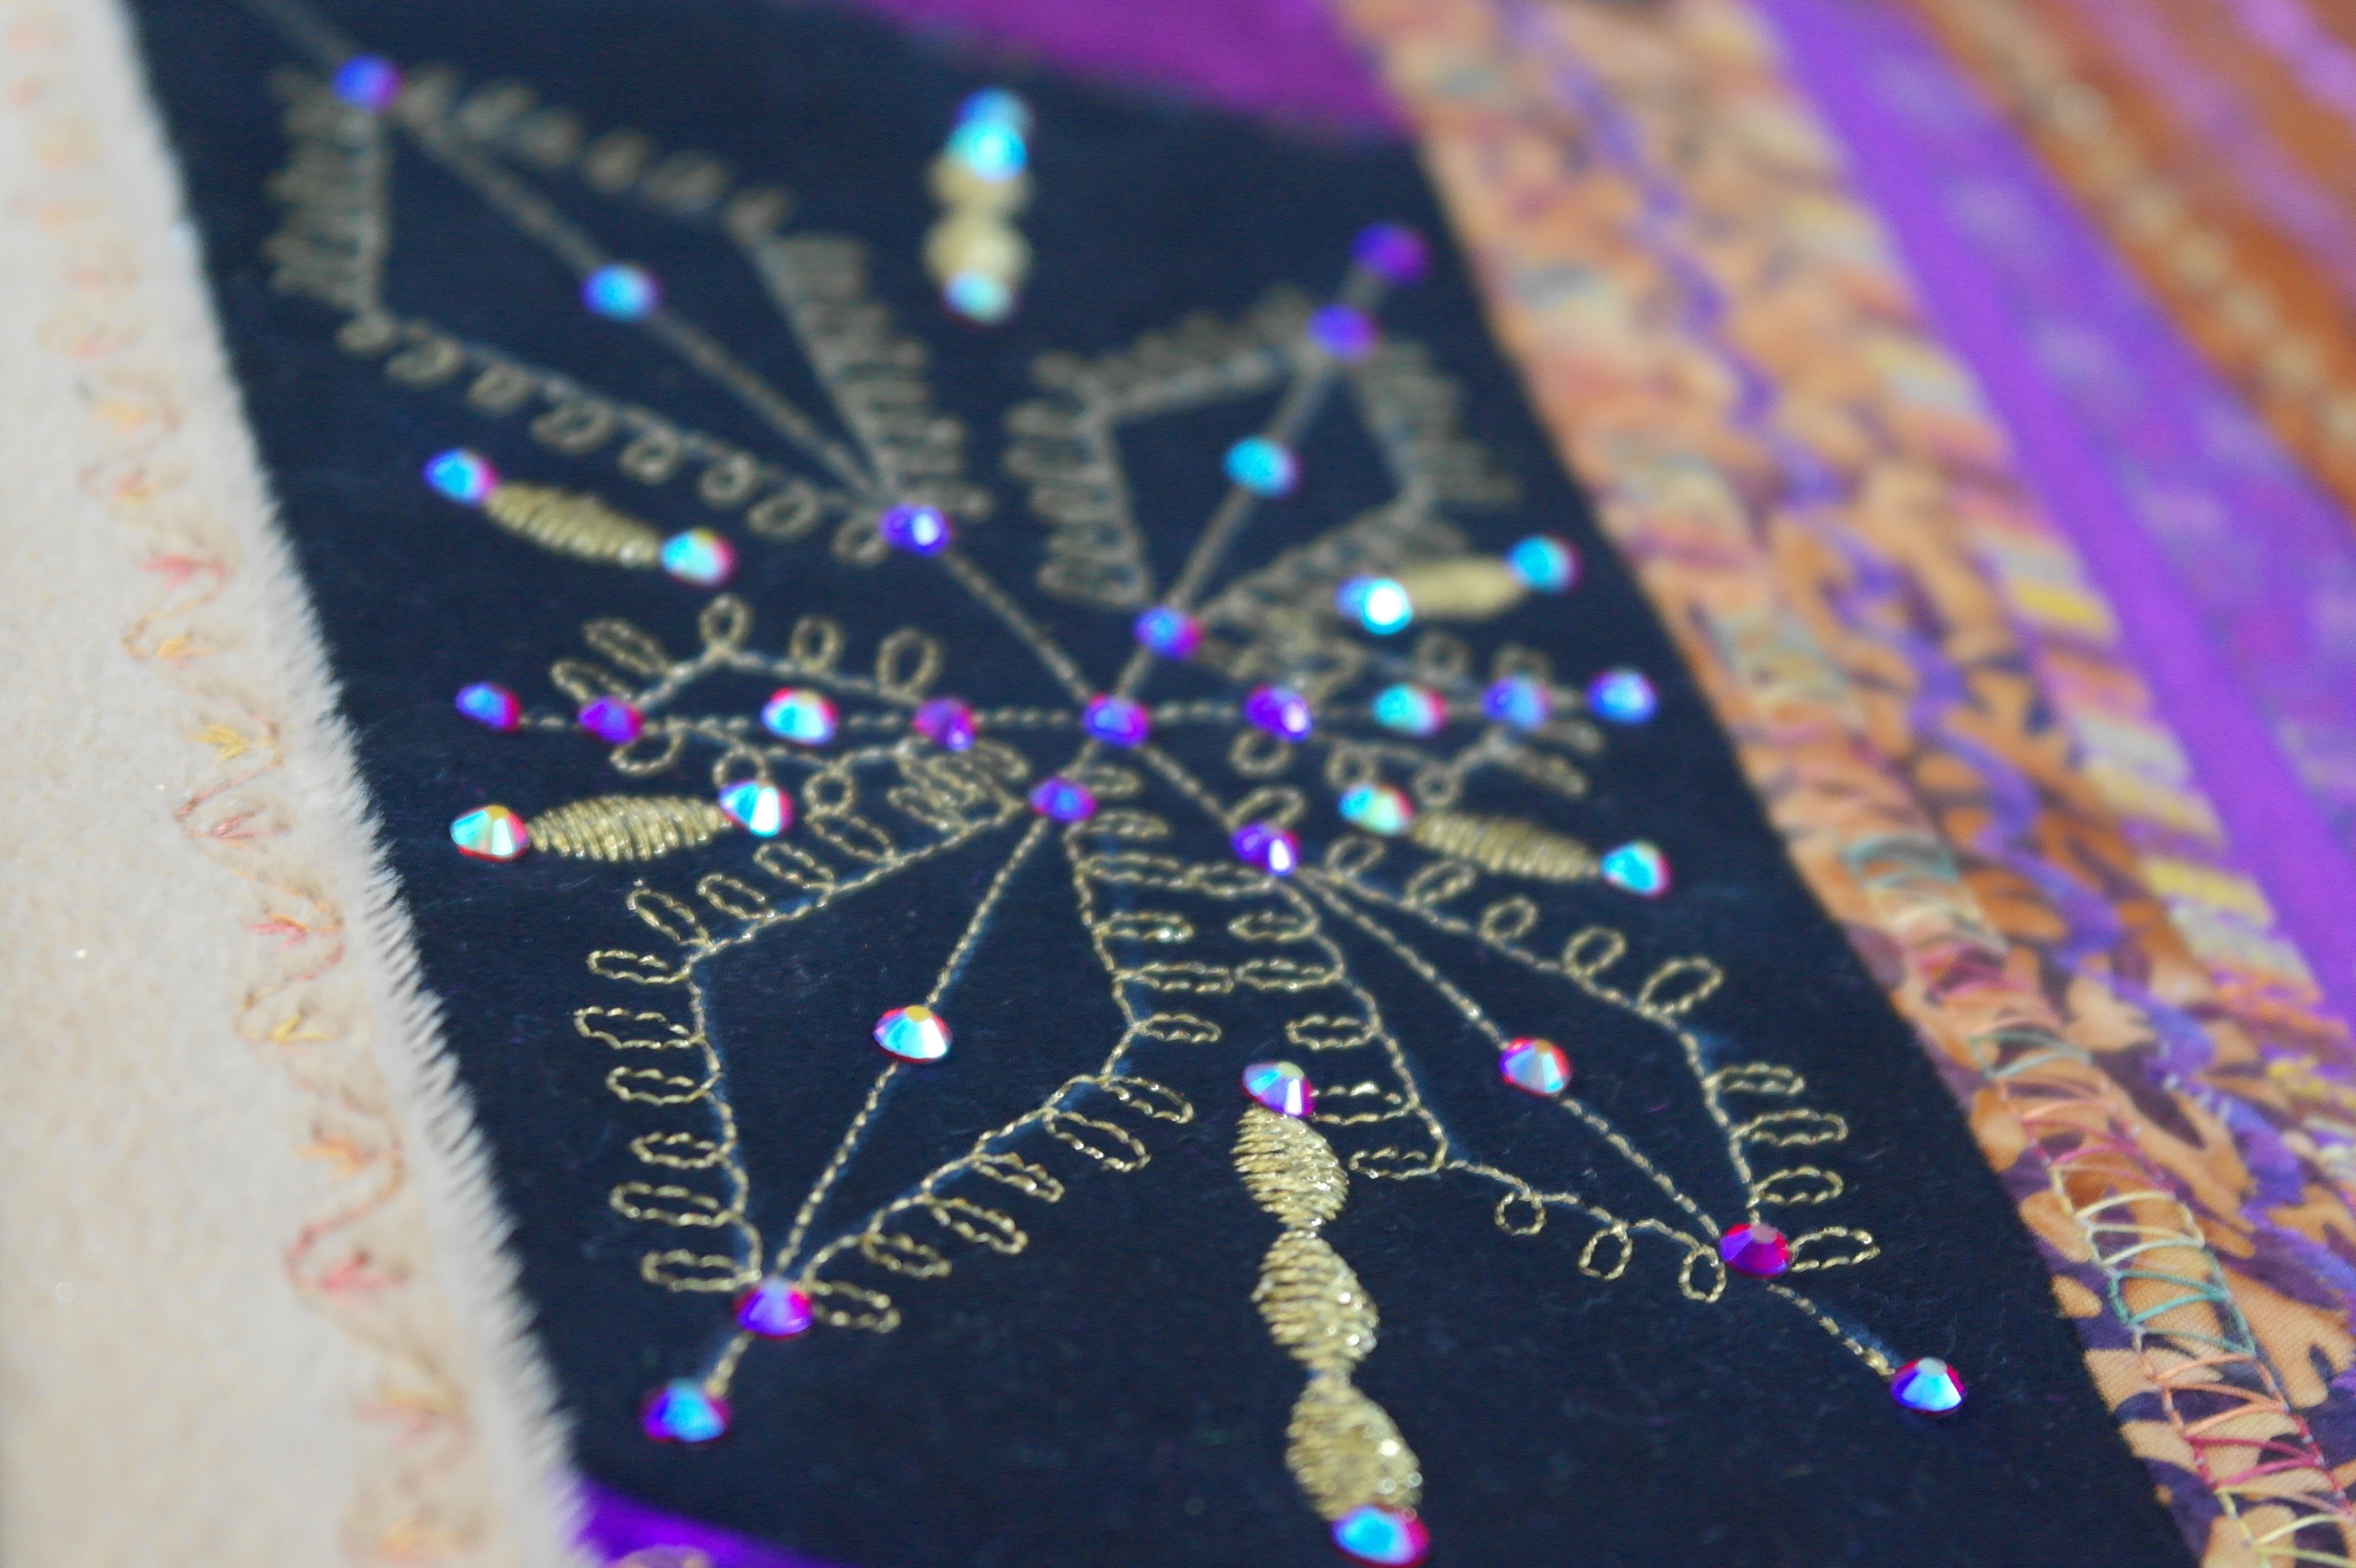
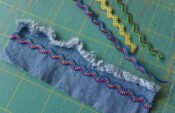
Make stitches on the lines you have drawn. I have used straight stitches for most longer lines, with a gold metallic thread on top, and DecoBob/Wonderfil in the bobbin. These are the base lines. Use decorative stitches for the rest: the picture above shows you my stitching. When the block is finished, I will add Hotfix stones…

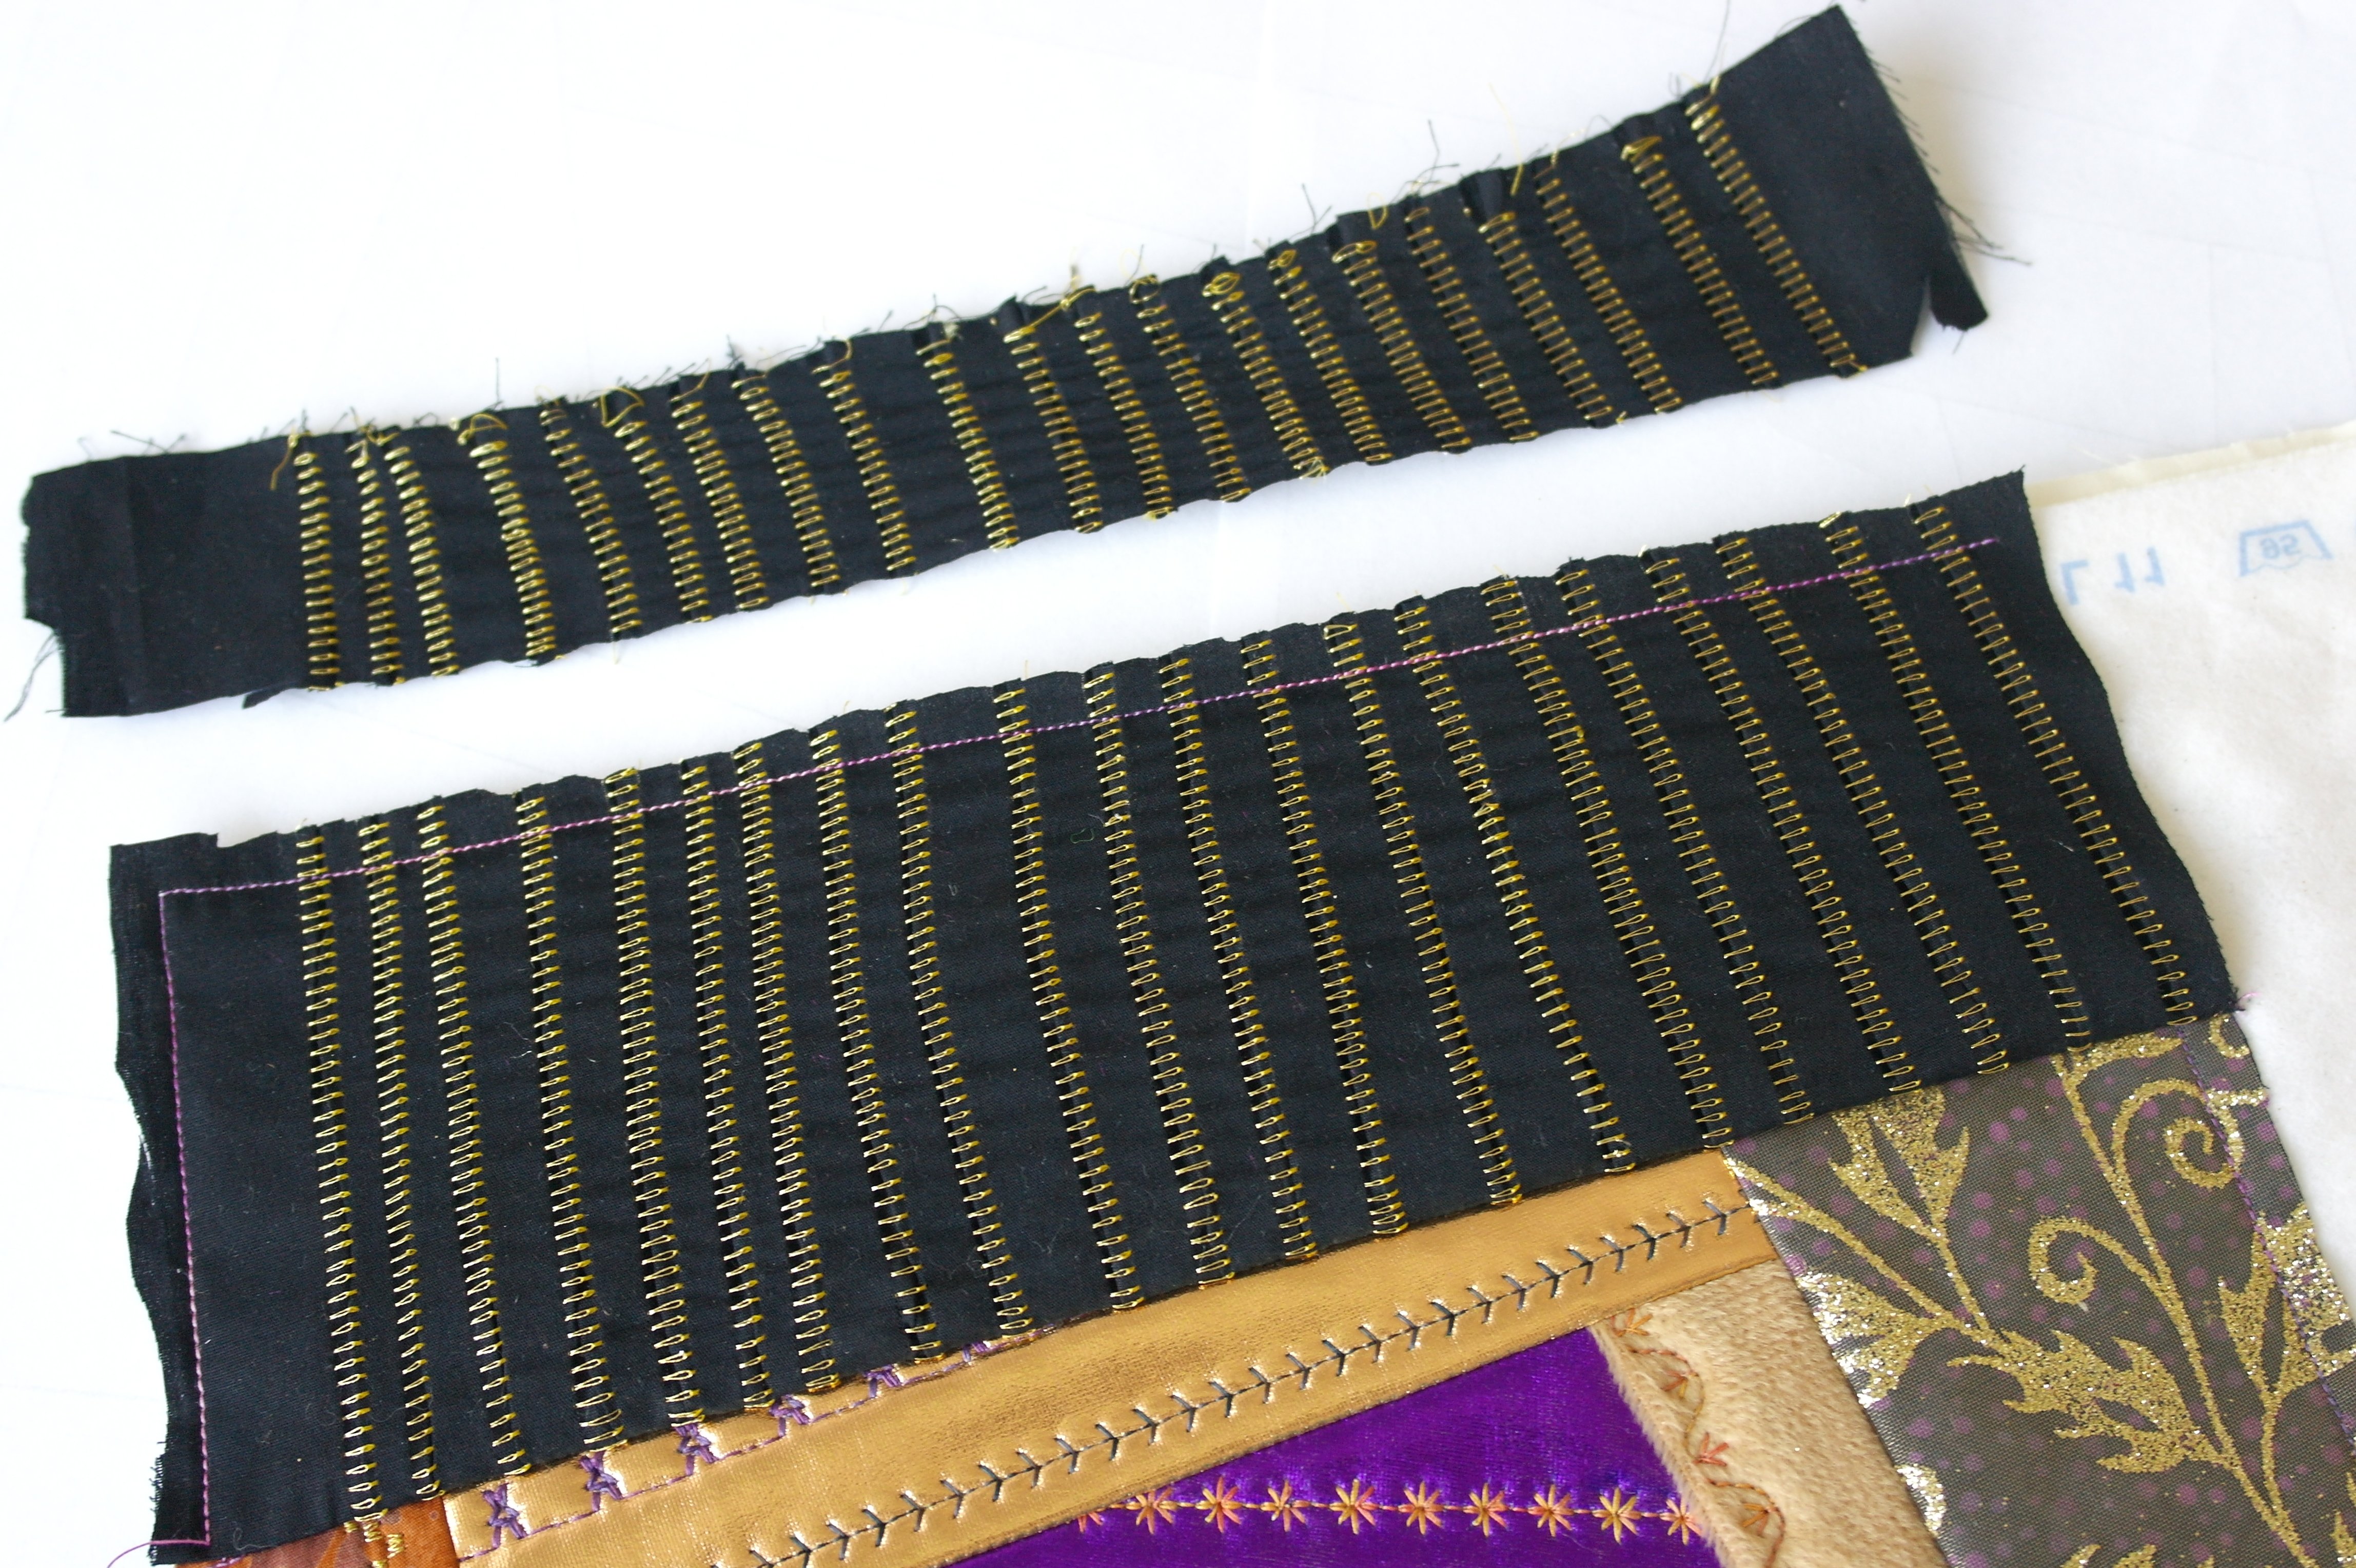
And now it is a matter of adding fabrics, like you did with the previous blocks. The difference with this block is my special prepared black batik with the lockstitches and gold metallic thread: you can find directions for making such a piece, checking the BERNINA Blog post of February 25 (Nr. 14: Bernina Overlocker 1300MDC: using metallic thread) I have used my BERNINA Overlock 1300MDC with metallic thread on top, in a special way. If you own a lock machine, check this post, and make such a piece (adapt it for your machine). BEWARE: the piece of black batik I’ve used for this piece is NOT included in your stock of black batik for this project: it is an additional piece!!! You can use another color if you want, but be sure to use a color where the golden stitches will stand out.
If you DON’T own a (over)lock machine and you would like to make a similar piece with stitches: use a piece of black fabric, or different color, draw similar lines with your white marker and cover these lines with a dense zigzagstitch/satinstitch. This will give you a special effect too. The fabric will ‘shrink’ less, because you don’t have to fold the fabric on the lines, but just make stitches on front.
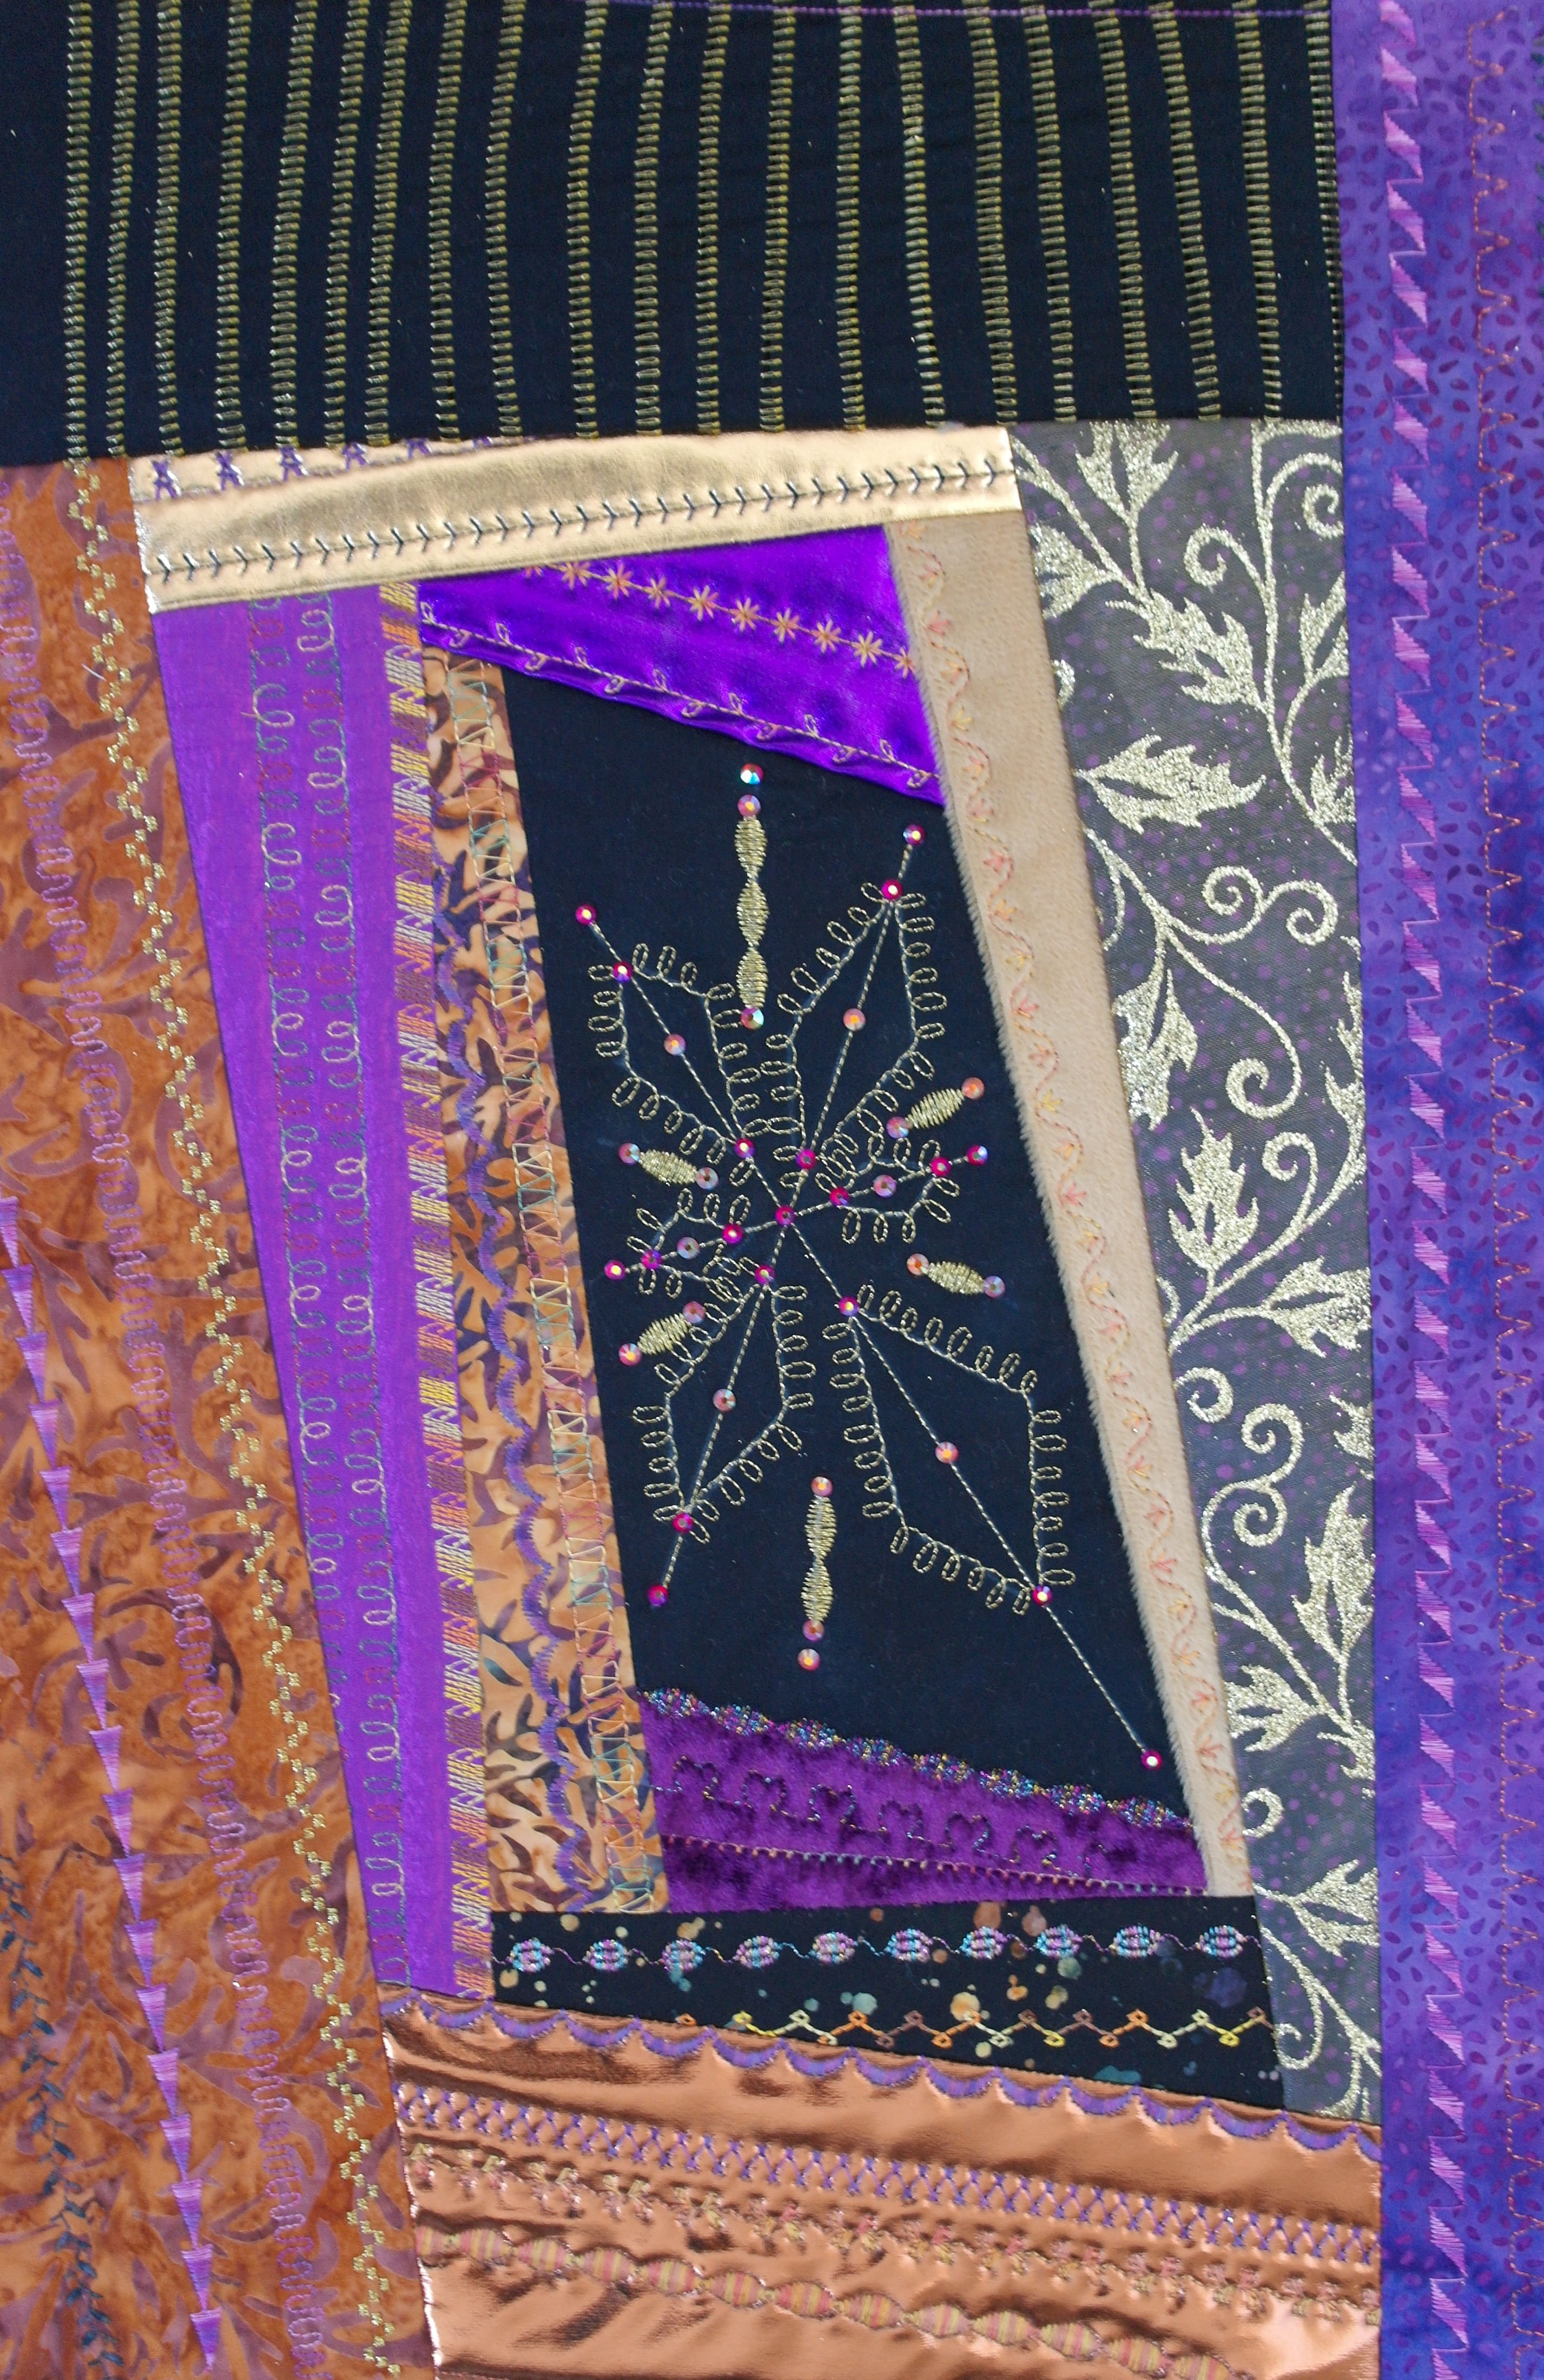
To cover the sandwich, I have sewn different fabrics/colors around the black centre part, as I have done with the previous blocks. If I want to use the prepared black fabric with golden stitches, I will need a large section to make it stand out: therefore his piece will be used for section 11. I am aware of the fact that a piece of this prepared fabric will be cut off, but I still need the total size. IF YOUR STRIP (BLACK) BATIK IS LONG ENOUGH, you can use it for another wide and long section of your block. BEWARE: the long sections are narrow and sometimes at quite a length, the short sections are much wider, but not as long, so you will have to prepare the strip with stitches for the section you want to use it for.
So… adding fabrics and stitches. Having fun with threads and colors. Remember to use pattern paper for sewing fabrics with a stiff stabilizer onto the block: they can be quite sticky. Information about this can be found with Month 1.

Please do NOT throw remnants of fabric in the waste basket: even smaller pieces will be used in one of the next months. Especially from shiny fabrics, like Lamé. Just put them in a clear bag, and stow them.
It is really fun to work with so many different fabrics, each with their own structures or prints…
and also different stitches. You would think that all stitches are used at a certain time, but sometimes it is fun to change them, or place two rows next to each other, one the mirror image of the other, to make it look like you have made just one row of wide stitches… that’s improvising!

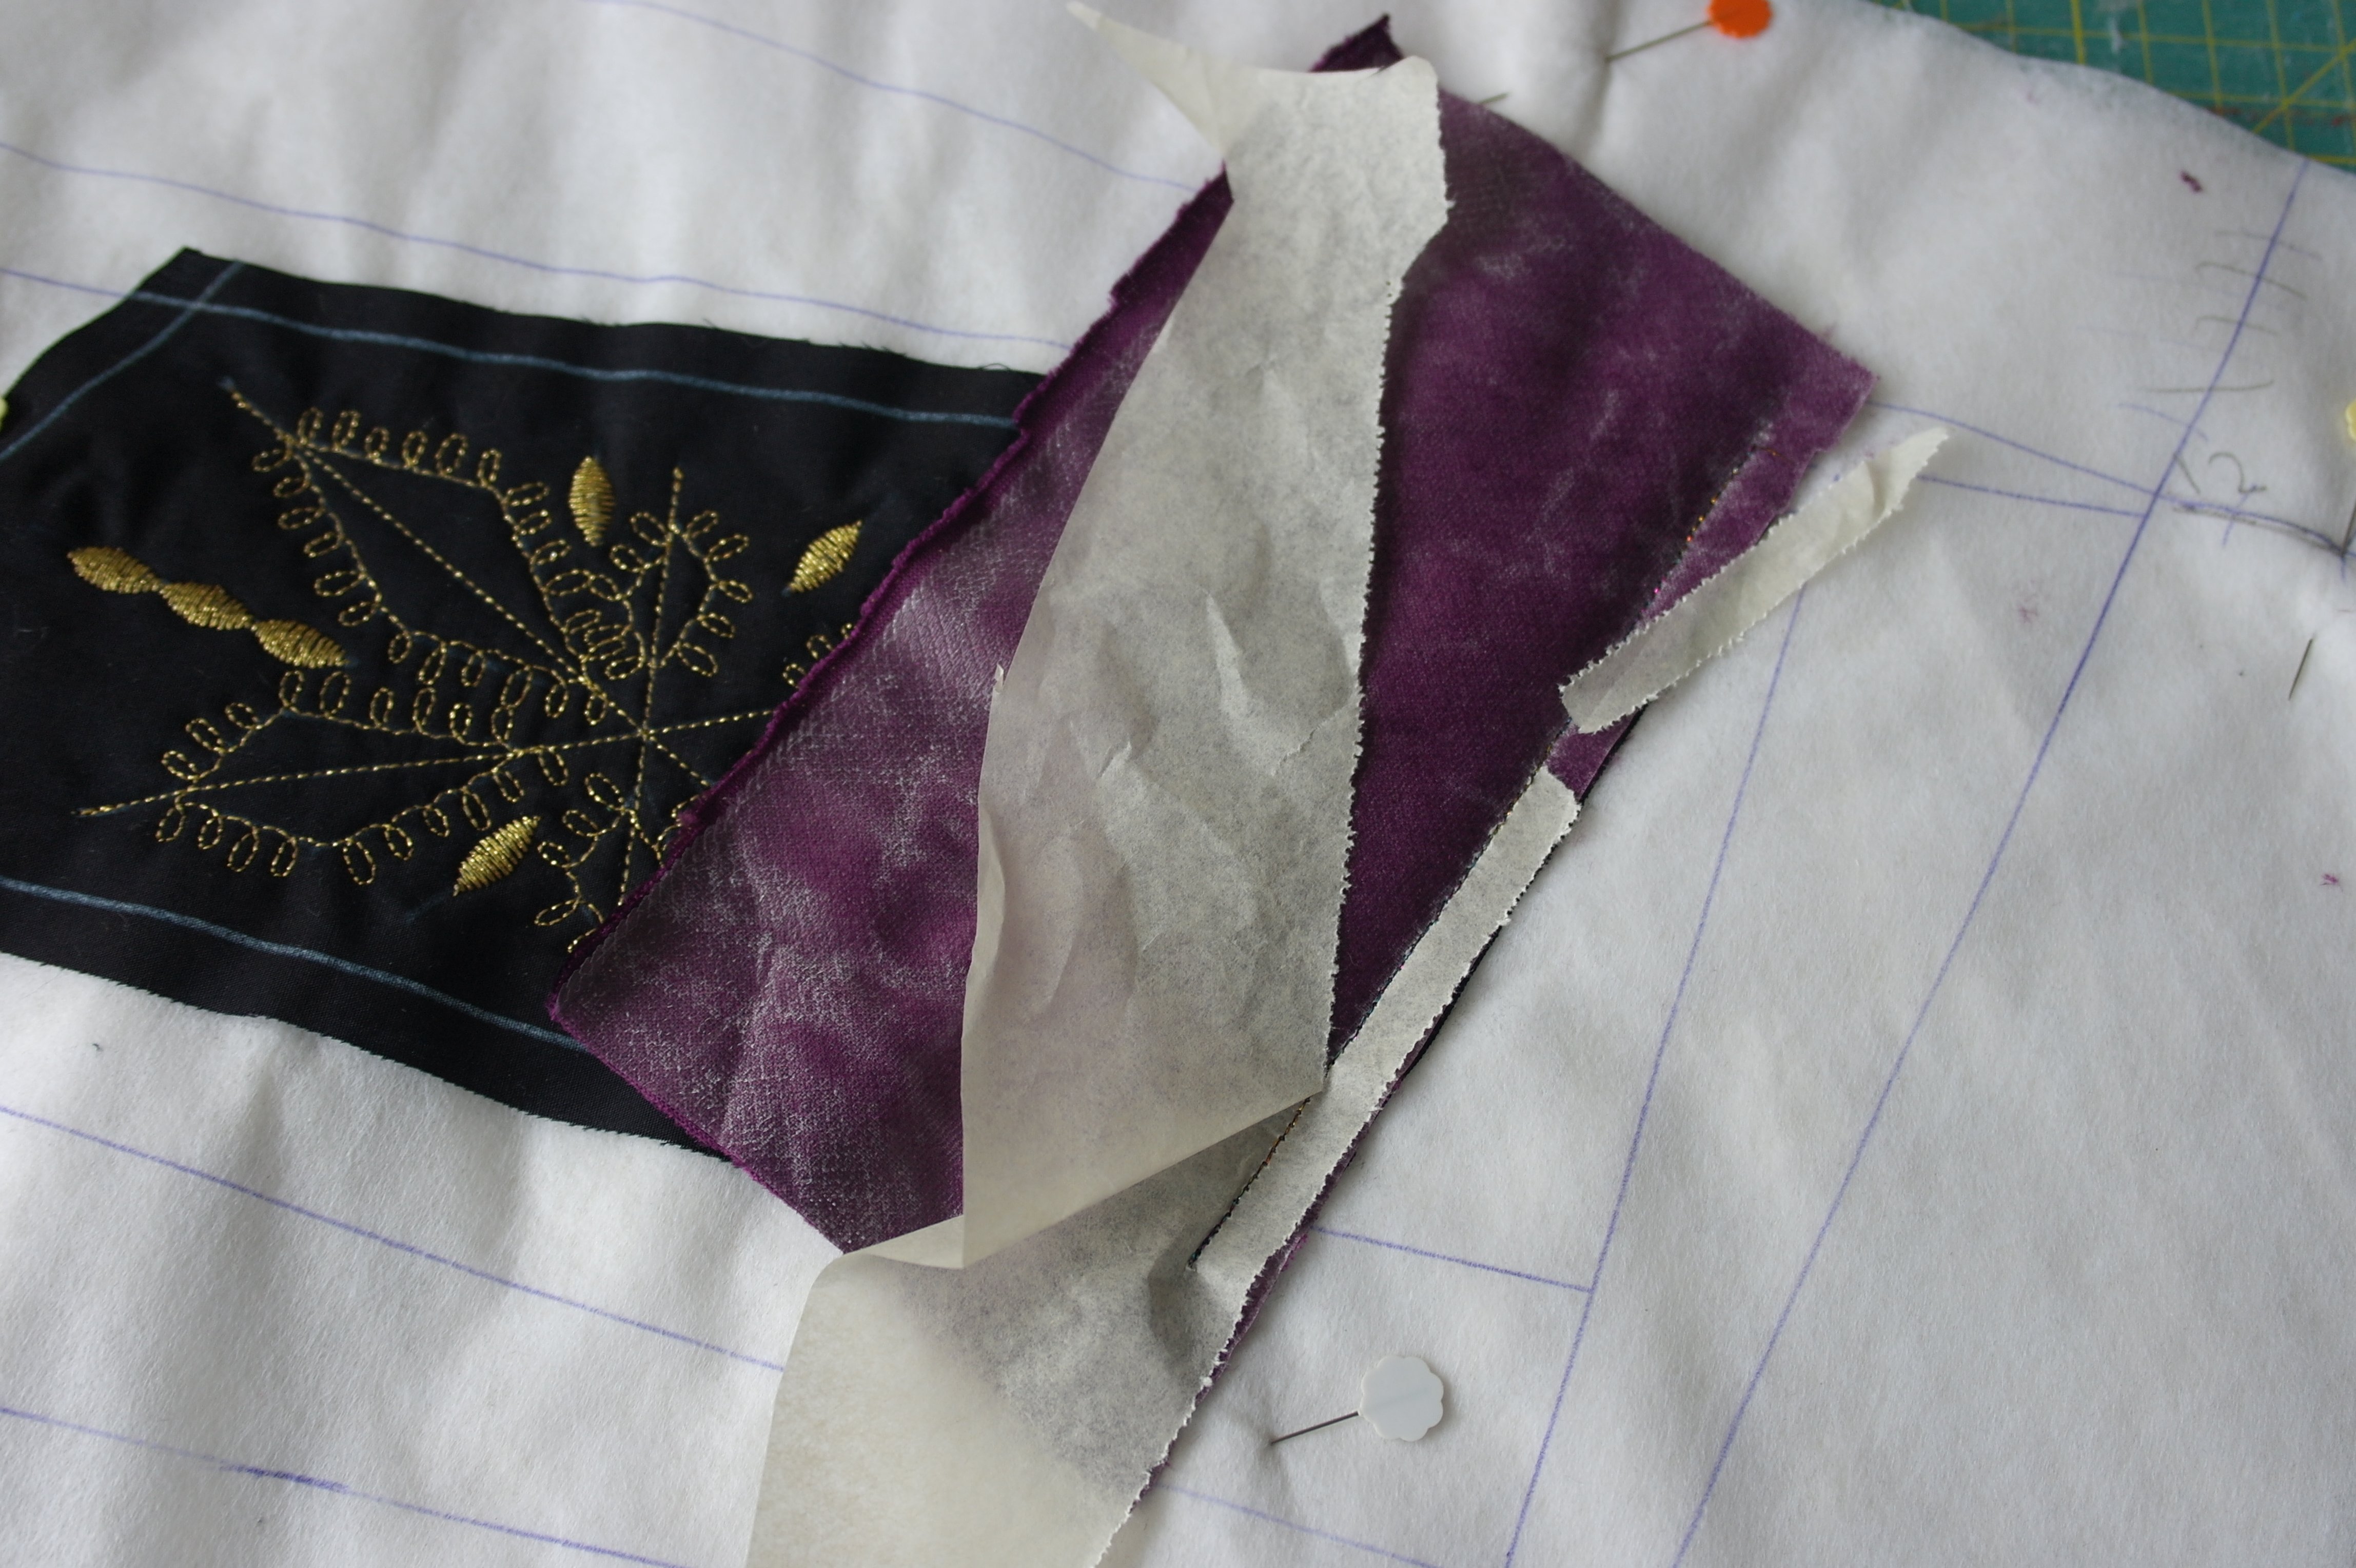
I have choosen two fabrics for section 8 and will add them together: a dark purple batik as underlayer, and an organza with golden glittering leaves on top. Both are cut at the right size + seam allowance, placed upside down (organza first, purple batik second) and sewn onto the sandwich. Both folded back, where the beautiful organza with golden glittering leaves lies on top now. A transparent fabric can be sewn onto the sandwich without a dark underlayer, but than it will show the Vlieselinle L11/white sandwich, and that’s not what I want…
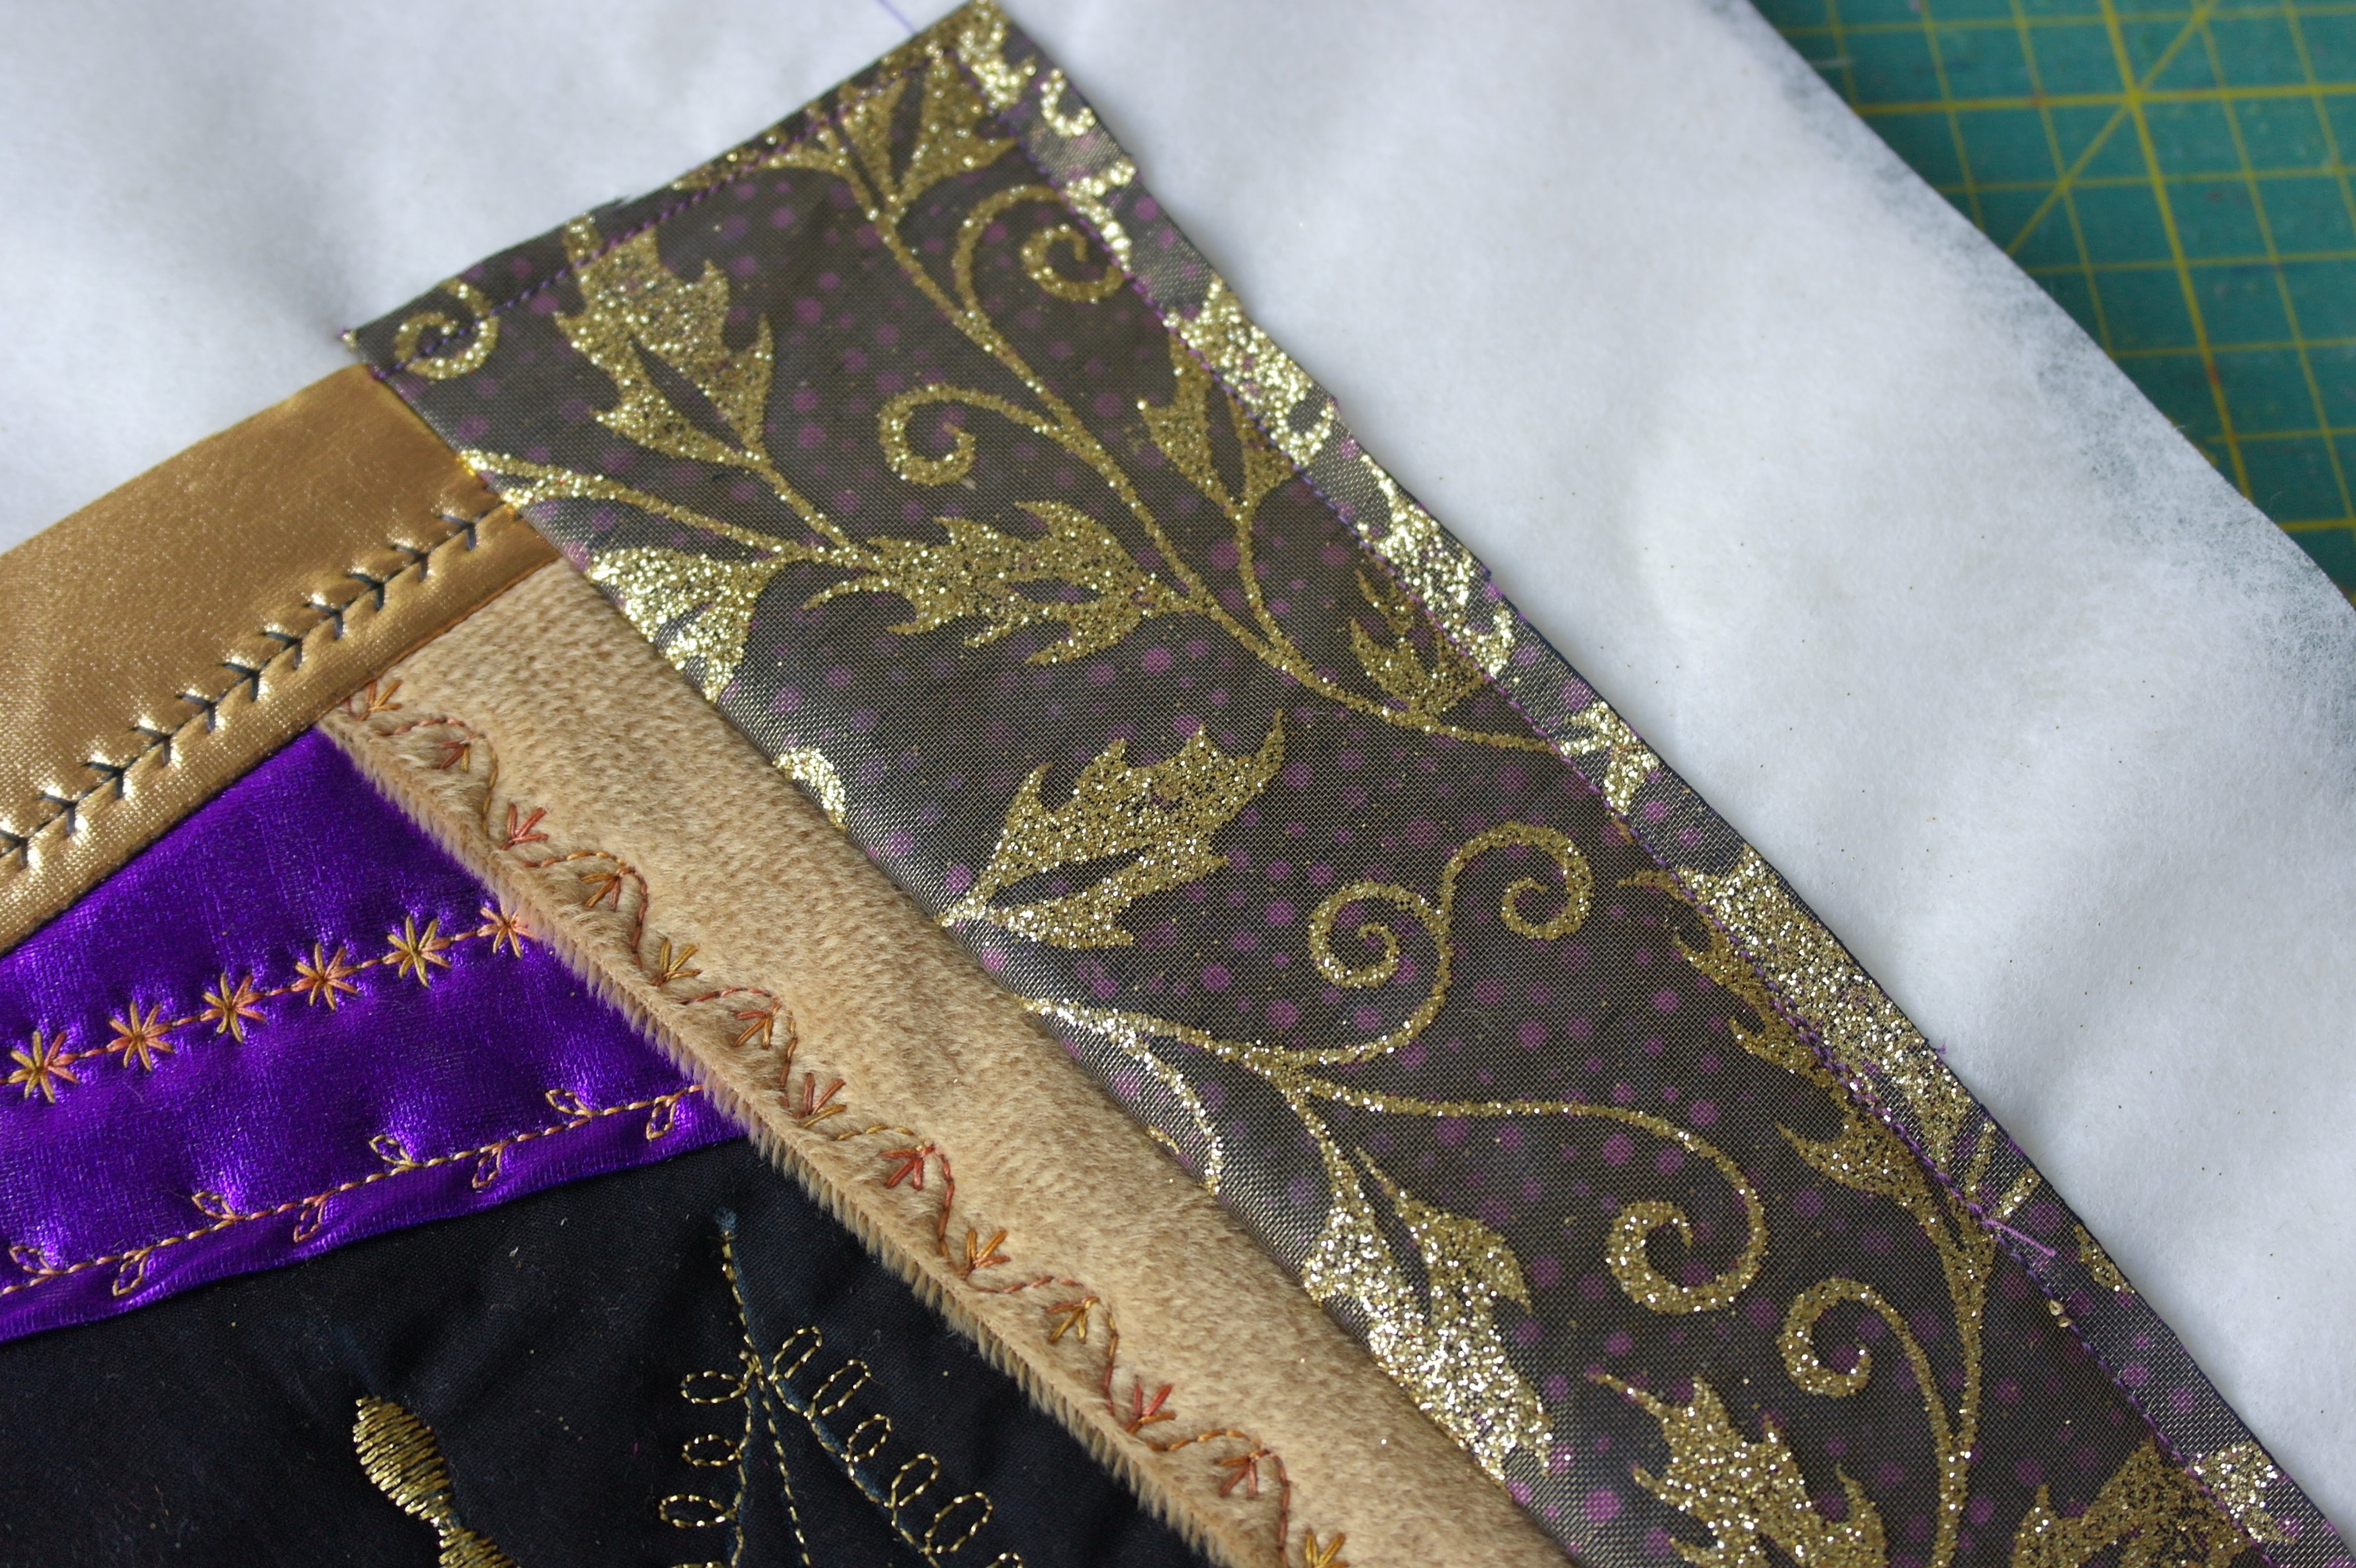
I have NOT added decorative stitches on top of the beautiful organza: I like the effect of the fabric so much, that I have just tacked it down onto the sandwich, beyond the next sewing lines. This way both fabrics of section 8 will stay, when moving the sandwich for sewing on the next fabrics.
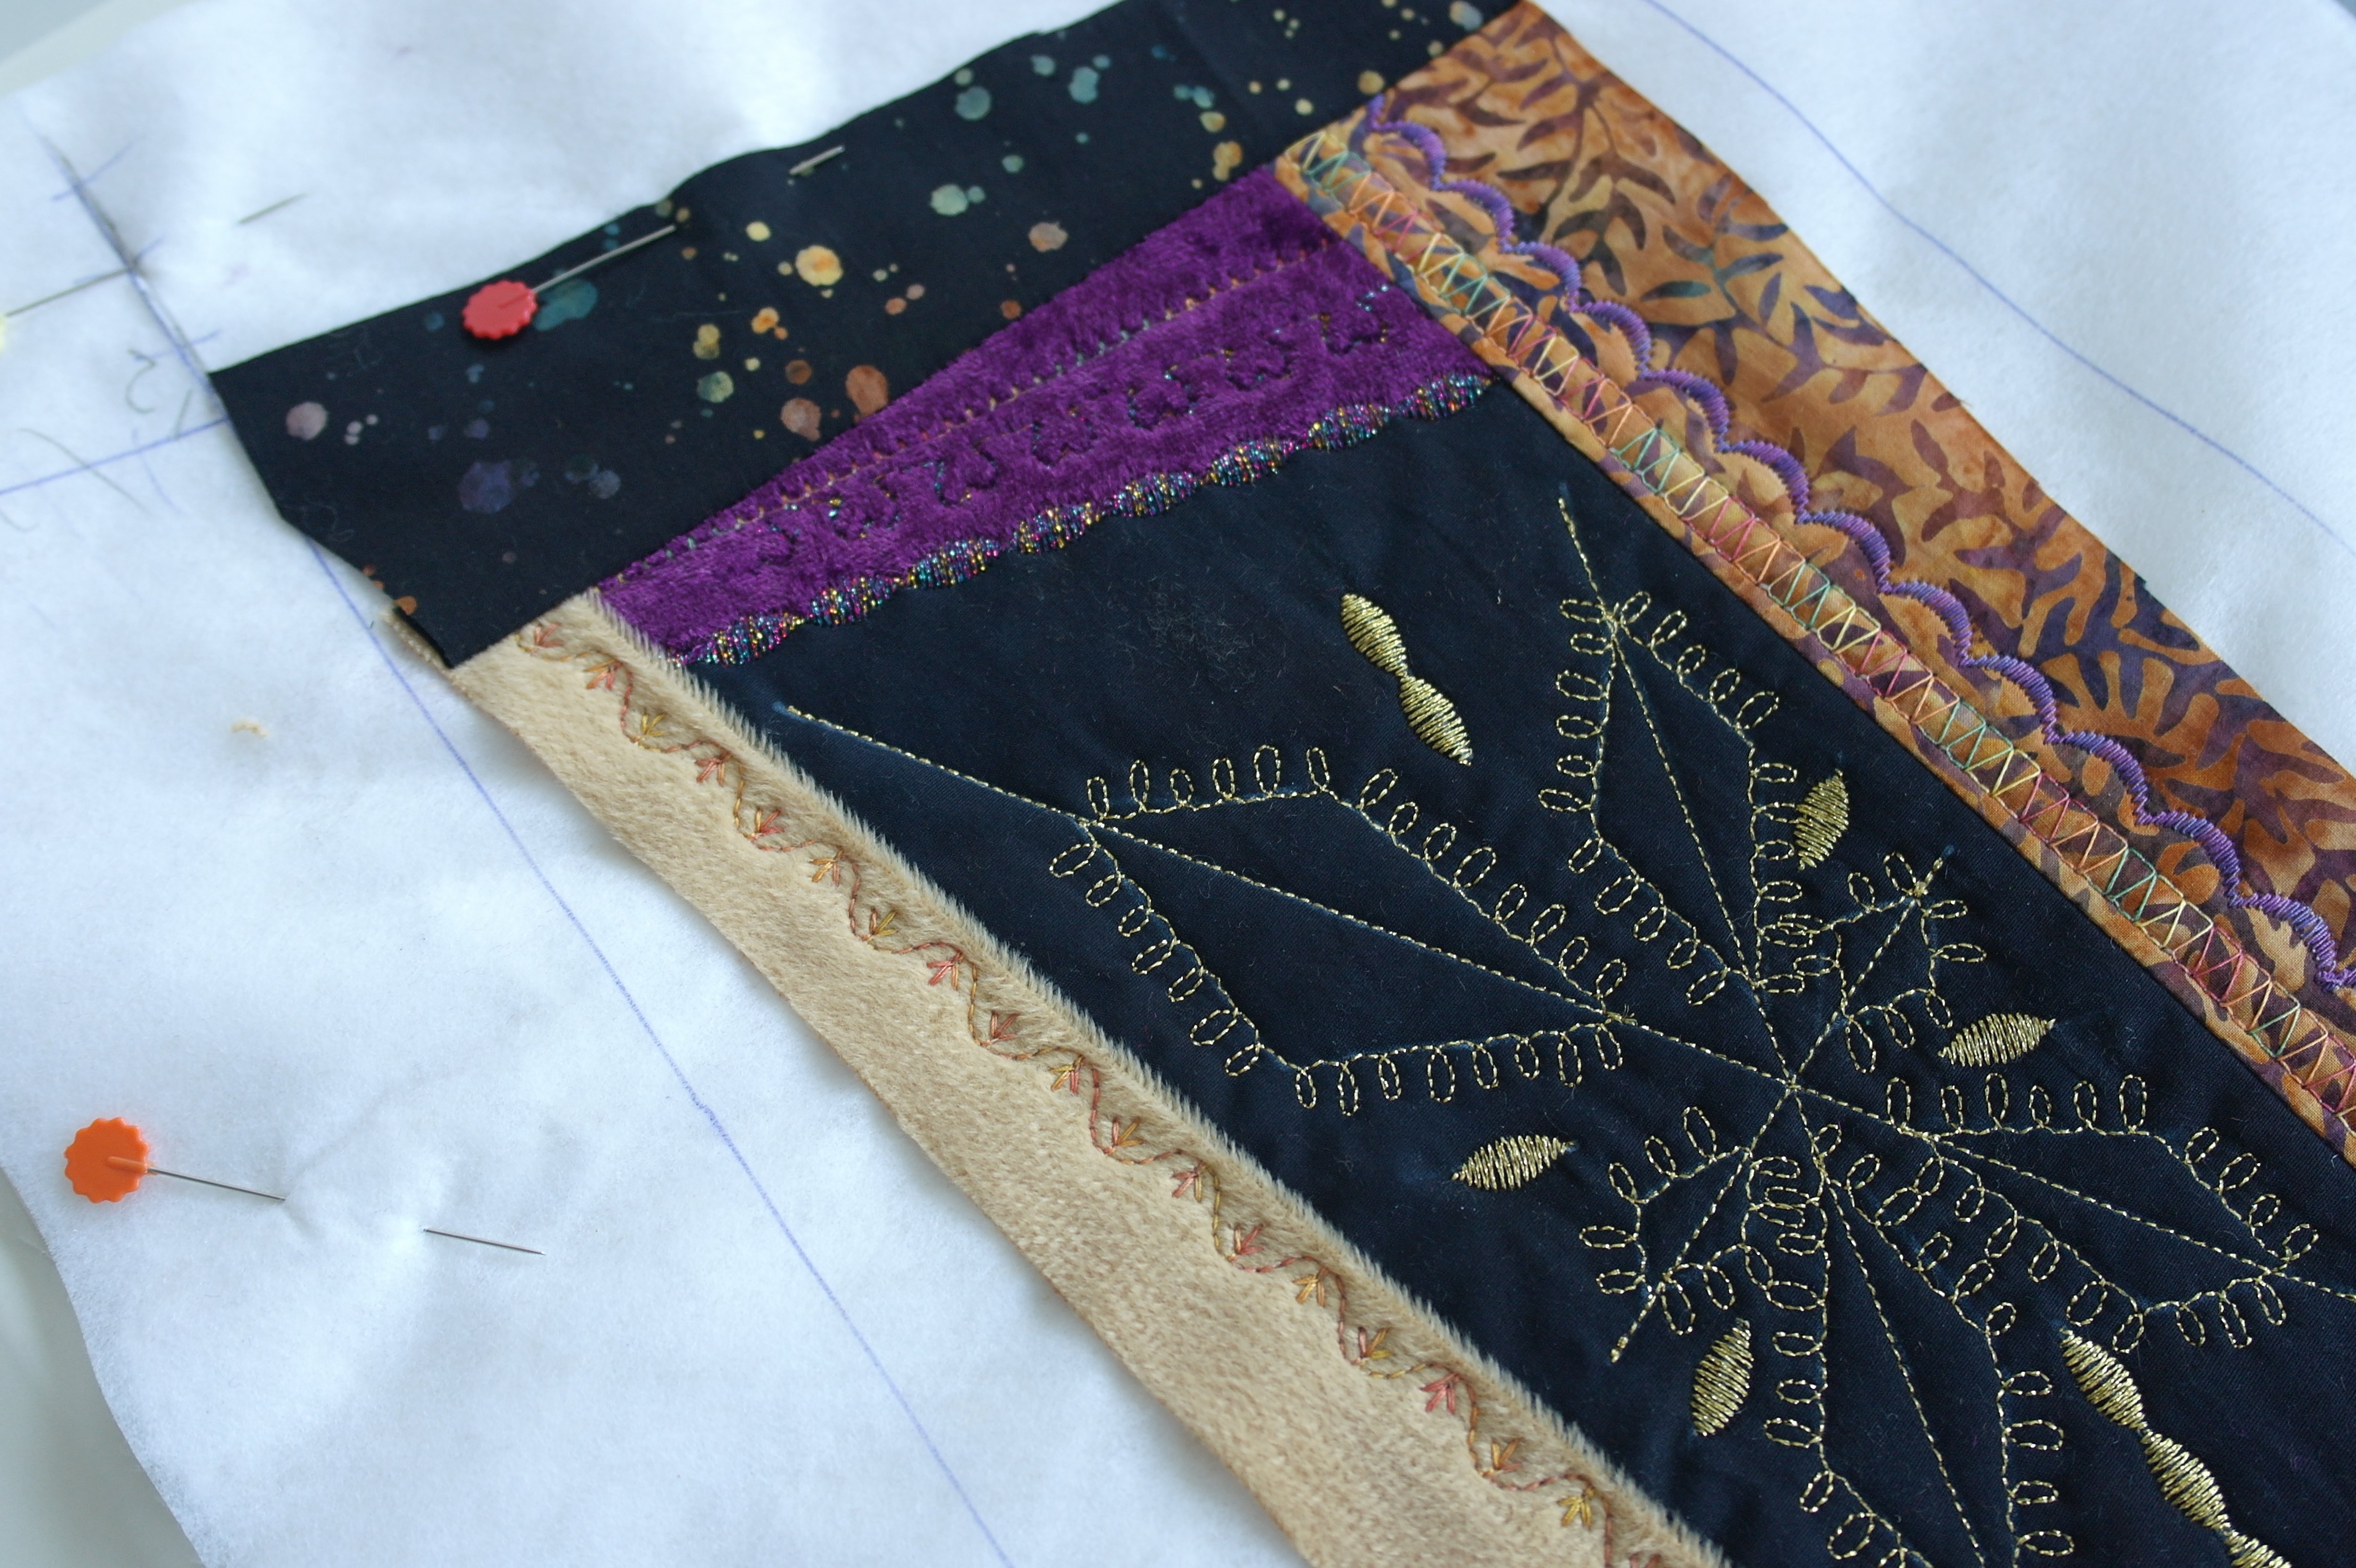
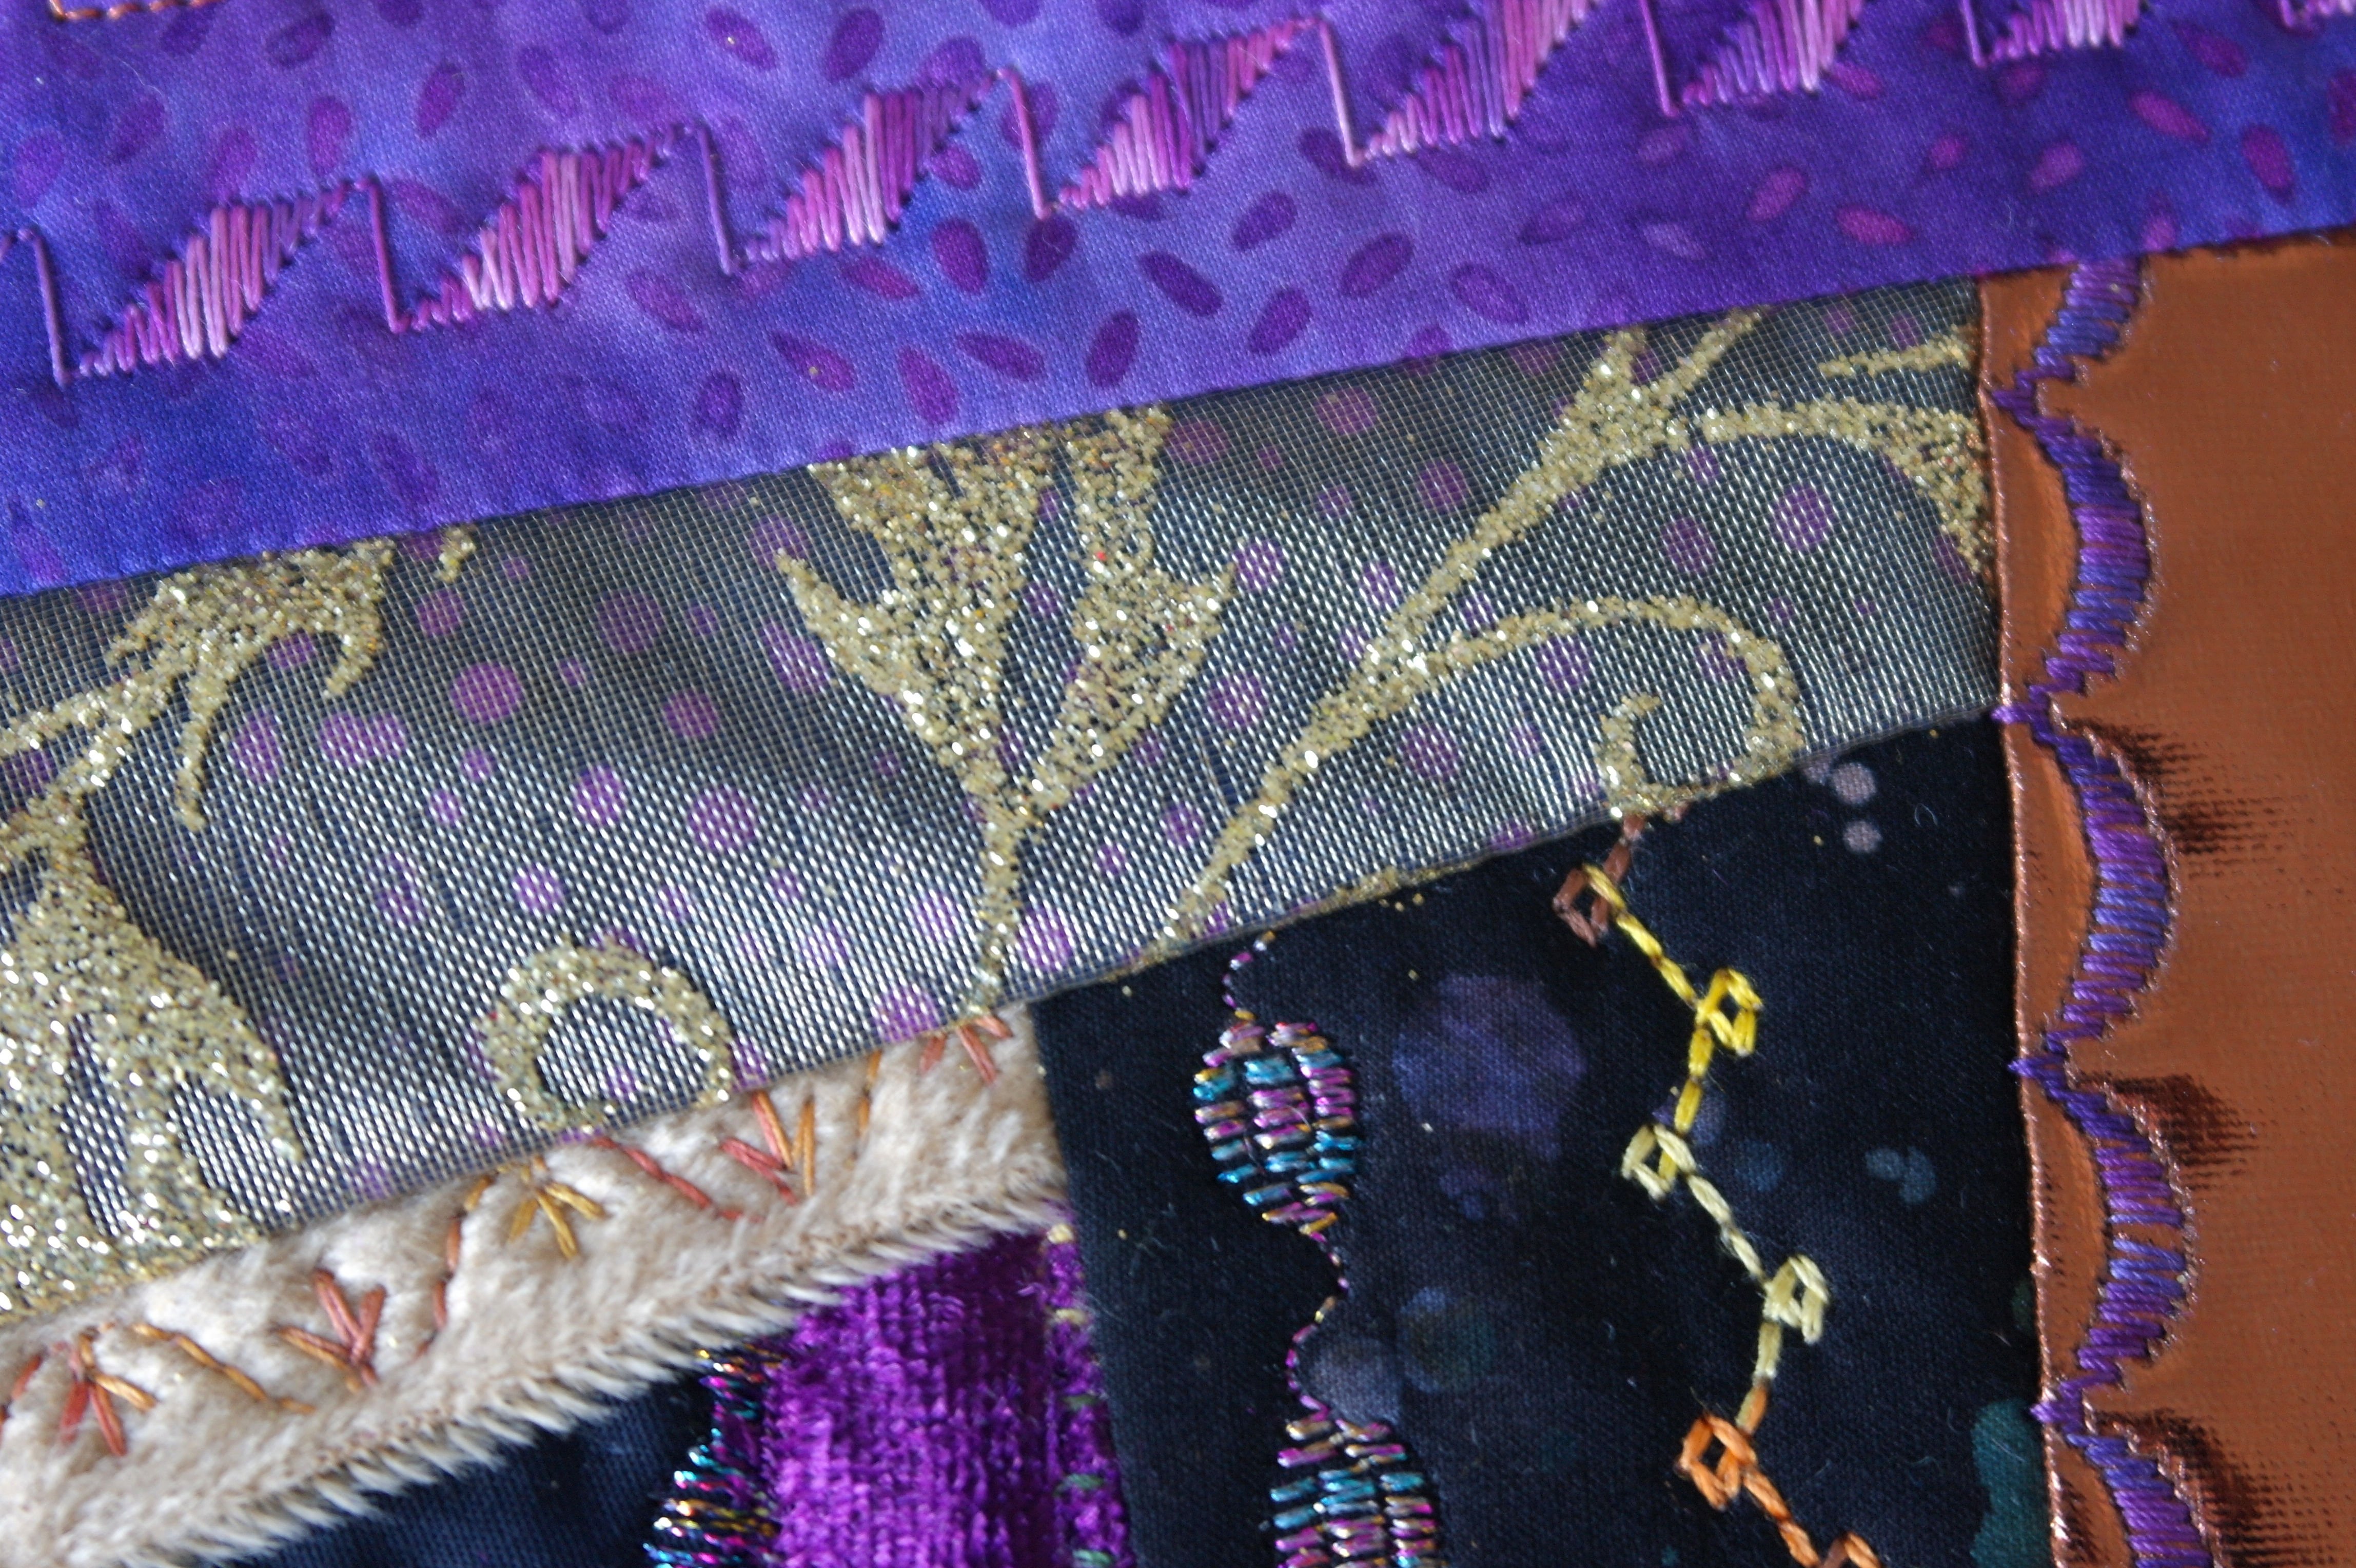
And at last: the black batik with the golden stitches is sewn onto the sandwich, for section 11. I have made sure the fabrics for section 7 and 8 are of a different color, to let this fabric for section 11 stand out. I have also NOT added any additional decorative stitches on this part, because I want the zipper-like stitches stand out at the most. Just tacked the edges down.
I have cut the excess fabric, and have placed this in a grip bag, for use with another block. It is a narrow piece, but perhaps I can use it on a small section on a future block.
The last strip is added and decorative stitches are made….
and of course the Hotfix stones are added in the center, at the crystal..
My block no. 3 is ready: DO NOT cut anything back, if yours is done too! Just leave it like this, put it aside for month 12.
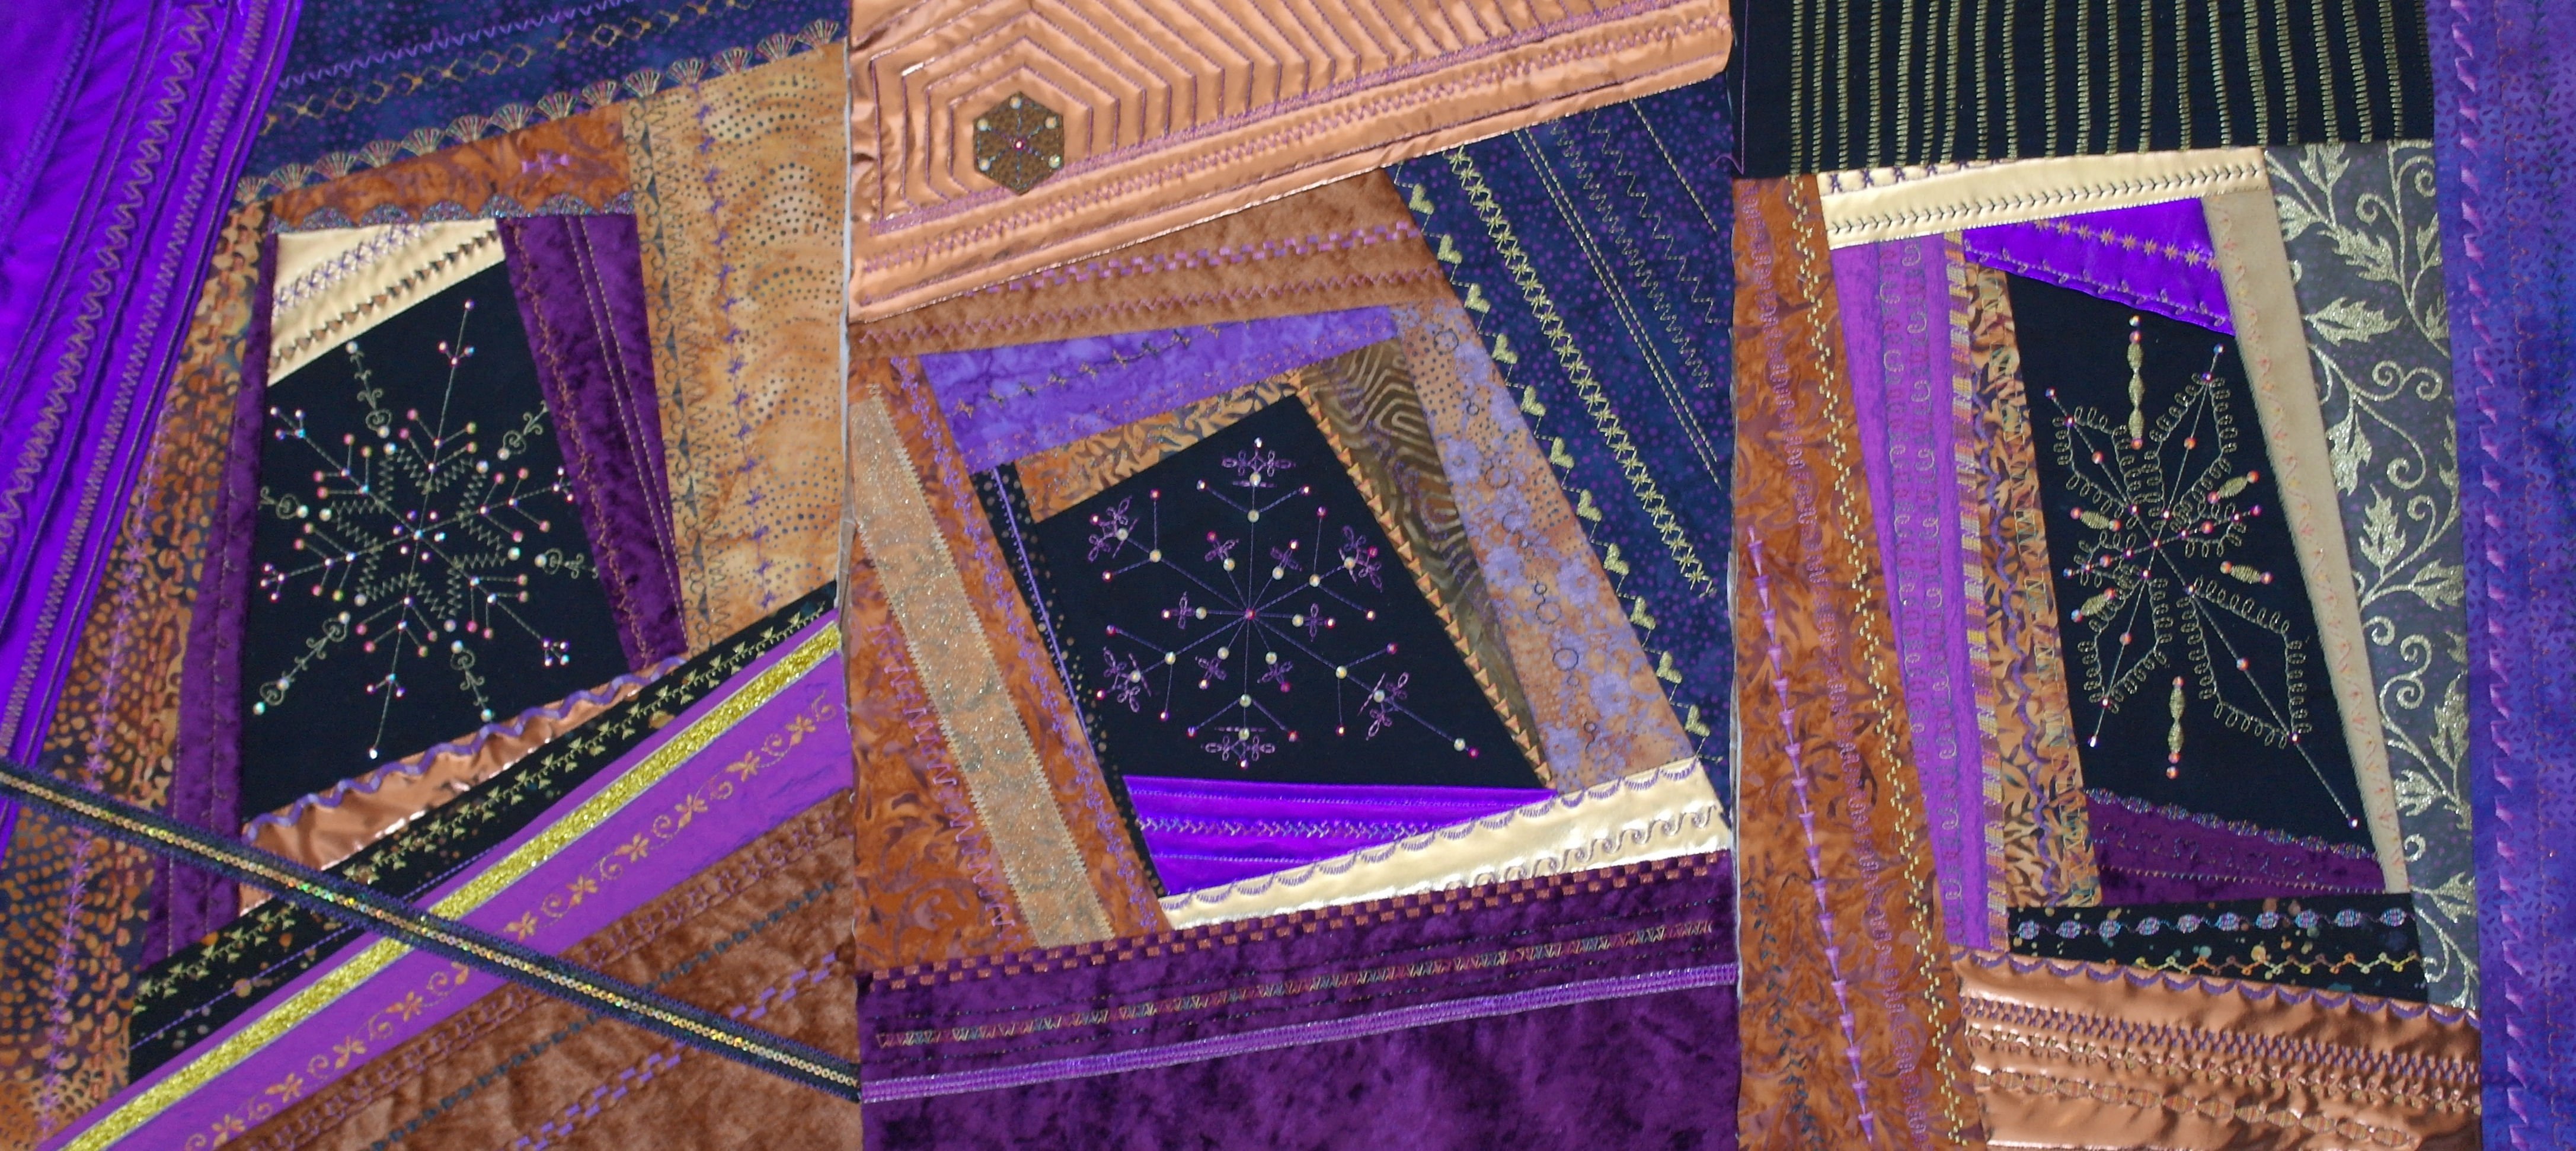
These are my 3 blocks, already made… don’t they look nice? The picture above just shows them: it is NOT an indication about assemble… just to give you an overview.
I cannot wait to see your blocks: please post pictures in the COMMUNITY of this BERNINA Blog or in my special FaceBook group for this project?
Have fun and see you next time,
Happy quilting!
Sylvia Kaptein
Sylvia’s Art Quilts Studio
0 Responses