 BERNINA Corporate Blog -
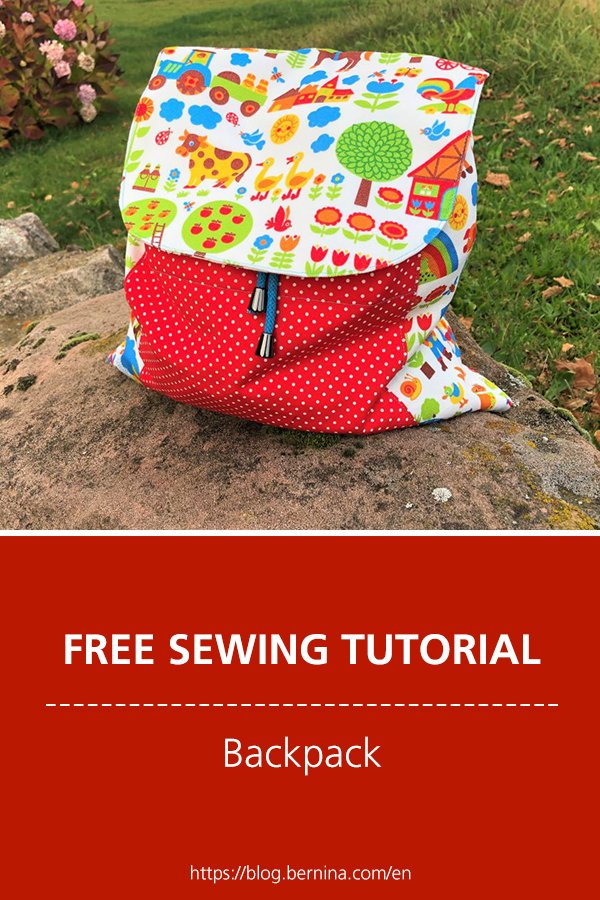
In this post, I’ll show you how to sew a simple backpack. The project is perfect for beginners.
This year’s theme of the blog advent calendar – “From the heart” – takes me back to my first sewing experiences in 5th grade. What was your very first experience of sewing? When I was 11 years old, I sewed a backpack for my first big project in school.
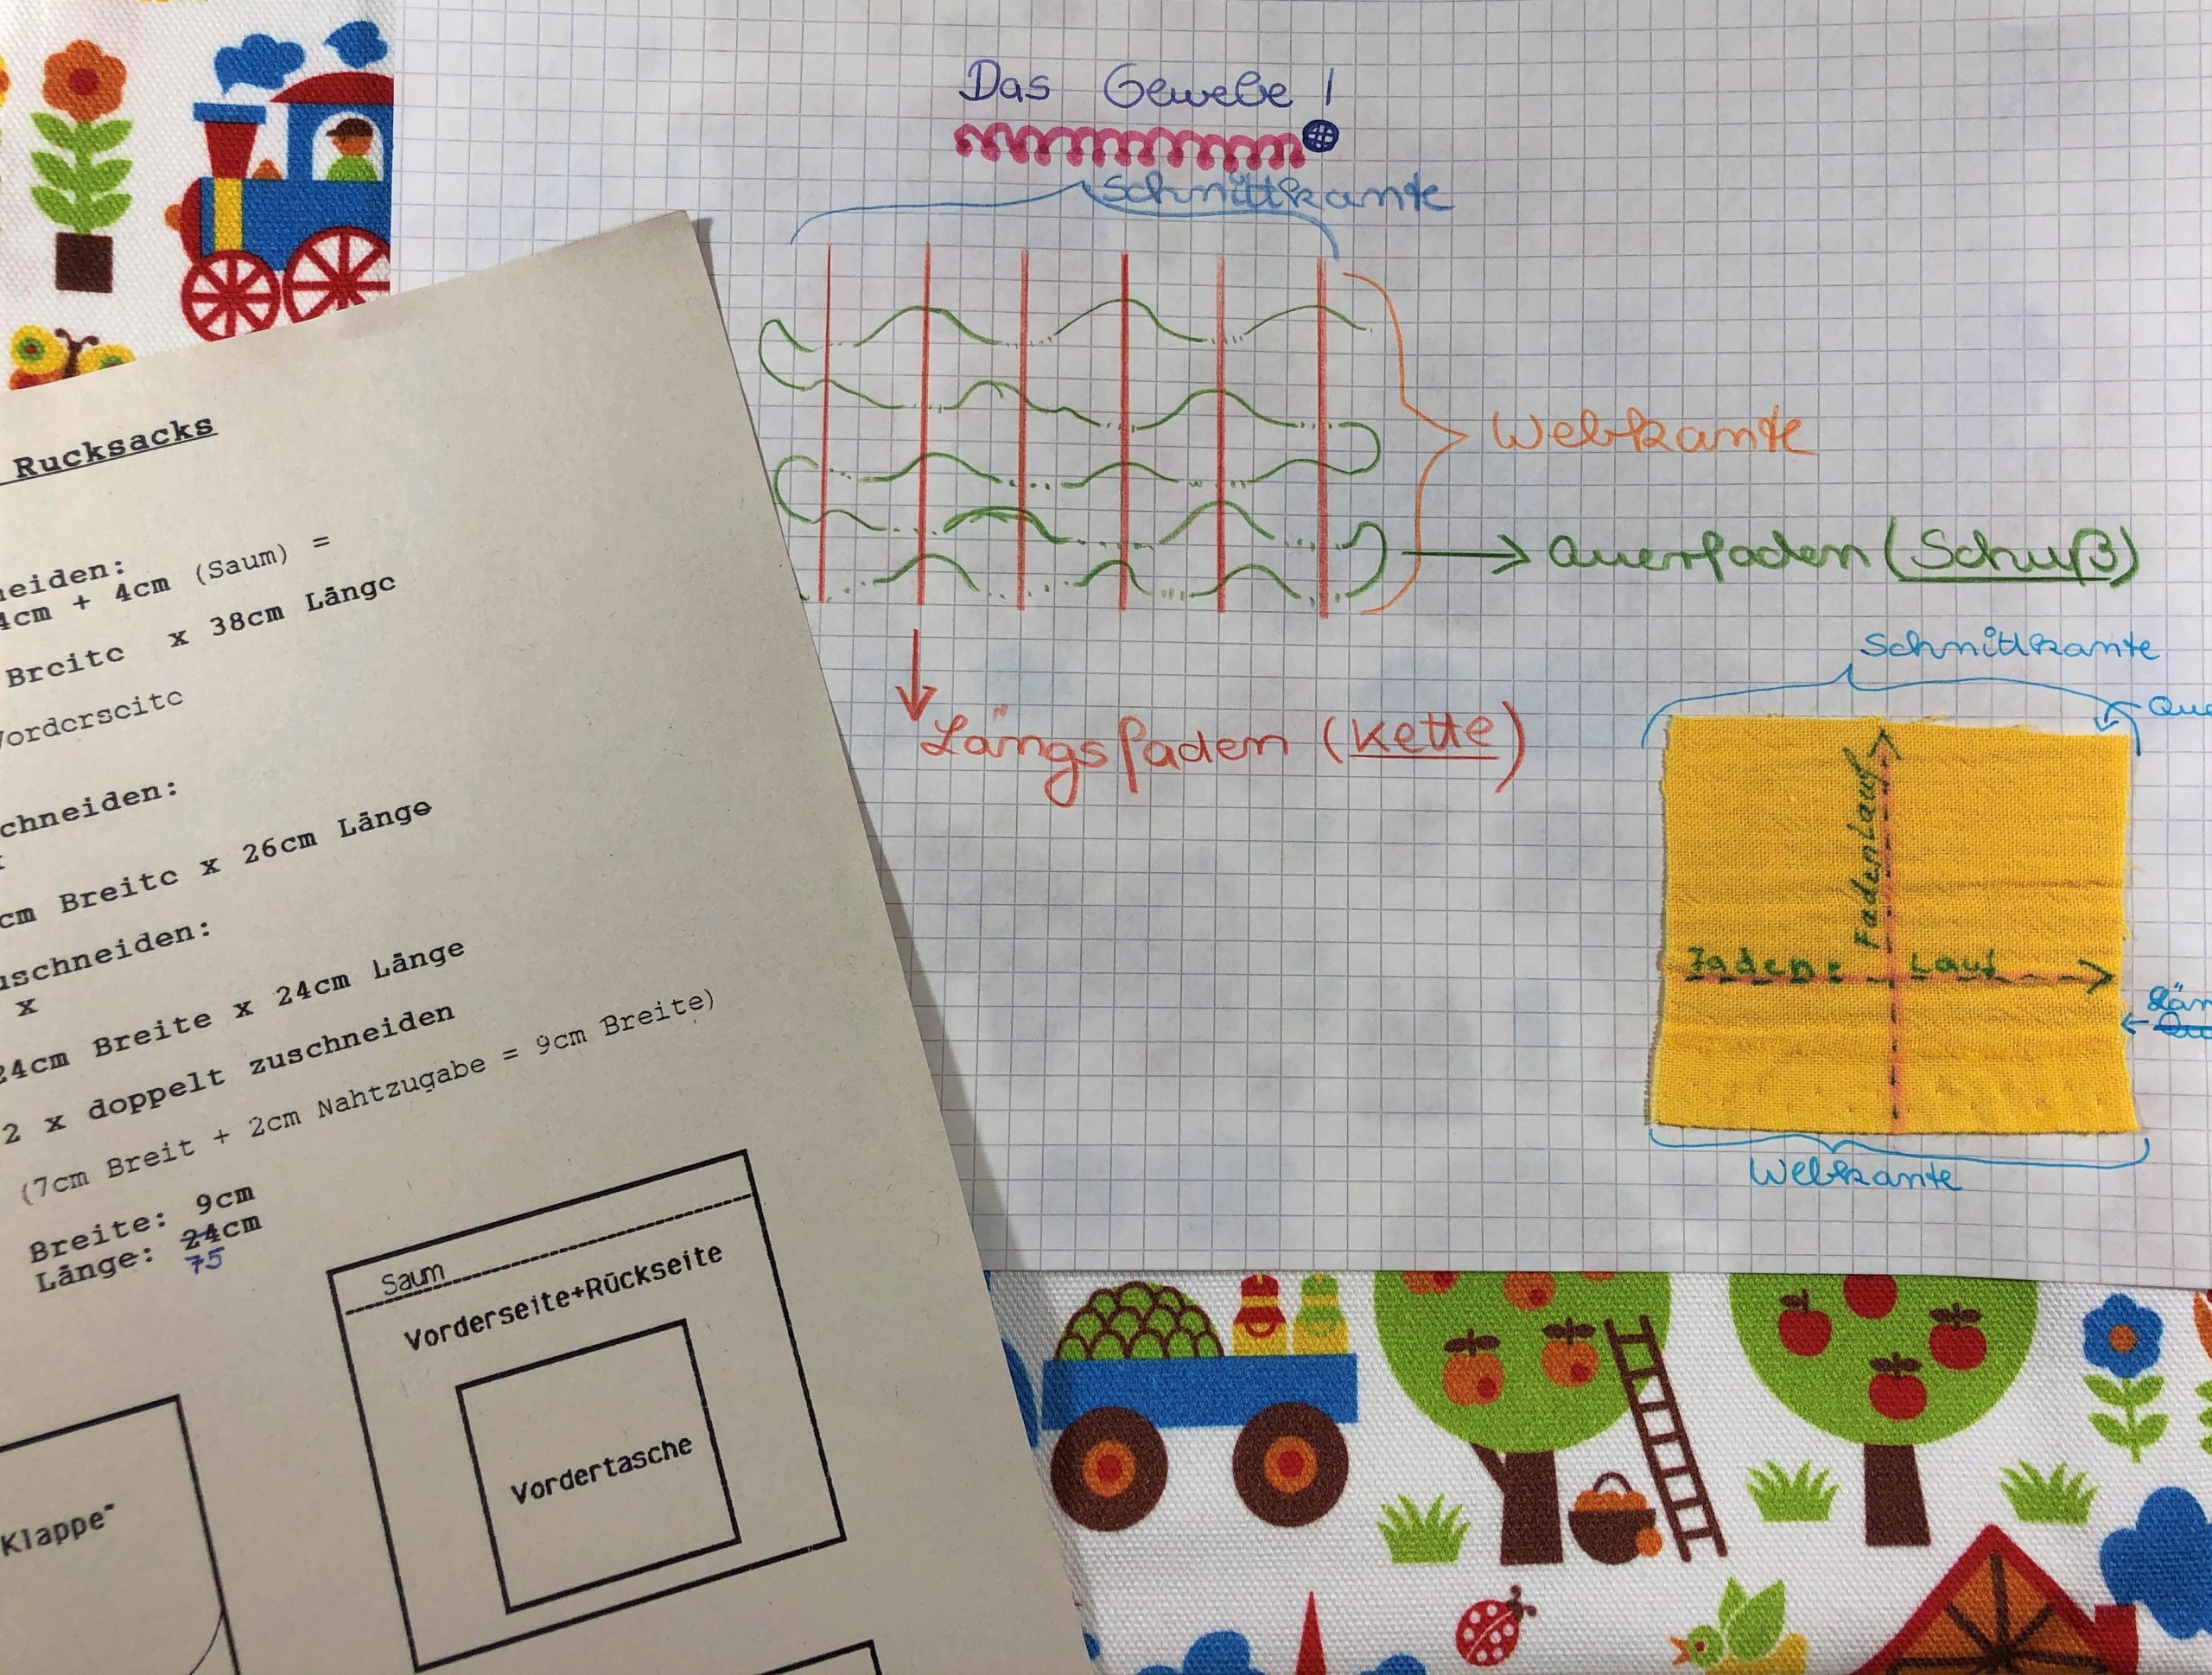
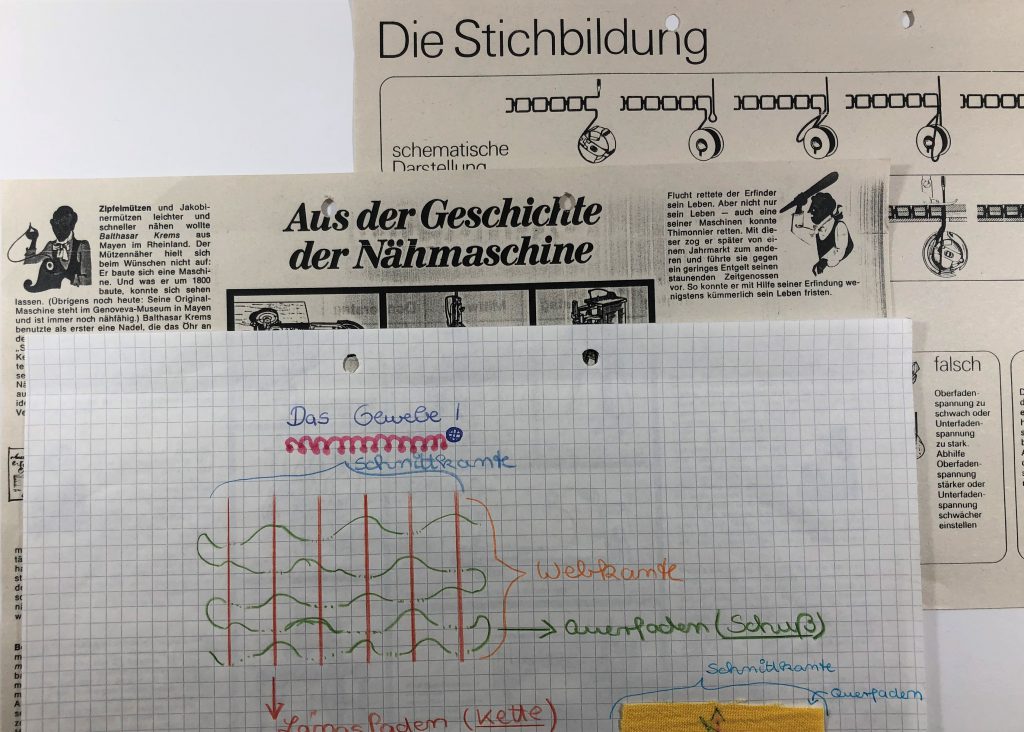
I remember us working happily without a care in the school’s small handicrafts room. And the things we learned there: thread path, selvedge and stitch formation. Not forgetting the history of the sewing machine – who would have thought that I would later write for the BERNINA blog!
And I’ve taken the old pattern from my school papers and used it to prepare the instructions for sewing a backpack!
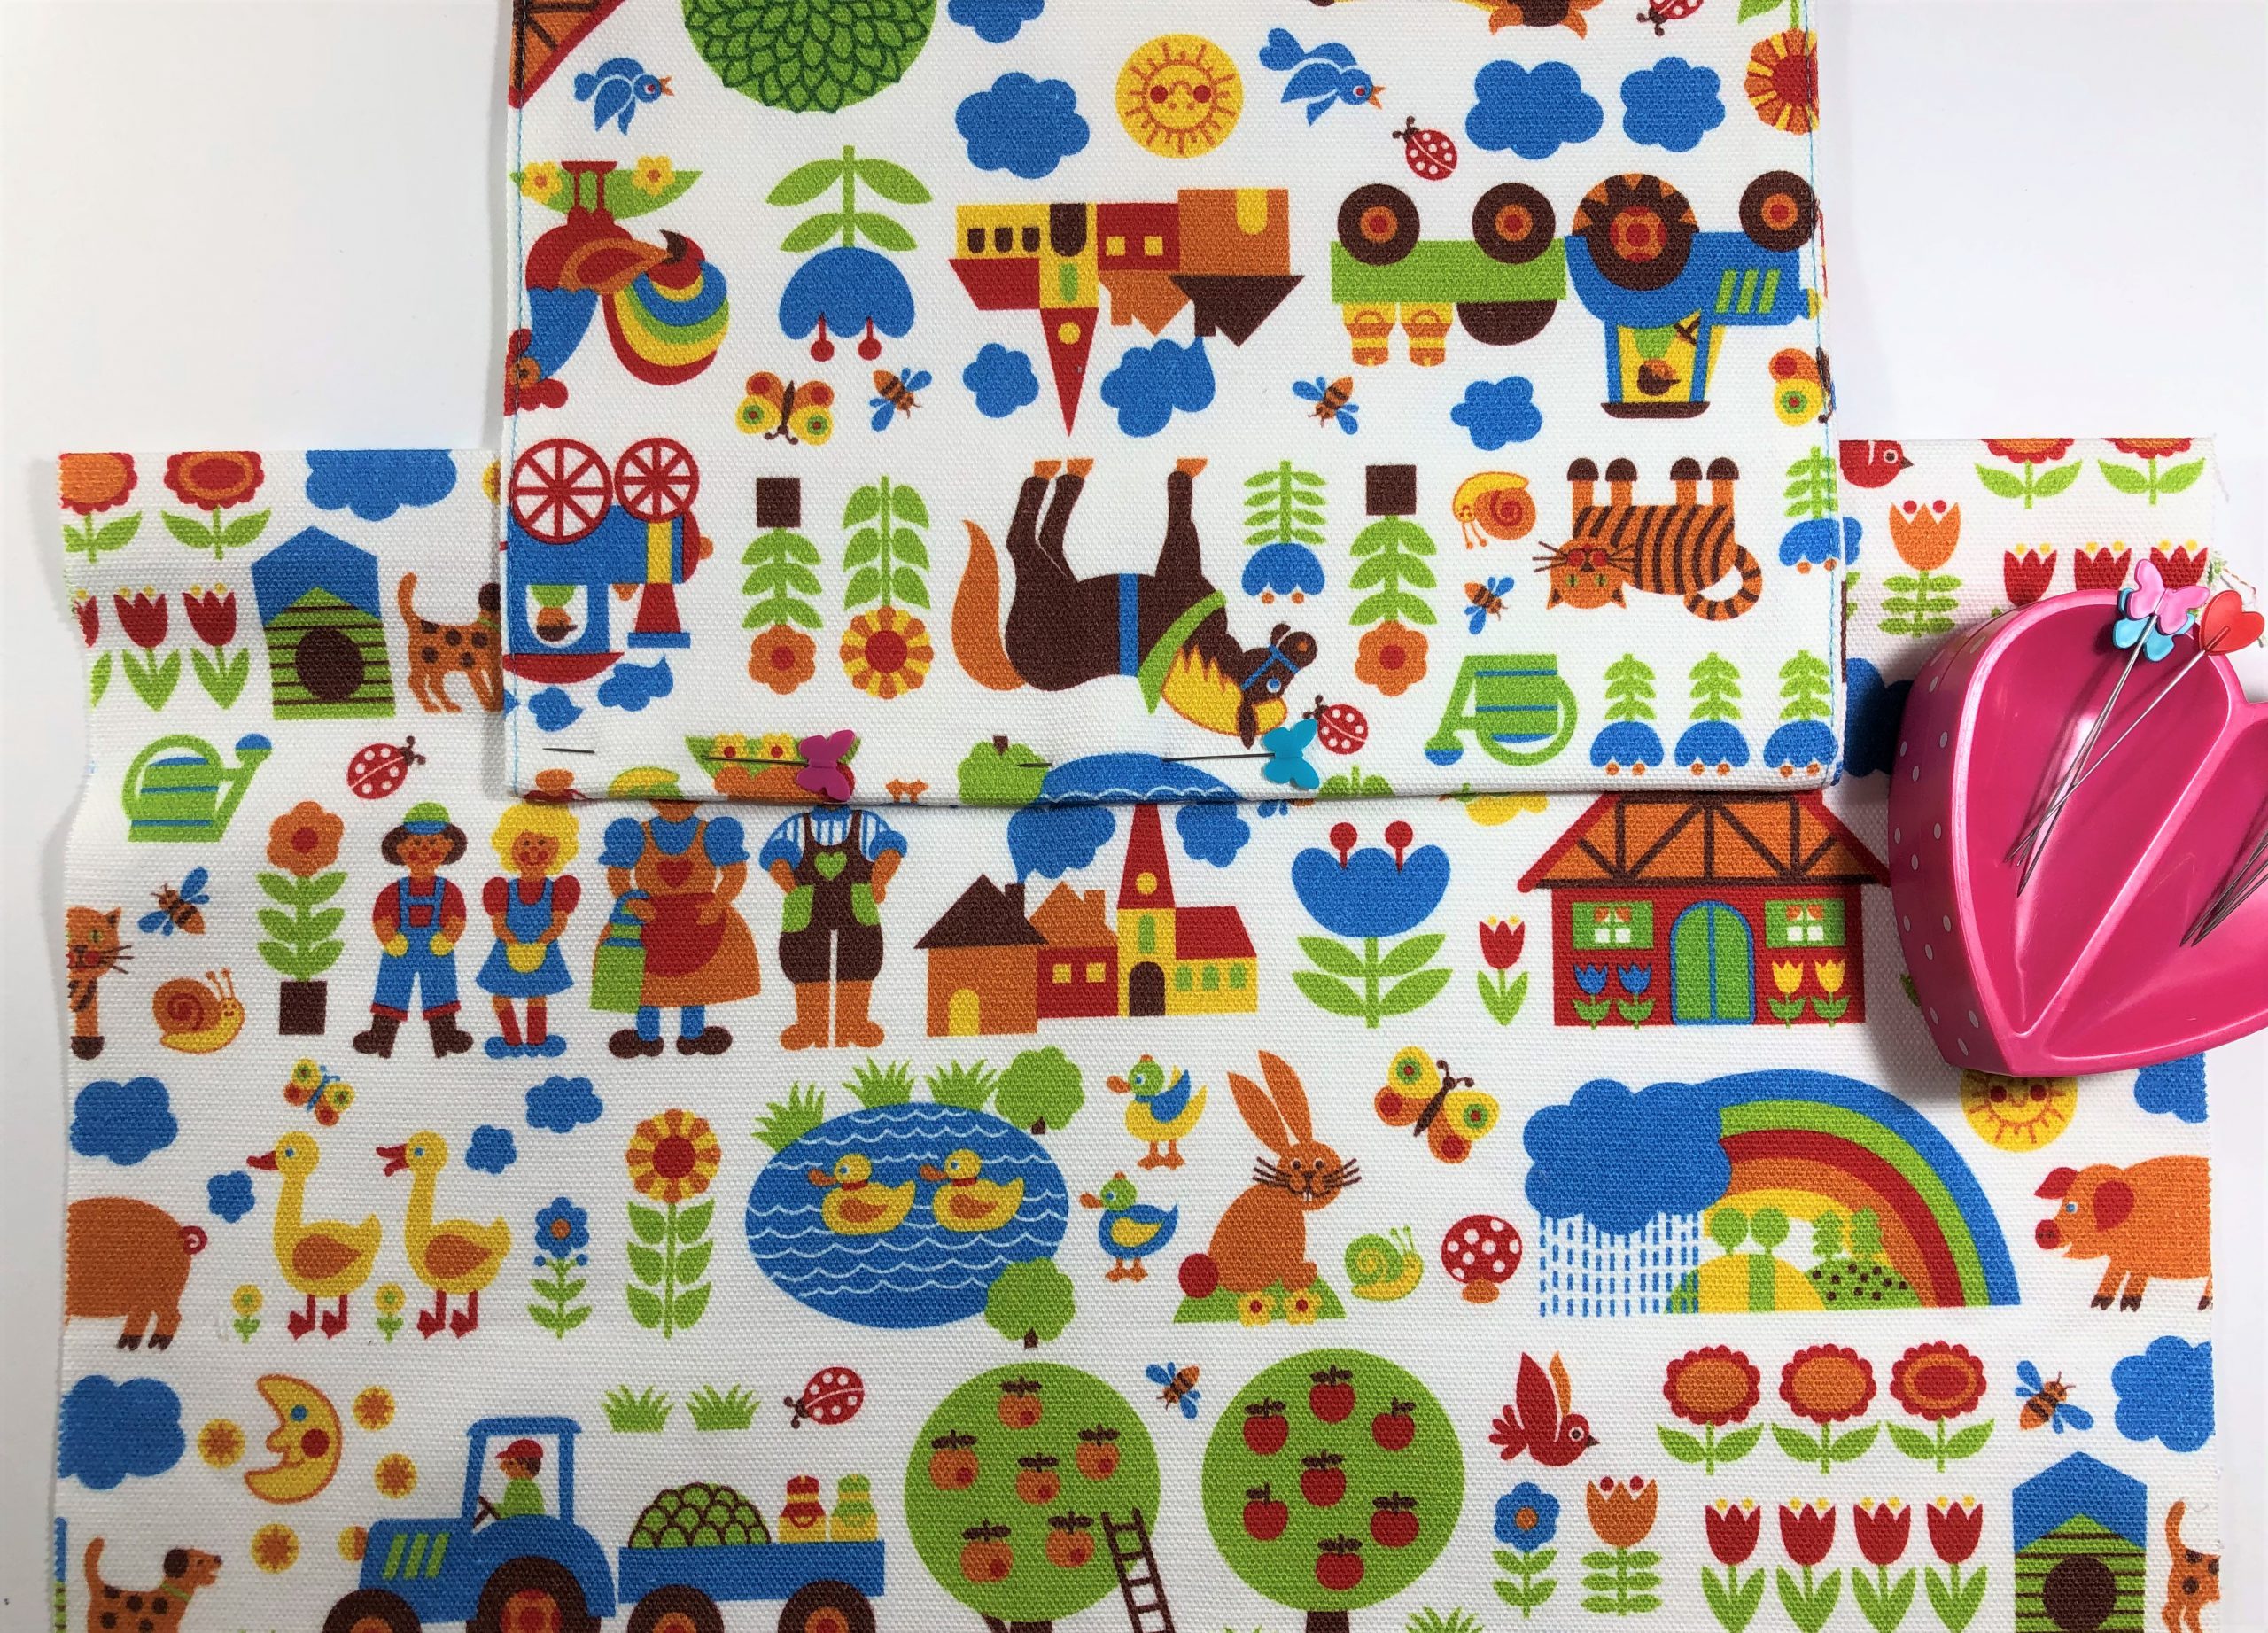
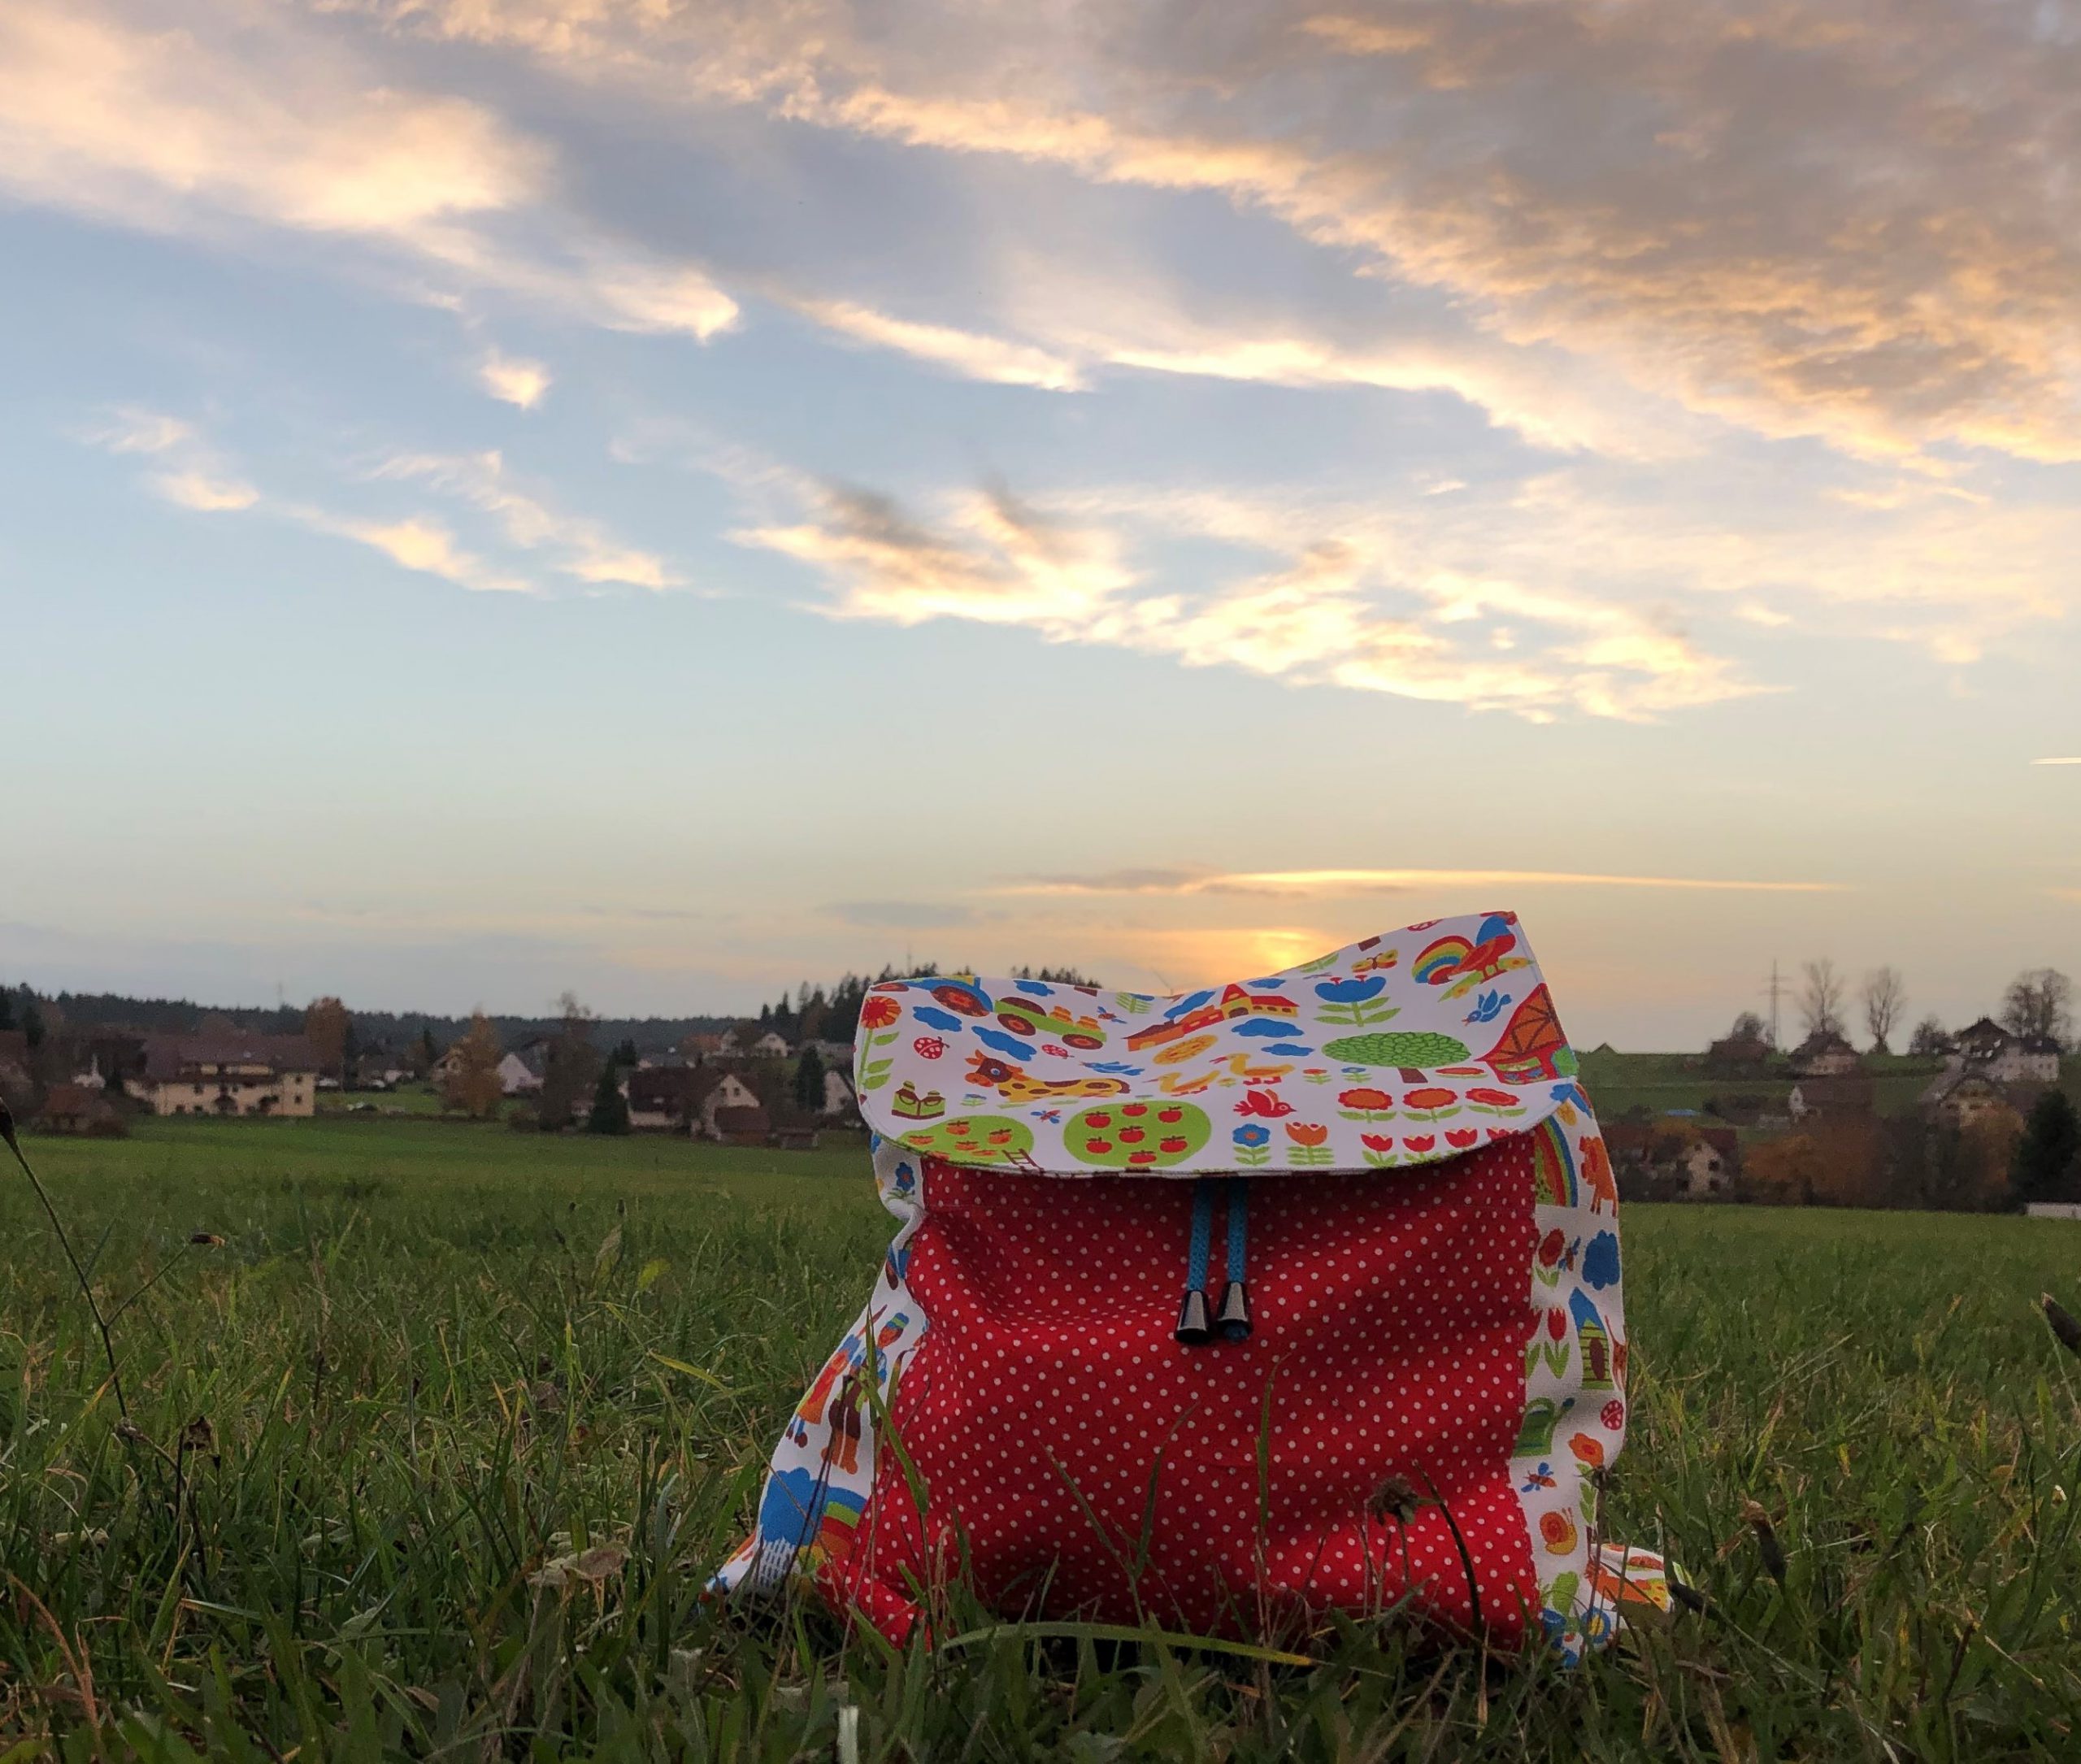
My choice of fabric also comes from the heart: this cheerful farmyard design has been with me since childhood – thinking of snuggling up in bed linen covered in these cute animals makes me feel warm and secure!
Ideas and tutorials for your next sewing adventure
Subscribe to the BERNINA Blog Newsletter
If you love to sew you don’t want to miss the chance to receive the latest content from our authors directly into your mailbox.
Sign up for the blog newsletter
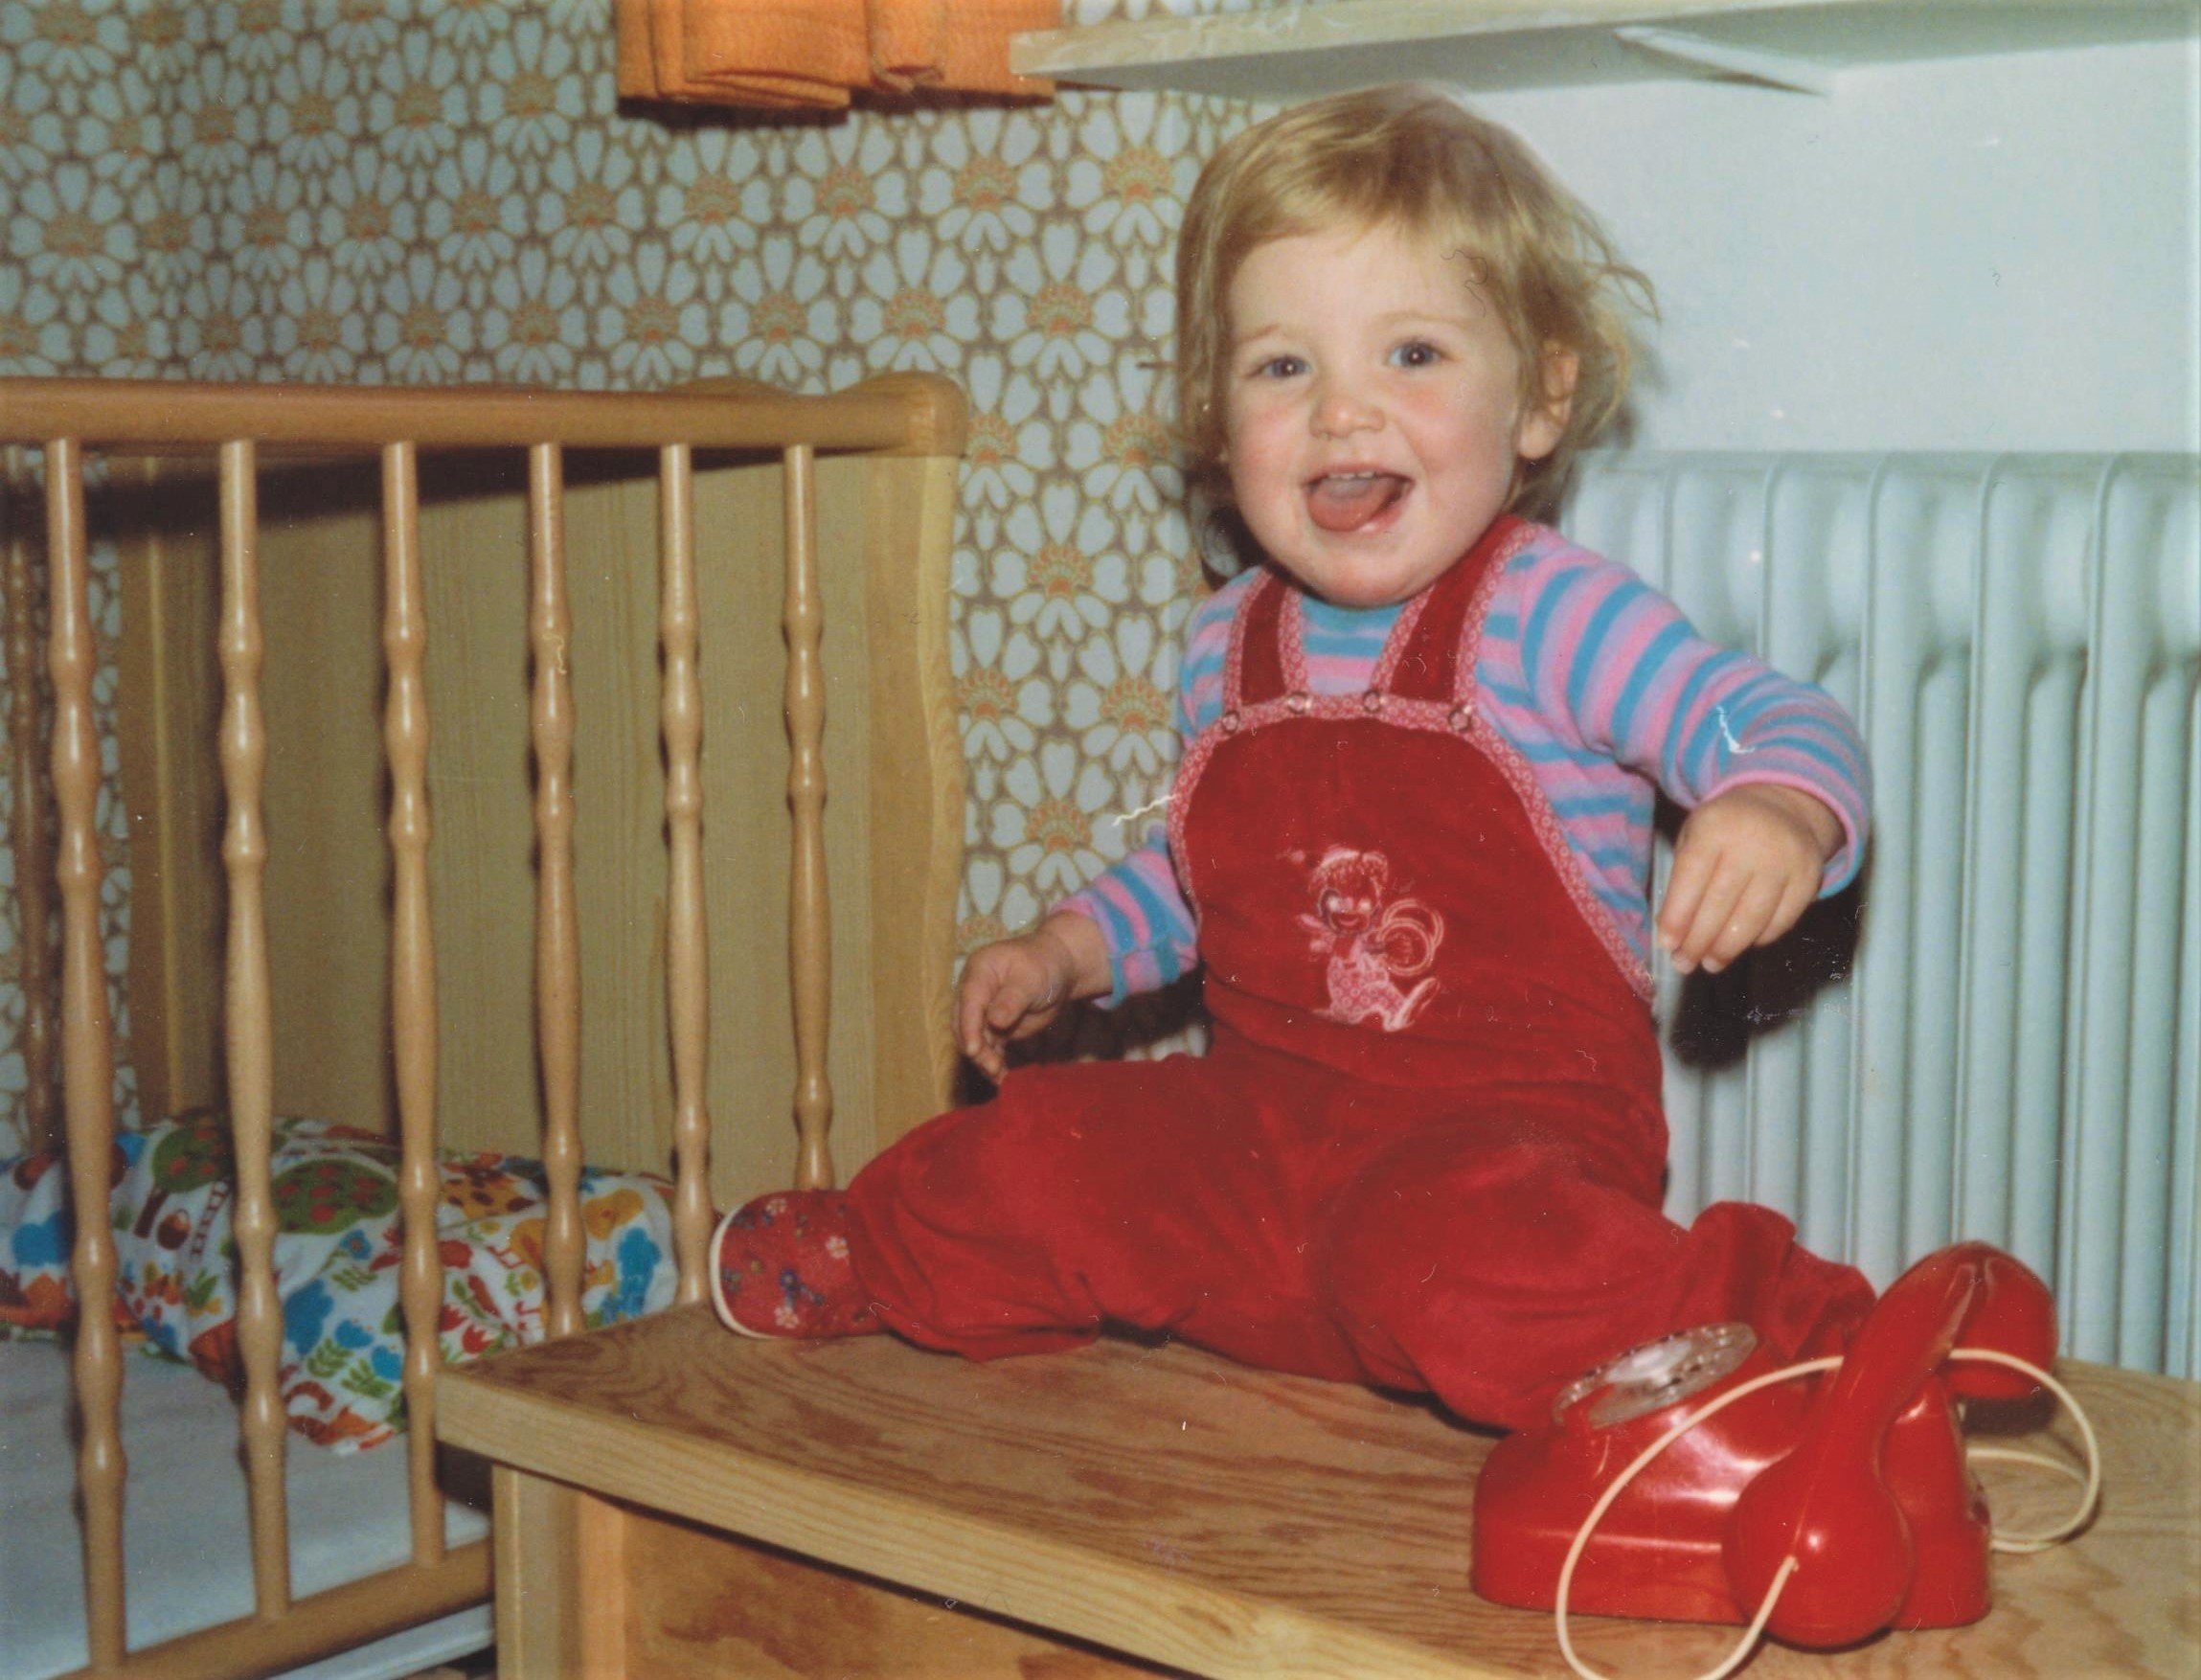
On this photo from 1981, you can see the original bed linen on the left and me as a one-year-old with my favorite toy, the phone. This bed linen fabric from the 70s was reissued by the designer’s daughter several years ago and I quickly realised that it would go well with my instructions for a backpack.
So let’s get started with my heart project!
Instructions for sewing a backpack
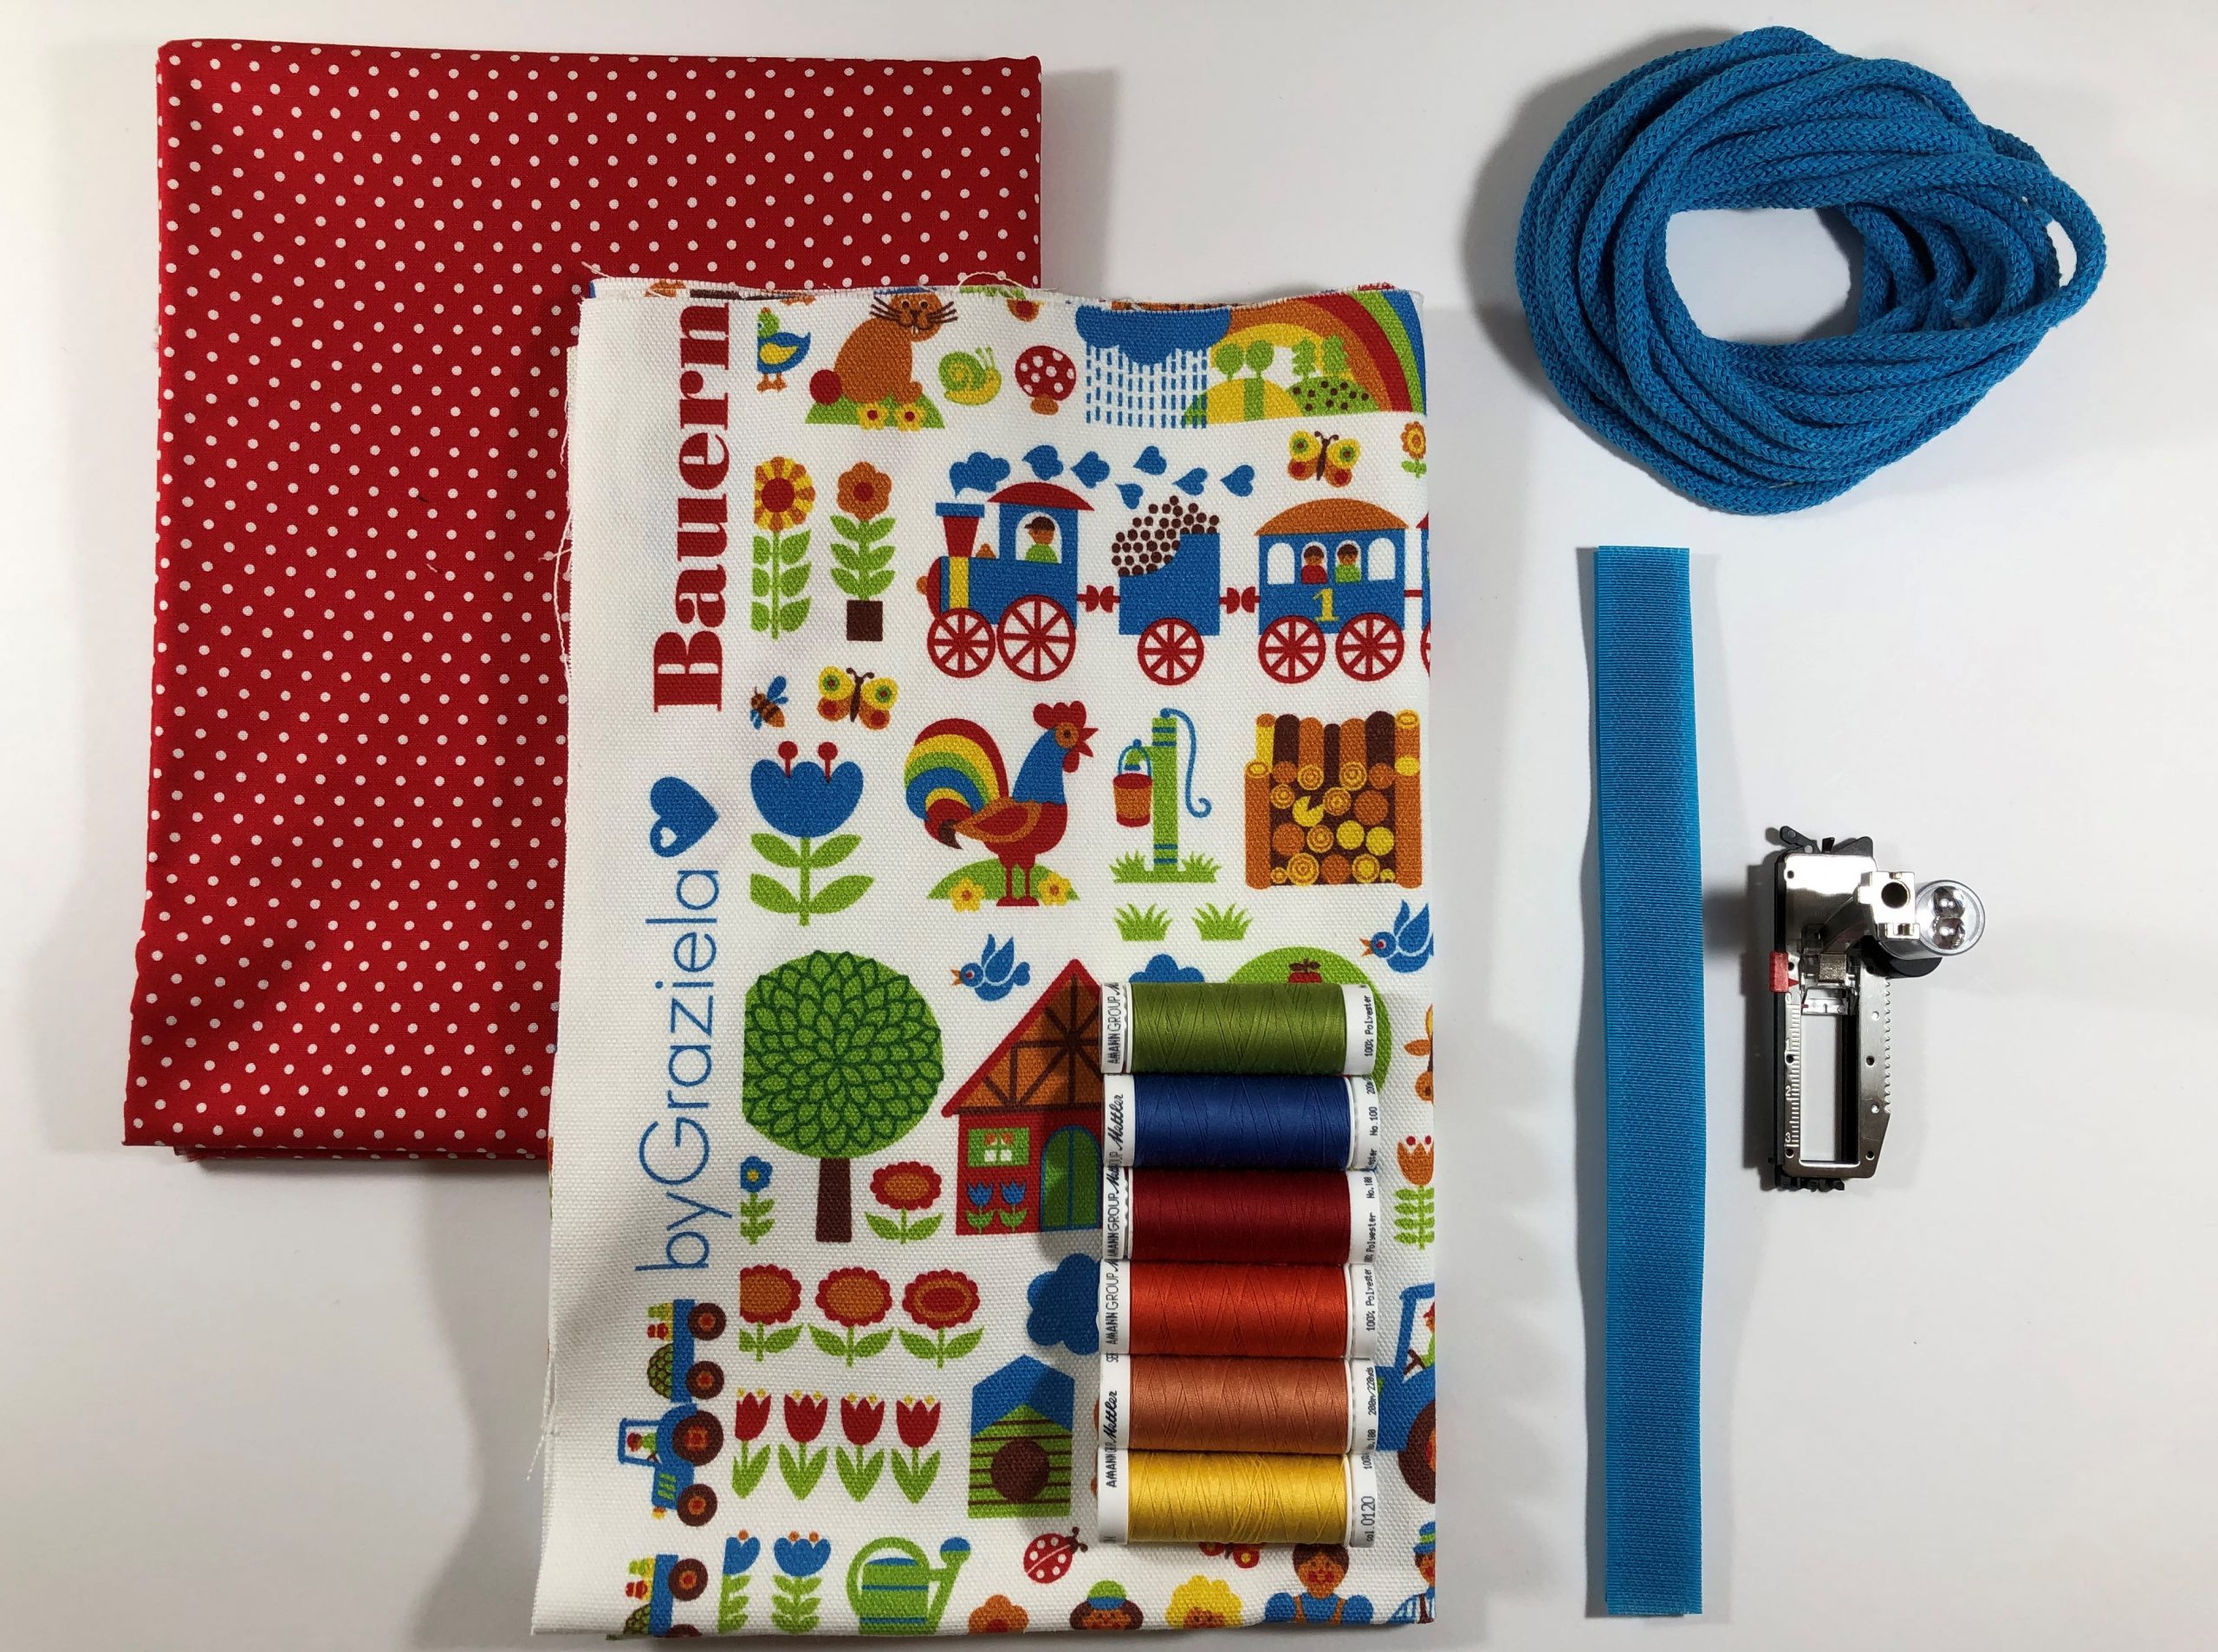
Materials for the backpack
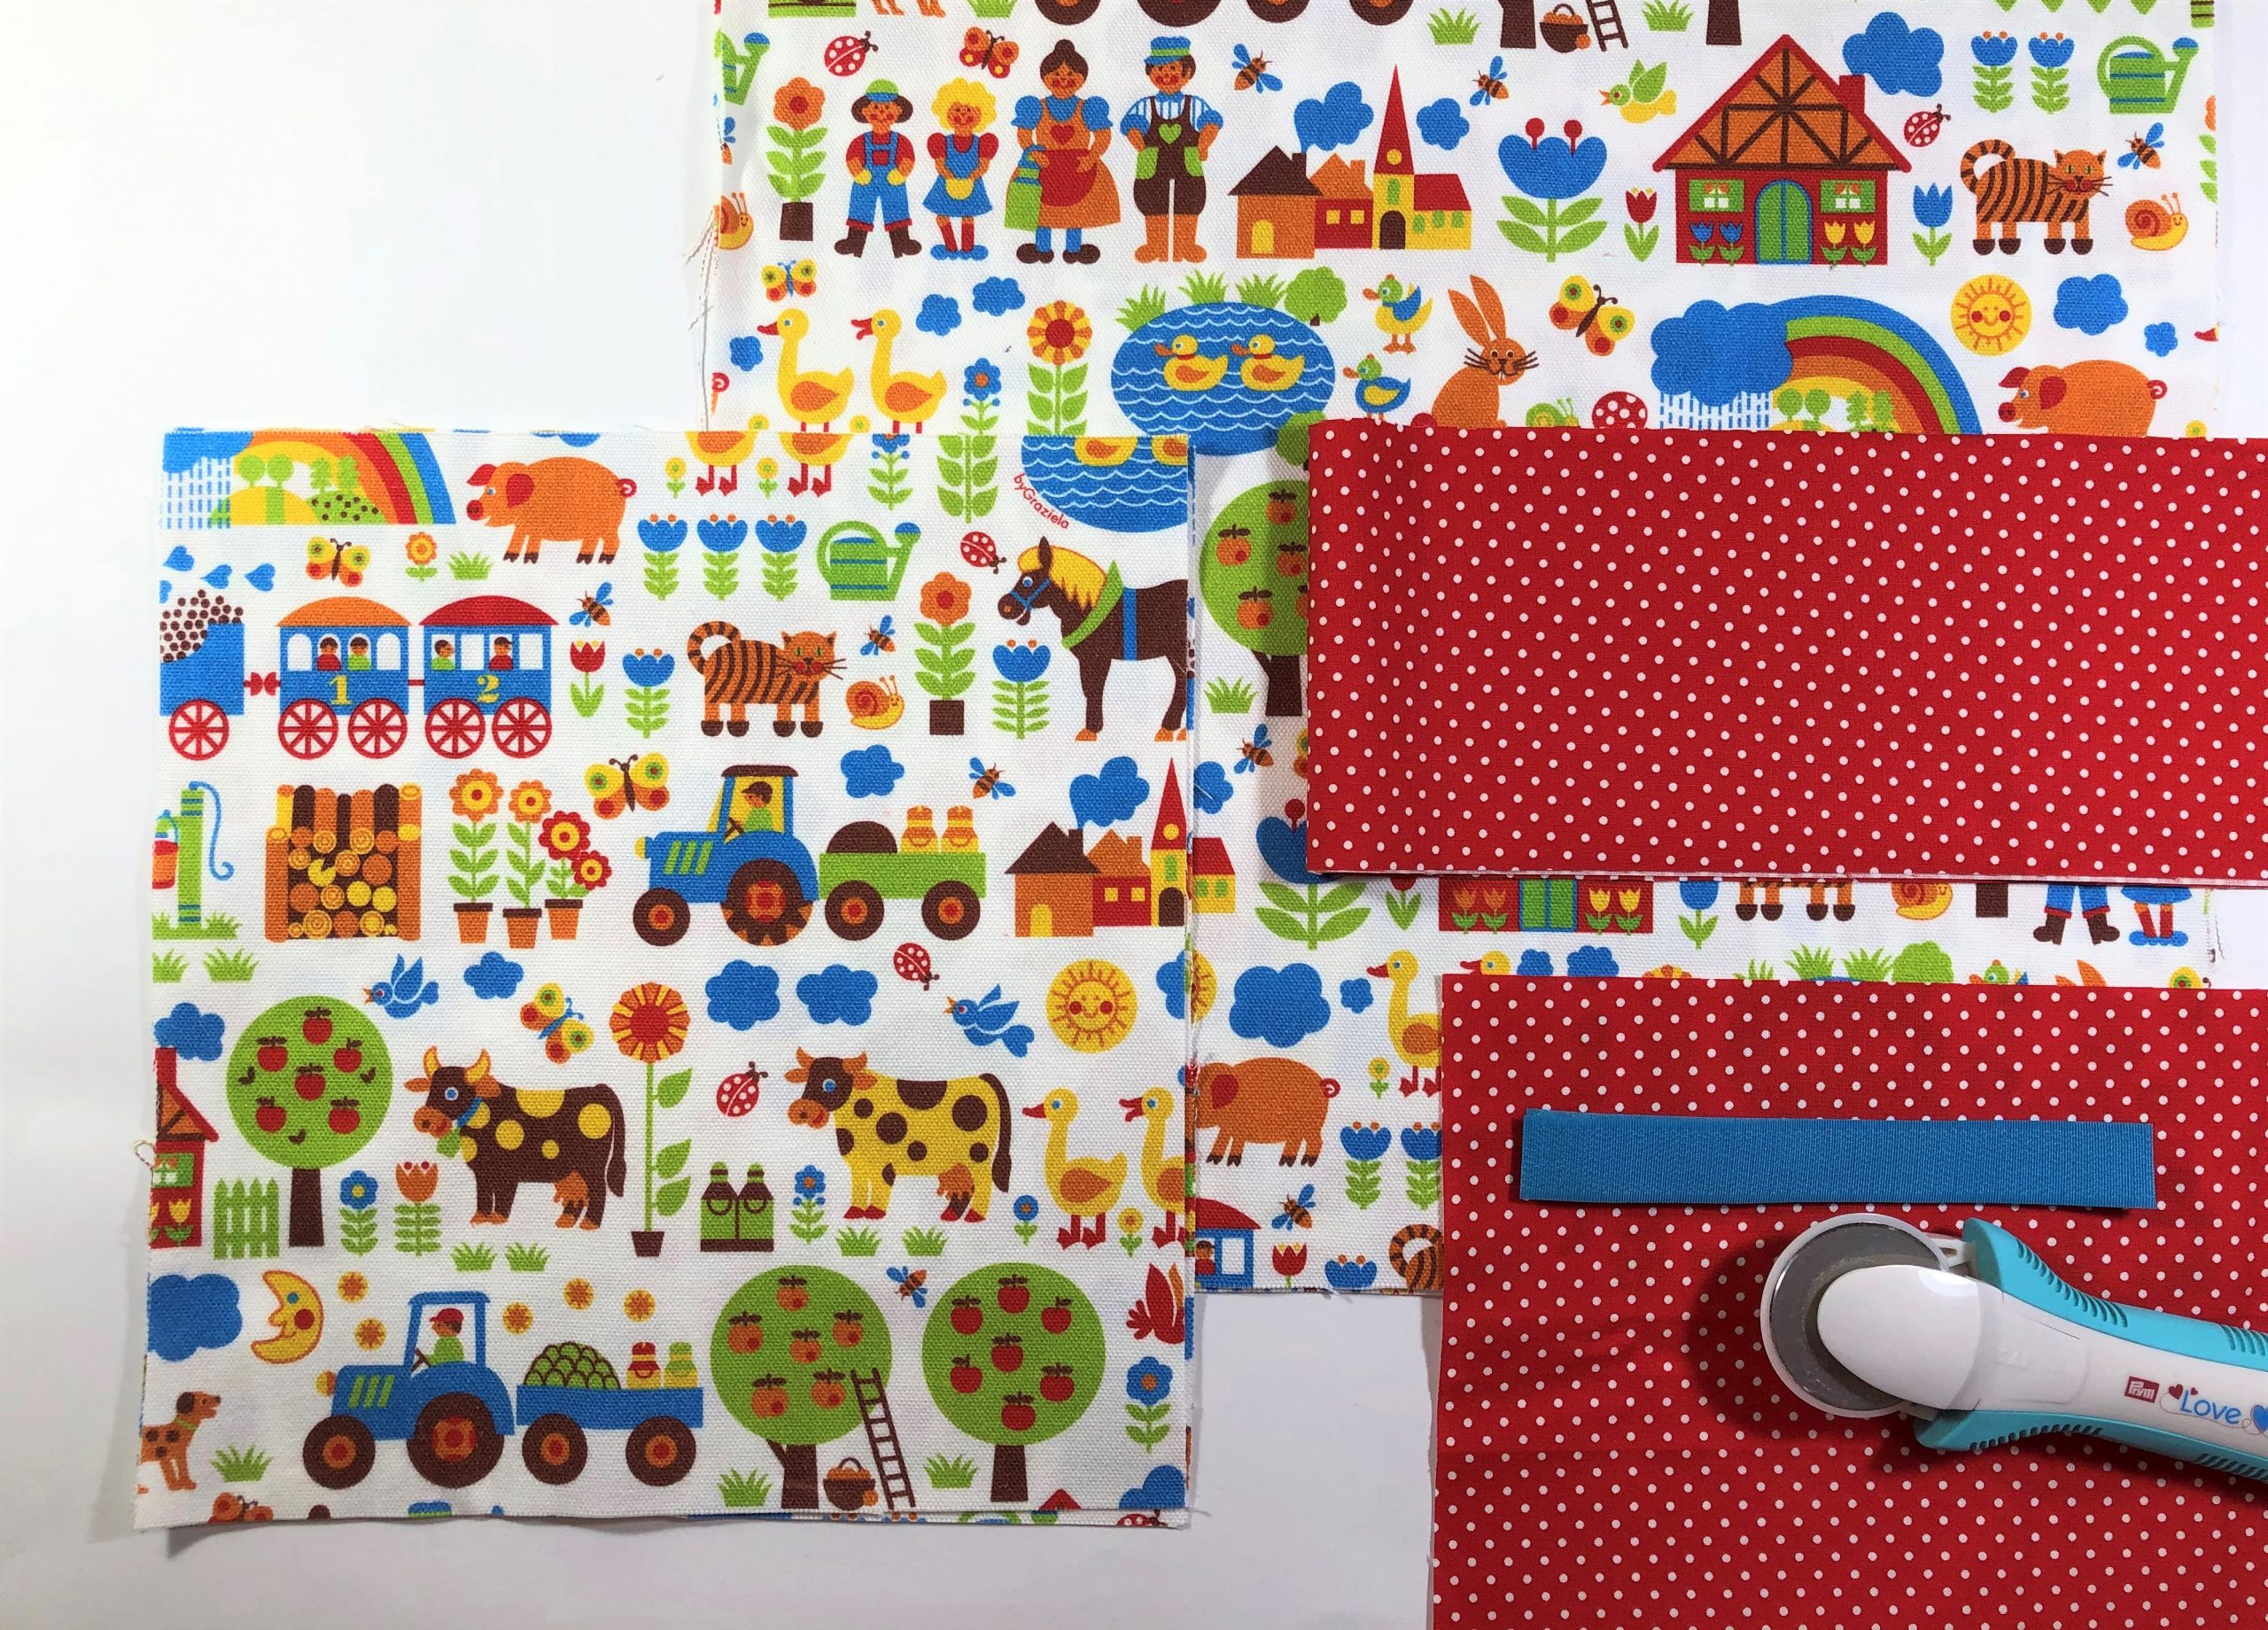
- 0.5 m fabric: “Farmyard” canvas from byGraziela
- 0.5 m coordinating red polka dot cotton fabric from byGraziela
- Sewing thread in matching colors e.g. Seralon from Amann Mettler
- 15 cm Velcro tape (2 cm wide), turquoise, 1 m 8 mm cord, aqua and if required, matching cord ends from snaply.de
- Trick marker from prym
- HT2 textile glue from Gütermann
- Small piece of Vilene S320 from Freudenberg (2 x 6 cm)
- Wool needle
- Wooden sticks for turning the straps
- Pins, fabric scissors, rotary cutter + cutting mat, quilting ruler
- Buttonhole foot with slide 3A
- Blindstitch foot 5
- And a sewing machine

Preparation
Cut the following pieces for the backpack:
- Front and back: 2x Farmyard canvas 38 x 38 cm
- Flap: 2x Farmyard canvas 26 x 26 cm
- Front pocket: 1x cotton polka dots 24 x 24 cm
- Straps: 2x cotton polka dots 9 x 75 cm
- 15 cm Velcro tape
- 1 m cord
Sewing the backpack
Sewing the front pocket onto the front
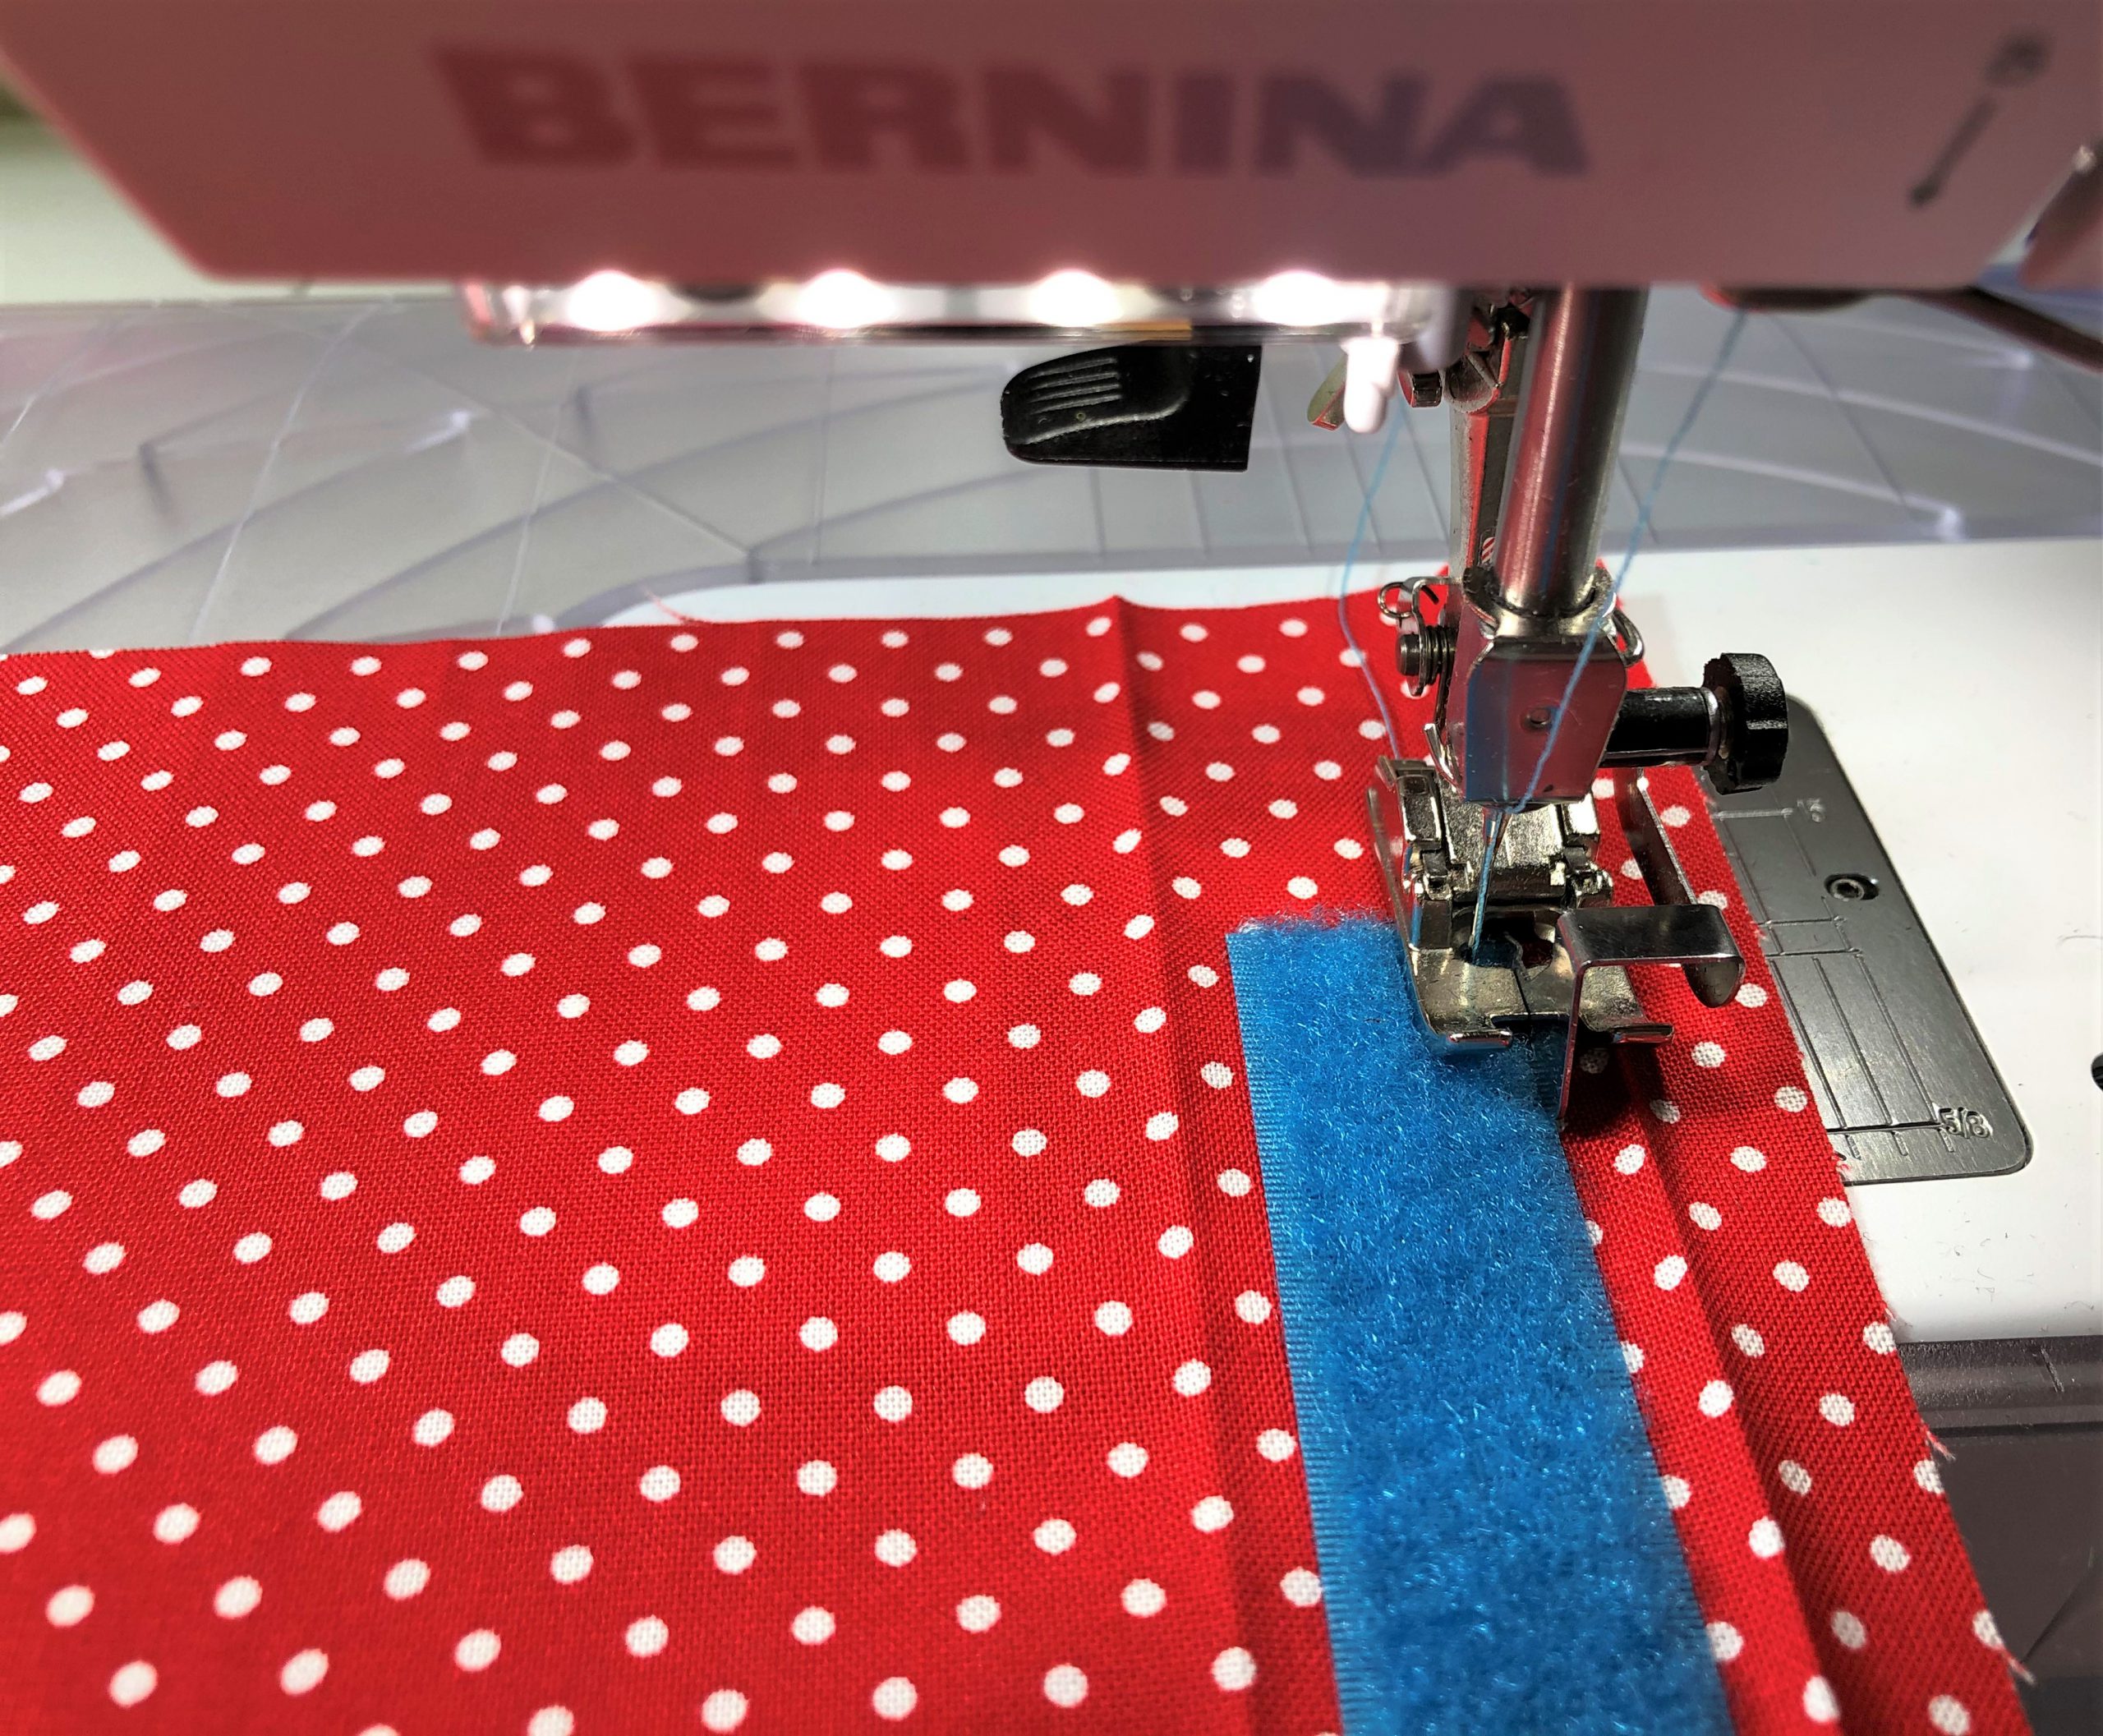
Iron the hem of the front pocket over, first by 1 cm and then by 3 cm. Unfold it again and glue the fluffy side of the Velcro onto the center of the 3 cm hem section. Apply the glue only at the middle of the tape and allow it to dry out thoroughly so that the textile glue does not stick to the needle of the machine when sewing.

Now sew the Velcro onto the ironed hem. I am using blindstitch foot #5 for this. Adjust the needle position to the left to give you a guide edge and edgestitch around it.
Now fold the hem along the ironed edges again and edgestitch it.
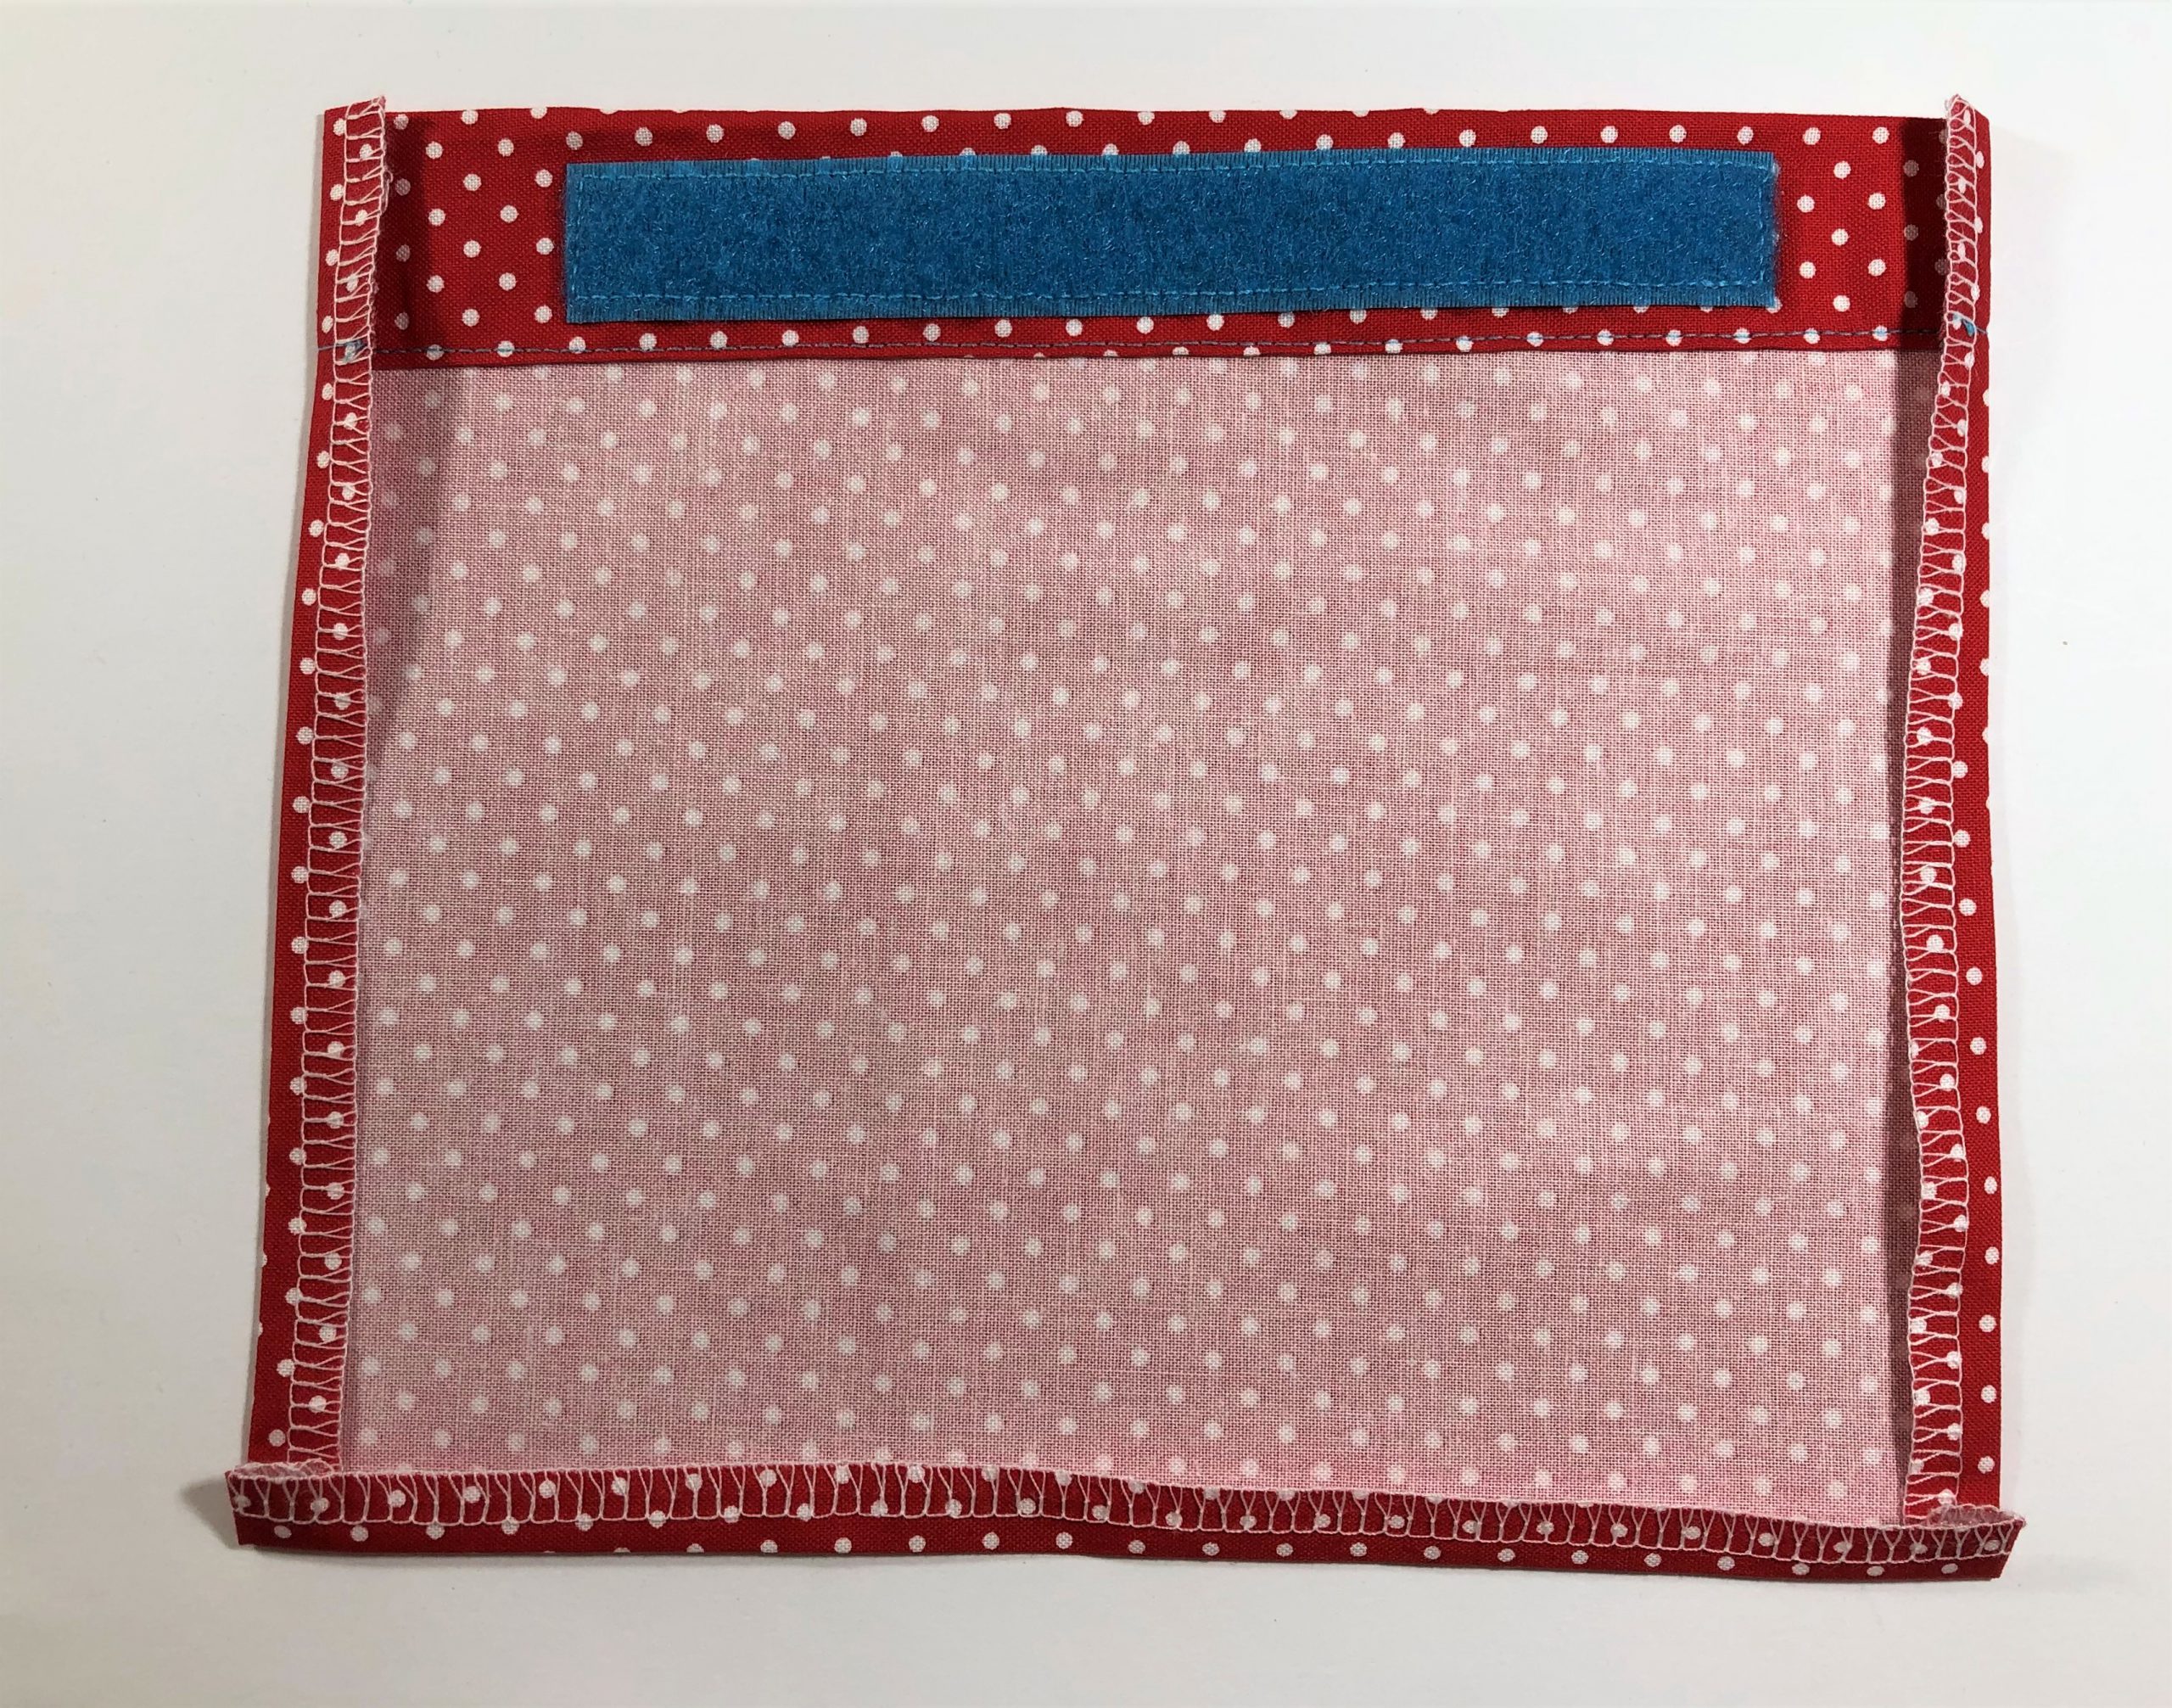
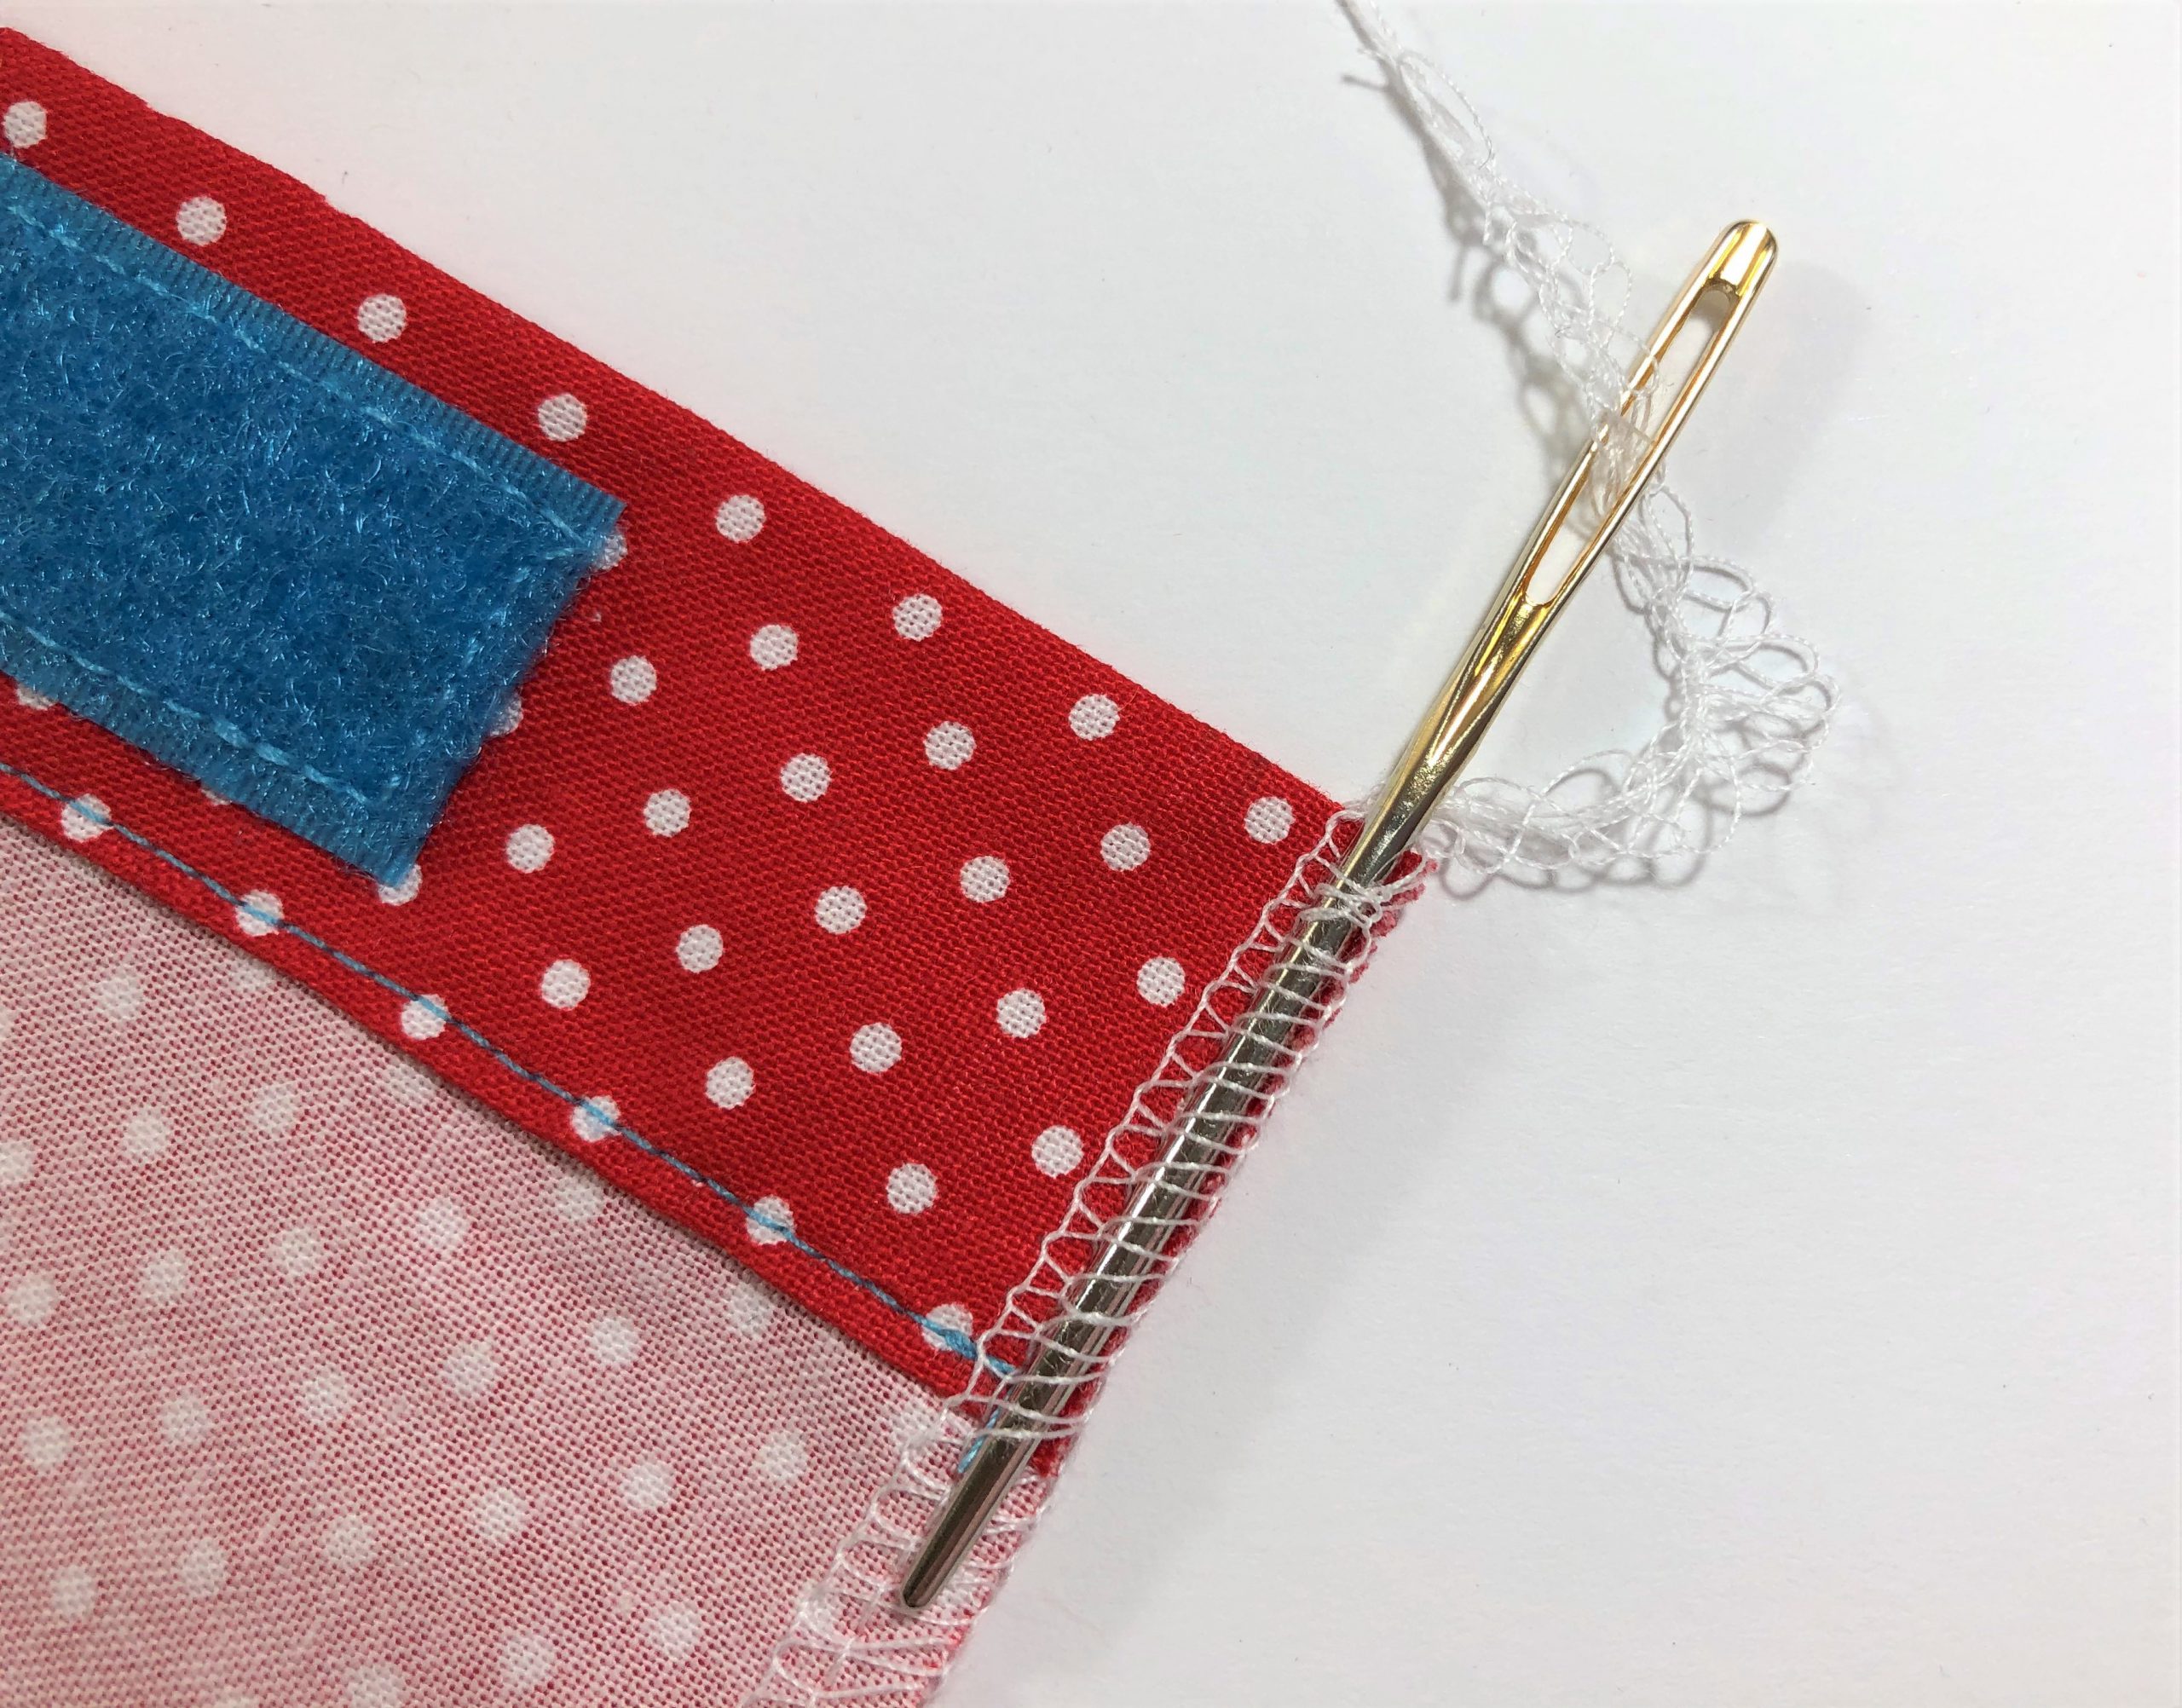
Overcast the open edges of the front pocket on an overlocker or with a zigzag stitch on your sewing machine. Then iron the edges inwards by 1 cm.
Tip: if you overcast the edges on an overlocker, thread the thread tail back into the seam with a wool needle!
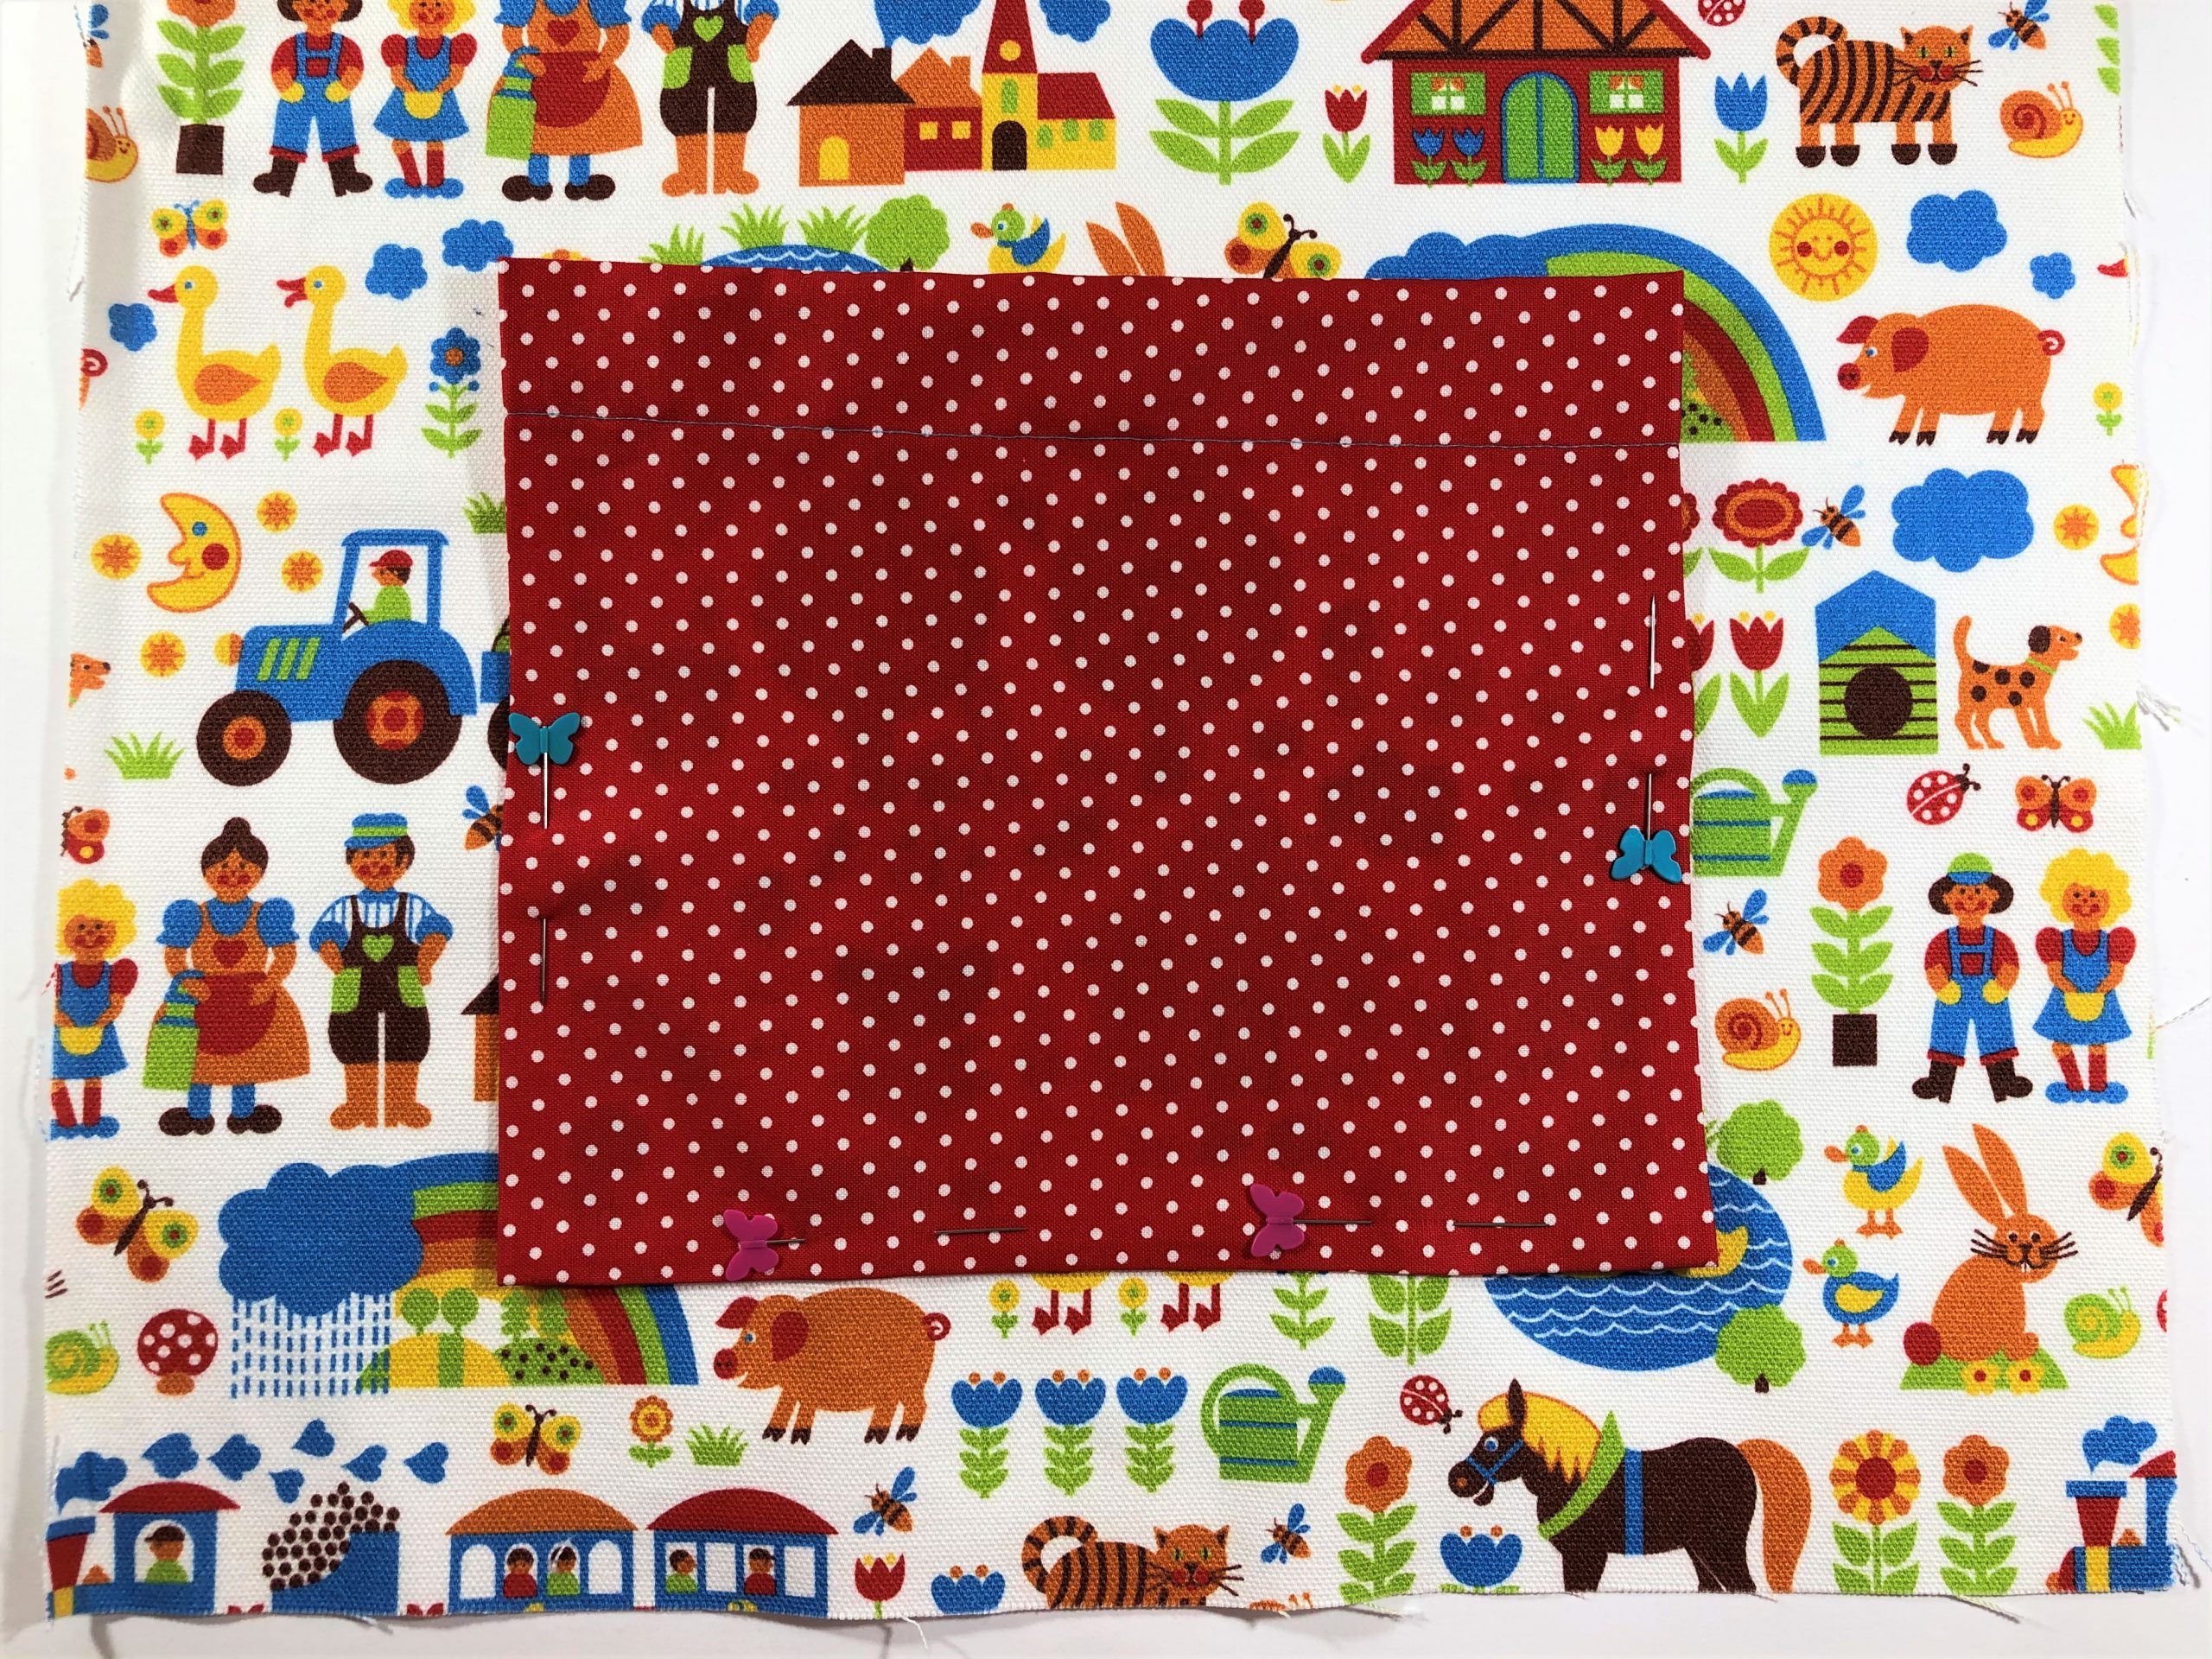
Now we pin the front pocket onto the front of the backpack (line up the pocket 5 cm from the bottom edge, in the center). Only attach pins to the lower part.
Now we sew on the second piece of Velcro: to find the right position on the front of the backpack, the second piece of Velcro is attached to the one that has already been sewn on. Then apply textile glue to the tape, fold the front pocket back onto the Farmyard canvas, allow it to dry out thoroughly and only then carefully peel off the pocket again.
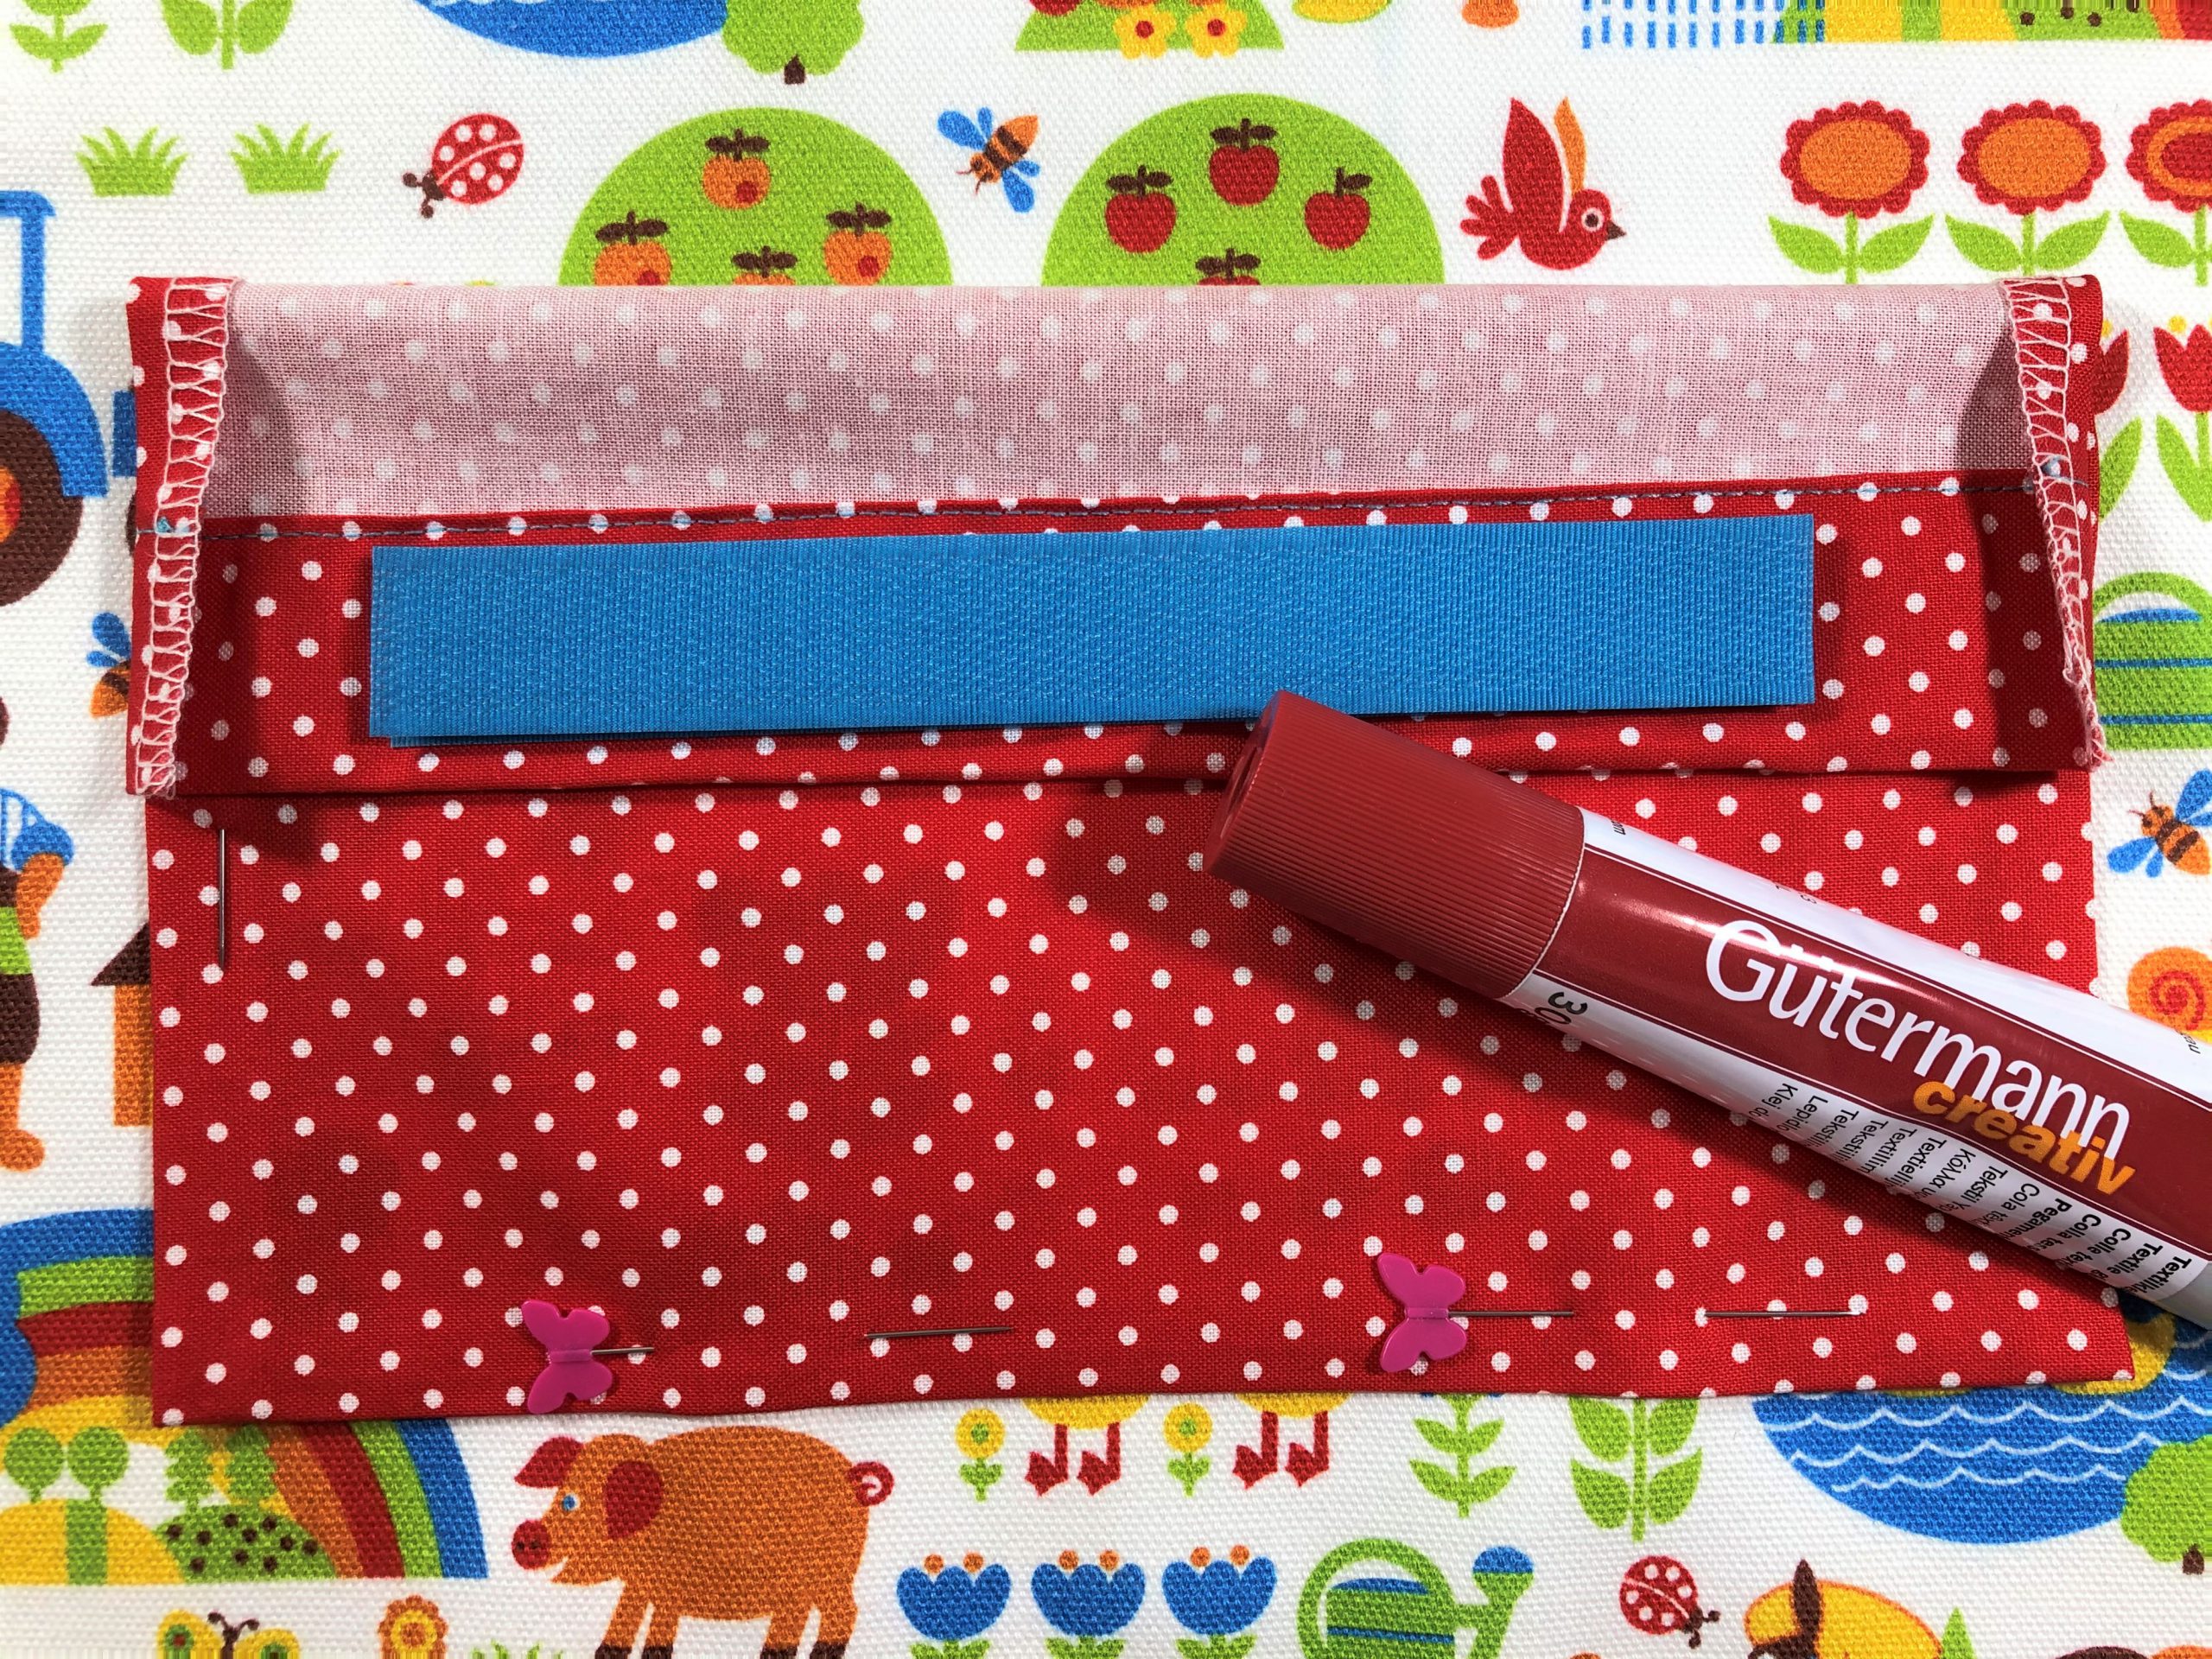
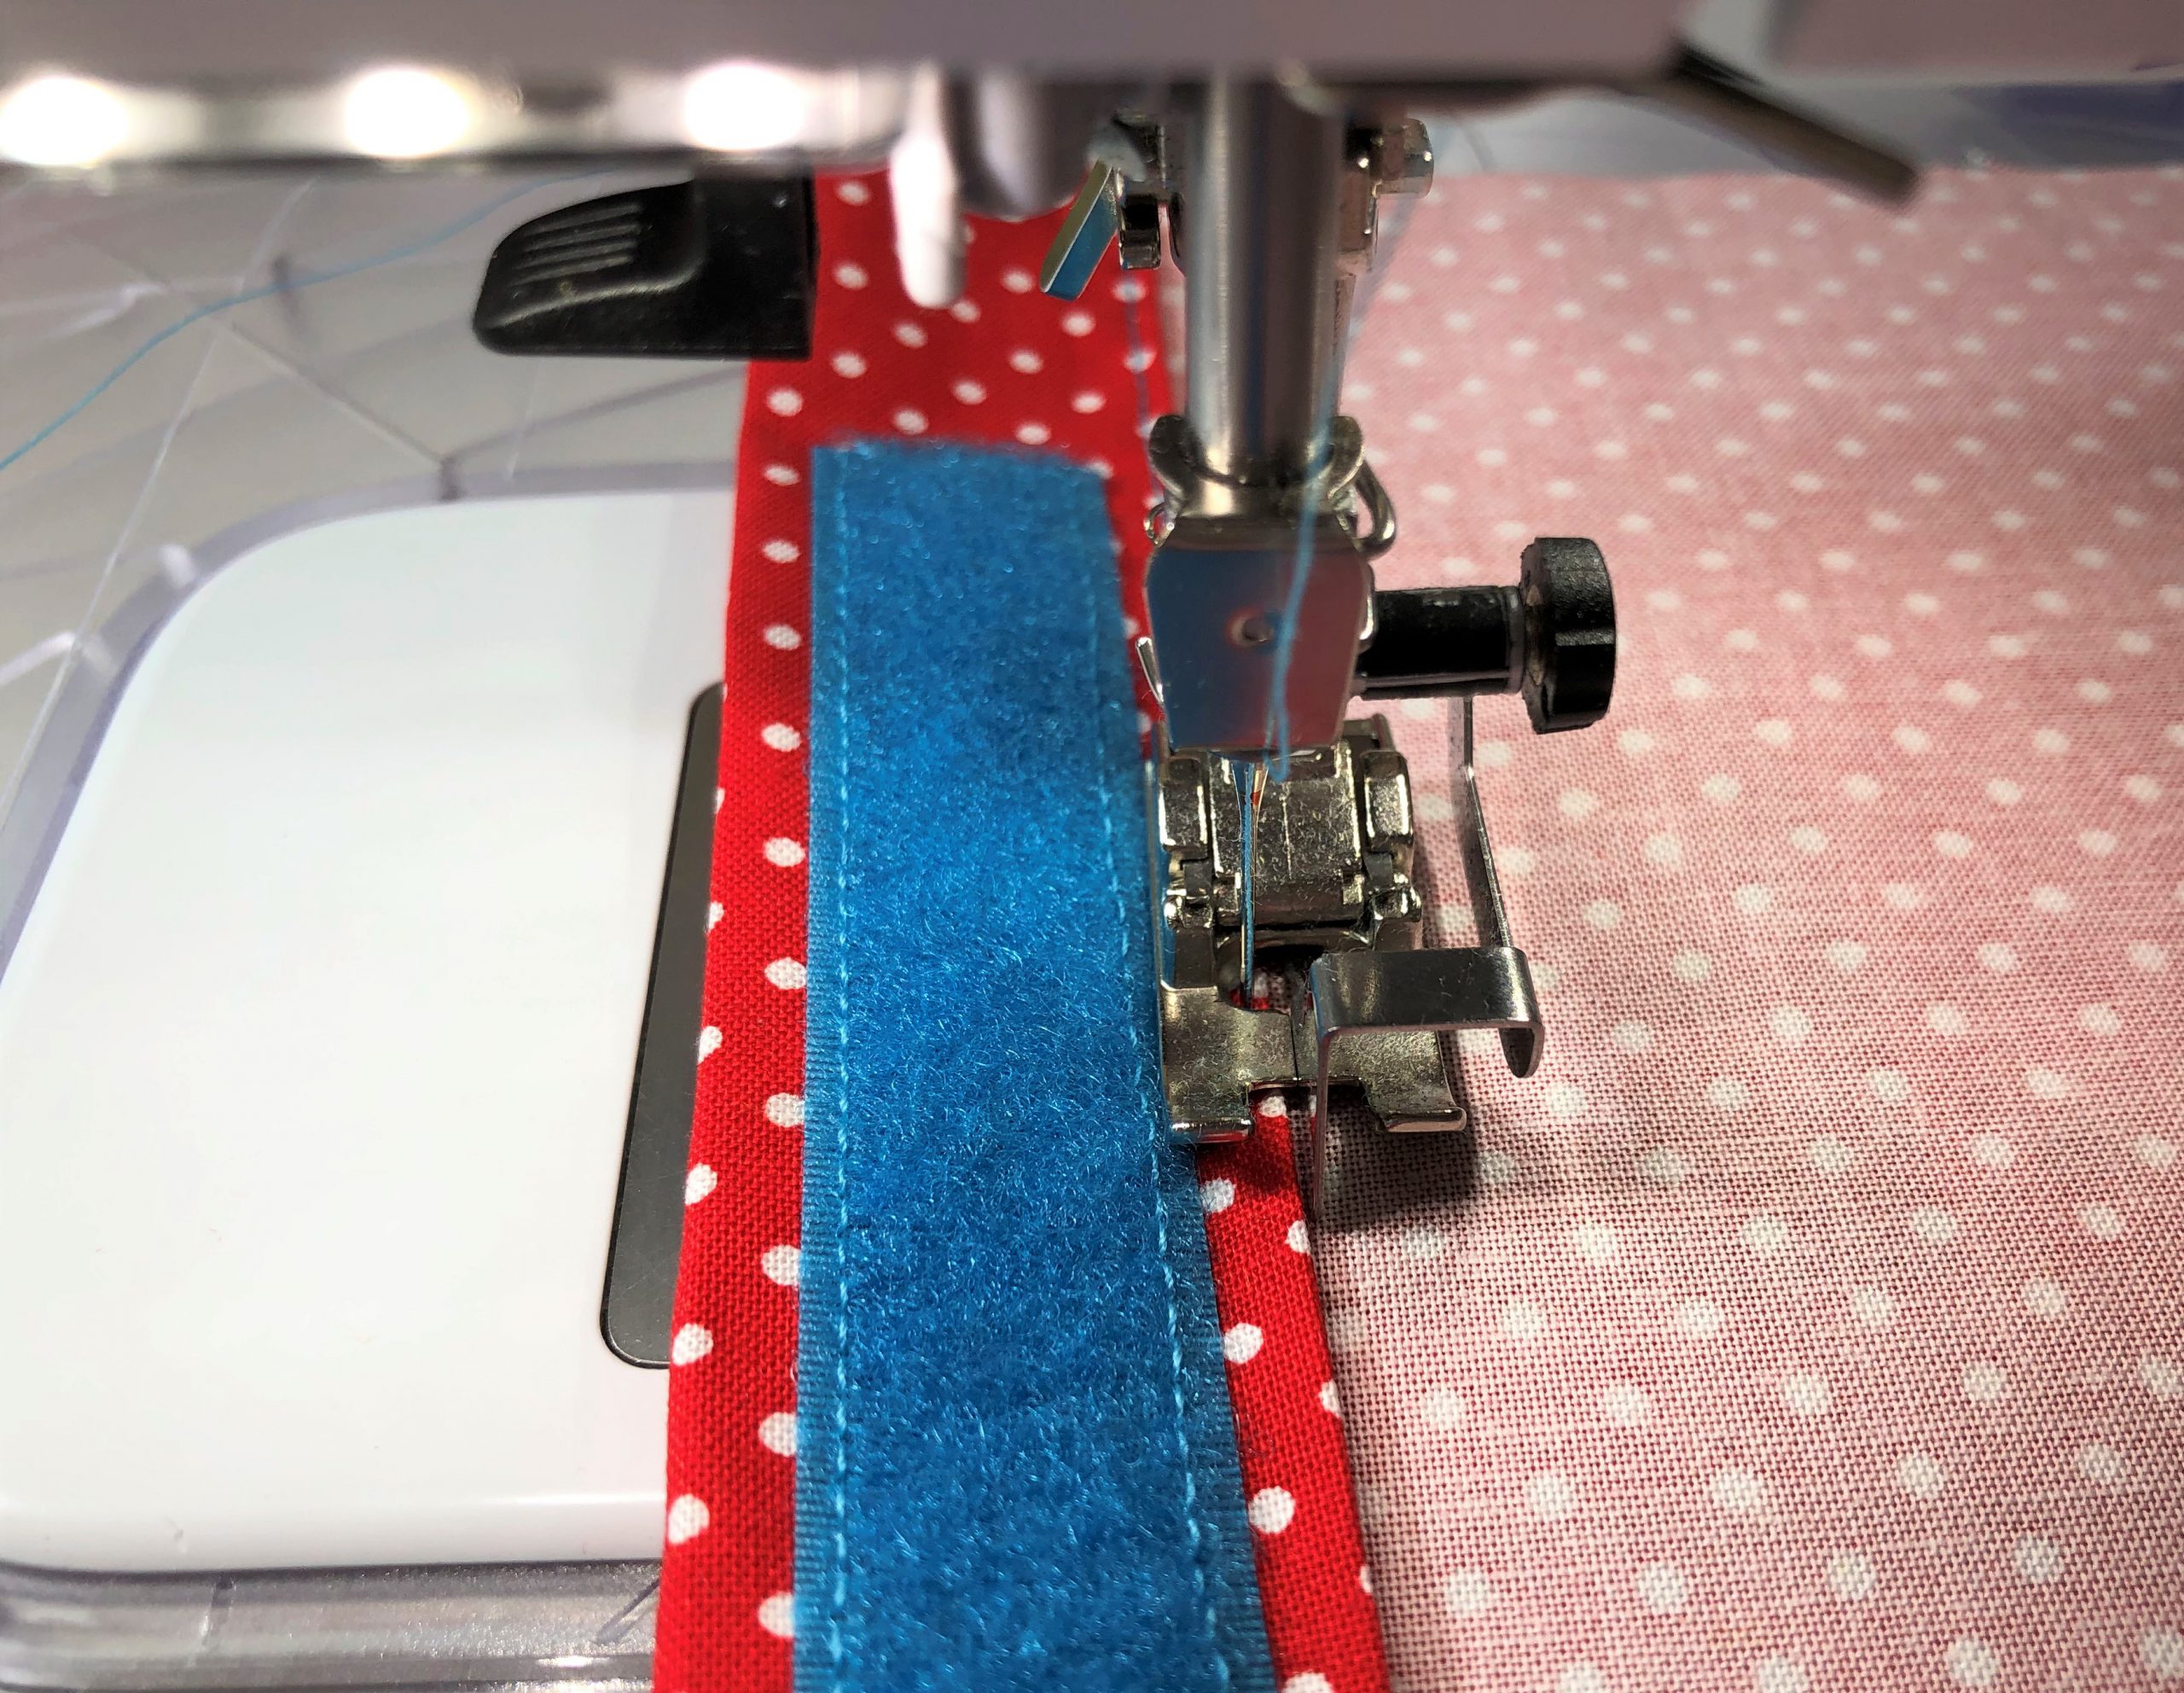
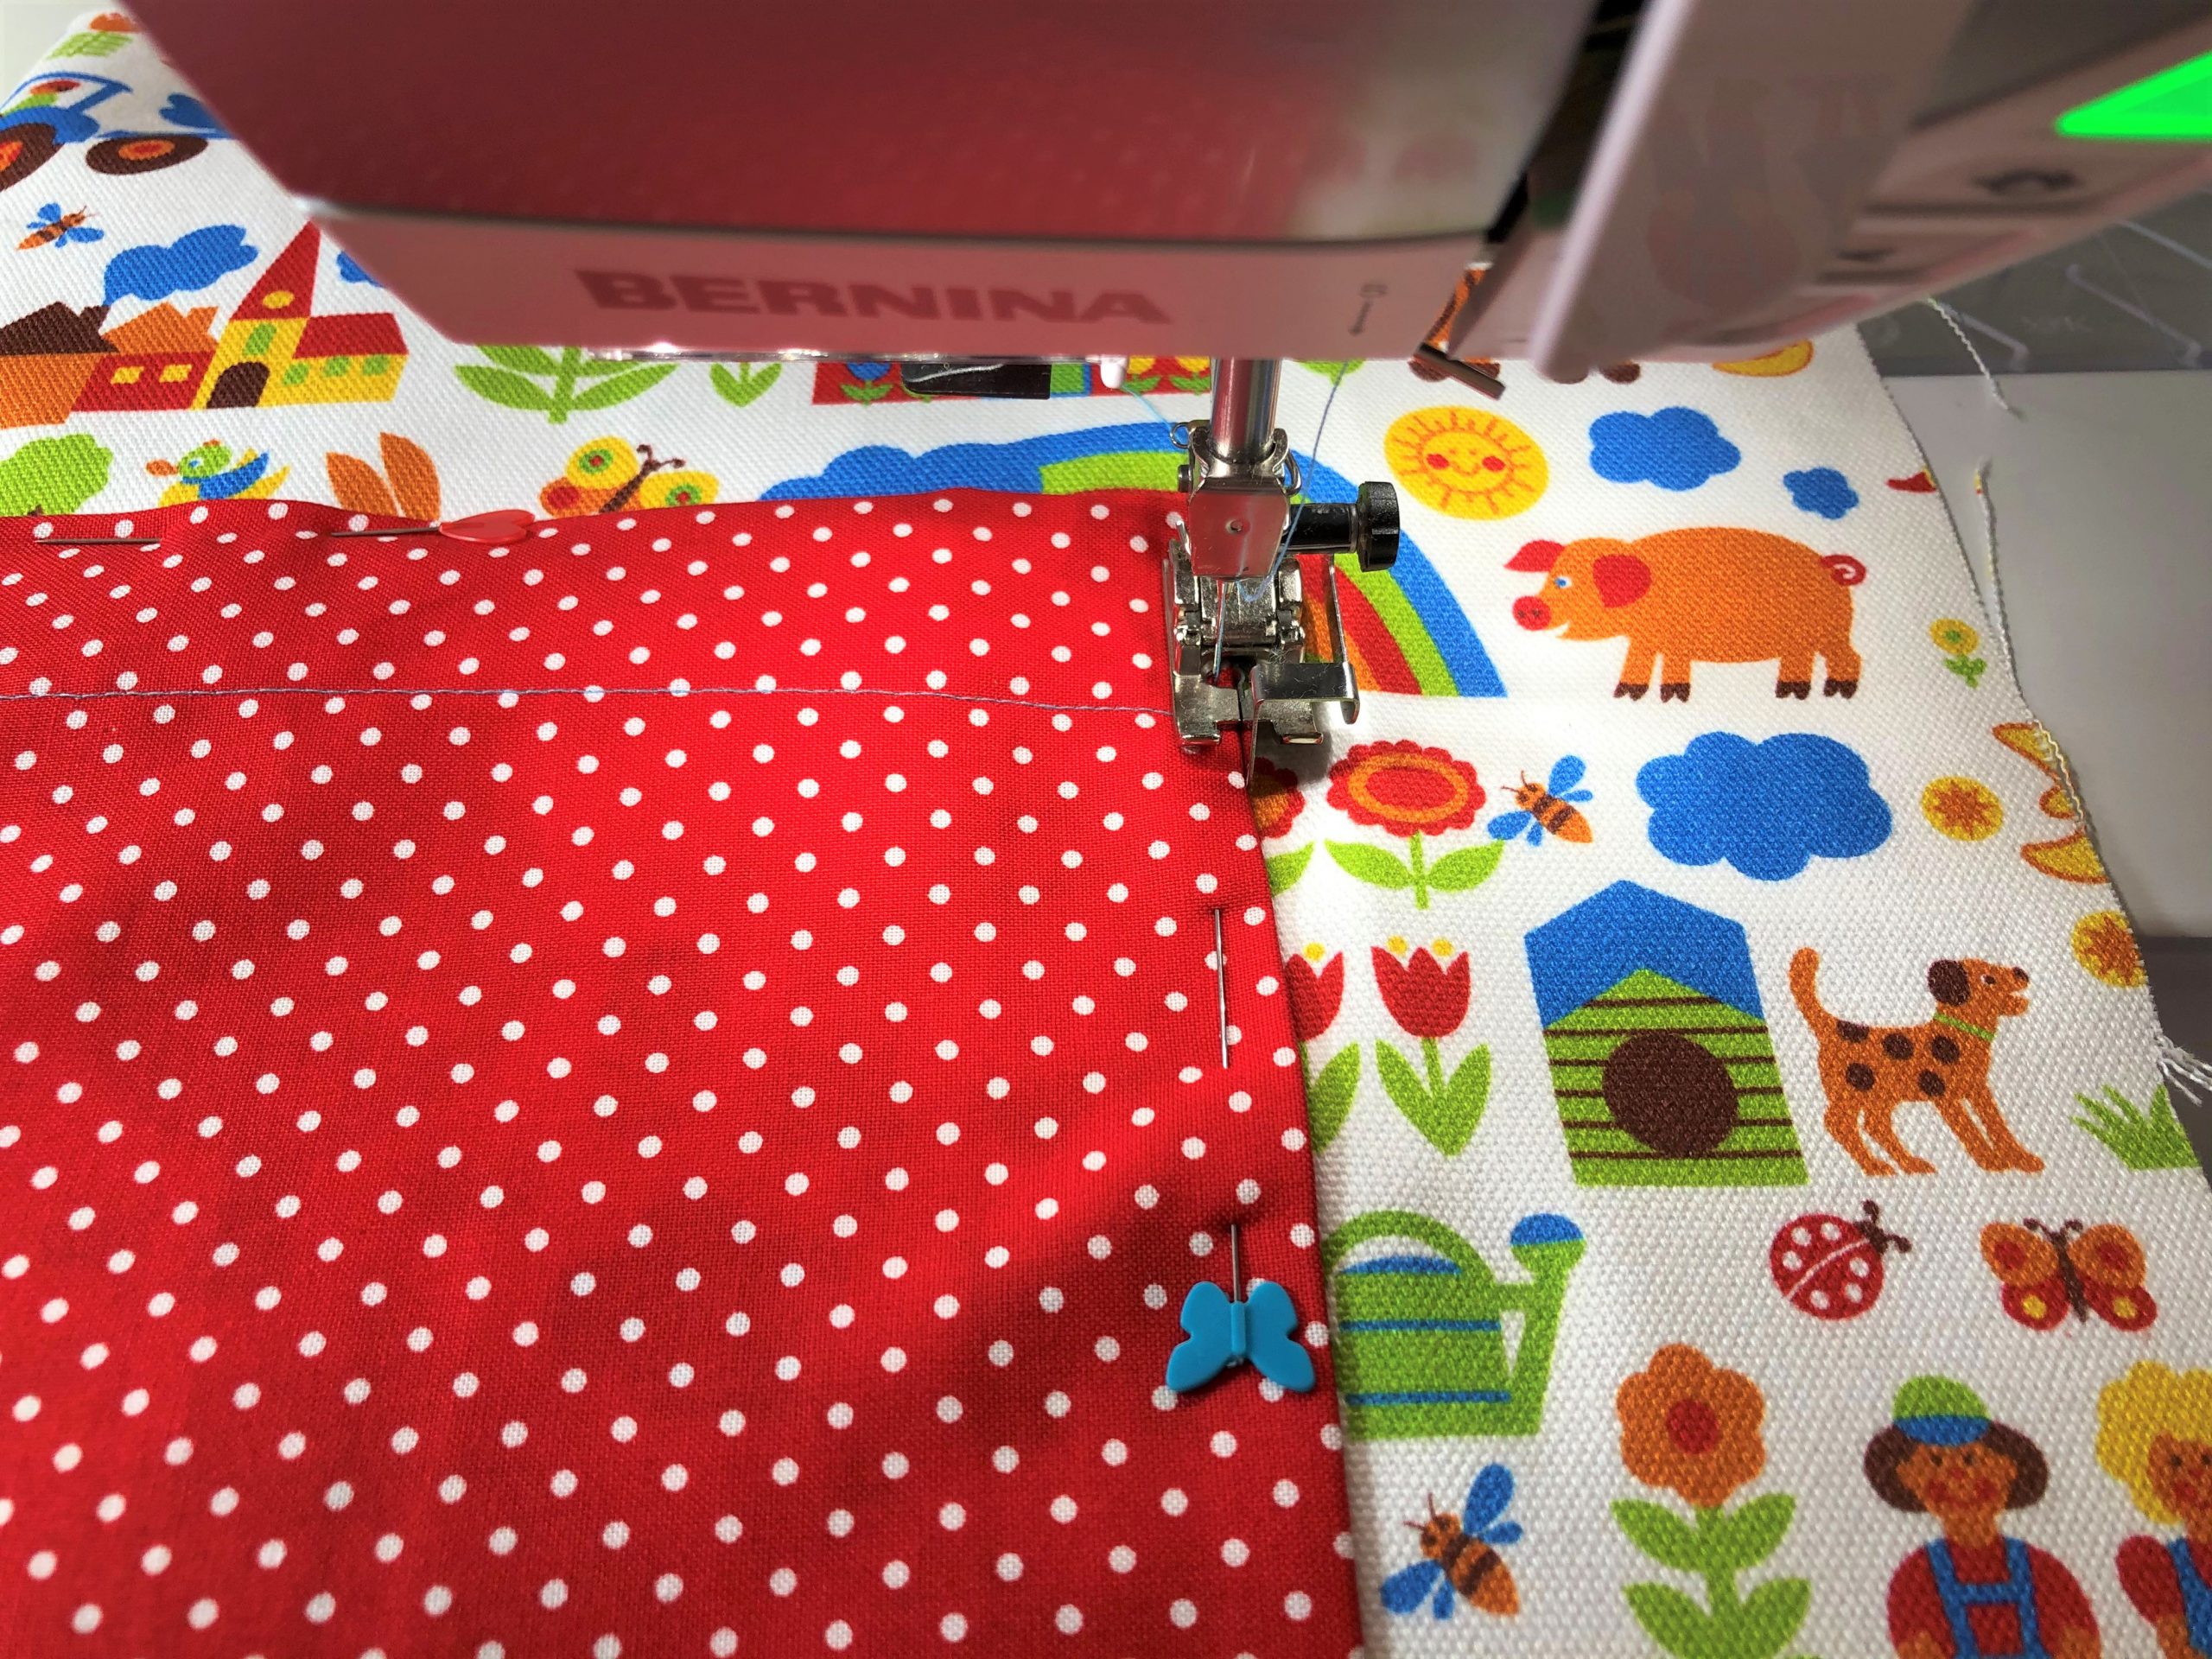
The second side of the Velcro tape is thus attached to the fabric in the correct position and can now be edgestitched using the blindstitch foot.
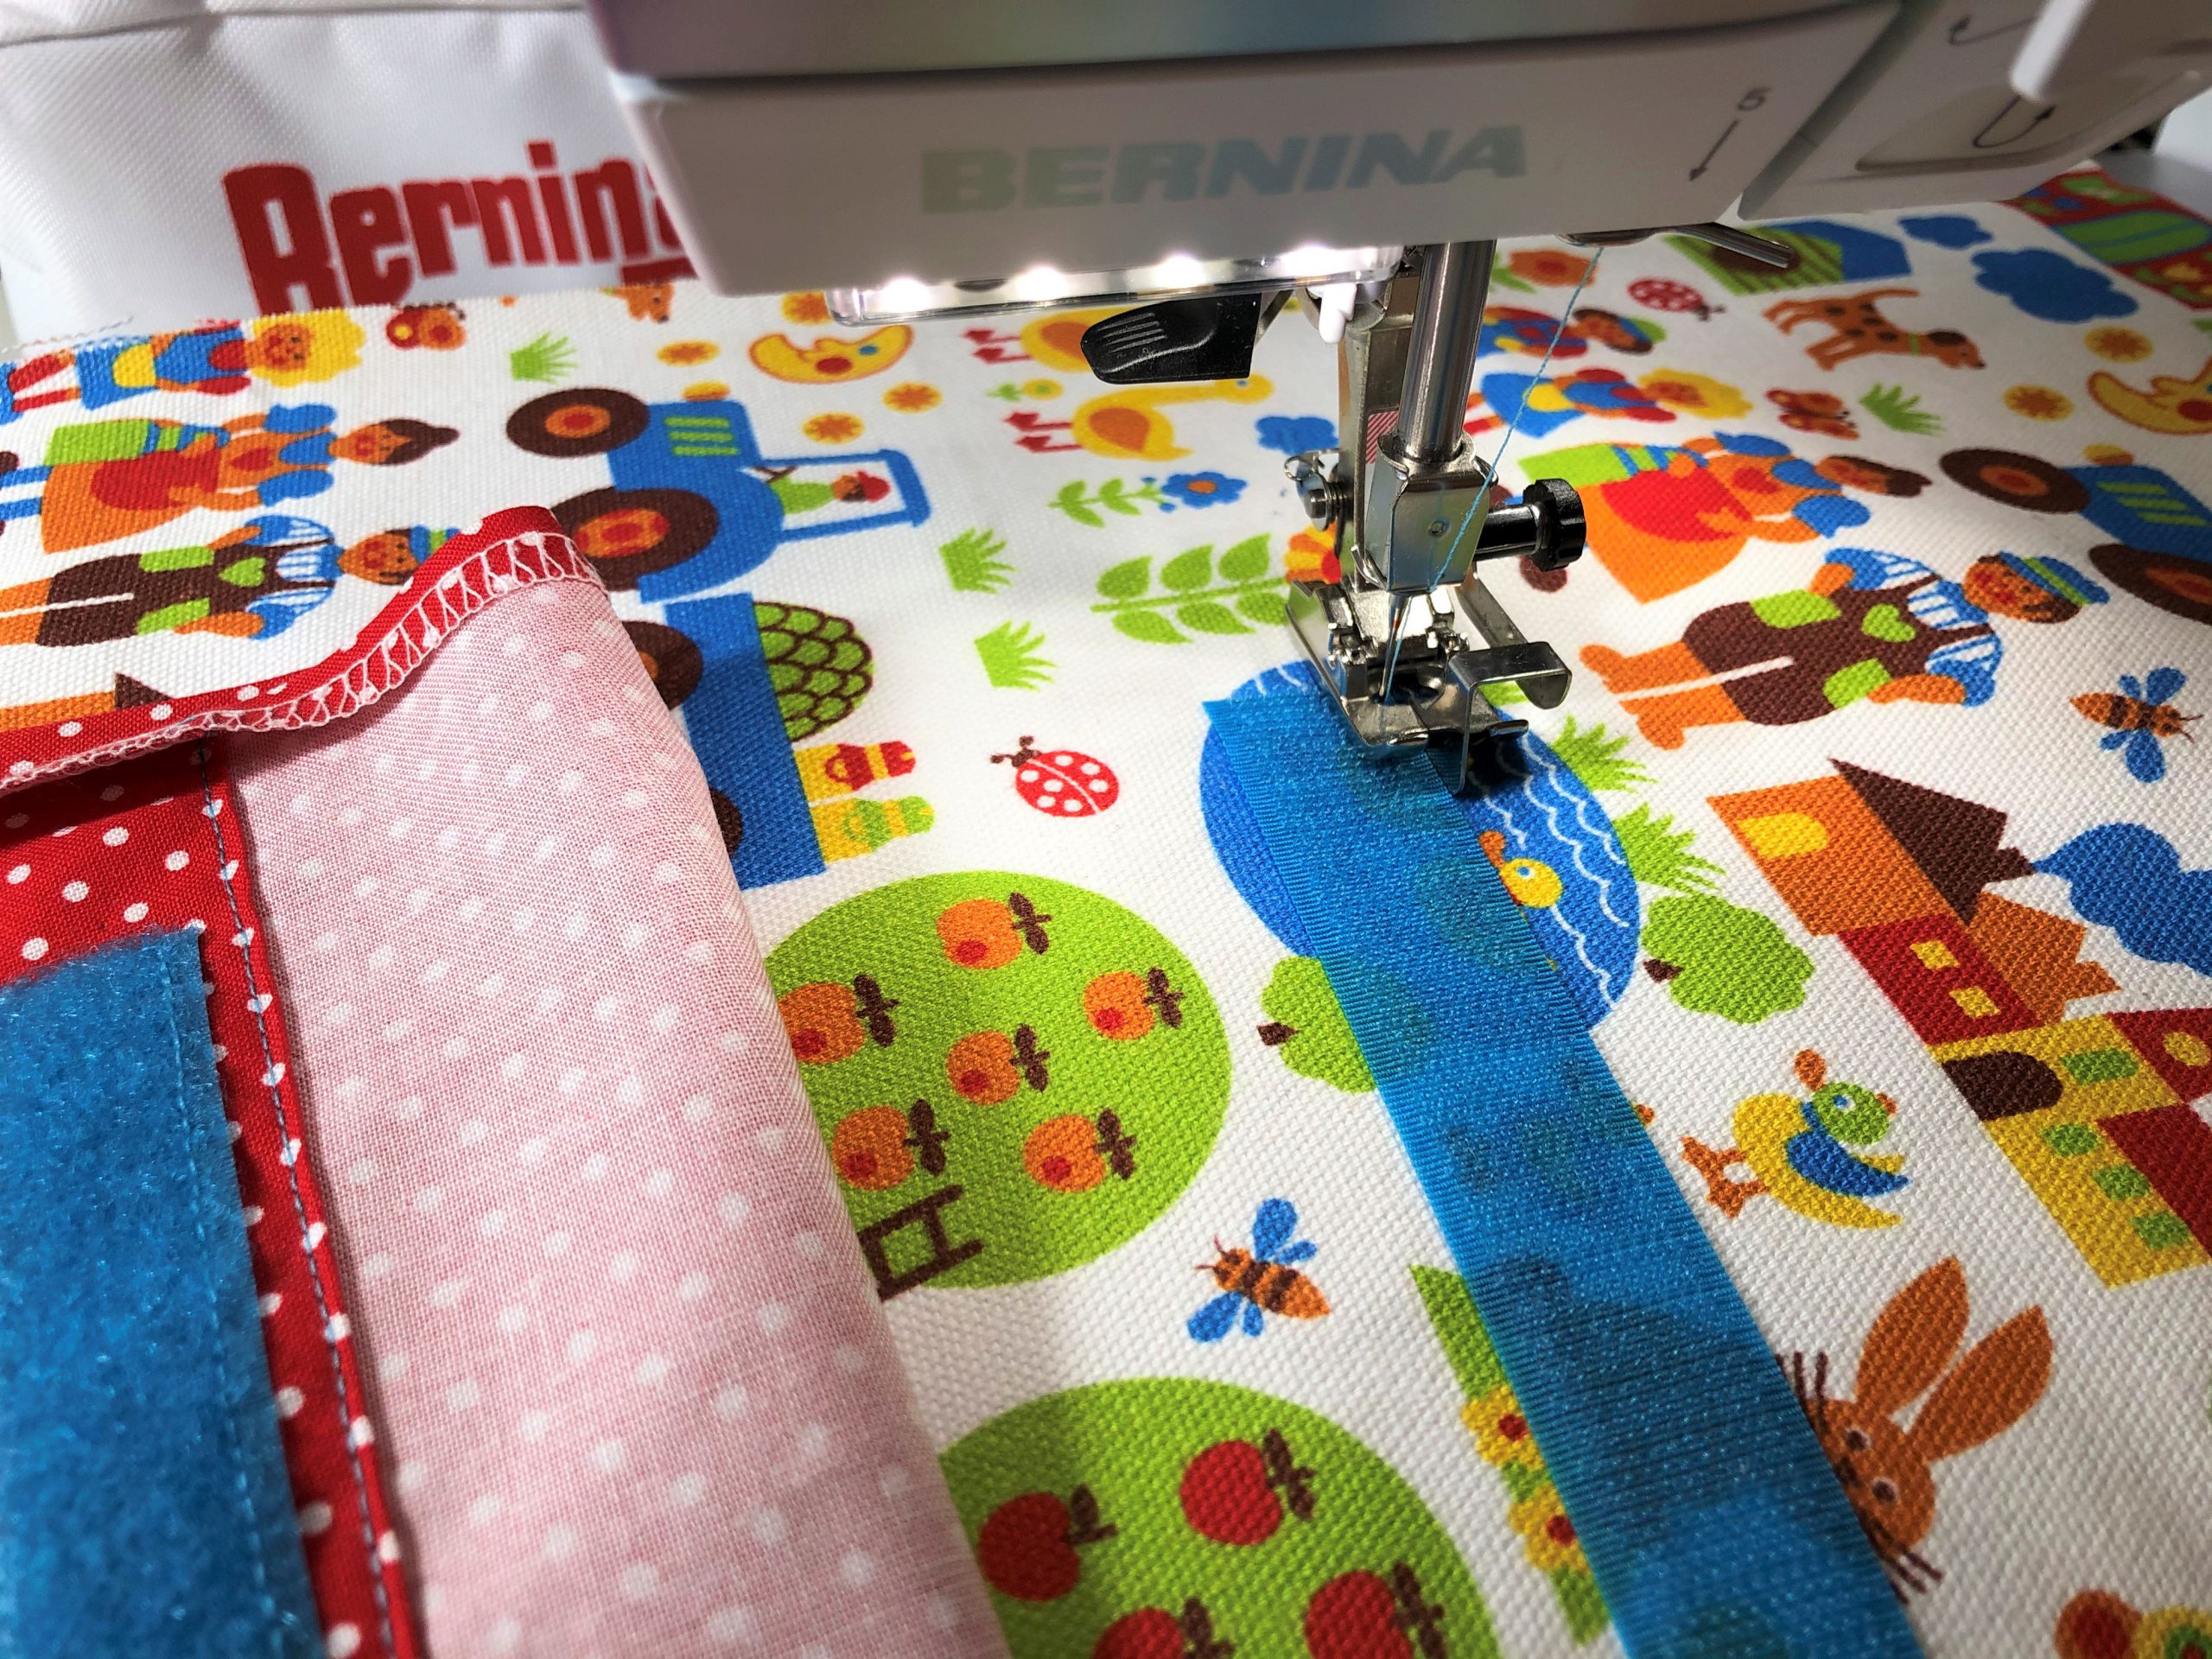
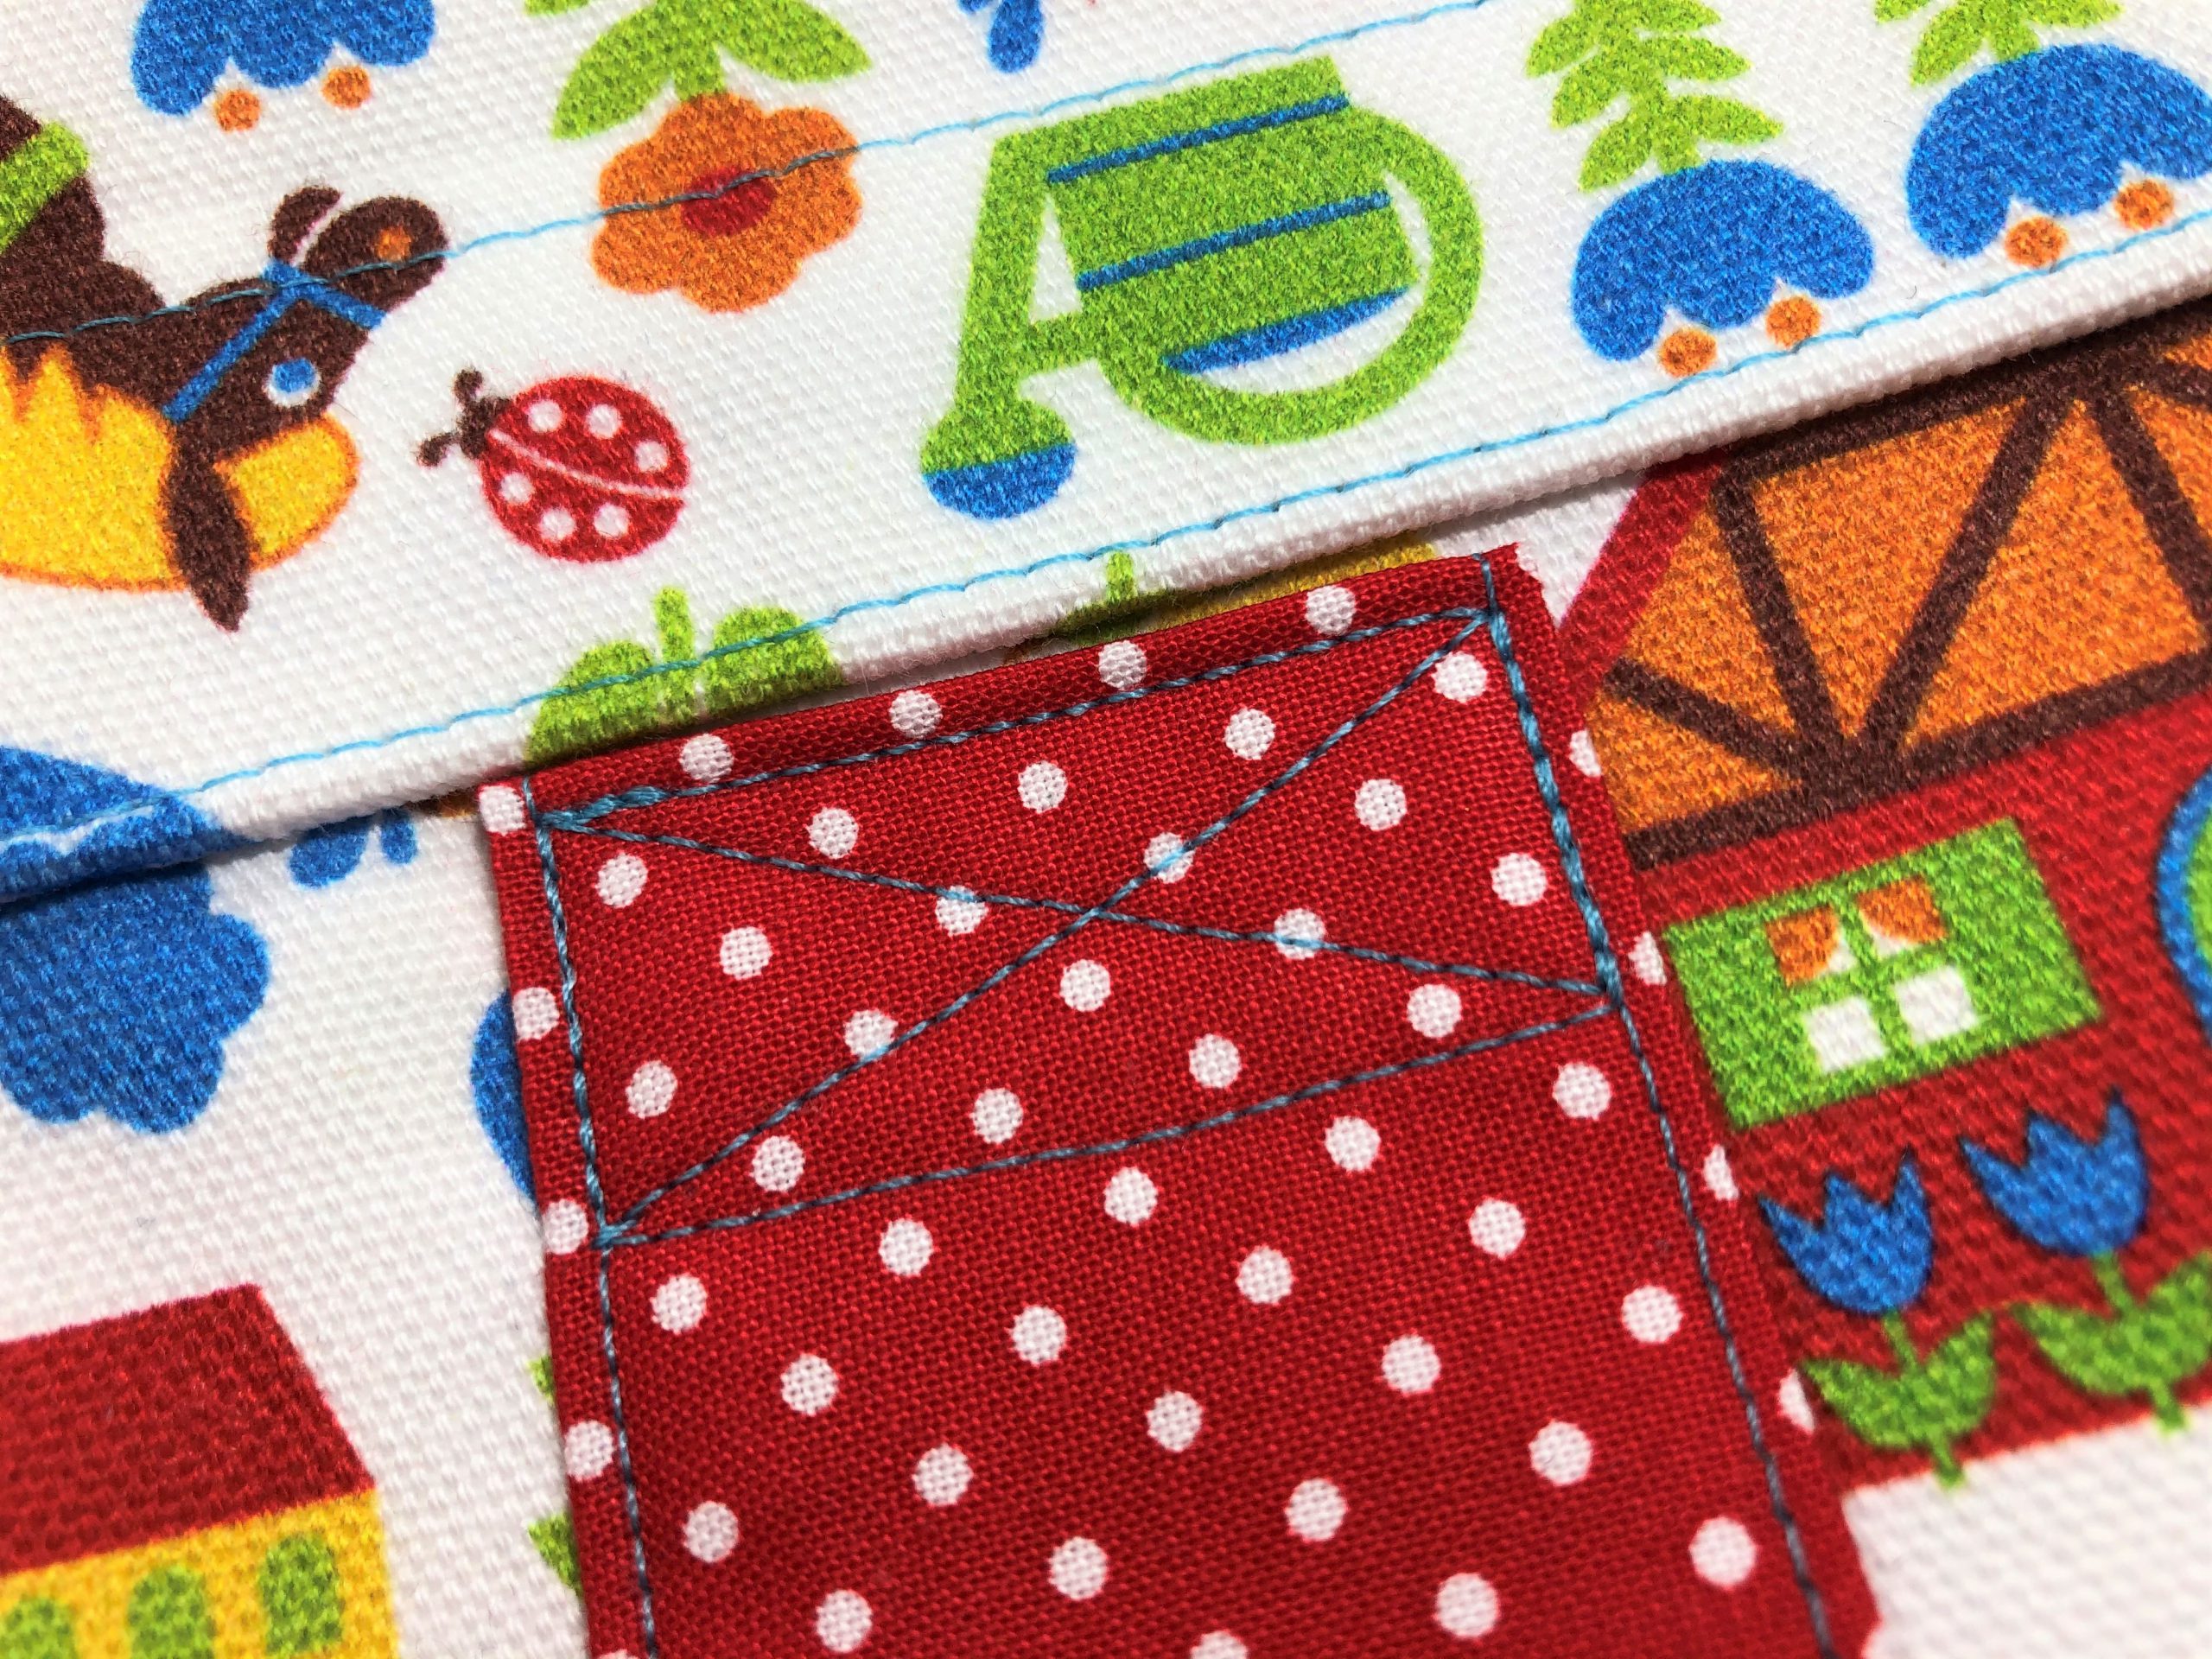
Now pin the pocket on securely and edgestitch around it. Use the 5 blindstitch foot #5 again.
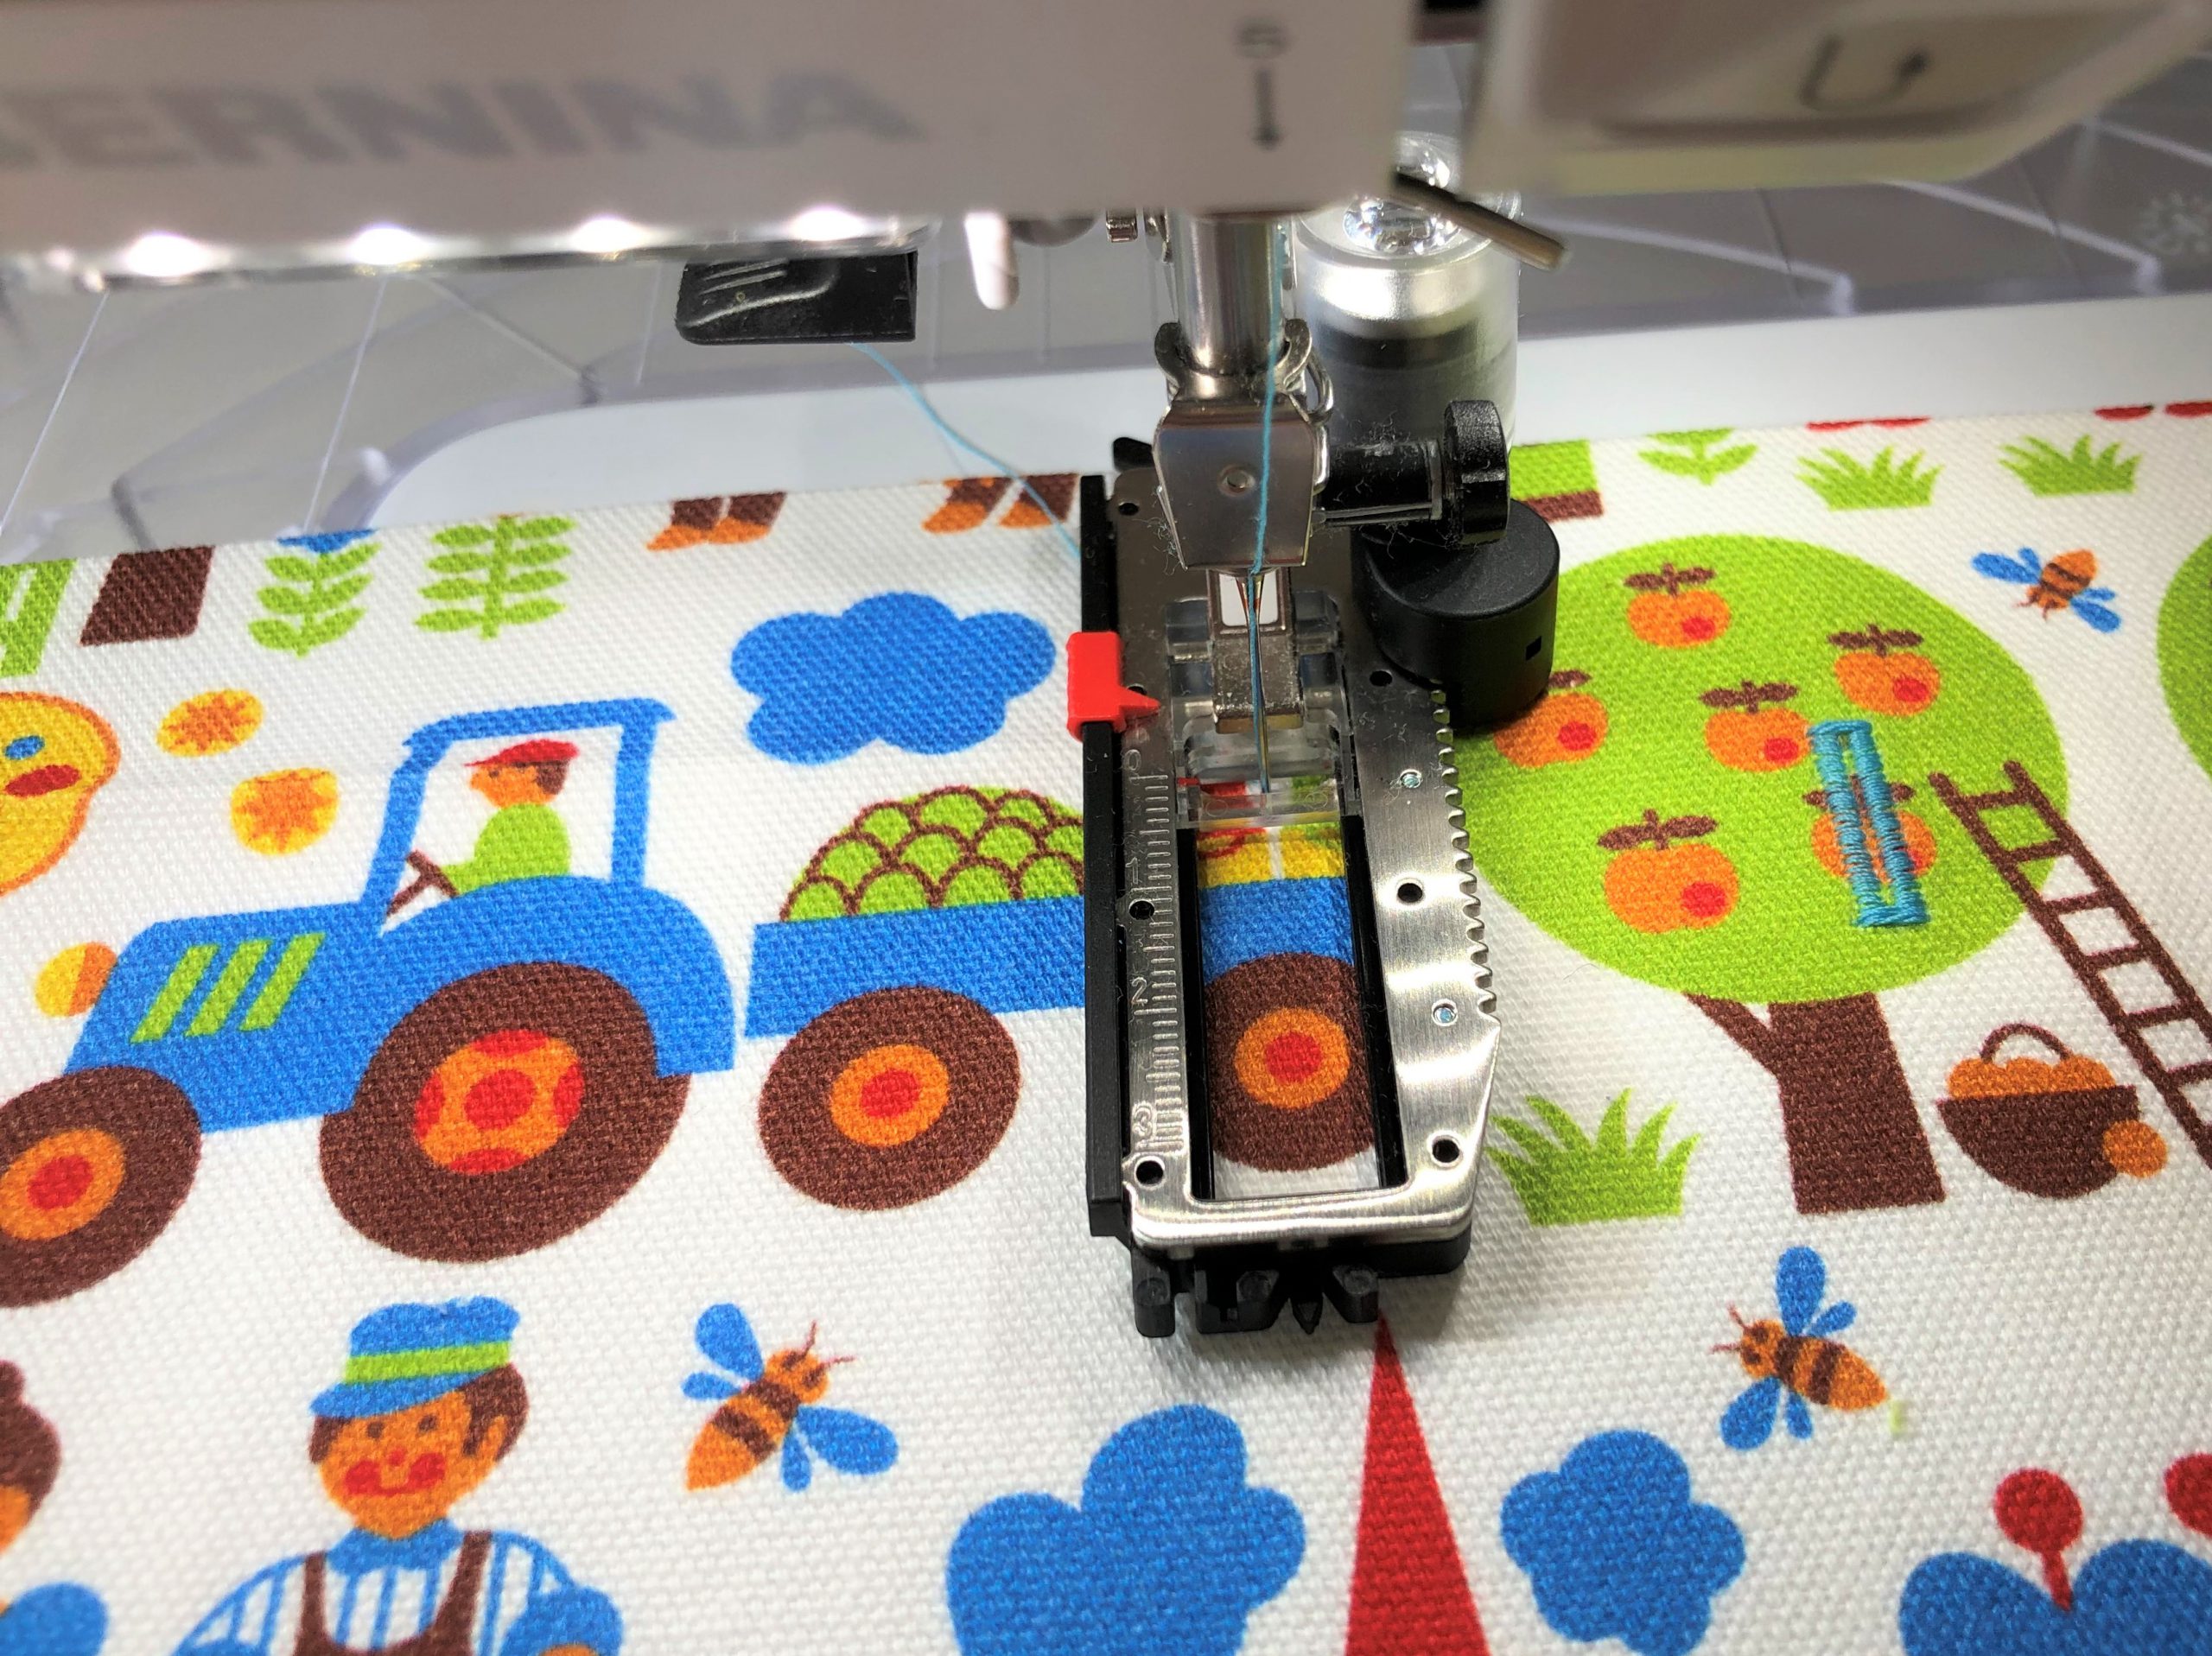
Making buttonholes on the front
Iron the top edge of the front over, first by 1 cm and then by 3 cm. We now sew the buttonholes for the cord. This is very easy using the buttonhole foot with slide on my B480!
Here is the video again, the automatic buttonhole starts at 3:15 minutes:
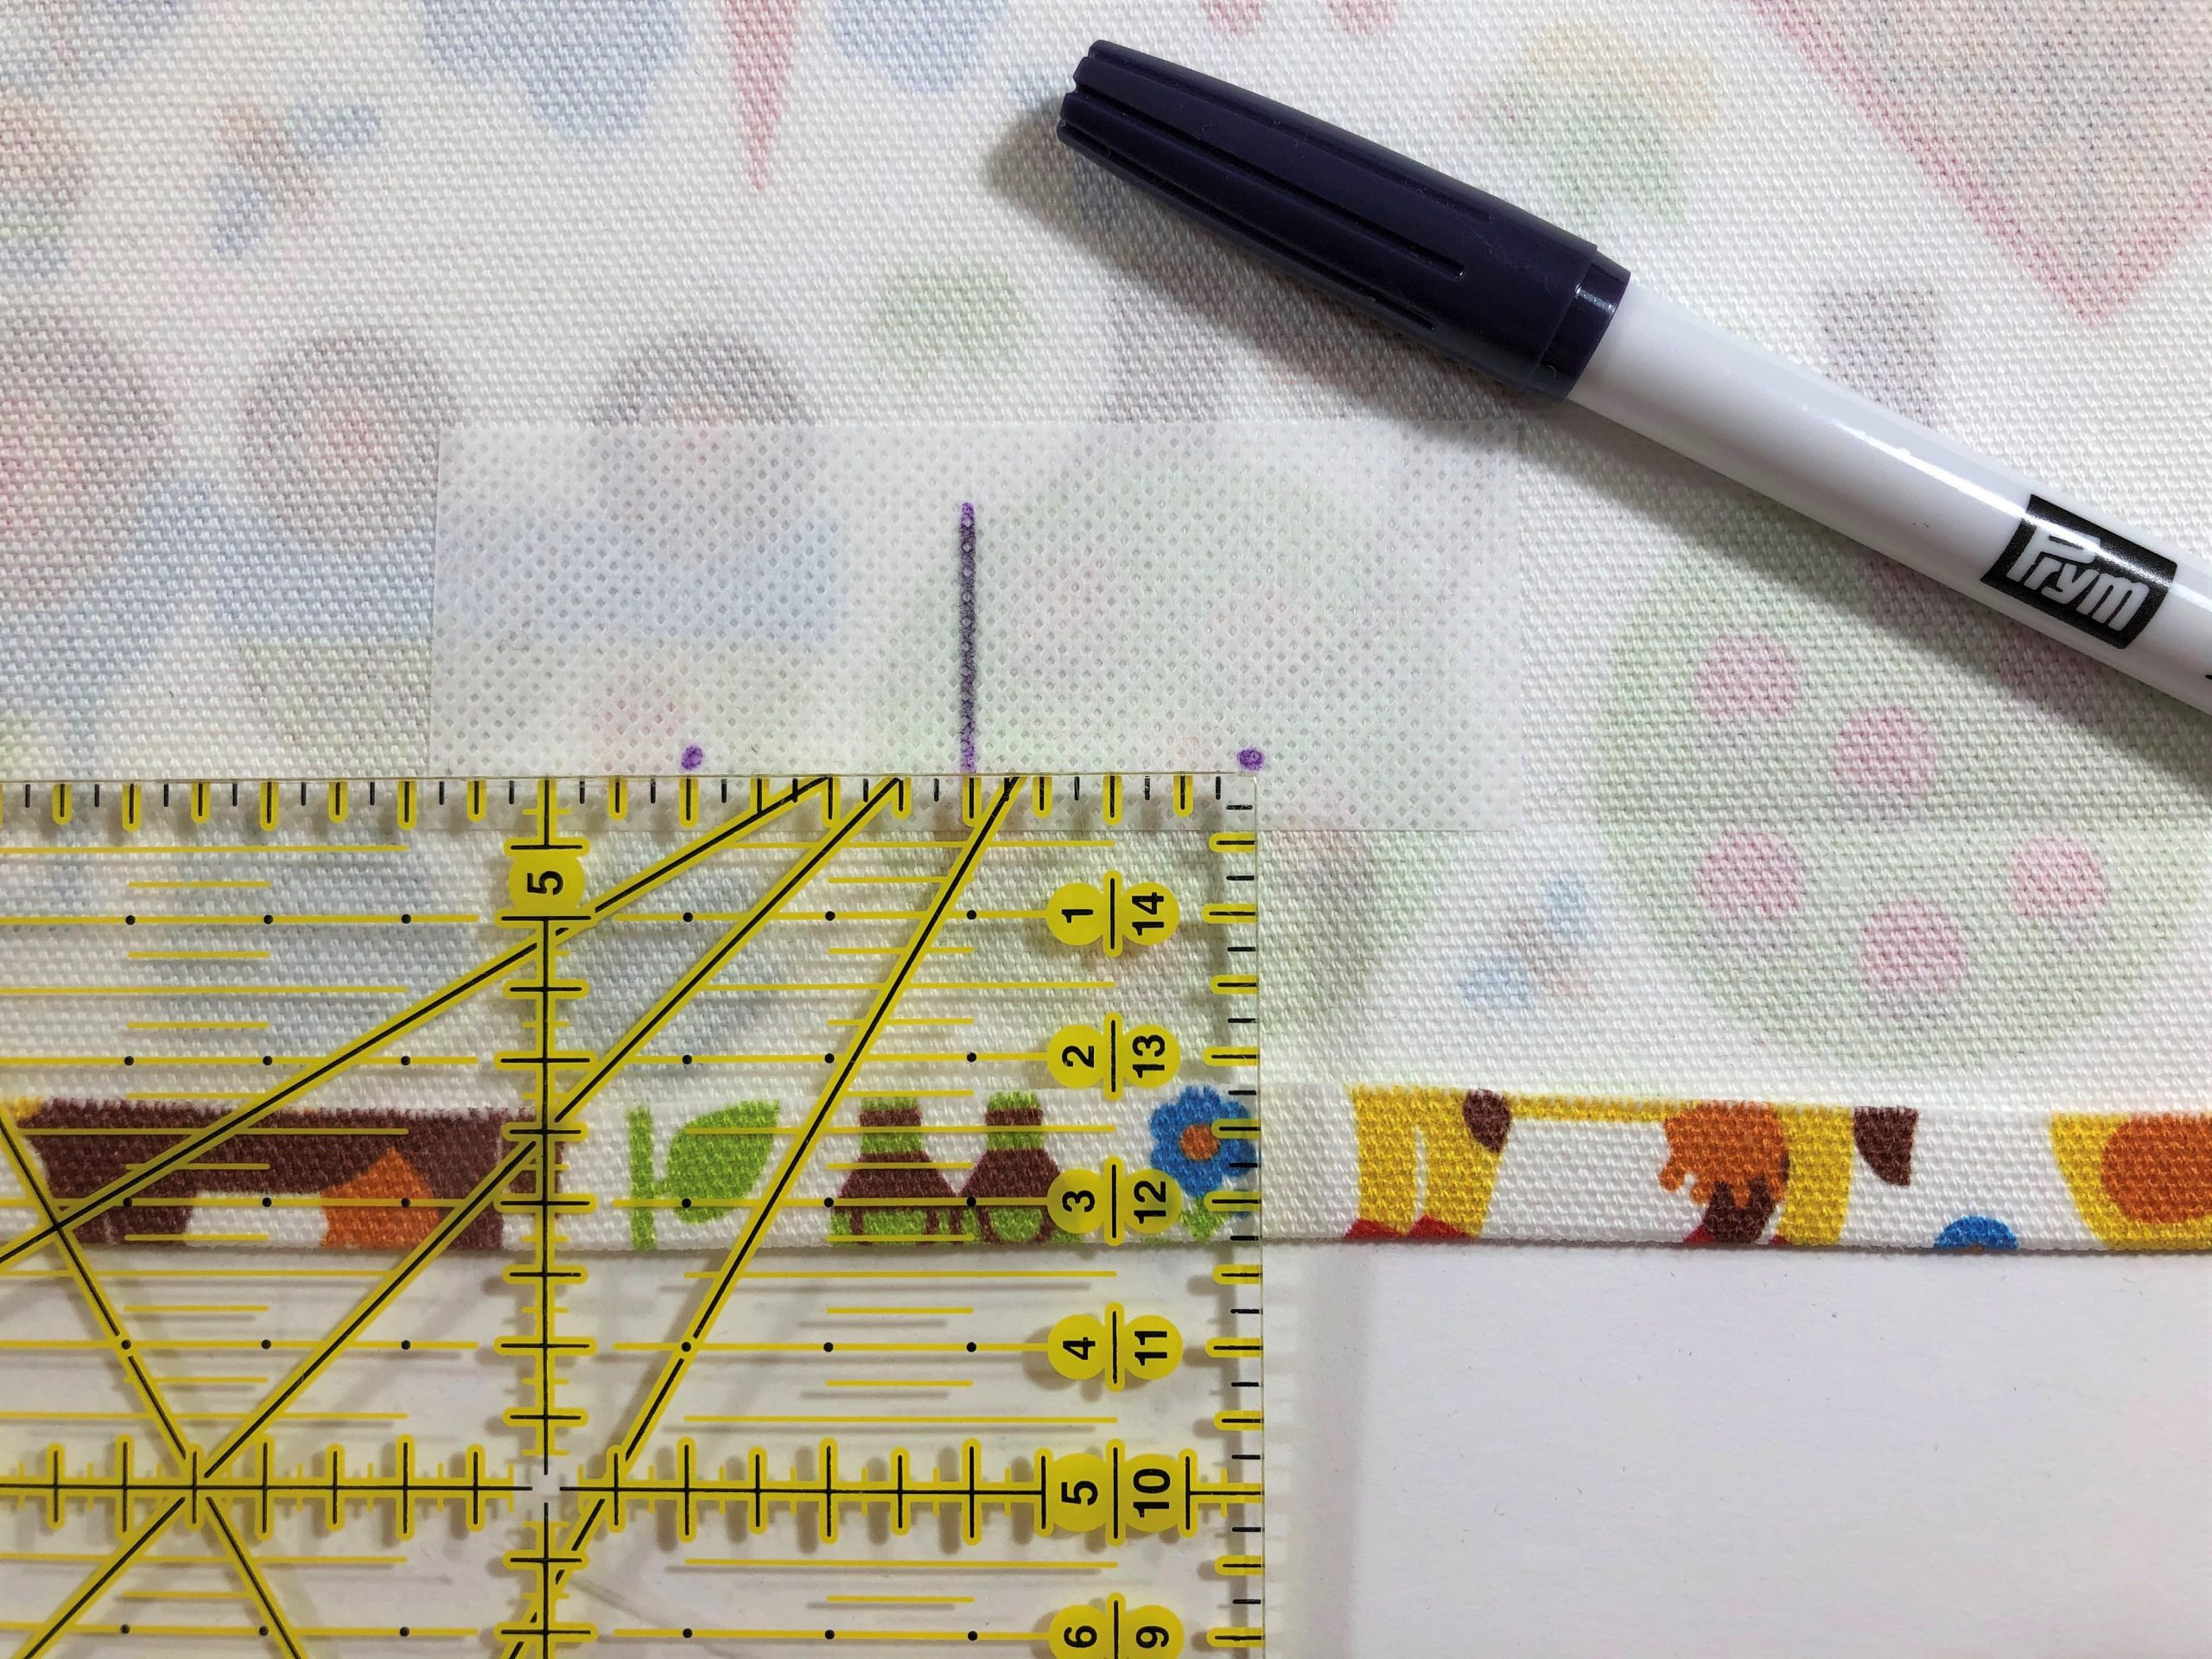
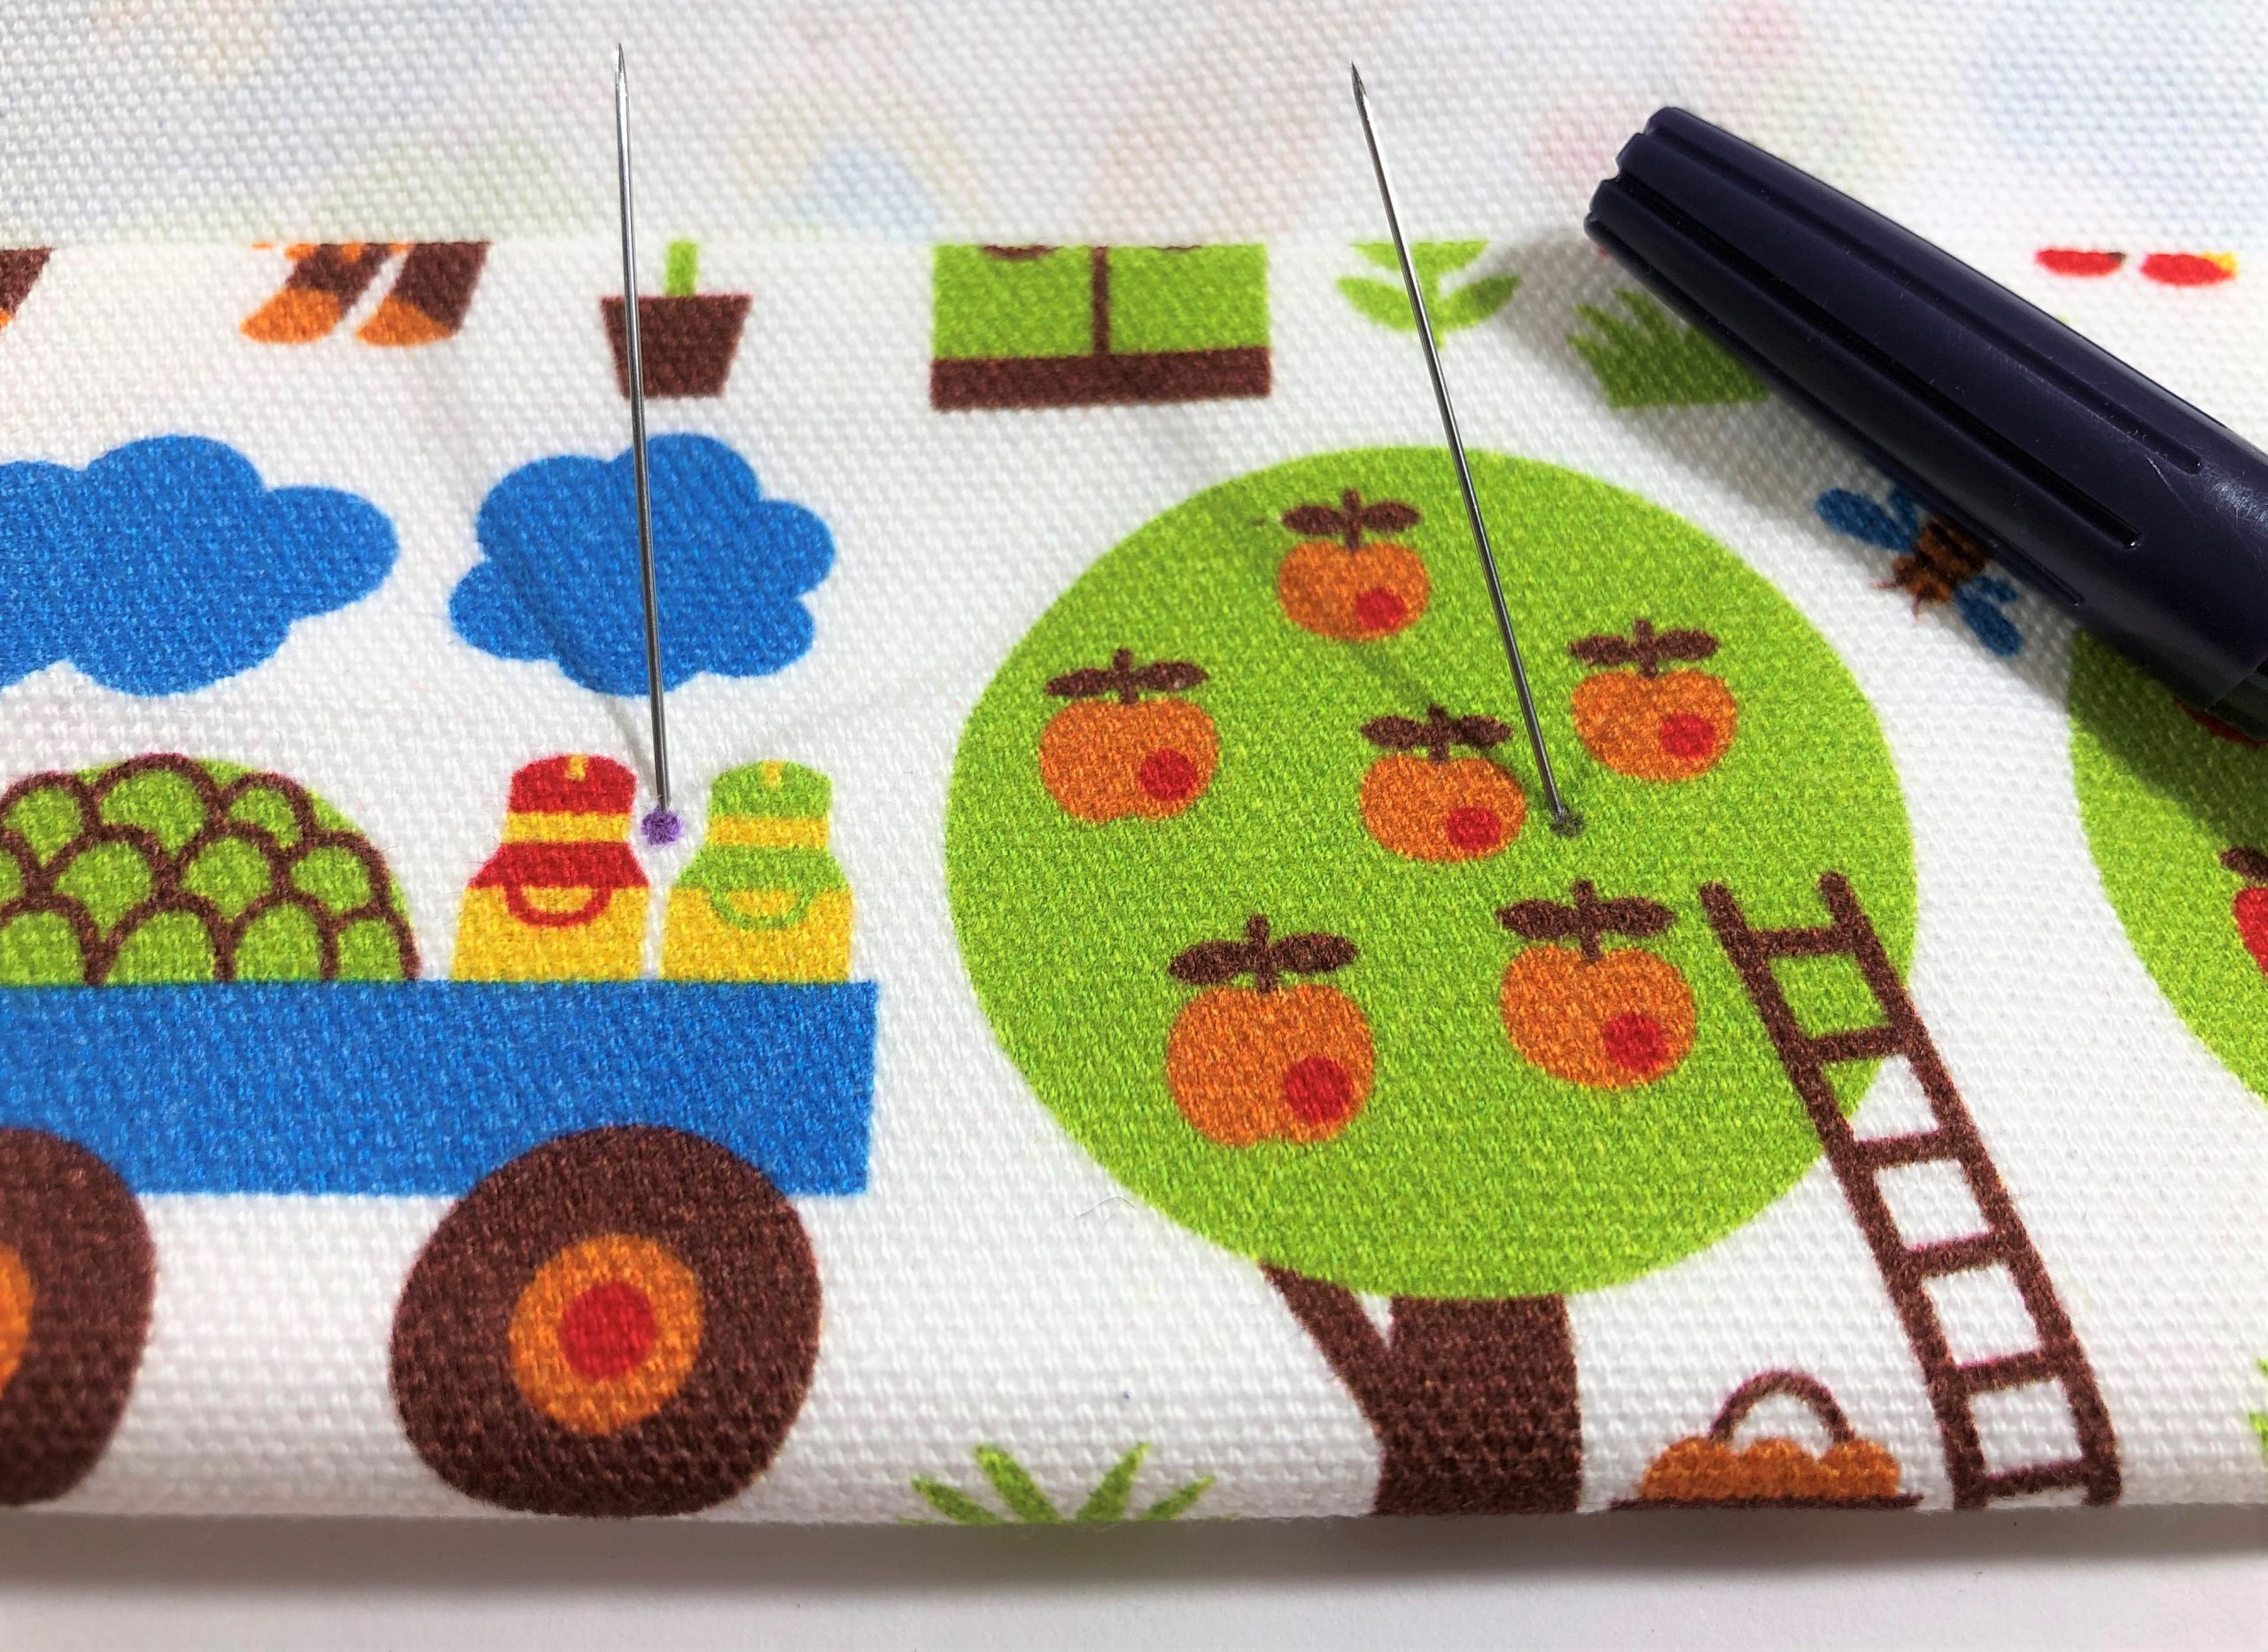
First, iron the small piece of Vilene S320 for reinforcing the buttonholes onto the wrong side of the fabric (below the 3 cm ironed edge, at the center of the fabric). Then mark the center of the fabric on the interfacing, measure 2 cm to the right and left of this, 0.5 cm from the ironed edge. Mark with the trick marker. Then put 2 pins through the dots and mark the pin holes on the right side of the fabric. This gives us the exact position in the hem for the buttonholes.
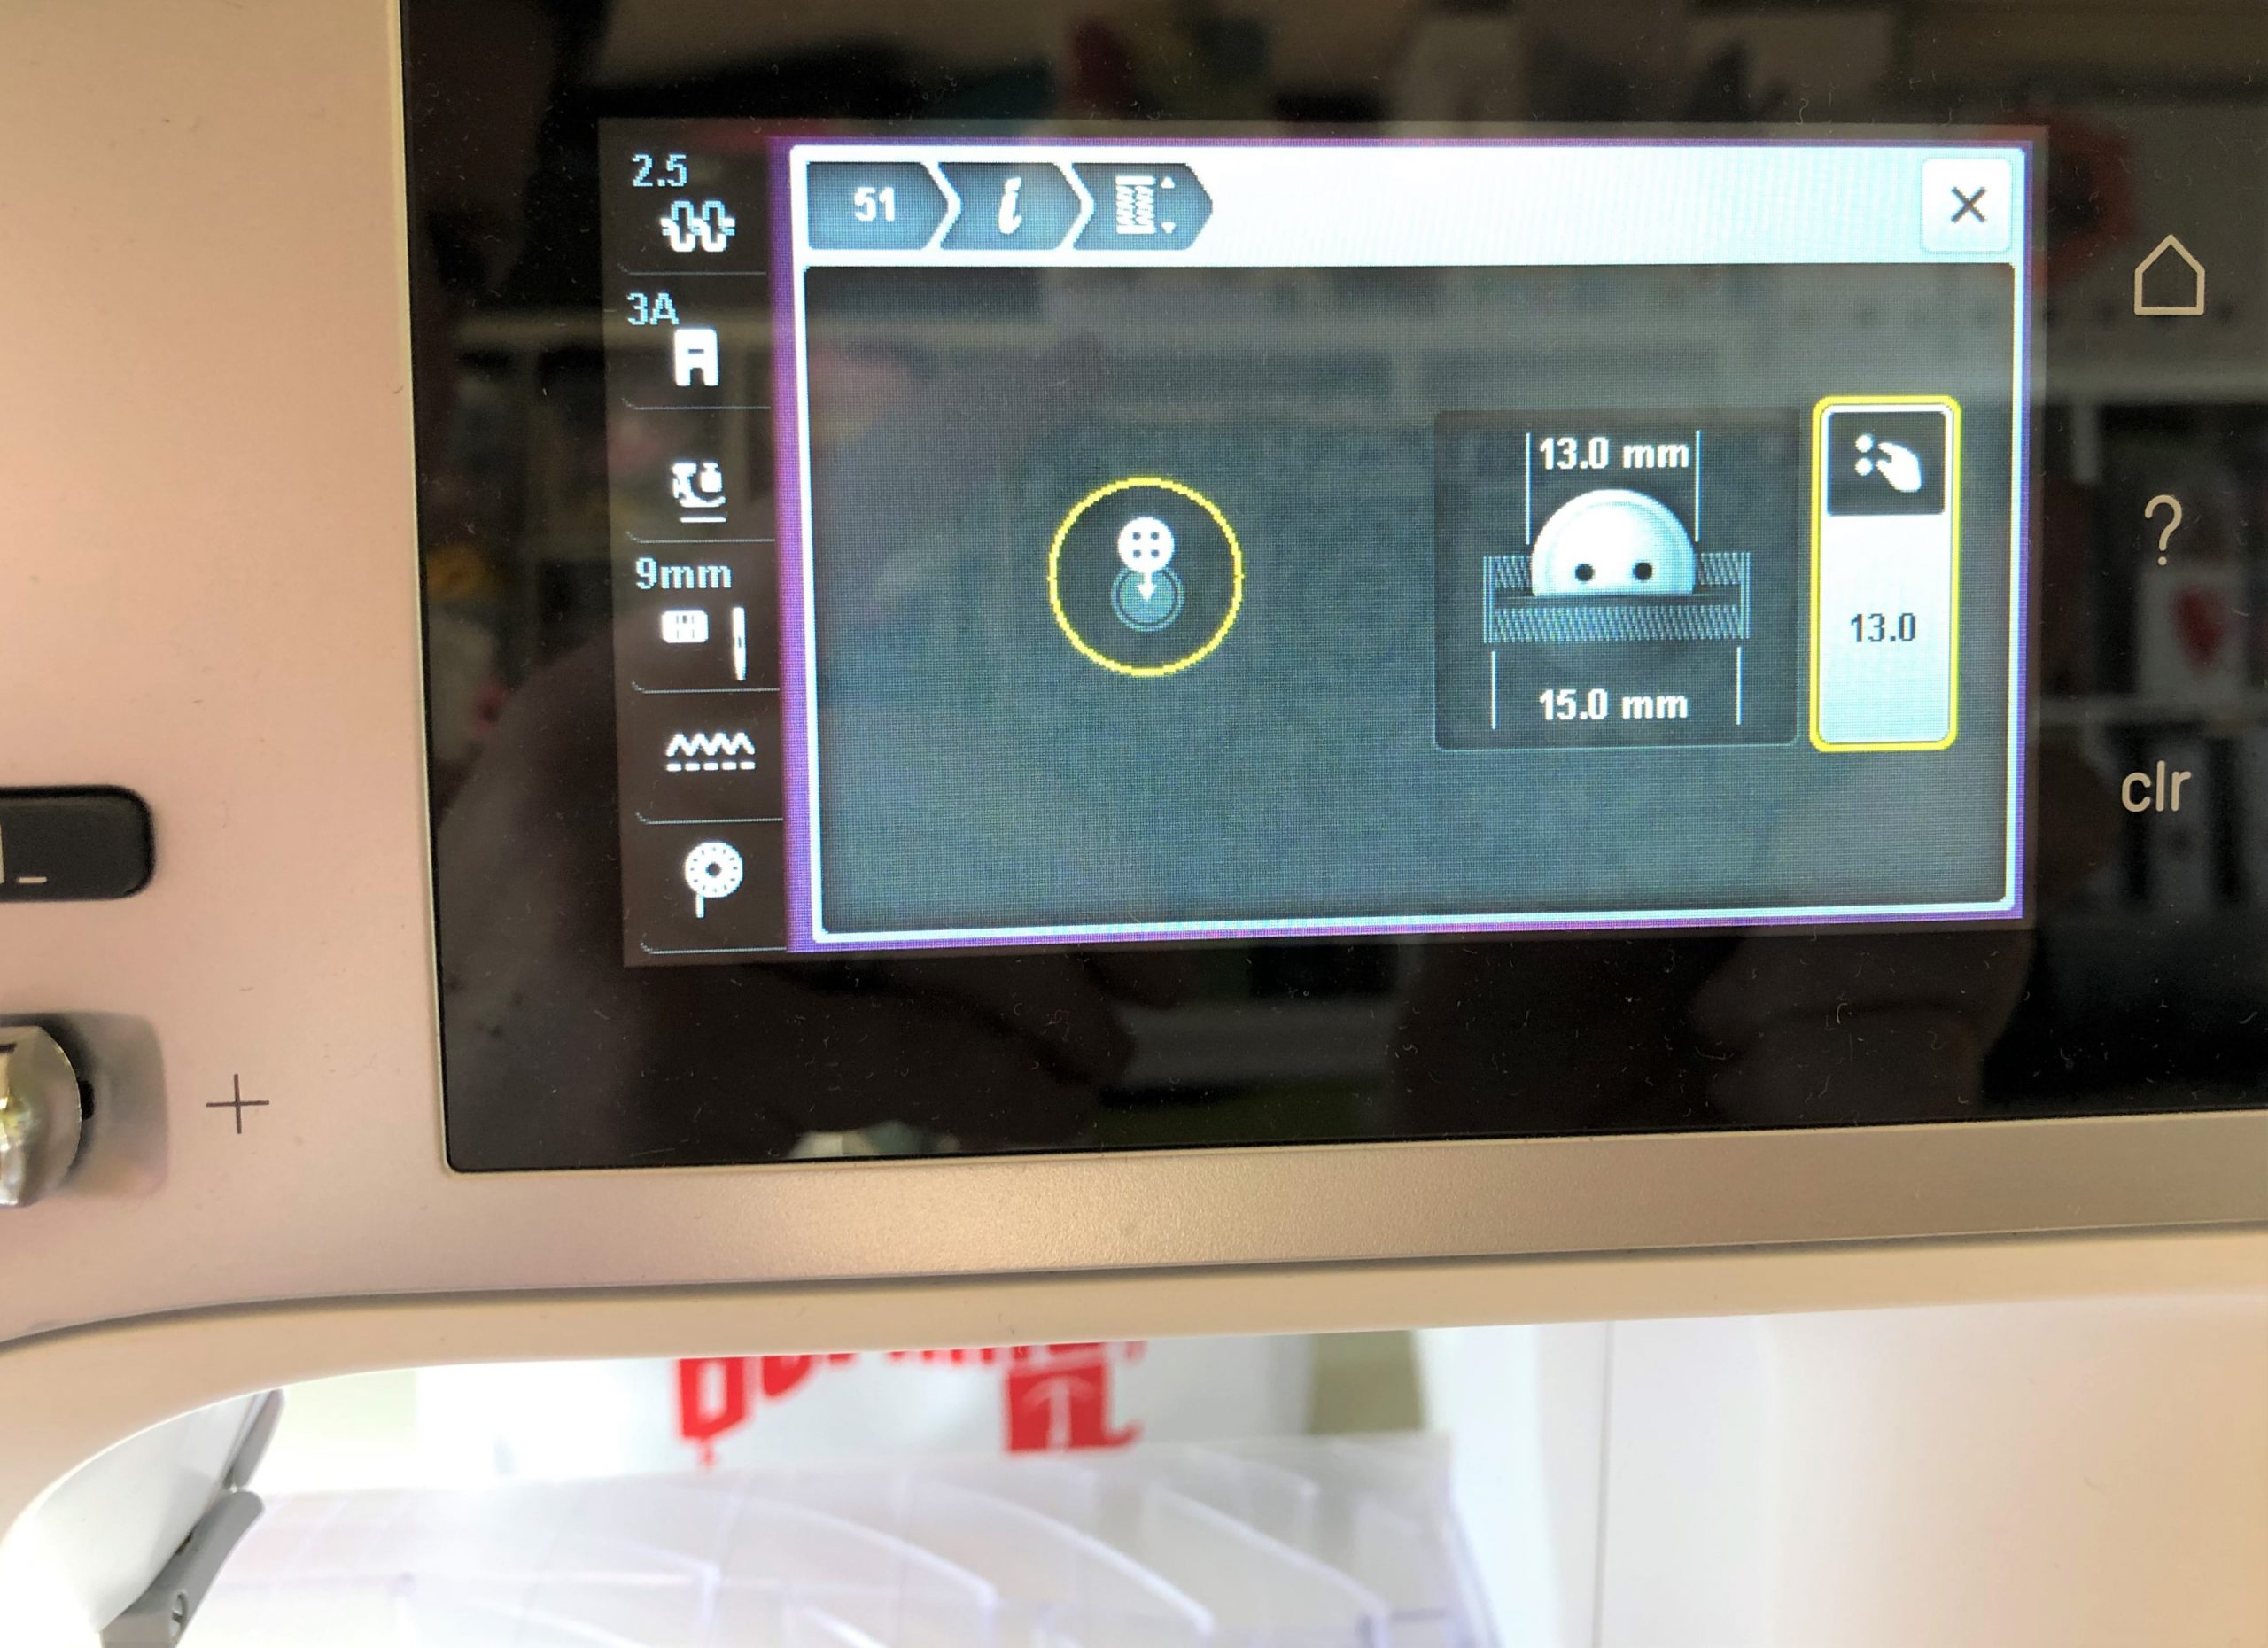
On my B480 I select the standard buttonhole no. 51 and set a buttonhole of 15 mm using the Info Button and the “Buttonhole Length” icon. This will give a slit width for the cord of 13 mm.

Now place the needle on the marked point and sew the buttonhole. Carefully open the buttonholes with the seam ripper.
Sewing the flap for the backpack
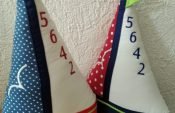
Place the two fabrics for the flap with the right sides together and fold in half. Measure 8 cm along the long side and then draw a curve and cut away the corner.

Sew the flap together with the right sides together, leaving the straight side at the top open. Cut notches into the seam allowance, turn, iron well and edgestitch using the blindstitch foot.
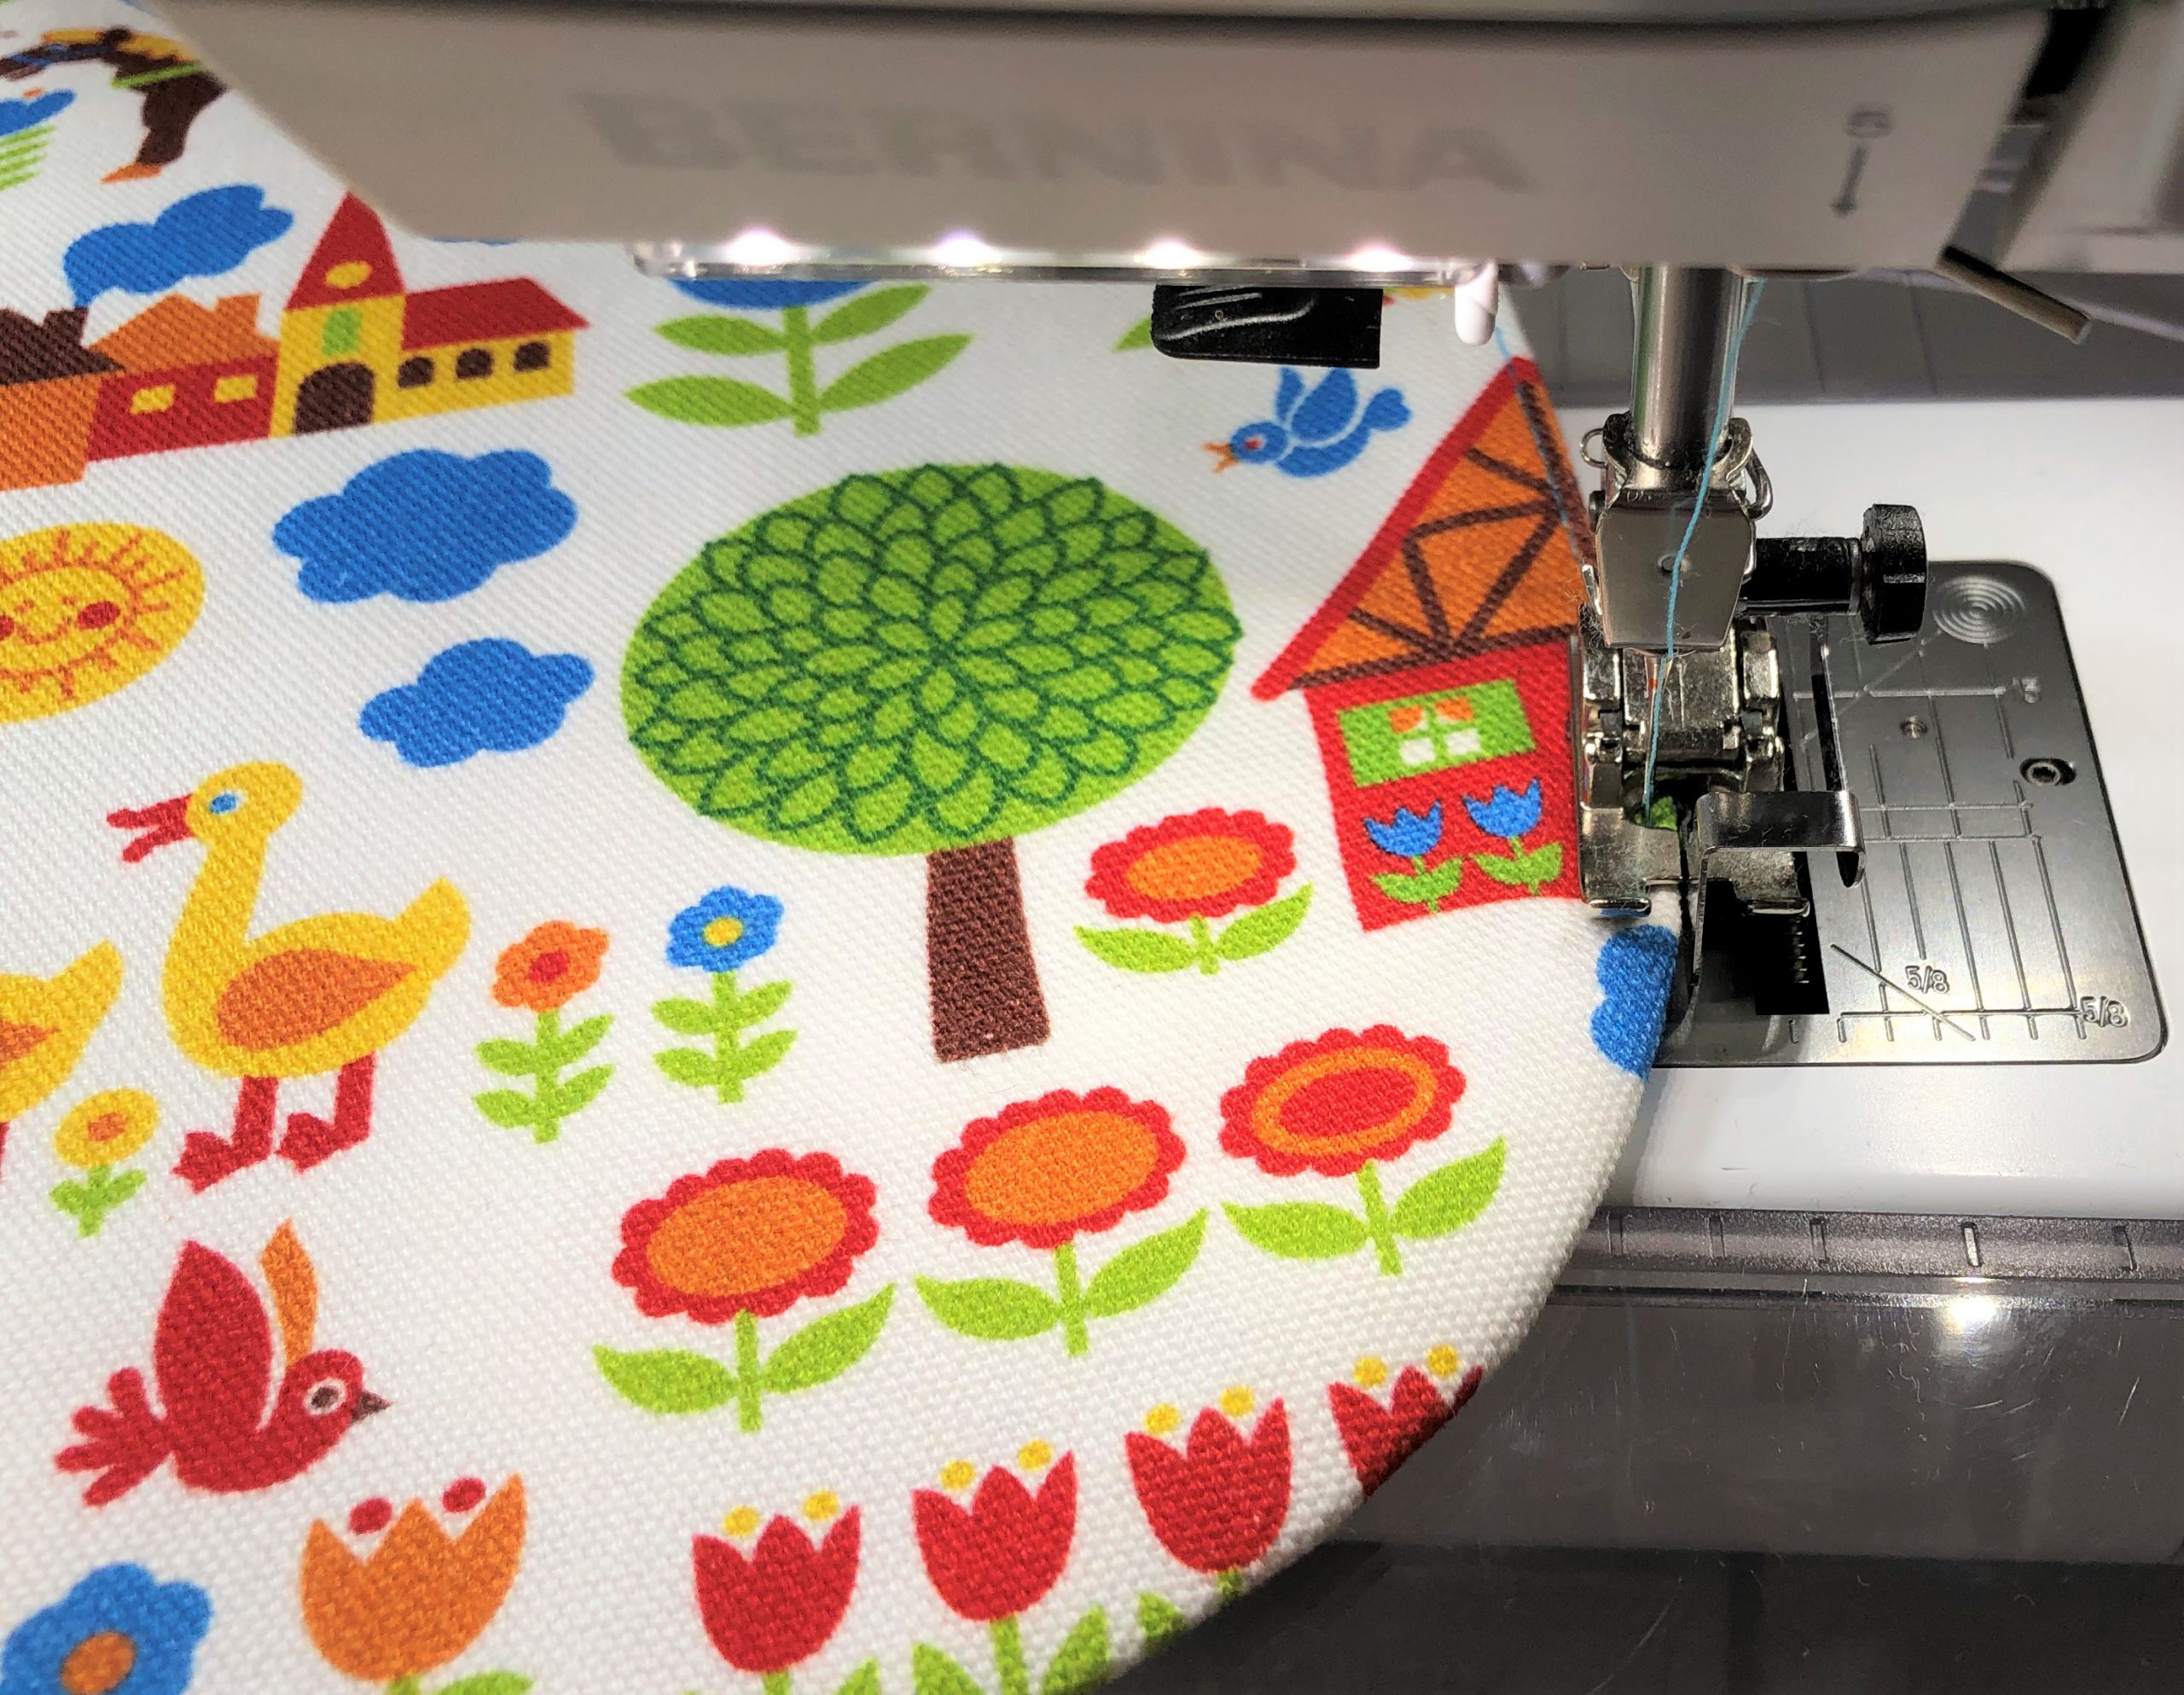
The open side can also be overcast on the overlocker or using a zigzag stitch. Then iron the edge over by 1 cm.

Now sew the flap onto the back. Pay attention to the orientation of the design on the fabric. Pin the flap 6 cm from the ironed hem, line it up in the center and sew on.
Making the straps for the backpack
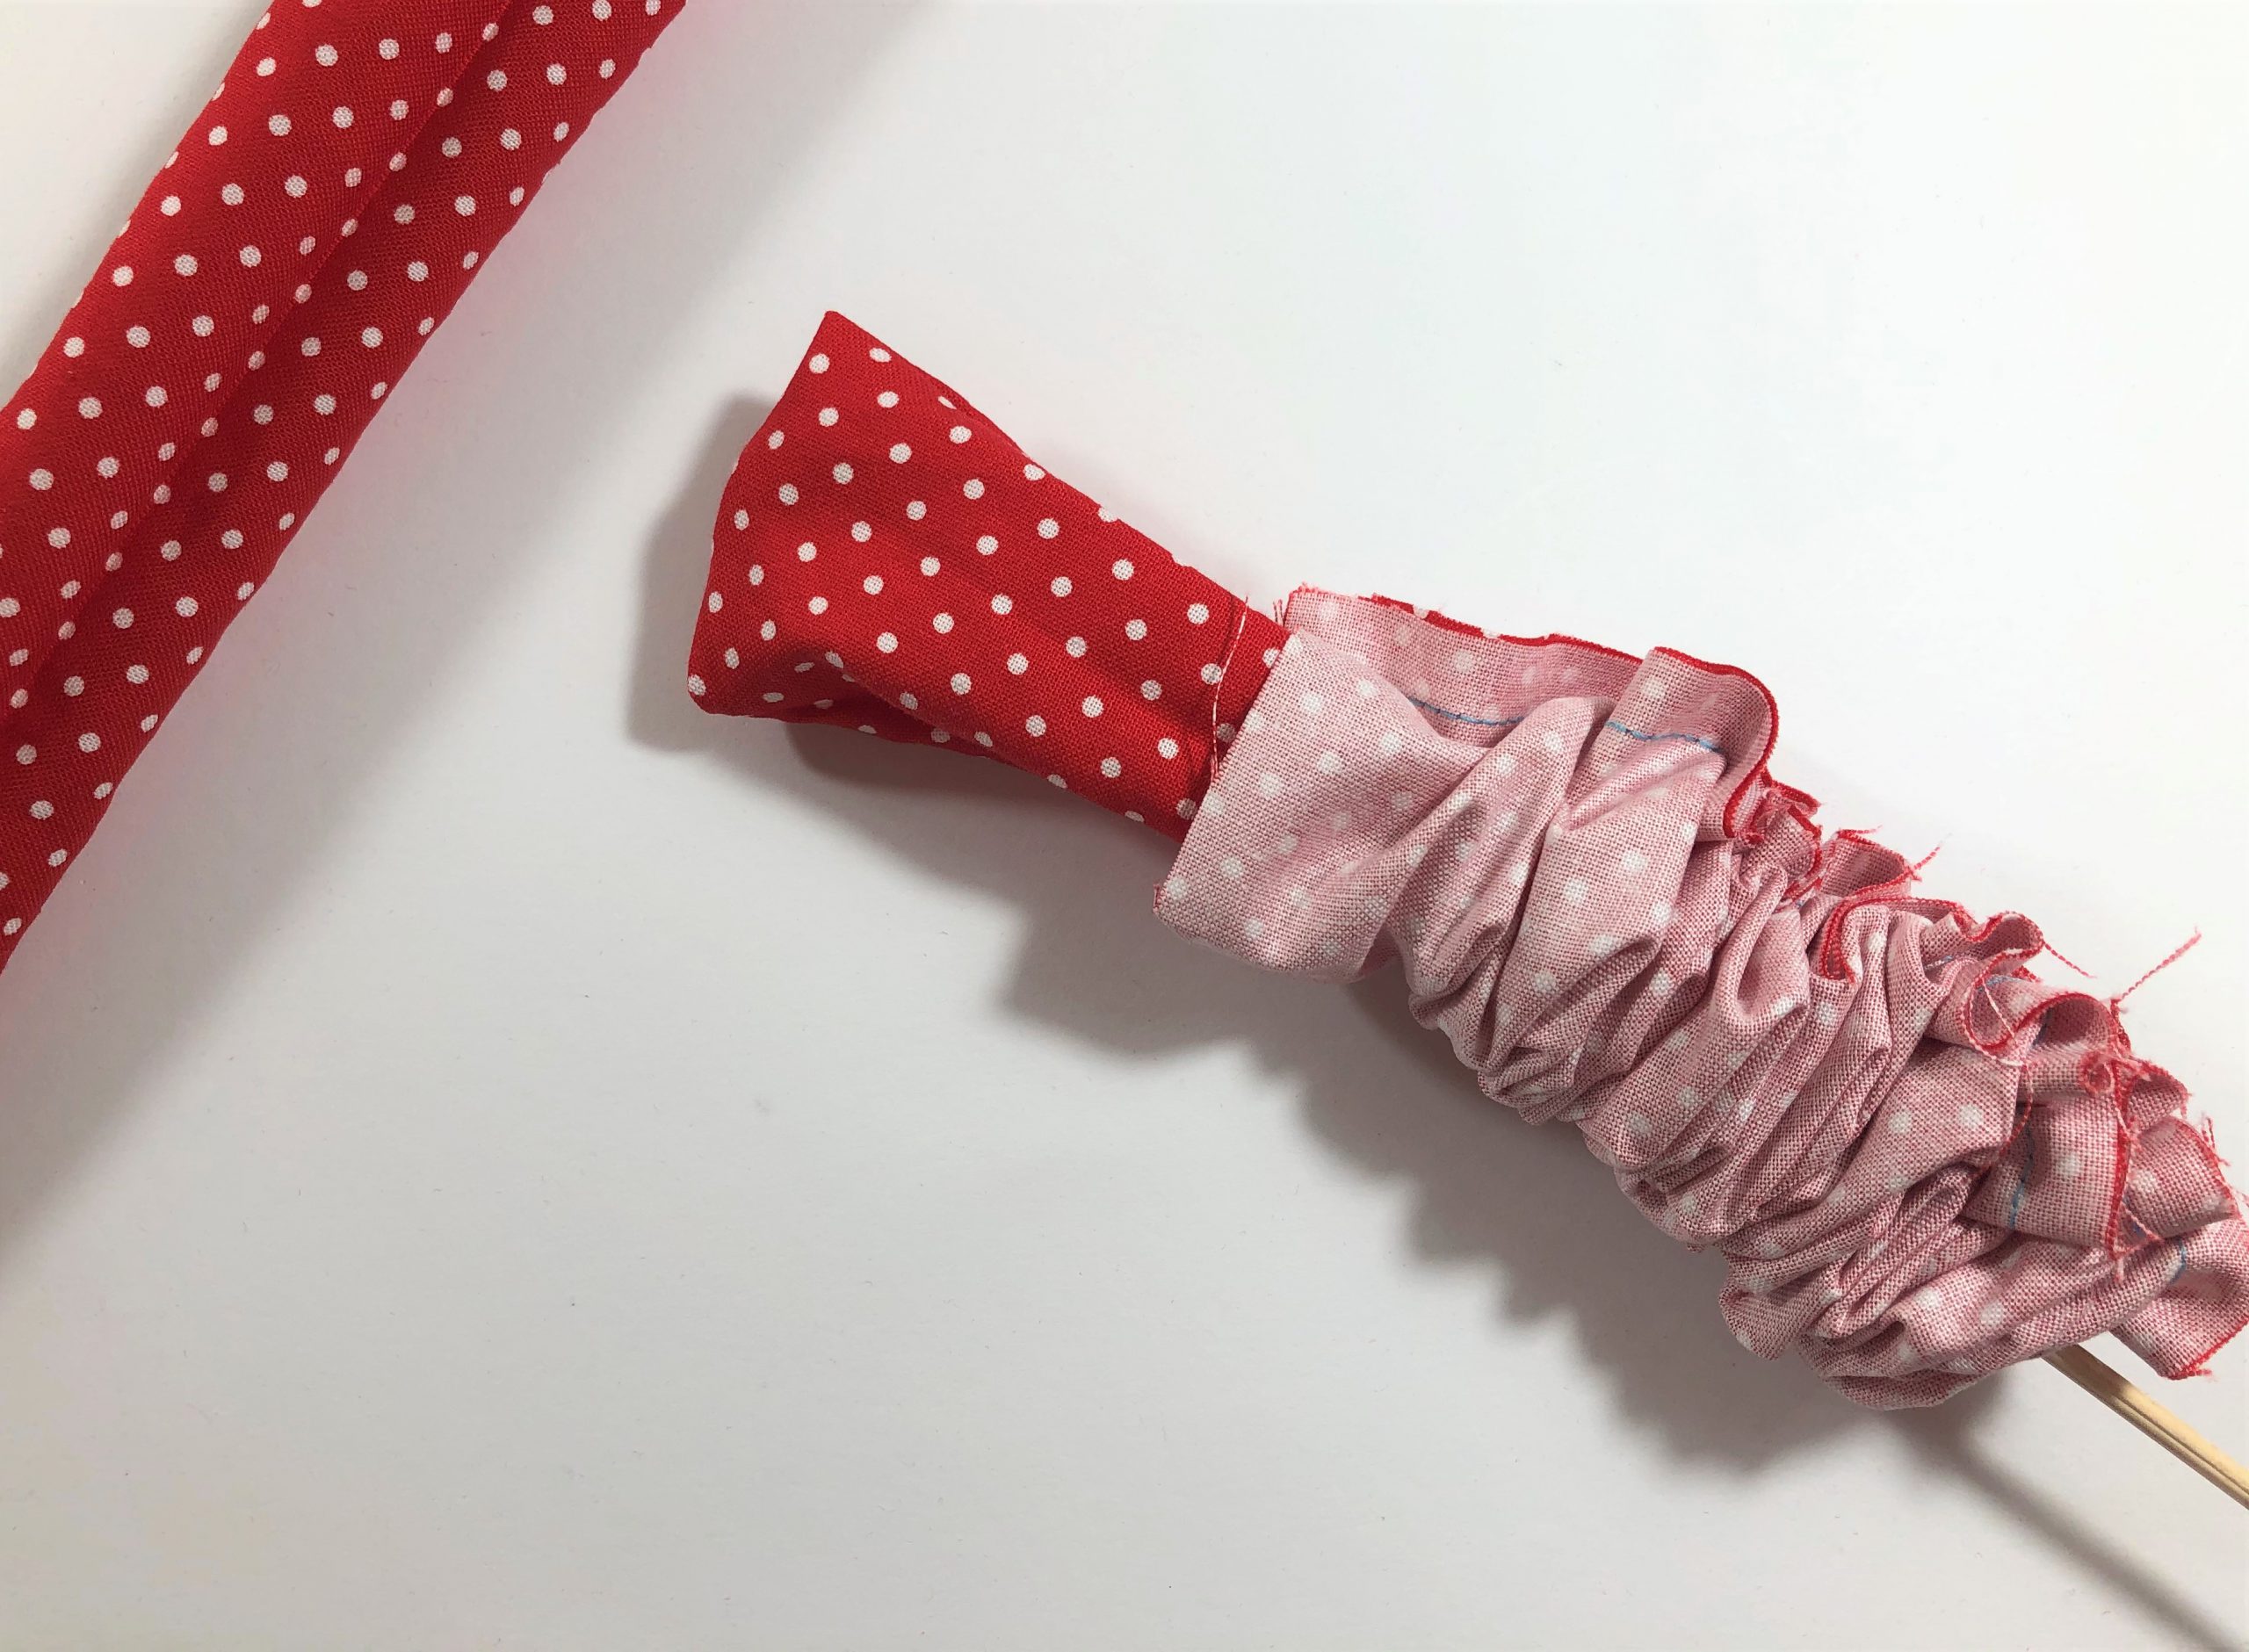
Iron the straps with the right sides together, sew together, and also sew up one end. This holds the wooden stick securely when turning the strap. Pull the fabric down over it.
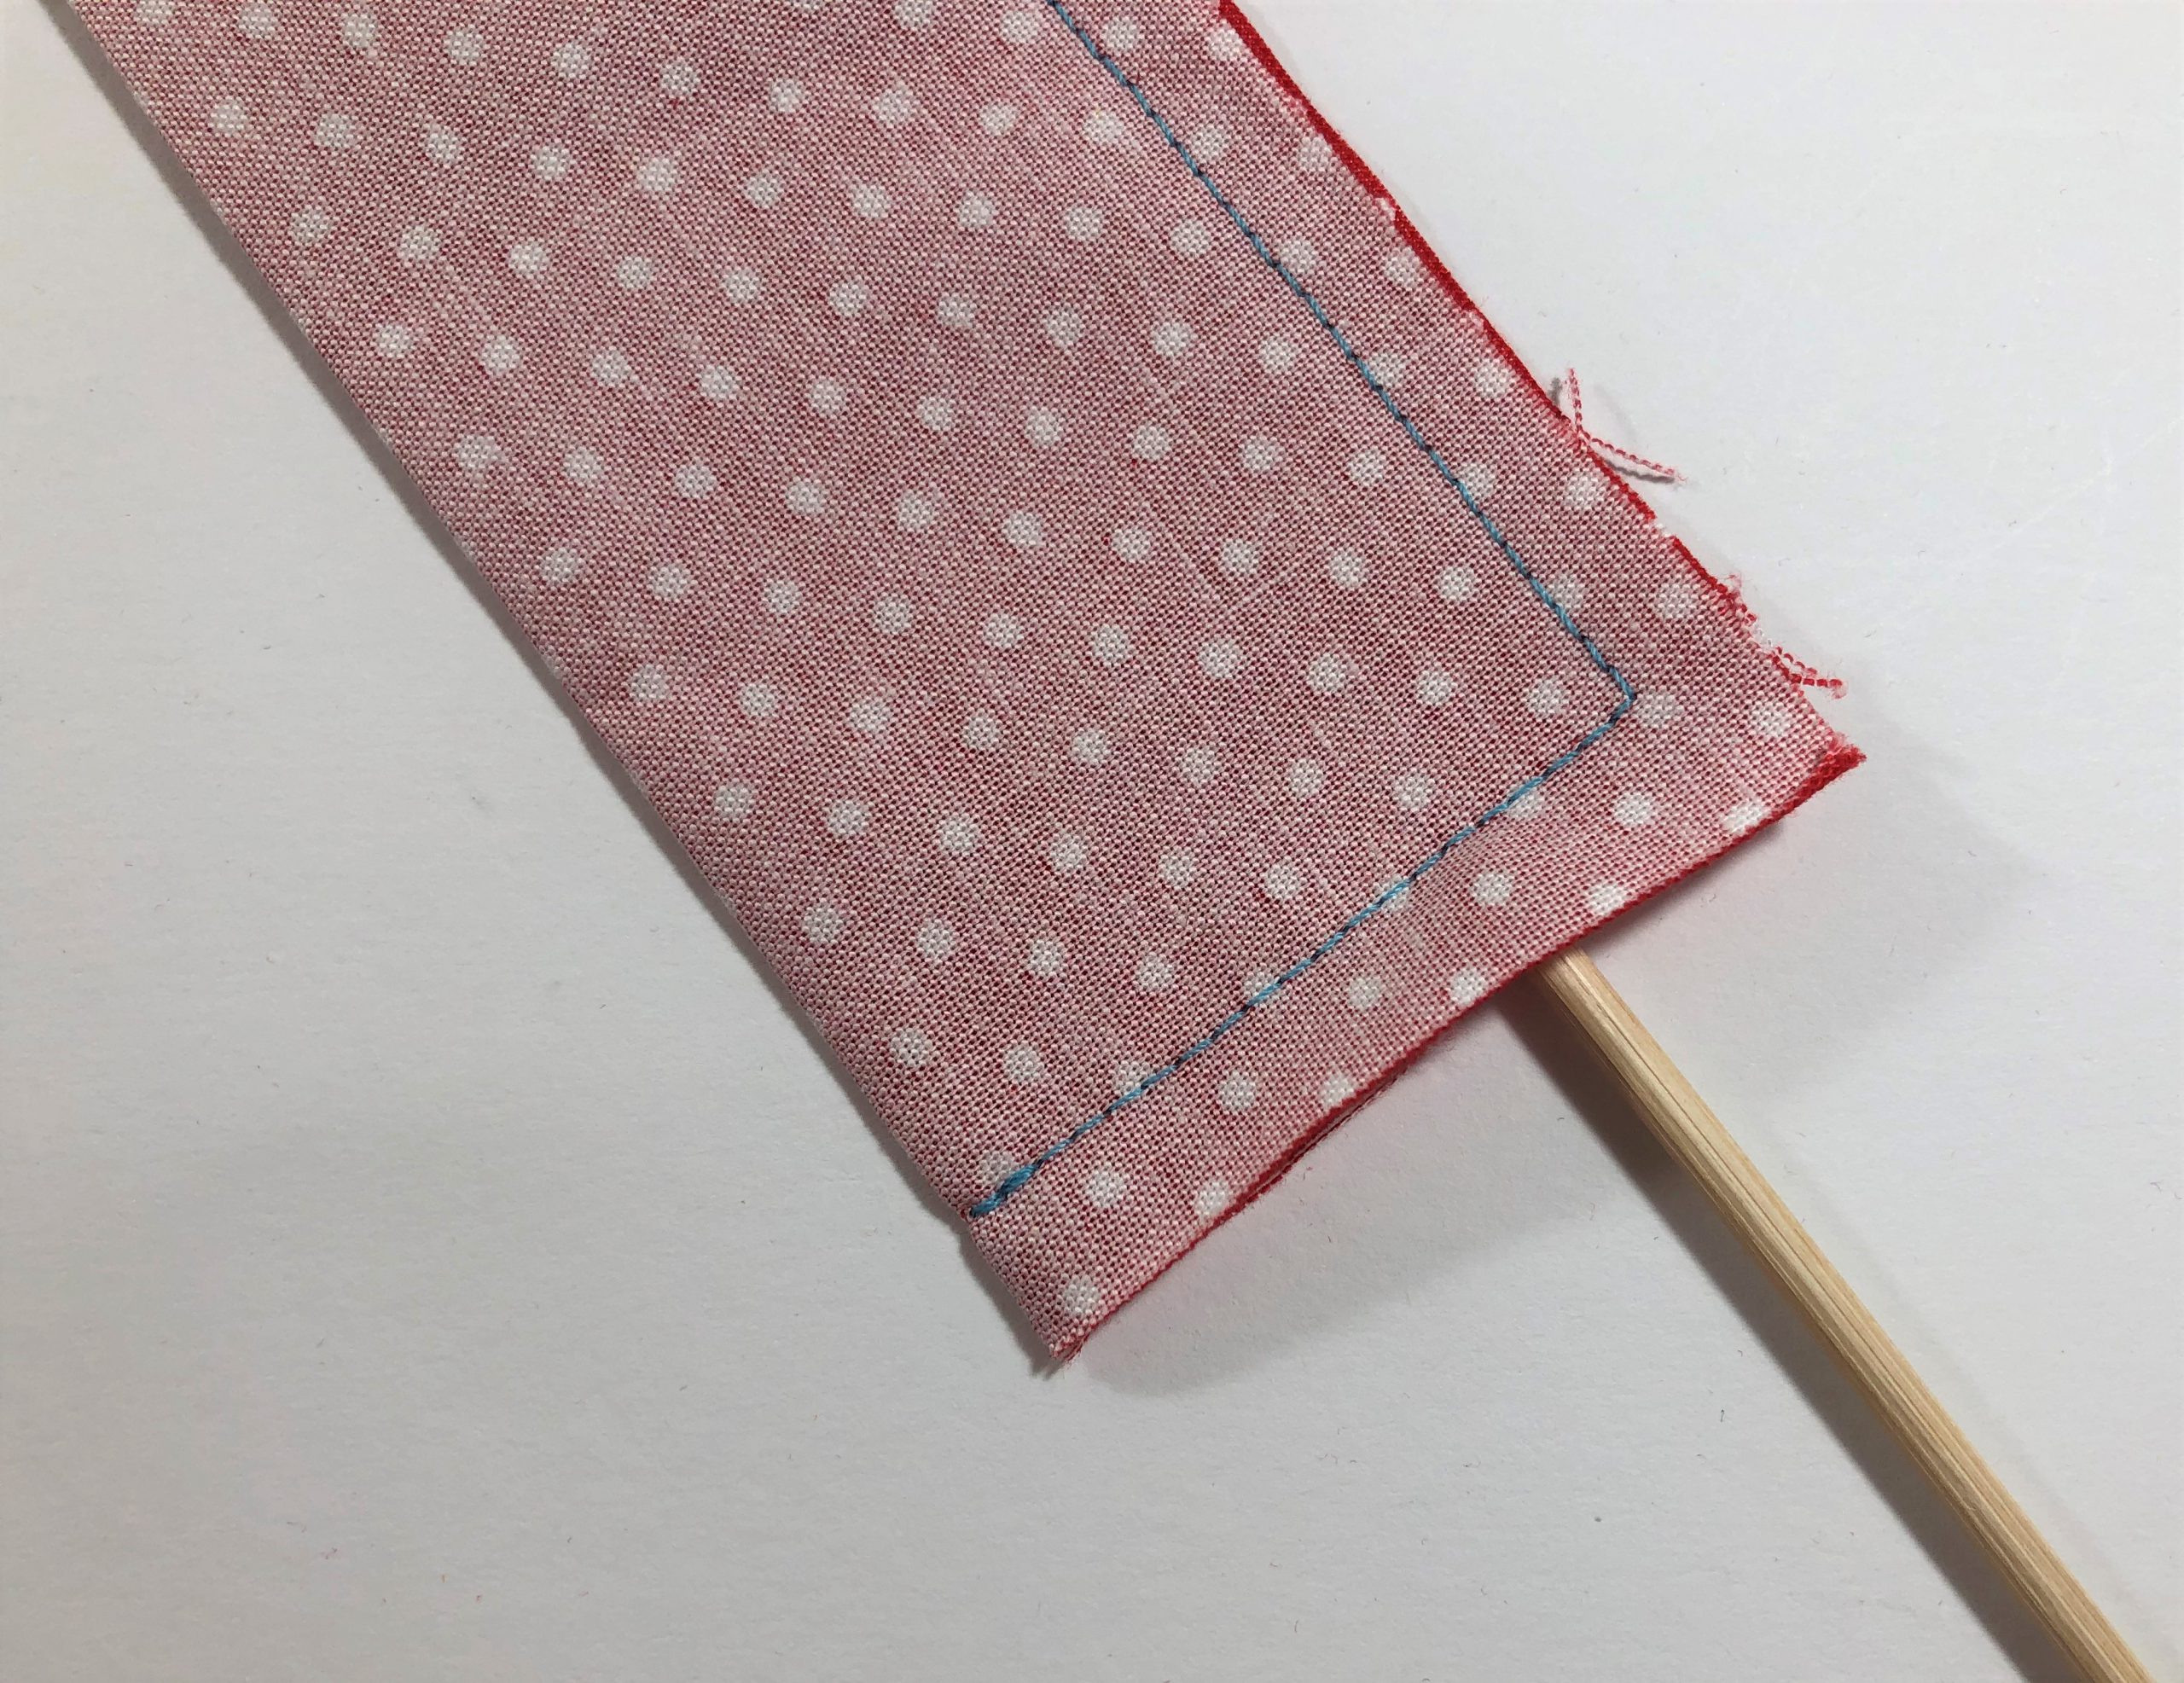
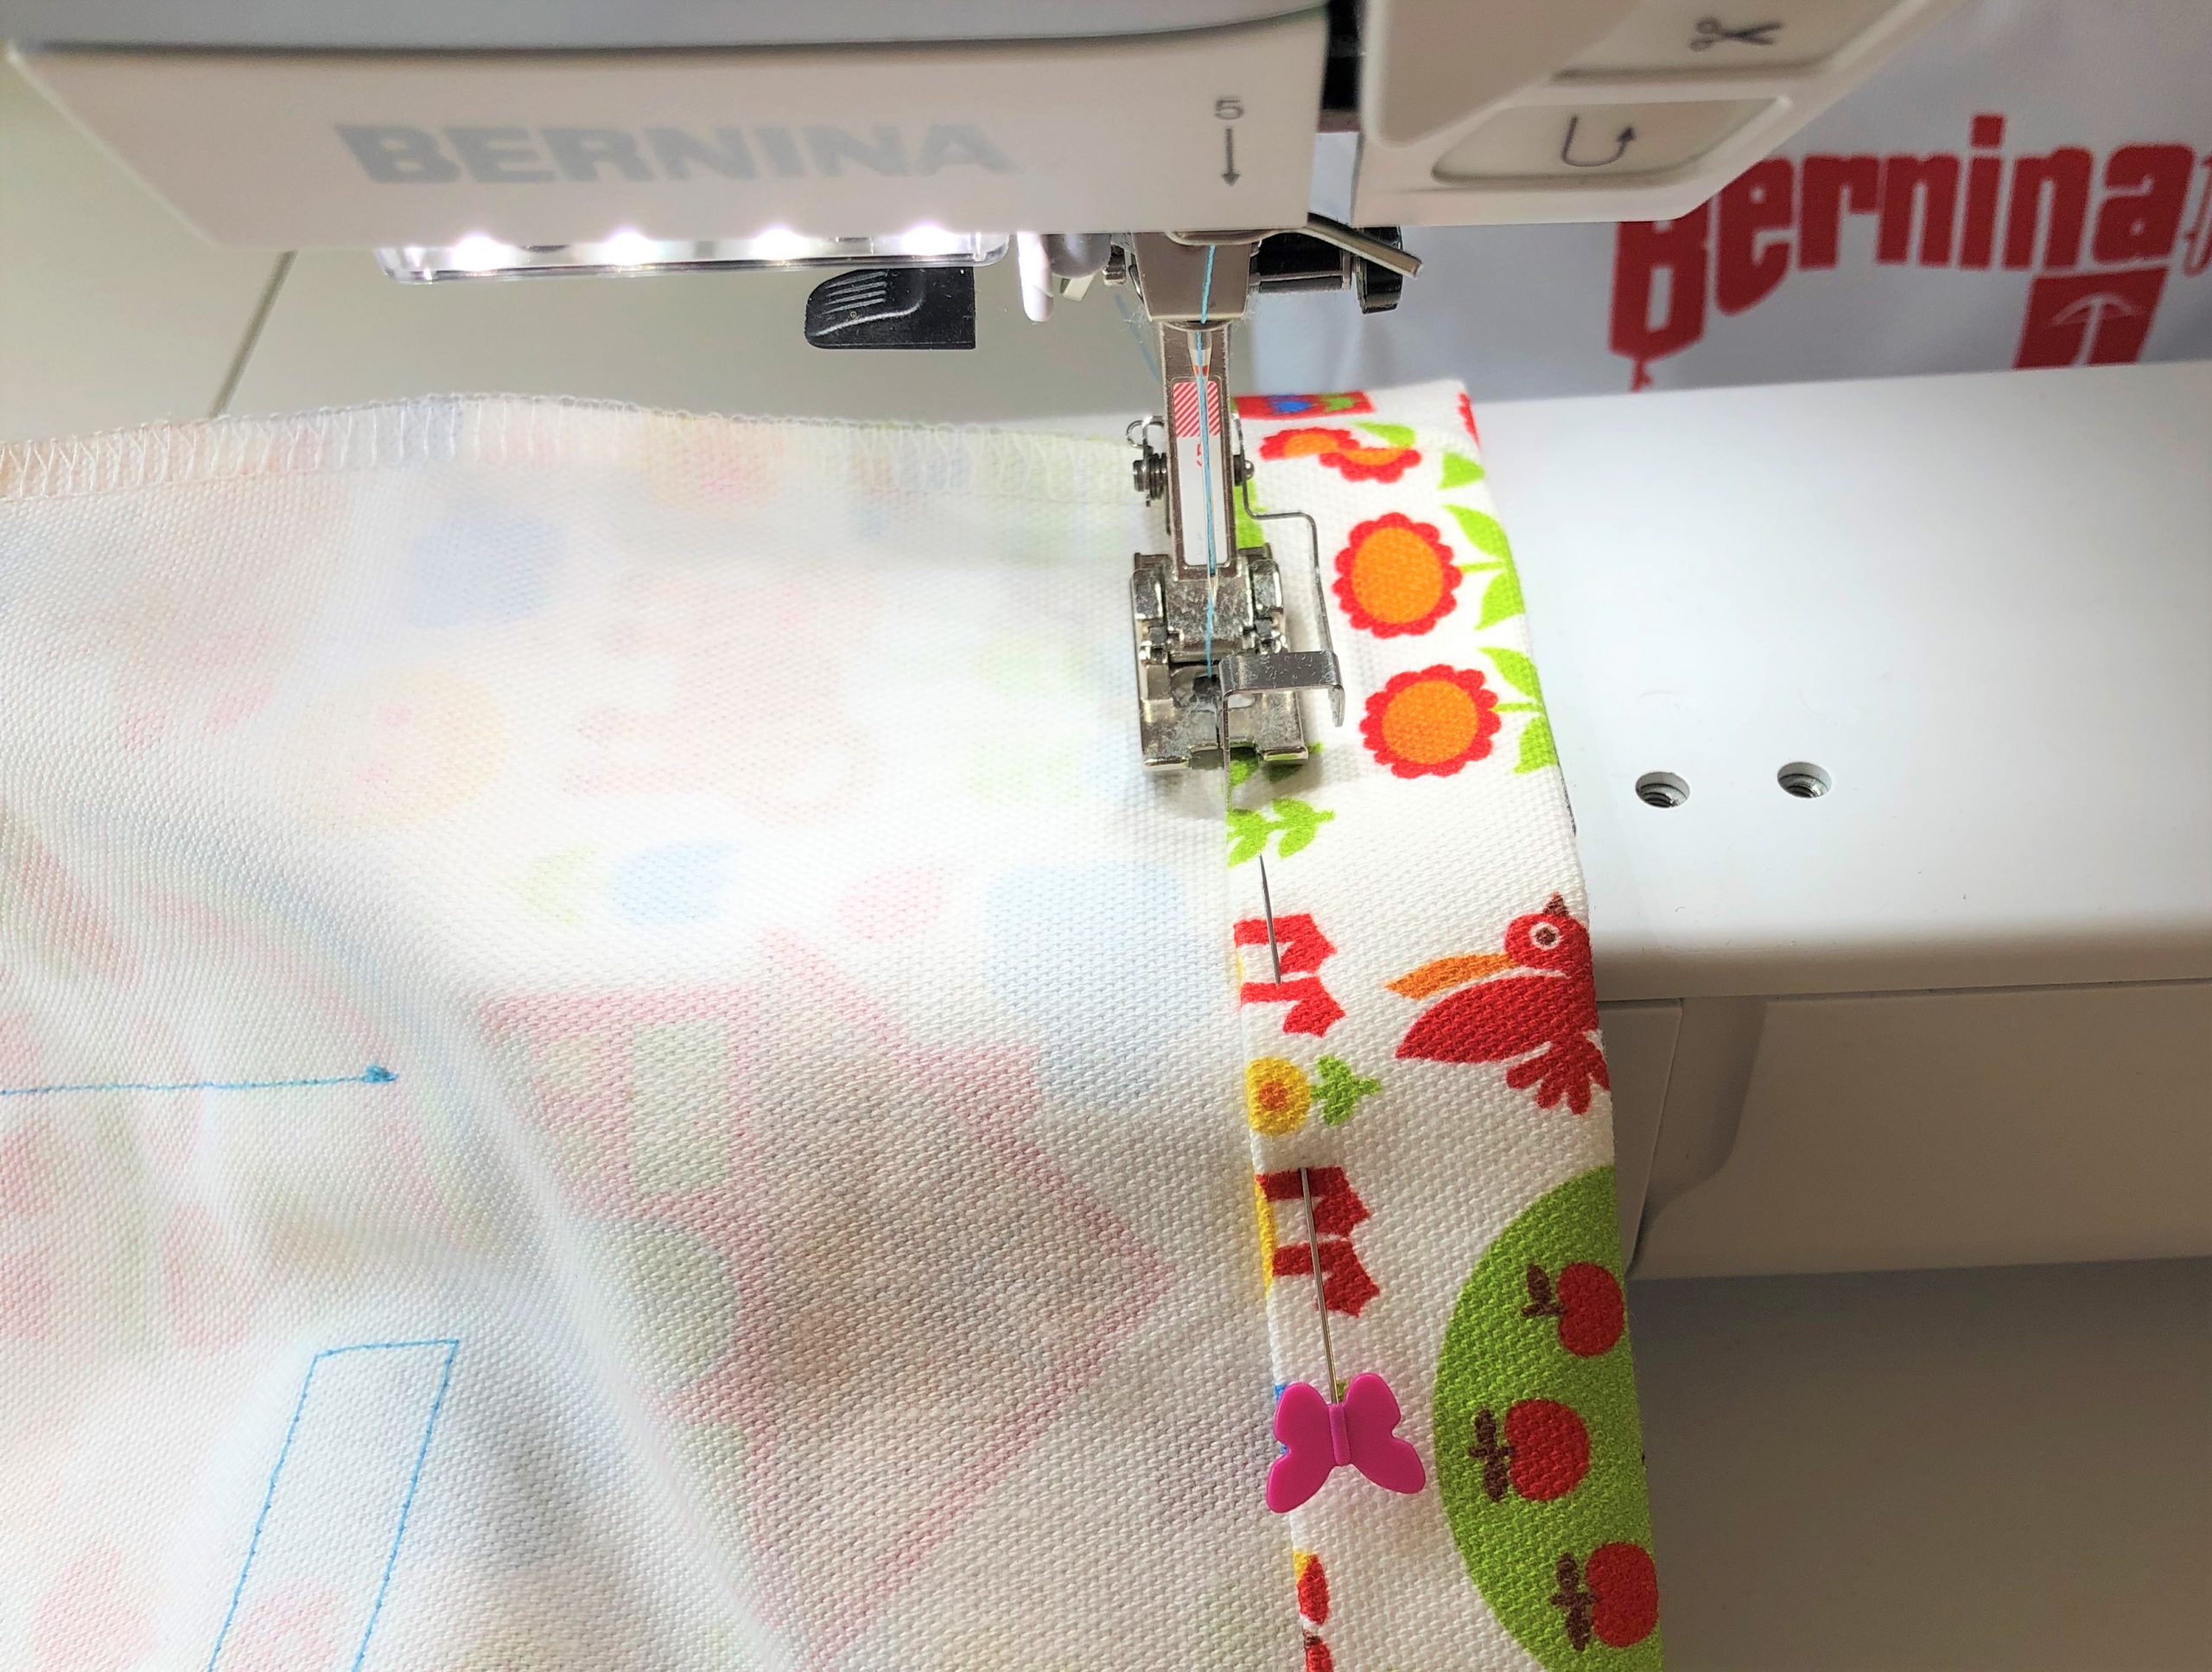
Iron and edgestitch the straps.
Sewing the backpack together
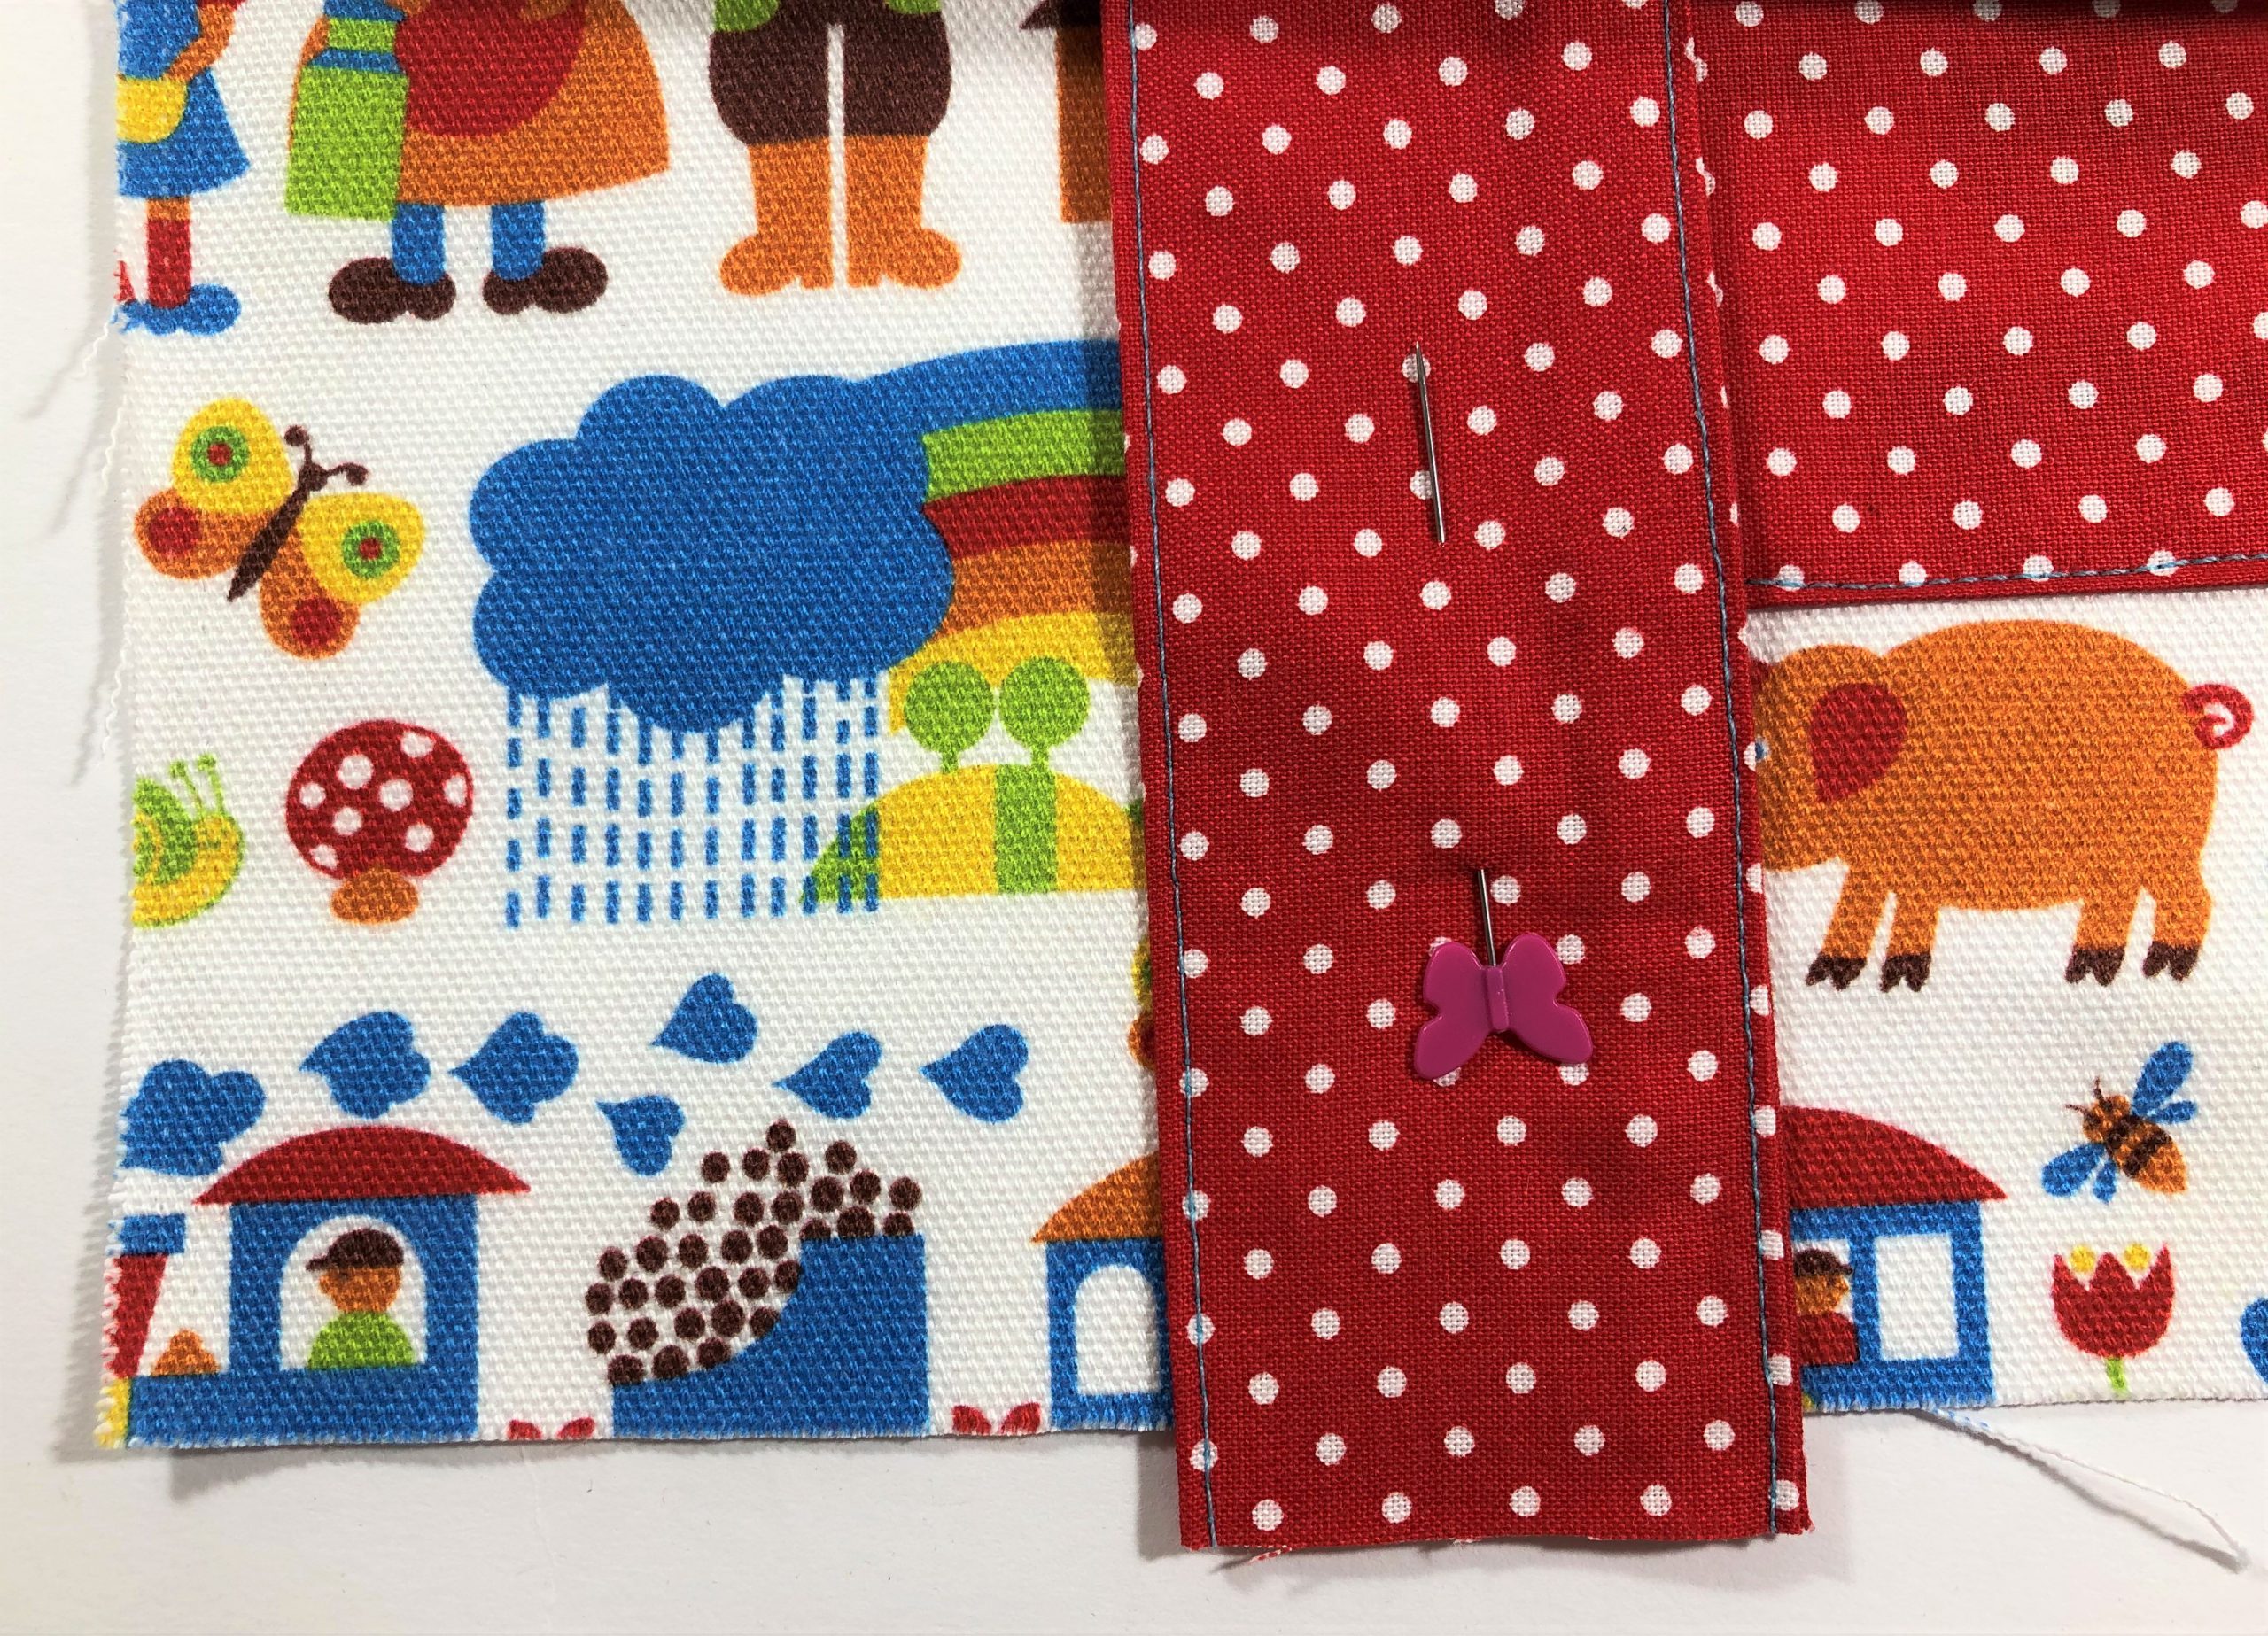
Now we pin the straps onto the front, at the bottom edge. I used the front pocket as a guide.
Then pin the front and back of the backpack with the right sides together, making sure that the hem at the top is unfolded and the straps can be seen sticking out at the bottom. If you are not using an overlocker, sew with a 1 cm seam allowance and overcast with a zigzag stitch.
Now fold the hem over inwards towards the ironed edge and edgestitch.
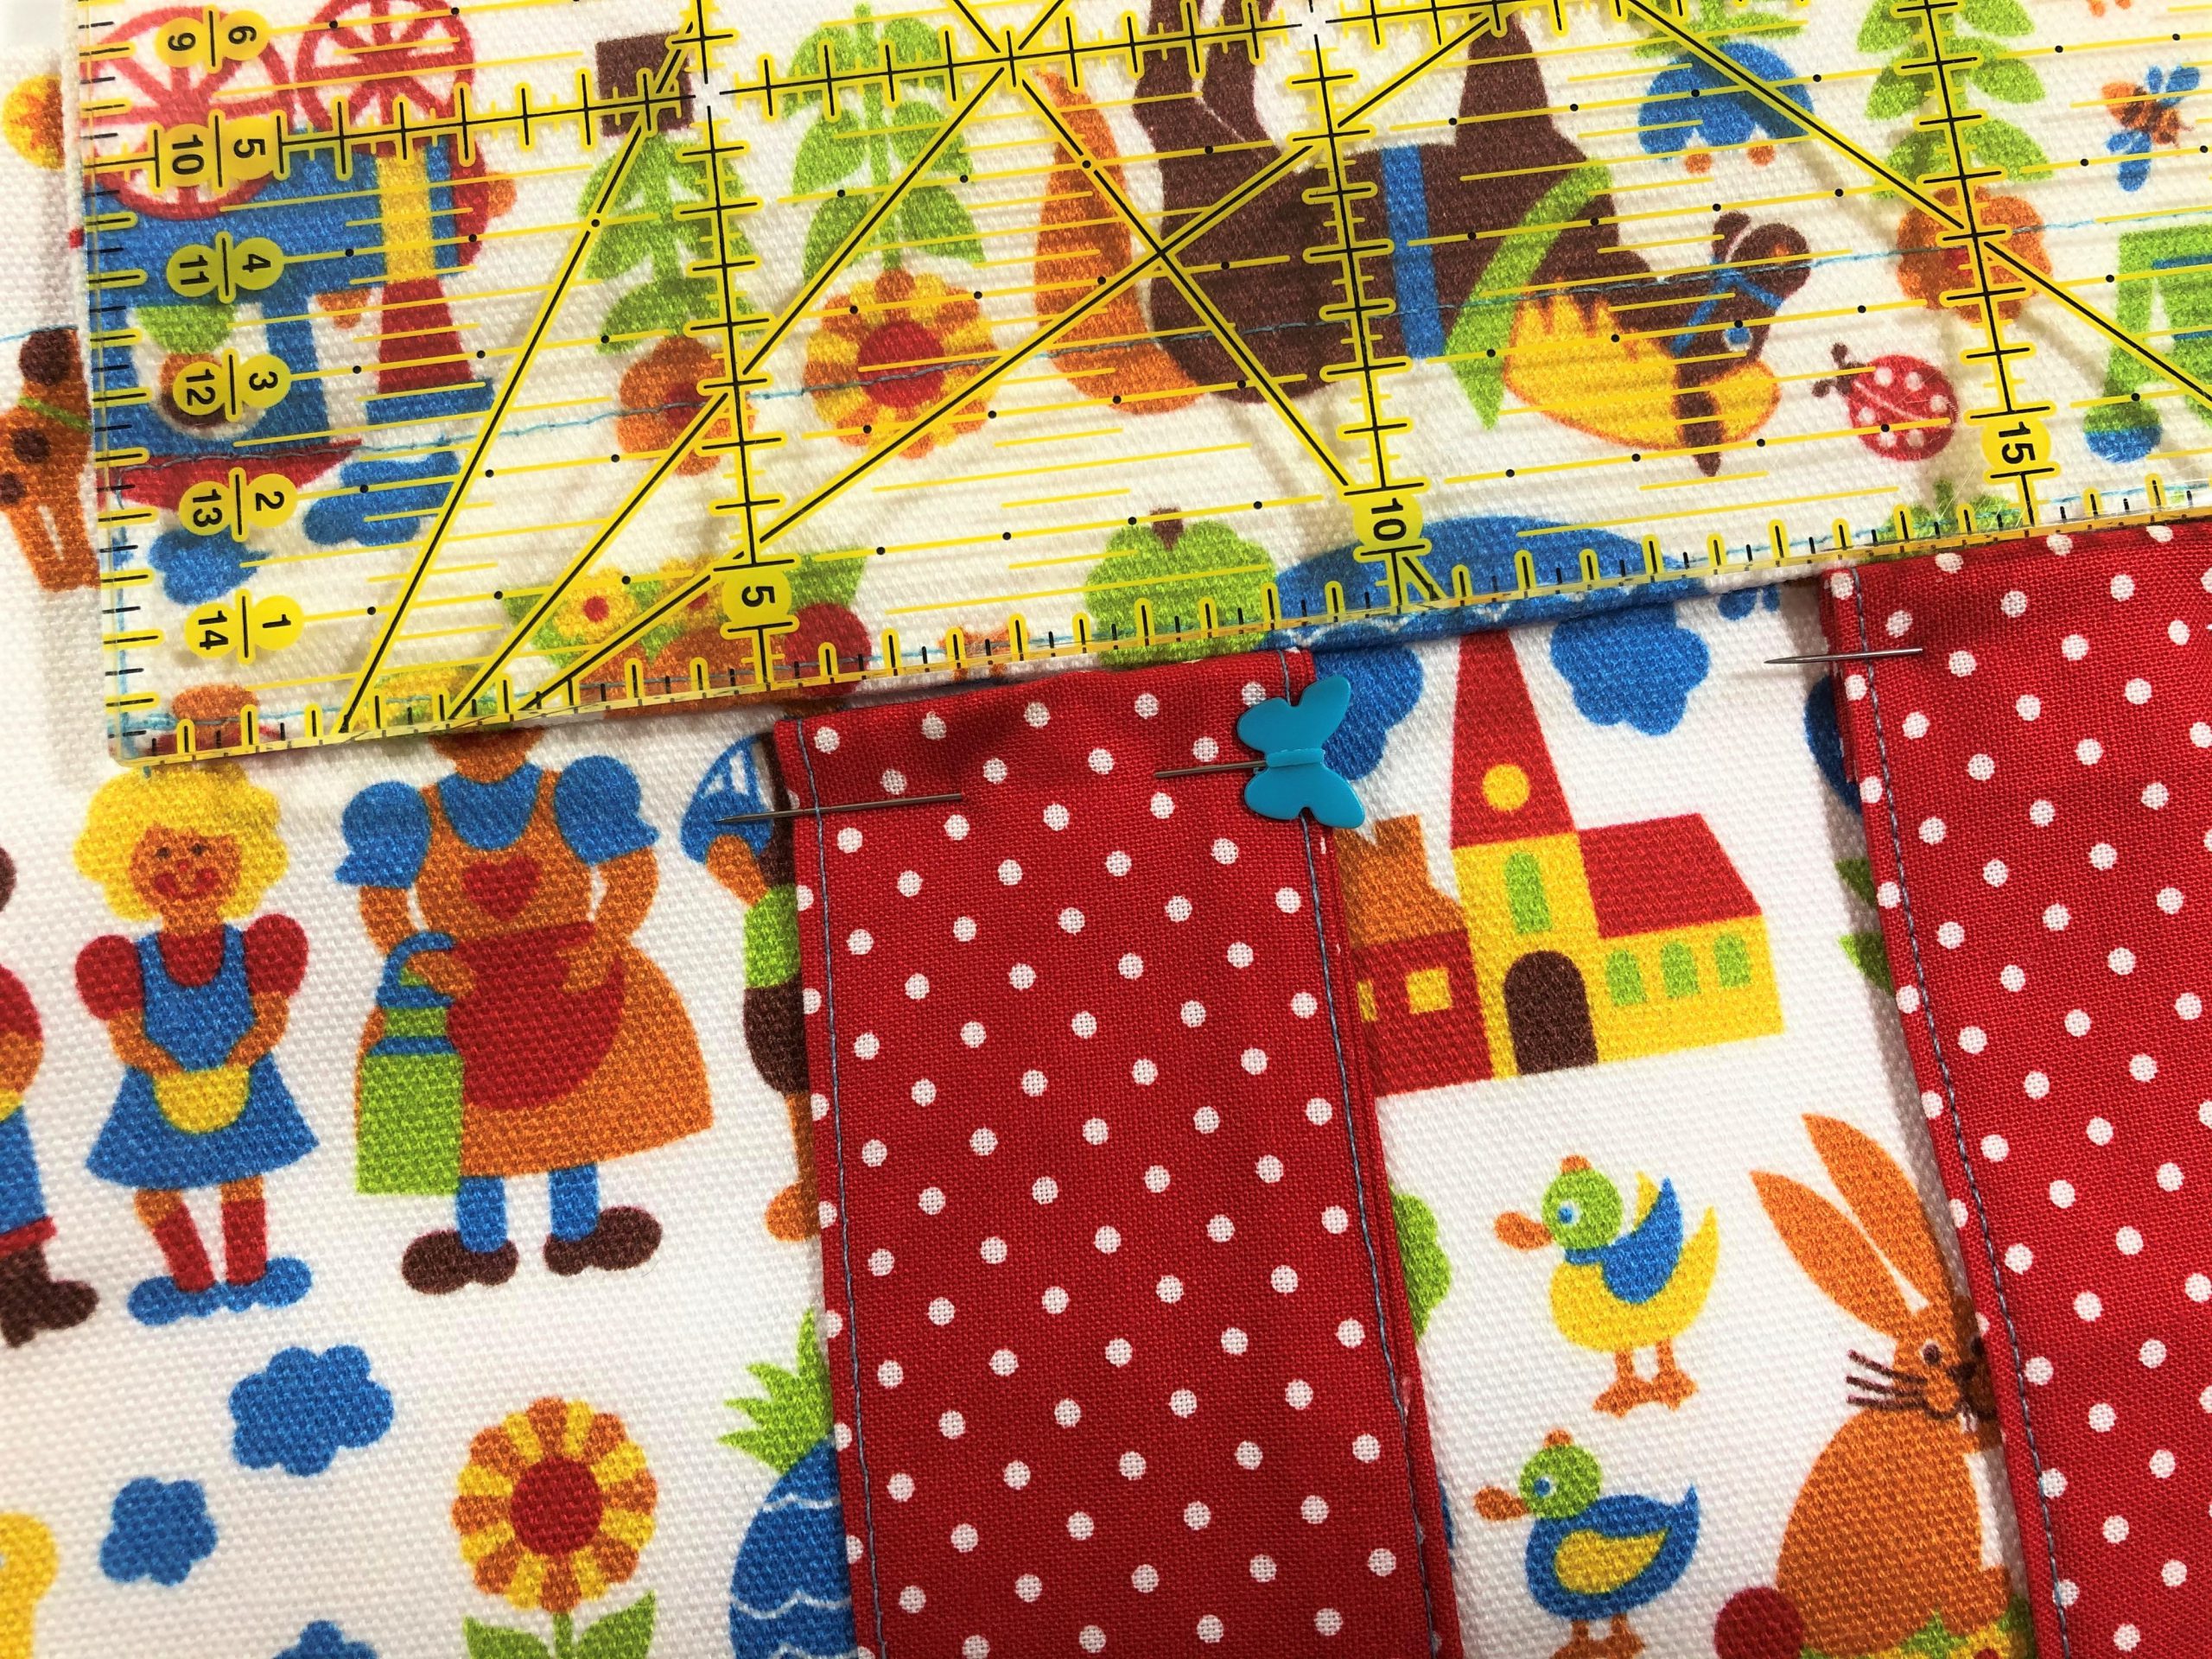
Next, we sew the straps onto the back. Measure beforehand what length is most suitable for the backpack wearer. Now fold over 1.5 cm of the strap and attach it directly below the flap (I measured 5 cm from the edge of the flap and then attached the strap).
Sew the strap in place securely with a cross. The rectangle should be 2 cm high, so the unfinished end is hidden underneath.
Finally, thread the cord through using a safety pin and attach the cord ends.
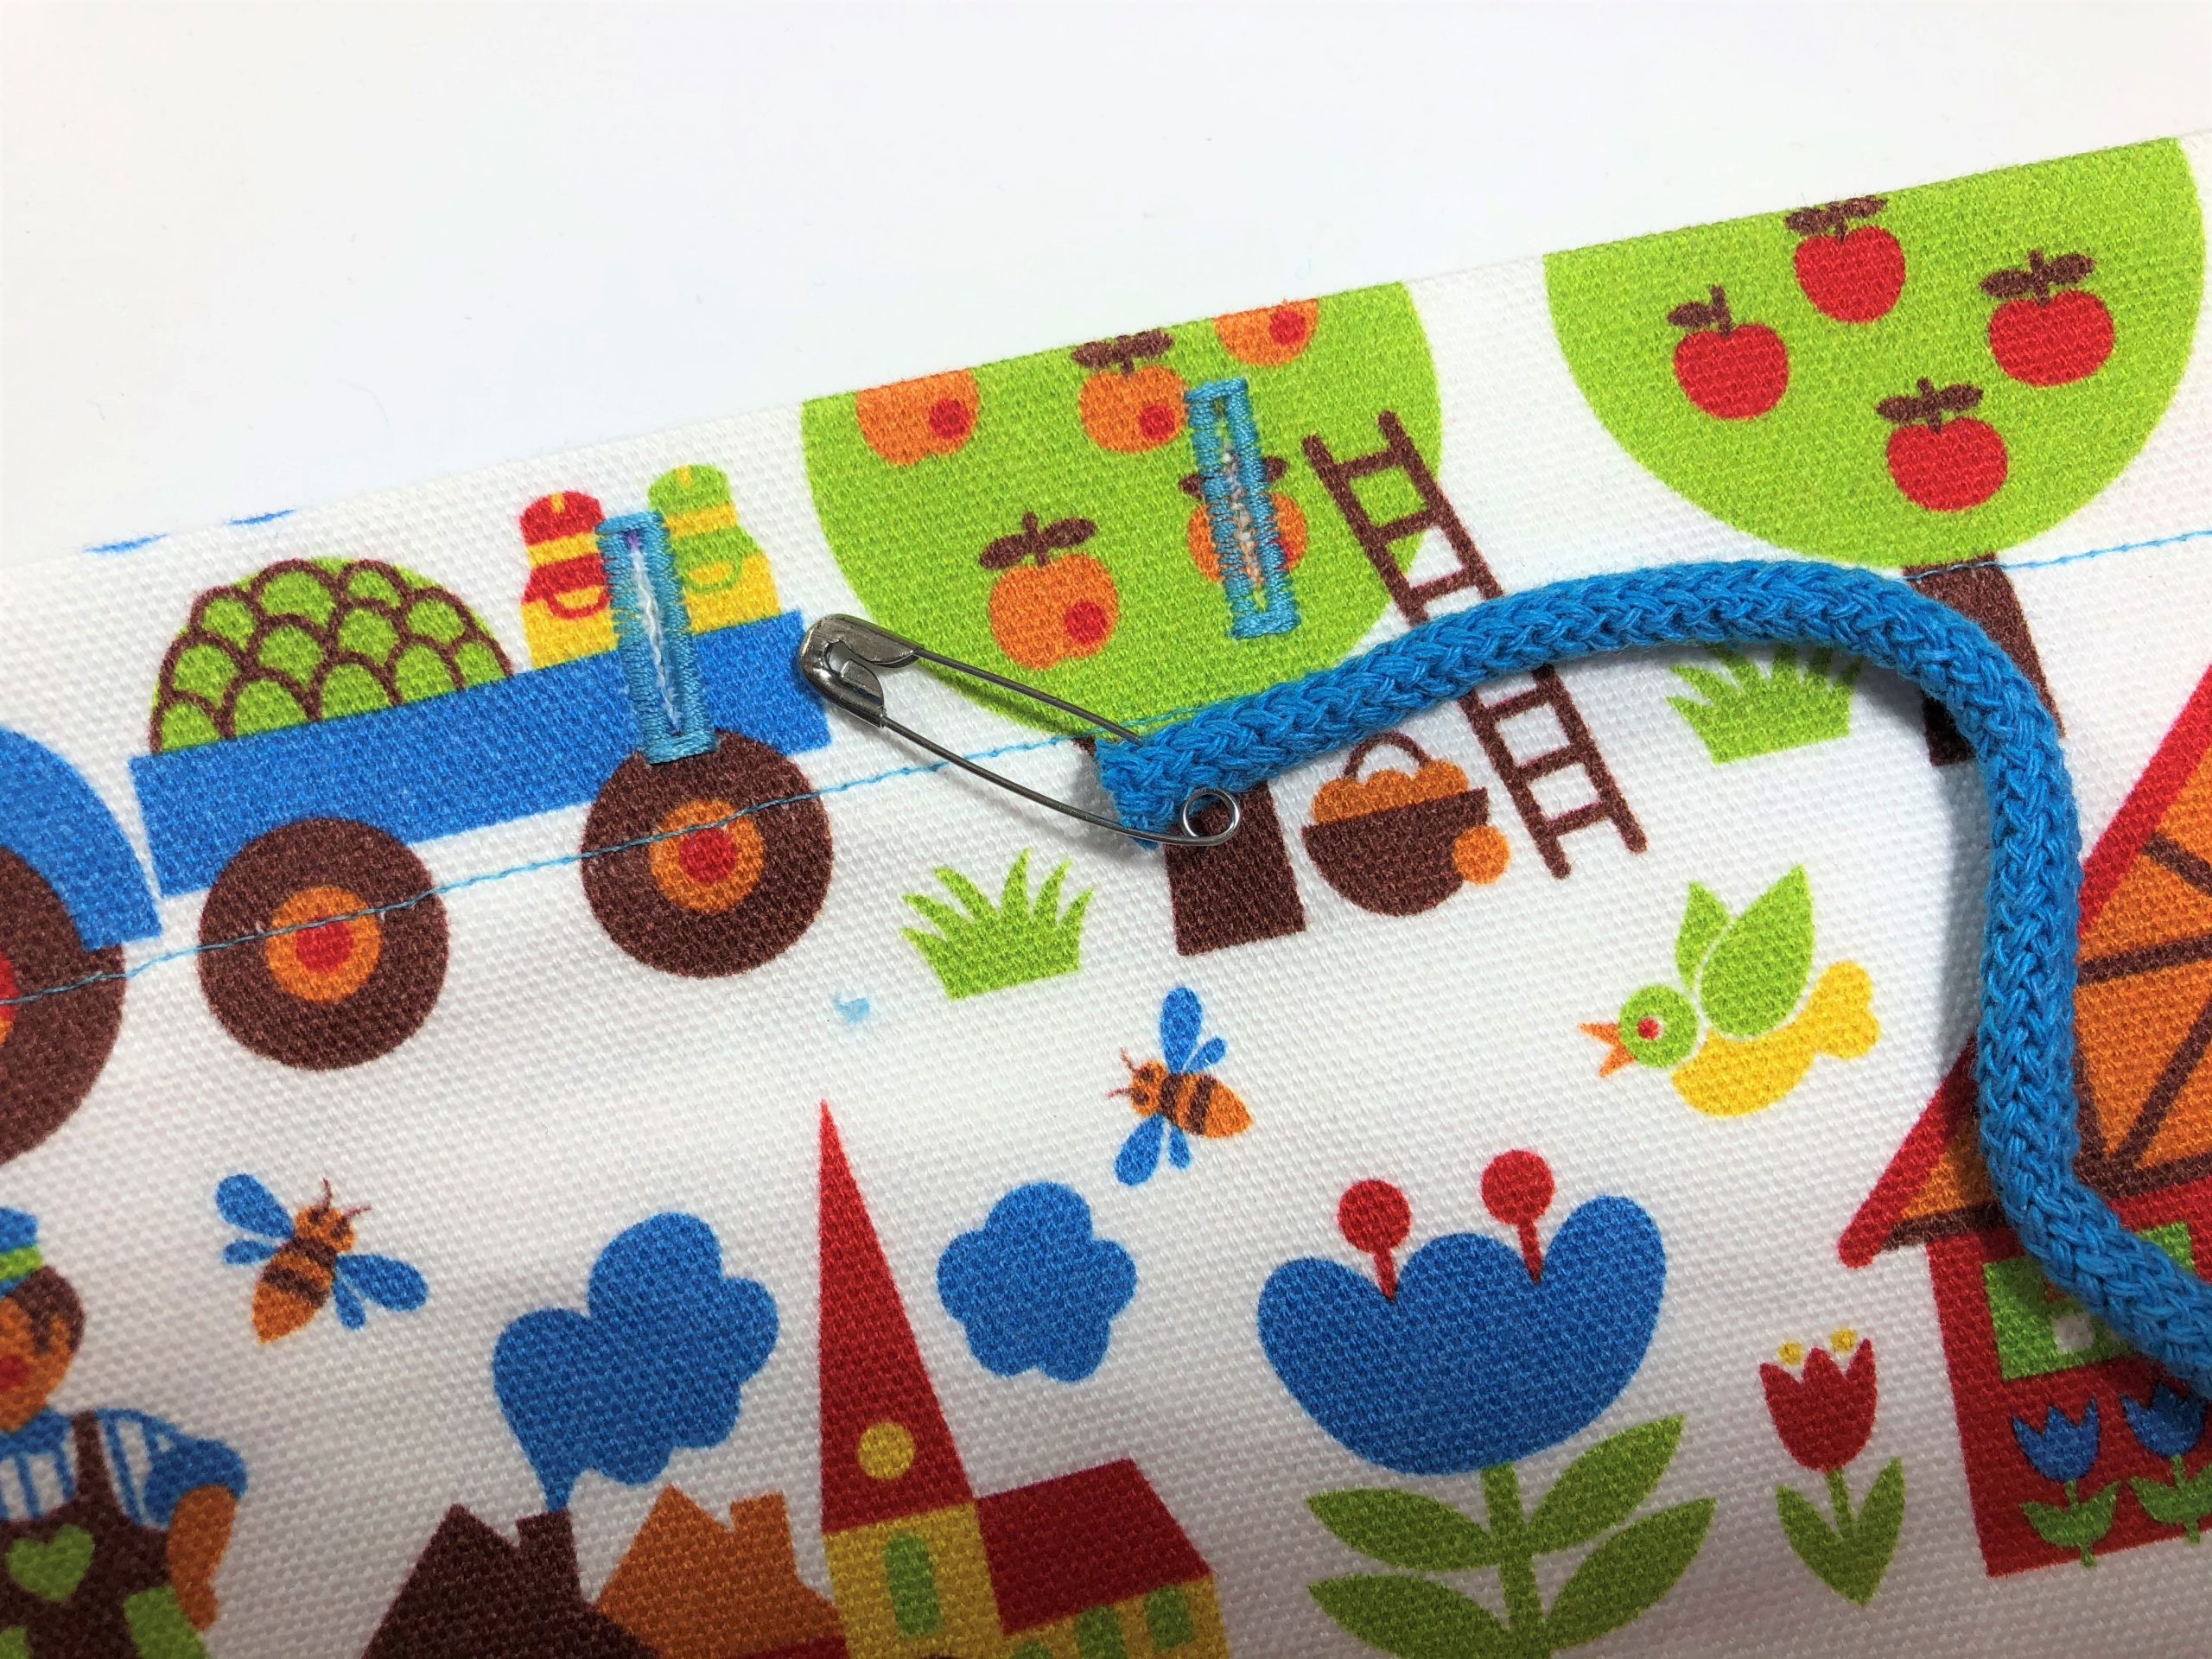
And our backpack is finished!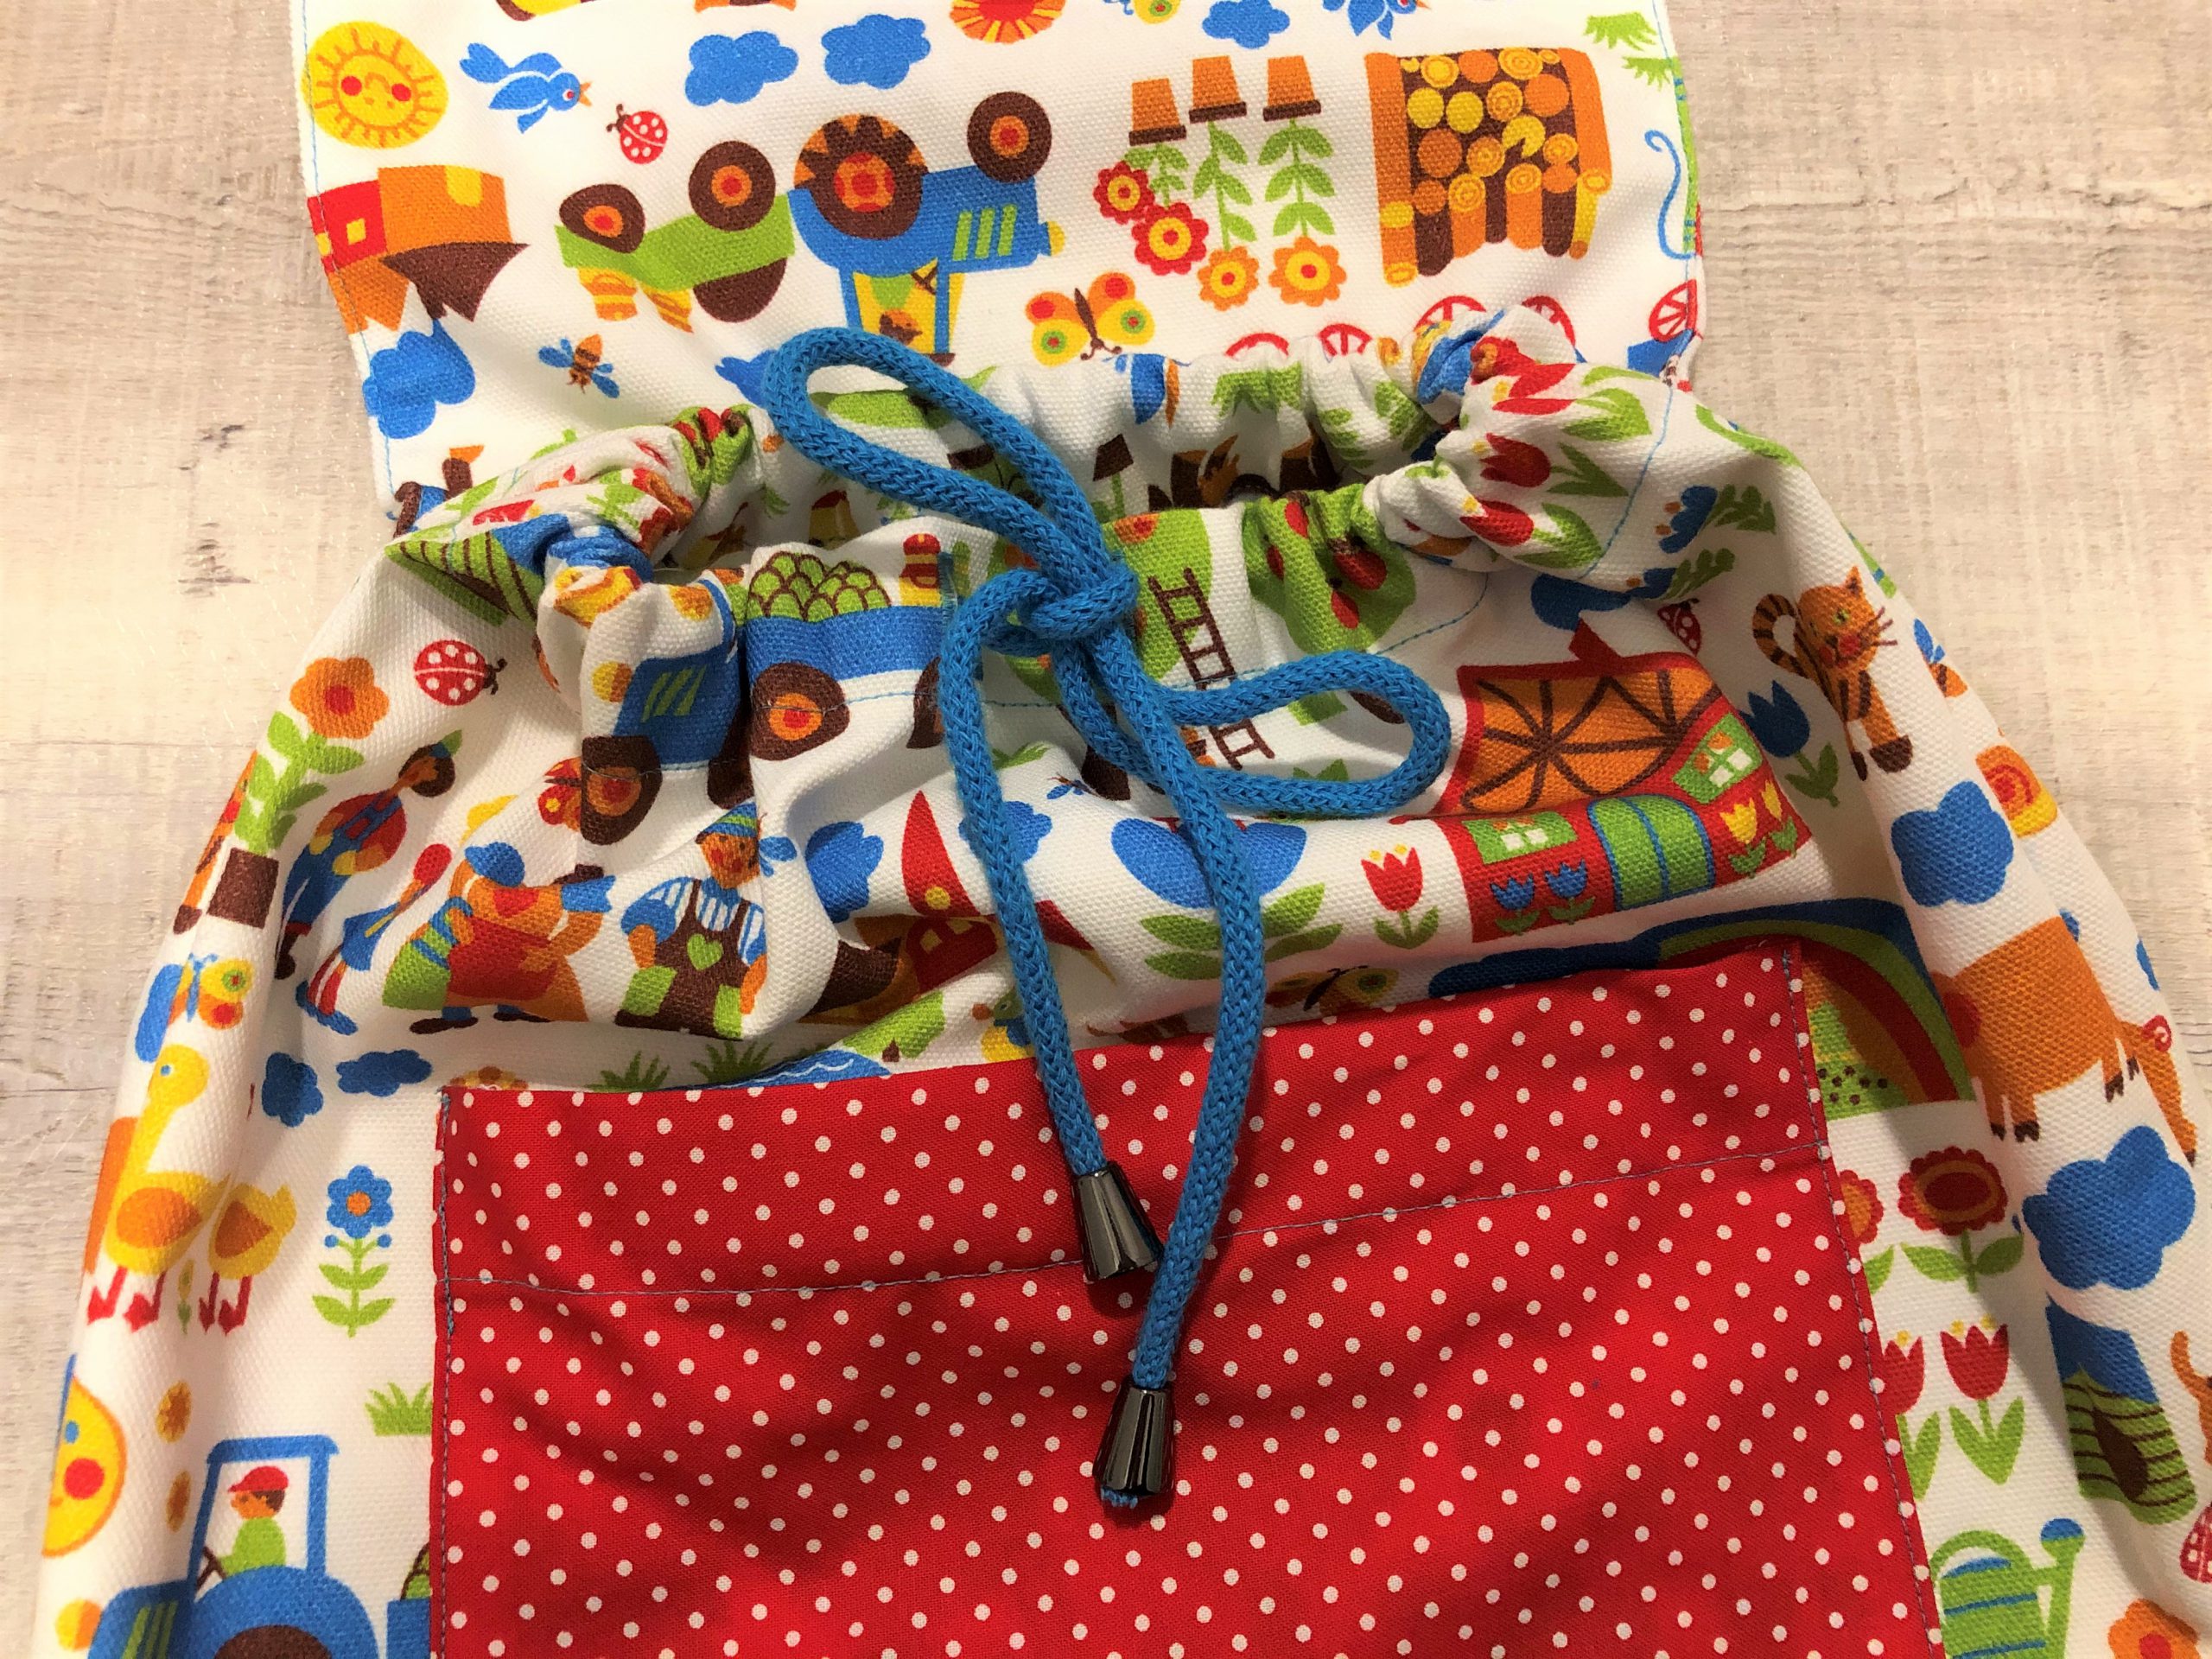
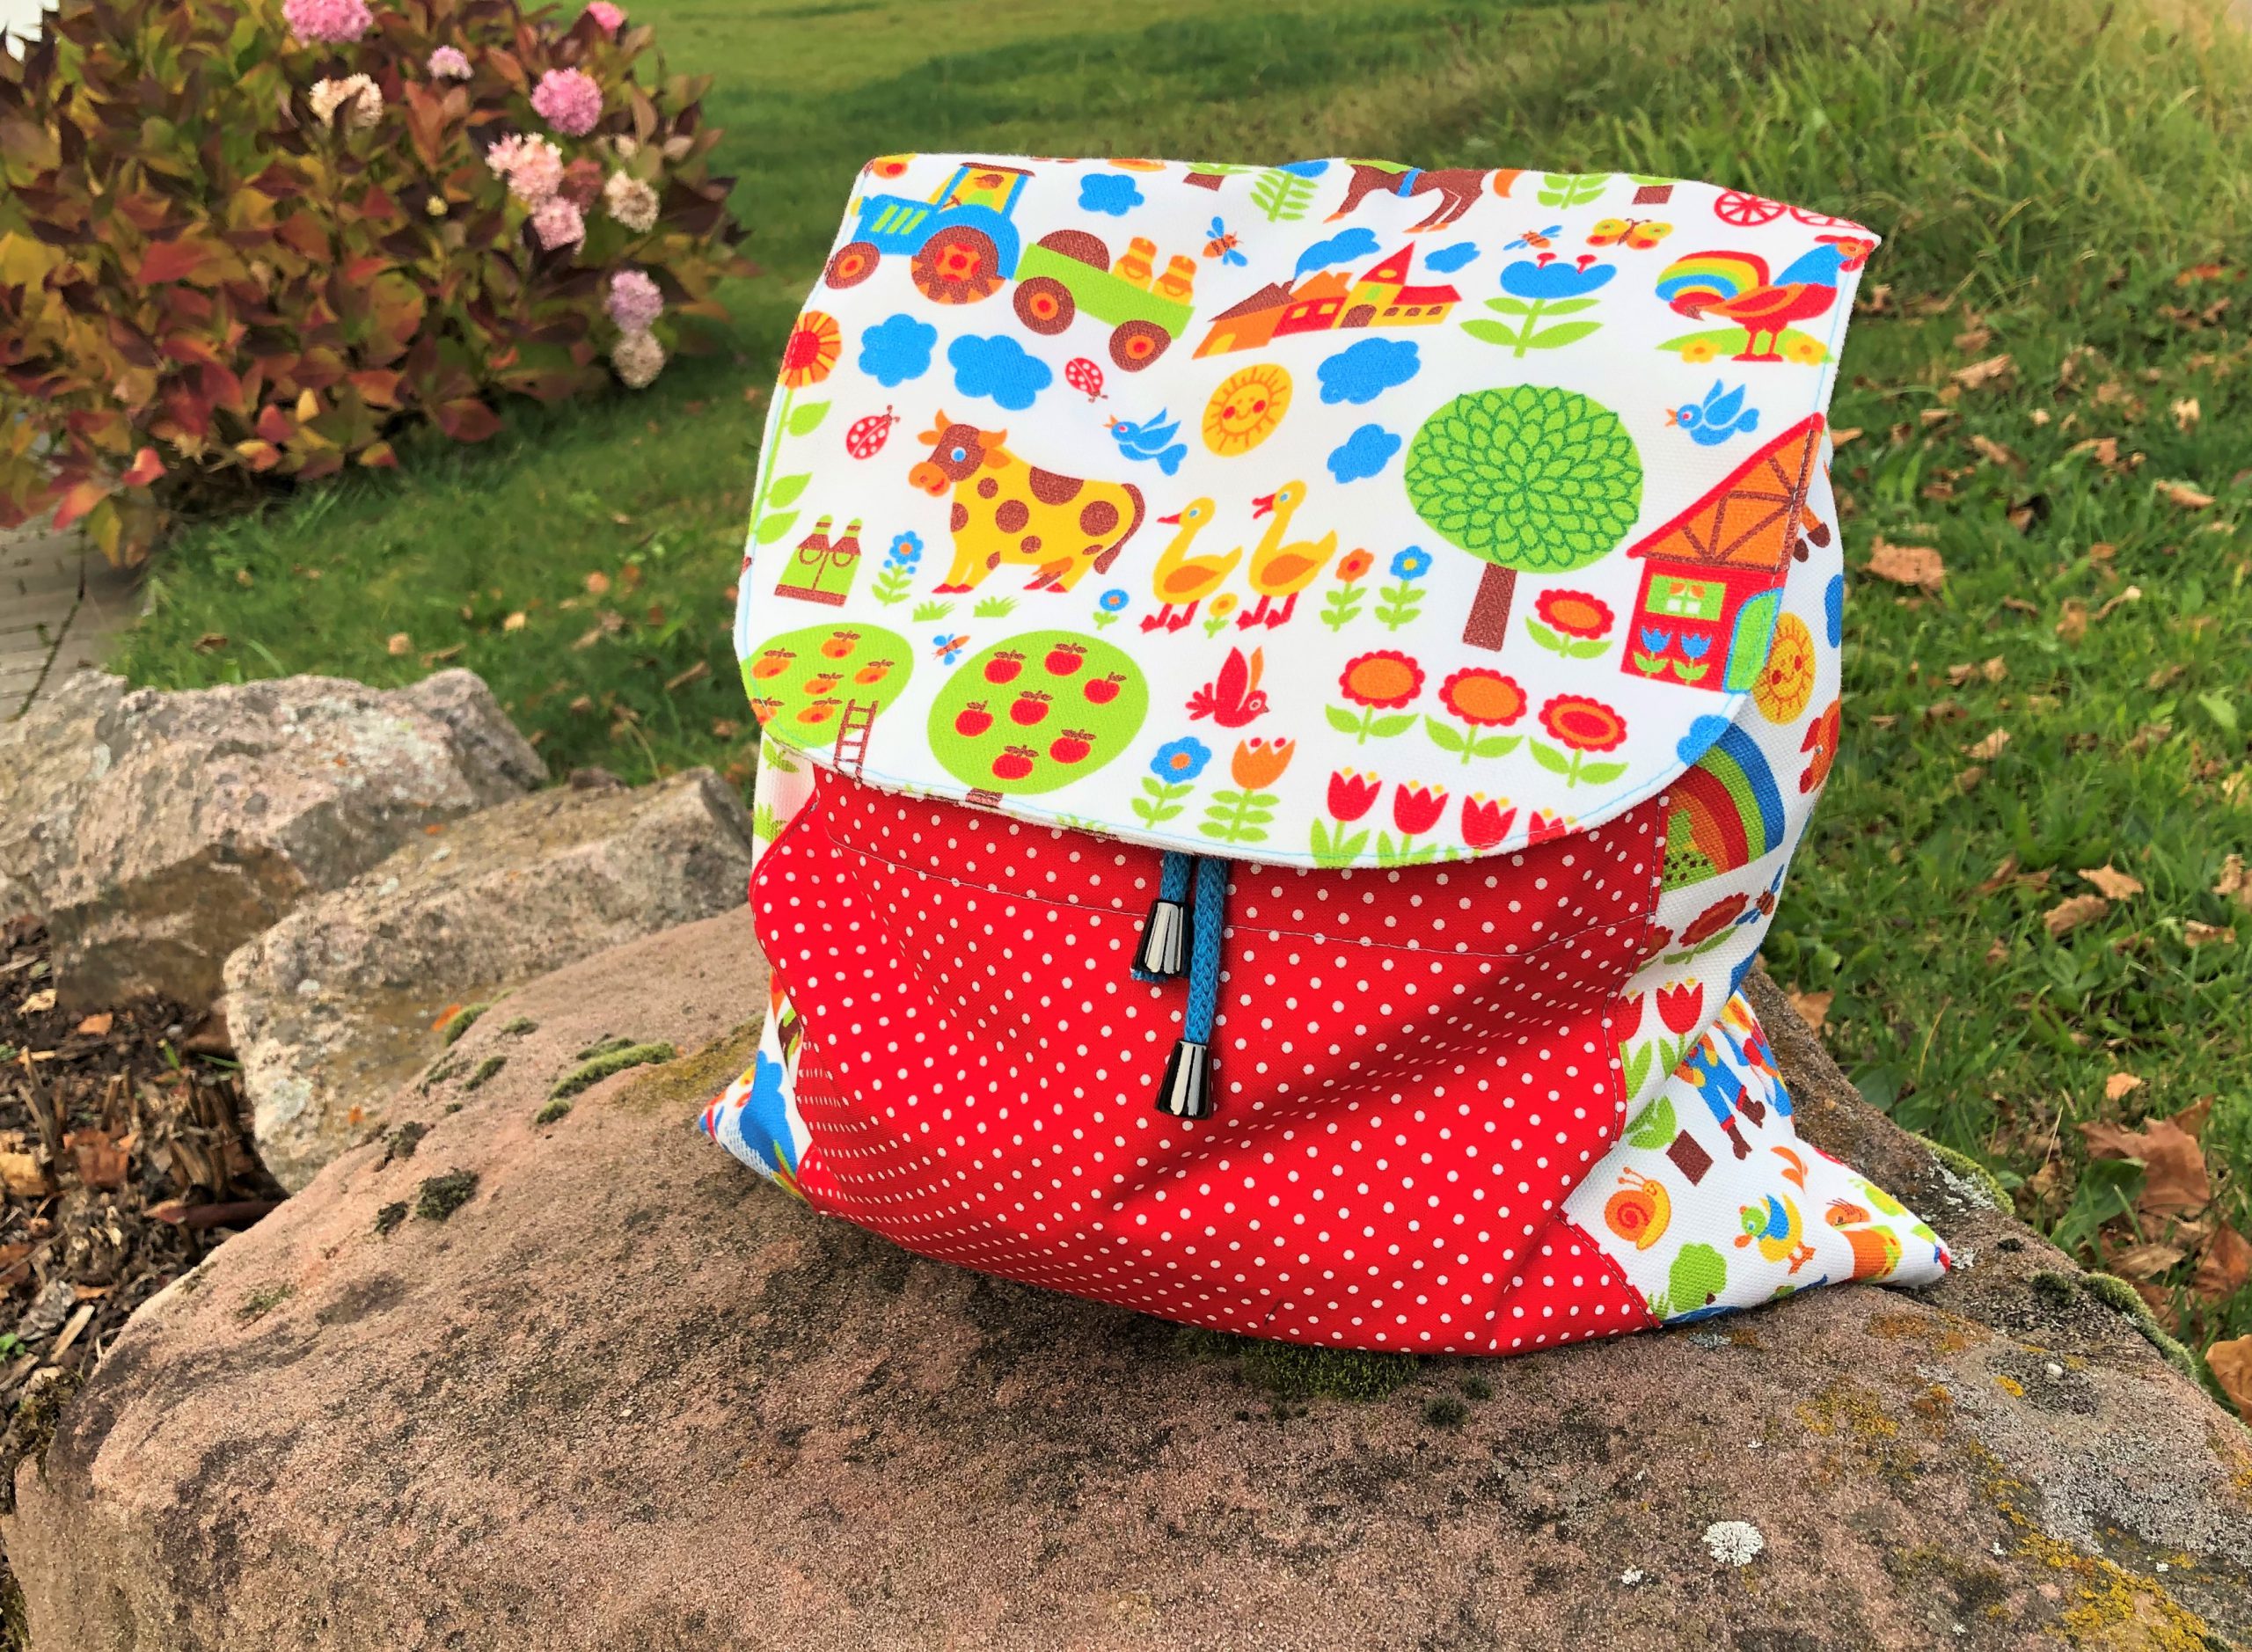
I hope you have lots of fun with my instructions for a backpack, happy Christmas holidays, a good start to the New Year and above all – stay safe!
“Creativity feeds the soul”
Best wishes,
Stefanie


0 Responses