 BERNINA Corporate Blog -
A warm welcome to the 2nd door of the Blog Advent Calendar 2023! It’s still the year of embroidery at BERNINA – which is why the motto of the blog Advent calendar is “Embroidery ideas for the Christmas season”. Today I’m going to show you how you can decorate your home with great utensil holders. We embroider with the extraordinary embroidery collection “Holiday Homies” by Tula Pink. These embroidery designs are modern and represent for once something different in the tradition-oriented Christmas season. As I live in the Black Forest, I absolutely love pine cones and fir branches, so I went straight to the forest to collect some for the decorations.

The designs are offered by ScissortailStitches. Like embroideryonline.com, ScissortailStitches belongs to the OESD company and is therefore a part of the BERNINA Group. It is a platform on which OESD mainly presents embroidery designs in modern, young styles.

At the end of the post, you will find a discount code which you can use to get the Holiday Homies designs at half price.
Instructions how to create Christmassy utensil holders
Here’s my tutorial on how to sew great Christmas utensil holders – ideal for decoration purposes or as a lovely gift.
Material supplies for one utensil holder
- 25×50 cm wool felt in dark gray mottled (1.50 mm thick) and 20x40cm wool felt in fuchsia melange
- Stabilizer, e.g. by Vlieseline
- Embroidery thread, e.g. POLY SHEEN by Mettler
- Sewing thread, e.g. SILK-FINISH COTTON 40 by Mettler
- Golden embroidery needle NM 75 by Schmetz
- Universal needle NM 80 by Schmetz
- Embroidery file “Holiday Homies by Tula Pink”
- Fabric scissors, embroidery scissors, paper scissors, rotary cutter + mat, pins/wonder clips
- and your embroidery machine and sewing machine!

Download the embroidery designs and select the colors according to the thread chart:
 These would be the great colors shown in the thread chart…. but of course I embroider with others!

Preparation how to cut the parts

For the utensil holder, cut out the following pieces from the felt:
- Large holder: 1x rectangle 25 x 50 cm and 1x bottom (see cutting pattern)
- Small holder: Rectangle 20 x 40 cm and 1x bottom (see cutting pattern)
Attention! Depending on the properties of the felt, it may warp slightly during embroidery; you may need to add a small seam allowance to the circles in order to achieve the optimum size of the bottom afterwards.
The cutting pattern for the bottom is available as a free download in A4 format at the following download link.
When printing, make sure that you do not make any size adjustments, but print in the original size (scaling=100%). With the help of the control square with an edge length of 5 cm, you can check this.
Preparation of the embroidery file
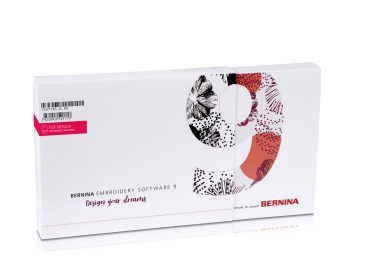
I imported the embroidery file “Holiday Homie Goose with Garland” into my BERNINA Embroidery Software 9 and scaled it down by 20%. This is possible with a grade A embroidery file in .ART format. Otherwise, the general rule of thumb is to downsize or scale up embroidery files by a maximum of 10 %. In any case, you should test your customized designs on a test piece first. In my case, the goose could be scaled down without any problems.
For the pink utensil holder, I have inserted two trims and lined them up.

The file is then sent directly to the machine via the BERNINA WiFi device. I find this very convenient!
Do you also have a gold-colored bobbin case to use for embroidering? When embroidering, free-motion sewing or free-motion quilting, you (sometimes) need more tension on the bobbin thread than usual. This is exactly what this bobbin case was developed for. It is occasionally called HTTBC, which stands for High Thread Tension Bobbin Case.
Preparation of the pattern piece and the embroidery hoop
Mark a position horizontally in the middle of the rectangular section and 10 cm from the bottom edge of the large utensil holder (7 cm for the small one).


Have you ever heard of the Medium Clamp Embroidery Hoop by BERNINA?
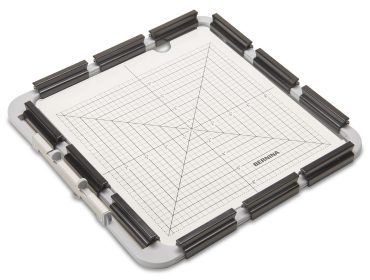
The Medium Clamp Embroidery Hoop is actually designed for quilting in the hoop (“Quilting in the hoop”). But it is also wonderfully suitable when it comes to hooping firmer materials. The Medium Clamp Embroidery Hoop is compatible with the following BERNINA machines: B 750 QE, B 780, B 700 E, B 720, B 735, B 770 QE, B 770 QE PLUS, B 790, B 790 PLUS, B 830, B 880, B 880 PLUS.
Now one of my favorite functions on the BERNINA 700 comes into play – the check function. You can find this when touching the icon “i-Dialog”. This allows the design to be precisely positioned on my embroidery fabric. In this case, I use my marked center as a reference point.
Embroidering
Now you are ready to embroider! Another great function of the B 700: the basting outline is already programmed as a icon and can be selected during embroidering. This is how you fix the piece of felt on the stabilizer again. The instruction manual explains:
- Touch the icon “Basting” to embroider basting stitches along the embroidery design.
- Touch the icon “Basting” again to embroider basting stitches along the embroidery hoop.
- Touch the icon “Basting” again to deactivate the basting stitches.

A little tip from me: Do not embroider the basting outline to the end but cut the thread 3-4 stitches before using the cutting function. By doing so, you can avoid the formation of a small knot that could possibly result in a hole.
Here we go!


Once the embroidery design is complete, remove the hoop from the machine and carefully cut open the basted outline with the embroidery scissors. The stabilizer can now be detached from the hoop and carefully peeled off the felt. The embroidered file is finished! How do you feel about my choice of color?
Sewing
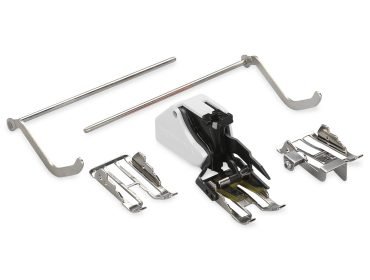
Now you can quickly sew your utensil holder from the embroidered felt. The first step is to finish the edge of the large holder with a triple straight stitch (stitch No. 6). I use my favorite foot for this: the Three-Sole Walking Foot with Seam Guide #50 with the sole for topstitching. Sew on the wrong side because we will turn this side outwards later. I didn’t finish anything on the small container but folded the outer edge over twice.

Then the short edge is sewn right side on right side together. To do this, I use the Blanket Stitch No. 1309. I set the stitch width to 4.8, the stitch length to 3.4 and the upper thread tension to 2.0. This stitch can then be pulled apart nicely, similar to an overlock flatlock seam.


I use Silk Finish Cotton 40 as sewing thread. The cotton yarn gives felt a great effect.

Leave the threads long and knot them. Then pull the side seam apart well so that the “flat lock seam” shows to advantage.

Now it’s time for the bottom. Pin it down well. As you can see, I didn’t do this on my first attempt with the photo, and all I can say now is: Sewing is easier when everything is pinned.


Now turn the edge outwards and pull all the seams apart. Your Christmassy utensil holder is done!


I wish you a relaxing Advent season with many wonderful hours of sewing & embroidering and by now a fantastic Christmas holiday!
Creativity caresses the soul!
Best wishes
Stefanie
by glückshäkelei – Design for fabric & wool
Discount code
Readers of the BERNINA blog can benefit from a 50 percent offer in November and December when purchasing the Holiday Homies Embroidery Designs at OESD. The promotion code must be entered at the checkout. This is OESDTULA50 and is valid until December 31, 2023.


Good day, dears. When do we’ll have an opportunity to buy a Medium Clamp Embroidery Hoop in Czech Republic, please? Thanks a lot
Dear Natálie,
The Medium Clamp Hoop is available in Czech Republic since September last year. Should the dealer close to you not have one on stock, you can ask them to order it for you.
Another really cute idea!
Thank you! Best regards, Stefanie