 BERNINA Corporate Blog -
Andrea from Quiltmanufaktur and author for the German BERNINA blog is your guide for this fantastic quilt-along over the next 12 months. Together, you will sew classic patchwork blocks and combine them into a sampler. The completed quilt will be traditional, yet modern! The next part has been written and we are delighted that you join this quilt project.
I am delighted to be able to show you another block for the Old Block Quilt-Along today. It is the 16th and it is called “Pink Magnolia”.
This block is the start of a small series of 6″ blocks, which are all nice and easy to make!
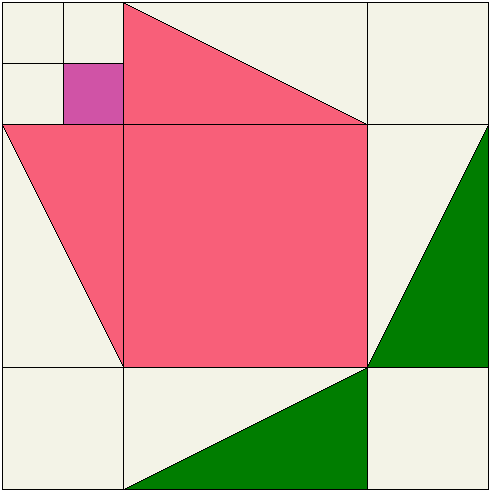
This patchwork pattern comes from the “Kansas City Star” and was designed by Eveline Foland in 1930. Eveline Foland called it “Magnolia Bud”.

(Source: Kansas City Star newspaper – Magnolia Bud)
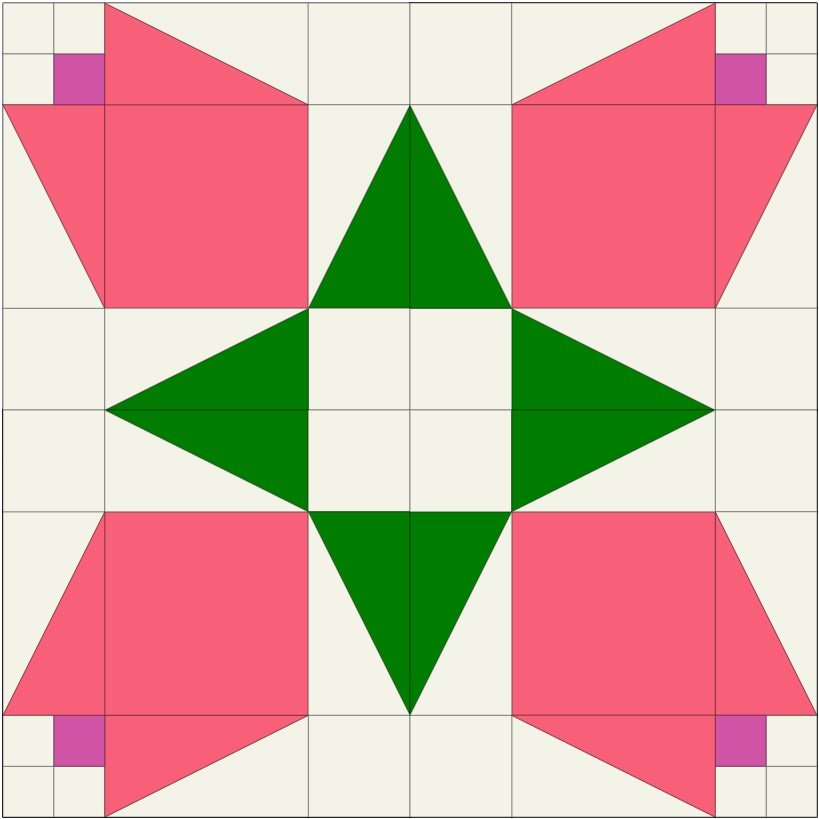
The name “Pink Magnolia(s)” actually comes from Nancy Cabot, who published this pattern in the Chicago Tribune on July 26, 1936. Her pattern was made up of four of these magnolia blocks with the flowers all facing outwards.
We are sewing the “Pink Magnolia” patchwork block
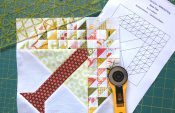
The “Pink Magnolia” block is a 6″ block (6.5″ including the seam allowance) and is made using pattern templates.
Download the patchwork templates
For cutting out, I have created two PDF documents to download:
- The first is a coloring sheet. This allows you to try out colors and designs for this block to see what they look like.
- On the second PDF you will find the templates.
On the PDF with the templates, I have put a control square with a side length of 1 inch so that you can check whether your printout of the templates is the right size. It is important to set your print options to “Actual size”.
Here are the downloads:
“Pink Magnolia” coloring sheet
Cutting out the pattern pieces
You will need to cut out the following pattern pieces:
- Piece A: 2 x patterned fabric 2 x background fabric
- Piece B: 2 x patterned fabric 2 x background fabric
- Piece C: 3 x background fabric
- Piece D: 2 x patterned fabric 2 x background fabric
- Piece E: 1 x patterned fabric
Sewing the “Pink Magnolia” patchwork block
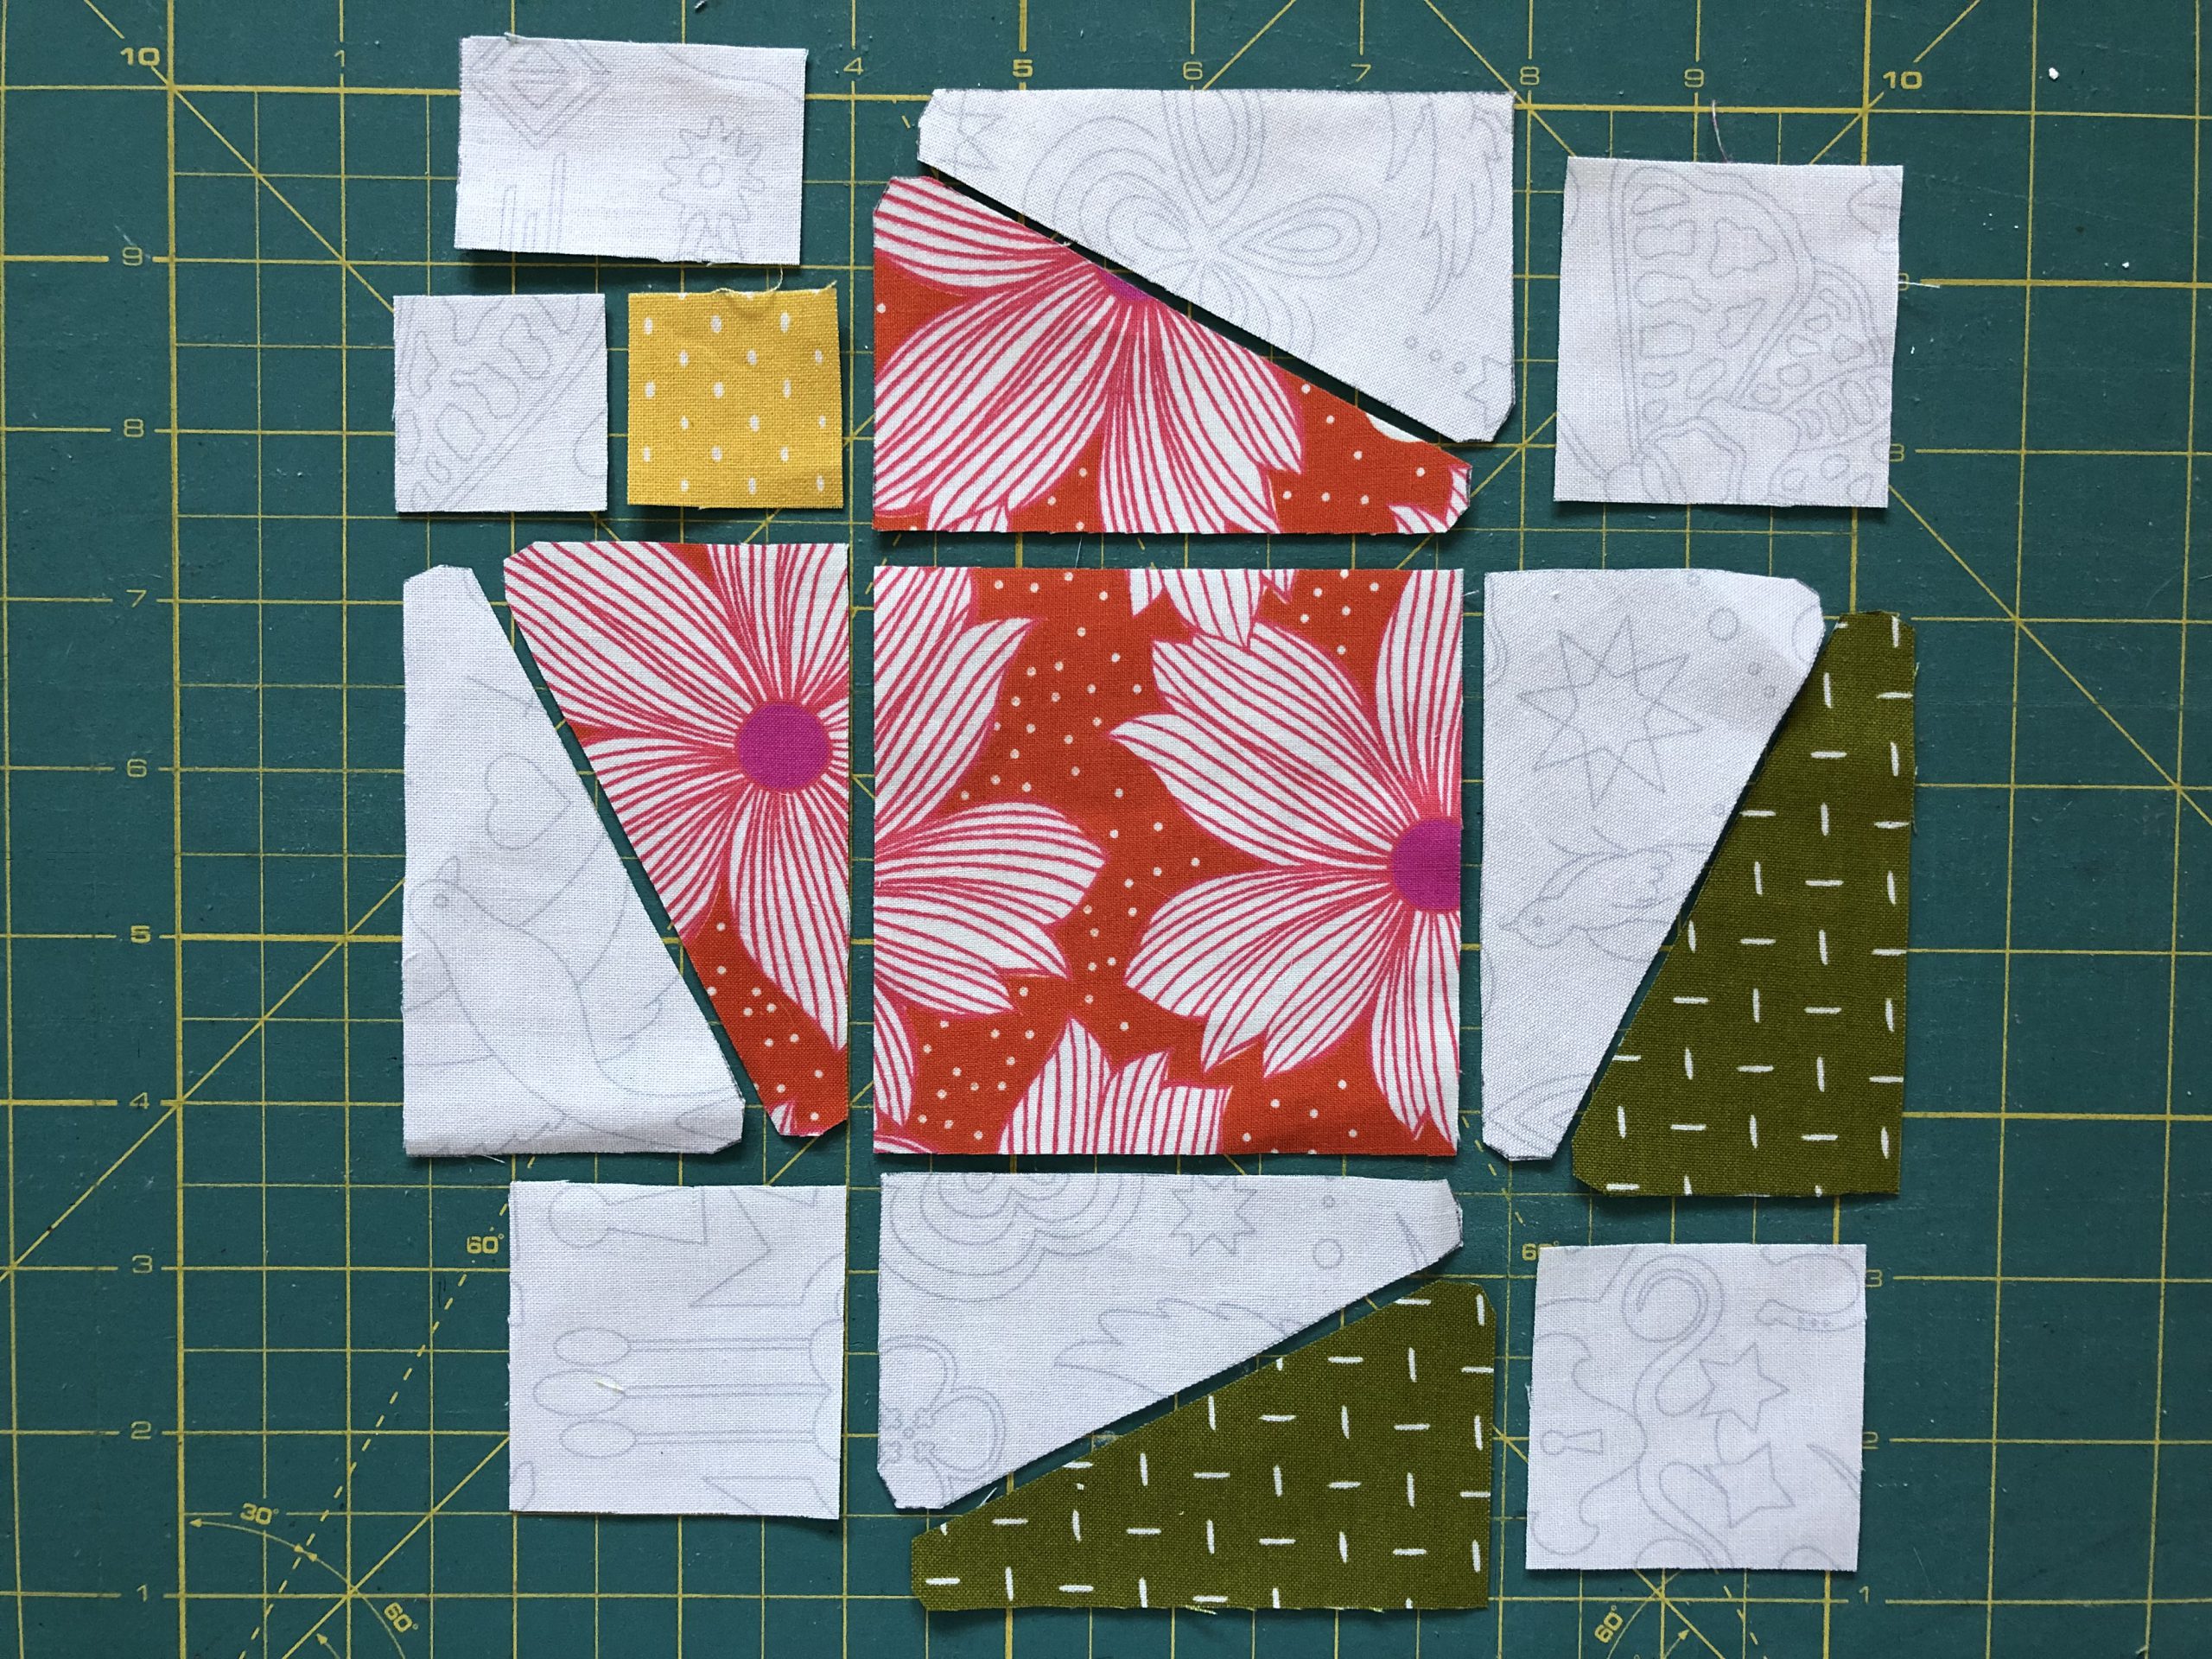
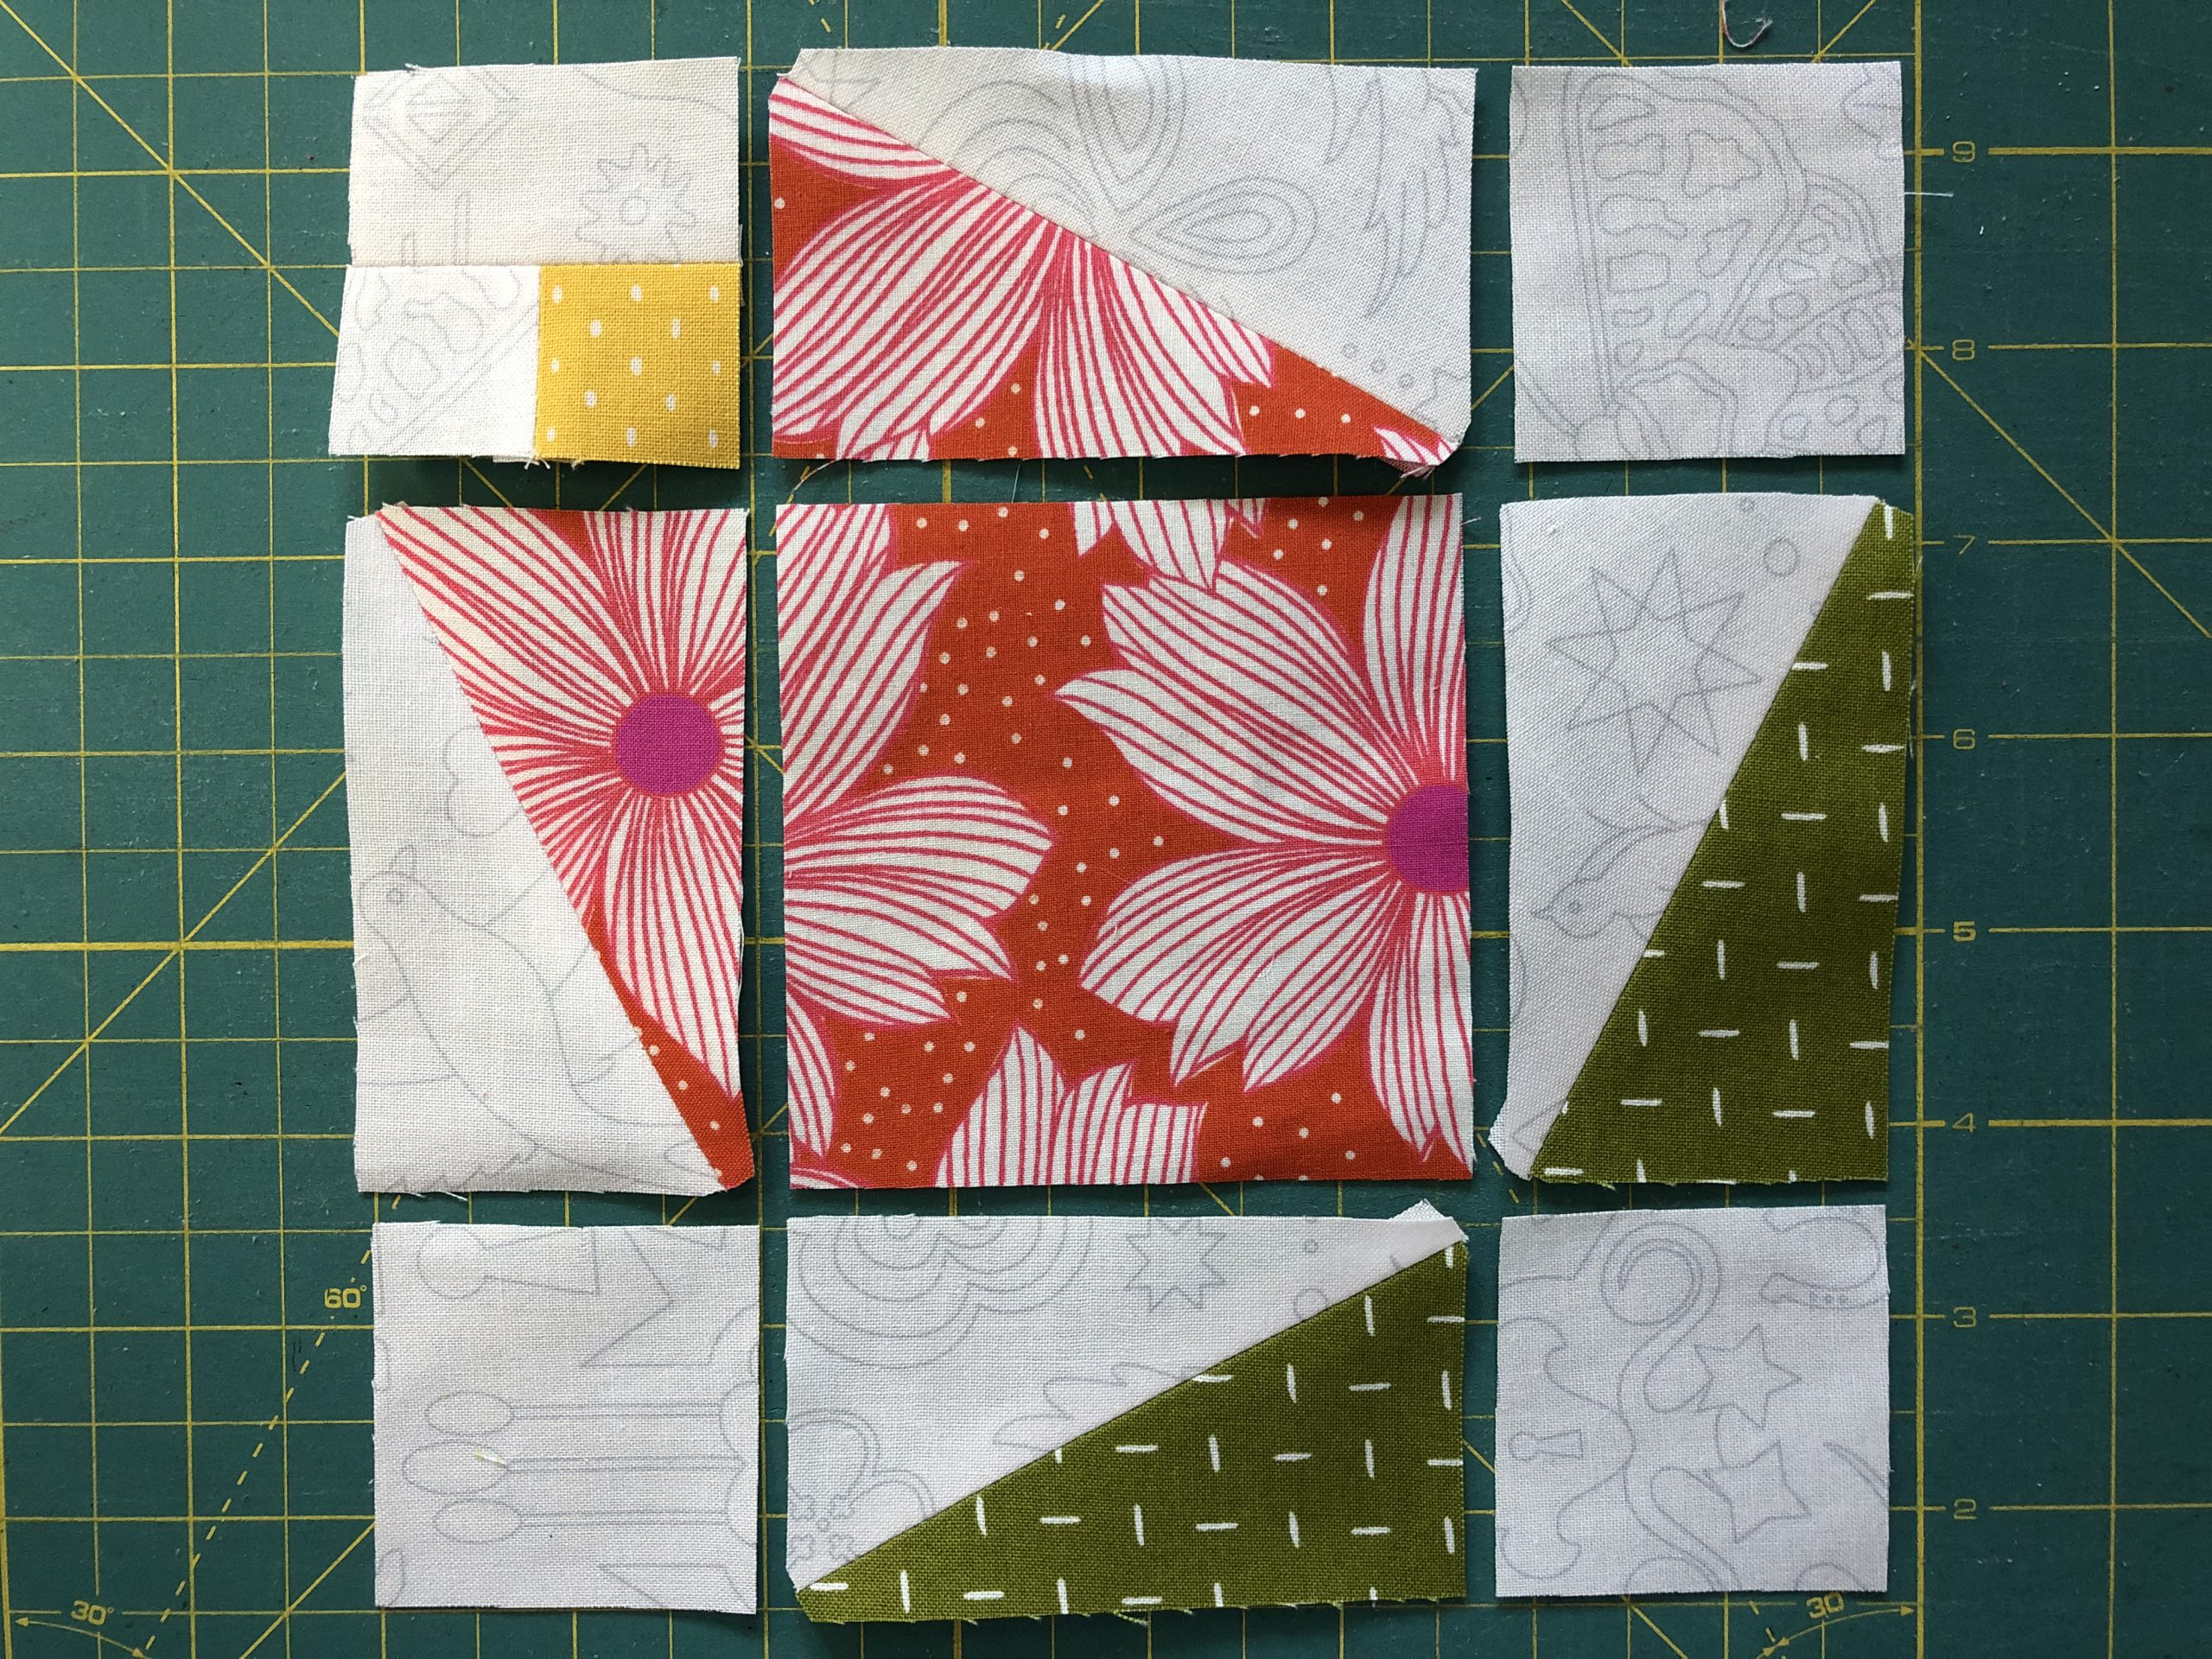
Lay out the cut pieces as usual. Please do not be surprised that you cannot see two individual background squares at the top left in the first picture. For the sake of simplicity, I cut a piece measuring 2 x 1″. You can do the same if you have read the instructions through once before cutting out the pieces (as I always recommend).
Sew the two squares for the top left part of the block together.
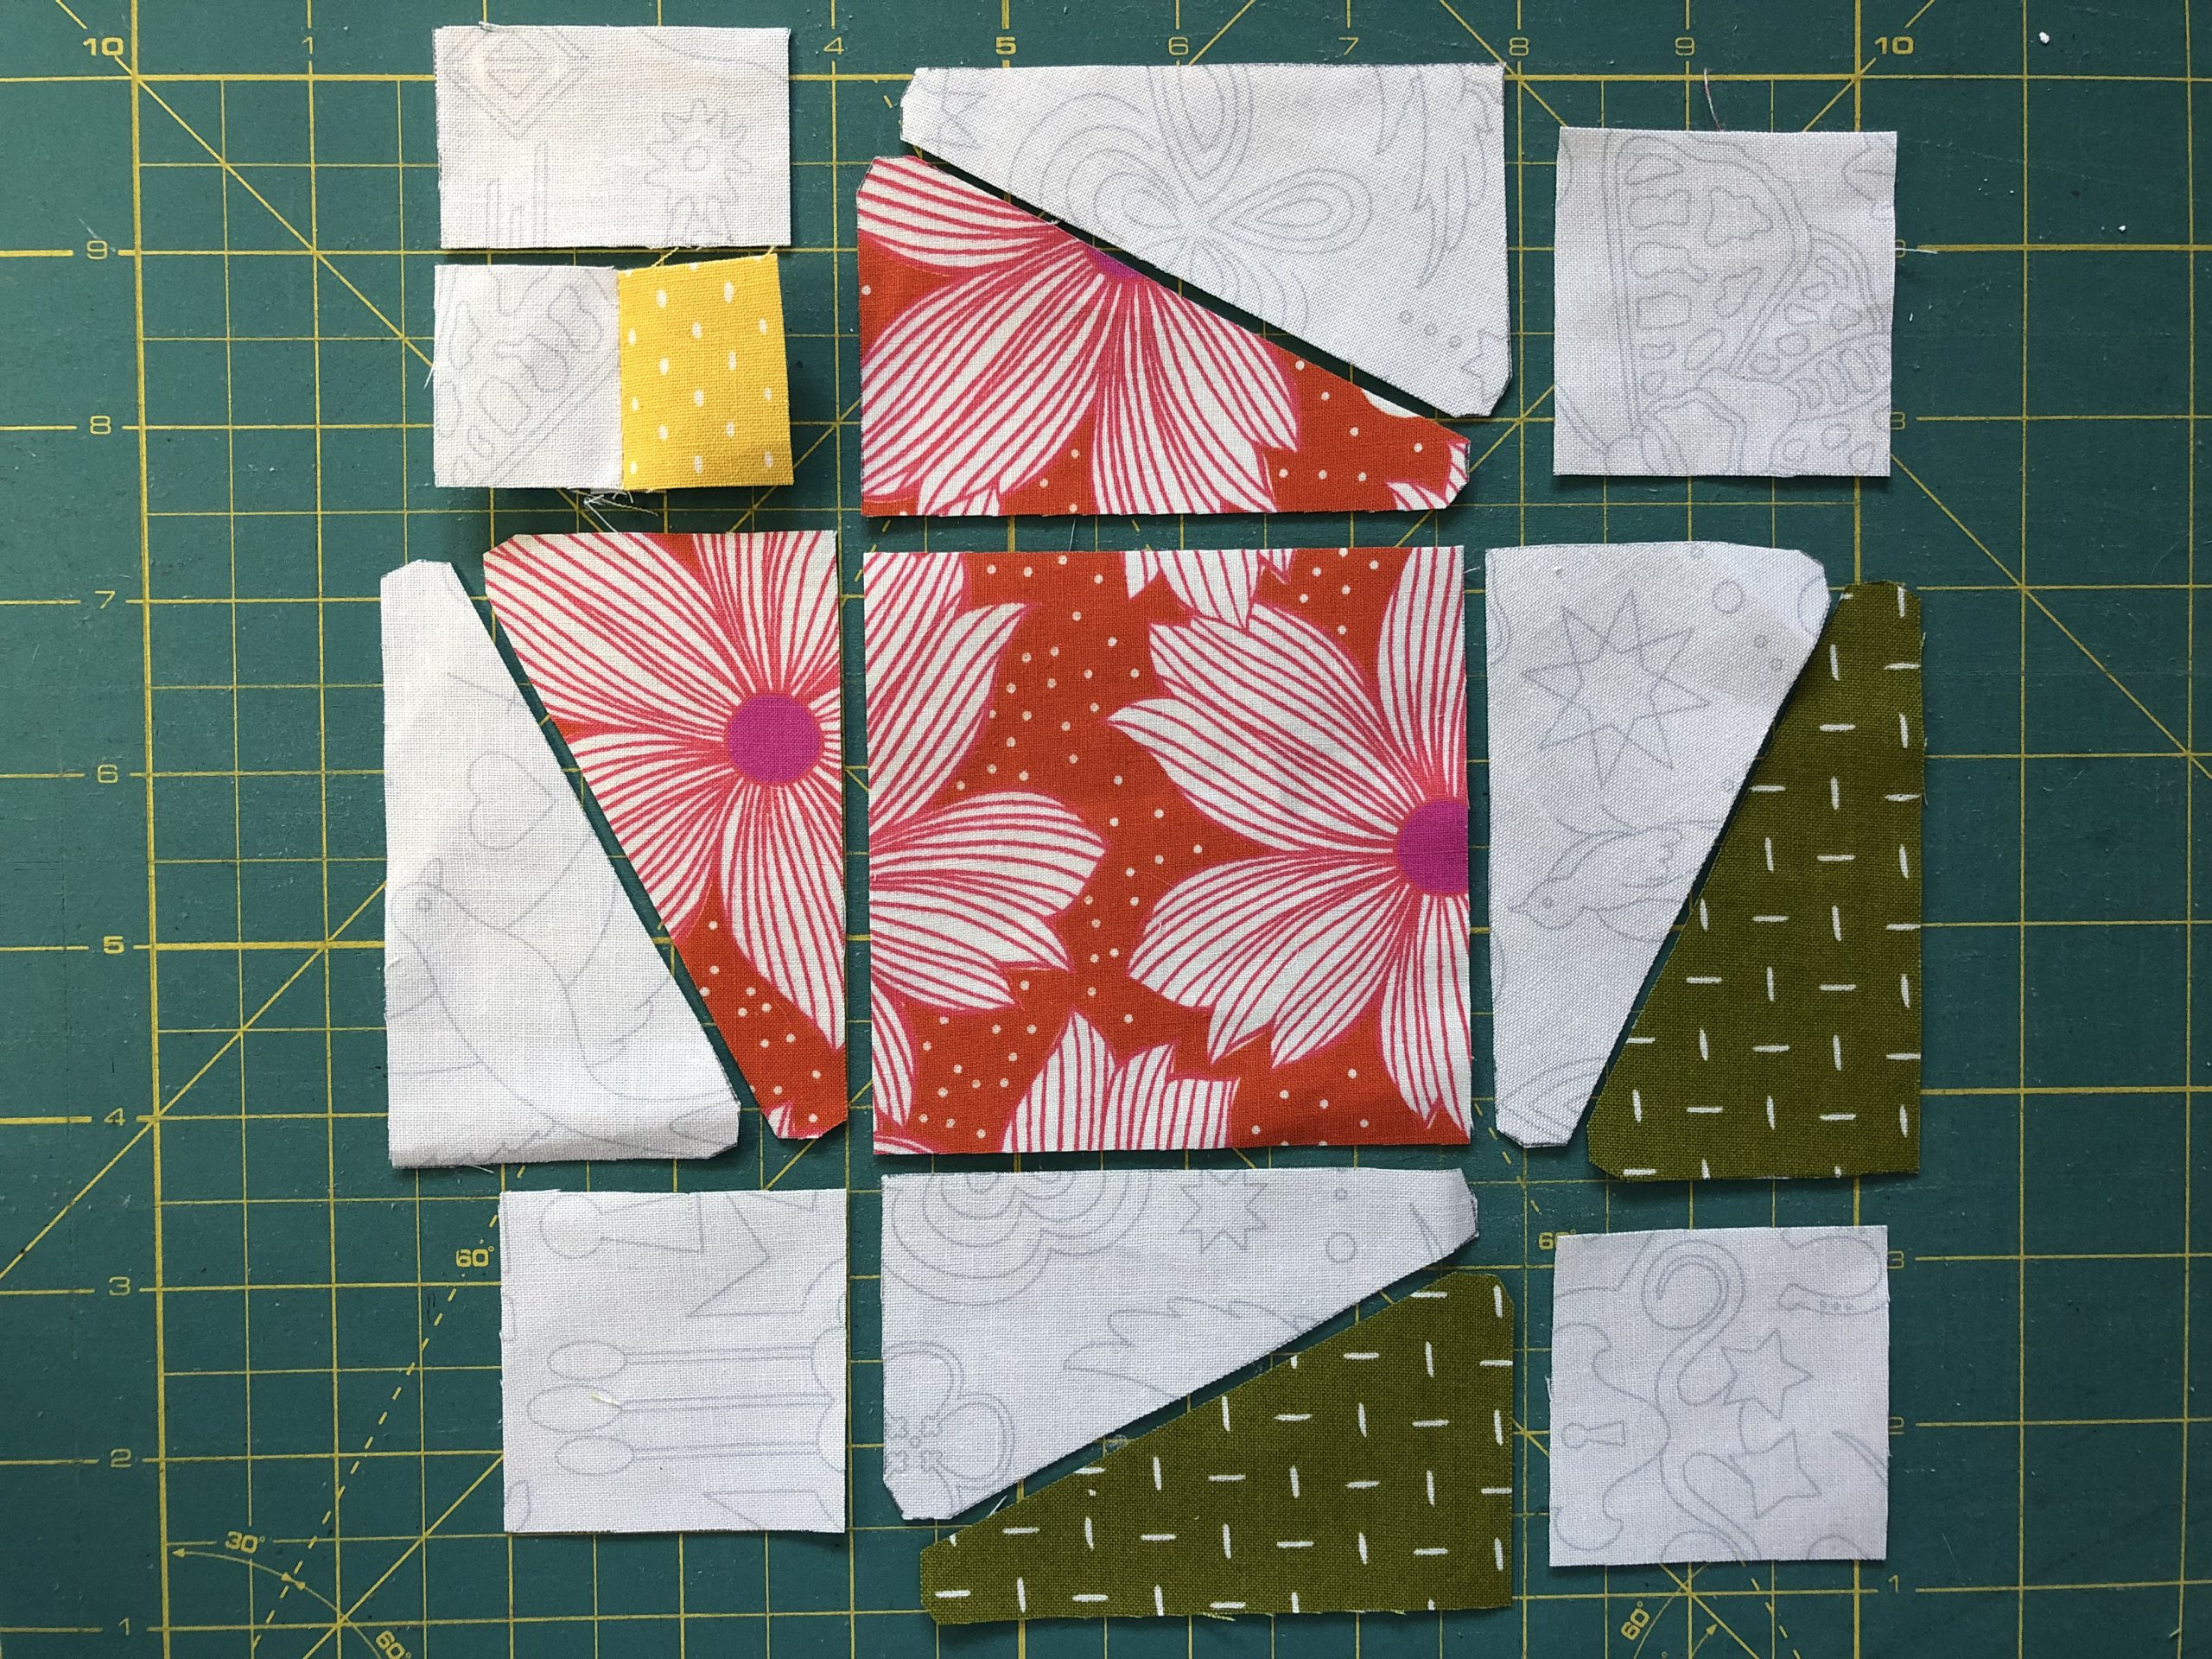
Close all the rest of the panel seams, giving you the remaining rectangular and square block pieces.
Now close the panel seams in each row.

And finally join the three rows together.

The block is called “Pink Magnolia”, but mine is actually orange… I imagine that this would also make a wonderful quilt made entirely out of scraps! What do you think?
Everyone will be happy to see your finished block here in the Community area. And of course you can also share your block on Facebook and Instagram. If you post there under the hashtag #BERNINAOldBlockSampler, it’s easy for people to find the blocks for this quilt-along all in one place.
New here?
Have you only just discovered the quilt-along? No problem! You can join at any time. Registration is not required, and you can win a BERNINA 570 QE! All the posts will remain permanently available:
In the first post, which was the invitation to participate in the quilt-along, you will find the important initial information about our joint project:
Old Block Quilt-Along – who’s in?
You can find the rest of the blocks from the quilt-along that have already been published here:
Old Block Quilt-Along – overview of all the posts
I’m glad you’re taking part and I hope to see more wonderful pictures of your blocks!
See you soon for the next block,
Andrea
Is there a measurement for the half square triangle (rectangle) shape to be able to make two at a time?
Dear sewhappy,
I don’t understand what you mean with making “two at a time”. Would you mind rephrasing your question so I can assist you? Thank you!
Kind regards, Ramona from BERNINA International