 BERNINA Corporate Blog -
Embroidering a dress is a lot of fun. But what is the best order to do it in? Is it better to cut out the fabric first and then embroider it, or would it be better to do it the other way around? In my opinion, this question does not have a simple clear-cut answer. In this article we look at both methods. You can find more tips on embroidery in the first post in this series by clicking on this link.
Embroidering a dress | When is it a good idea to embroider before cutting out?
Basically, it is very convenient to embroider the fabric for the dress first and then cut it out. This ensures that the embroidery is positioned exactly where you want it, as shown here on the collar, for example. This is particularly useful for small pieces or pieces where the embroidery is on the grain.
To help me orient the embroidery correctly when cutting out the piece later on, I transfer the paper template onto a piece of film. If you don’t have any on hand, you can also use a transparent plastic bag (for example a freezer bag) instead.

Embroidering a dress | Embroidery after cutting out, and working with templates
If the embroidery is not positioned on the grain, there are several things to take into account when embroidering the dress. All the other pieces of this embroidered dress need to be cut accurately on the grain and in some cases, the embroidery has to be oriented precisely in a specific position diagonal to the grain.
For this, I first combine the corresponding designs in my BERNINA Embroidery Software 8 and print them out. I cut out the printout in the original size and place it as a template in the desired position on my pattern pieces. You can download the free embroidery designs here.

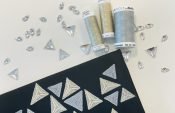
The right front piece has to be embroidered in two stages because the border does not fit completely into the hoop. As you can see, I did not embroider the empty triangles. This will allow me to think carefully about which stones I want to place there. The teardrops could be a good alternative to the triangles…


I also use the templates for the embroidery designs to cut out the H 609 fusible interlining to the right size. This is ironed onto the wrong side of the fabric before embroidering. You can find more information about interlinings in the first article from this series by following this link.

When embroidering sleeves, it is important to remember that the embroidery has to be the opposite way around. For this, you can use the mirror function on your embroidery machine for the second sleeve. To ensure that the embroidery on both sleeves is in the same position, I made appropriate notes here. This ensures that the embroidery on both sleeves is absolutely identical. With this method, it worked out great… but in the end I decided on one unembroidered sleeve, as you will see in one of my later posts.

Embroidering a dress | Pinpoint Placement
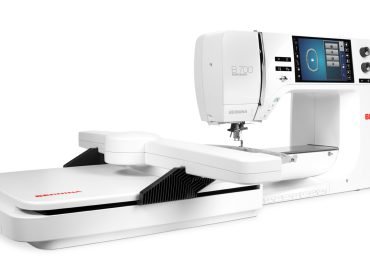
For this project, I am particularly pleased that my BERNINA 700 can position the embroidery designs precisely.
To do this, I put the relevant template on the fabric part intended for this purpose. As explained, the template is the same size as the embroidery.

In order to judge the correct position, it might be a good idea to fold the corners backwards first.

Once everything fits perfectly, I orient the design on the fabric using the Pinpoint Placement funcion on my B 700. As I always use two opposite corners as a reference, the template then has to be fully unfolded again.

Here, the pattern for the front piece is first aligned with the top corner….

…and then with the bottom corner.

In this video, you can see how easy it is to use Pinpoint Placement.
If your BERNINA does not have this function, I recommend using paper templates to determine the position and then hoop the fabric precisely with the clear plastic template that comes with every frame.
In the next post, I will give you some tips on the topic of sewing!
Until then, warm sparkling wishes,
Claudia


0 Responses