 BERNINA Corporate Blog -
Straight and CutWork Stitch Plate with the CutWork Accessories Box (CutWork Foot #44C, CutWork Tool with 2 Blades and allen key)
My lovely friends at Bernina RSA & Bernina HQ gifted me the CutWork Accessories.
These amazing tools enable you to be able to cut designs in your fabric with the embroidery module.
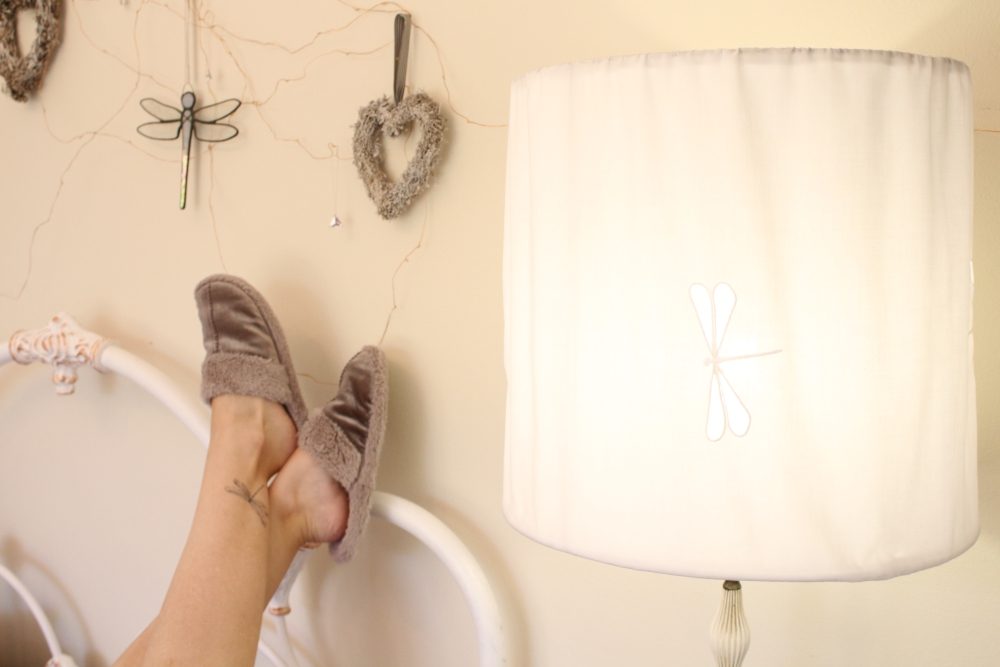
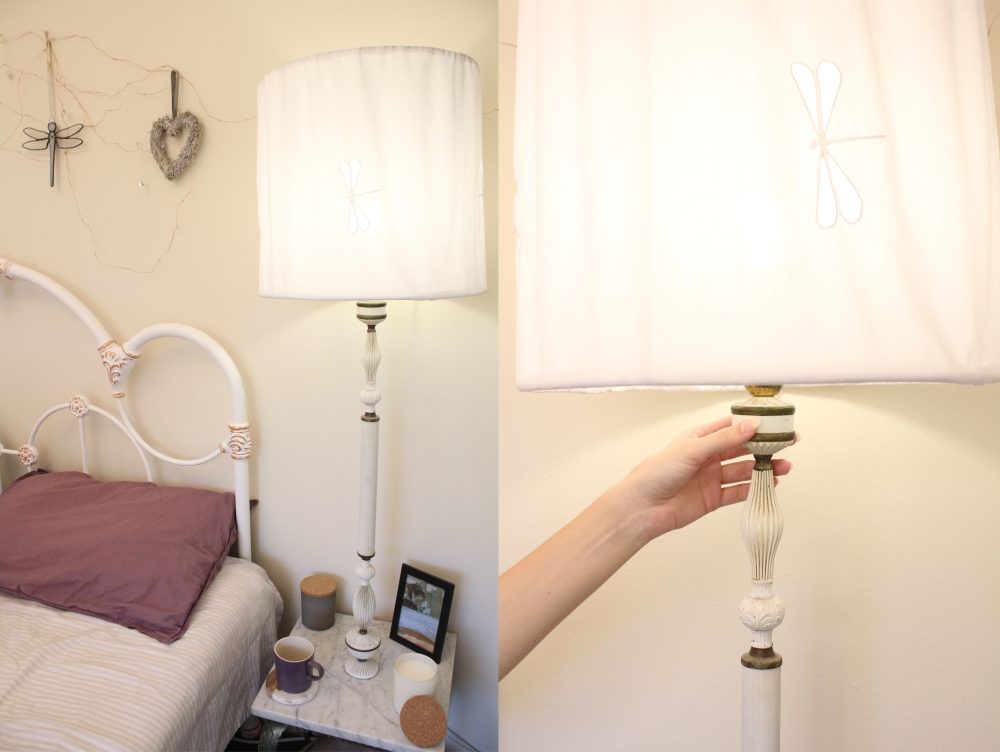
I immediately knew that I wanted to use it to make an interesting lampshade for my bedside and with the use of my Embroidery Software Designer Plus (V8) I can create a unique cutwork embroidery design.
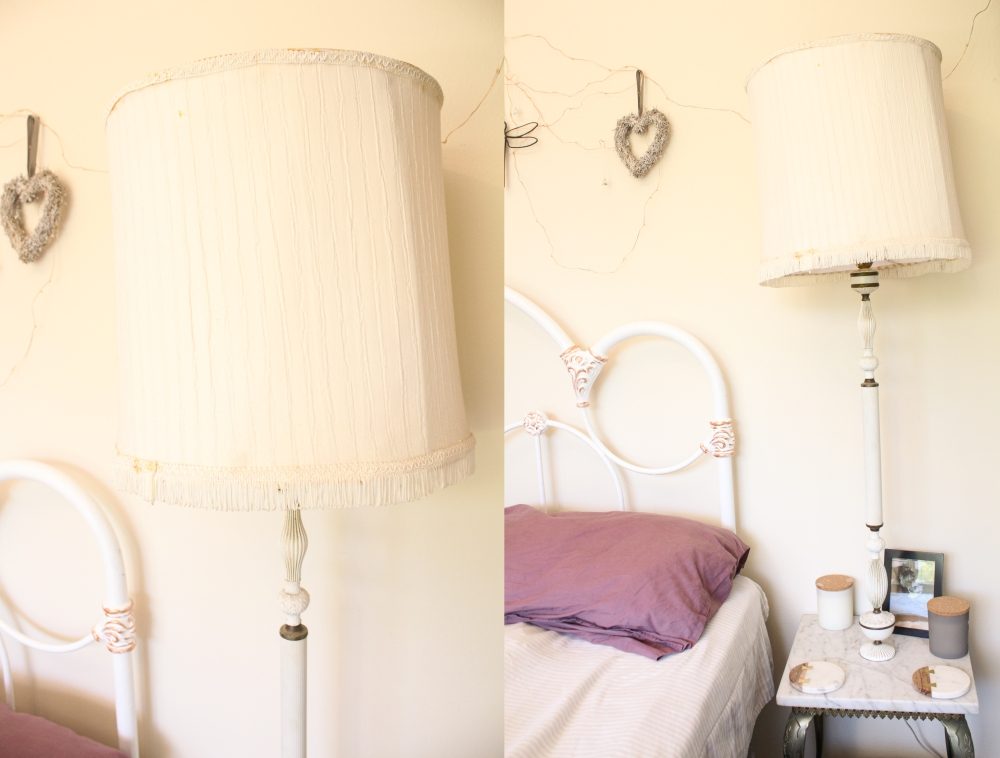
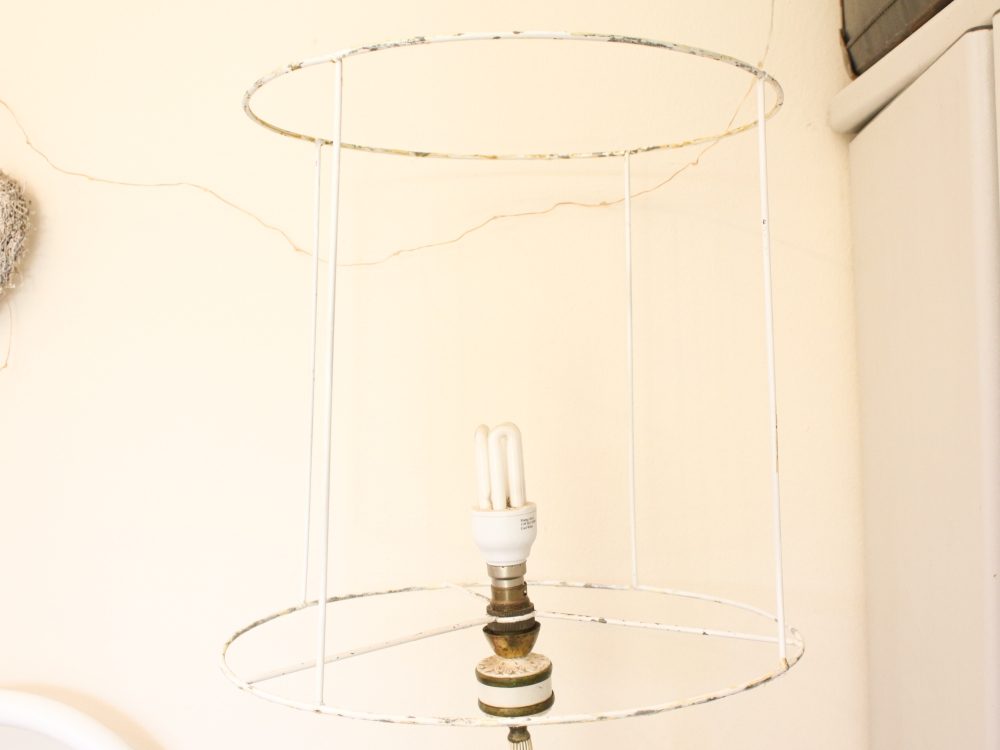
My lampshade before I gave it a fresh update.
What will be needed:
- Sewing machine
- Embroidery Module
- CutWork Foot #44C
- CutWork Tool & Blade
- Straight and CutWork Stitch Plate
- Tear-away Stabiliser
- Embroidery Thread
- Embroidery Software Designer Plus (V8)
- Embroidery Hoop
- Overlocker
- Cotton fabric (twice the length of the lampshade)
- Thread to match fabric
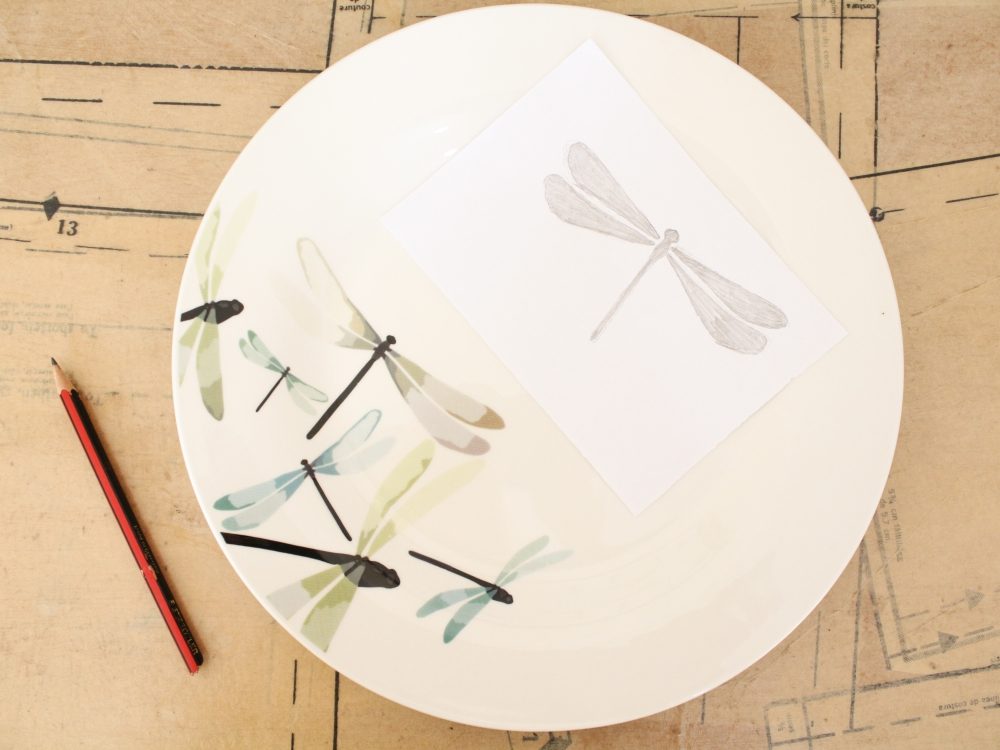
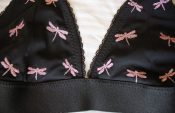
I love the dragonflies on my dinnerware so I traced my favourite one and photographed the drawing to import to the Embroidery software.
One could also scan the picture with a printer and import it.
Create a design in the Embroidery Software
Closed Object
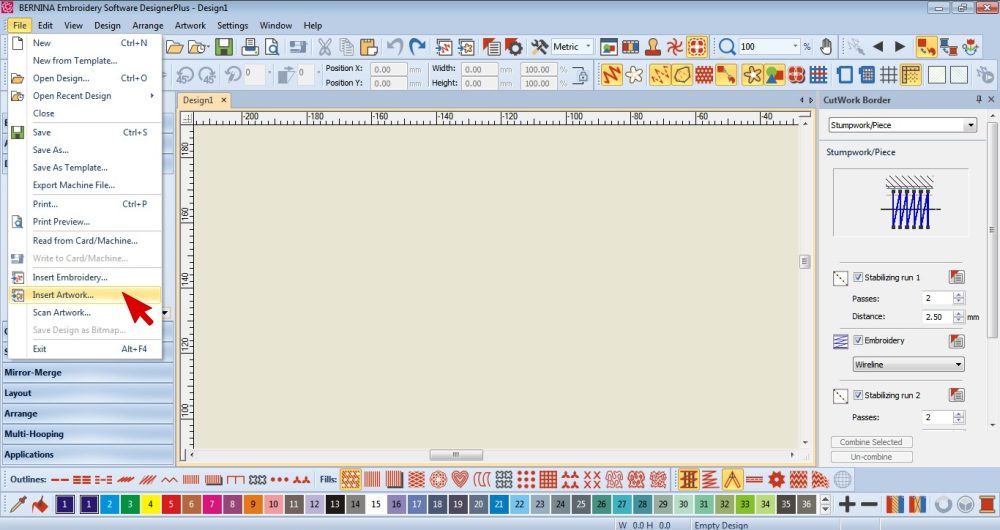
1. Insert the Artwork you want to trace to create your design.
Resize it if necessary.
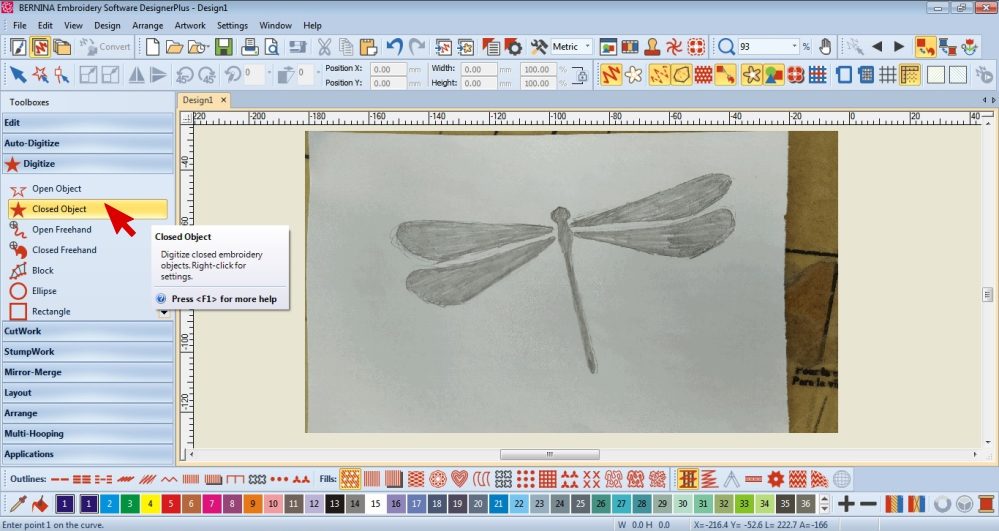
2. I wanted the body of the Dragonfly to be solid so in the Digitize Toolbox I selected Closed Object.
 Draw around the area you want to be solid embroidery
Left click to create straight lines and right click to make curves.
Press Enter to finish the shape.
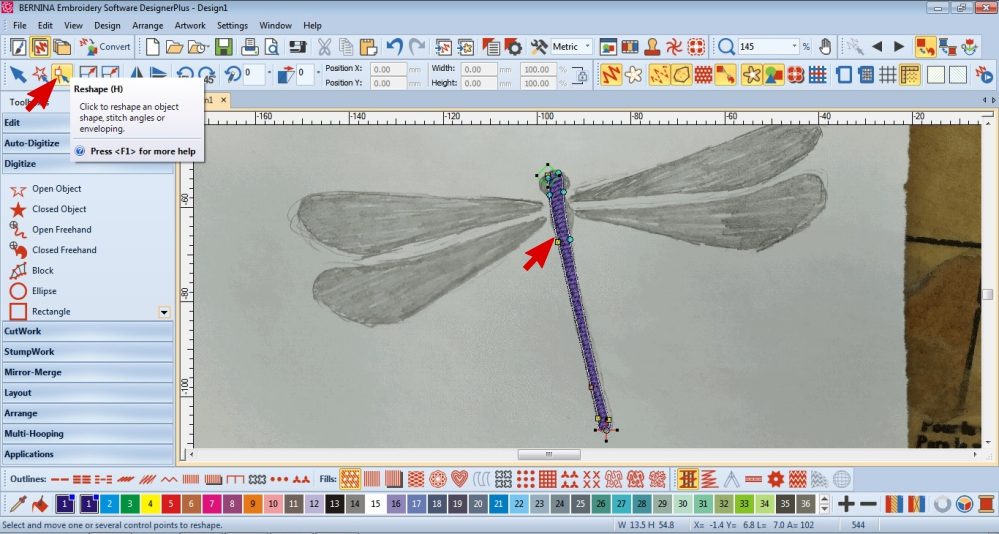
3. While the item is selected, select the Reshape Tool and edit the nodes to create a neat shape.
You can add more nodes in if necessary.
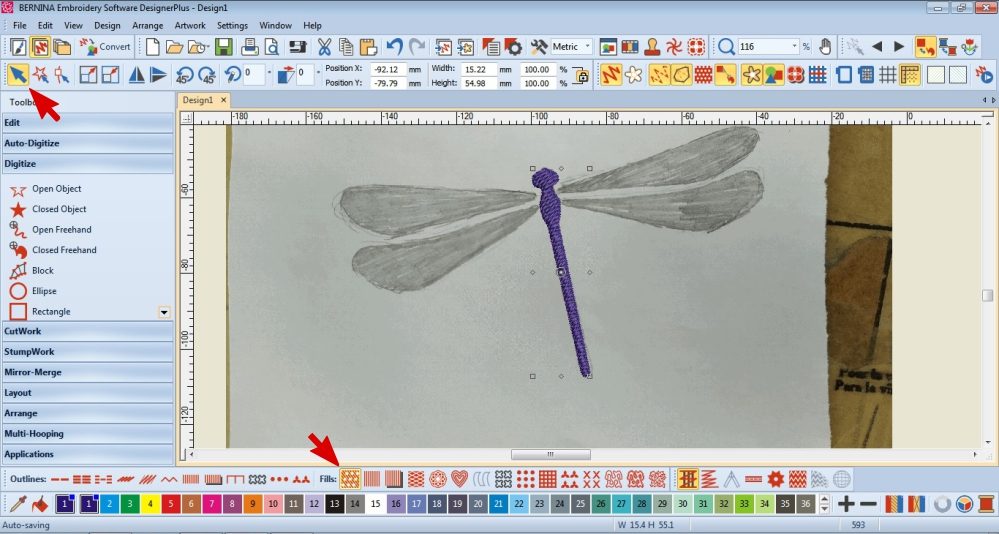
4. Along the bottom Toolbar, choose what type of Fill you want.
CutWork Object
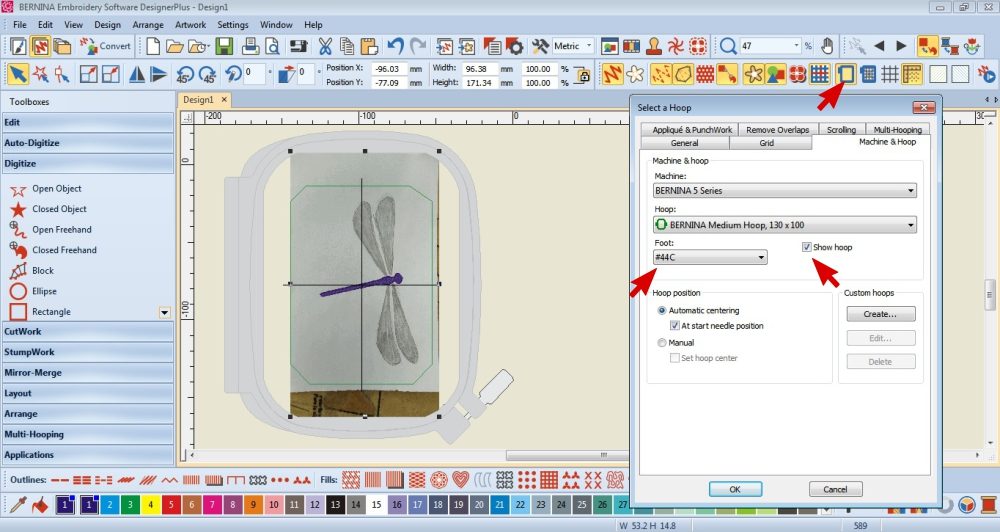
Before you create the CutWork objects, make sure that the design is the correct size, orientation and fits in the hoop. You won’t be able to rotate or scale the CutWork design on your machine.
You can crop the background image on the Artwork canvas to help you determine sizing.
Open the Hoop settings and tick Show Hoop to help you ensure that your design will fit in your chosen Hoop. While you are there, change the Foot to #44C.
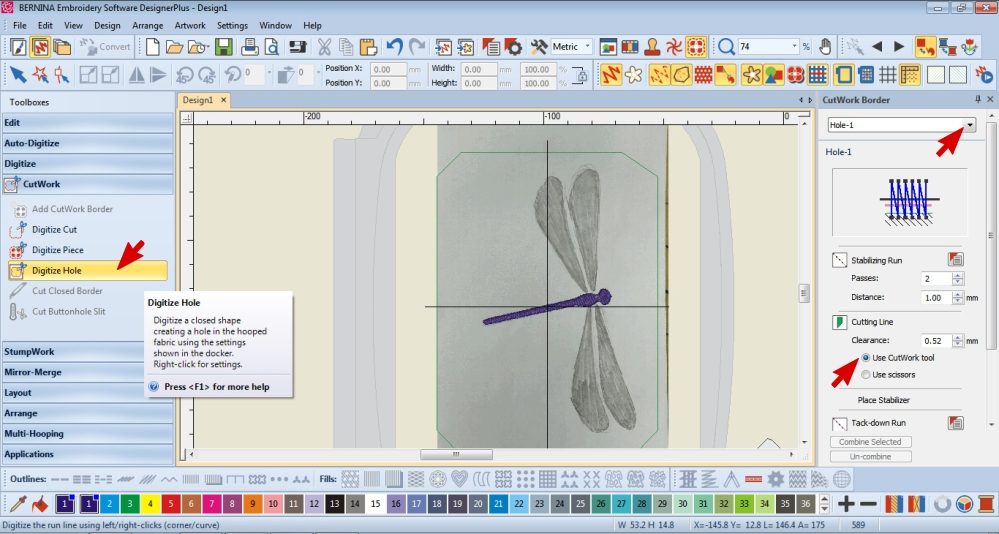
5. On the left Toolbar under the CutWork Section, right click on Digitize Hole.
In the CutWork Toolbox on the right, select Hole 2
 Edit the default settings if necessary.
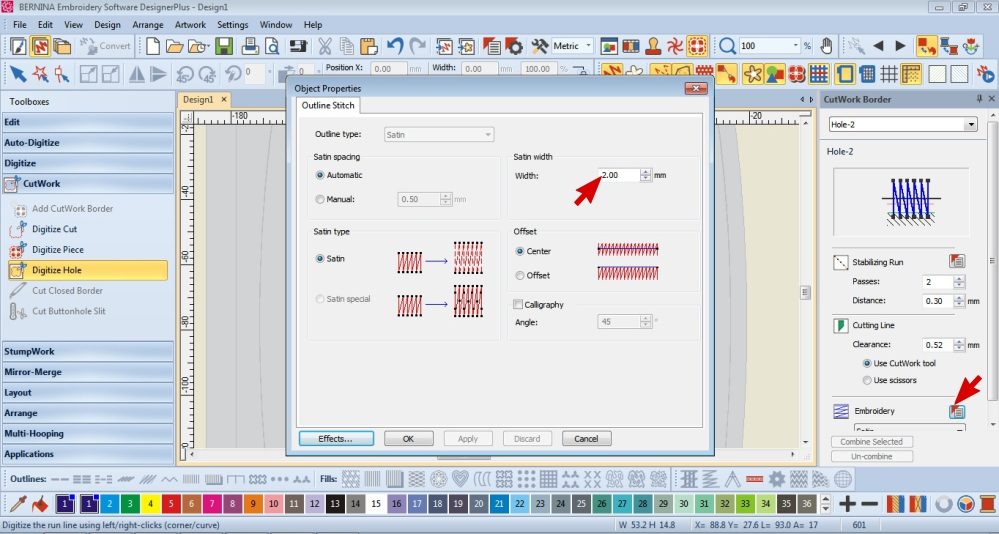
I selected the Object Properties of the Embroidery to make the Satin stitch narrower.
I don’t recommend going smaller than 2mm.
Check that the CutWork Tool is selected under the Cutting Line Section.

6. Select Digitize Hole on the left.
Draw around the area you want to be cut out (the Dragonfly wings).
Left click to create straight lines and right click to make curves.
Press Enter to finish the shape.
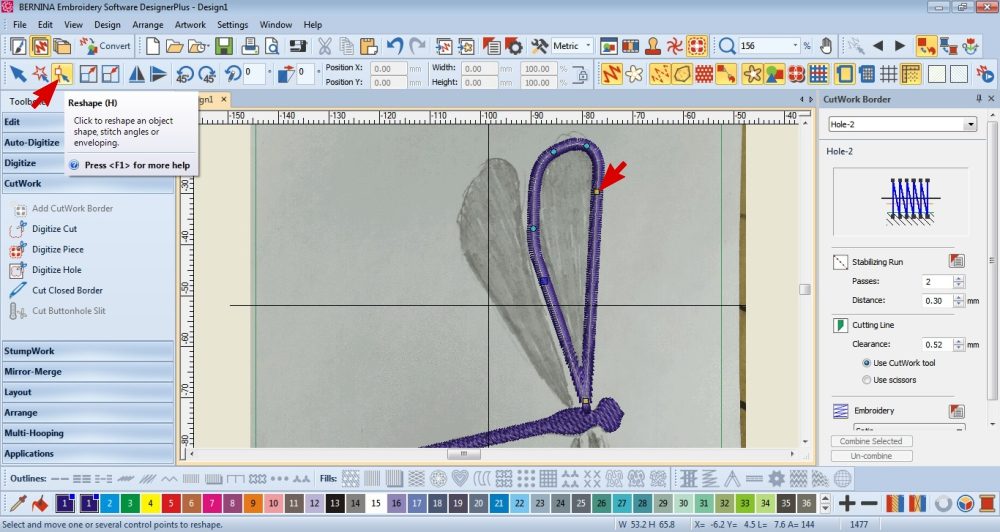
7. While the item is selected, select the Reshape Tool and edit the nodes to create a neat shape.
Repeat step 5, 6 & 7 as necessary (for example I wanted all 4 wings to be cut out).
Finishing Touches
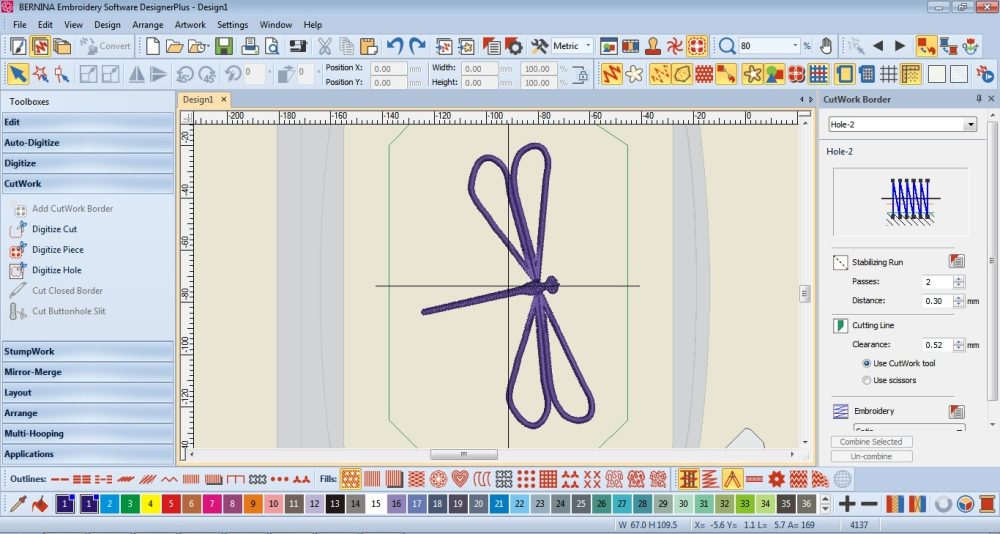
8. Delete the background image.
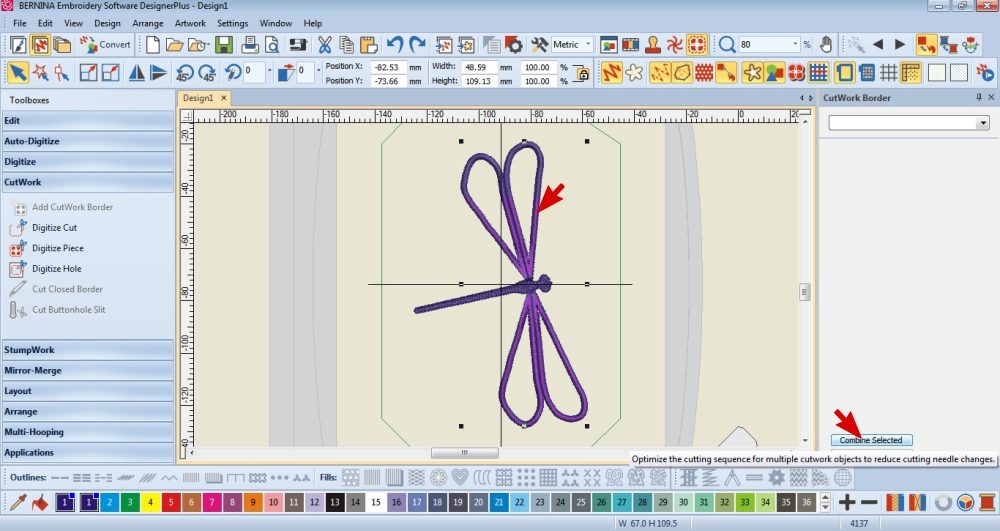
9. Select the CutWork items (hold shift and click on each item)
Select Combine all on the right hand Toolbar.
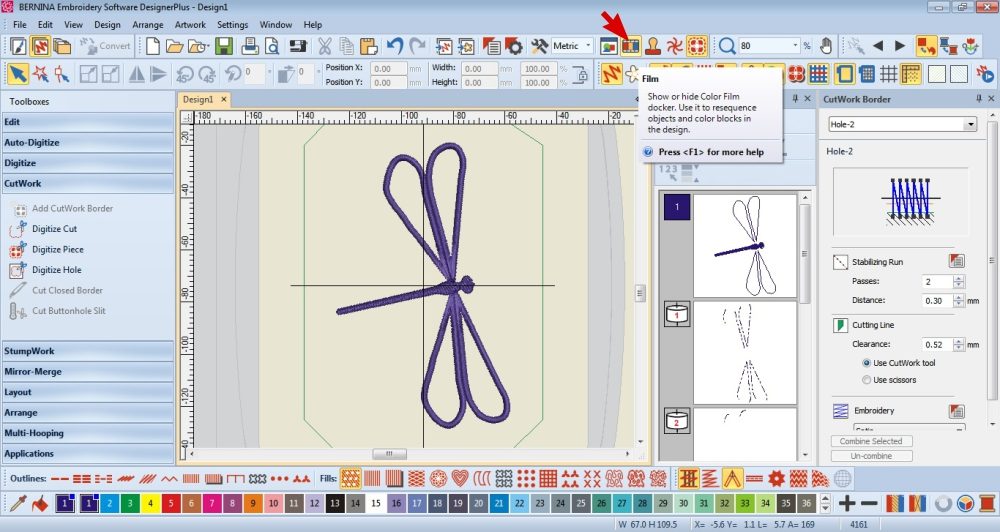
10. If you want to check the sequence of the steps, select the Film Tool in the top Toolbar.

11. Save the file or Export the Machine File.
Create the Lampshade
Make a pattern
Use the existing Lampshade to make a pattern and cut the fabric accordingly.
Add seam allowances to the top, bottom and side seam.
Cut the same for the Lining. You may want to make the Lining a bit shorter and extend the Outer Fabric accordingly so that the Lining doesn’t peak out the top or bottom.
Once I removed the existing lampshade, I couldn’t bring myself to use it as a pattern as it was dusty and grimey from age. So I cut rectangles according the the lower circumference and the height of the frame. I made a note to gather the top edges of the rectangles to fit the upper circumference in order to accommodate the slight difference between the top & bottom of the frame.
Embroider & Cut
Remember that you can’t rotate or scale the CutWork design on your machine.
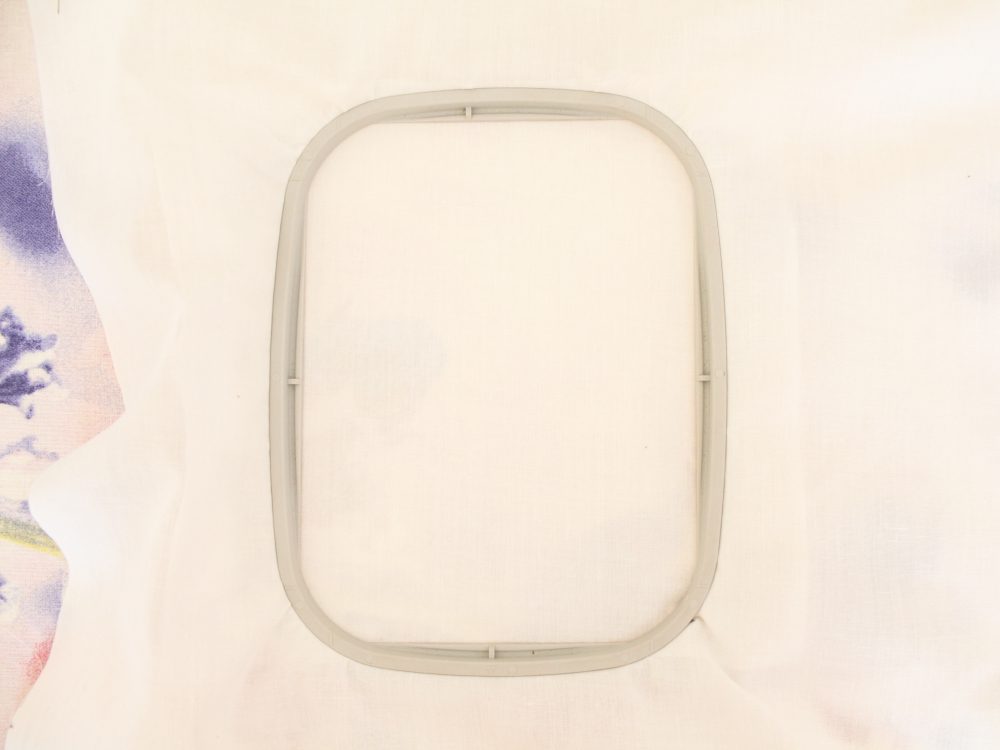
1. Work out where you want to embroider on the Outer Fabric.
Place the fabric in the hoop (size dependent on your design) with a stabilizer beneath it.
I used a tear-away stabilizer.

2. Set up your machine as you normally do for embroidery.
However you’ll need to replace:
-the Stitchplate with the CutWork Stitch Plate.
-the Embroidery foot with the CutWork Foot #44C.
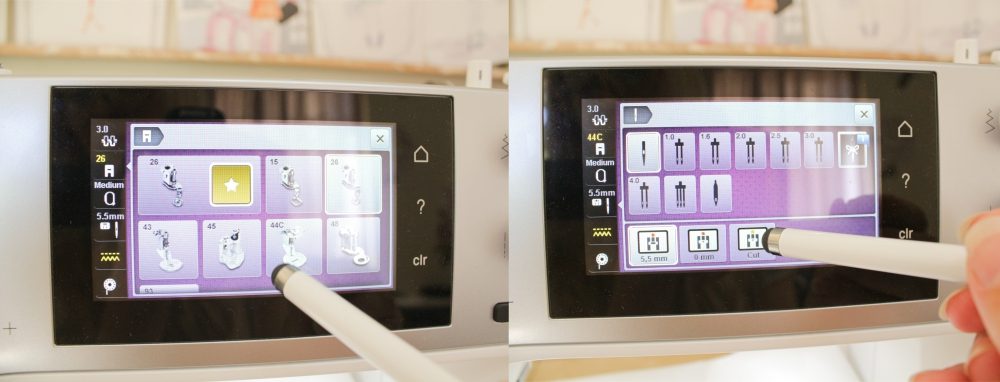 Remember to tell the machine that you will be using these items.
Start embroidering and follow the machine’s instructions.
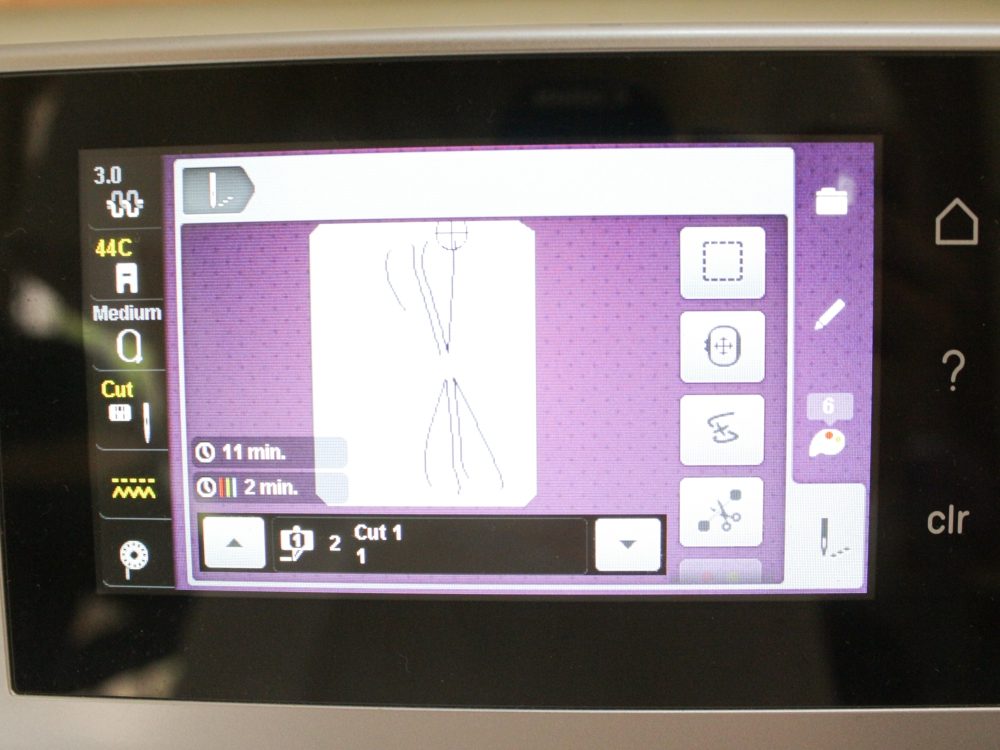
When it comes time to do the CutWork:
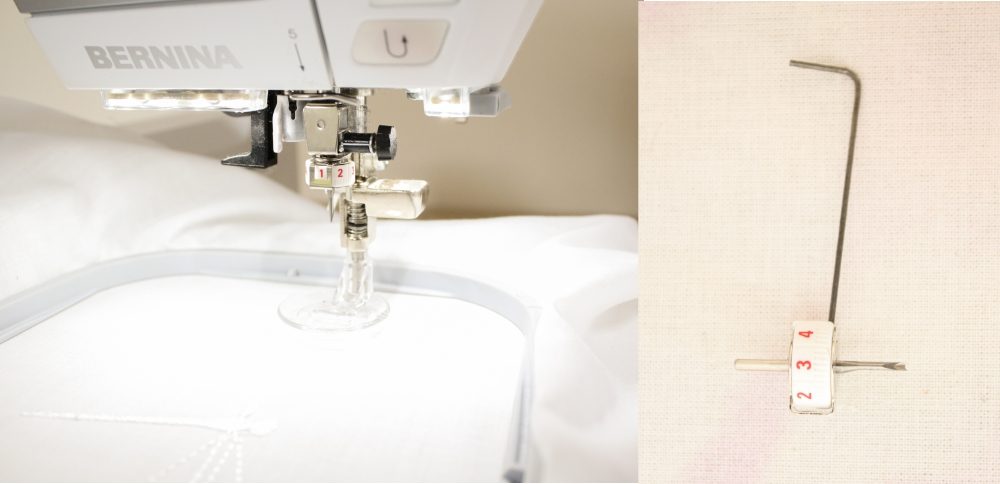
3. Replace the needle with the CutWork Tool & Blade (remember to insert the blade in to the tool first).
I also recommend removing the thread & bobbin from the machine.

4. Press the start button and follow the machine’s instructions.
You’ll need to turn the CutWork Tool to different numbers when the machine instructs you to do so.
Once the CutWork is complete:
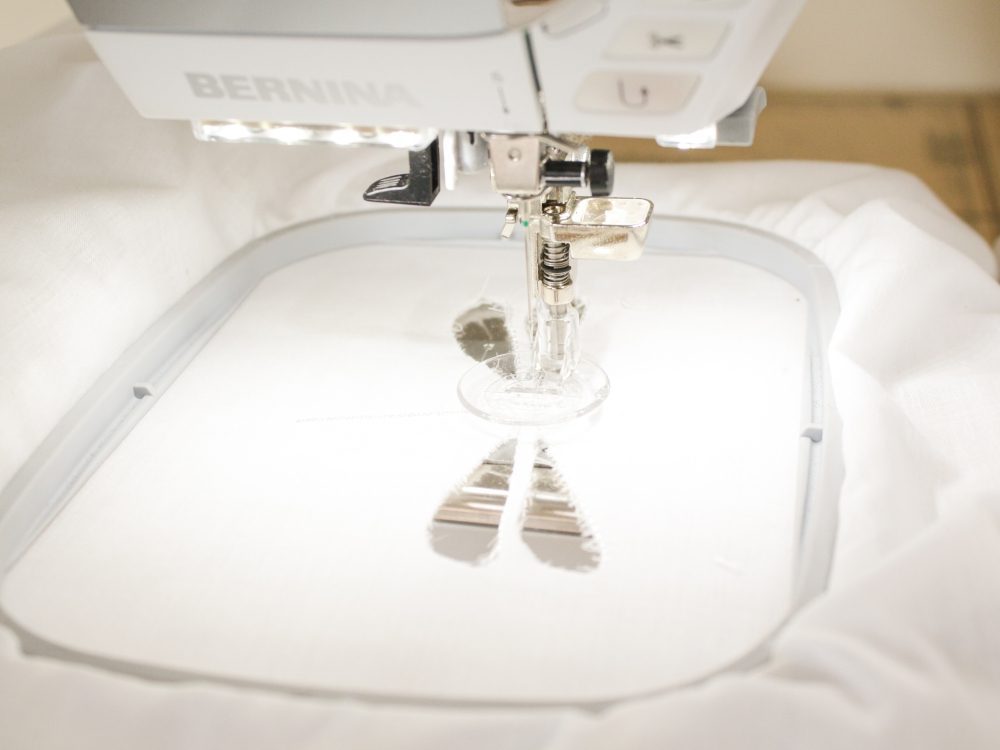
5. Remove the cut out bits of fabric.
Replace the CutWork Tool & Blade with your regular needle and rethread the machine.

6. Continue with the embroidery.
I added some more Tear-away stabilizer as my fabric was a bit flimsy once cut.
I would recommend using adhesive Tear-away or an adhesive spray with your normal tear-away.
You’ll need to carefully remove the hoop to attach it to the back of the embroidery and ensure the layout of the cut-outs are not disturbed.
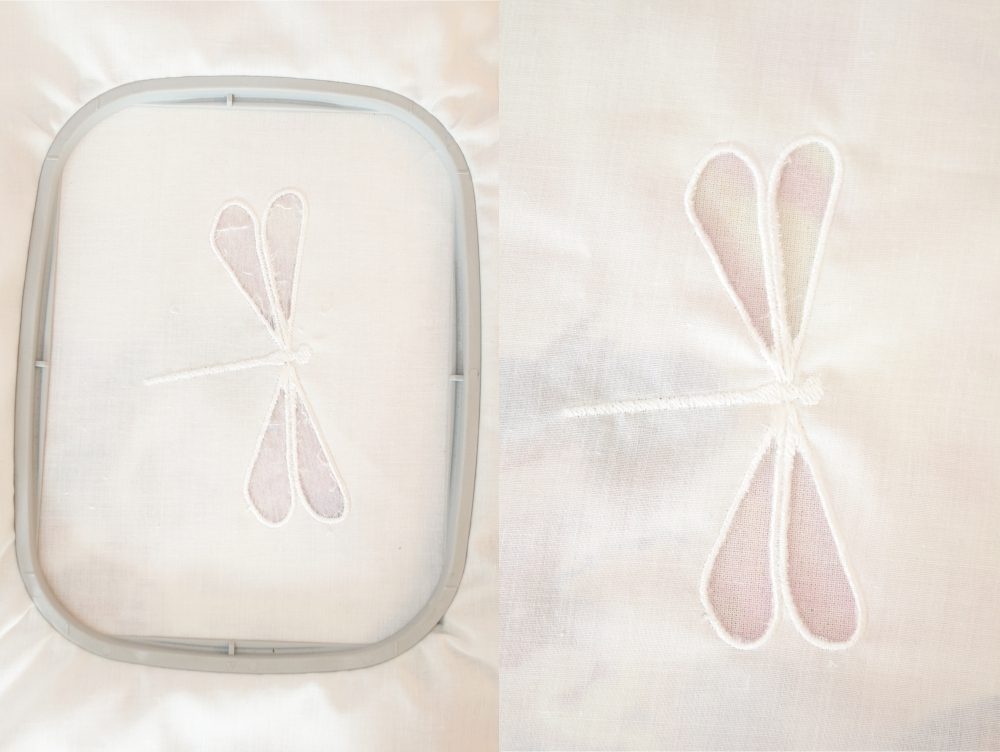
7. Once complete, remove the Hoop, take the fabric out and carefully remove the stabilizer.
Give your fabric & embroidery a gentle press.
Assemble
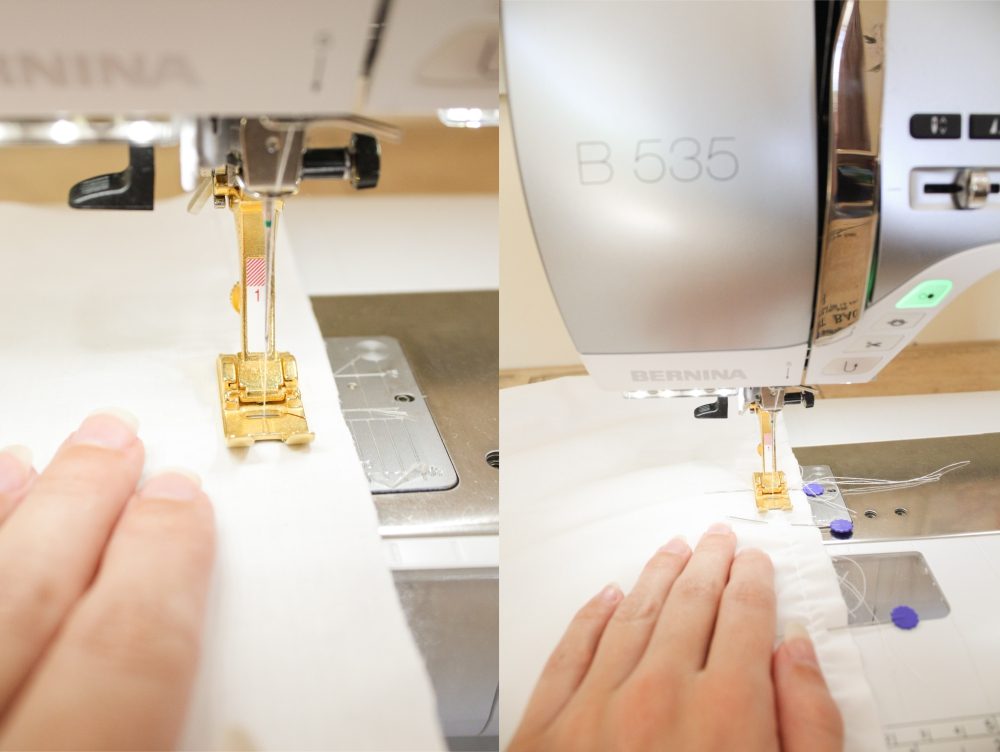
1. Sew the side seams of the Outer Fabric and Lining then join them together along the top seam.

2. Fold up and press the hem allowance as well as all seams.
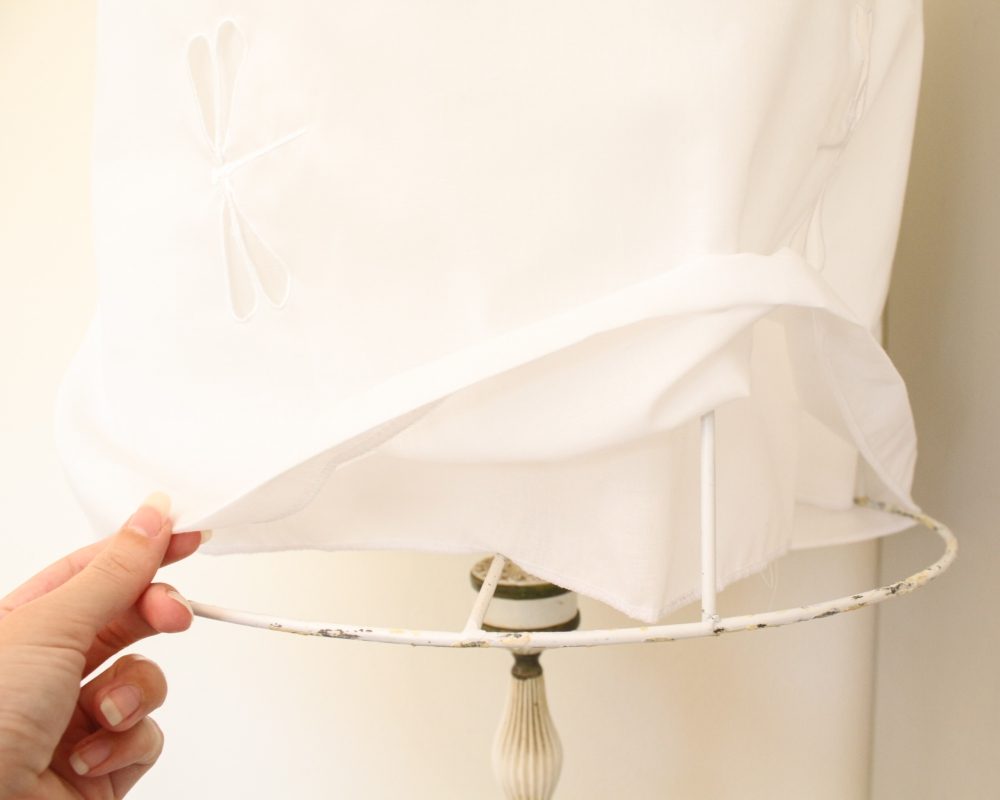
3. Place the Lampshade Cover onto the Lampshade Frame.
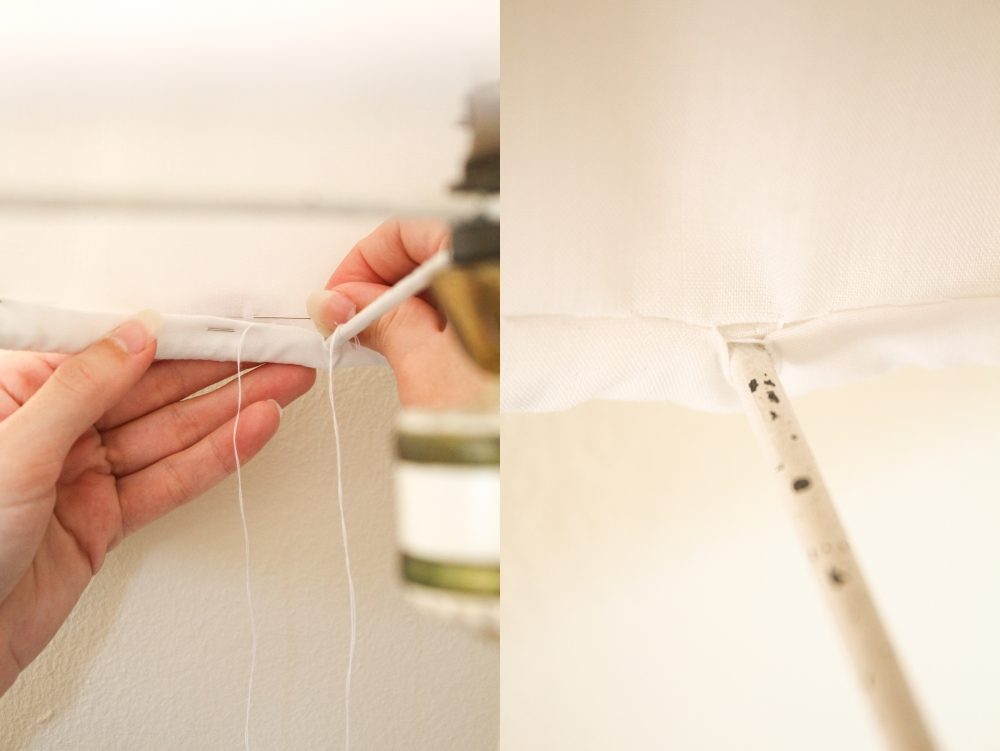
4. Hand stitch the hems together.
Stitch around the crossbeams.
I used a ladder stitch to secure the Hem of the Outer Fabric to the Lining.
I recommend trying to be as neat as possible as glimpses of this join are possible. Also keep in mind that when the light is on, the join may show through the Lampshade if it is thin.

Tips
- I recommend removing the Lampshade frame from the Lampstand to make it easier to work with.
However, my Lamp is rather old so I am unable to unscrew the Lampshade Frame. - The CutWork Accessories have companion software (the BERNINA CutWork Software or the BERNINA DesignWorks Software Suite) available for purchase to for those without the Designer Plus Embroidery Software.
- I wanted my design to be subtle so I used an embroidery thread that was similar in colour to the fabric.
I also kept the Lining the same fabric as the Outer so that there wasn’t a contrast when it is seen through the cutout wings of my design.
However, you could have the Outer fabric, Lining and embroidery thread in complimentary or contrasting fabric depending on your decor and personal preference. - Bernina has free embroidery designs that you can download
- If you want to have the repetitions of your design rotated but don’t want to re-digitize the artwork, simply rotate your fabric when placing it in the hoop. I did a total of 4 embroidered designs, each rotated using this technique.
- Take the time to clean out under the stitch plate after a CutWork project. Often a lot of fluff collects there when using the CutWork blade.
- Cut-away Stabilizer will work in place of Tear-away. I don’t recommend Wash-away as if you don’t get it fully washed out, there will be patches of it visible when the light shines through the Lampshade.
I would love to see what you make, please feel free to share with me!
Instagram
Facebook
-Hannah-Rose


0 Responses