I love to use the decorative stitches of the Bernina sewing machines in my quilts. In many cases you can lengthen, enlarge or mirror them. For me, these are interesting options to bring variation into my work. The B880 now allows me to design my own decorative stitches or to alter the existing ones, without having to use special software.
I can do it right on the machine’s screen, without detours.
Within the next few weeks I will show you, step by step, the various options you have.
If you want to come along, please prepare some “test rags”. To do so, you need several pieces of fabric of about 30 x 30 cm, with some stabilizer ironed or fastened to the back.
Please use embroidery thread for the top and bobbin thread for the bottom.
Before you start on the sewing machine, you need to make some exercises on paper. On graph paper you draw two lines at a 1 cm distance. Be creative and draw some patterns between the lines. To start with, imagine something like a temperature curve.
It should not be wider than 1 cm, but it can be longer, of course. Make several sketches and keep them. You may want to revert to them later.
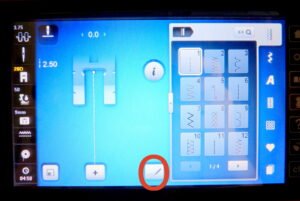
Now we turn to the machine and open the Stitch Designer.
Please insert foot No. 20D and thread the machine. Then we can start right away.
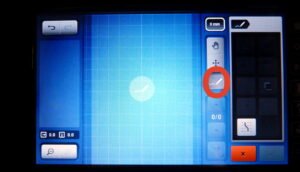
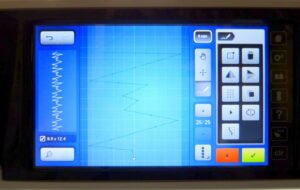
After the stitch designer has been opened, the button for editing a stitch should be activated. The width of your stitch is 9mm right now and there is no need to change it. Now take your touchscreen pen and draw a “temperature curve” from top to bottom, directly on your screen.
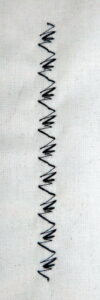
Confirm your design on the bottom right, and the screen will change to the sewing display. Now you can stitch your temperature curve.
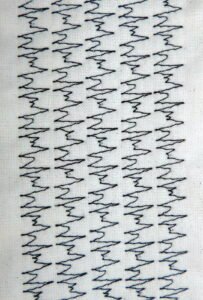
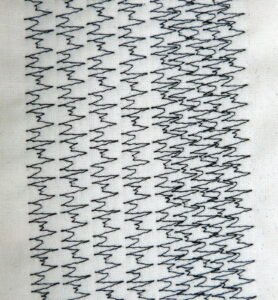
I like those kinds of pattern, as they are an easy way to bring structure to your fabrics without displaying a real motive. In my case, the fabrics are a little wavy, as I stitched through three layers. I did this to find out whether the pattern would be suitable for quilting.
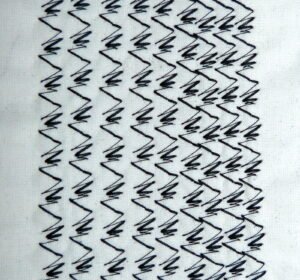
This is how it looks when you stitch one row next to each other…
…and here I reduced the distance between rows. All in all, I am quite content with the results, but I know there is more you can do.
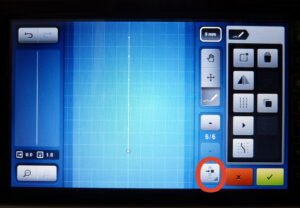
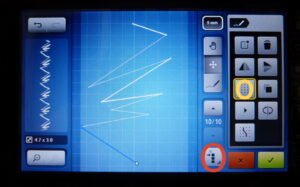
You can choose a different way to design a temperature curve. Draw a straight line by placing many dots on the screen, one behind the other. On the bottom right you select the button „A single point is selected”.
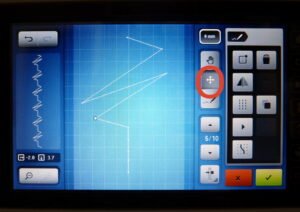
Then you activate the button „Moving points“. Now you can create a new “temperature curve”. Move the single points to the left and the right.Remember to use the full 9mm. On the left screen you can see how your pattern will look when it is repeated. Please remember to set the endpoint of the pattern to the end. Otherwise you will need an additional line to stitch the pattern continuously (we will practice this elsewhere!).
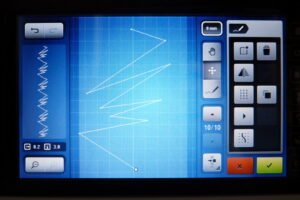
This is my completed pattern. But to make it a little more exciting, I make sure that the button „Single point is selected” has been activated. When you repeat this, you click to a point in your pattern (I selected the end point.)
Then you change to „Selection from a defined point“ and click to one of the next points above or below (depending on where your selected point lies). This activates a section which you can stitch in triple. To do this, select the „Triple Stitch Button“ (yellow).
And this is how it will look after it has been stitched. I changed several sections. (Shown on the screen by the thicker white lines.)
Quite exciting – don’t you think?
Next time we will design small abstract patterns with curves. Until then I recommend you to practice the steps explained above to gain confidence.
I wish you lots of fun!
Yours Pia
Translated by my dear friend Gabriele Schultz-Herzberger!
 BERNINA Corporate Blog -

0 Responses