 BERNINA Corporate Blog -
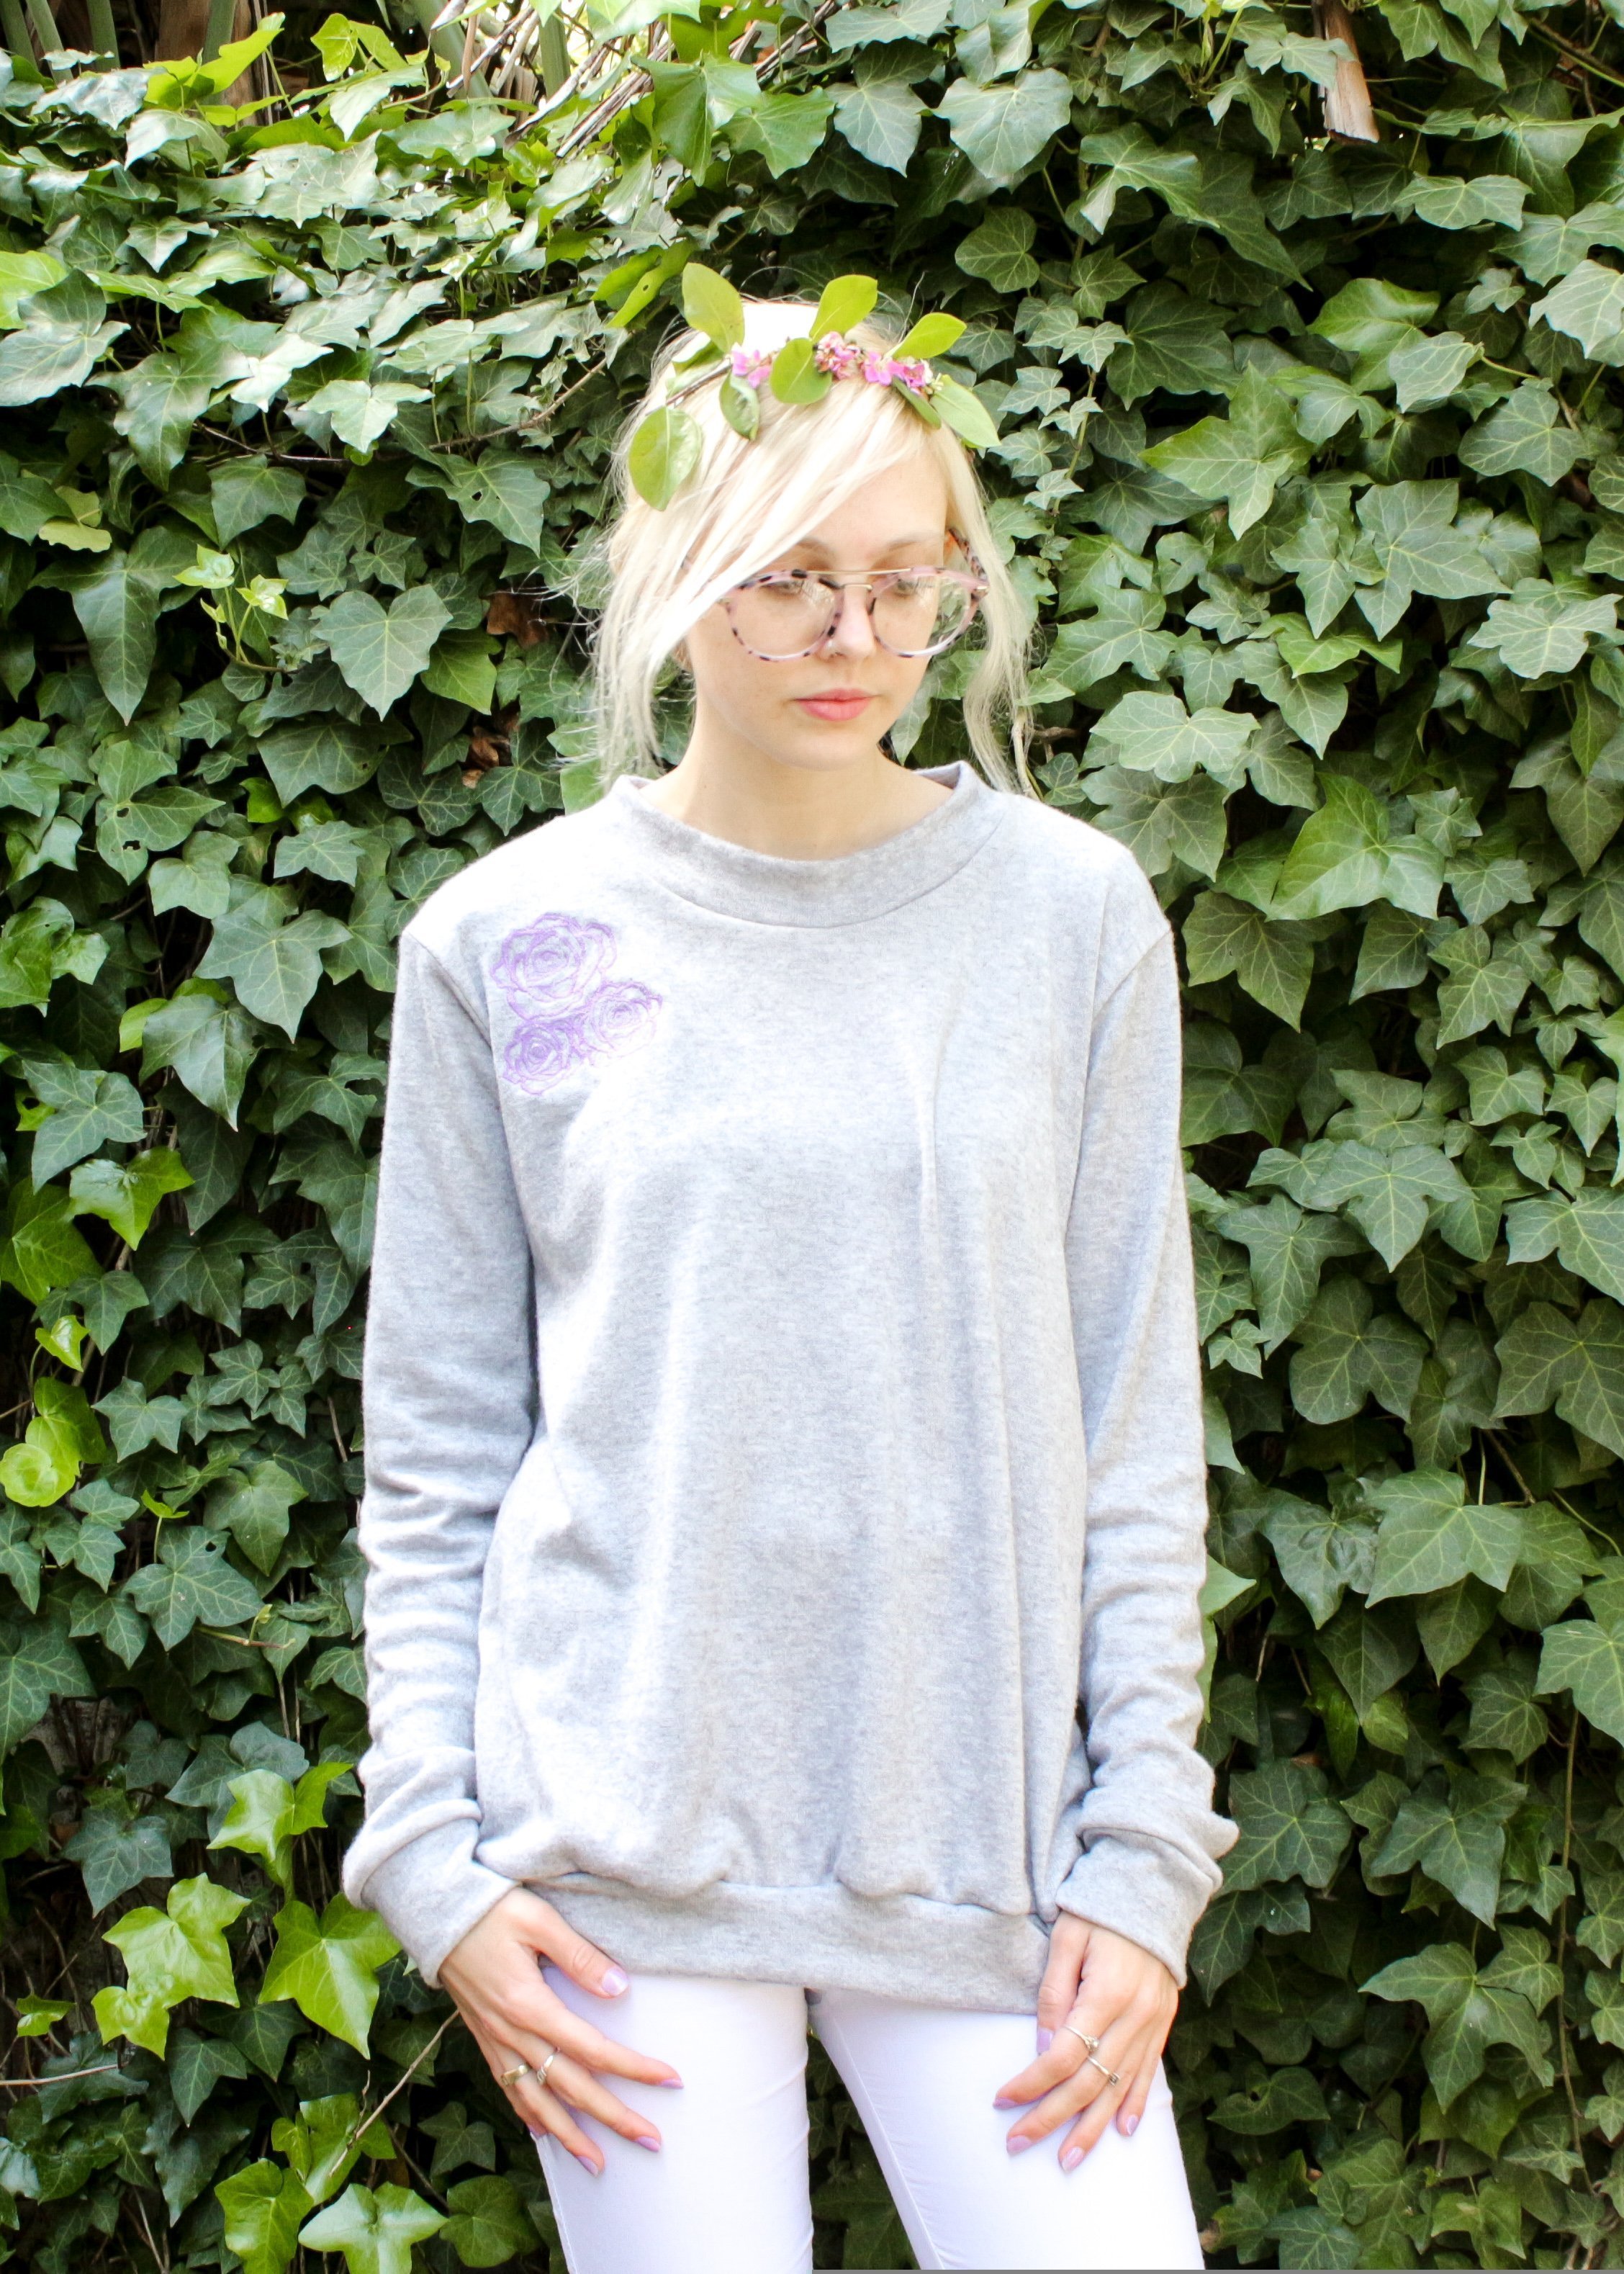
September is my birthday month and this year is extra special as it is my crown birthday!
This September is also my 1st anniversary of blogging for Bernina.
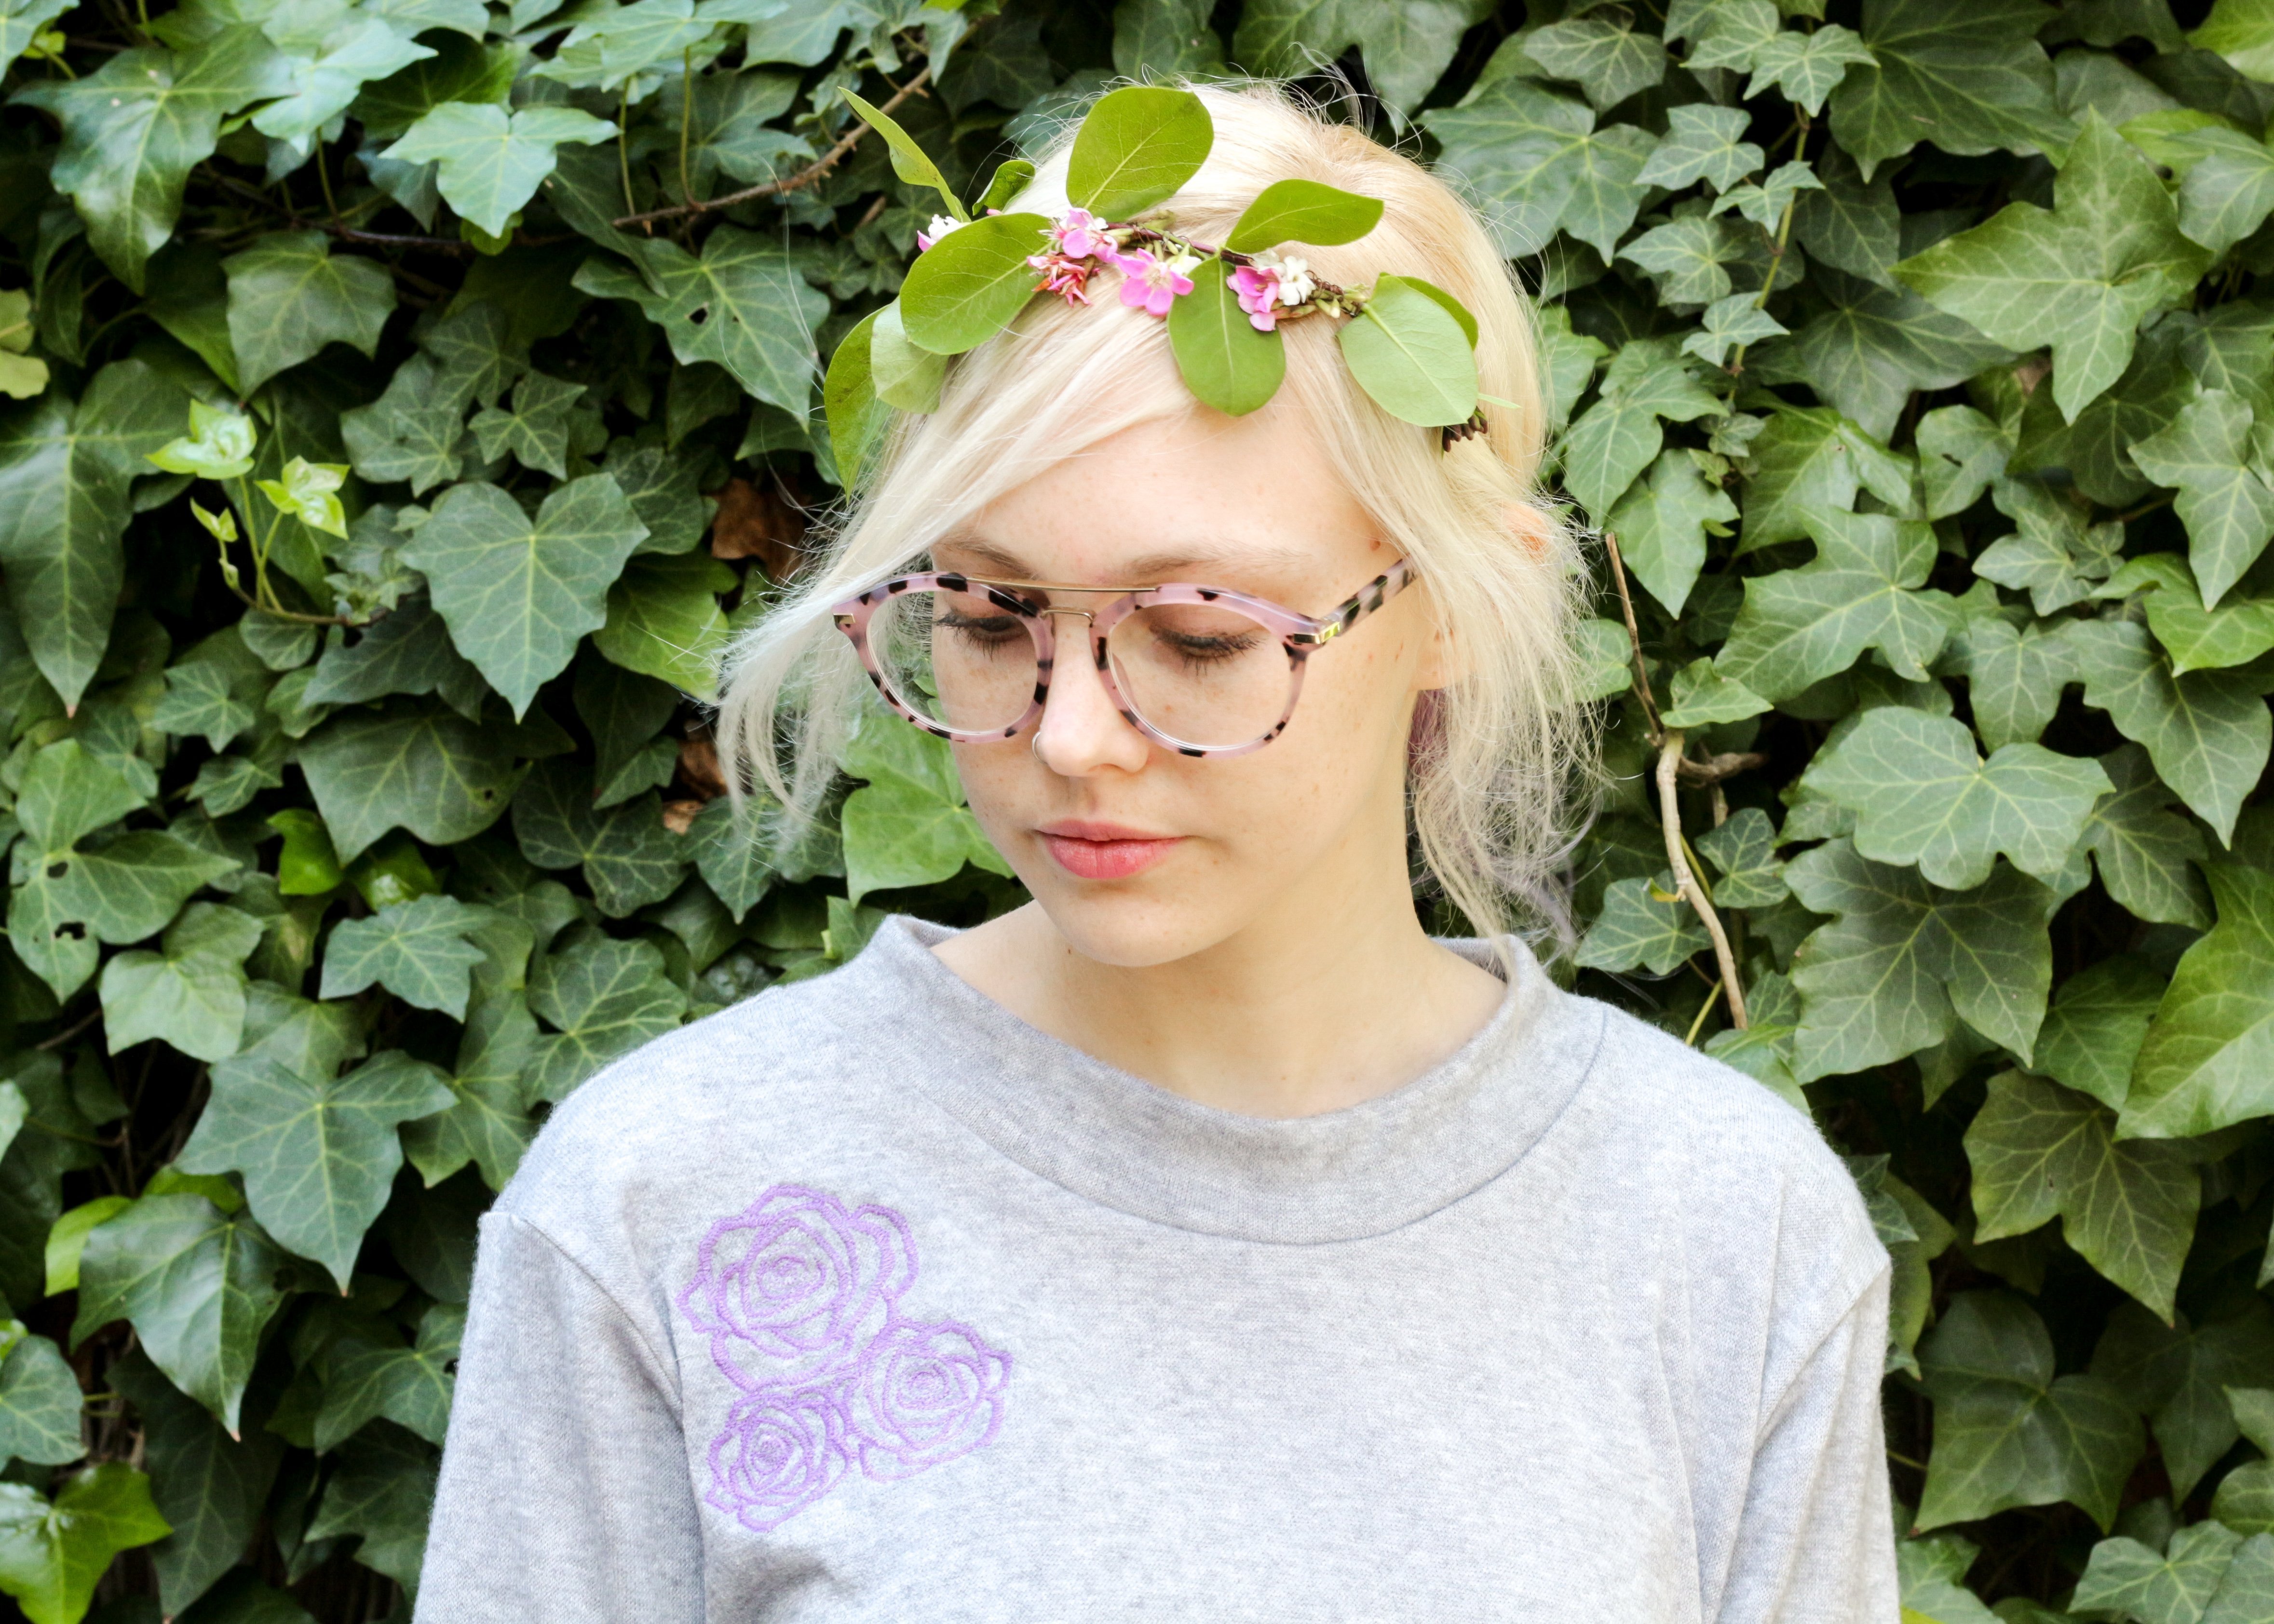
To celebrate my next 3 years of blogging, Bernina sent me the incredible B535 sewing machine with embroidery module. I feel like Bernina have given me the best gift a sewist could need!
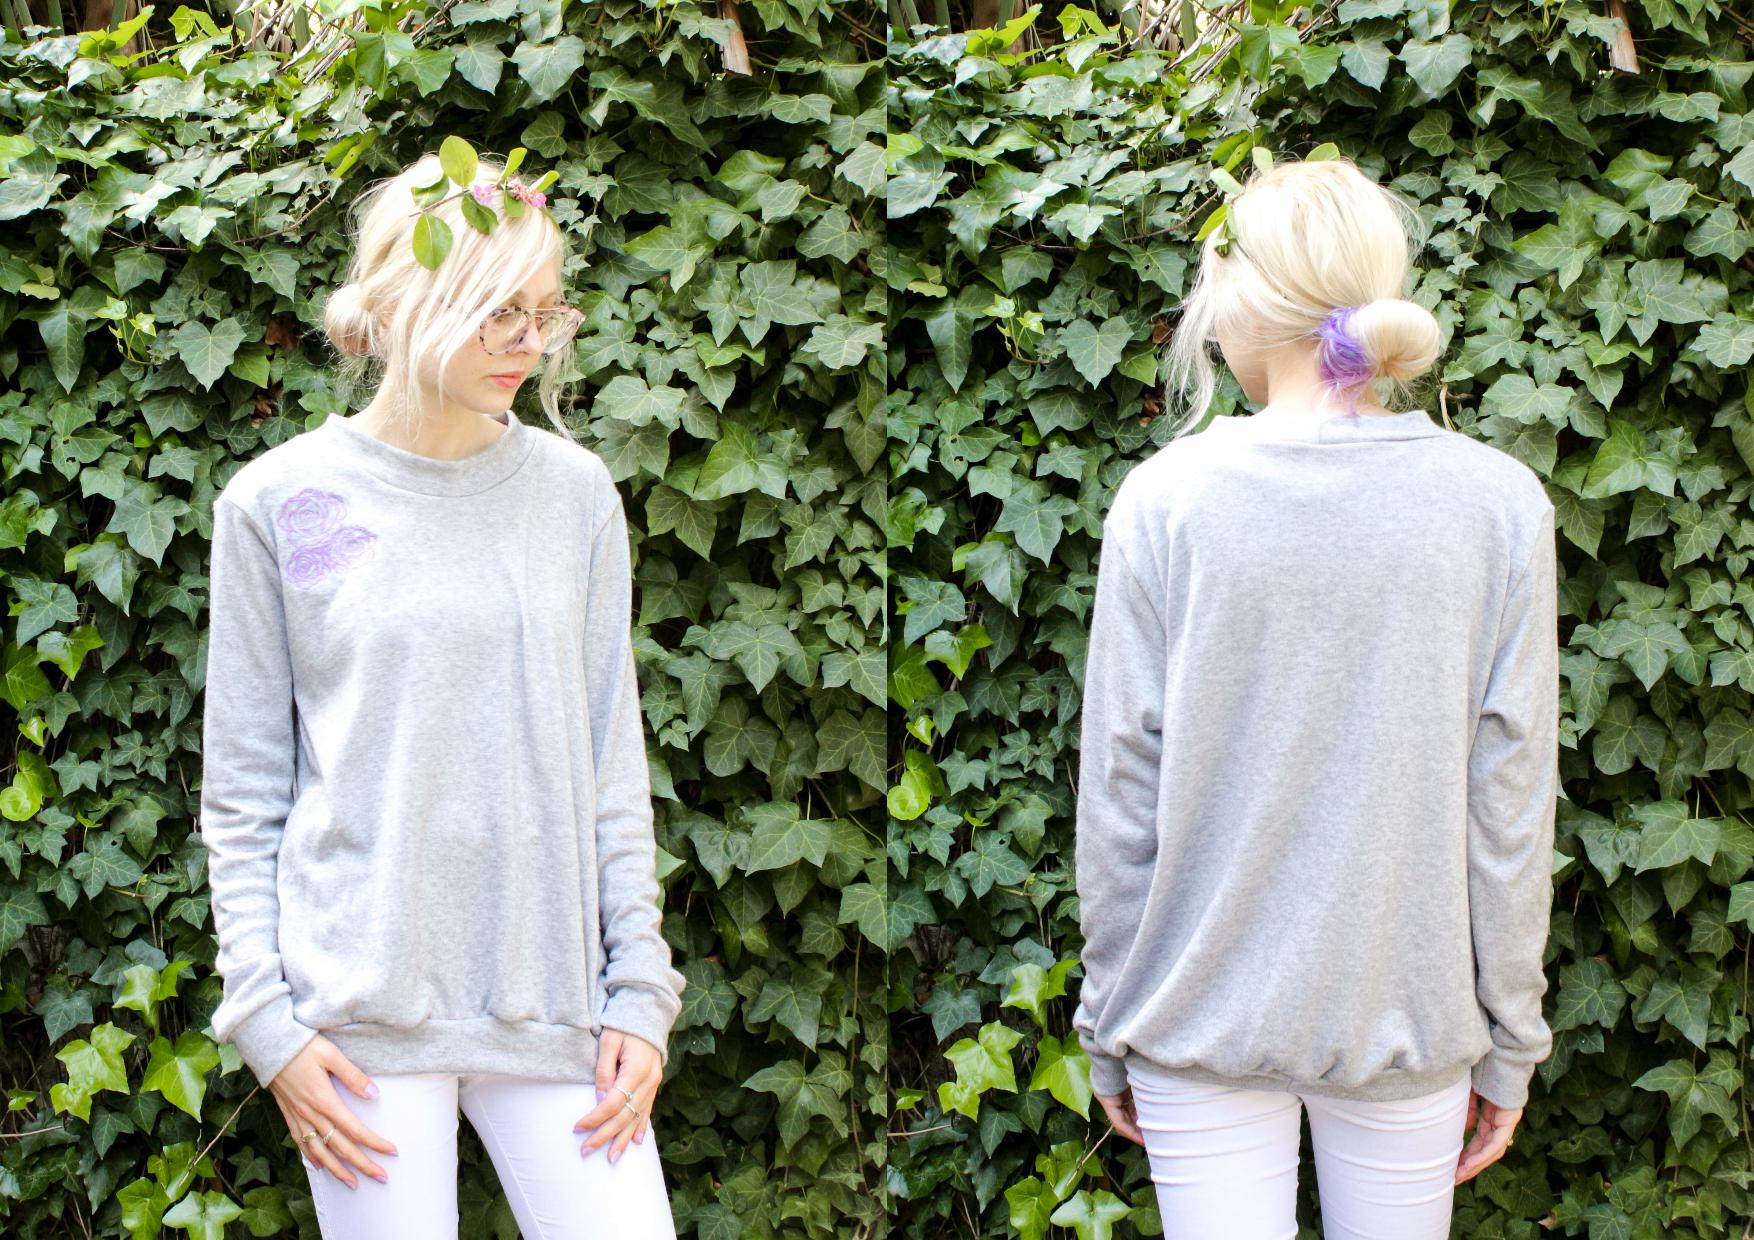
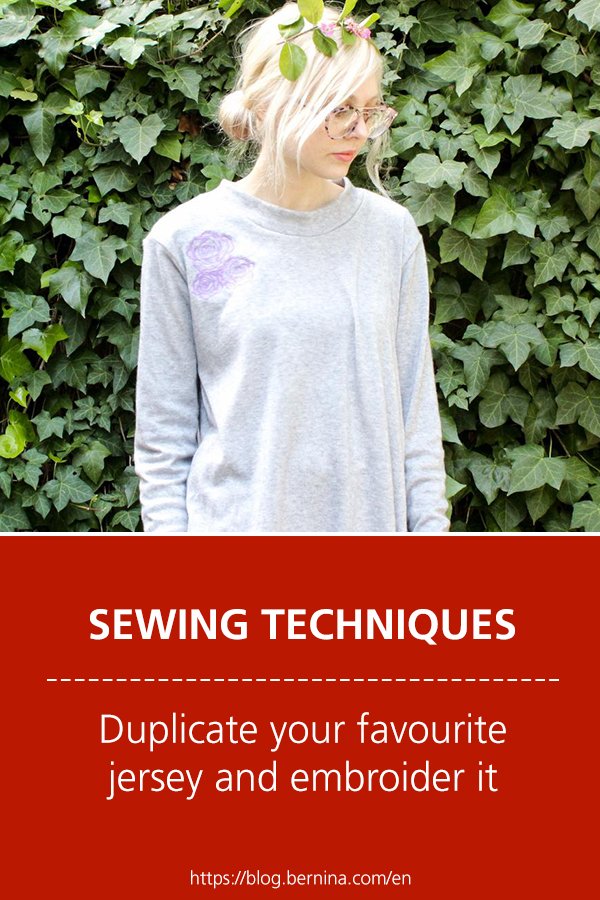
With the beginning of Spring still being chilly, I wanted to make a comfy but still stylish sweater. I was so excited to be able to further personalize my garment with embroidery. Not only will I share how I embroidered but also how I created a pattern from my favourite jersey.
Needed
- Favourite Jersey/Sweater (See steps below to duplicae your own jersey)
- Paper for the pattern
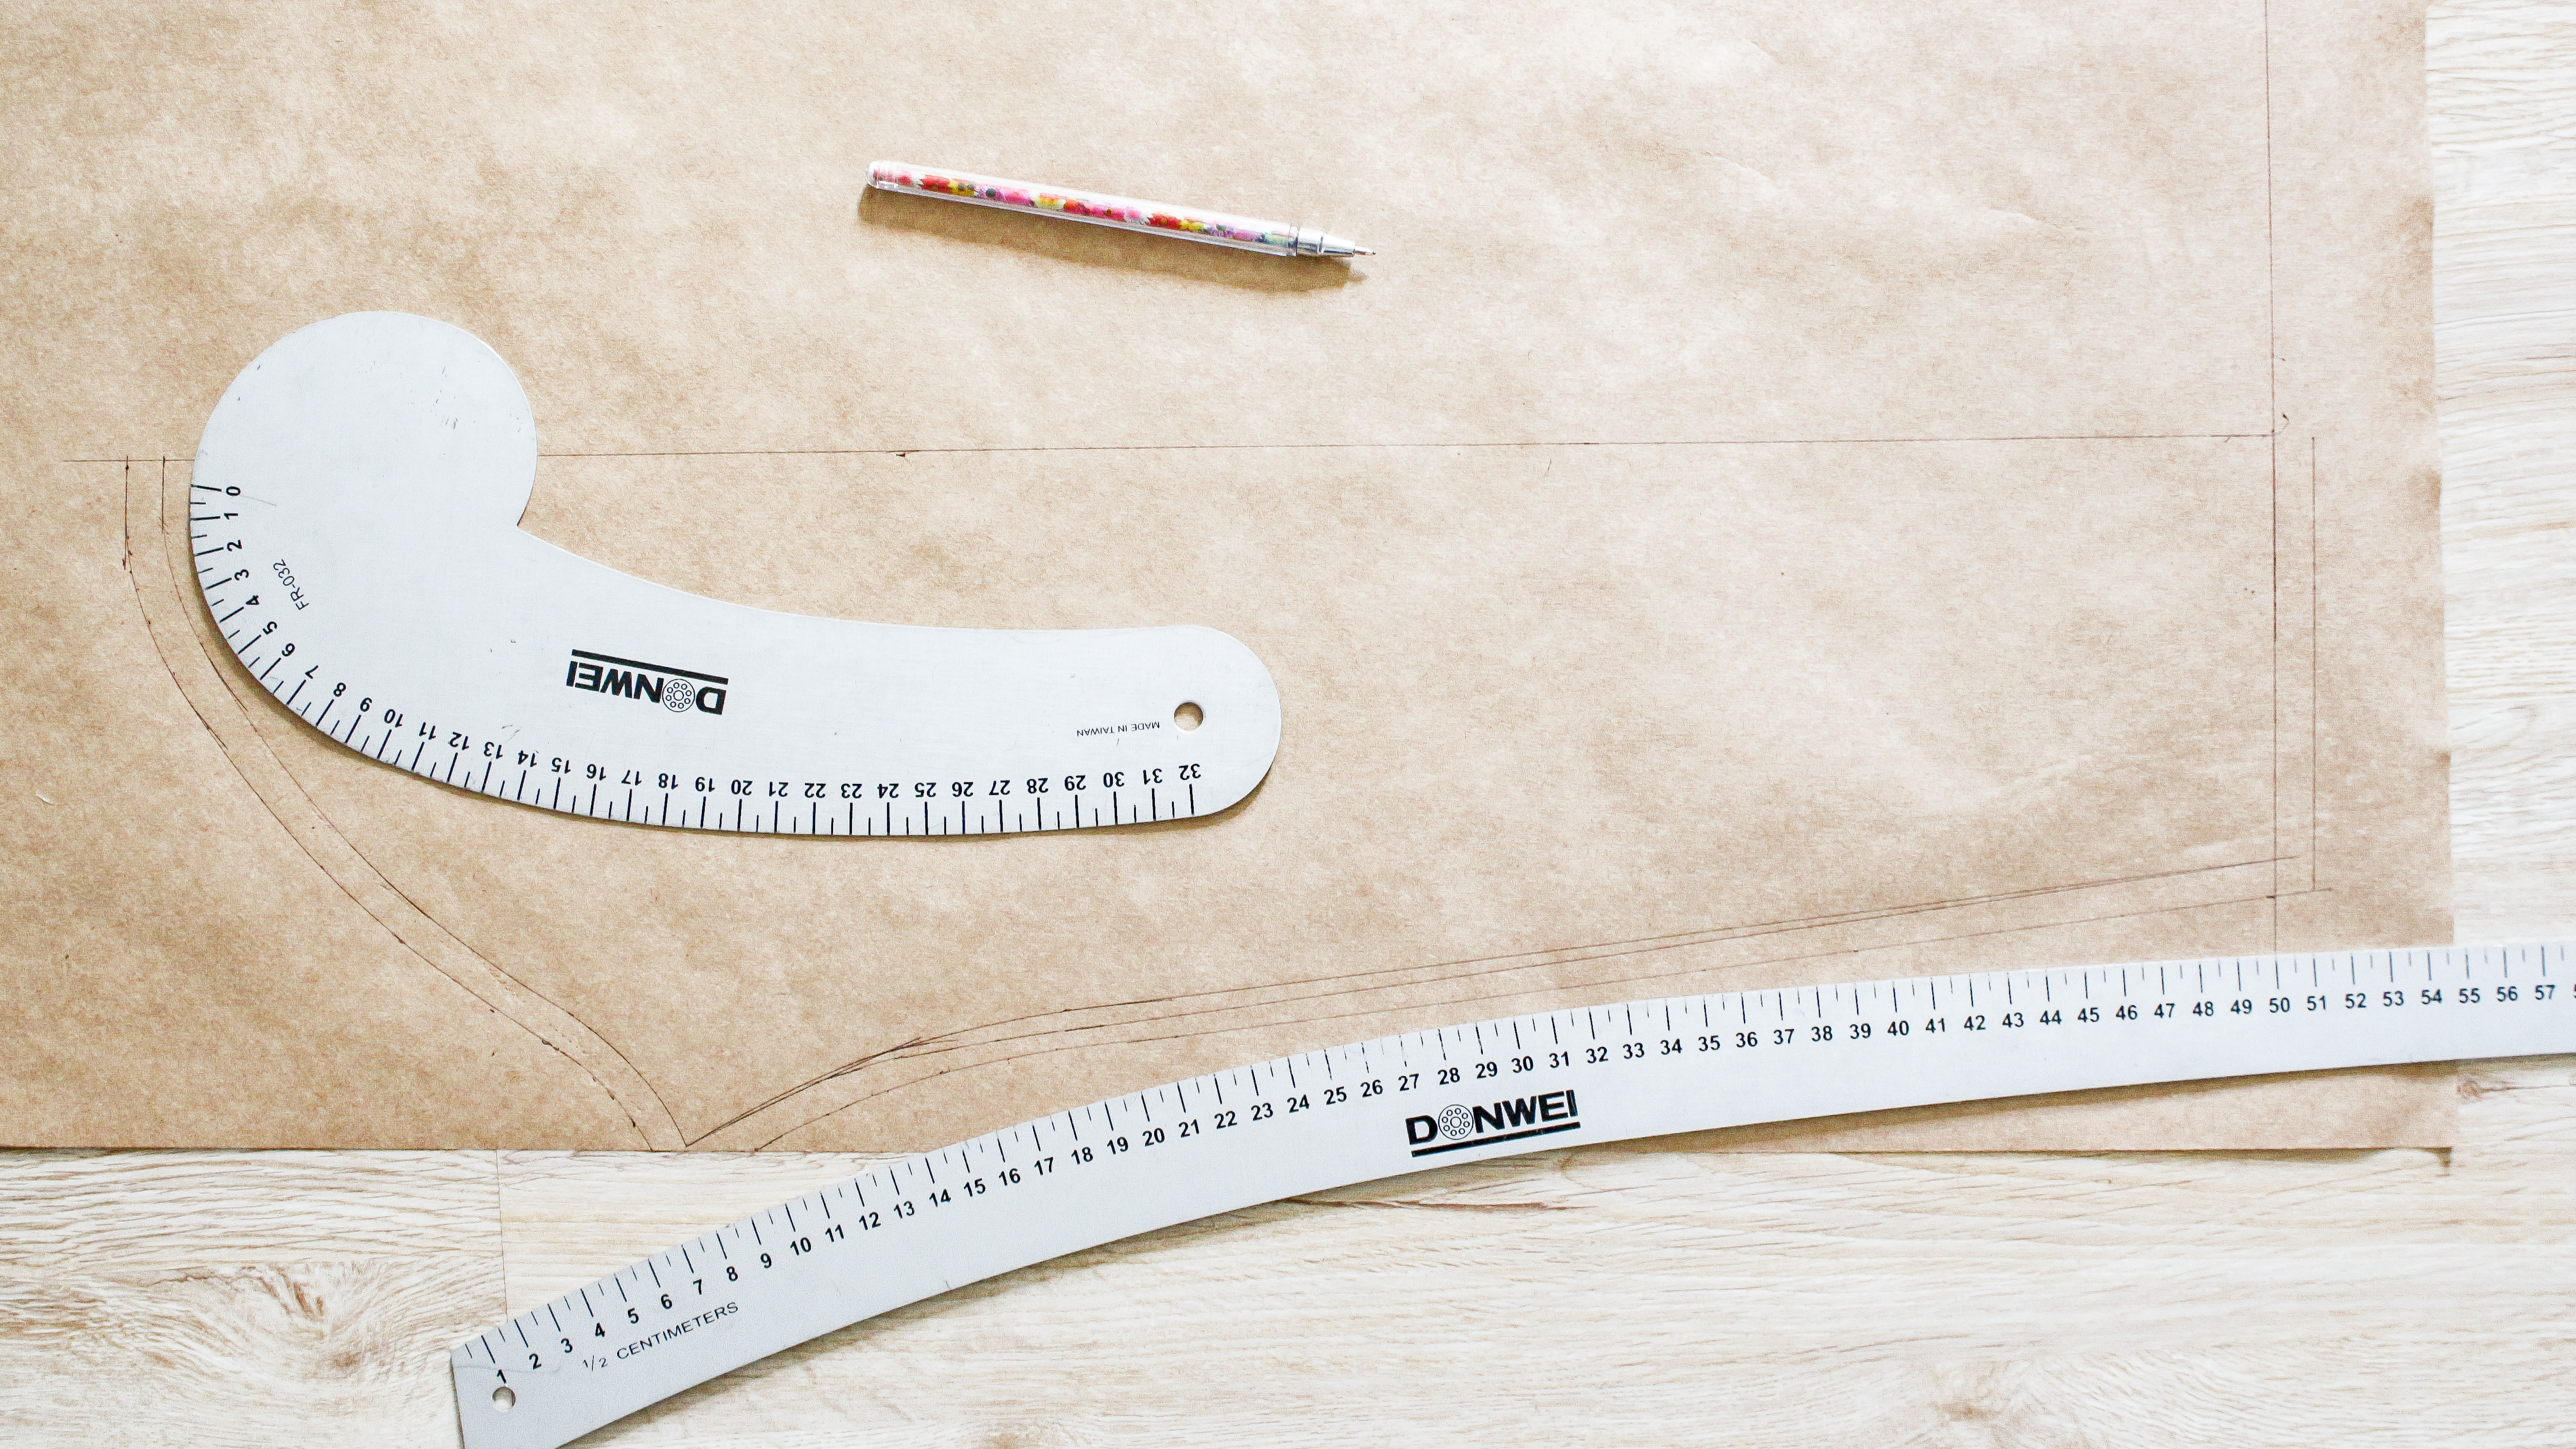
- Tracing Wheel
- Pen/Pencil
- Ruler and French Curves (optional)
- Knit fabric
- Cut away stabilizer (and wash away stabilizer)
- Overlocker
- Embroidery model for sewing machine
(hand embroider or use embroidered patches if you can’t machine embroider) - 3 or 4 threads to match fabric
- Embroidery thread (amount dependent on your design)
Pattern
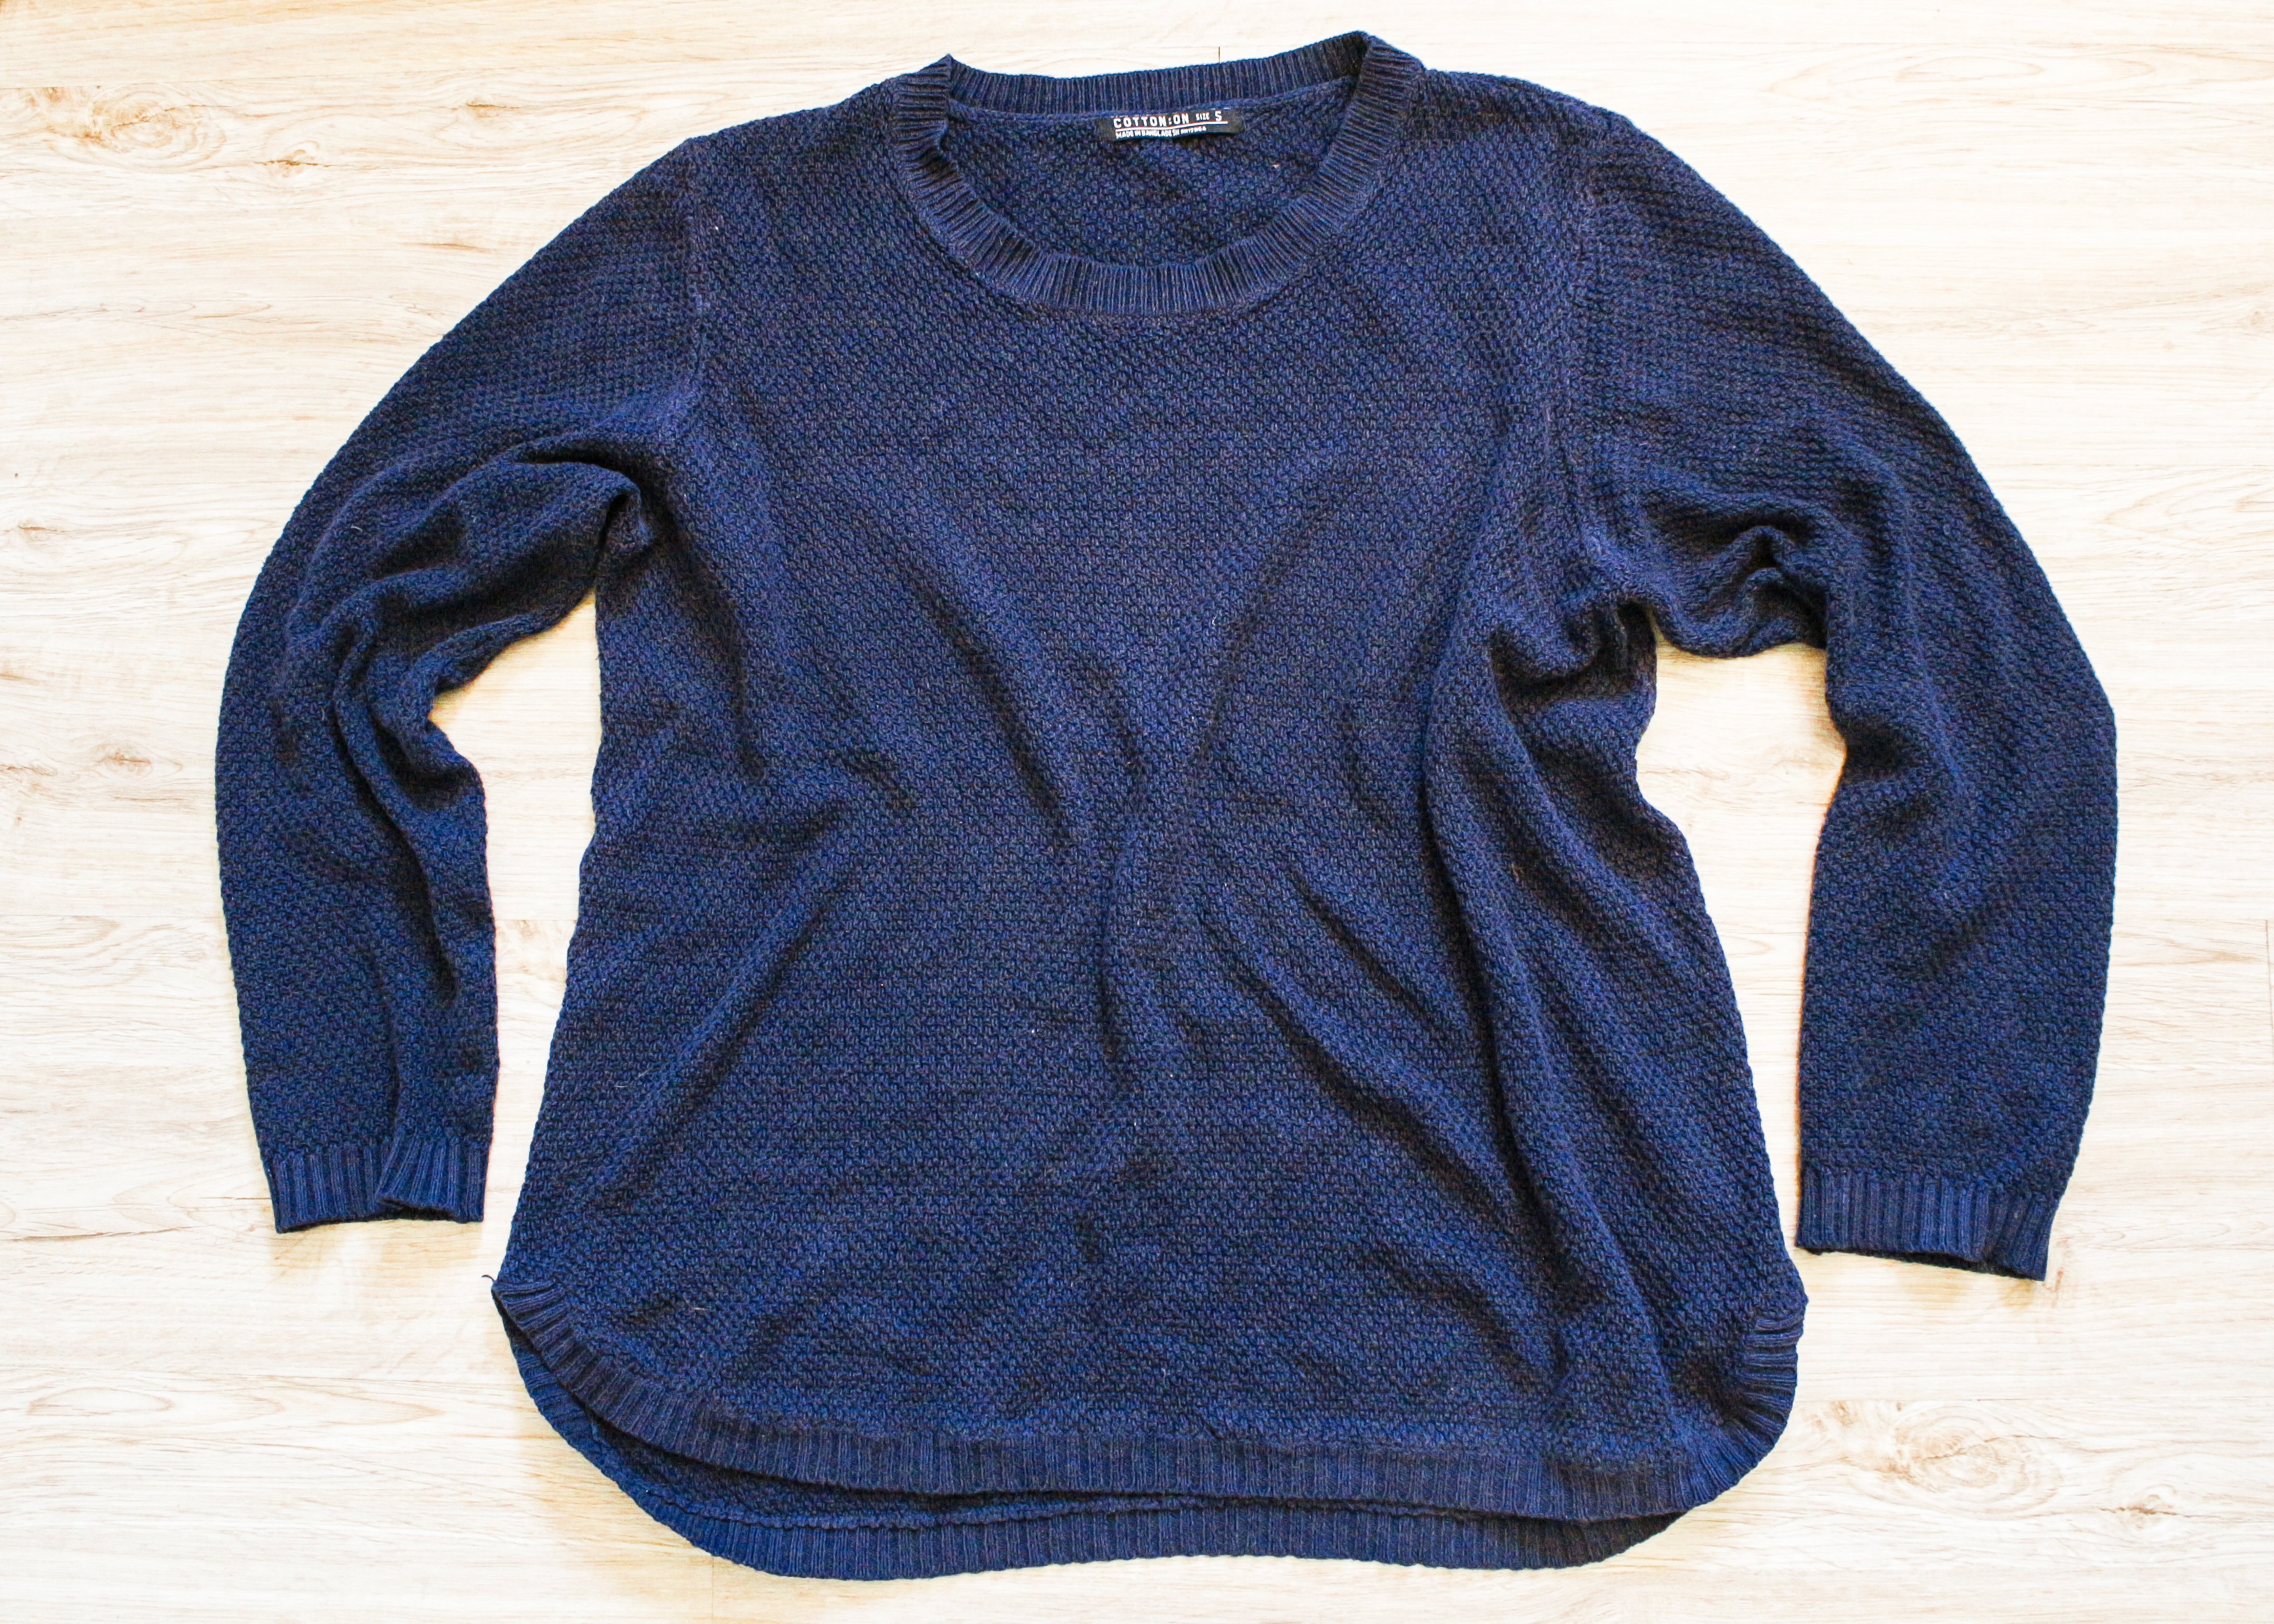
- Use your favourite jersey/sweater/top as a pattern.
- Draw a straight line on the pattern paper.
Fold the garment in half and line up the Centre Front with the line on the pattern paper.
Trace along the Shoulder, Side seam and Hem.
(I chose to do a straighter hem than my original jersey)
- Trace along the neckline, below the neckband. Do for the Front & Back.
This is when it is great to use a Tracing Wheel. You can trace on top of the fabric and as long as you push hard enough, the wheel should transfer the line onto the paper.
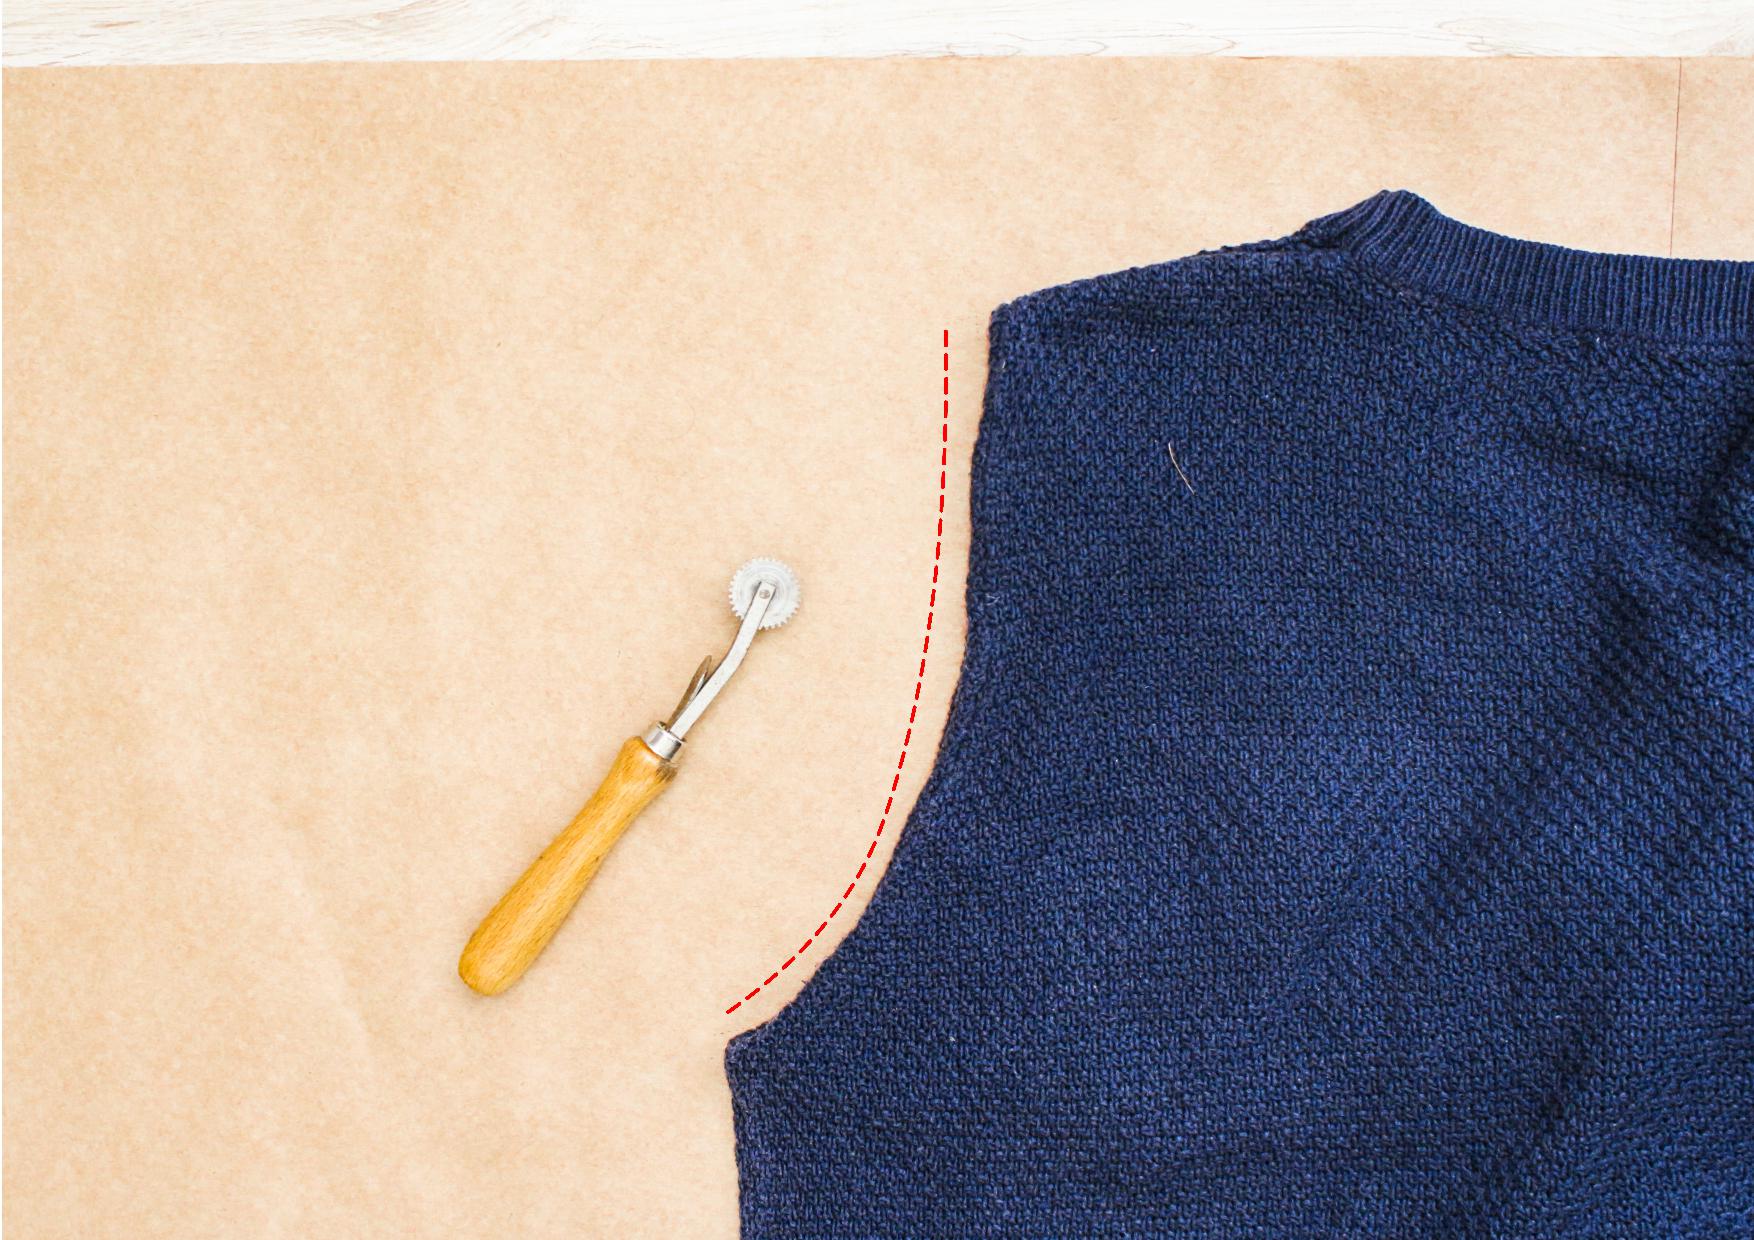
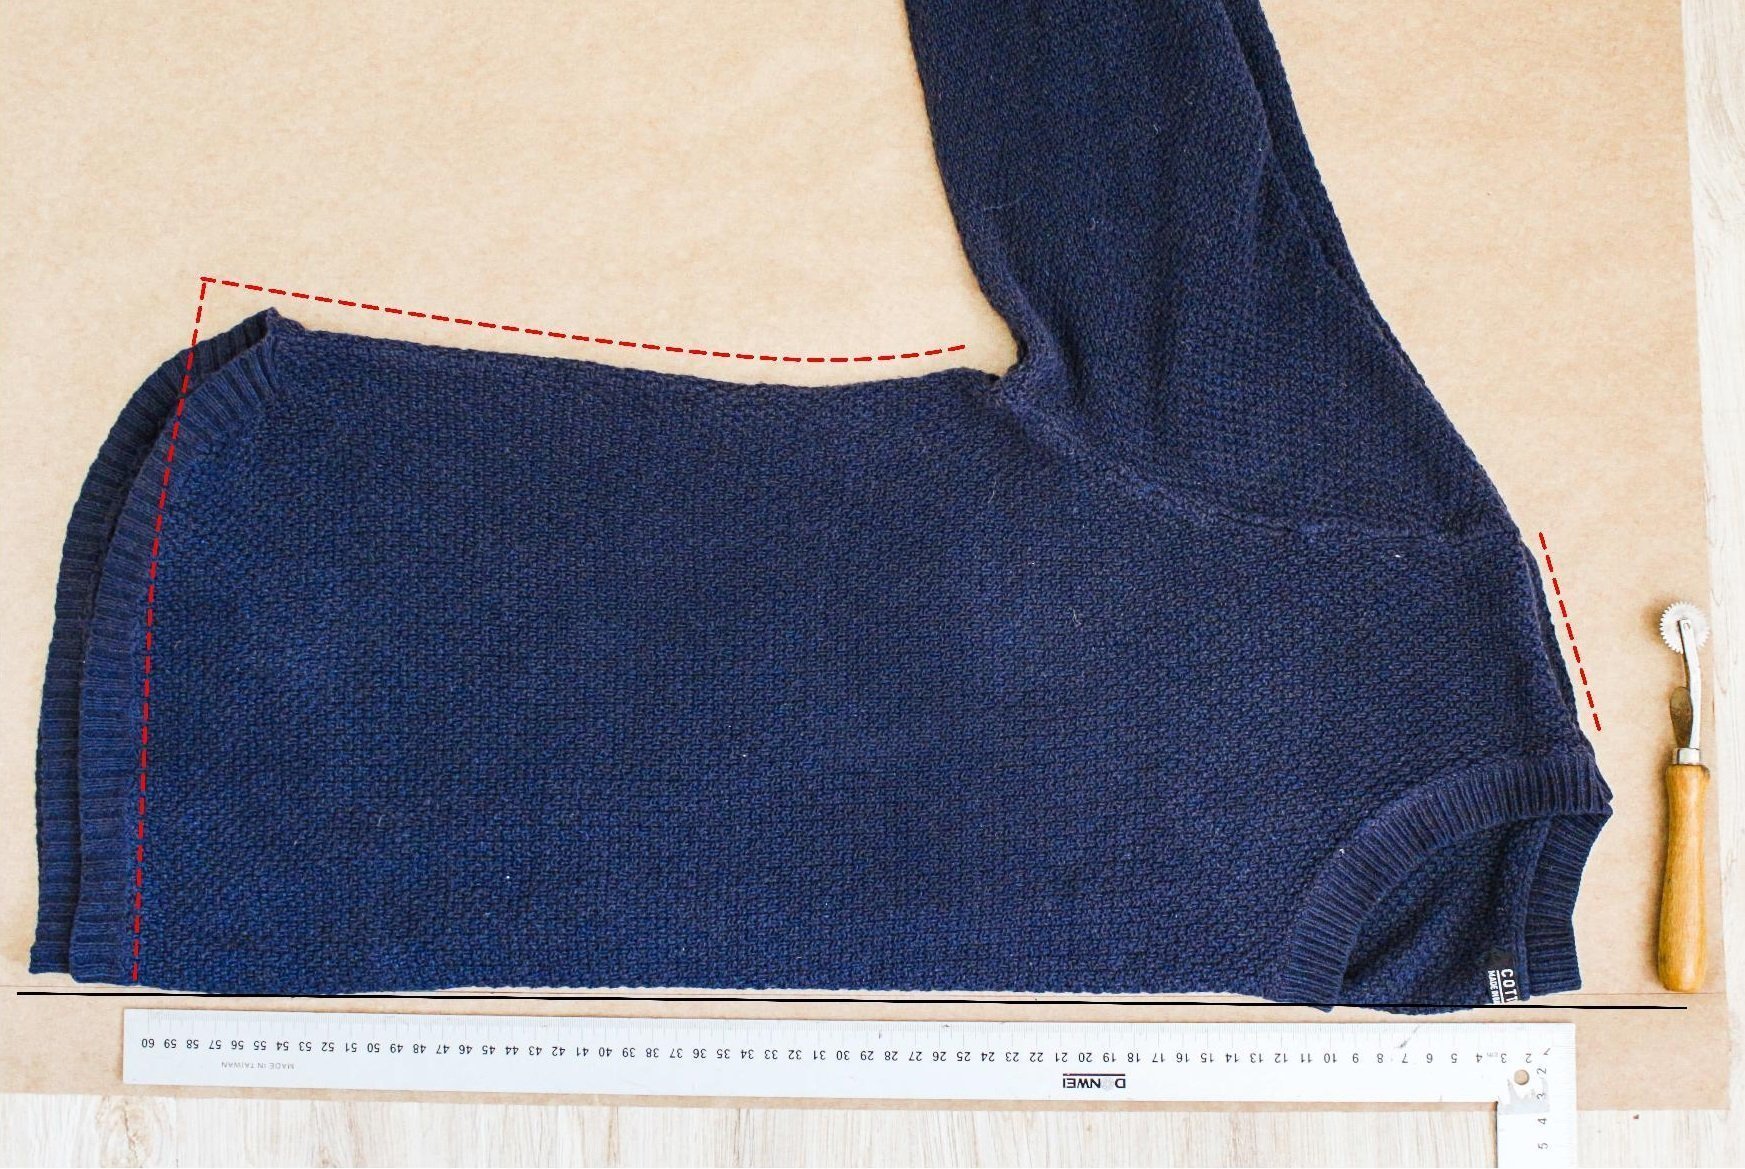
- Feed the sleeve through the armhole and lay the garment back in place on the pattern paper.
Trace along the armhole.
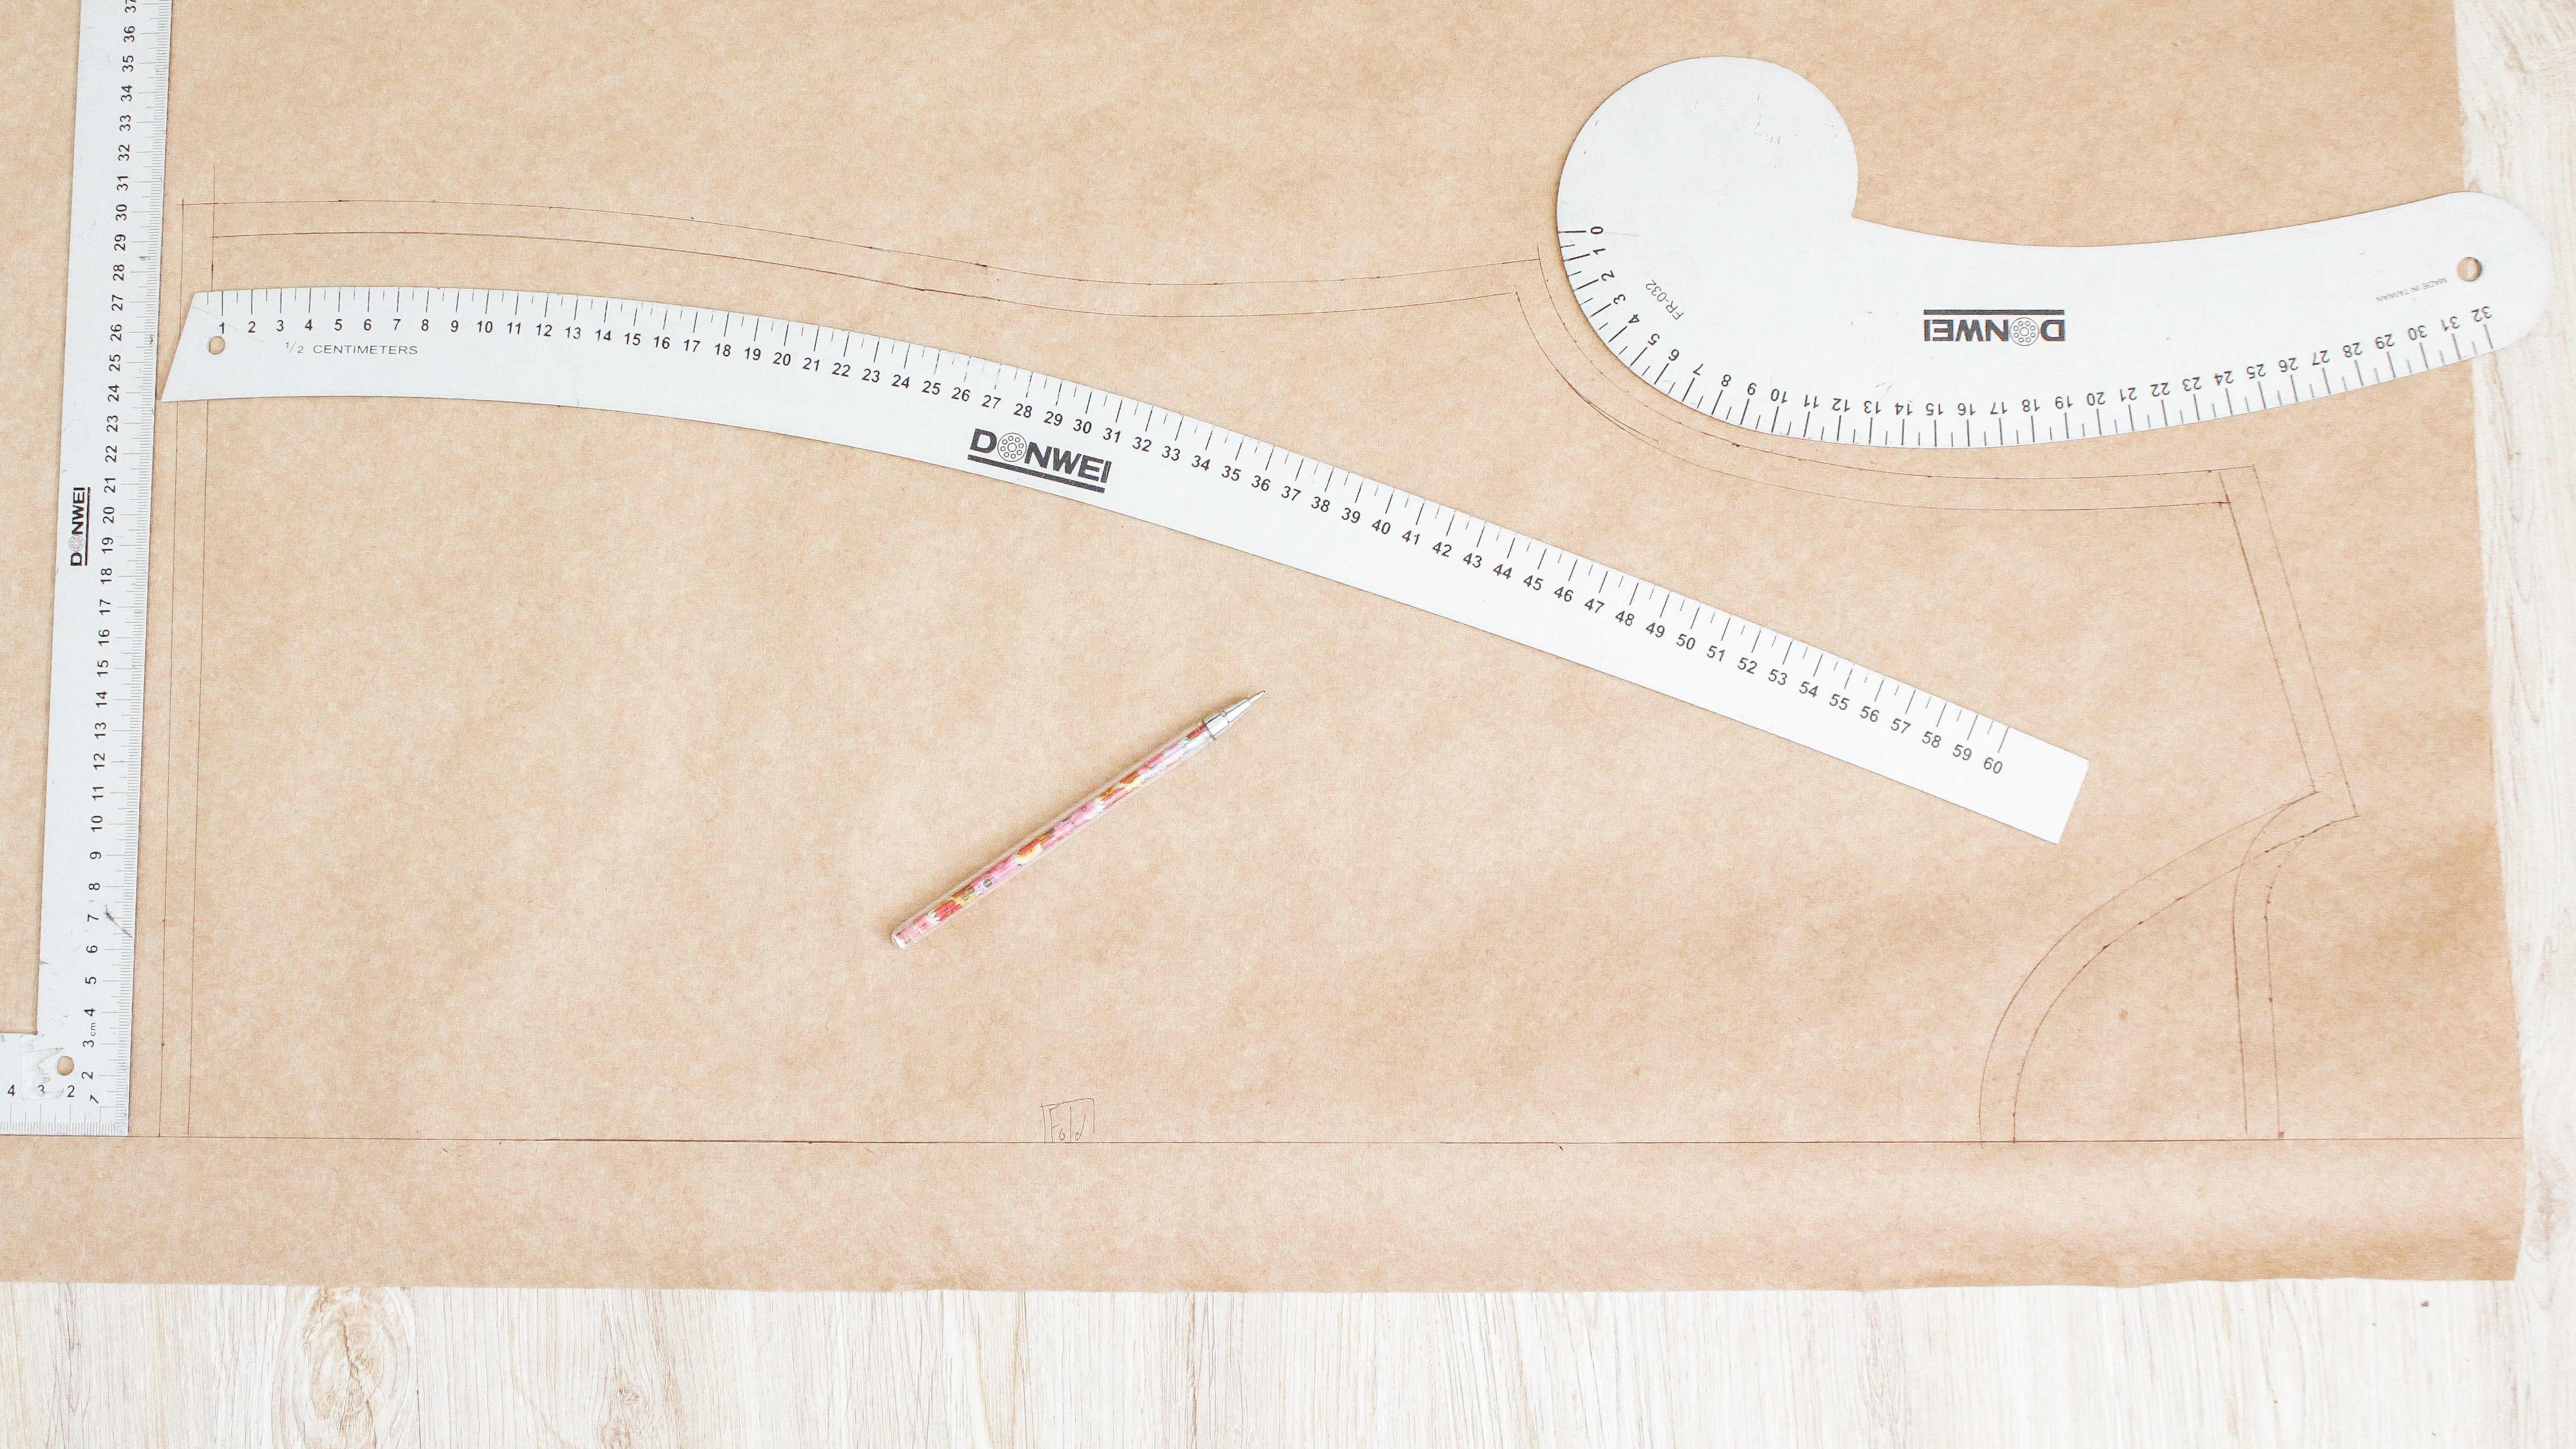
- Put your garment aside and draw along the markings.
Remember to add seam allowance (I did 1cm seam allowance.)
I used my ruler and French Curves to get crisp lines.
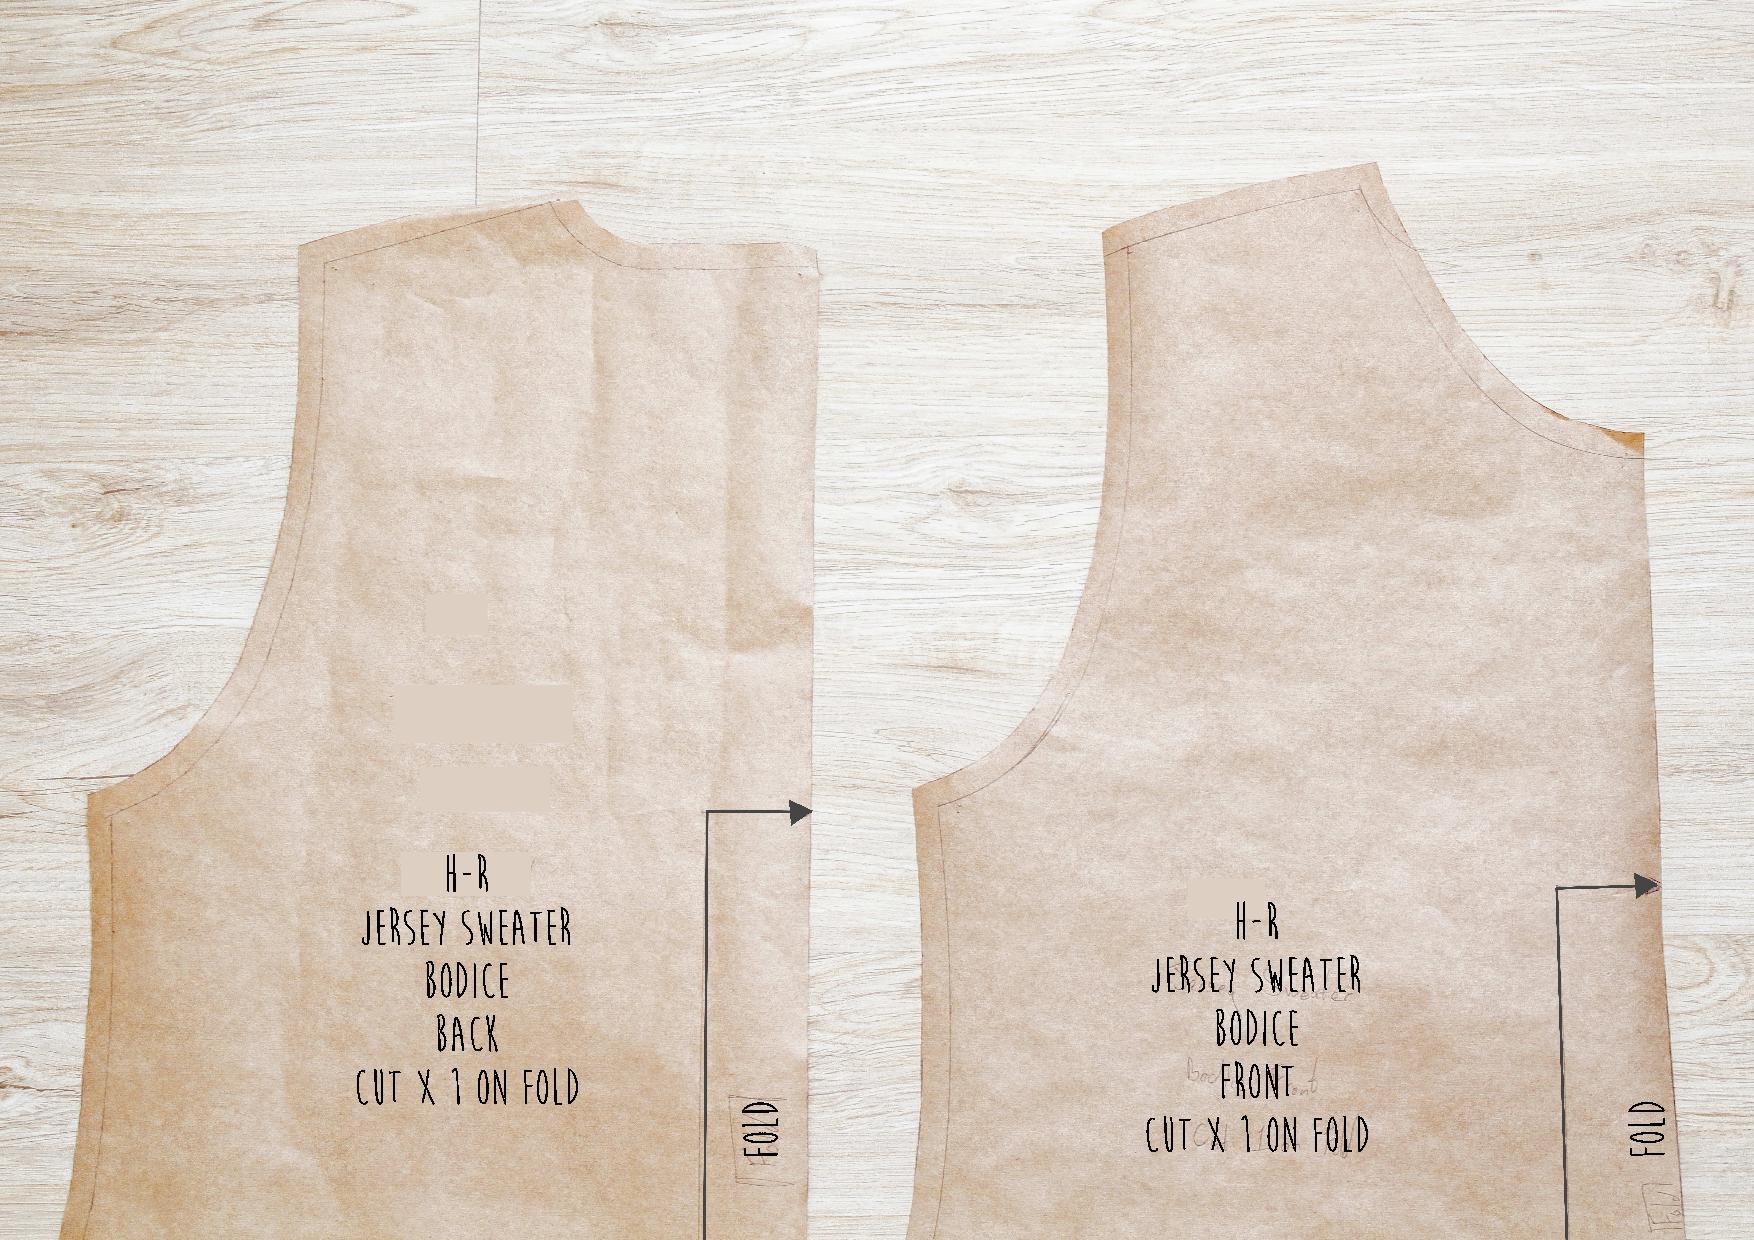
- Cut out the Bodice pattern piece and on another piece of paper trace around it.
You’ll have 2 pattern pieces that look the same.
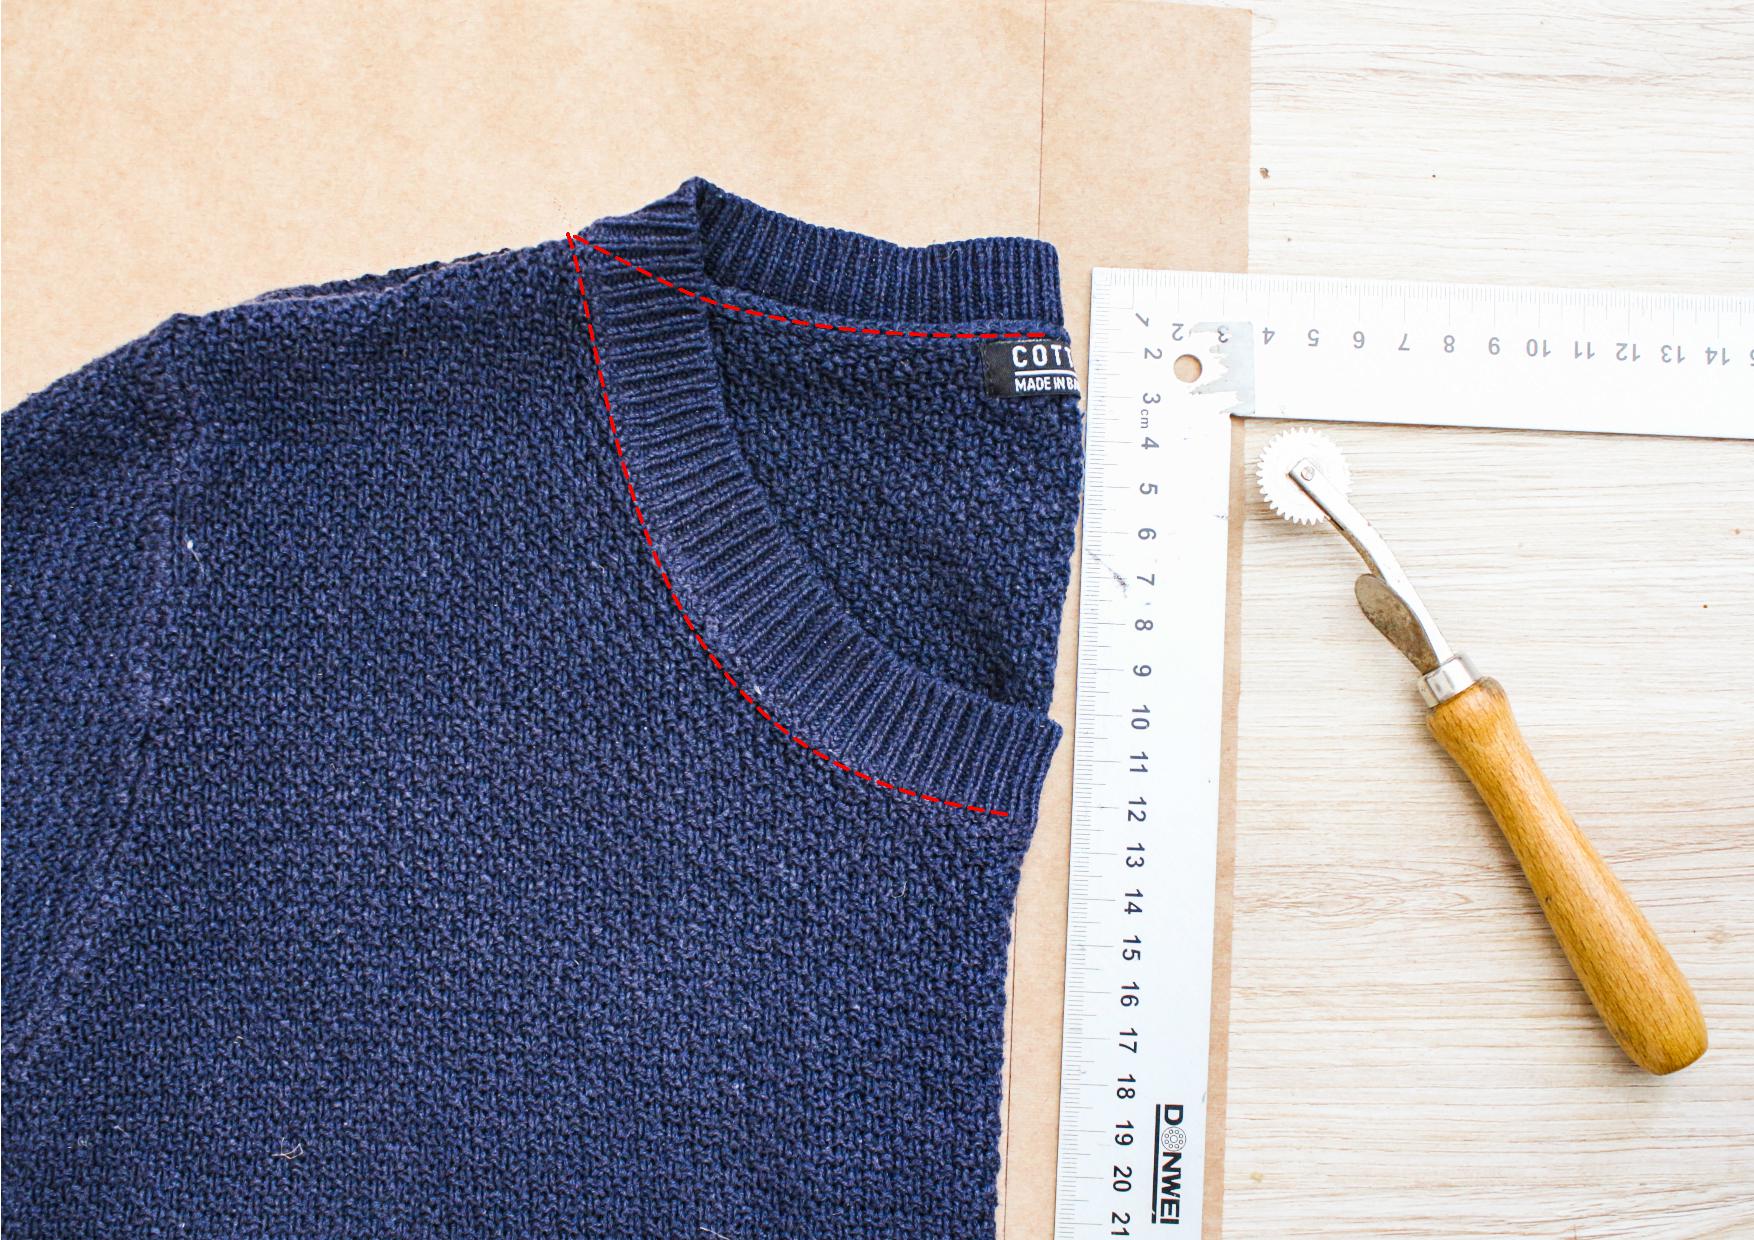
On the original Bodice pattern piece, cut along the front neck edge.
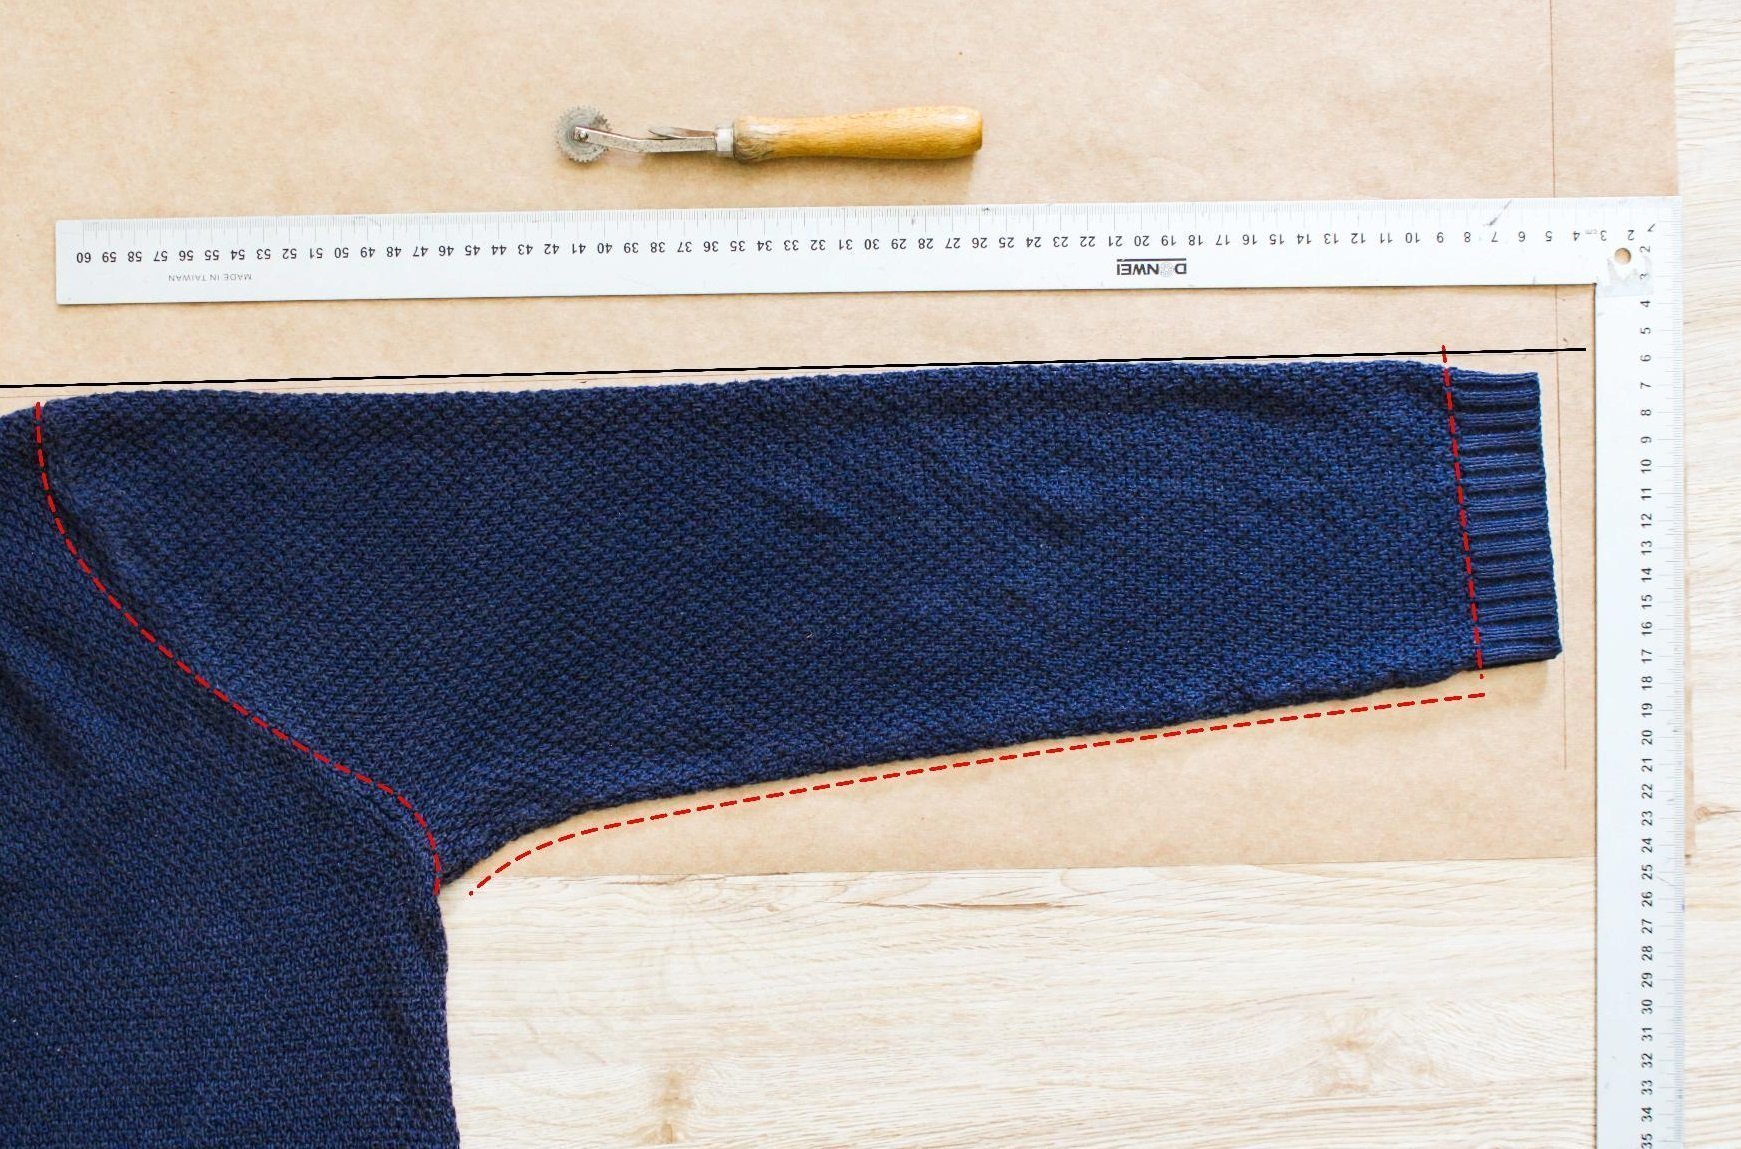
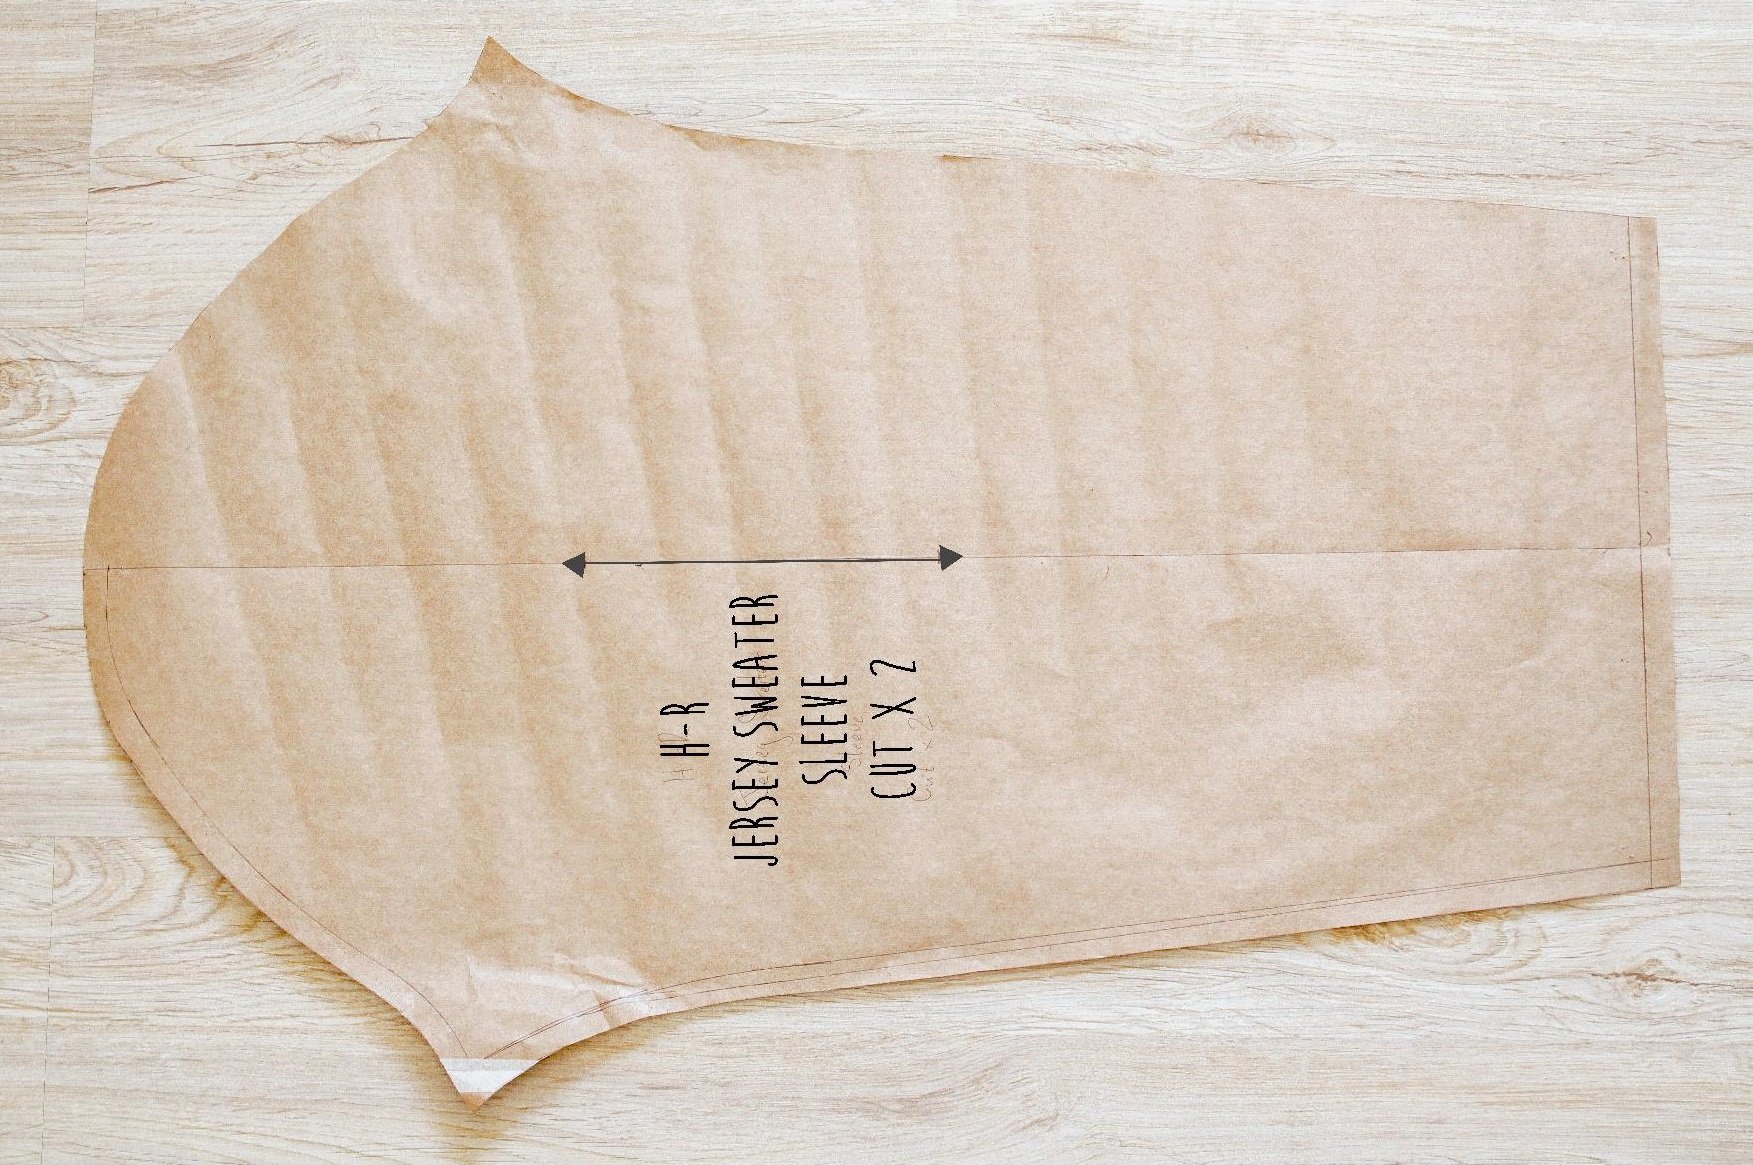
- Lay the sleeve of the garment on the pattern paper and draw a straight line along the fold of the sleeve.
Trace along the cuff seam, the underarm seam and sleeve head.
- Put your garment aside and draw along the markings, adding seam allowance.
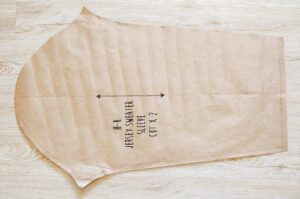
- Fold the paper lengthwise along the straight line and cut out so that you end up with a full sleeve pattern piece.
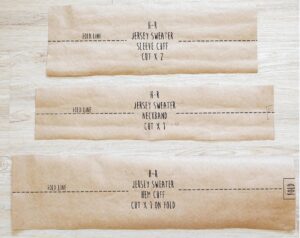
- Work out the measurements of your sleeve cuffs, hem cuff and neckband.
My measurements:
-Sleeve Cuff: 14cm x (sleeve width-5cm)
-Hem Cuff: 14cm x (bodice width-5cm)
-Neckband: 10cm x (neck width-5cm)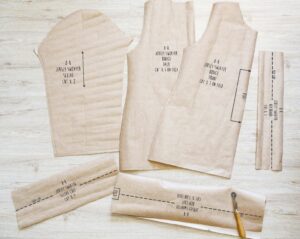
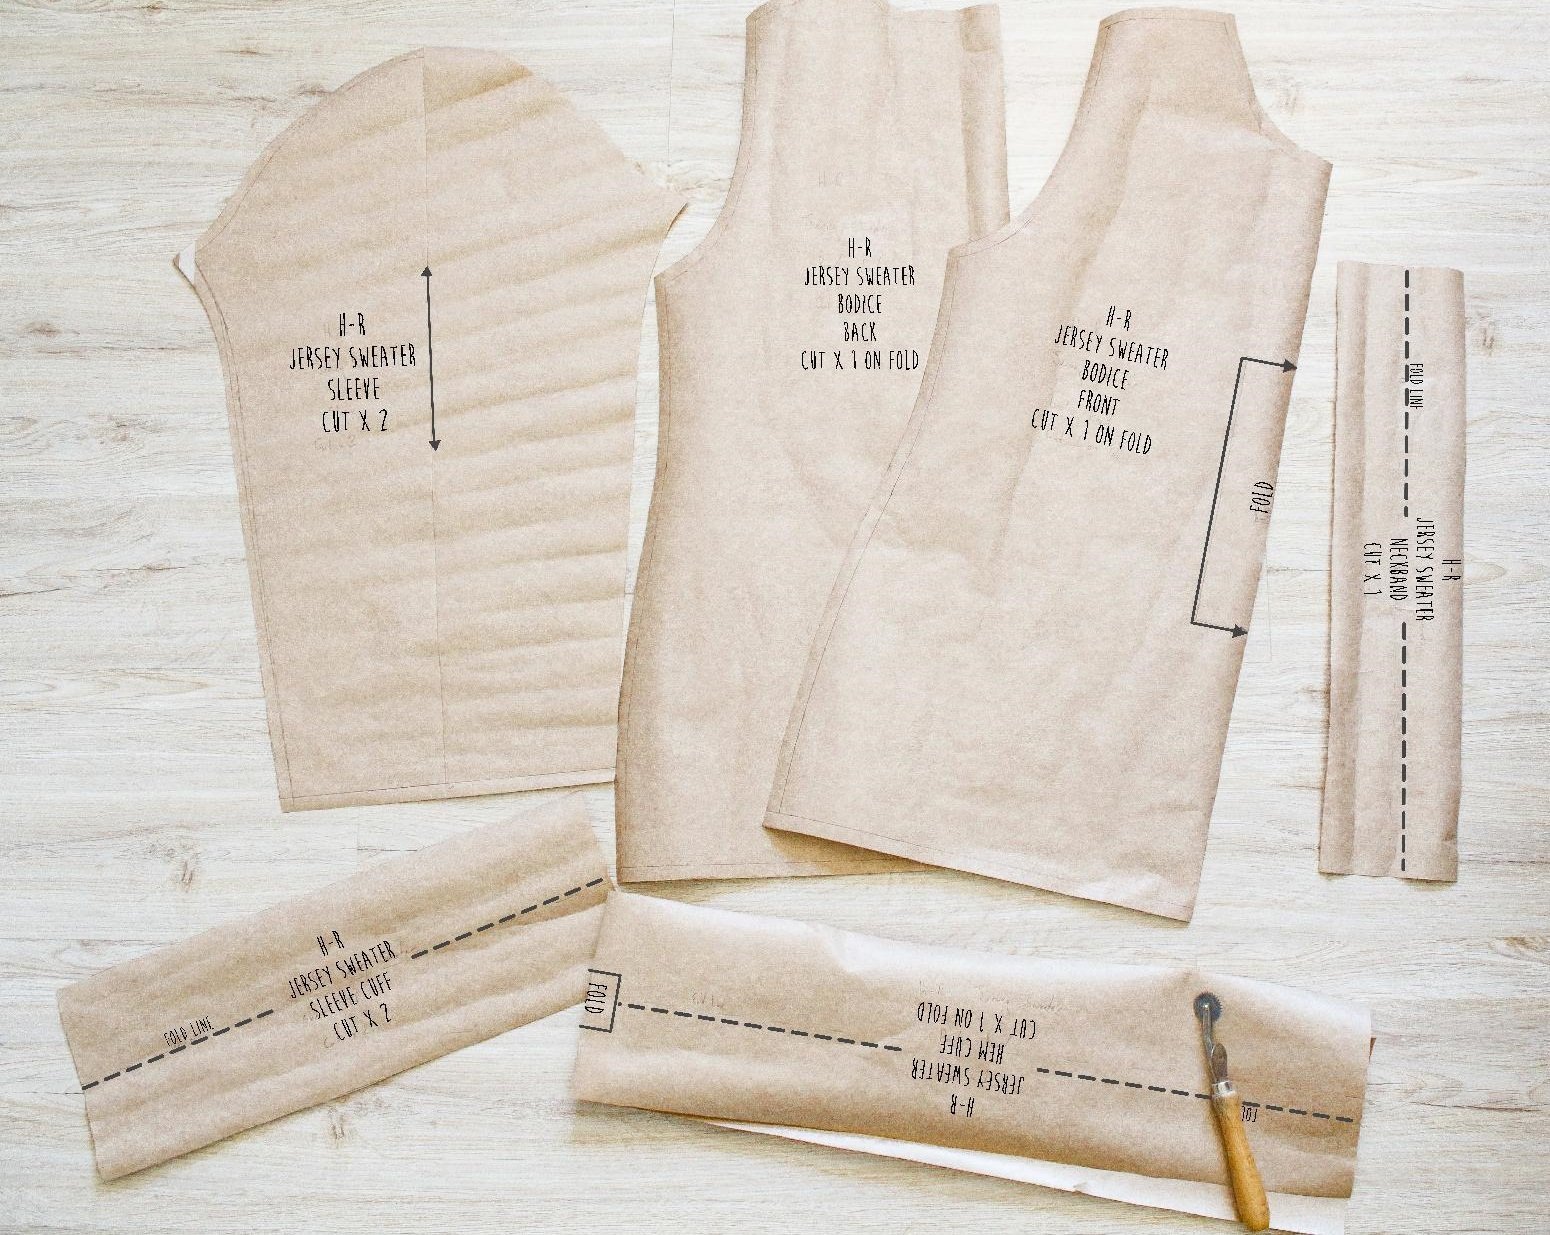
- When you cut out your fabric you should end up with:
-1 x Bodice Front (cut on Fold)
-1 x Bodice Back (cut on Fold)
-2 x Sleeves
-1 x Neckband
-2 x Sleeve Cuffs
-1 x Hem Cuff

If you are not going to embroider then skip to the Overlocking section.
If you are going to embroider, then do not join your garment together yet.
Embroidery
If you don’t have access to an embroidery machine, you could applique a piece of embroidered tulle or an embroidered patch from your fabric shop to your jersey. You could also try hand embroidery or cross-stitching.
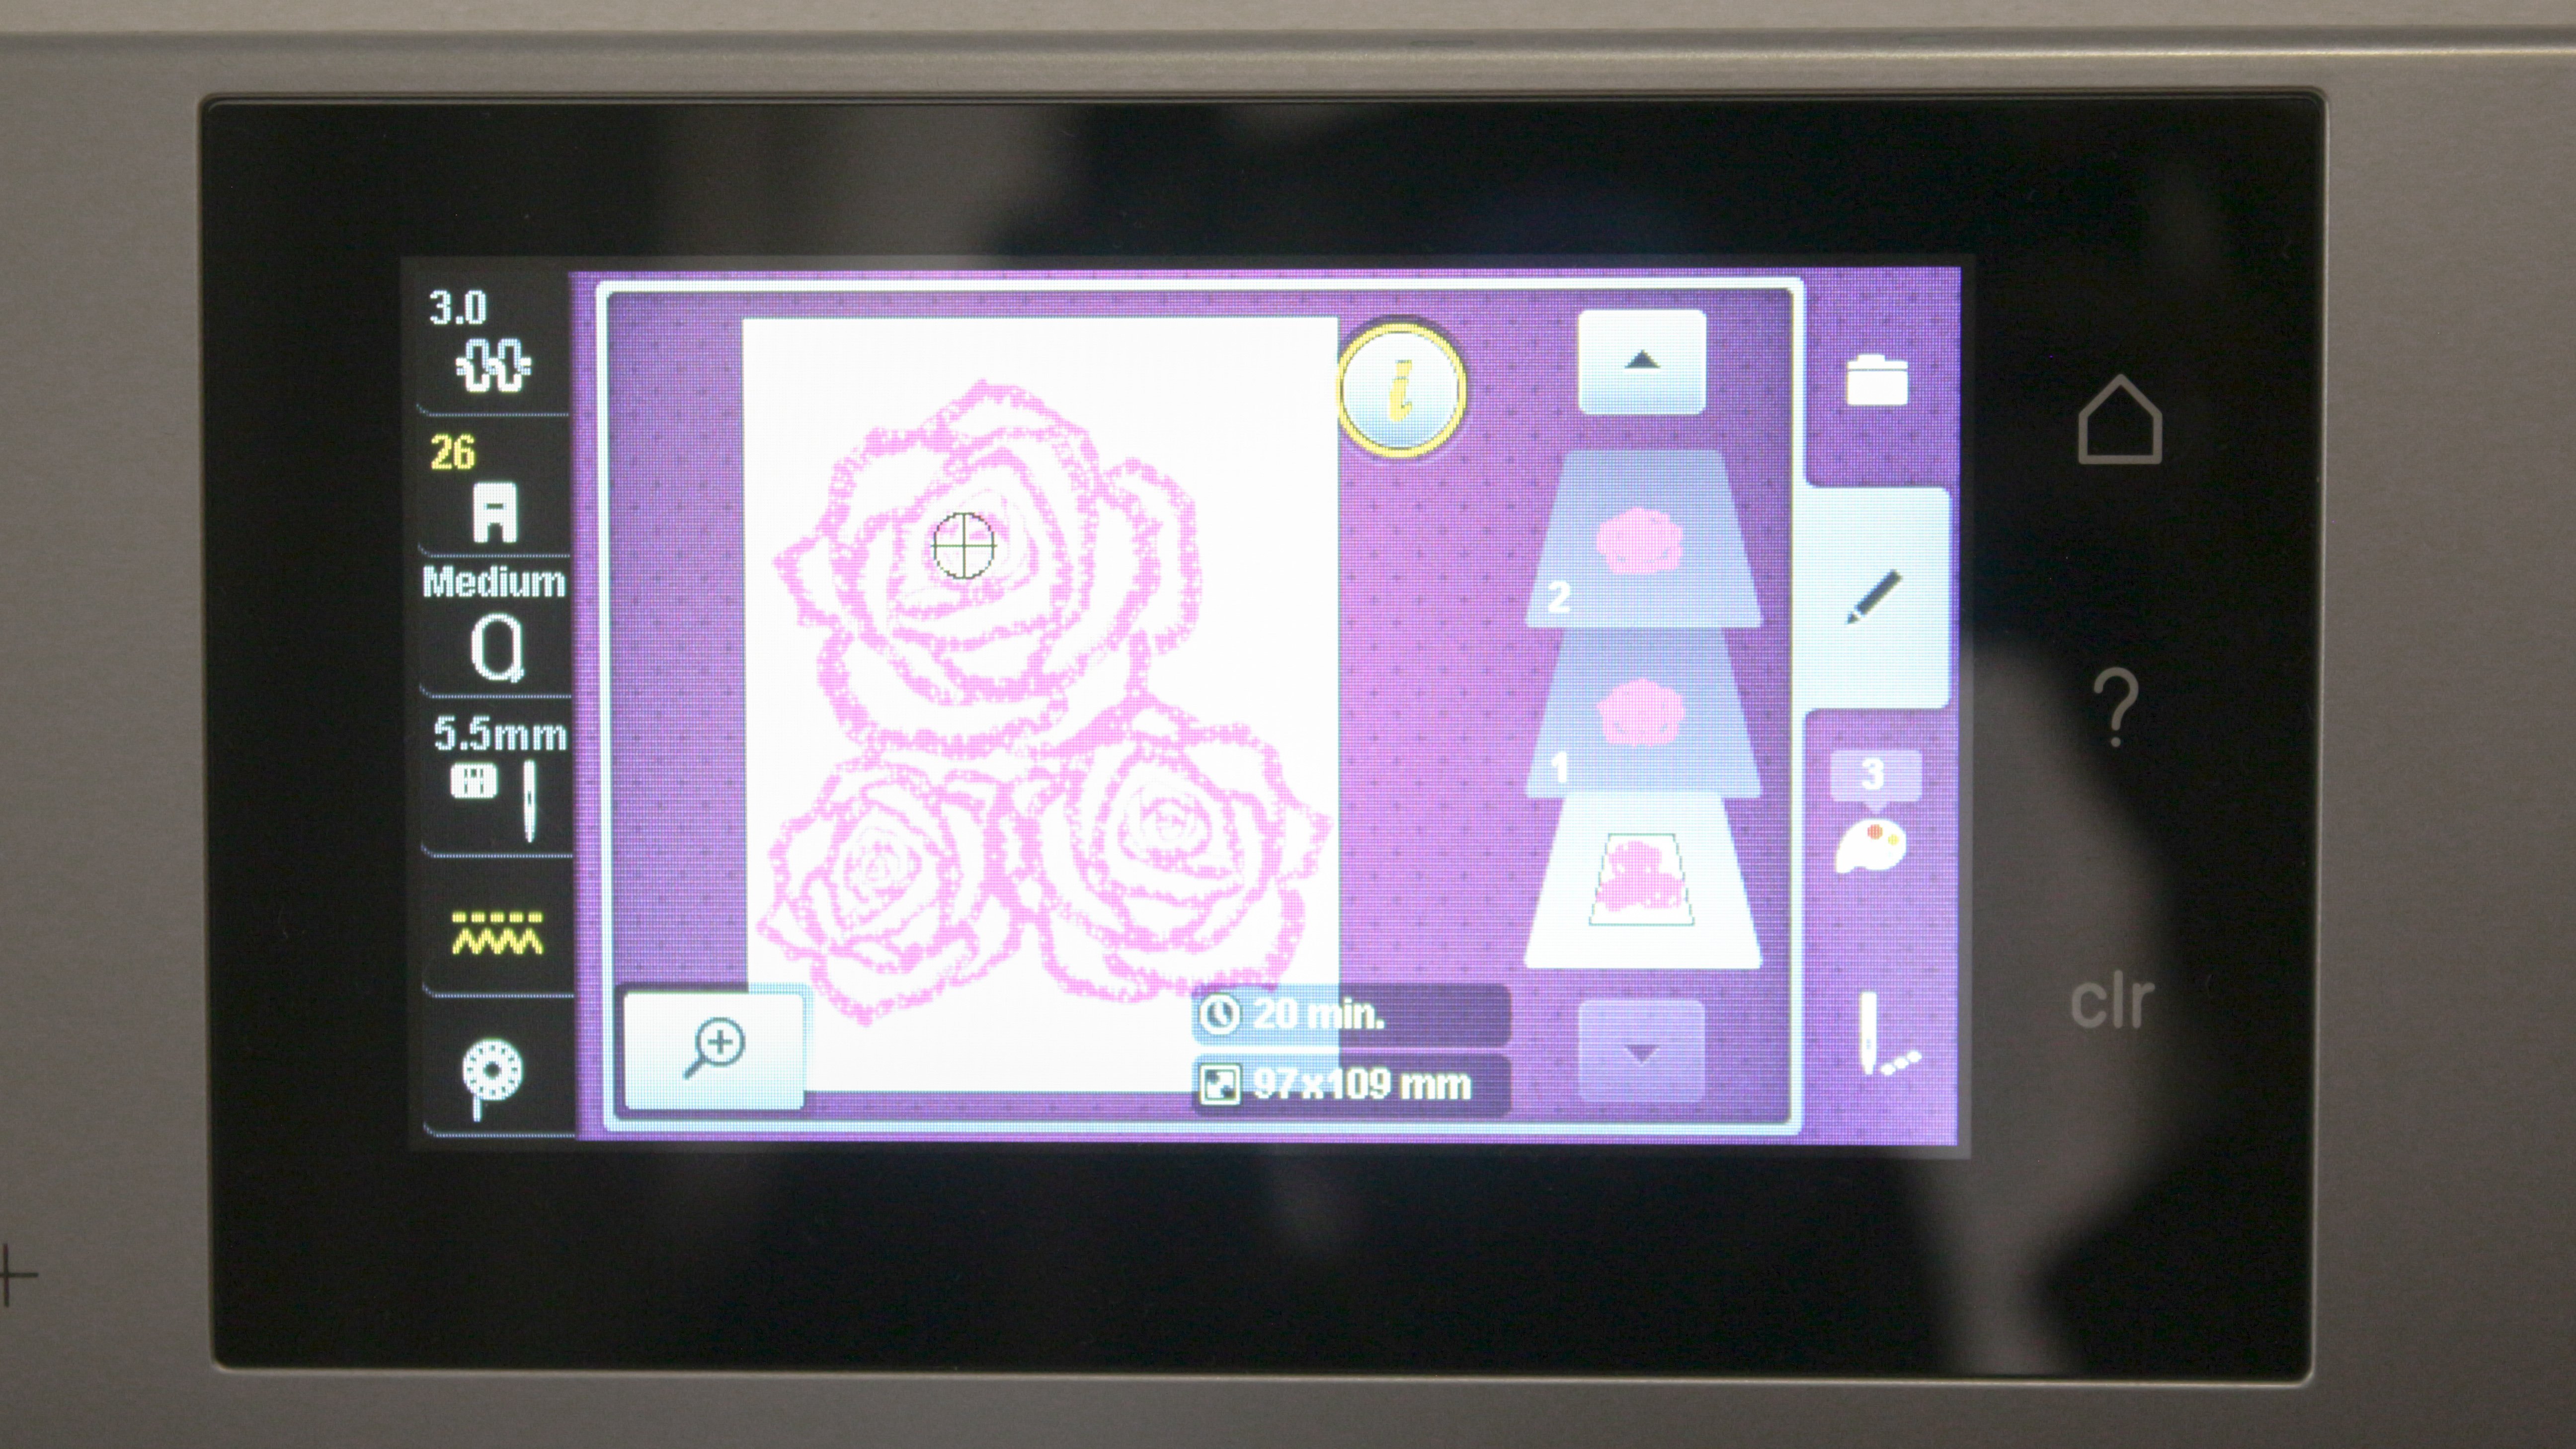
Original design by Igor Denisov, Pink Sketch Rose
- Find an embroidery design you like.
(I found a rose design and duplicated it to make this design.)
Bernina has many beautiful designs to download for free from their Inspiration Magazine
Just click on an issue to see what embroidery designs are available for free download.
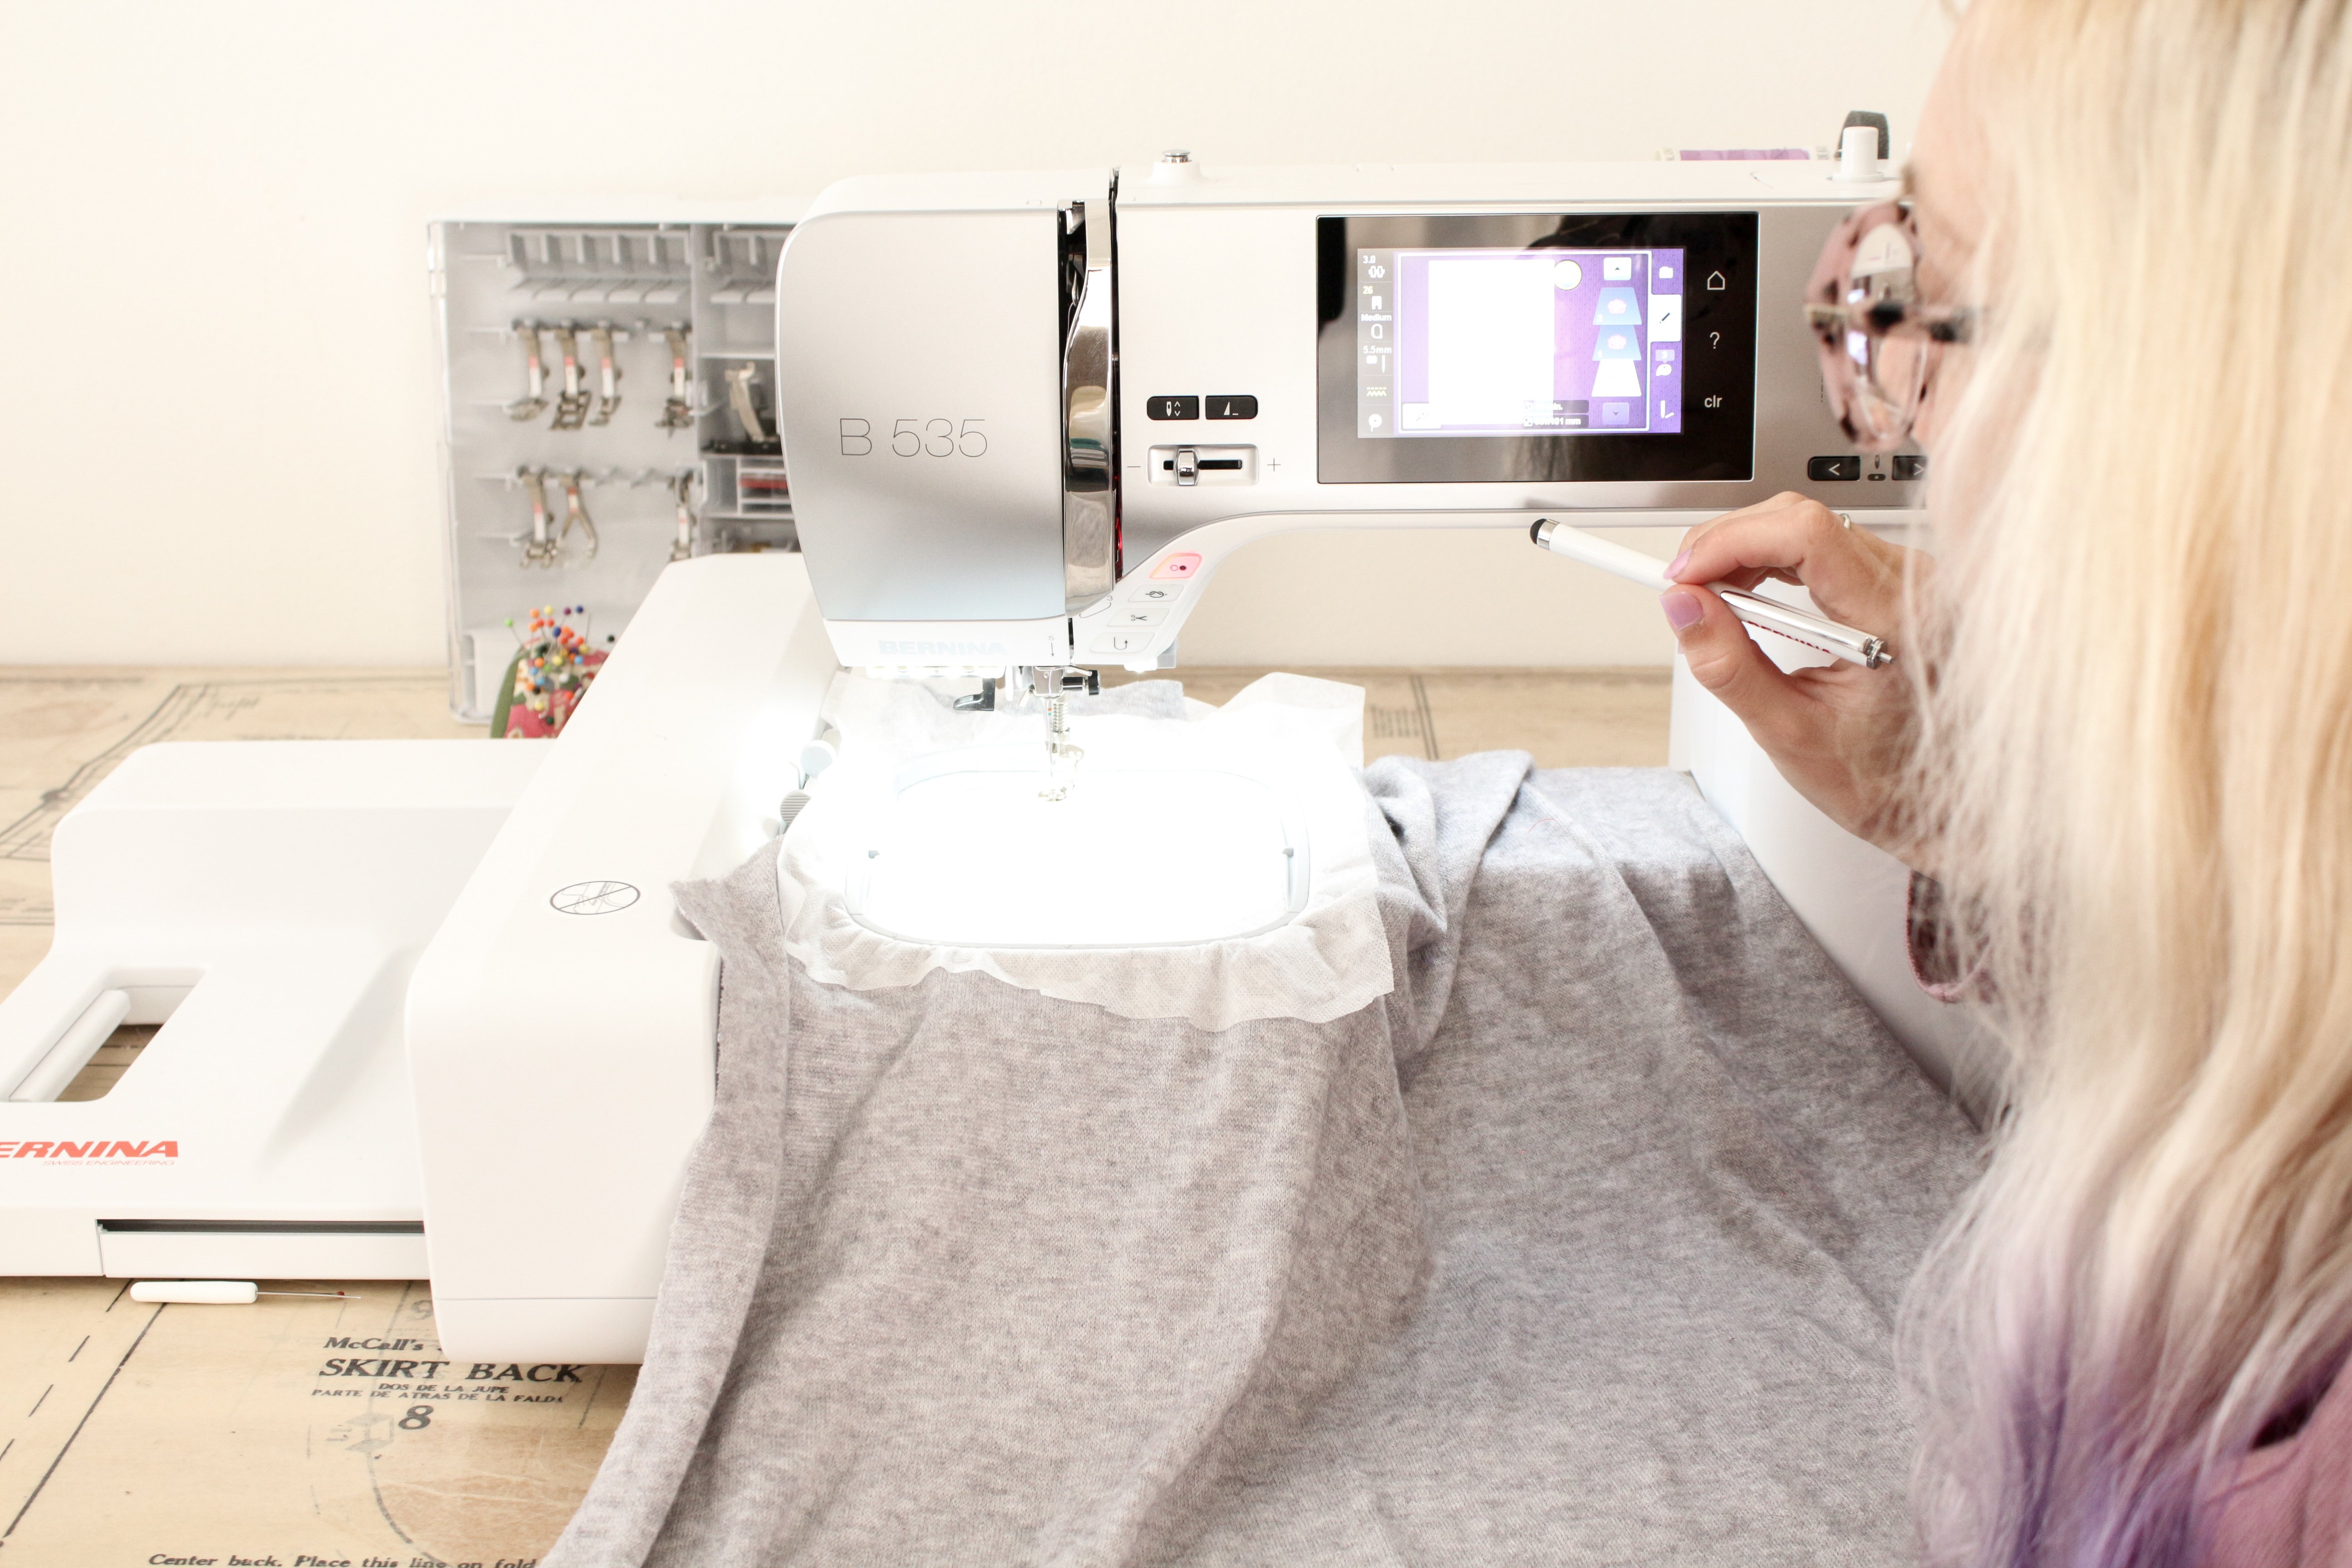
How to embroider with the B535
Here is a video I made to show you how to embroider using a B535 sewing machine with embroidery model.
I also show you how I created my design from an existing design I downloaded.
I think most of Bernina’s sewing machines with embroidery modules work very similarly.

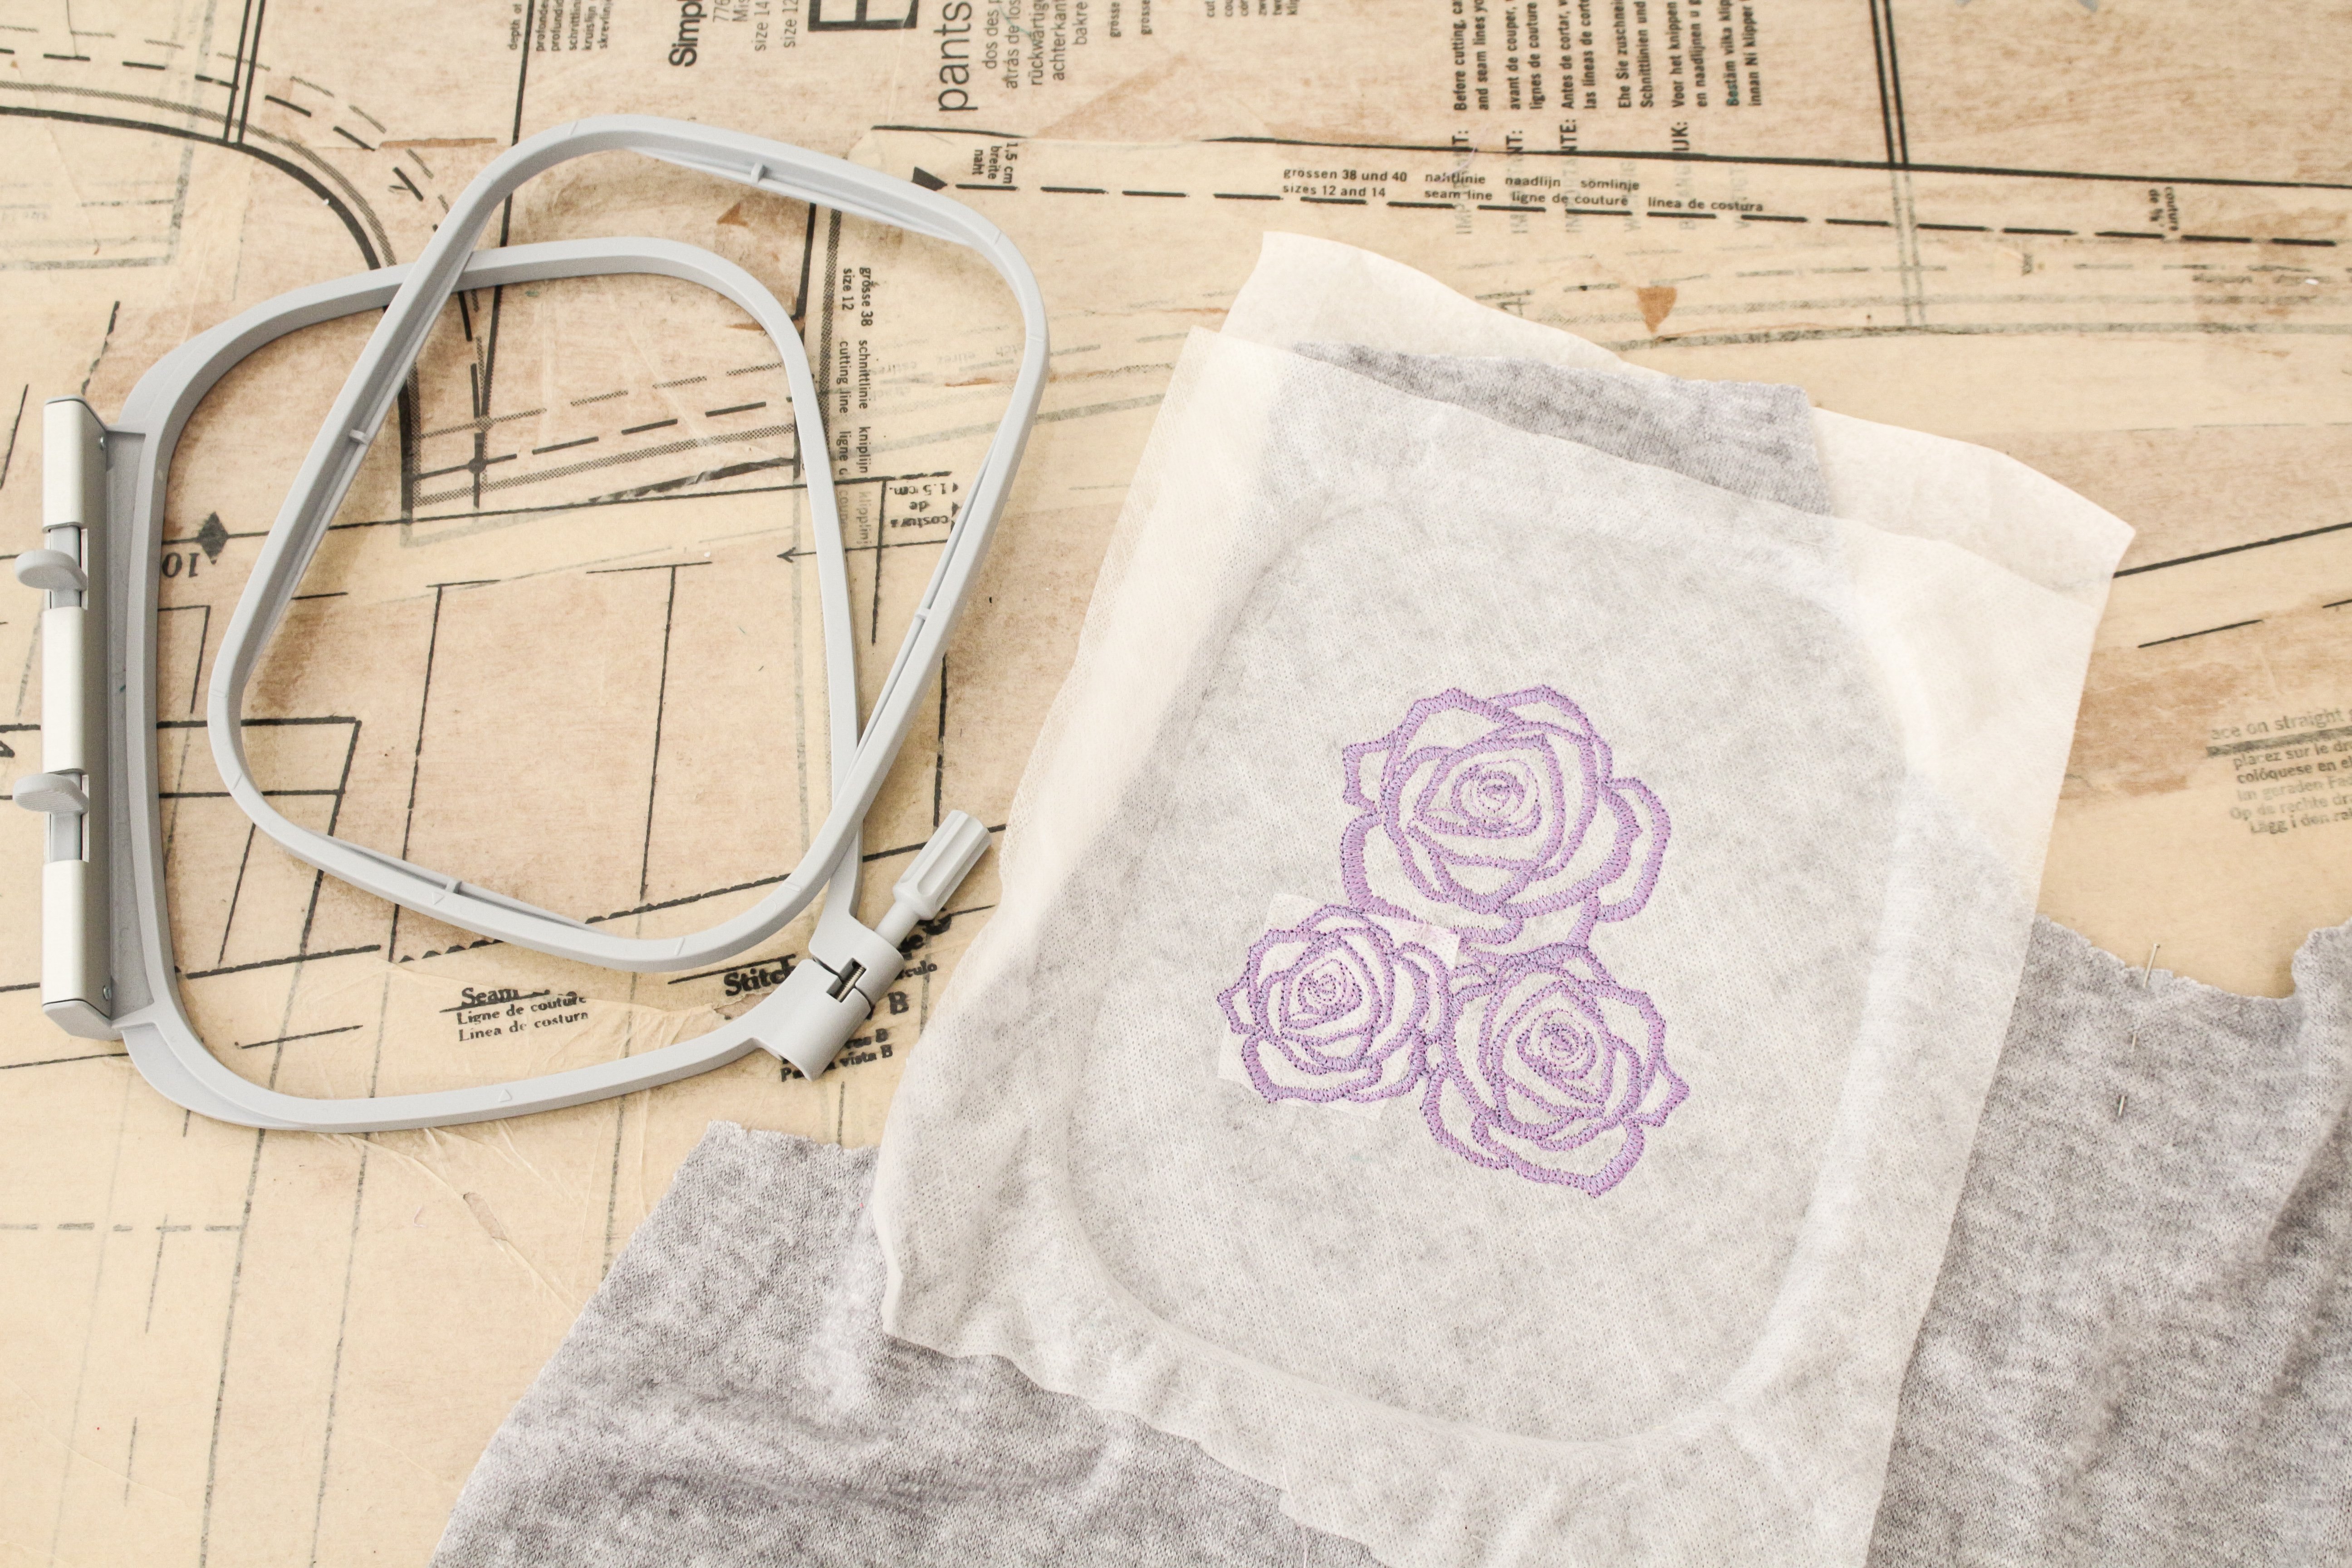
- If your knit fabric is thin, sandwich it between a layer of cut away stabilizer (base) and wash away stabilizer (top).
Baste the layers together and place in the embroidery hoop.
The sandwhiching & basting will prevent the fabric moving or stretching.
If your fabric isn’t so thin, just use a layer of cut away stabilizer beneath your fabric.
- Follow the steps in the video from above on how to embroider your design to your garment.
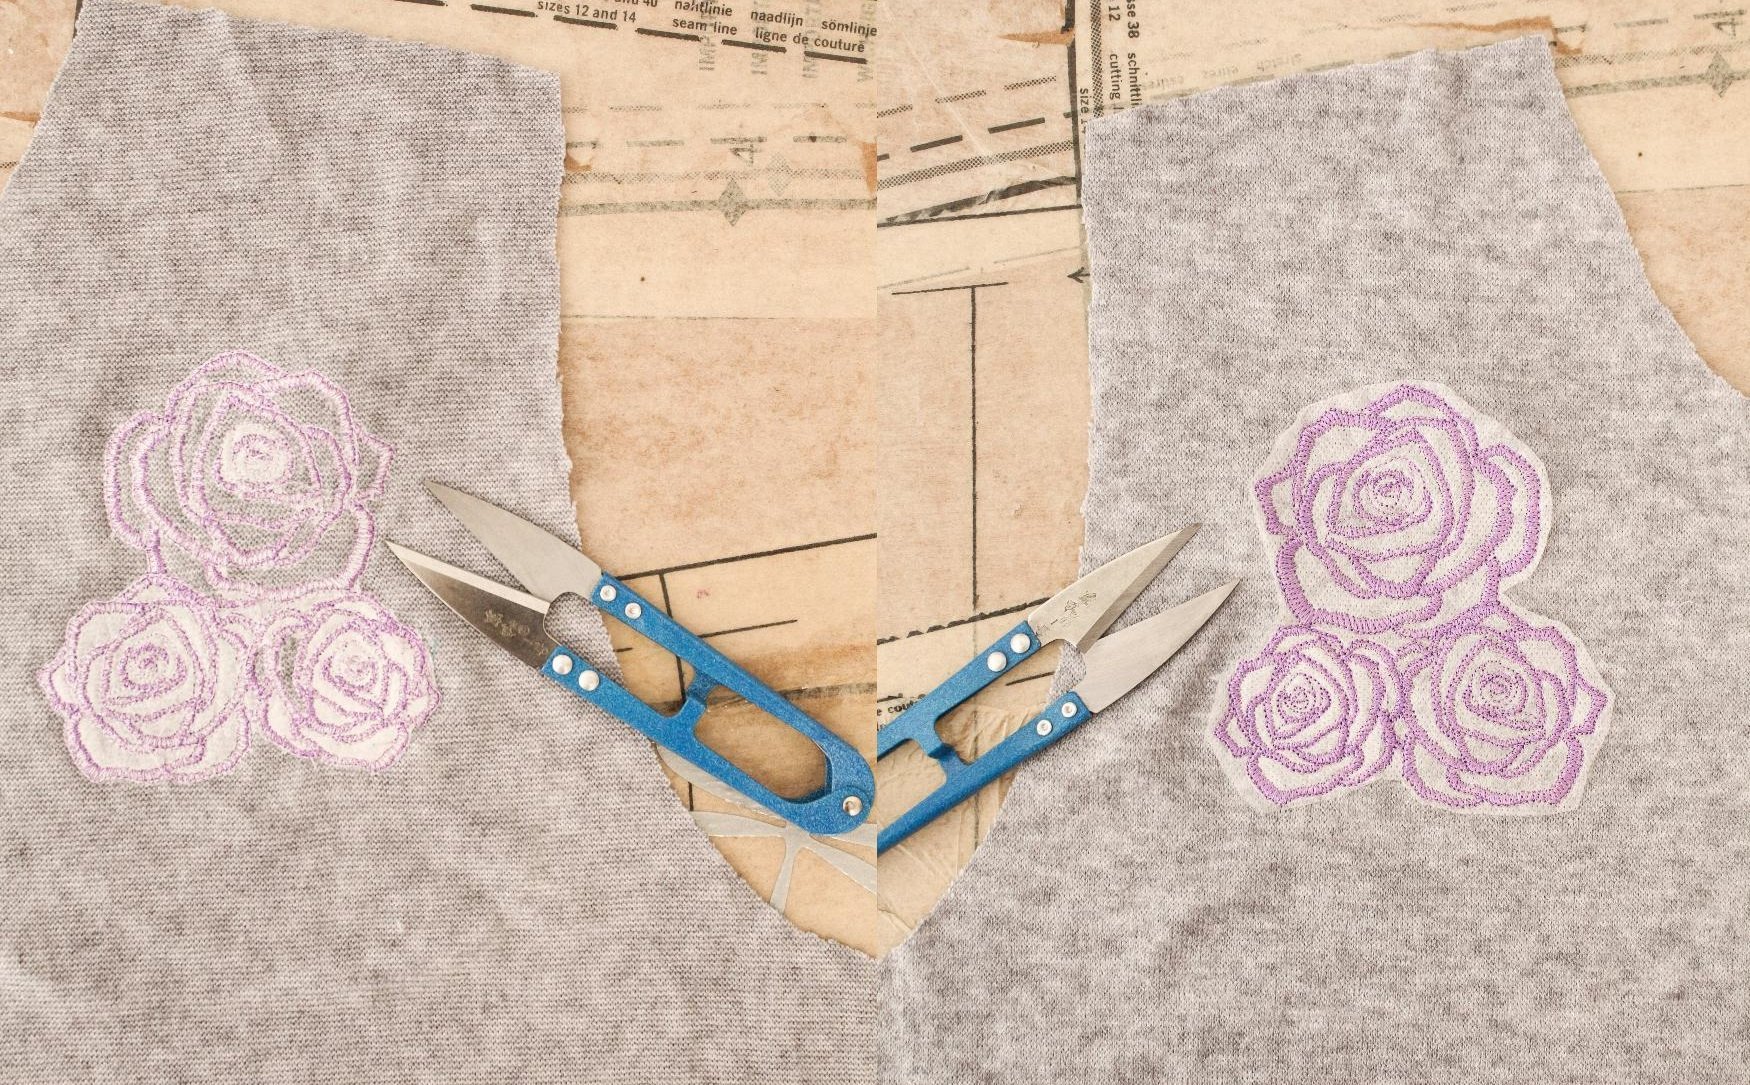
- Remove your garment from the hoop once the machine is finished embroidering.

- Carefully cut away the stabilizer from behind the design.
Trim the stabilizer on top of your design before soaking it in water.
Overlocking
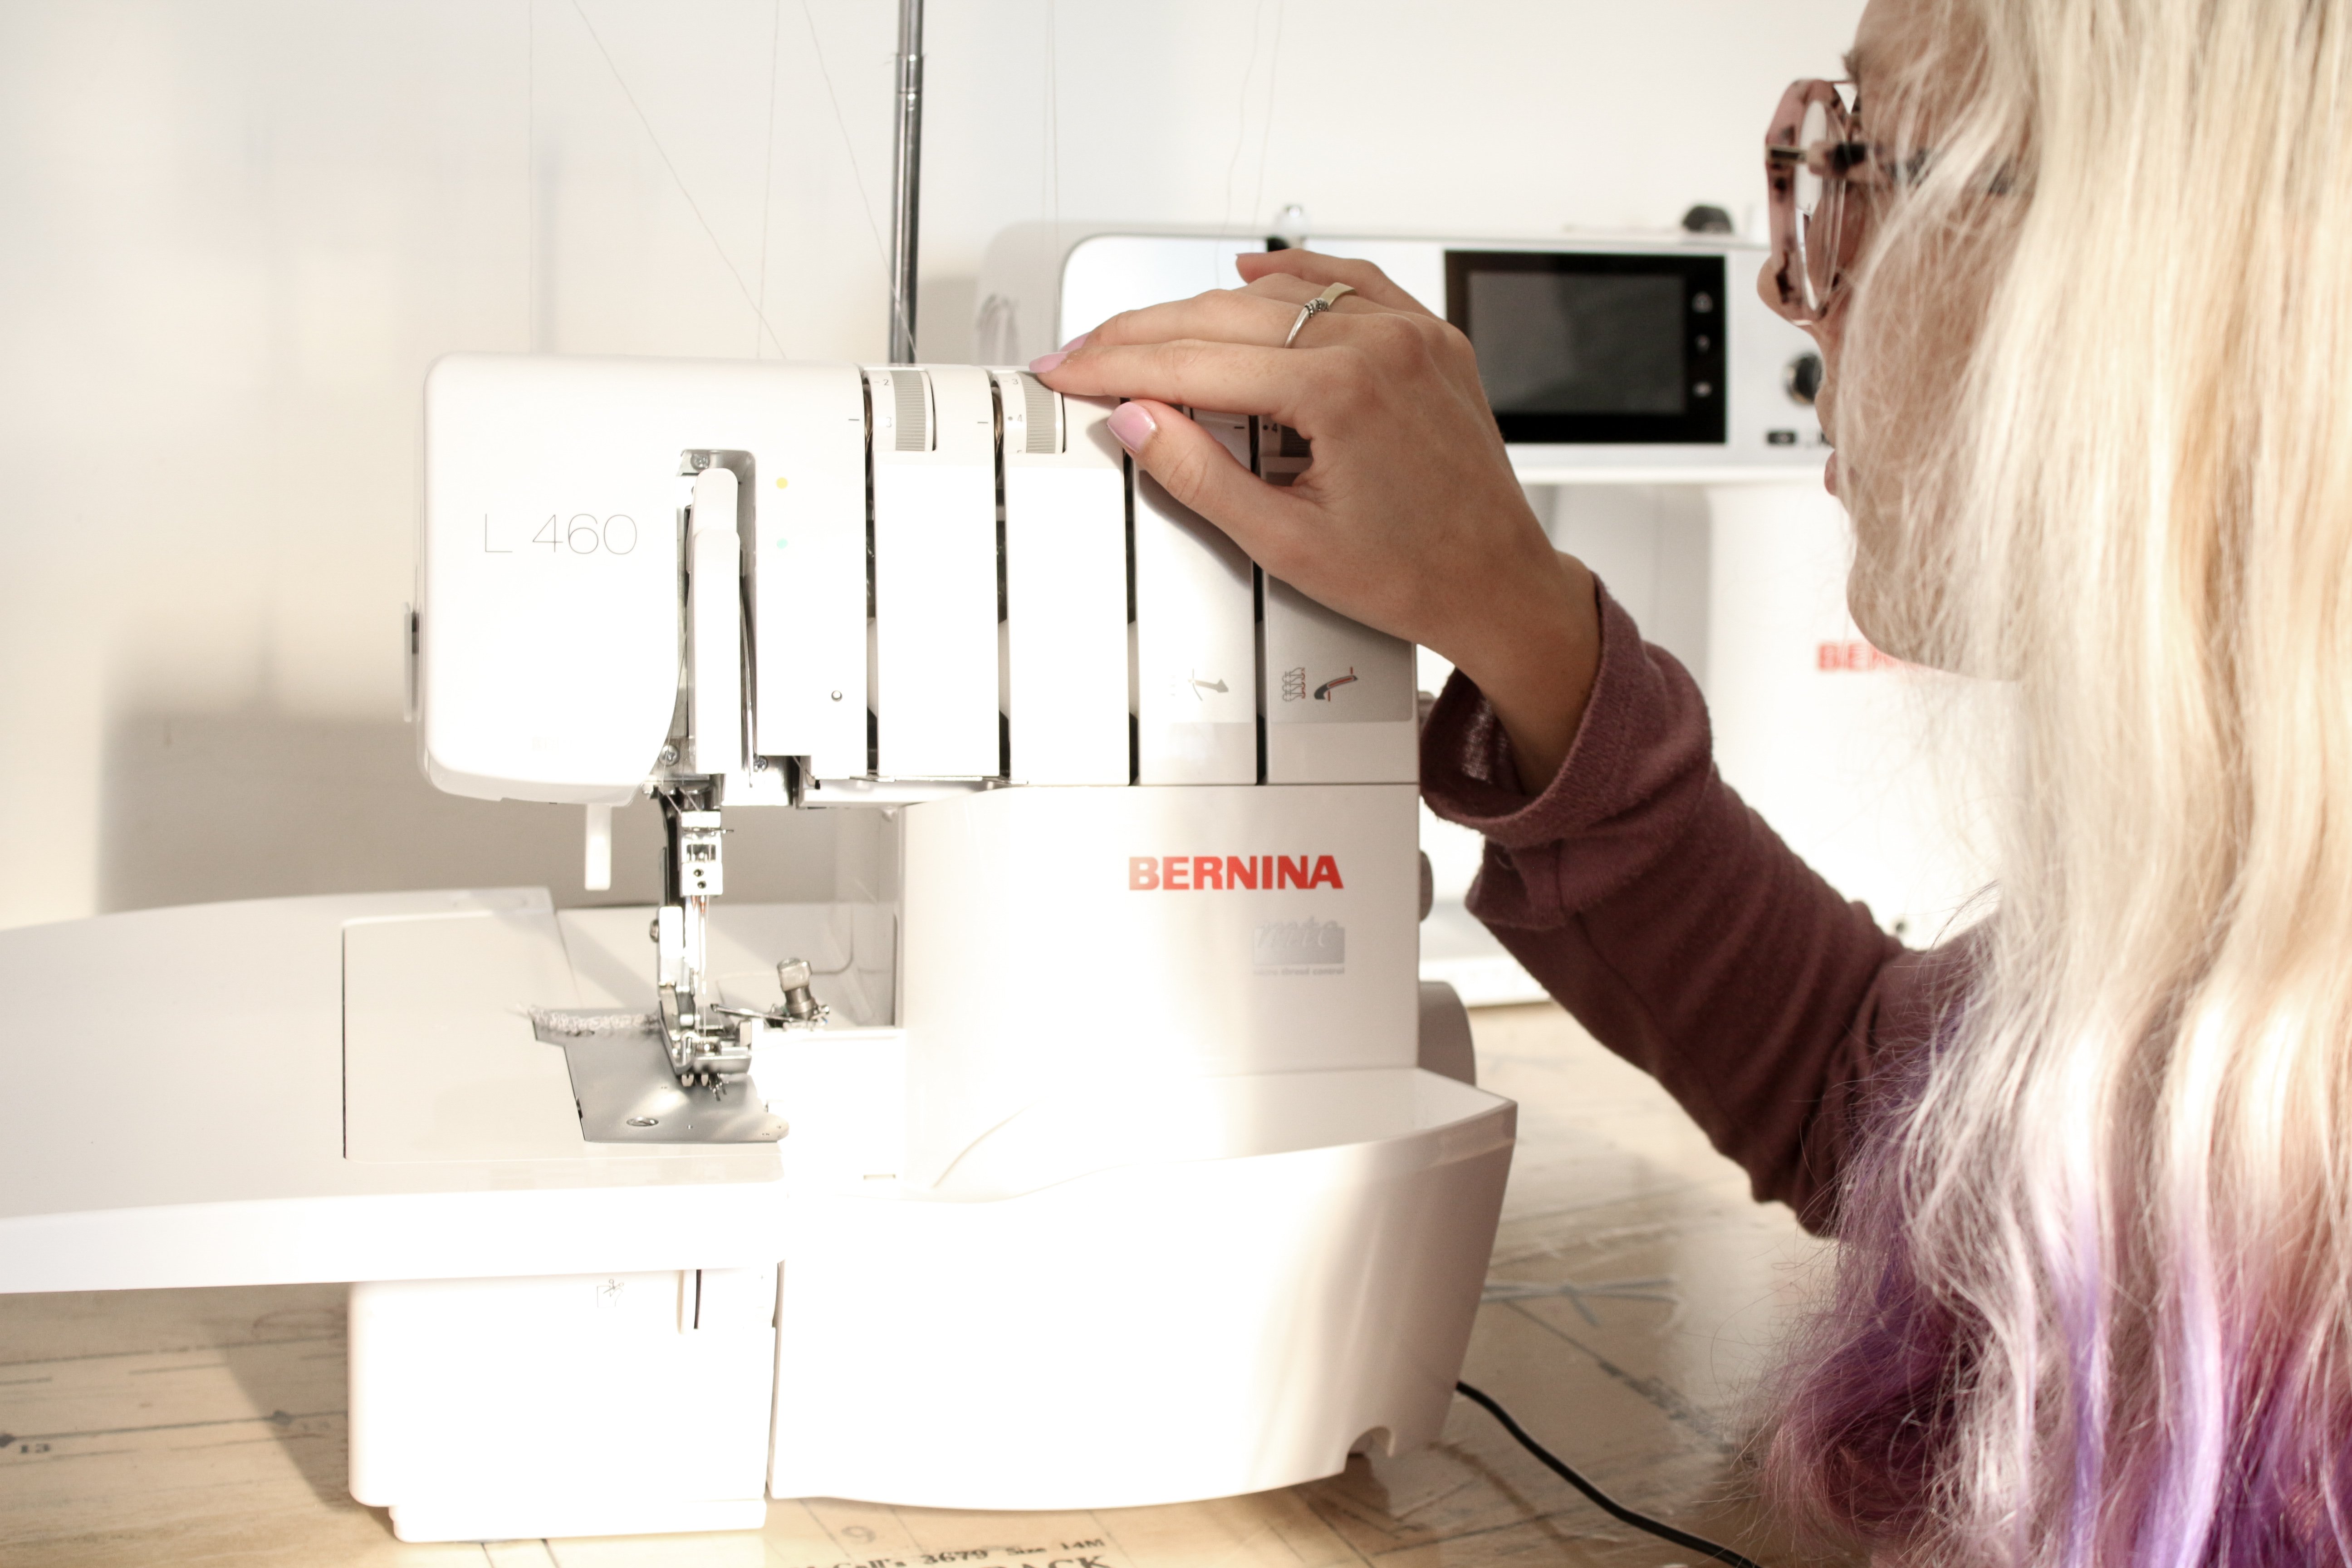
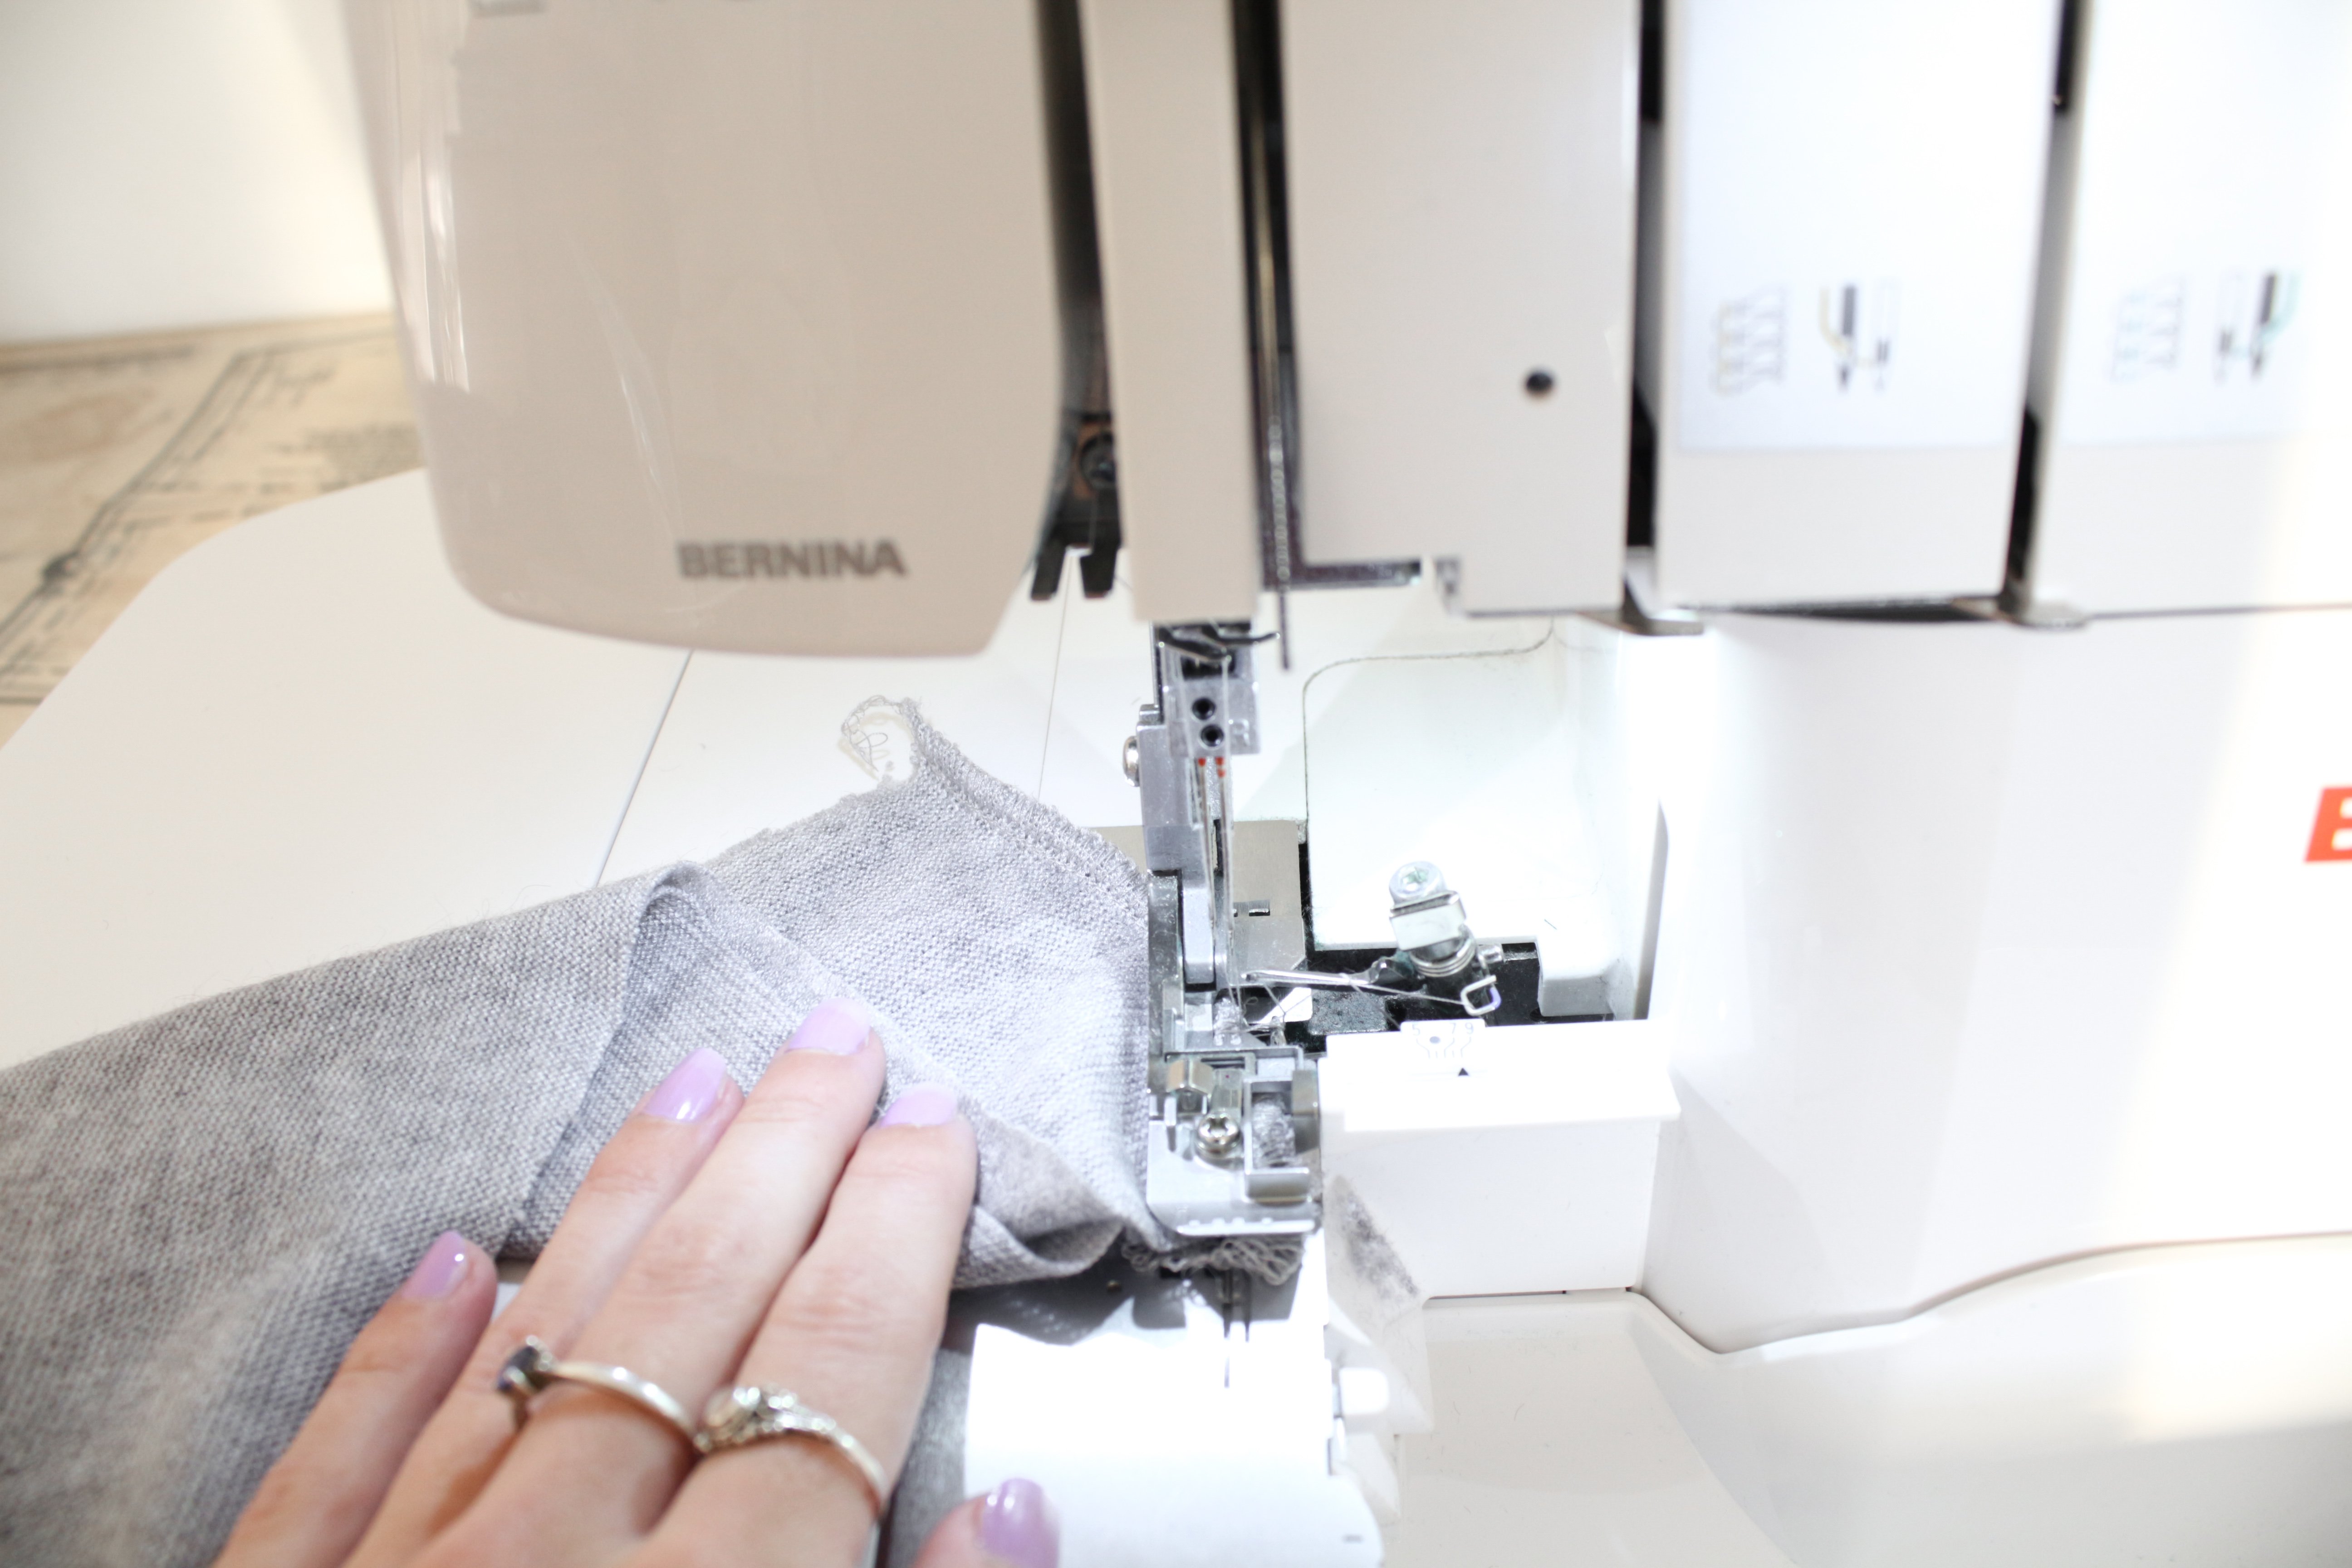
- Set up your overlocker for the 4-thread stitch
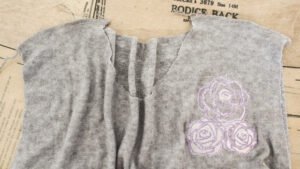
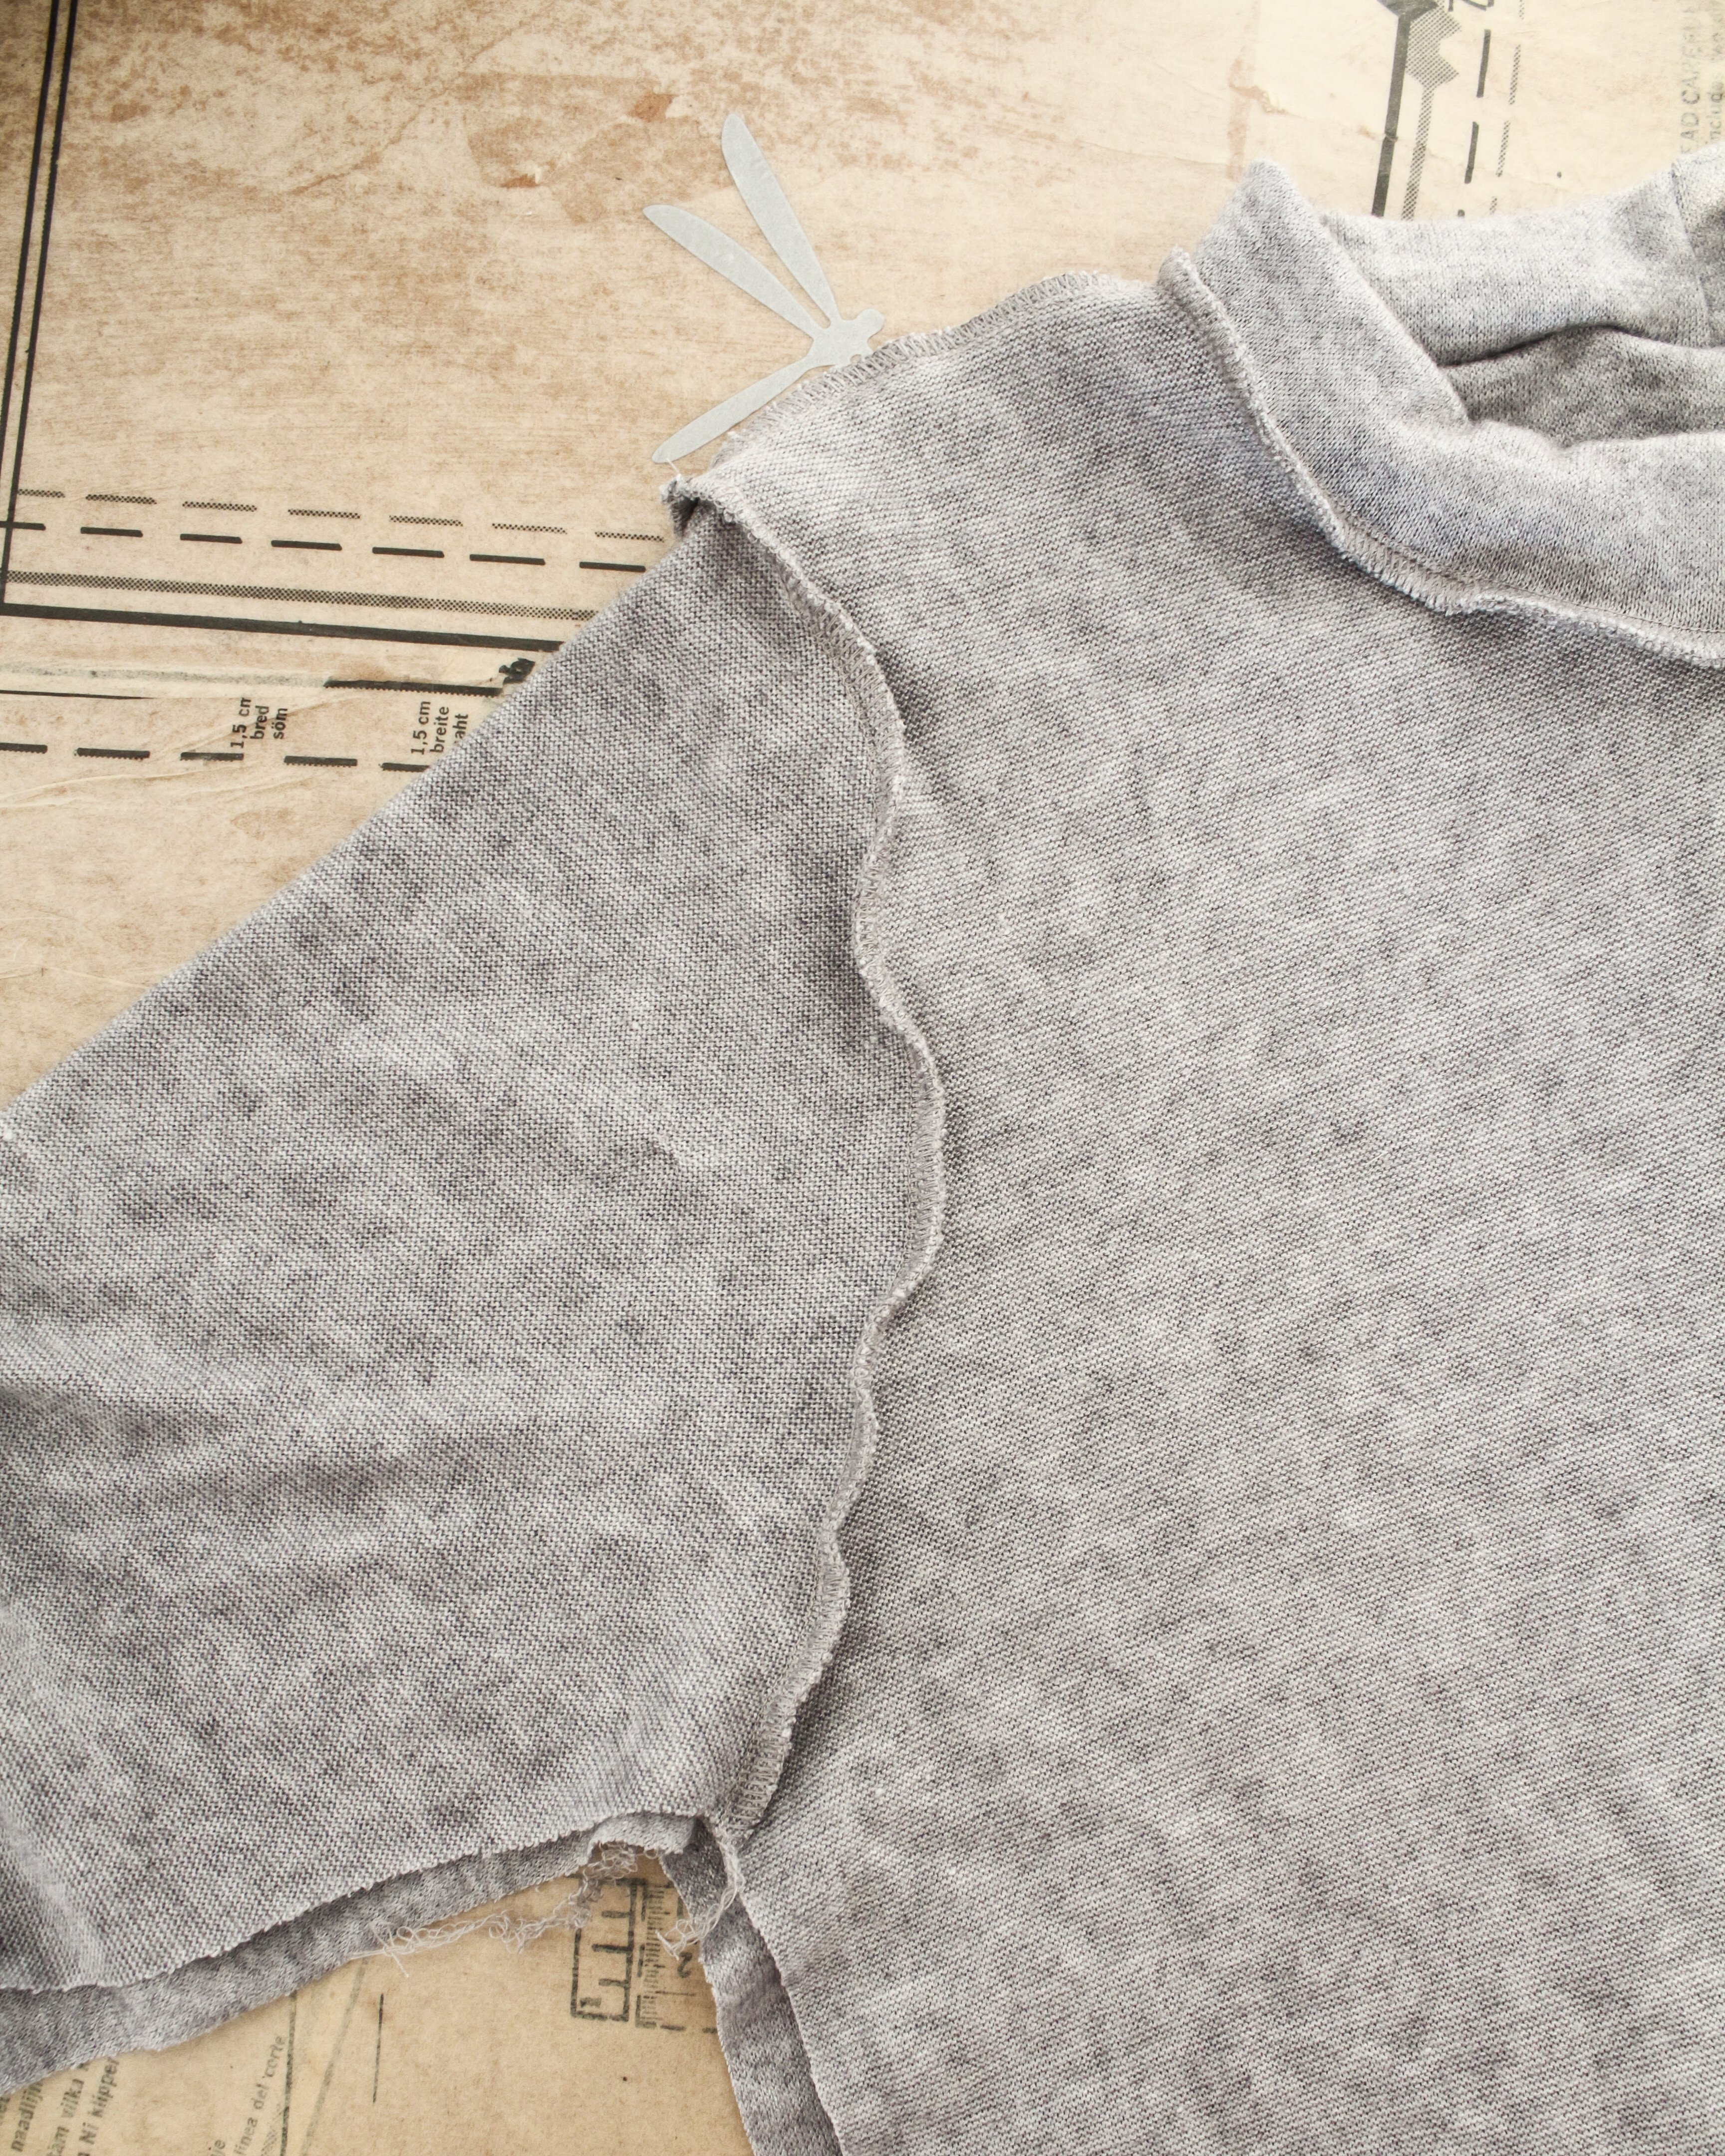
- Join your shoulder seams.

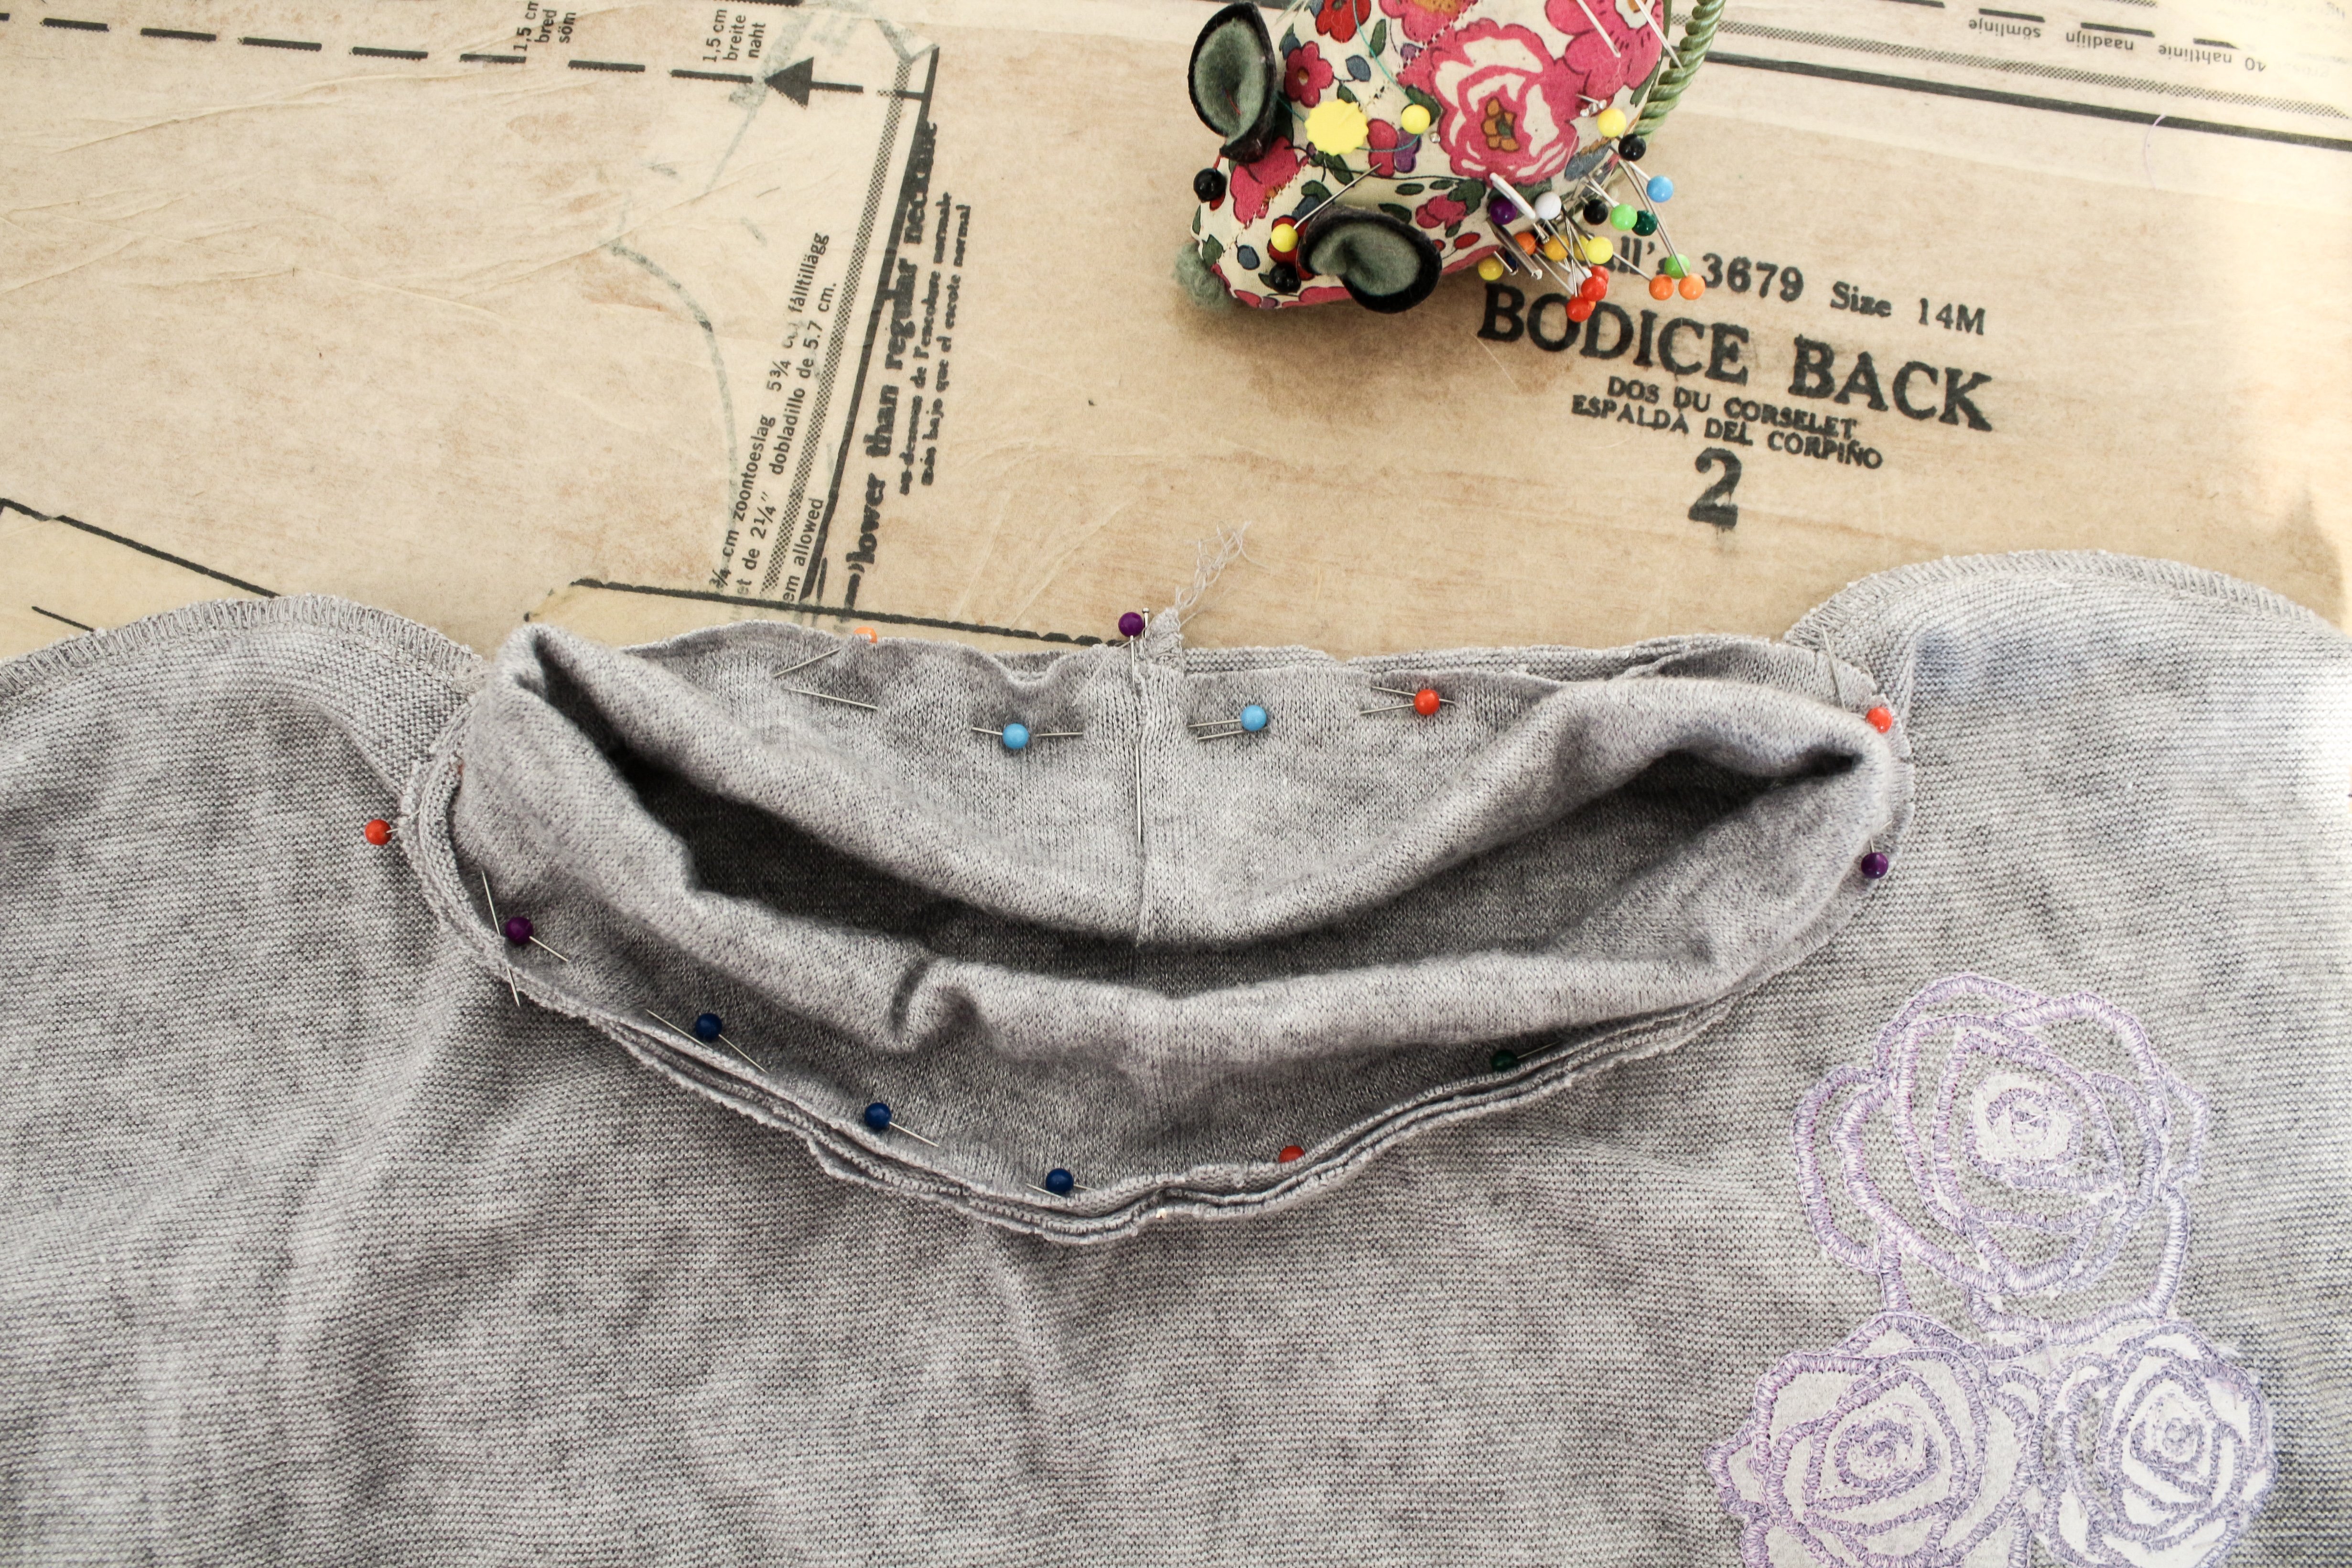
- Join the ends of the neckband then fold it lengthwise.
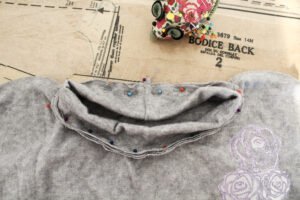
- Join it to the garment’s neck opening.

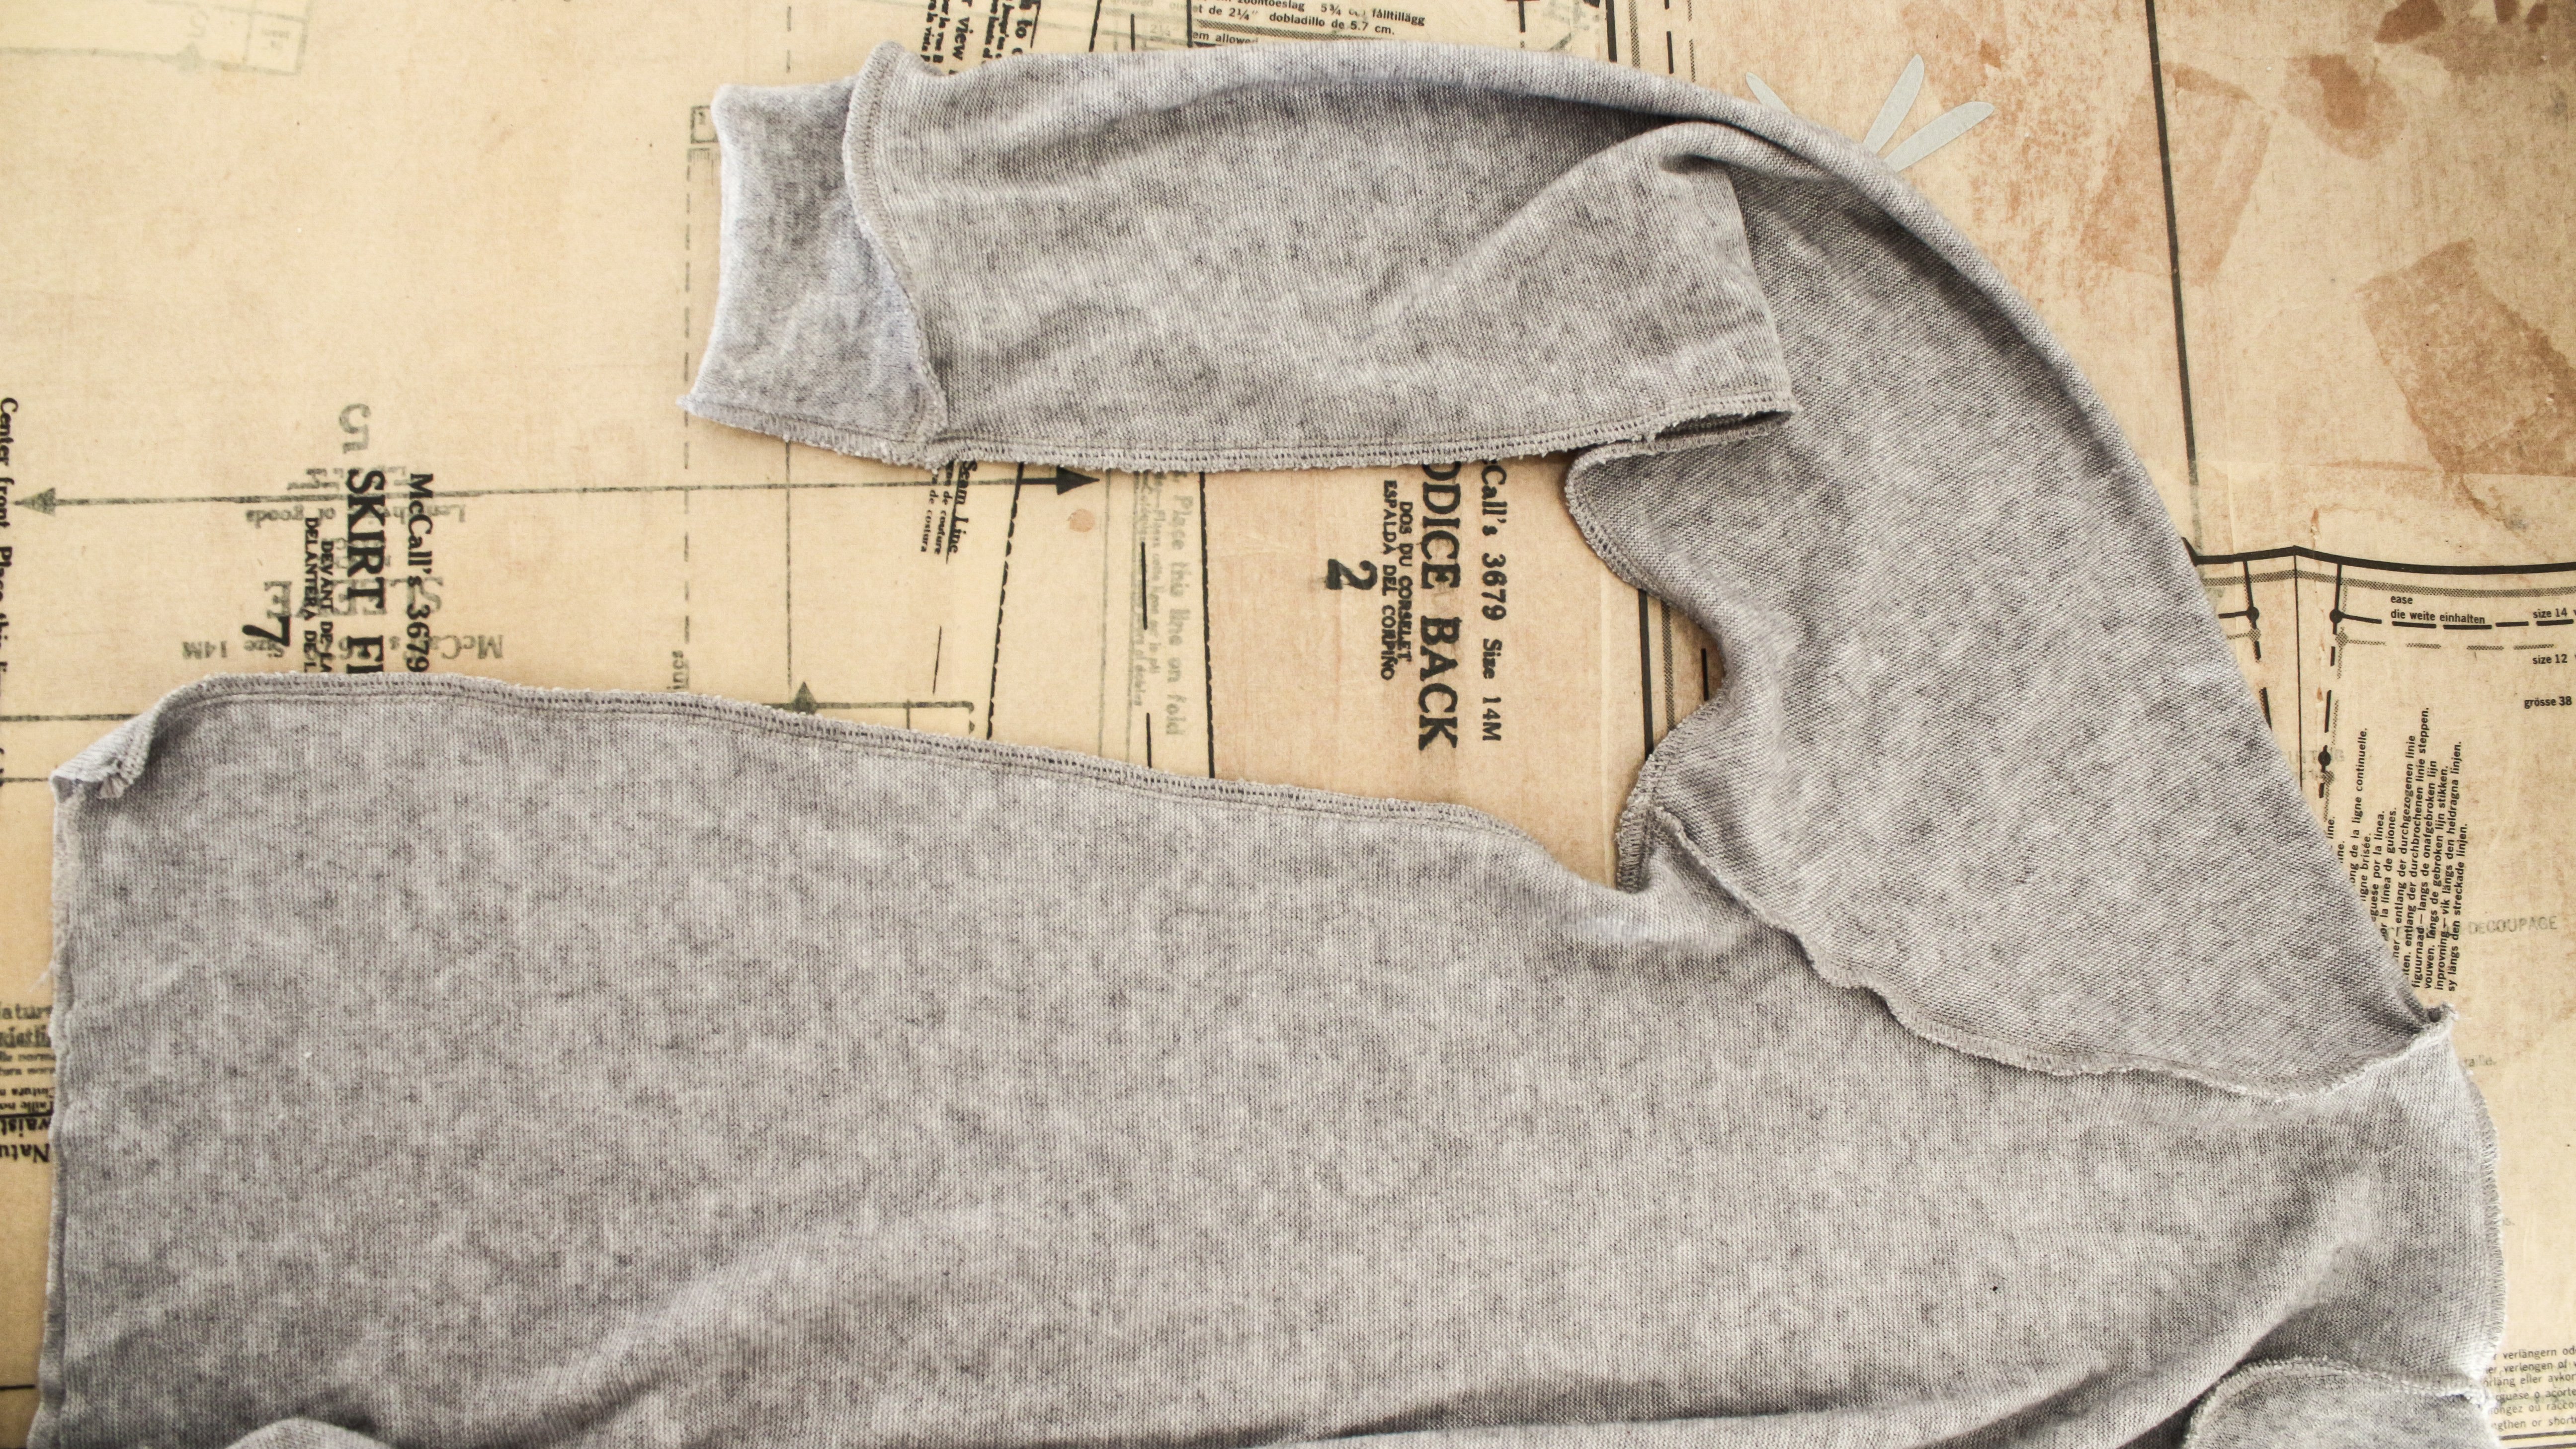
- Join the sleeves to the armholes.
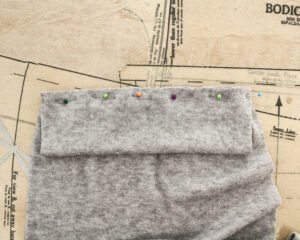
- Fold the sleeve cuffs lengthwise and join them to the sleeves.

- Join the side seams from the sleeve cuffs all along the sleeves and bodice.
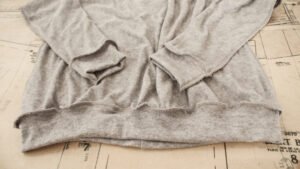
- Join the ends of the hem cuff then fold it lengthwise and join it to the edge of the bodice.


I would love to see your embroidered sweaters, please feel free to share them with me!
Instagram
Facebook
-Hannah-Rose


0 Responses