 BERNINA Corporate Blog -
Let’s continue with the Stitches Toolbar, looking at Fill Stitches.
![]()
The first 12 icons are for Outlines, the other 15 icons are for Fills. I will explain the last 15 one by one.
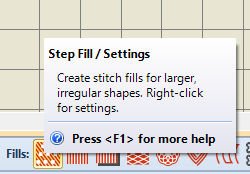
1) Step Fill/settings: Create stitch fills for larger, irregular shapes. Right-click for settings.
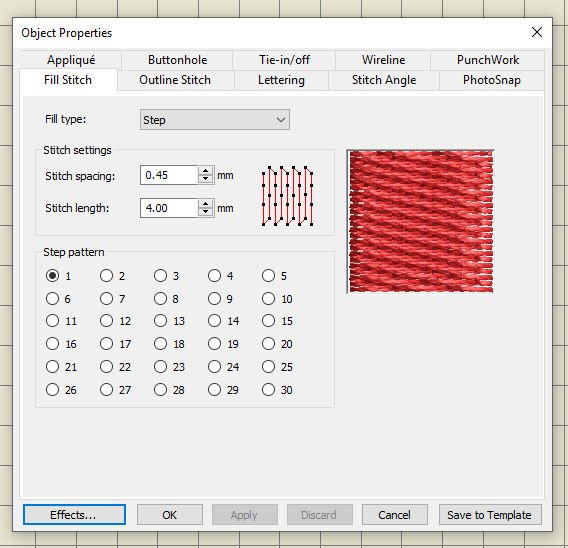
With right-click ‘Object Properties’ can be used to change settings. The type of Fill Stitch = Step (because it is activated now). The Stitch Settings like spacing and length can be adjusted, and with that the diagram next to these settings is showing you how the stitches are made with the current settings.  Starting top left, with three needle penetrations to the bottom, taking a diagonal step to the right and up again, and so on. The box next to the diagram is an example of the stitches, which will change with different settings: an easy way to show you how your objects will appear.
While hovering with the cursor over the mm of spacing or length, blue arrows appear, showing you which setting will be adjusted when changing the numbers.
If you want to change the mm settings, use a point (not a comma): depending on the country you are living in, you are used to place a point for decimals. I am used to comma’s (the Netherlands), but working with International software has taught me to change that.
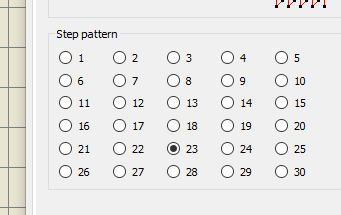
For different Step pattern: choose to click a different box than the default ’23’, out of 30!
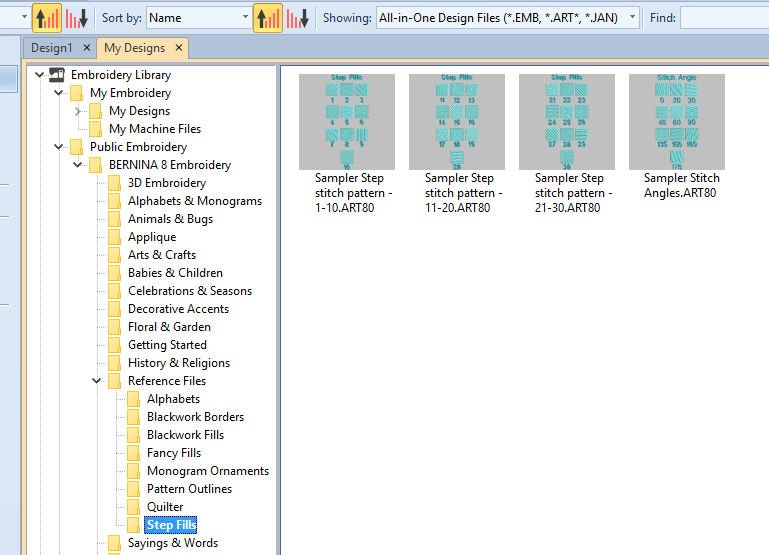
If you want to see the different Step patterns and embroider them for Stitch samples, go to the BERNINA Embroidery Library, Public Embroidery, Reference Files – Step Fills. There are 4 Sampler Step stitch embroidery files you can place on your workspace, then use your USBstick to write to card/machine and move these to your embroidery machine and stitch them out for future reference.

2) Satin Stitches/settings: Create stitch fills for narrow shapes. Right-click for settings.
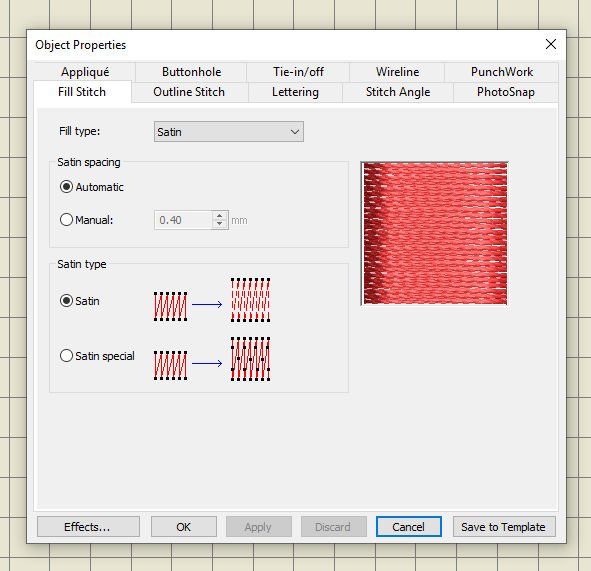
Fill type = Satin (which is activated), and settings for adjustment are available with ‘Object Properties’. The box ‘Automatic’ with Satin Spacing is activated, which means that V8 will calculate the number of stitches for width. If you want to change this, click the box ‘Manual’, and change the mm.
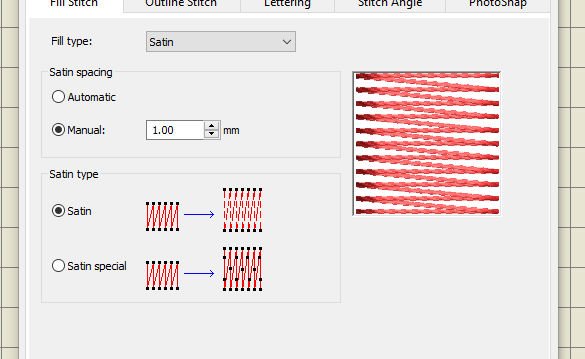
I have used ‘Manual’ and changed the spacing from 0.40mm to 1.00mm: the box with the example changes to show me how my settings will affect the actual stitching, which is significant. (Don’t forget to change settings back to default, if you want to, before saving and exiting V8, otherwise your last settings will change into default).
The Satin Type can be adjusted too: the graphics are showing that, and also ‘Satin Special’, with more needle penetrations.
Choosing Satin Fill stitch gives you normally smooth stitches, which will fill objects evenly. That’s ok with small objects, but when they have to cover large objects, stitching from one end to the other can be too long, so your software will place extra needle points to prevent that. The longer the stiches, the more probable problems with tension (pulling). Also these longer stitches are much more fragile, because they can be distorted when toughing them. If you don’t want extra needle penetrations, divide the object into smaller objects: that way you can also change the angle of stitches, which sometimes leads to more interesting effects.
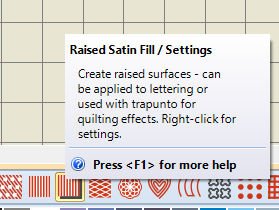
3) Raised Satin Fill/settings: Create raised surfaces – can be applied to lettering or used with Trapunto for quilting effects. Right-click for settings.
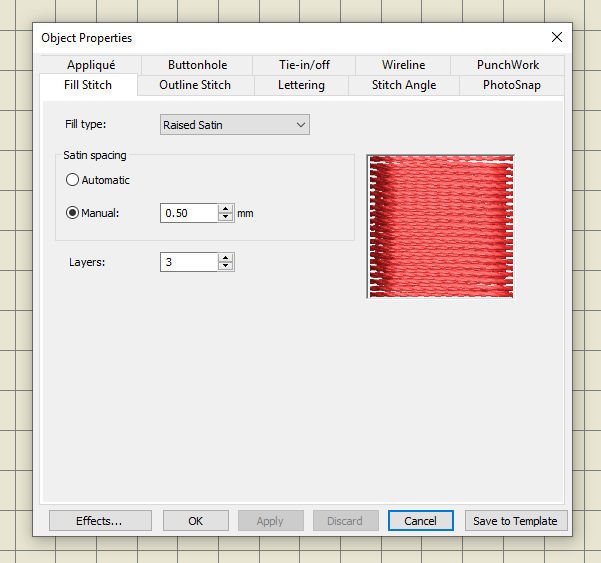
Again Satin Stitches, but this time they are raised, because they will be made with different layers. Each layer is larger than the previous, to cover the entire row or object. I have used this option many times, for the special Trapunto effects but again, the more layers you will use, the more fragile your embroidery will become: you can adjust the number of layers up to 5.
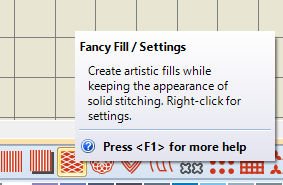
4) Fancy Fill/settings: Create artistic fills while keeping the appearance of solid stitching. Right-click for settings.
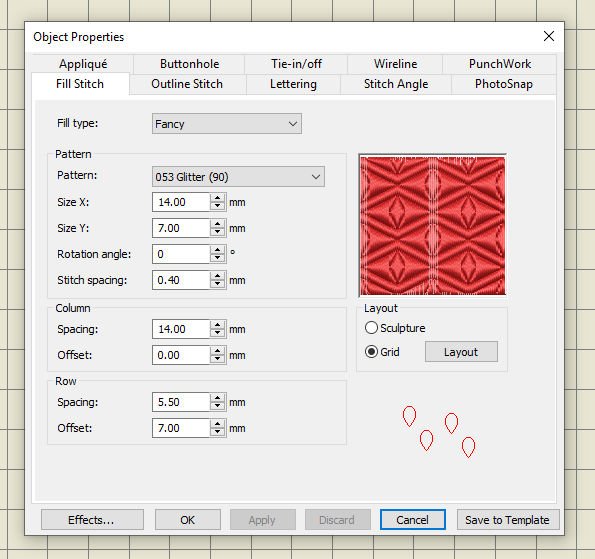
So much possibilities with these stitches: via Object Properties (settings). Opening Object Properties for the first time, pattern 053 Glitter (90) was activated. By clicking on the down arrow, you can choose from a huge amount of patterns to fill objects. It is also possible to adjust the X or Y, determine angle, stitch spacing and change the spacing and offset with Column and Row. Underneath the box with the example of your stitch, you can change Layout of that box: default = Grid, as it shows on the picture above. 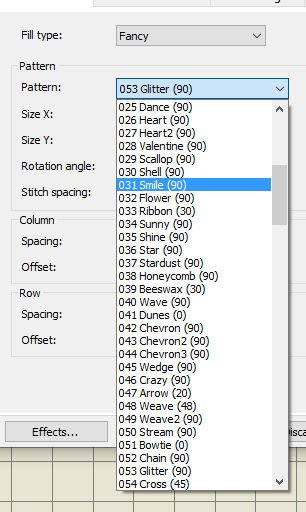
Just click on the down arrow with Fill Type, and a huge amount of patterns are available to choose from.

If you want to see the different Fancy Fill patterns and embroider them for Stitch samples, go to the BERNINA Embroidery Library, Public Embroidery, Reference Files – Fancy Fills. There are 16 Sampler Fill stitch embroidery files you can place on your workspace, then use your USBstick to write to card/machine and move these to your embroidery machine and stitch them out for future reference.
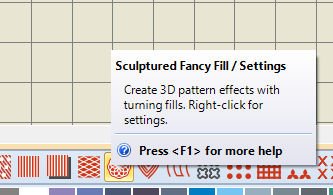
5) Sculptured Fancy Fill/settings: Create 3D pattern effects with turning fills. Right-click for settings.
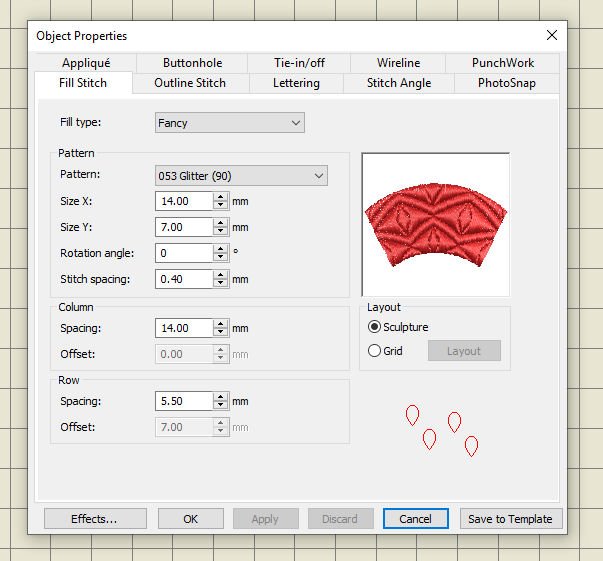
Again many options for different pattern types, same as with Fancy Fills. The difference is the appearance of the stitches. Opening Object Properties for the first time, pattern 053 Glitter (90) was activated. By clicking on the down arrow, you can choose from a huge amount of patterns to fill objects. It is also possible to adjust the X or Y, determine angle, stitch spacing and change the spacing and offset with Column and Row. Underneath the box with the example of your stitch, you can change Layout of that box: default = Sculpture, as it shows on the picture above.

6) Ripple Fill/settings: Create spiral stitching from the center of any filled object. Right-click for settings.
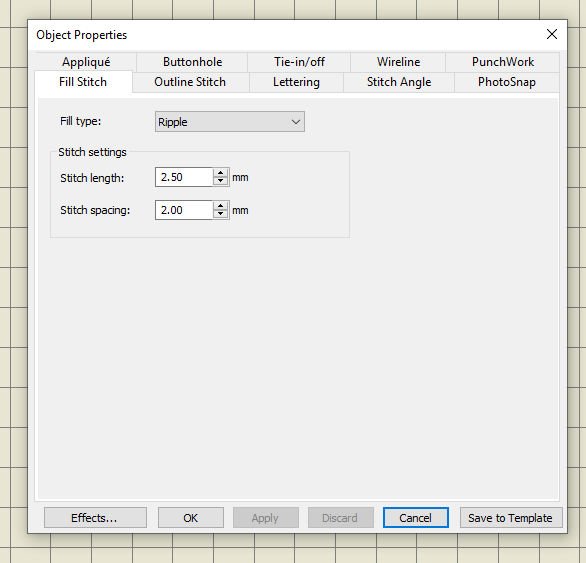
You can only adjust Stitch settings = length or spacing.
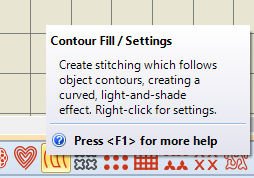
7) Contour Fill/settings: Create stitching which follows object contours, creating a curved, light-and-shade effect. Right-click for settings.
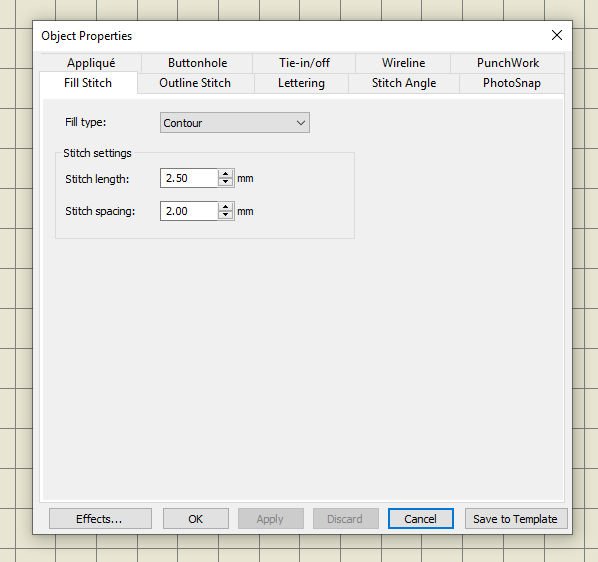
You can only adjust Stitch settings = length or spacing.
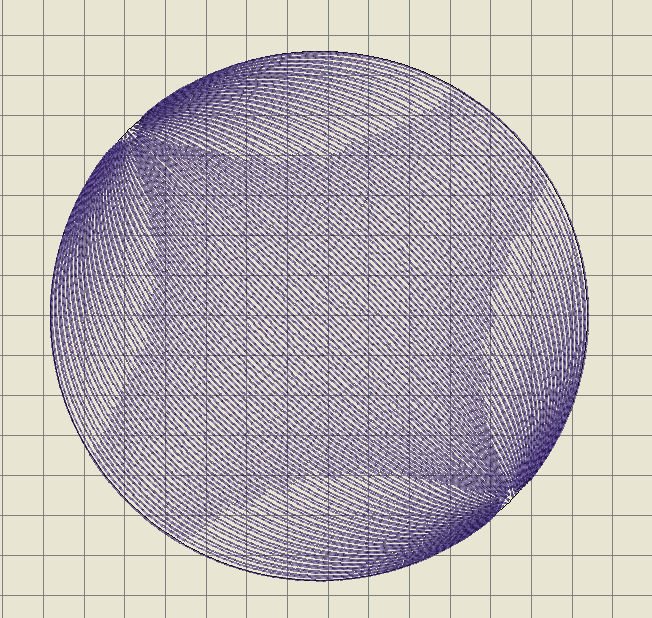
I have made a sphere, just to see what happens when using a Contour Fill. Sometimes making a sample, if only on your workspace, gives you an idea about the effect after embroidery.
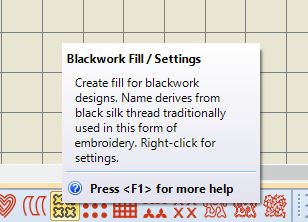
8) Blackwork Fills/settings: Create fill for Blackwork designs. Name derives from black silk thread traditionally used in this form of embroidery. Right-click for settings.

You can adjust the X or Y, determine angle, stitch spacing and change the spacing and offset with Column and Row.
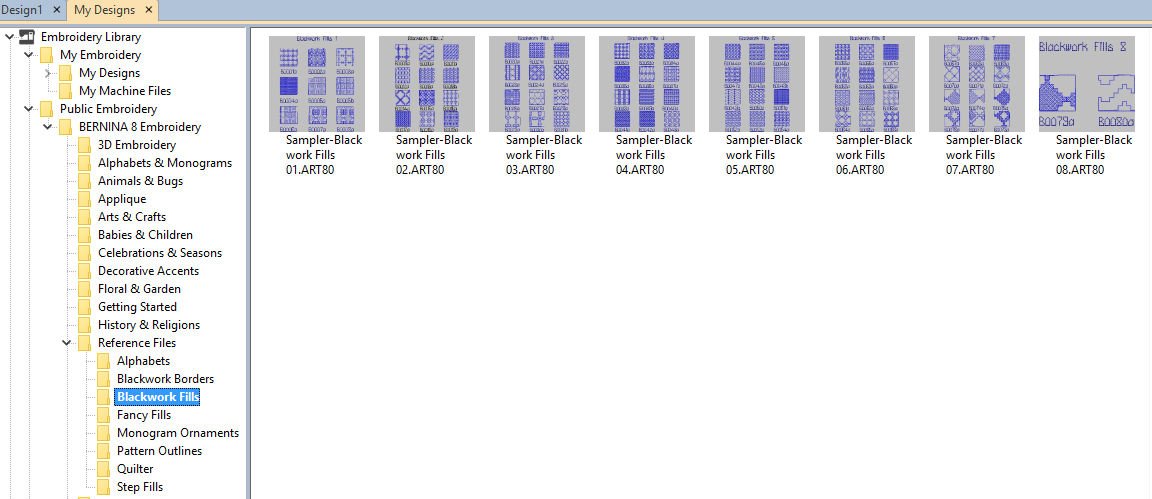
If you want to see the different Blackwork Fill patterns and embroider them for Stitch samples, go to the BERNINA Embroidery Library, Public Embroidery, Reference Files – Blackwork Fills. There are 8 Sampler Blackwork stitch embroidery files you can place on your workspace, then use your USBstick to write to card/machine and move these to your embroidery machine and stitch them out for future reference.
There are over 83 different Blackwork Fill stitches, if I have counted them right. Every time I click on a pattern type (select) another beautiful stitch appears. So much to choose from. To demonstrate how to use some of them in one embroidery motif, I have made a flower with 7 petals.
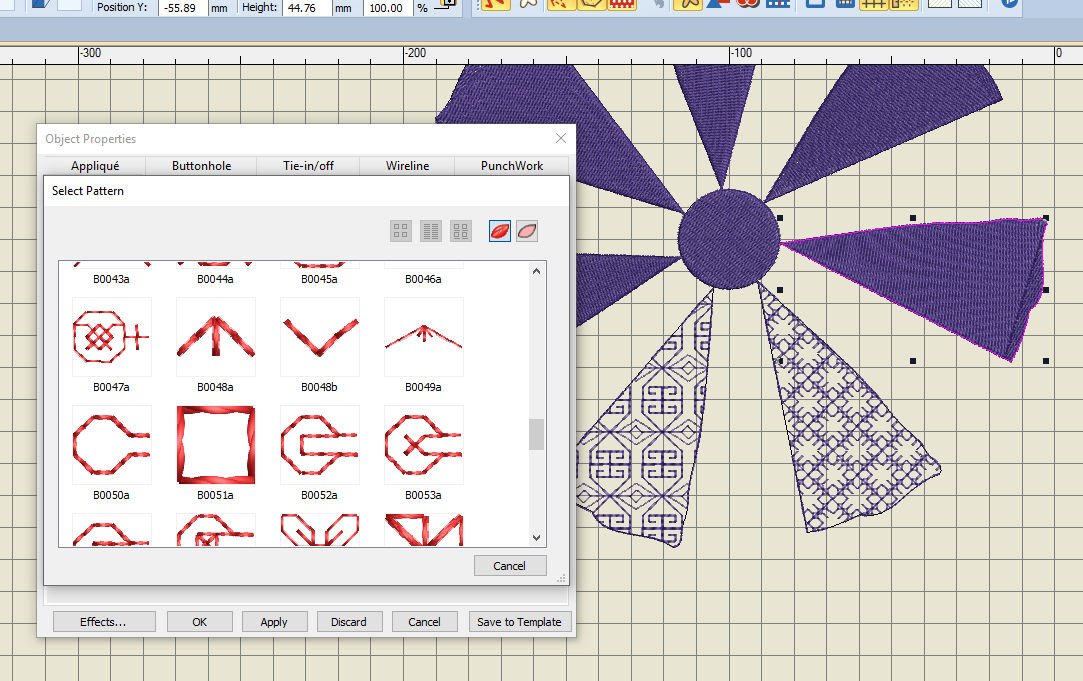
To change each petal and the center circle into different Blackwork Fill, each has to be selected and changes into different stitch types: I didn’t change anything with X, Y, spacing etc, but just the stitches,
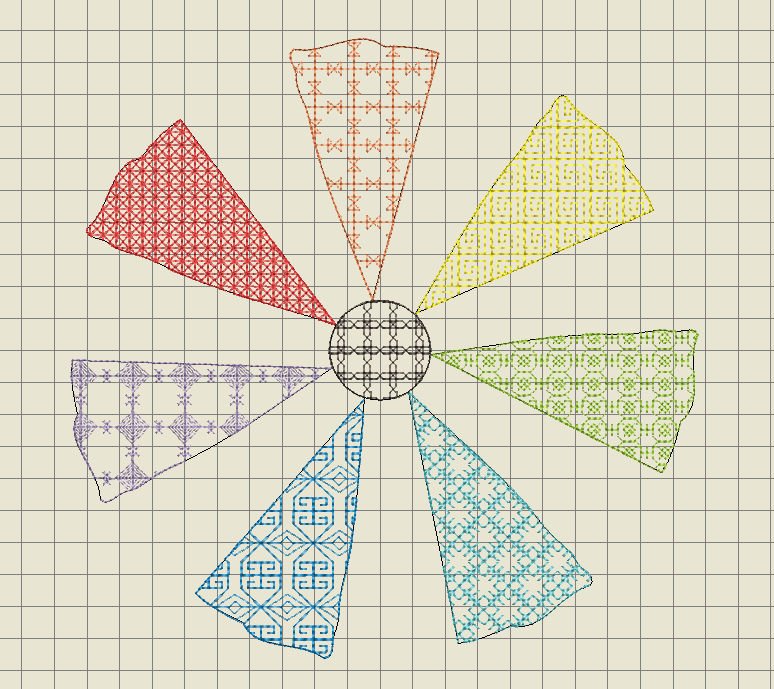
and gave each petal and center a different color. This is really fun! But beware of the stitch count: the more effect in stitches, the more stitches are made = needle penetrations have to be made, the longer it takes for your embroidery to finish. Stitch count now: 10.456. The size is 19.1 x 19.3 mm, for all my samples hereafter.
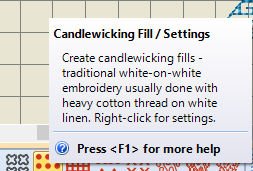
9) Candlewicking Fill/settings: Create Candlewicking fills – traditional white-on-white embroidery usually done with heavy cotton thread on white linen. Right-click for settings.

Opening Object Properties for the first time, Candlewicking pattern ‘Colonial 4.5mm’ is selected by default. By clicking on ‘Select’, you can choose 4 different types of Candlewicking patterns to fill objects. It is also possible to adjust the X or Y, determine angle, stitch spacing and change the spacing and offset with Column and Row.
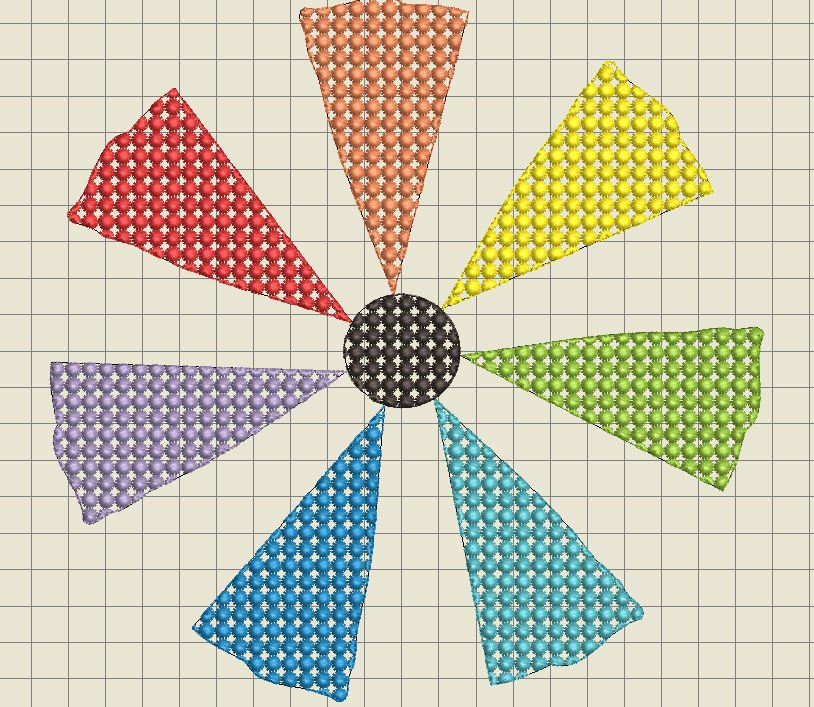
With the flower still selected: I’ve just changed the type of fill stitch to Candlewicking, which became just one type/variation, and all is changed. Beware of the stitch count: with the flower this is now 30.637!
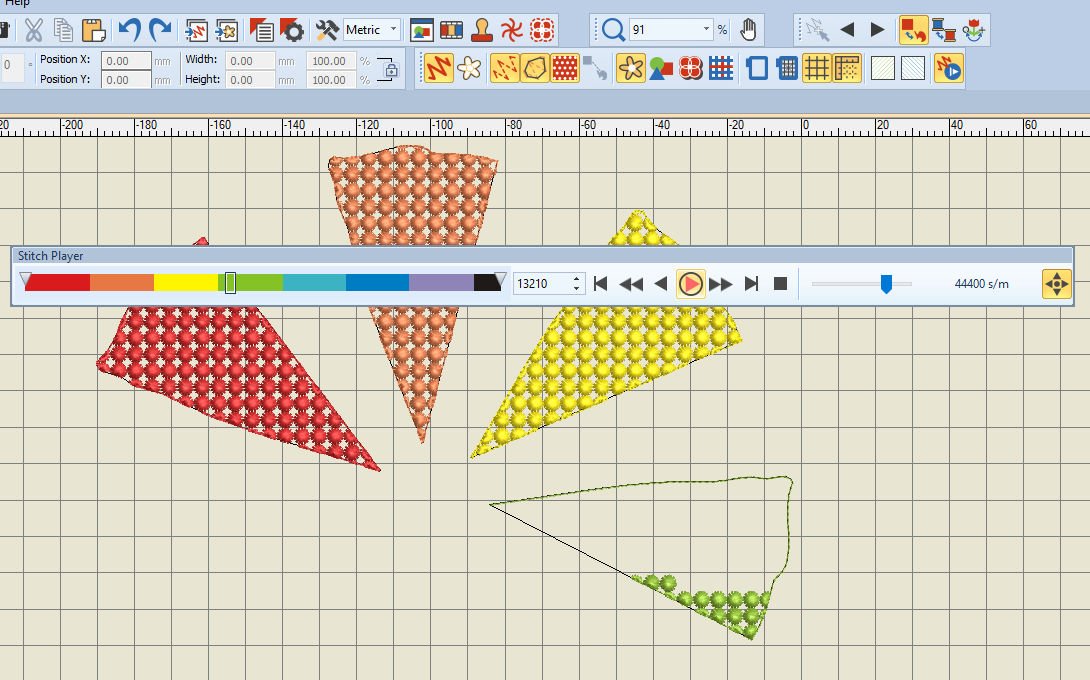
If you want to know the actual sequence of embroidery, use ‘Stitch Player’, or Shift+R (lowercase!).

10) Lacework Fill/settings: Create a lacey look with open trellis-like patterns. Right-click for settings.
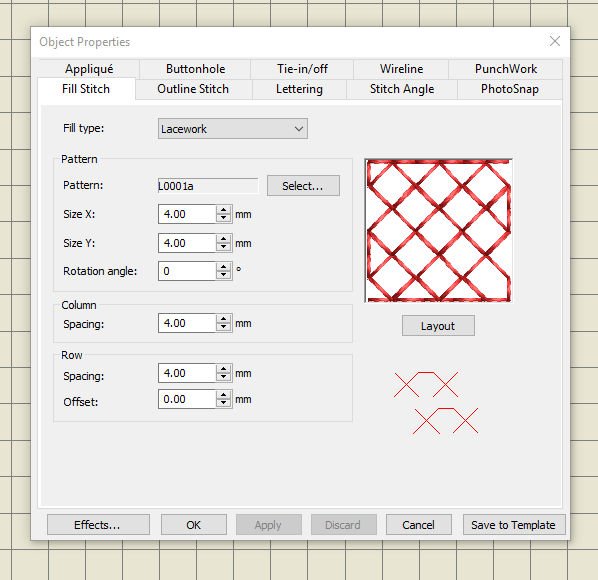
Adjusting X, Y, rotation angle, column spacing and row spacing/offset to see what happens. You can choose from 5 different patterns via ‘select’.
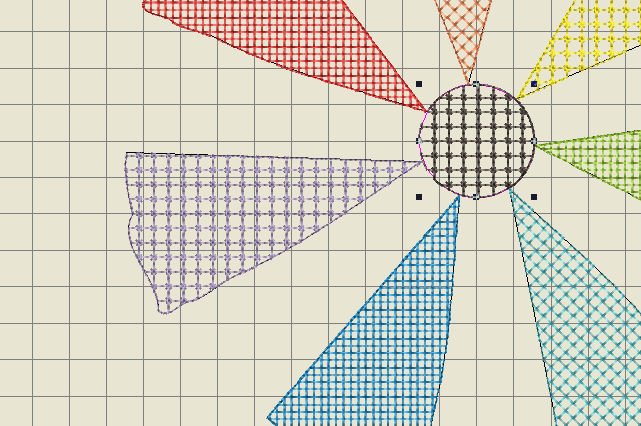
Using the same flower, changing the petals en center in different Lacework Fills. My stitch count is 12.152 at this point. Much less, because of the open embroidery.
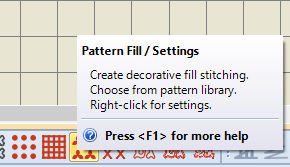
11) Pattern Fill/settings: Create decorative fill stitching. Choose from pattern library. Right-click for settings.

And again, via Object Properties, so many different patterns can be selected,

depending on the Pattern Set you are choosing after clicking on ‘Select’, and the pattern with each category. And of course X, Y, etc. can be changed.
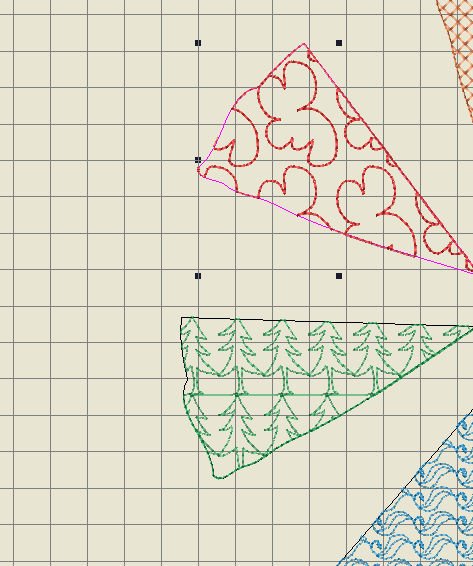
There are even Landscape patterns; trees and clouds! Again, so much to choose from! Just click on any of the patterns and change objects on your workspace, with the petals of the flower.

12) Cross Stitch Fill/settings: Create open patterned fills with crosses generated to suit standard grid for entire design. Right-click on settings.
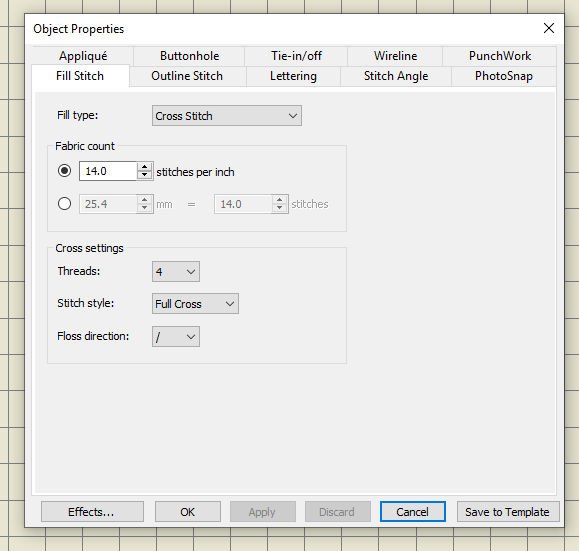
With Object Properties, you can adjust the Fabric Count, default per inch, but check the box ‘mm’ and the measurements are chosen for millimeters, with which you can choose how many stitches per mm. you want. Also Cross Settings = Threads, Stitch Style and Floss direction can be adjusted.
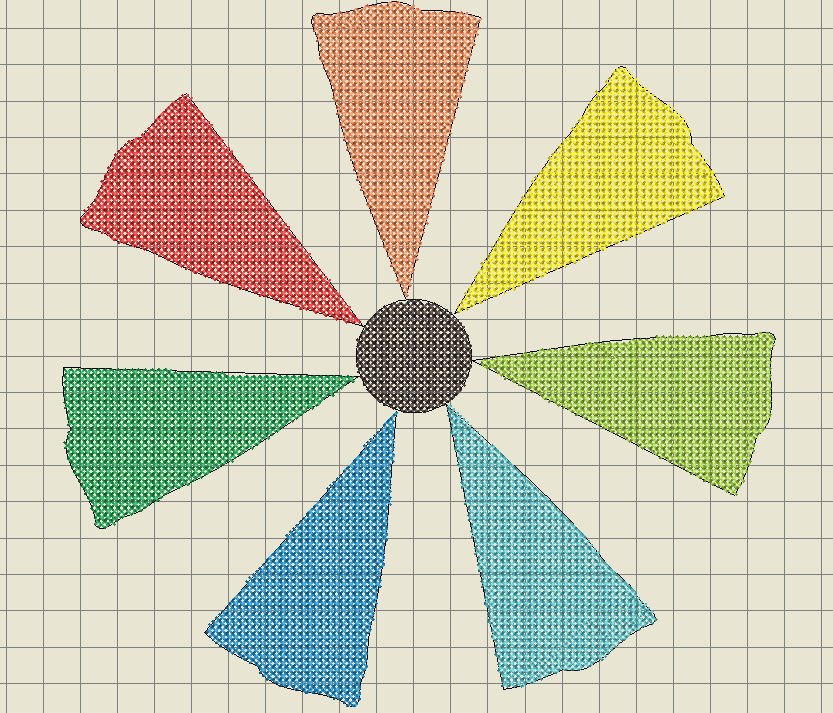
Now all stitches of the flower are changed into cross stitches: Stitch count is over the top: 46.275 now! With still the same measurements but a higher stitch count, this will take some time to be embroidered.
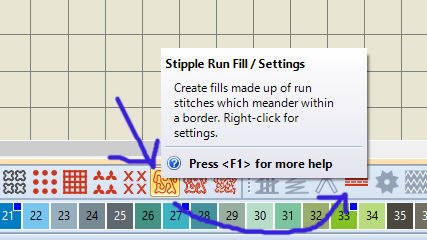
13) Stipple Run Fill/settings: Create fills made up of run stitches with meander within a border. Right-click for settings. Notice that – after activating this function – the Couching icon is also activated (blue arrows), which means that you can Couch via this stitch type too!

Different stitch settings can be adjusted for different stitch density: length (for smoother or sharper curves), run count (this defines the number of stitch repetitions), stipple settings as loop spacing (for tighter or more open stitching) and inset step (to offset stippling inwards from the object outline – the higher the number the less stitches!): try them all to see what happens. With the flower, the stitch count was reduced significantly: only 1.592 remaining.
This is the first Stipple Fill = Stipple Run Fill, these are to fill up objects within a border.

14) Stipple Stemstitch Fill/settings: Create heavier stipple run fills with stemstitch outlines: heavier then with 13) regular Stipple Fills. Right-click for settings. Here you can also adjust the angle, ‘single or triple’ and stitch thickness.
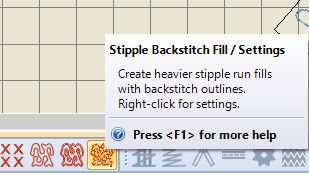
15) Stipple Backstitch Fill/settings: Create heavier stipple run fills with backstitch outlines: heavier then with 13) regular Stipple Fills. Right-click for settings. Here you can also adjust % overlap, how many strokes (3 by default, or choose 5).

Just three petals are changed into Stipple 13), 14) and 15), without changing settings. You can see the difference between these Stipple Fills. Via settings you can adjust the distance from stitches to the borders, or make stitches denser by more runs. This will increase the stitch count, and makes the embroidery thread stand out more. TIP: the ‘Break Apart’ function can be applied to Stipple Fill objects. This way you can edit the Stipple run line directly by changing the outline stitch type: choose a Satin stitch or Blanket stitch for special effect.
So much possibilities, try them all, make samples on your workspace, change them, adjust settings etc., to practice. There is so much to discover, once you change settings and perhaps combine Fill Stitches (and Outline Stitches) in your embroidery.
Next time we will use the icons of the Effects Taakbalk. See you then!
Happy Stitching!
Sylvia Kaptein
Sylvia’s Art Quilts Studio
www.sylviasartquilts.nl
[email protected]


Have you checked different categgories? Embellishment was missing too, but is now available again with these special pattern fillings…
Hi Sylvia, Thank you for your lessons! I do not have Landscape or mijn patronne in my fill type pattern fills. I am running Version 8 software and just did the update 2 nights ago. I also checked with my dealer and they do not have those options either and they did not do the update. The Christmas trees and clouds look very cool.
thank you
Hello Sylvia, I agree with Lucia Maria Marshall, and wonder why we don’t have Christmas trees and clouds in V 8
Dear Judy,
I just checked with my V8 and I also dont have those pattern fills. My guess is, that Sylvia has made those herself. She uses the software in English, but the folders are named in Dutch, that is why I suspect she made those.
Kind regards, Ramona
You can select the text and copy paste it in Word, save it and/or print it. But also remember that it will stay in this BERNINA Blog, so you can check it any time you want
Sylvia
is there a way to print this off so we can do the lesson step by step and be able to see it as we go?
Glad to hear that you like the lesson, Annl. There is still a lot to discover in V8
Sylvia Kaptein for BERNINA
Nice one yet again ??