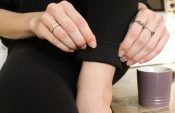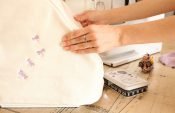
This year for Valentine ’s Day, my boyfriend and I spent the night on our family’s little yacht in Langebaan.
My family recently got a Holiday 23 which is essentially a sailable house boat. As I don’t yet have the qualifications (or courage) to sail it, we enjoy using it as a house boat. It makes for a great weekend escape!
A little while ago my boyfriend gave me a well worn shirt of his that he no longer wore.
I decided to refashion this in to a skirt for myself and made it in time for our Valentine’s Day getaway.
This isn’t the first time I have refashion a pre-loved garment from my loved one.
In a previous post I refashioned a pair of my boyfriend’s jeans into a bustier Refashion: Jeans to Bustier.
Another refahioned skirt from Matt’s shirt is featured in that post too.
What I used:
- B535 Sewing Machine
- L460 Overlocker
- Old Shirt
- Thread to match the shirt
- Thread for topstitching
- Fabric Scissors
- Unpicker
Before

Here is Matt wearing the shirt. I love the colour of the shirt as well as the topstitching and press stud details.

On one of the sleeves there was a hole and some press studs were missing.
The refashion
Cutting

This is what the shirt looked like once I took it a part and cut out the pieces for my skirt.

These are the pieces I used: The collar, a cuff, both sleeves, the pocket as well as the lower front and back of the bodice.
The sleeves and bodice would make up the body of the skirt while the cuff and collar would become the waistband.
Sewing

I wanted to continue with the topstitching detail so I found a close matching thread in my box of old embroidery threads. I would describe it as a copper/bronze colour which is similar to the press studs.

- I top stitched the placket closed on the sleeves.
Even though there was a press stud, I didn’t want to run the risk of a wardrobe malfunction later on.
The press stud was also missing on the other sleeve.

- I topstitched and hemmed the wider edge of the Sleeves to match the hem on the Shirt bodice.

- Then with my sewing machine and overlocker, I joined the Sleeves to each side of the Front and Back Bodice pieces.

- Once again I top stitched, this time along the seams I made in the previous step.
I also reattached the pocket to the Front Bodice piece.

- For the Waistband I used the Collar and the one Cuff with a working press stud.
I made the Cuff up bit narrower to match the width of the Collar Stand and attached it to the opening of the Collar.

- I then evenly gathered (using the biggest stitch length of 6) the top edge of my Skirt before attaching it to the Waistband.
After


Notes
- I hand stitched the hole left by the missing press stud on one of the plackets.
- I also hand stitched the base of the button stands together to prevent any indecent exposure.
- The tshirt is also a me-make.
It is the Stellan Tee Pattern by French Navy Patterns which I have used in a previous blog post: Coffee Inspired Embroidered Tshirt
I would love to see your refashions, please feel free to share with me!
Instagram
Facebook
-Hannah-Rose
 BERNINA Corporate Blog -


0 Responses