 BERNINA Corporate Blog -
Hi everyone!
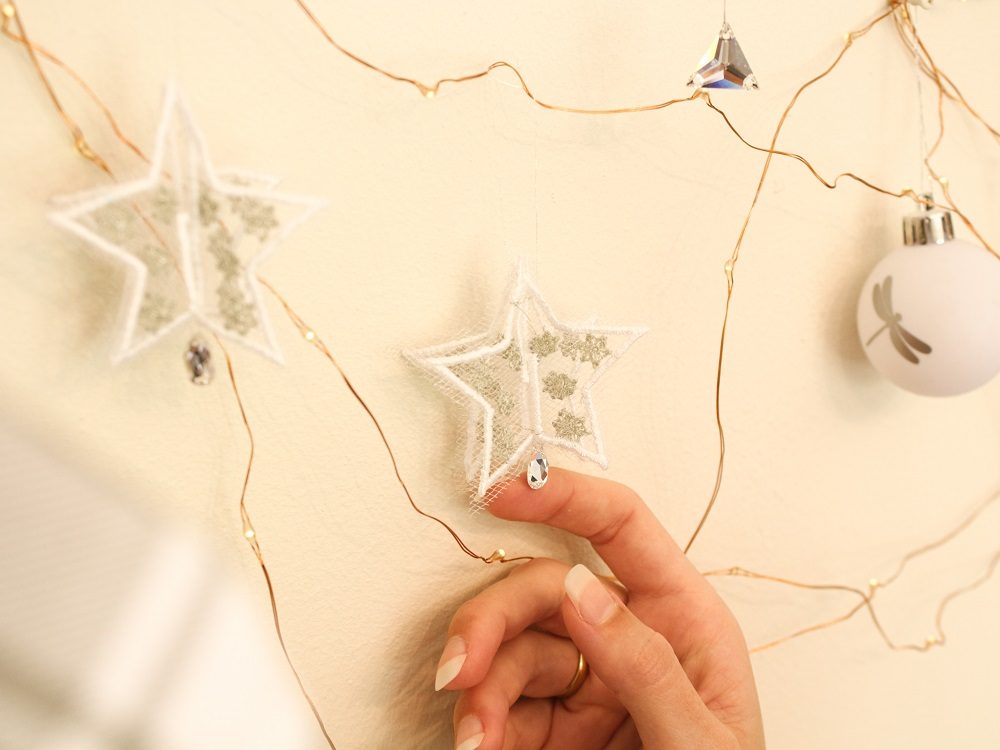
Today I’ll share with you an intricate decoration to add some shine to your holiday décor.
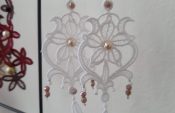
It is a 3D Freestanding Lace Embroidered Star that has smaller stars in it to be stitched in a metallic thread to add some sparkle. For an extra magical touch I recommend adding some crystals!
I’ve gifted my embroidered decoration for you to download but I’ve also provided the steps for you to create your own Freestanding Lace Embroidery with Bernina’s Designer Plus Embroidery Software (V8)
Download the Star here: Time to shine Star by H-R Smith
What will be needed:
- Sewing machine
- Embroidery Module
- Embroidery Software Designer Plus V8 (if you are making your own design)
- Small/Medium Embroidery Hoop
- Embroidery Foot #26
- Wash-away Stabilizer (preferably the fabric rather than the plastic looking type)
- Small piece of Tulle Fabric
- Small bowl with water
- 2 polyester Embroidery Threads (at least 1 metallic thread)
- Hand sewing needle
- Crystals
If you are using my free embroidery design, please look a little further down for the instructions under Embroidery the Design & Finishing Touches.
Otherwise in this next section I’ll share how I created the design. You can use the same techniques to create your own shapes with the Designer Plus Embroidery Software.
Create a design in the Embroidery Software
Create the Basic Shape
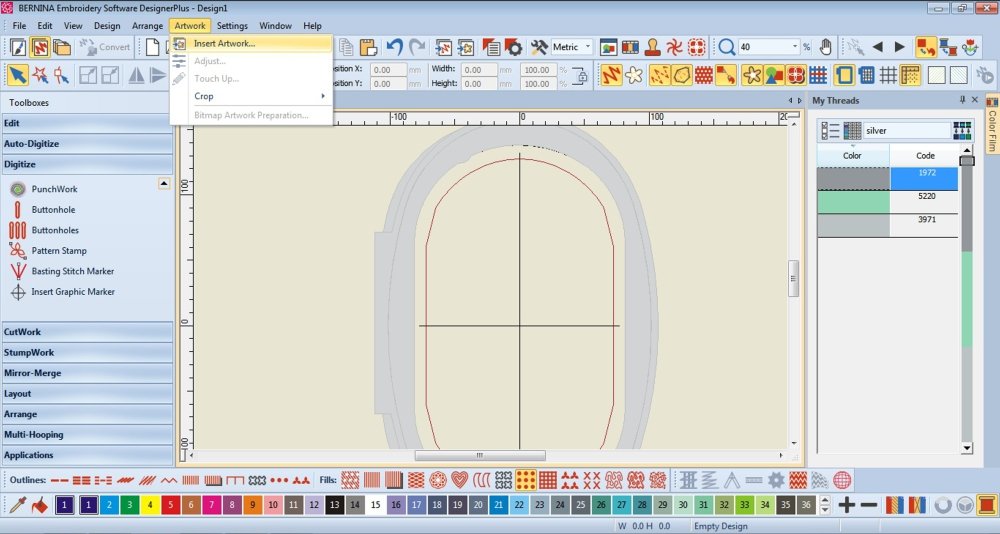
- Insert the shape you want to trace.
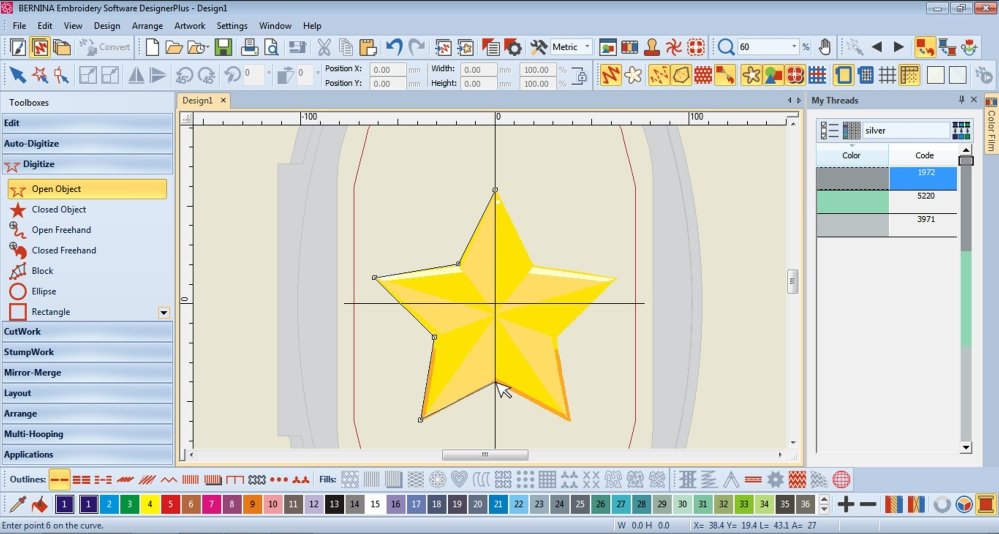
- In the Digitize Toolbox, select Open Object.
Draw around half of the object. Left click to create straight lines and right click to make curves.
Press Enter to finish the shape.
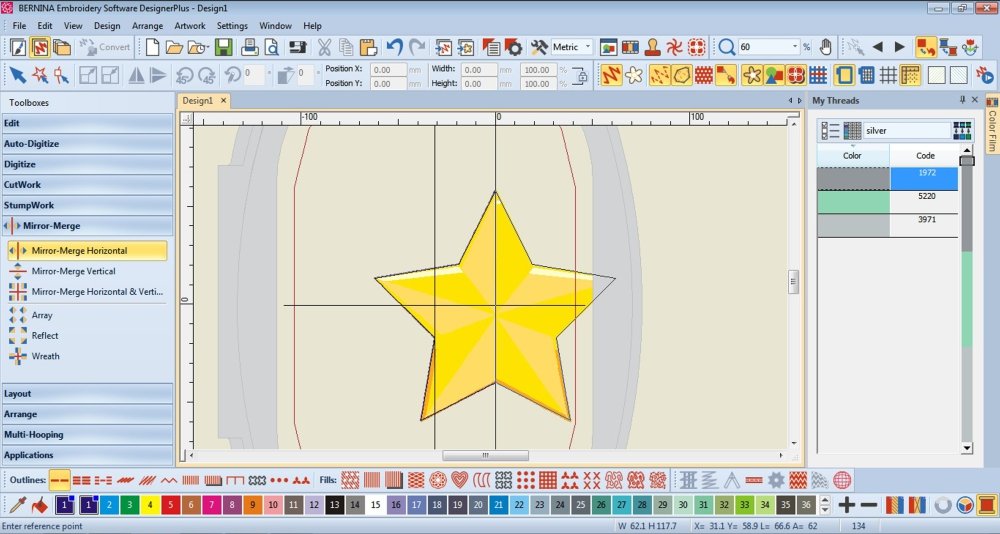
- Select the shape.
In the Mirror-Merge Toolbox select Mirror-Merge Horizontal.
The shape will automatically duplicate and place itself, press enter to secure it.
When asked “Do you want to merge the overlapped objects” select Yes.

- Delete the background image.
Make the shape the size you want the final embroidery to be.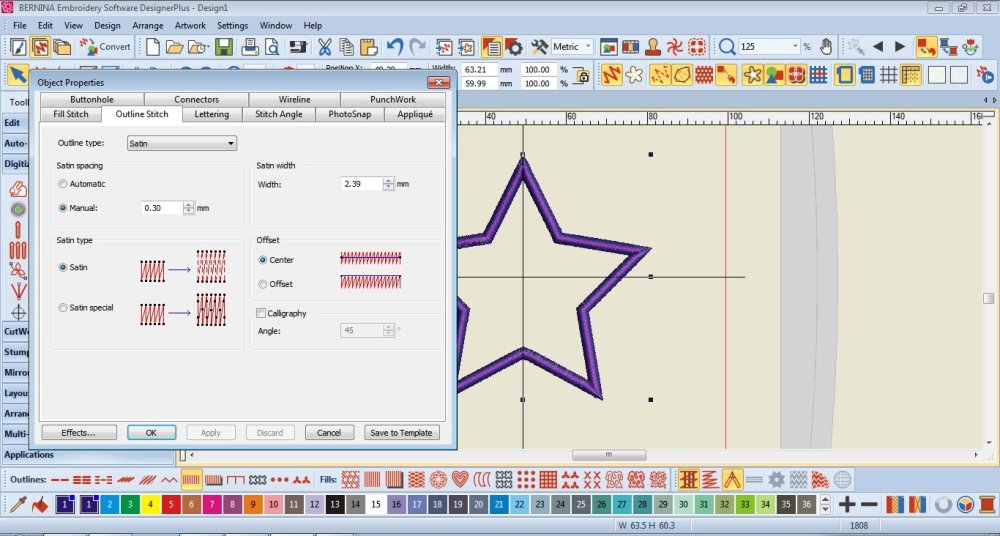
- Select the shape and change the Stitch Type to Satin.
Double click on the design to open the Object Properties.
Make the Satin Width no less than 1.5mm
You can also make the Satin Spacing smaller.

- In the Digitize Toolbox, select Pattern Stamp.
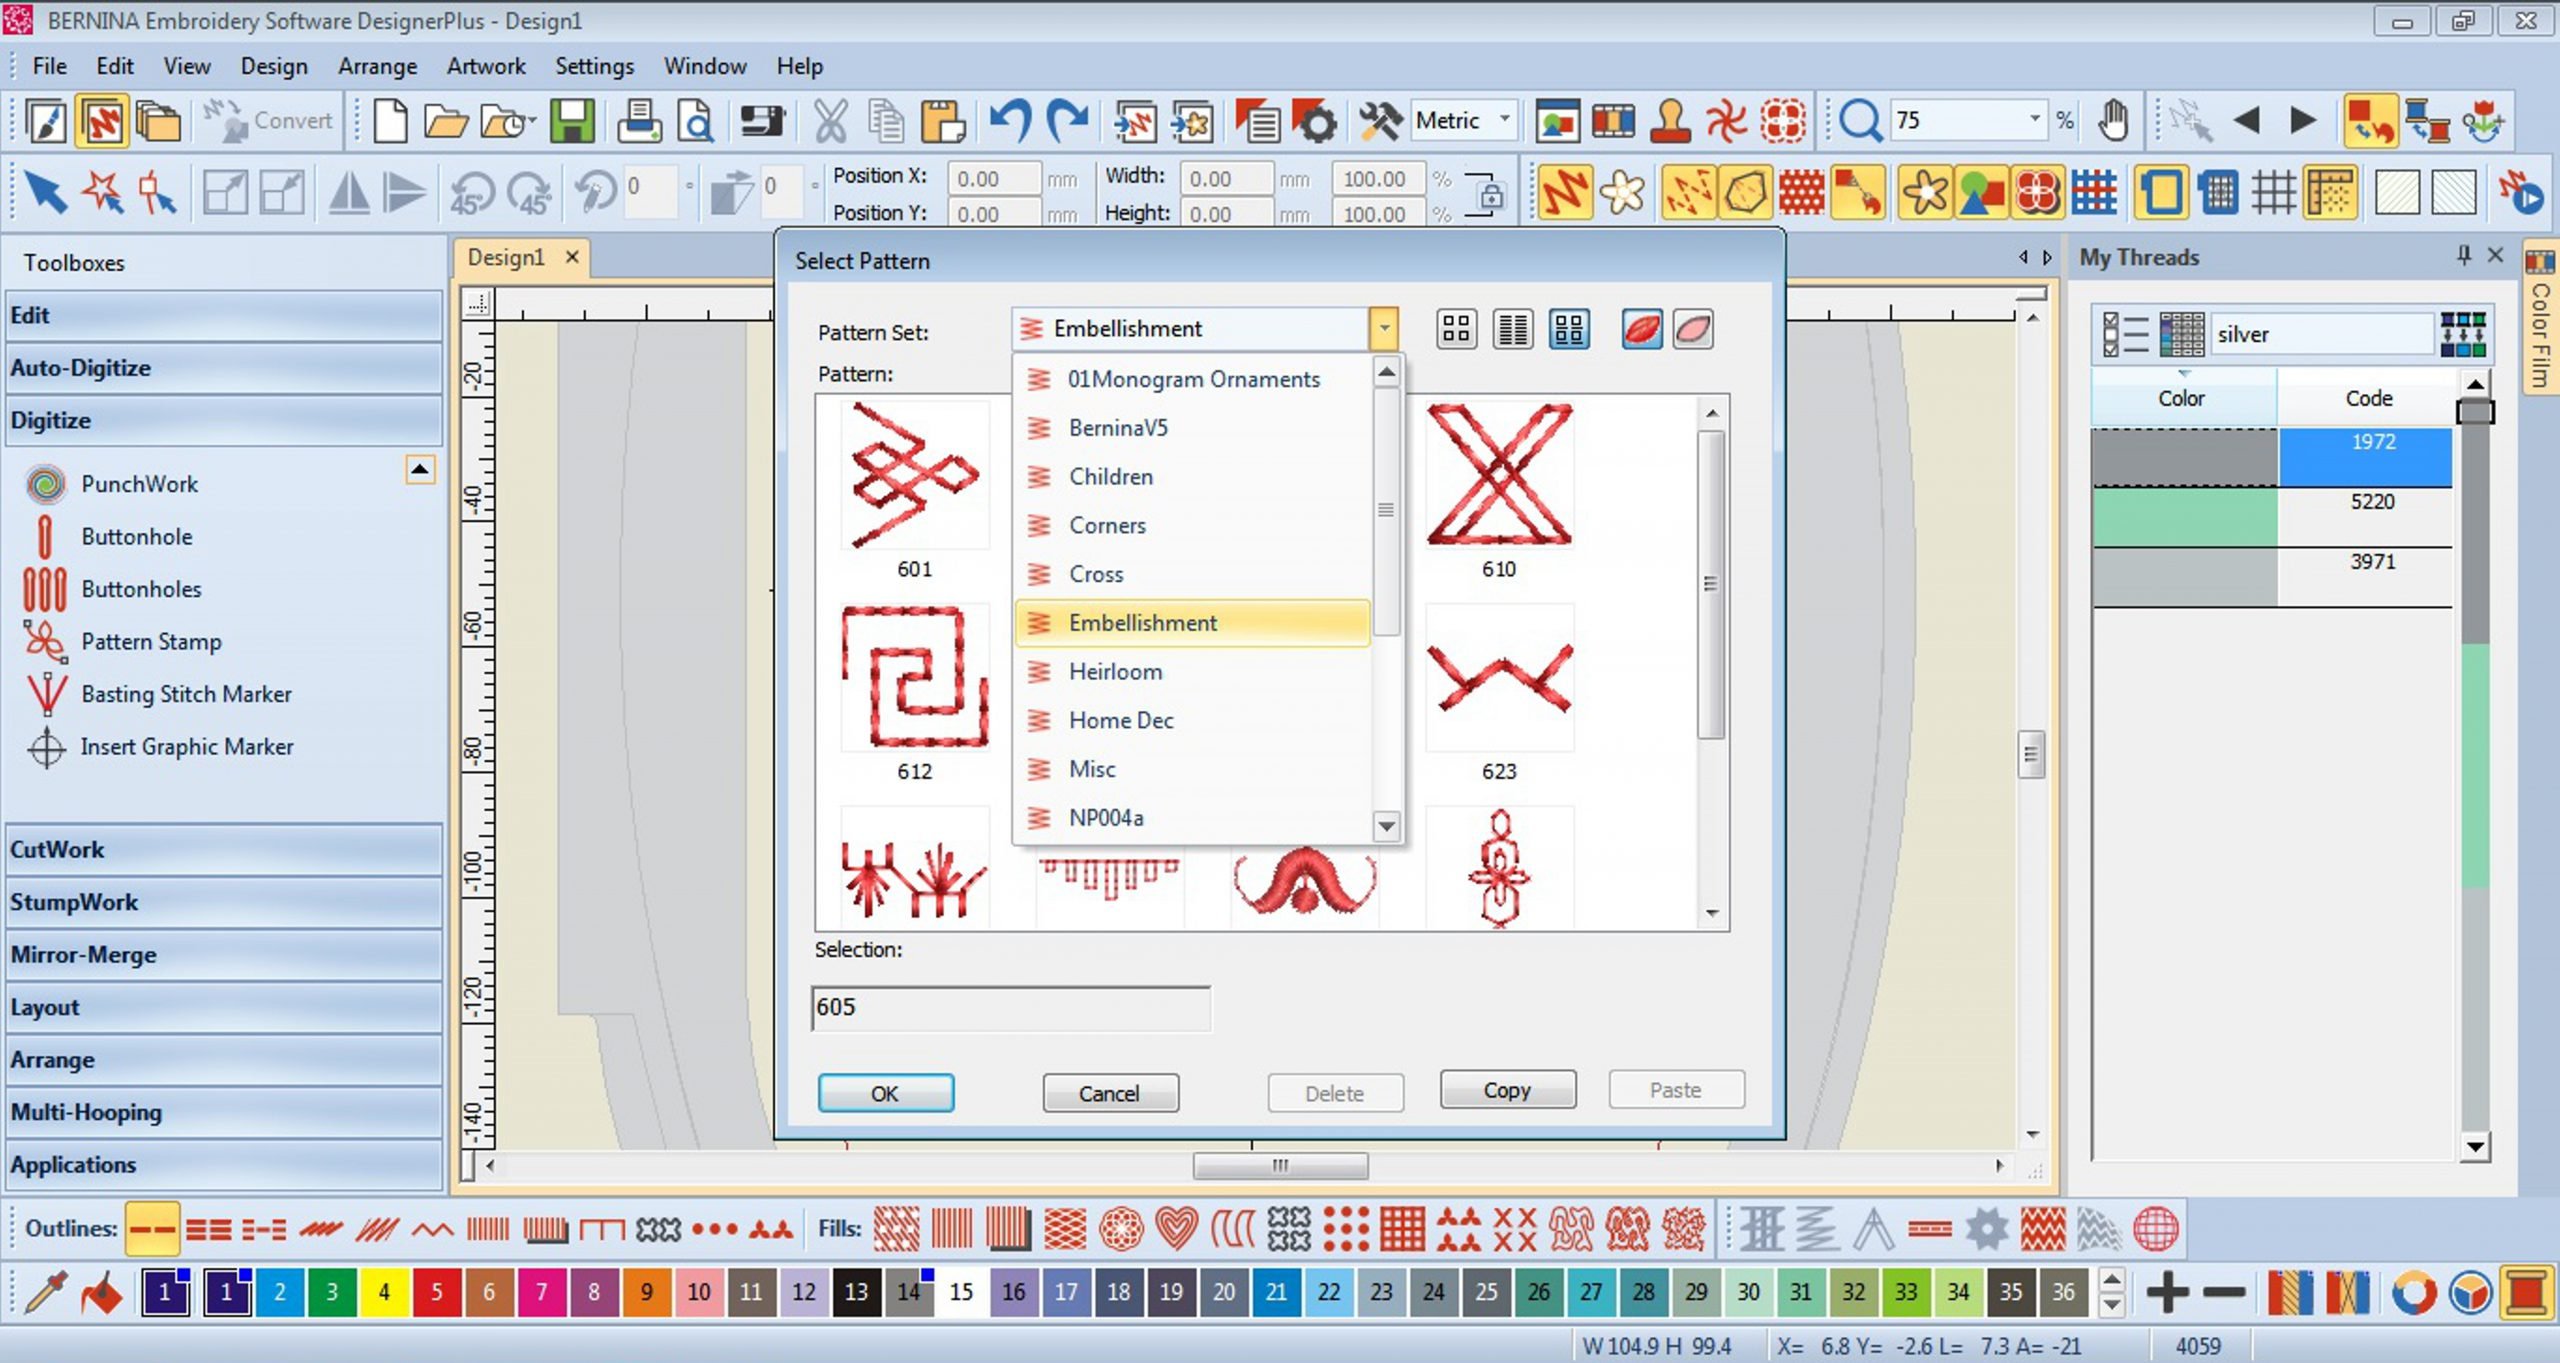
- Choose a Stamp. There are a few collections to choose from in the drop down menu.
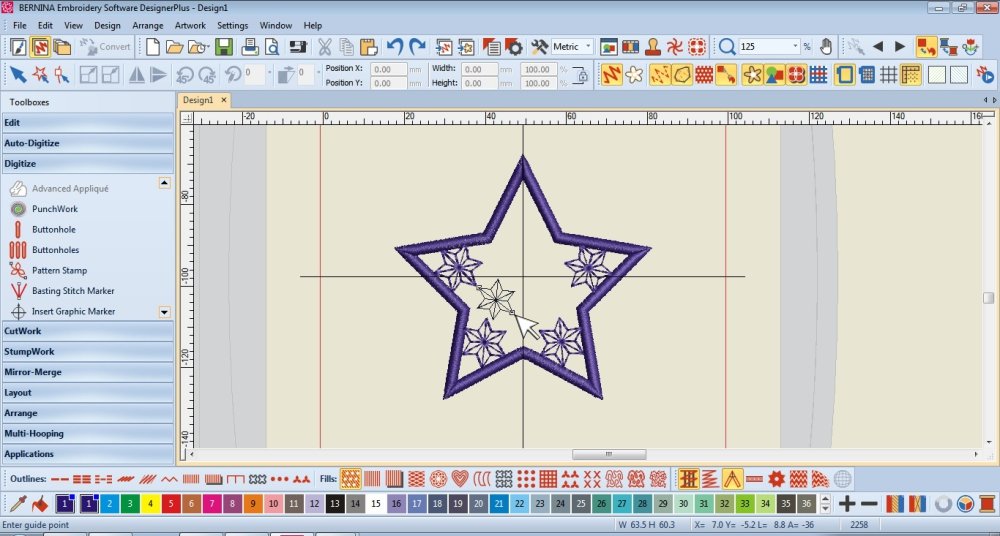
- Click to place and Esc to stop creating Stamps.
You can duplicate them, edit their size and rotation.
Don’t place any along the centre line.
Create the Interlocking
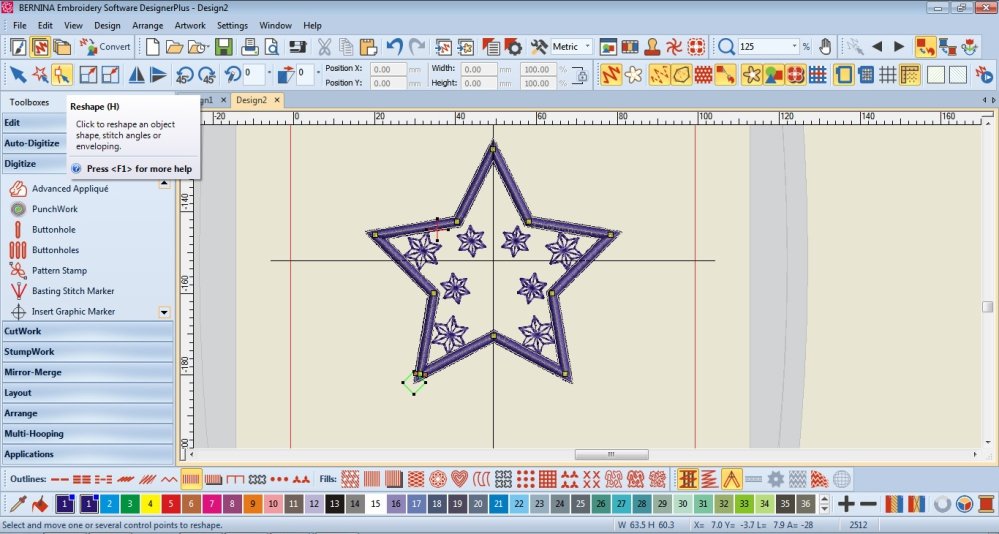
- Duplicate the design.
Move one of the designs to another Canvas.
- Focus on one of the Canvases for now.
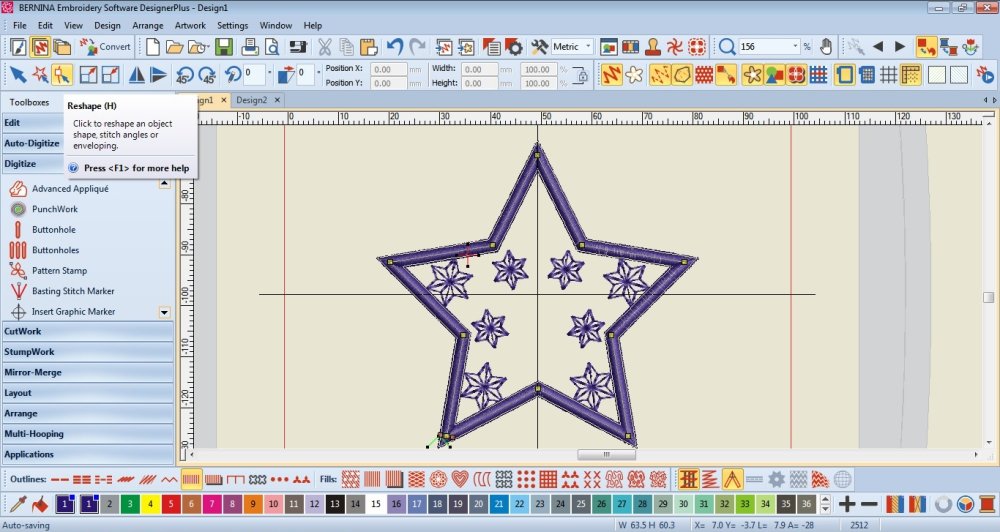
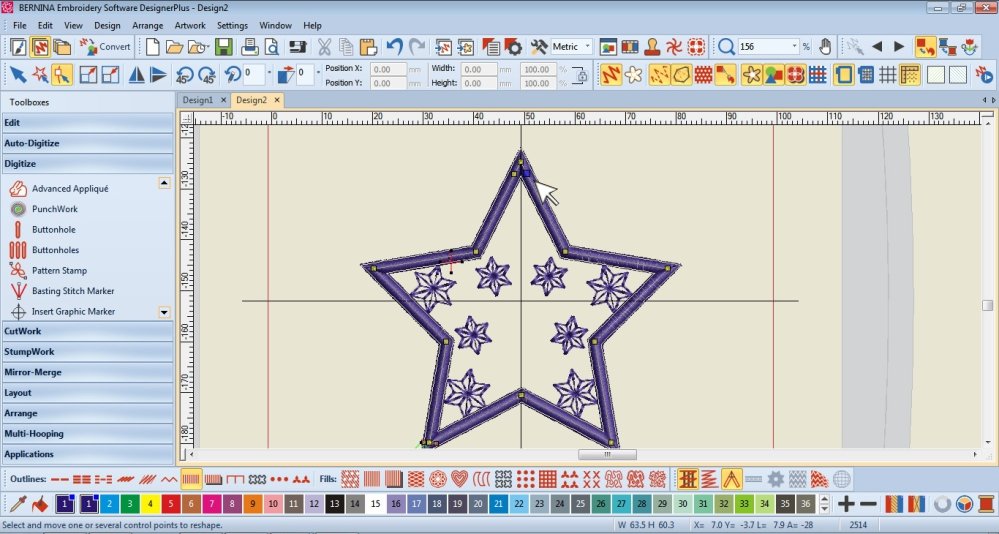
Select the Satin stitch line and select the Reshape Tool.

- Create 2 nodes at the lower centre.
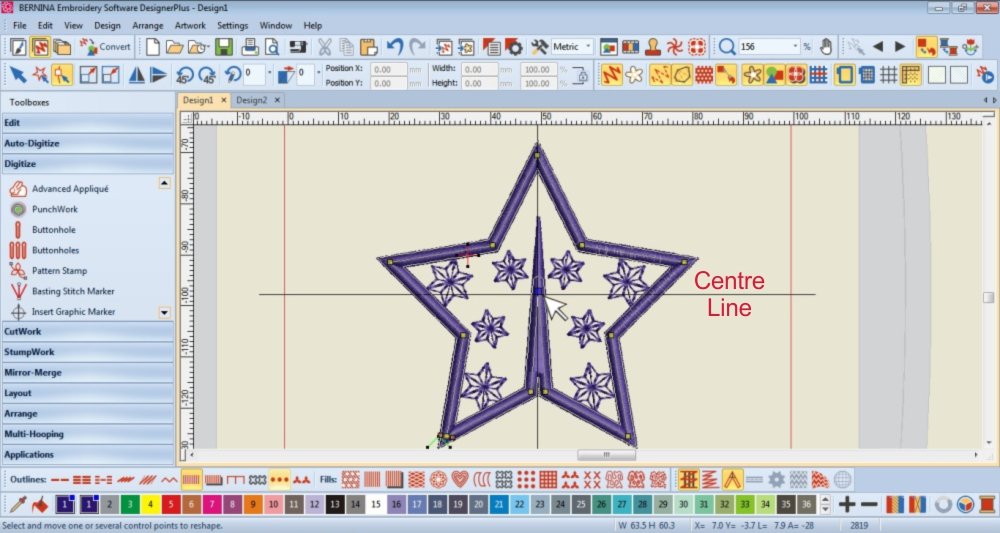
- Move the centre node straight up, just above the Centre Cross Line.
- Make another node next to the one you just moved.
Adjust them so that they create parallel lines.
Ensure that there is a thin gap between these parallel lines.
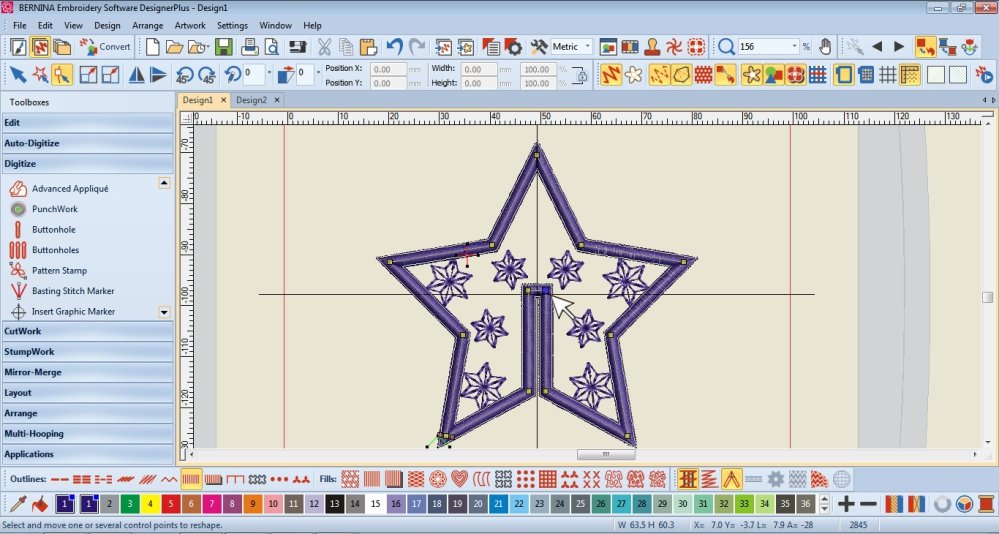
- Go to the other Canvas.
Select the Satin stitch line and select the Reshape Tool.
- Create 2 nodes at the upper centre.

- Move the centre node straight down, just below the Centre Cross Line.
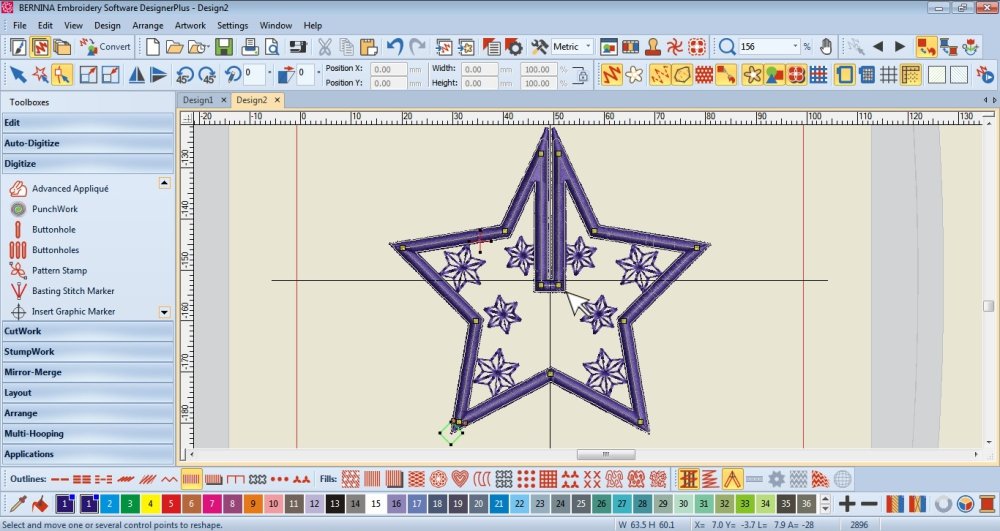
- Make another node next to the one you just moved.
Adjust them so that they create parallel lines.
Ensure that there is a thin gap between these parallel lines.
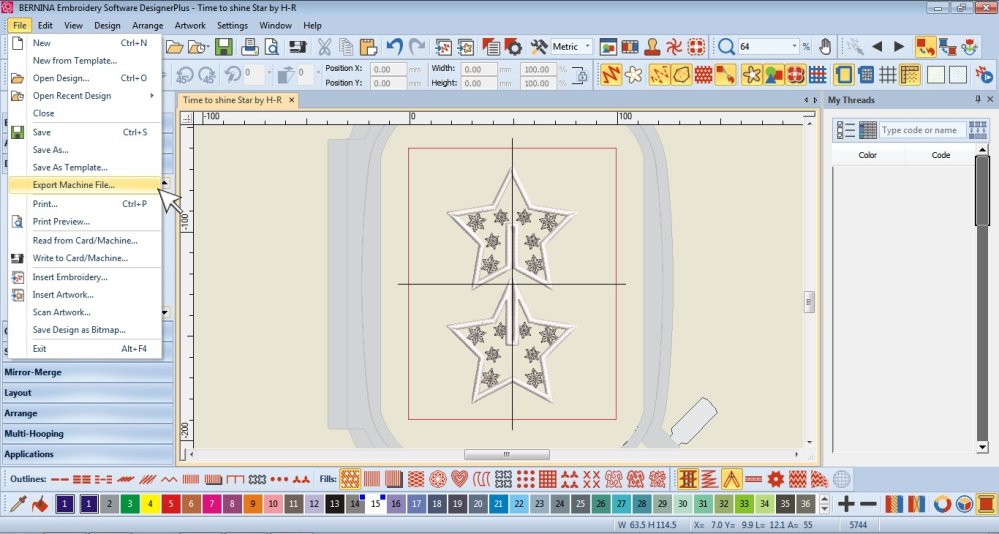
Export
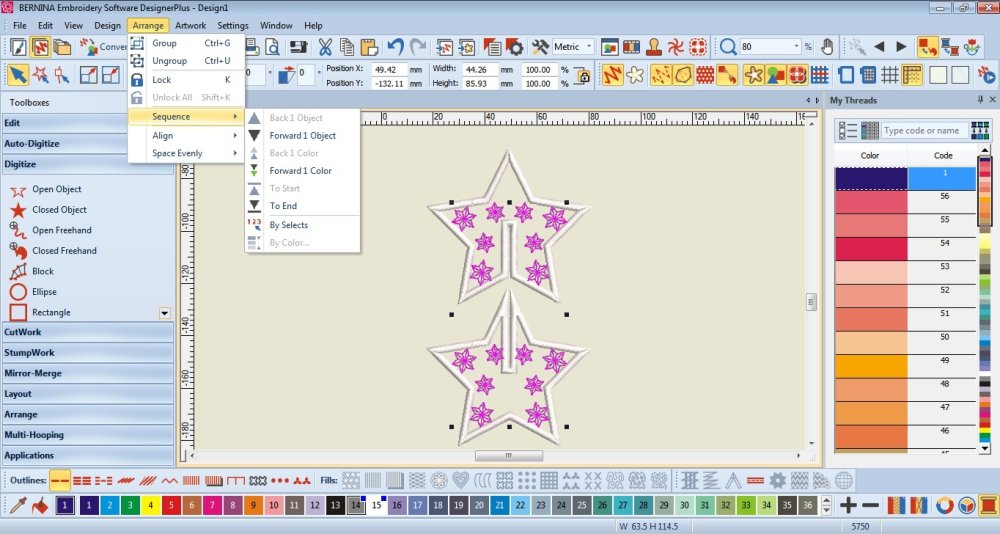
- Check the Sequence Arrangement.
The Stamps must be the furthest Back/To Start
The Satin Stitch to the Front/To End
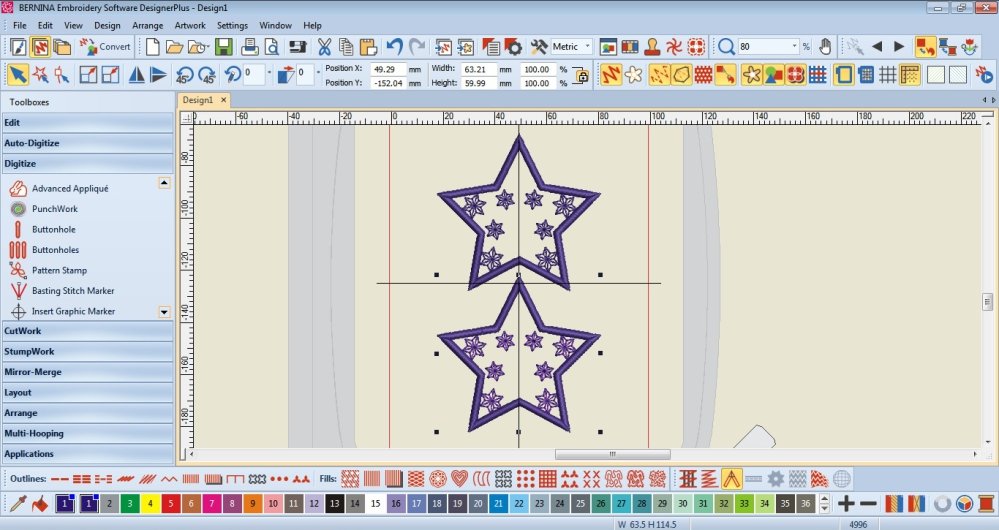
- Place both shapes on 1 Canvas.
Edit the size if necessary (ensure both shapes are the same size)
Save the file or Export the Machine File.
Embroider the design
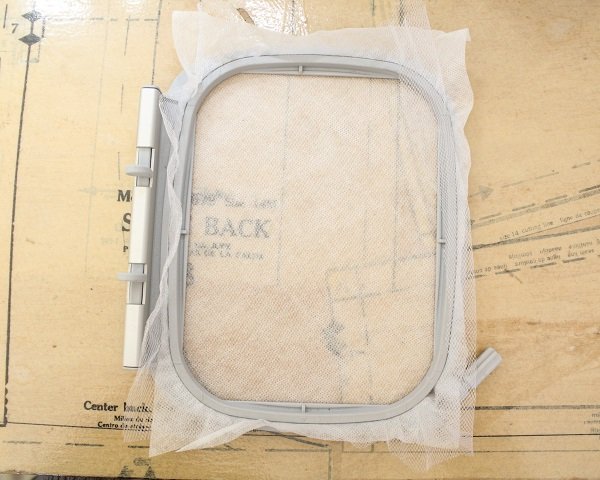
- Place the wash-away stabilizer in the hoop with the piece of tulle on top.
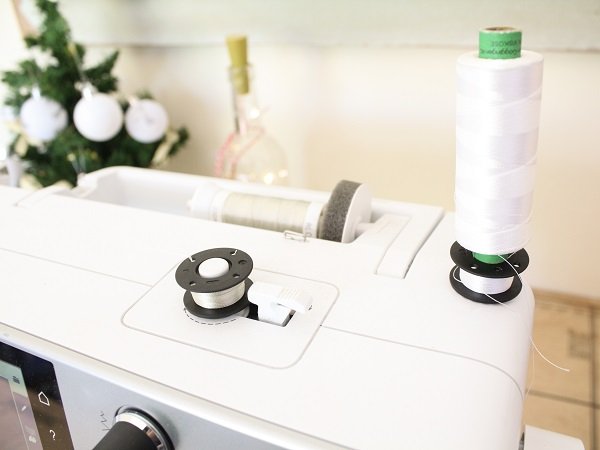
- Wind your bobbins with the same threads you will be using to embroider.
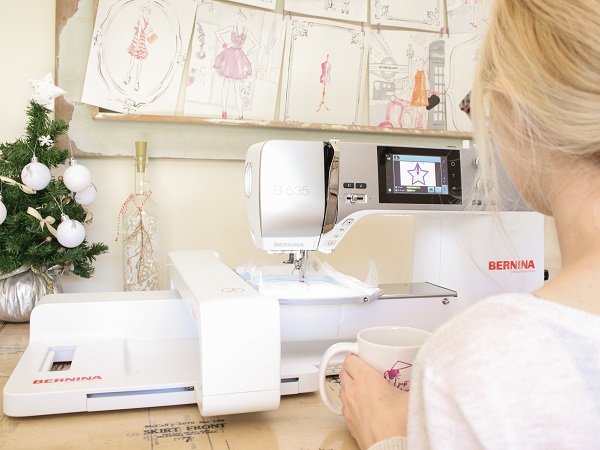
- Embroider as you usually do.
Finishing touches
- Trim all the threads.
Neatly trim about 2mm around the embroidery.
I don’t recommend cutting up the centres just yet.

- Dunk your embroidery in to the bowl of warm water a few times to dissolve the stabilizer.
As we need to keep the embroidery somewhat firm, don’t wash away too much of the stabilizer.
Rinse enough of the stabilizer away that you don’t see it but don’t rub the embroidery too much that the stabilizer is completely washed away.
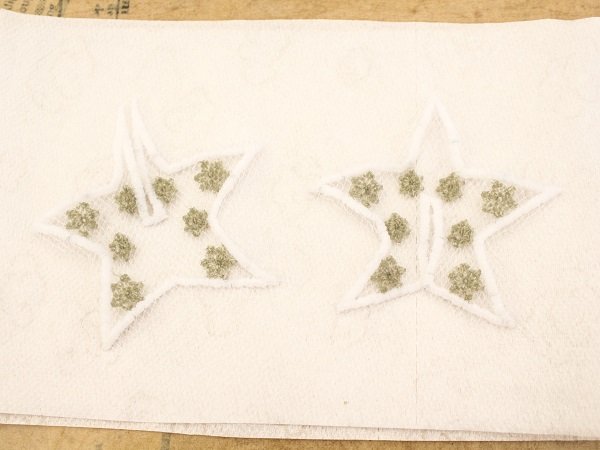
- Place the pieces between a few layers of paper towel and gently press out the liquid.
Replace the wet paper towel and lay the pieces flat beneath something weighted to dry.
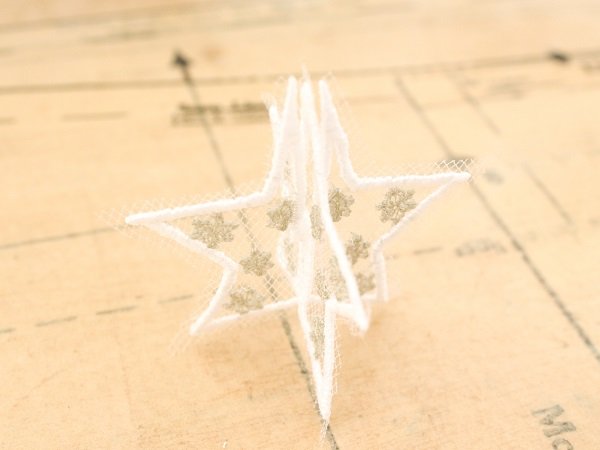
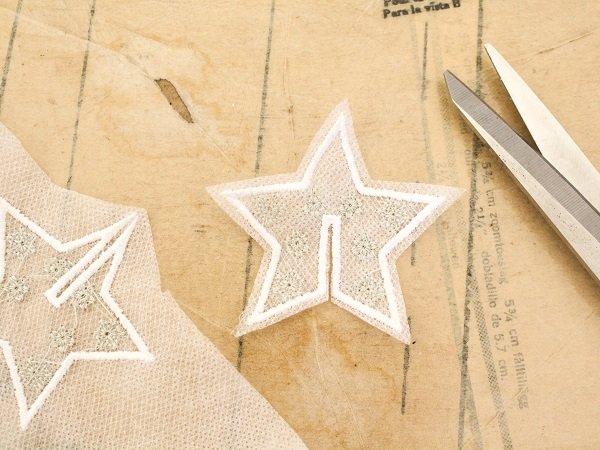
- Carefully cut up centre of each piece.
Interlock the 2 pieces of the Star.
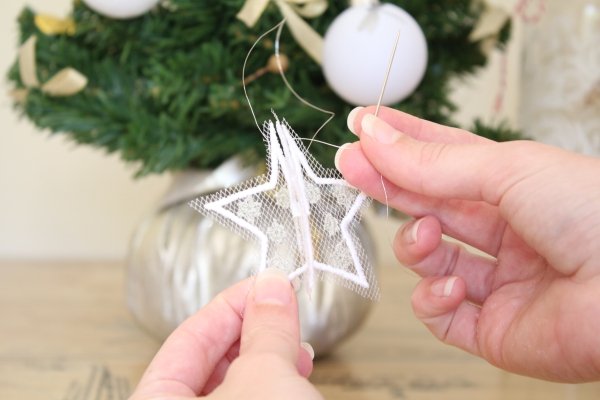
- Thread your hand needle and stitch through the tops of each Star piece and create a loop for hanging.
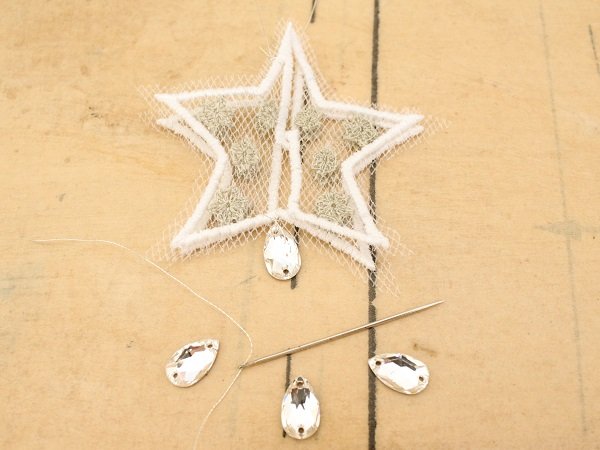
- Stitch a crystal to the base of the star for an extra special touch.
When the light hits the crystal it creates a magical reflection all around.
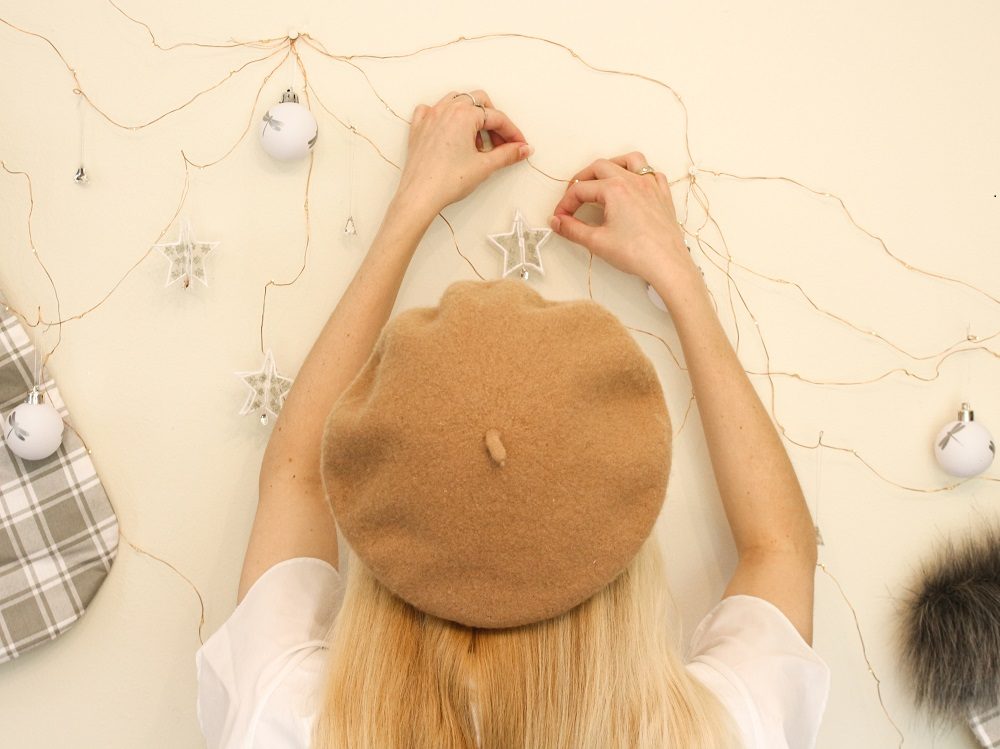


I don’t have space in my tiny studio for a Christmas Tree so I’ve hung my decorations on the copper fairy lights above my bed along with our stockings my mom made. At night the crystals catch and reflect the little lights creating a beautiful effect around my room.
Tips
- The wash-away stabilizer will act a bit like starch to help keep the embroidery design firm
- If you use a rayon embroidery thread, your embroidery design will be more flimsy/won’t hold its shape as well.
- I chose a light, neutral colour Tulle so that the embroidery stands out but you can use a colour, maybe a complimentary one to the thread colours.
I would love to see what you make, please feel free to share with me!
Instagram
Facebook
Happy holidays
-Hannah-Rose


Thank you for your design idea..I share it with my Facebook group, JustLearningBerninaSoftware..they are an extreme wonderful group..so we all appreciate what you are doing..Joann.
Hi Joann
Thank you, I hope everyone enjoys them 🙂
Thanks for showing how to make an interlocking object. This could be useful for a lot of things. Merry Christmas.
Hi Sue
I’m so happy that you found this article helpful!
Happy Holidays 🙂
Thanks for the software lesson and not just the pattern download. Really great.
Need v9 here now to go faster! 🇬🇧🏴
Only a pleasure Ann!
I’m so glad you like it.
Really looking forward to the new software too, it is going to be amazing!
Happy holidays