 BERNINA Corporate Blog -
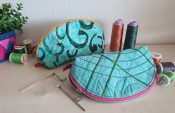
Decide to make a beautiful eyecatcher on your sewing project and decorate with the circular embroidery attachment. There are so many possibilities.
I want to make a small bag, it could be used for different occasions. You have this nice circular shape with the circular embroidery attachment and I want a round shape for half of my bag. My crochet hooks fit in:

I set the level to beginners, as the main idea is to use the circular embroidery attachment, which is really easy to use. To fit in the zipper the way I did (seen on a TikTok tutorial) is more for ‘beginners +’.
Supplies to make a bag with the circular embroidery attachment:
- An embroidery hoop to secure the fabric.
- A firm fabric, about 6 cm wider than the hoop.
- Iron on stabilizer
- 14 cm decorative tape
- Strong adhesive tape
- Mettler Seralon sewing thread
- A zipper (mine isj 19 cm), the length of the zipper defines the shape of the bag.
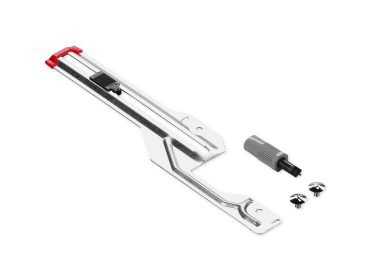
- The Circular embroidery attachment # 83
- Sharp fabric scissors
- A double ring
- A heat erasable pen
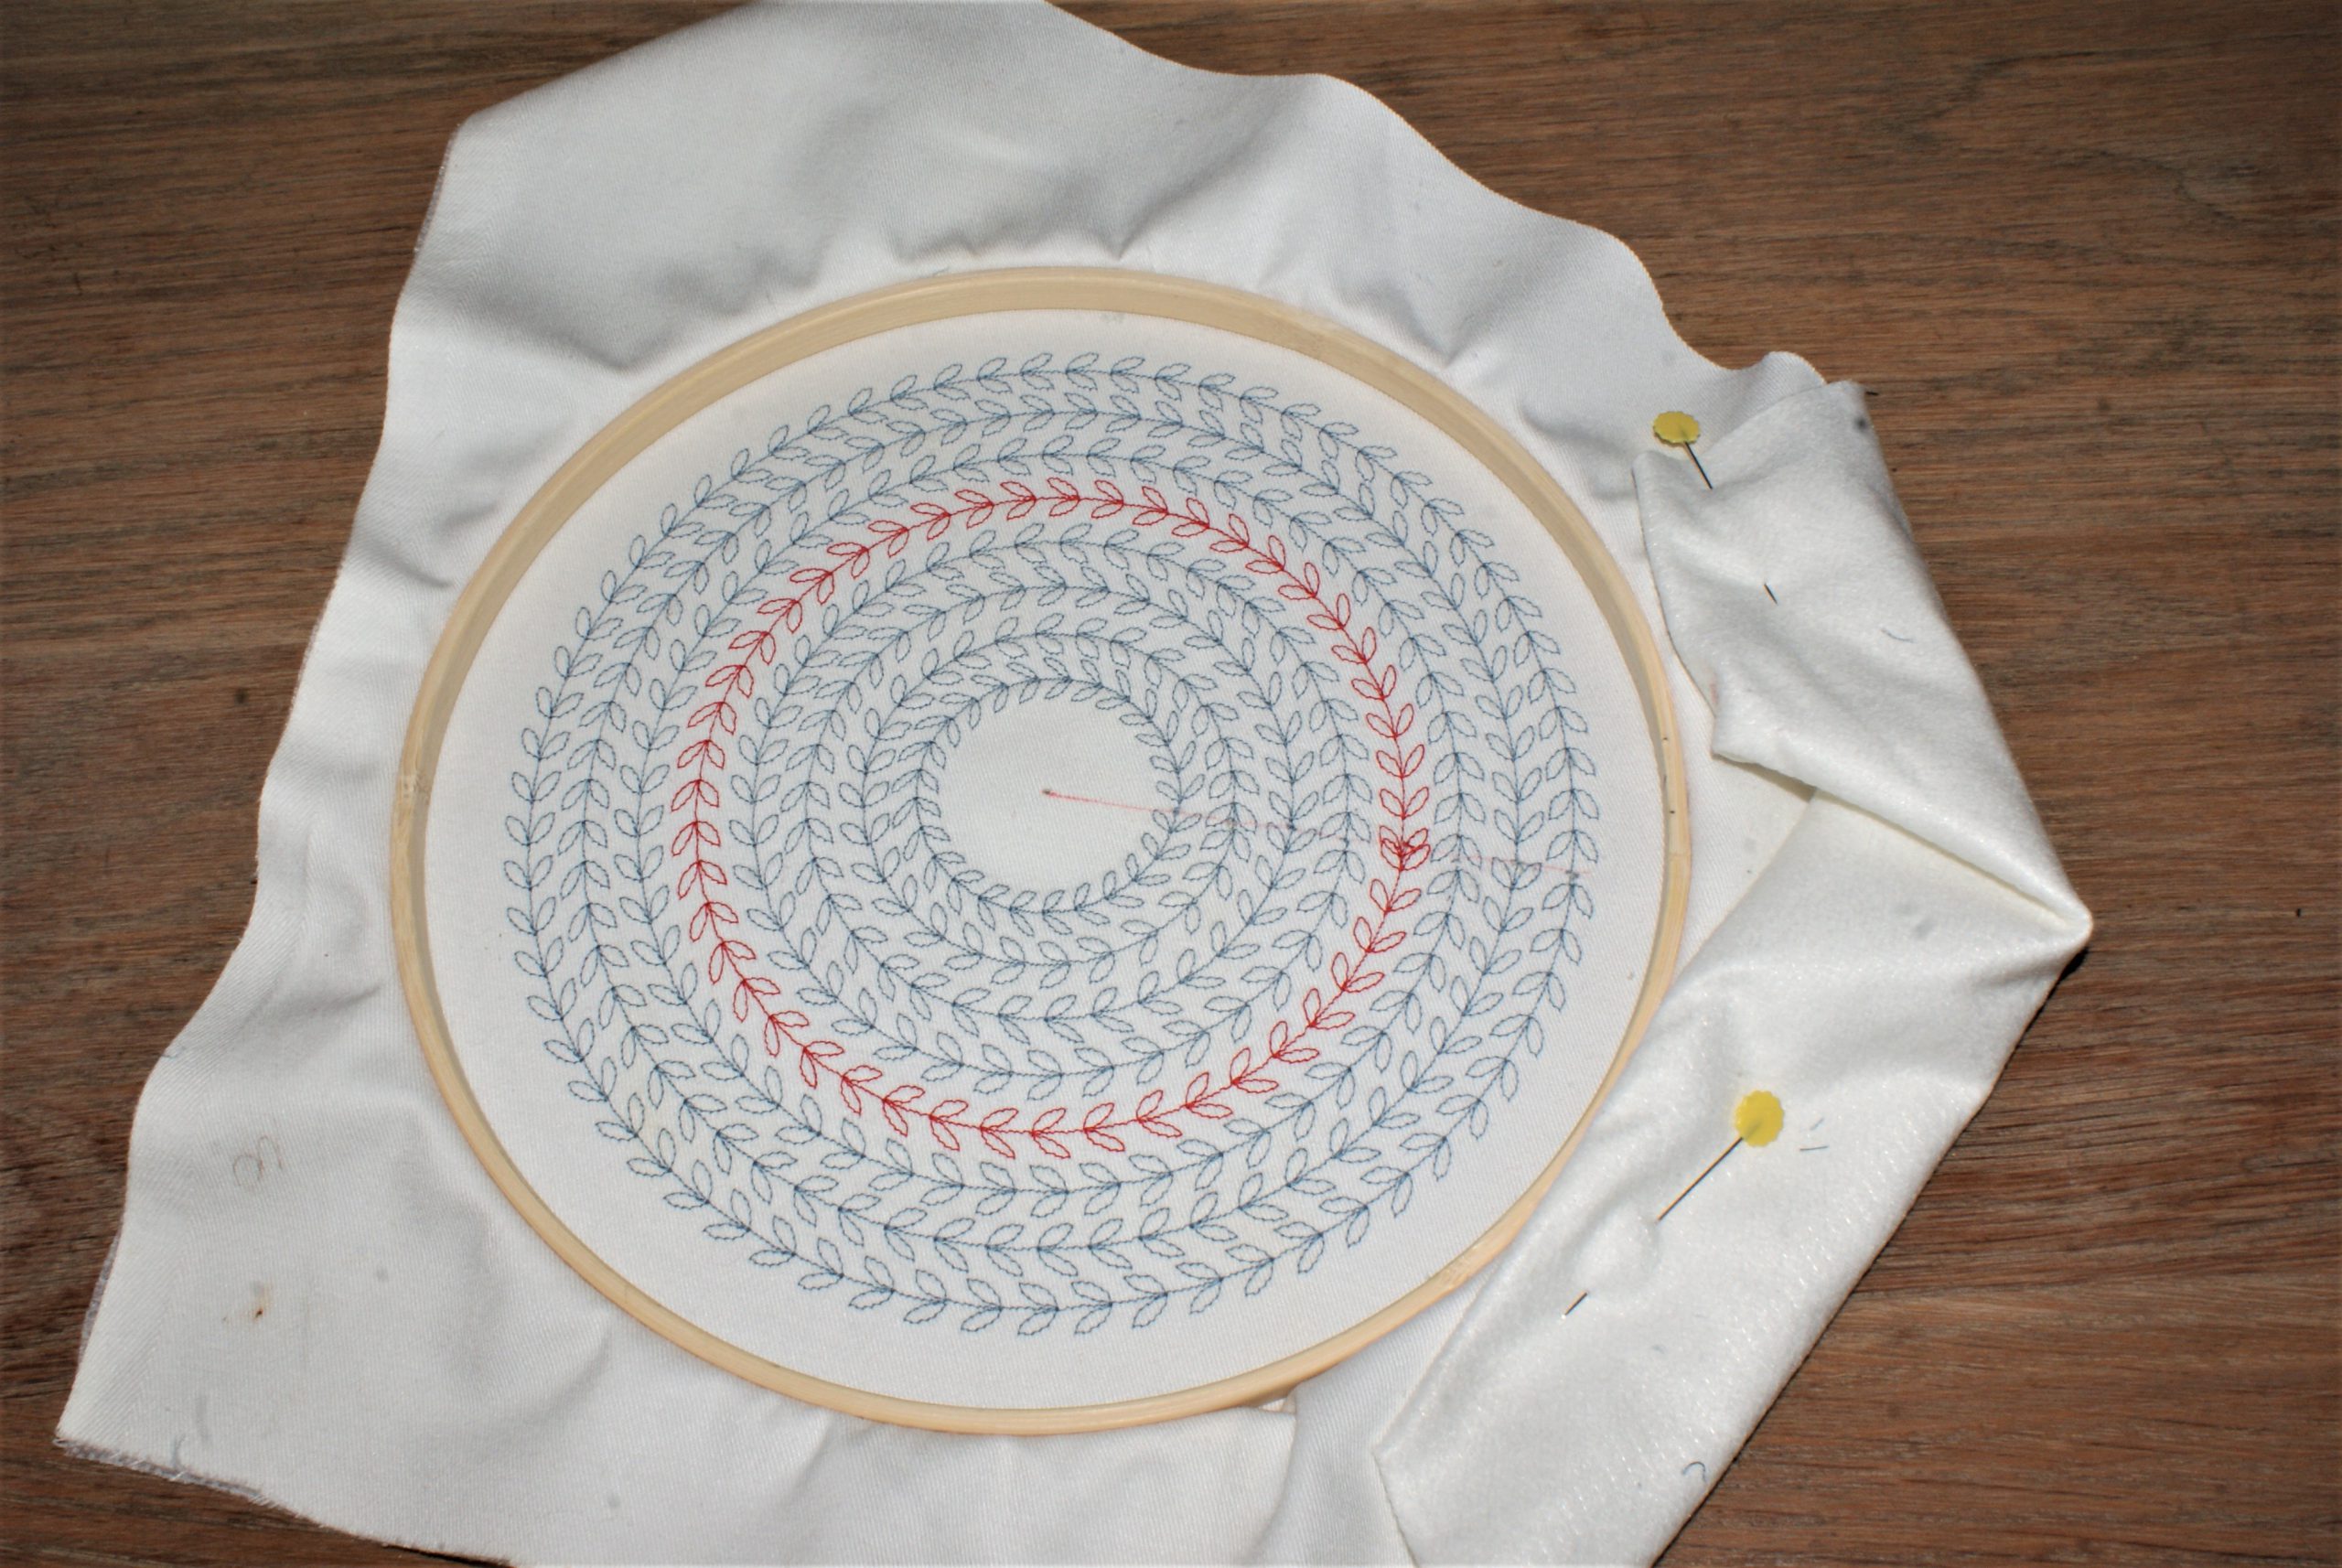
Iron on the stabilizer on the fabric. Hoop it in the embroidery hoop. Draw a line from the middle towards the outline of the hoop with the heat erasable pen.

I chose a simple decorative stitch: a line with leaves, they will be stitched in standard mode and mirror mode. This is done by clicking the vertical mirror button (click the black and white triangle with the horizontal line).

Apply a patch of firm adhesive tape on the back of your fabric. Don’t cut it too big, you would sew over it with the first circle if it’s too big.
Put the circular embroidery attachment on the machine:

Put the center of the fabric in the hoop over the pin. Don’t forget to replace the silicon cap, you could hurt your hands with the sharp pin.
I start every new circle on the red line, so all endings are lined up.
Be sure the fabric has a free movement. If necessary you can roll up corners and pin to the front.

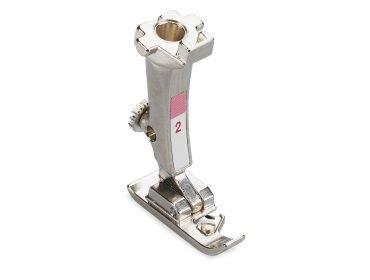
The centre line of the former circle serves as a guideline for the next, by following with the left side of the presserfoot. I always like to take Open Embroidery Foot #20 as standard foot. It gives me a great view on my work.

The hoop is full, so the decorative eye catcher is finished. The most difficult aspect of using the circular embroidery attachment is to have a neat transition from end and start of each line. You could sew tape over it in an other project, or you could adjust stitch length to blur.
Finishing the bag:
Cut the fabric on the red line till 1 cm from the center of the circle (I already pinned the zipper for the picture, so I had to remove it).
Pin the zipper along the red line, right side facing the fabric.
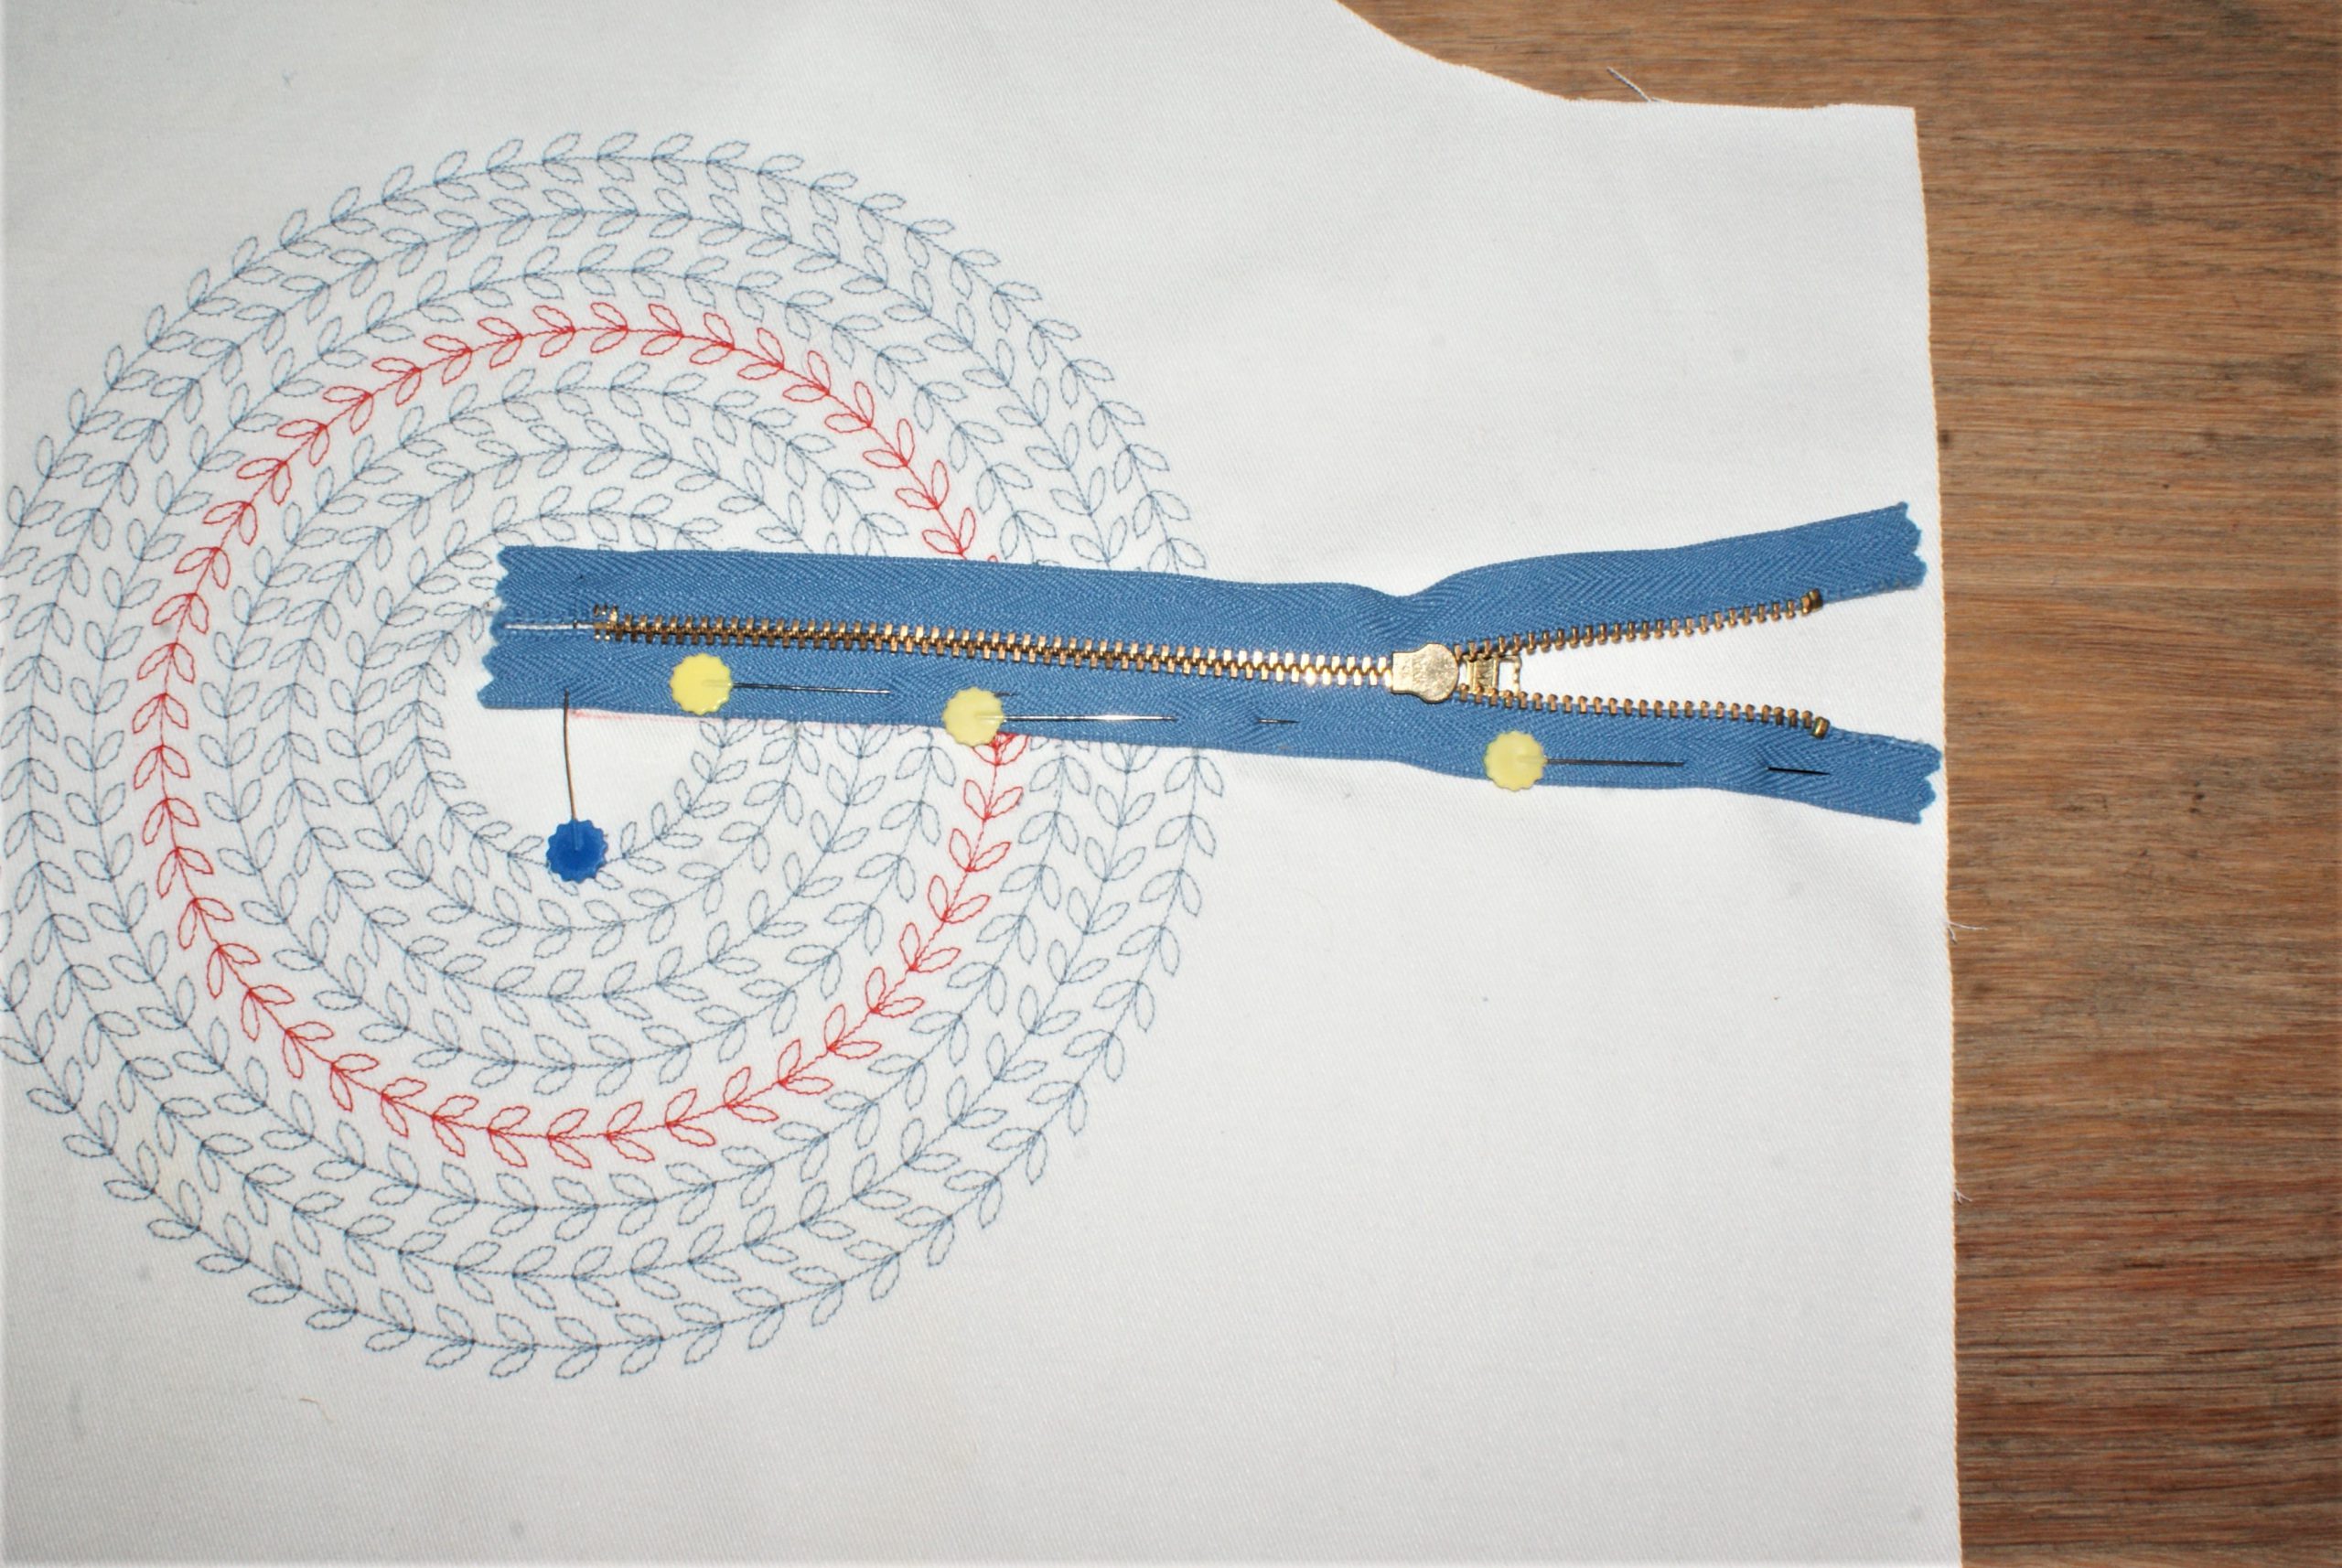
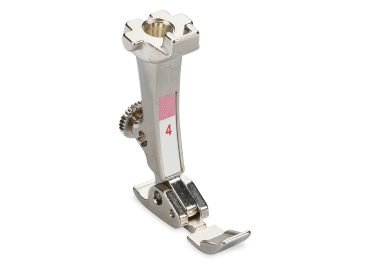
Sew with Zipper Foot #4 along the zipper. The sewing line is in half of the width of the zipper leg.

Lift the zipper and cut the end of the red line towards the needle.

Turn the project a 180°. The zipper is now in extension of the opening. Sew the bottom part.

Cut the orther corner and turn the zipper over the open line. Check well to see if both circle lines are matching.
The zipper is finished:

Sew a zigzagline over the edge of the fabric and the zipper. Overlock Foot #2 is your helper:

Topstitch around the zipper. I continued sewing with the overlock foot, and guided along the edge of the presser foot. 
Finish the bag:
Fold the project in halves, right sides facing. Position the tape in between the fabric on both sides.
Sew with a straight stitch round the circular decoration. Finish with a zigzagstitch or overlock.
The bag is ready for any application.
Look, for the glitter markers:
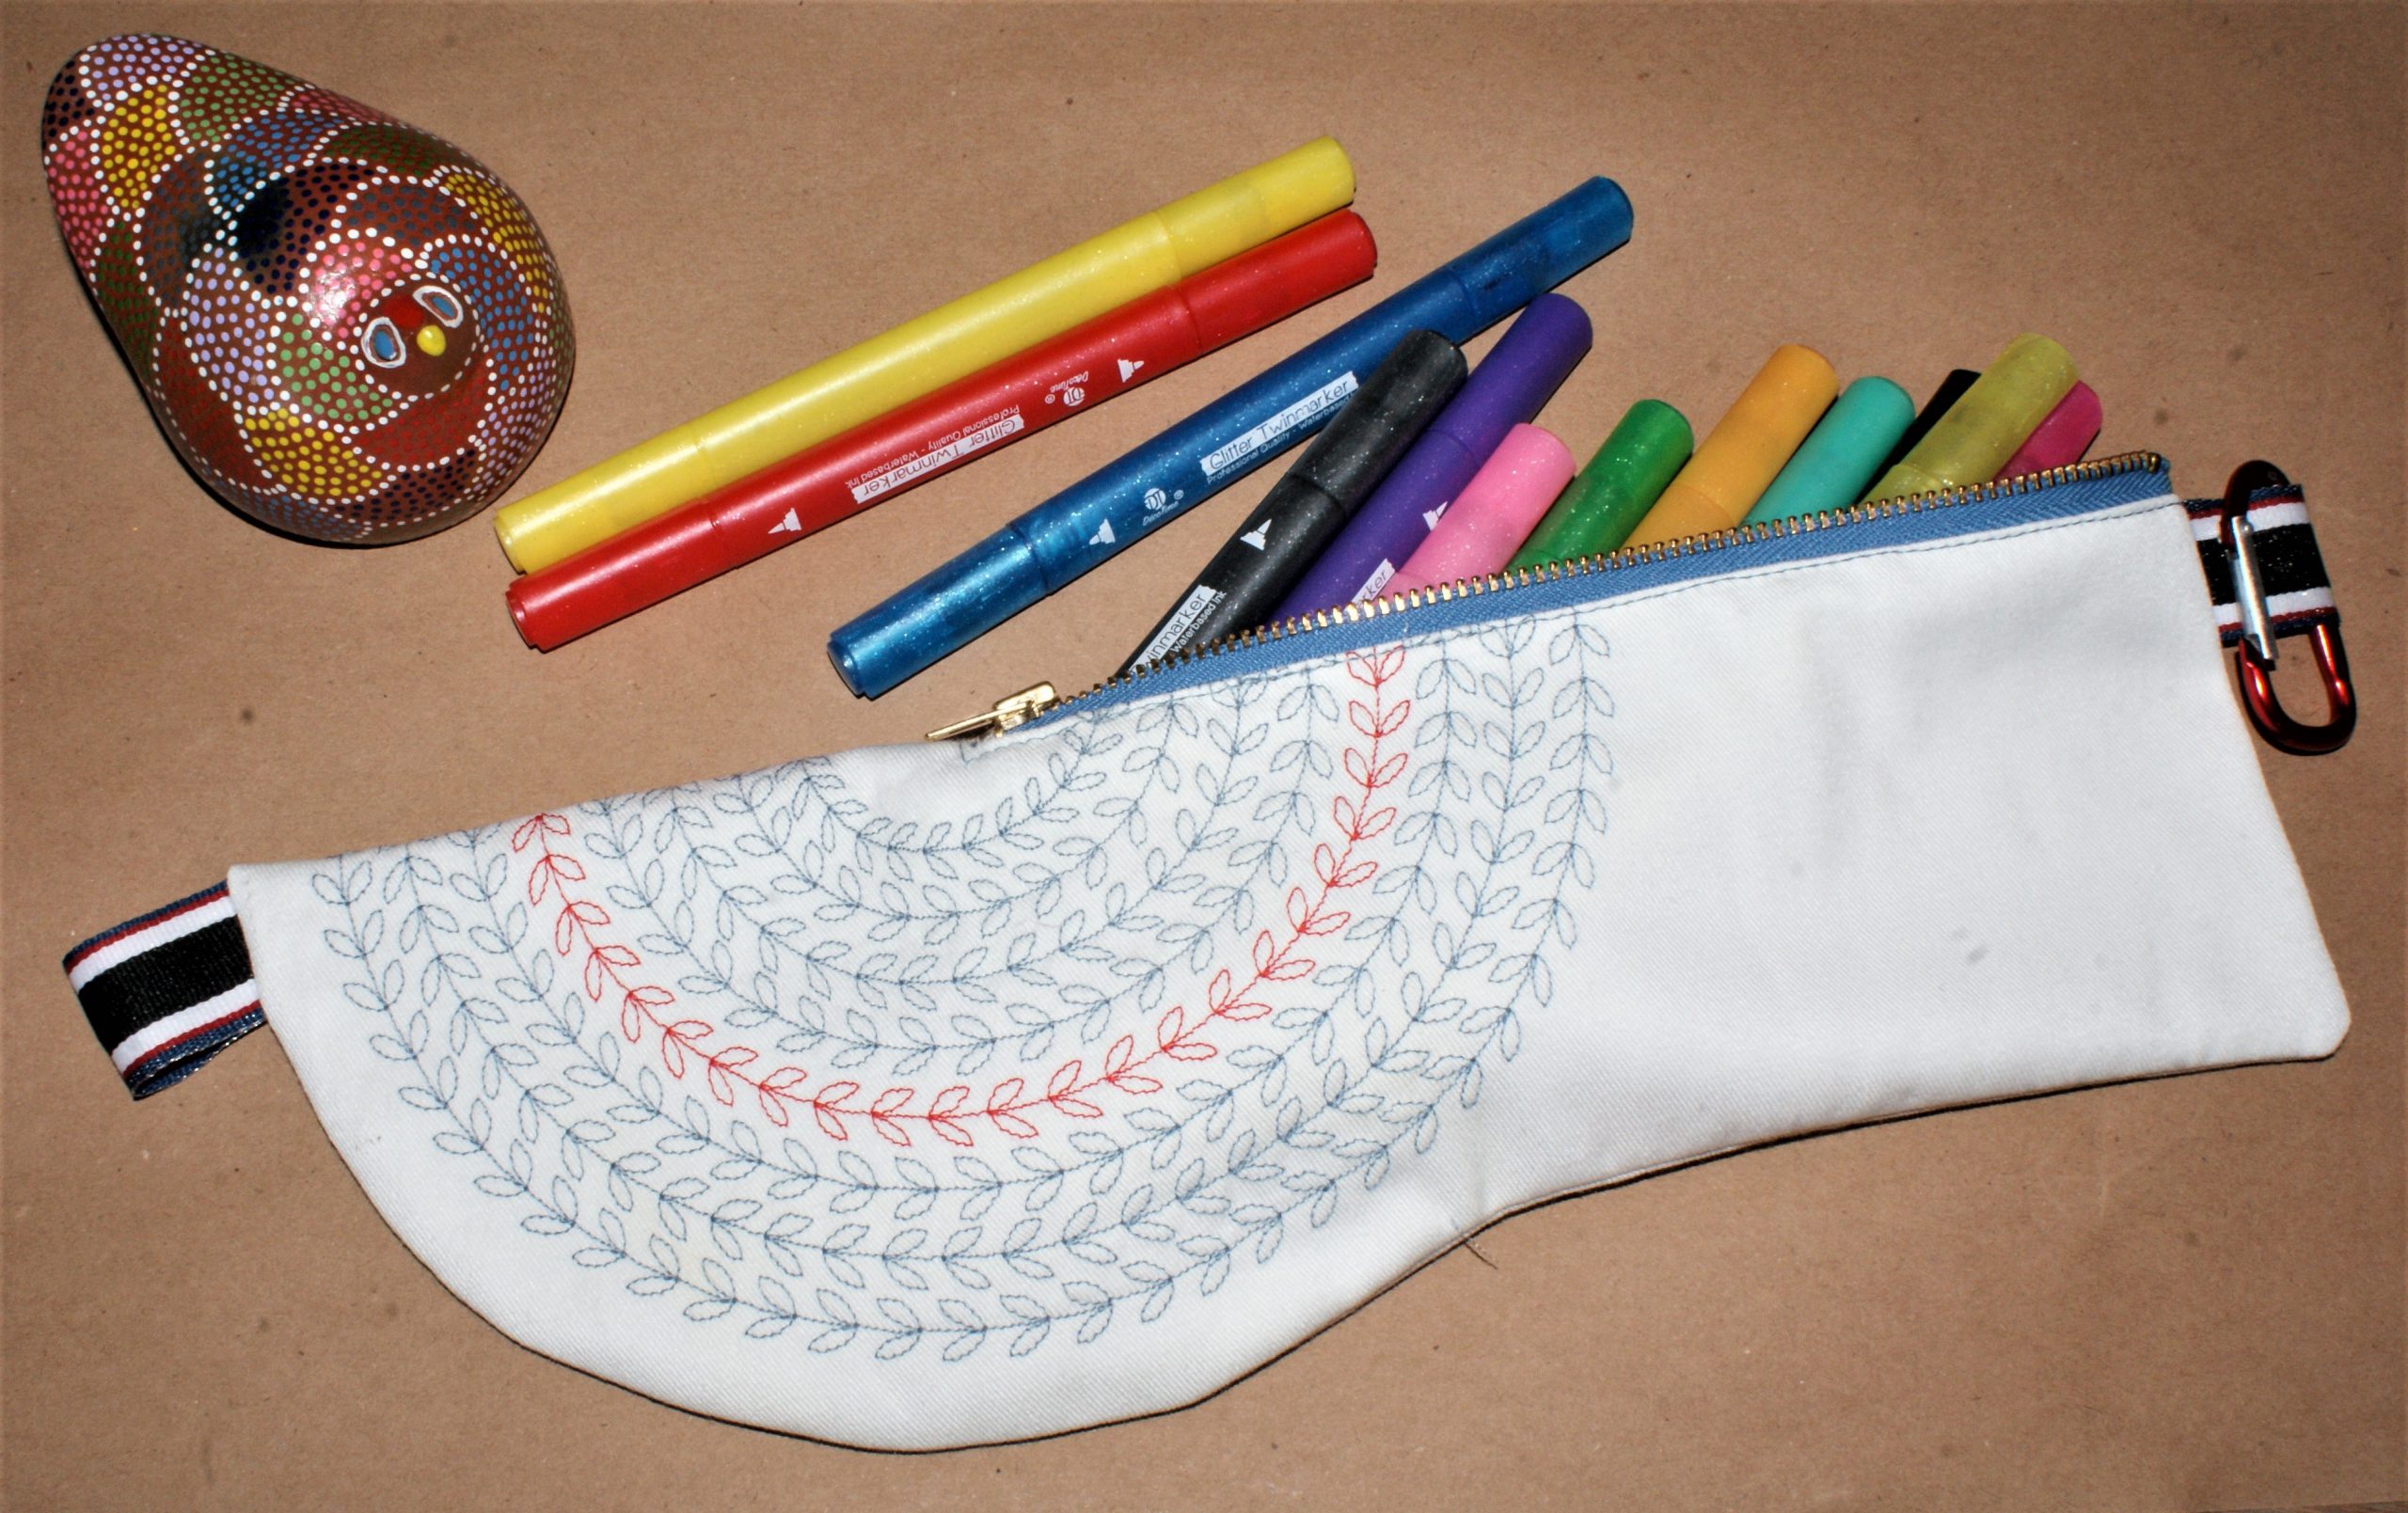
Or for all those cables you gather over years:

Decorate with the circular embroidery attachment for a funny eye catcher on a project.


Thanks Bea for the useful tips on using my so-far unused circular attachment. However as someone used to putting zips in garments I see the method for your bag is very different, eg I see the edge of the zip, not the row of teeth, is placed along the cut line. So for those like me, I do think more clarification of the steps for inserting the zip would be useful, particularly in the sewing of the second side and turning over of the zip. It would be a shame for people to spoil the project at that stage.
Maggie, I’m sorry it wasn’t clear. In fact, I meant to show an application of the circular embroidery attachment in anything you wish to do it. I added a video of how the zipper is finished in this bag. I hope this makes it clear. Succes with it!