 BERNINA Corporate Blog -
Hi all,
Sewing fringe with the overlocker? Yes, that is possible, easily. Ok, I admit, it is a bit time consuming and involves some cutting by hand, but the result is something to be proud of, isn’t it?

In this article I would like to introduce you to the technique, respectively to the procedure and give you some tips on what to look at, that it works out – may be not on the first attempt, but on the second attempt.
Sewing fringe with an Overlock/Coverstitch-Combo – Instructions

Sewing fringe with this technique I only learned earlier this year, but after first doubts I have to say, yes, I like the effect on decorative projects that are not too stressed.
For the procedure you need the 2-thread wrapped overlock and the 2-thread chainstitch. I’m sewing with the BERNINA L 890. Madeira Lana 12 has proven to be a good yarn for my fringe.

Step 1
2-thread wrapped overlock is the basis, stitch 9 on the L 890. Thread the lower looper simultaneously with three times Madeira Lana 12, that will give our fringe a full, fluffy appearance.

If you are using more than one thread per threading path, it is important, that each spool has a separate spool holder pin. You also nee a separate antenna guide per spool. The threads will only join at the pre-tension guide, for the 2-thread wrapped overlock this is at the red guide for the lower looper.

In case you ask, how will that work, three threads in the lower looper, then I like to point you to the video tutorial about “alternative threading methods”. Especially with wool threads, using the Air-Threader will not be successful. Therefore, use a thread cradle for threading the Lana threads into the lower looper. How to handle this is shown in the video in detail:
For the left needle I used Seracor 120.
Set the cutting width to 9, with this your fringe can become approx. 13 mm wide. Set the stitch length to 3. Set mtc to +2, we want to have as much looper thread in the stitch as possible.

The thread tension settings for this stitch were on my L 890 as follows:
Left needle LN 3, lower looper LL 2. It is important that the needle thread is loose!

Set the max sewing speed to 600 or 700 rpm. We recommend sewing slowly but steadily when using decorative threads. That is outstandingly easy on the L 890, since we can change the sewing speed directly via the icon on the sewing screen.

Make a sewing test. It is important that the needle thread is loose, it shall be visible a width of 4 mm. You will understand why this is essential at the latest when topstitching with chainstitch.

The sewing test serves to determine the settings on your machine, because depending on the thread-fabric combination, they can be slightly different to the settings on my machine.
I personally keep my samples labelled; in case I want do duplicate the stitch for another project.

For the fringe I produced two samples, so that I can keep one with the wrapped overlock – and another one with step 2, with 2-thread chainstitch. But more later.
Sew your test and set the stitch that it looks like this. Remember the 4 mm visible loose needle thread:
Step 2
2-thread chainstitch is the basis, stitch 16 on the L 890. Thread the chain looper also with a decorative Madeira Lana 12. I used one spool only, the multicolor one. Remember the threading alternatives with a thread cradle.

In the right coverstitch needle I used Seracor 120.
Set the stitch length to 3.
The thread tension settings for this stitch were on my machine as follows:
Right coverstitch needle RC 3.3, chain looper thread 1

The sewing speed remains reduced at approx. 700 rpm.
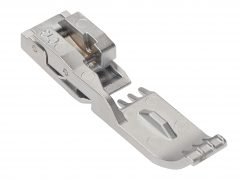
For topstitching, place the wrapped overlock with the right side down under the presser foot (Chainstitch Foot #C13). While sewing, the right edge of the foot helps holding the looper threads at the right, so that the stitching is in the middle of the visible needle threads. It is important that the looper threads that are now lying on top are not stitched down. You will notice that they are stitched in place on the underside.

Step 3
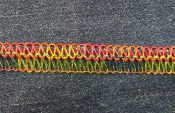
For the fringe completion, cut the needle thread of the 2-thread wrapped overlock, this will release the overlock loops to create the fringe. Small but not to pointy scissors work best. Alternatively use applique scissors.

As usual, press the fringe with steam for better durability.
… and yes, it takes some time until all bits of needle thread are released from the stitch – but some time…

Fringy fringe
Alternatively, instead of cutting the needle thread, cut the looper thread, right next to the needle thread.

I call that result “fringy fringe”.

Tips for sewing fringe
Fringe can be sewn along a fabric edge or along a fold. Should they be on the fabric edge, remember to neaten the edge first or hem it, because the 2-thread wrapped overlock that is cut open will not serve as edge neatening.

Why Madeira Lana? Because this thread is a bit “rough”, that makes the fringe more durable, and pressing will stabilize the fringes additionally.

Alternatively I have also sewn fringe with Mettler Silk Finish Cotton 28 und 40. These are a bit more shiny and you can achieve a different effect.

As with all creative processes, it comes down to threads, fabrics and techniques. Let your imagination run wild!

No chainstitch? No coverstitch machine? No combo machine? Use your sewing machine to topstitch the 2-thread wrapped overlock using a triple straight stitch or another decorative stitch you like.

Decorative stitches by thread blending? I plan a separate article about that topic, because with thread blending you open a box of possibilities.

This technique is particularly effective in wide, decorative stitches.

I love using fast techniques to pimp up readymade garments.

And here is an example with a rolled hem and three times Poly Sheen in the upper looper. By the way, this is very easy with the Air Threader, if you want to try it.

Since the rolled hem with three times Poly Sheen becomes really voluminous, I recommend using the cording foot, that eases feeding the stitch nicely.

Sewing fringe plus: If you don’t know fringes with the sewing machine yet, here an example:

They are sewn with the Tailor Tack Foot #7.
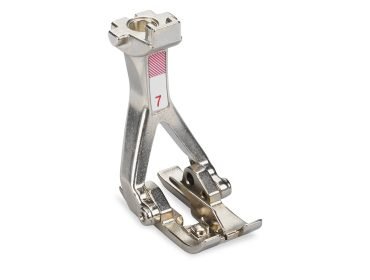
There is a tutorial video for the Tailer Tack Foot available. The last third of the video is about stitching fringes, as you can see, also in combination with decorative sewing stitches.
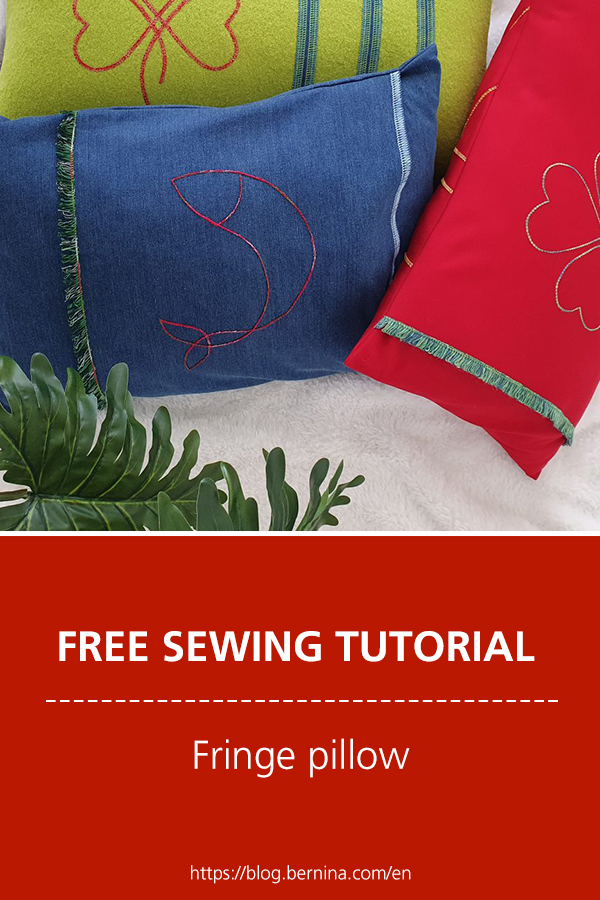
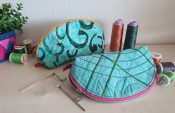
If you ask, fringe what for, let me give you a project proposal. Please find a pillowcase decorated with fringe and a decorative chainstitch shamrock in a separate blog.

With that, I wish everyone good stitching with many fringy projects.
Doris

0 Responses