 BERNINA Corporate Blog -
I am definitely more of a garment sewist than a quilter- I’ve been making everything I wear since 2016, and I’m very comfortable in the realm of trousers, shirts, dresses, bras, and even shoes! I have made quilts in the past – notably my Constellation Quilt (pattern by Haptic Lab), which I adored, but it’s a whole cloth quilt, embroidered and assembled entirely by hand, except for the first pass of the binding. Although I learned to quilt from my mom, my most recent pieced quilt is nearly 12 years old, so you could say it’s been a while!
I recently attended the Auckland Festival of Quilts, and although I am still happily a garment sewist, I think I must’ve caught the quilting bug! Given it’s been so long, I thought I’d dip my toes back into the world of quilting with a relatively simple and small project – a baby quilt for my sister’s future kiddo!

Choosing Pattern and Colours for the baby quilt
I’ve selected the Summer Haze quilt pattern by fellow BERNINA Ambassador Suzy Quilts – the baby quilt size is available as a free PDF download, and the other sizes are available for purchase on Suzy’s website.

You’ll need a main colour as well as 8 accent colours, all but one of which can be cut from a fat eighth (one colour requires two, or a fat quarter). Since it’s been 12 years since I chose quilt fabrics, I kept my focus narrow by choosing fabrics with very small prints and similar contrast, leaning towards greens and blues with a few pops of orangey reds. The background colour in the original sample is a solid cream, so I chose a fabric with a very subtle minty airbrushed effect so that it’d have a bit of texture without being distracting.
Cutting and Assembling the HSTs
Following the instructions, I cut 15 squares of background fabric, and 15 from my assortment of accent colours. From these squares, eight HST (Half Square Triangle) blocks can be made at a time – it’s a really interesting and speedy technique!

First, I drew guidelines on my background squares – I used a pilot Frixion pen which is heat erasable so the marks will iron away. Always test before using a new marking tool – sometimes Frixion pen marks can reappear or cause ‘ghost’ marks, but since these guidelines will all be hidden well inside the seam allowances later, it won’t matter.

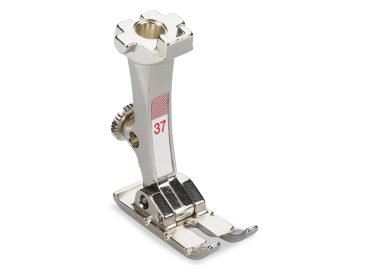
Next, I used the Patchwork Foot #37 on my B 570 to stitch down either side of the diagonal lines, ¼” away from each one. Don’t stitch the vertical and horizontal lines!

The piece should look like this, with two sets of stitch lines in an “X” shape:

Finally – use a ruler and rotary cutter to trim along each guide mark. Each square makes eight perfect HST blocks! The nicest part of this for me is that it’s very easy to keep the bias stabilised as you stitch, so the risk of ending up with wonky blocks is a lot lower!

I repeated these steps for each of the 14 remaining squares, and then pressed each one open, trimmed the excess at the corners, and sorted them into piles of their respective colours.

Assembling the baby quilt top
By this point I was feeling pretty hooked on the process! The HST construction was a bit magical, and I felt like I was on a roll! The quilt comes together in strips, there’s no block assembly beyond the HSTs, so it felt very achievable for me even though it’d been over a decade since my last quilt.
I chose colours that were quite different to the pattern, so I found it helpful to number them 1-8 in the assembly diagram, and then lay out my HST blocks in order so it was easy to remember which was which.

I was quite worried about keeping my strips organised so they wouldn’t end up out of order – I ended up doing this by keeping them stacked in order as I assembled them and then pressed them – I numbered them with my frixion pen after they were pressed, but of course I couldn’t do that pre-pressing since the pen is heat erasable! This is a good system except that I was so darn excited to see the quilt layout as I was sewing the strips, and I couldn’t lay them out next to each other until they were labelled – I tried at first, but I have some very curious kitties who wanted to see up close what I was working on!

Final assembly involved sewing those 17 strips together. I lightened up the presser foot pressure to 55 as I found this helped navigate the bulky seam allowances a bit more easily. Once I figured out the ideal pressure it all came together easily! Speaking of bulky seam allowances, I also found my awl quite handy for holding the intersections together so they lined up perfectly on the front.
It probably would have gone a bit faster if I wasn’t stopping to hold it up and admire it every two rows! Once stitched, I pressed it all flat and immediately had to take it outside for the full effect in natural light! I’m so glad I went for the lightly textured main fabric colour, I think this combined with the quilting will look awesome.

Finishing Touches
As for the accent colours – they look SO different than they did in my little stack! It was fun to go outside my comfort zone and choose some I wouldn’t usually have picked. I think they play nicely together, although I also think I’d probably swap one or two of them out if I were to make this again. Experimenting with a baby quilt works well, as it turns out.
I’m quite enjoying this little foray into the world of quilting so far, and very excited to see how the rest of the project comes together! Stay tuned for part 2, where we make the quilt sandwich and have some fun with quilting!

I haven’t actually decided as of writing whether I’ll try quilting in the hoop with my embroidery module, try out the BERNINA Stitch Regulator for some free motion, or get some of the BERNINA echo quilting rulers and give that a try – all of the options sound like so much fun, I can’t decide! Let me know in the comments what quilting technique you think would be best for this project!
As always, you can catch me on Instagram, TikTok, and YouTube to see what I’m currently sewing!

0 Responses