 BERNINA Corporate Blog -
Happy Holidays! Things are starting to get pretty festive around here – even if the brand of ‘festive’ we get in New Zealand is a hot summer day at the beach and a BBQ Christmas dinner – the gift-giving spirit is still very much a constant!

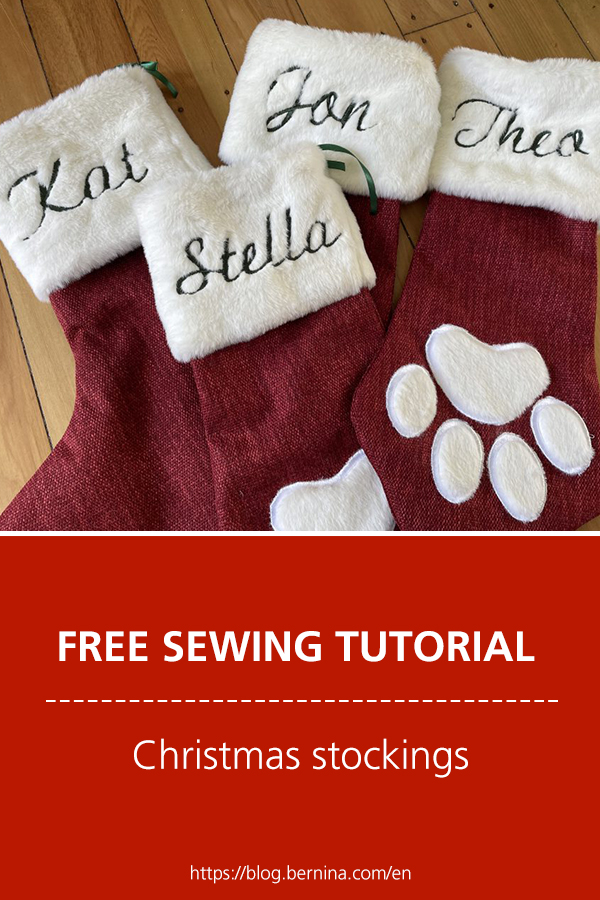
I’ve made a new set of stockings for my little family – there are two cats and two humans in this house, so everyone gets a stocking of their own! Follow along and you’ll be able to make a stocking for each of the pets and people in your life!
Materials (for 2 human and 2 pet stockings)
- 1m Main stocking fabric (I chose a stiff upholstery fabric – you may wish to interface to add structure)
- 1 1/2m lining fabric
- .3 m faux fur for cuffs and paw applique
- Ribbon for hanging loops
- Christmas Stocking Pattern PDF (free download from this page, printed and taped together)
Additional embroidery supplies:
- Embroidery thread for name and paw appliqué
- Tearaway stabiliser
- Water-soluble embroidery topper
- Spray-baste, such as Odif 205
- Duckbill applique scissors
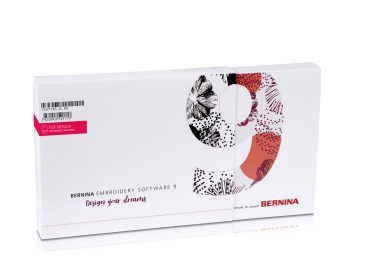
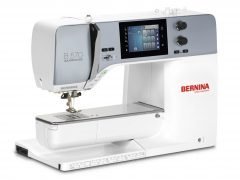
I am using the BERNINA 570 QE (NEW), BERNINA Embroidery Software 9 and the Embroidery Module L (SDT) with the large oval hoop for this project. The paw print embroidery file is 6.75″ by 5.5″ so any embroidery machine and hoop combo that can accomodate that size will work! If you don’t have BERNINA Embroider Software, I recommend trying out the inbuilt fonts on your machine instead!

Prep your supplies first, and print the included Christmas Stocking PDF pattern from this page. 1/2″ seam allowance is included in the pattern, indicated by the dotted lines.
Download the PDF for US Letter paper here

Paw Print Applique
We start by embroidering the paw print appliqué before assembly. I prefer to cut my pattern pieces out first but you could embroider and then cut your stocking piece out after.
To set up, hoop a piece of tearaway stabiliser in the large oval hoop, and use the spray-baste to float one pet-stocking piece in the hoop, aligning it with the markings on the pattern piece.

Download and unzip the ‘paw-print.exp’ file and load the paw-print applique file on to your machine, and use the “Check” function to ensure the placement is correct. Each edge of the paw print should be about 1″ away from the seam edge, or 1.5″ away from the cut edge of the fabric.
If you wish, set your machine to run a basting stitch to secure the stocking in place. I used the yellow high-tension bobbin casing with a 60wt embroidery bobbin thread, and a 40wt white embroidery thread for this appliqué. There are three steps in the embroidery file – each is saved as a separate colour so the machine stops between steps, but you’ll use the same colour for the entire design.

First, the machine stitches out a placement guide – a running stitch in the shape of the paw print. Cut a piece of faux fur large enough to cover the placement guide, and lay it on top of the stitched out paw. Proceed with the second step – this will stitch a zig-zag tack-down line to hold the fur in place.

When the tack-down is finished, remove the hoop from the machine. Use your duckbill applique scissors to trim the excess fabric away from the edges of the tack-down, as close to the edge as possible. Depending on how thick your fur is, this step can be a bit of a mission, but take your time and try to trim away as much as possible so the fur doesn’t peek out of the edges after the final step of stitching.

When you’re happy with the trimming, bring the hoop back to your machine, lay a sheet of water soluble transparent topper over the embroidery (this will keep the fur contained and provide a neater result) – and stitch the final step.

This step consists of an underlayer to help contain the fur, and a final satin stitch run. When the embroidery is complete, tear away the excess topper and run a lint roller over your paw print to capture all the loose fur!
Name Applique
Next, we’ll embroider the names on each stocking cuff. I used Bernina Software 9 Designer Plus to create machine files for each family member, but the Bernina machines come with a range of in-built embroidery fonts as well, so you may choose to lay the names out directly on your machine.

In the software, create a new project and select the “Type and Monograms” tool. Click in to the design and type your name – then double click the name to bring up the settings for your text. Here, you can select a font and make some decisions about the size. I chose “Lisa” for all four of my stockings, and sized each to 45mm tall. Your sizing and font choice may be different – in general, try to keep the width of each name under 15cm so it will fit on the cuff.

When you’re happy with the name, save it as an embroidery file, repeat the process for each name you need, and then import the files to your machine.
Float a cut out cuff piece in the large oval hoop with spray baste, the same as we did for the paw prints, and centre each name on the pattern piece in the hoop.

Before stitching, lay a sheet of the soluble topper on the fur to keep the fur under control so everything looks nice and neat!
Stocking Assembly
We’re almost there! You should now have embroidered cuffs for each member of your family, and paw prints appliqued for each furry friend. The final step is to switch back to sewing mode and construct our stockings.

Stitch each stocking front to the cuff underlayer, an outer cuff, and a lining, in that order. Repeat the process for the backs – a diagram is included below.

Understitch on either side of the faux fur cuff – this will help the fabric of the cuff roll at the top and bottom, disguising the edges for a neater finish.

Starting with the lining, stitch the stocking front assembly to the back assembly, lining up the cuffs, and leaving a 3” gap in the lining to turn your stocking. Flip it right side out, and hand stitch (or edge stitch by machine) to close the hole in the lining.

Tuck the lining inside the cuff, and situate the cuff so it folds down over the main stocking fabric. This step might take a bit of fussing, especially if you used a slippery lining fabric like I did! I chose to take a few tacking stitches to secure my folded cuff in place as well – this may be helpful depending on the type of fabric you chose.
Finally, add the ribbon – cut a 6” piece of ribbon and stitch it down through all stocking layers – you may opt for a hanging loop here, but I prefer the flexibility of being able to tie my stockings to their hooks.

After a final press, your stockings are complete! Mine passed the sniff test from Theo and Stella – this will be Stella’s first Christmas, but Theo knows what his stocking means! He was already hunting for the treats that will soon be inside!

I hope your holidays are filled with joy, and enough time to get all your sewing done too! If you’d like to see what else I’m up to, I’m on Instagram, TikTok, and Youtube, and I’d love for you to come say hi!


the stocking is for my Grandson’s cat
How cute! Thank you for sharing.