 BERNINA Corporate Blog -
Today we are opening door 20 together in this year’s Blog Advent Calendar. With the motto “Embroidery Ideas for the Christmas Season”, I have prepared instructions for embroidering a few Christmas cards “free-motion” just before Christmas. I am not very experienced in free-motion embroidery myself, so it was important to me that this project was easy to do and that it would be a breeze for you too.


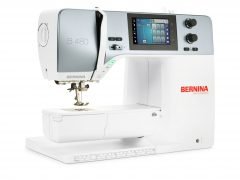
I embroidered and stitched the Christmas cards with the BERNINA 480. This is a mere sewing machine, i.e. this machine cannot be supplemented with an embroidery module. In addition to a thread cutter at the touch of a button, the machine features a larger bobbin thread spool. It is very easy to operate.
My Instagram Profile and my TikTok Page are all about sewing, plotting, upcycling and embroidering. Here you will find articles with tips and tricks for various projects.
The following material is required for the Christmas cards:
- Remnants of felt 3 mm, plain
- Remnants of cotton fabric with Christmas motifs
- SnapPap Paper A4
- Vliesofix (Vlieseline)
- Metallic thread by Mettler
- optional: Darning Foot #9
- optional: Free-motion Embroidery Foot #24

To the instructions – here we go!
Cut the felt to the desired size. In my example, the felt measures 18 x 12.5 cm.

Preparation
For the Christmas balls, I choose a roll of adhesive tape with a diameter of 4 cm as a template. You can also use a pair of compasses to draw the circles on the smooth side of the Vliesofix.

Then iron the Vliesofix with the rough side down on the wrong side of the Christmas fabric. Allow this to cool well.

Then cut out the balls.

Remove the backing paper from the circles.

Place the balls with the wrong side facing down on the right side of your felt. You can arrange the balls however you like. I iron them on slightly offset.

Free-motion embroidering with the Free-motion Embroidery Foot #24
Before we continue with free-motion embroidering, I can recommend you the following tutorial. The individual free-motion feet are shown and explained in detail here:
The feed dog is lowered before free-motion embroidery can begin. This is the only way how the fabric can be moved freely. If it makes free-motion embroidery easier, you can always hoop the fabric in an embroidery hoop. However, it is not quite so easy with 3 mm felt, so I decided not to use a hoop.
Embroider a sample beforehand so that you get the right feel for free-motion embroidery. It is also important that the upper and bobbin threads match in color. I have opted for a metallic thread as the upper thread. For this I reduced the thread tension. I chose a normal white thread as the bobbin thread, as I cannot adjust the thread tension there.
The Christmas balls are now topstitched all around using a narrow zigzag stitch and the Free-Motion Embroidery Foot #24. The foot gives you an excellent view of the needle and the embroidery. Instead of a zigzag stitch, you can also embroider several circles all around with a straight stitch.


Setting for the zigzag stitch for free-motion embroidery of the Christmas balls.
The balls are now embroidered all around.

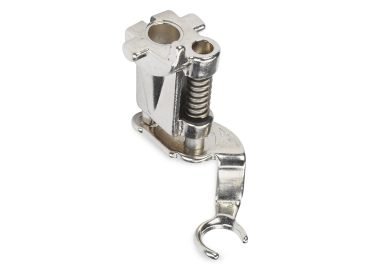
Free-motion embroidering with the Darning Foot #9
The next step is to decorate the balls. You can let your creativity run wild here. It is certainly nice to choose a contrasting color. To highlight the outlines in the Christmas balls, I decided to use the Darning Foot #9 here and moved the Christmas card over the free space with a straight stitch.


Afterwards you can sew up and down the hanger above the balls several times. I also embroidered small rectangles on the ball. So it looks like a real Christmas ball.


Detail view
Your Christmas card is almost done. At this point you can still sew “Merry Christmas”, for example. To do this, I use the Reverse Pattern Foot 1C and raise the feed dog again.

I programmed the order of the letters using the alphabet stitches on my machine. This allows the sewing machine to sew the letters on the felt in the correct order.

Finally, you can sew the finished design onto the Snapap


Detail view
Your free-motion embroidered Christmas card is ready! I hope you enjoyed this super quick project. Wishing you lots of fun making them and giving them as gifts!
Yours, Lisa


0 Responses