 BERNINA Corporate Blog -
Good morning dear readers, I am delighted to present you with the fourth project in this year’s Blog Advent Calendar. The motto of the calendar is “Embroidery ideas for the Christmas season”. In my tutorial today, I will therefore show you how to embroider and sew festive cutlery bags. My bags have two compartments: one for the cutlery, the other for a napkin or a menu card. I have embroidered an adult as well as a children’s version so that everyone can get their money’s worth.

The two embroidery files are available at OESD. Here are the links: Polar Bear and Joy. The polar bear file also includes a snowflake, which I simply deleted beforehand while selecting the colors in the BERNINA Toolbox.

As for the embroidery threads, I opted for the Christmas colors green and red and decided to keep the cutlery bags very simple. The main fabric is a linen-look canvas which is so firm that I only had to reinforce the front pocket with Vlieseline. Depending on which fabric you choose, you may need to use more iron-on stabilizer.
I wanted to save material for the sake of sustainability, so I positioned and embroidered several motifs in one embroidery hoop. I’ll show you how easy it is with both embroidery files later in this post. However, you can of course embroider each design individually.
Material supplies
You need:
- Canvas
- Remnants of cotton fabric for the binding
- Stabilizer Stitch-n-Tear by Vlieseline
- some volume fleece H 630 by Vlieseline
- Used embroidery thread: Poly Sheen by Amann Mettler

How to embroider the cutlery bags
Select the corresponding embroidery file in the folder. I want to embroider the lettering “Joy” twice in the same hoop, so I have to move the file first. This is very easy using the two rotary knobs. Please refer to the pictures to see the exact values.

Then I add the file again, rotate it by 180 degrees and drag it again, this time to the bottom.

To embroider the small pocket, cut a square of 15 cm edge length from the main fabric. If you wish to embroider two of them, simply cut out two squares. Hoop the tear-away stabilizer in the medium hoop and attach the two squares from the center line upwards and downwards with a little spray adhesive.

And now comes an important button that saves even more time: select the icon with the three embroidery threads to reduce color changes.

Afterwards, attach the hoop and embroider a basting outline – not around the individual files, but along the edge of the entire hoop. Now you can get started with the first thread color. Here you can see the reduction of the color changes. After that, add two more colors and then remove the hoop from the machine.

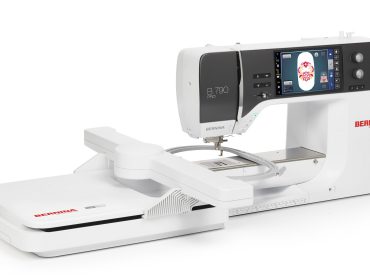
I followed a similar procedure for the children’s version of the cutlery bag, the difference being that I chose the large, oval hoop so that I could embroider the polar bear three times in the same hoop. As you can see here, I have already embroidered it twice. With this quantity, it is not so easy to position the embroidery design in the right place. But even here, the BERNINA 790 PRO provides the perfect solution…

… select the corresponding file, downsize it (here: 70 %) and rotate it as required and then tap the pinpoint placement.

This will take you to the grid point positioning.

Activate the laser and mark on the fabric where you want to place one corner of the embroidery design. Then you can use the dials to move the embroidery hoop exactly where you want it. I really find this function ingenious.

Have the basting outline embroidered around the design and off you go.

When you have embroidered all the colors, remove the hoop from the fixture and cut away the jump stitches and the basting stitches. Then carefully remove the stabilizer from the back and iron the fabrics until they are smooth. Next, iron the volume fleece H 630 onto the wrong side according to the manufacturer’s instructions.

How to finish sewing the cutlery bags
Cutting:
All parts have a width of 15 cm.
- 2x main part, 30 cm
- 2x center pocket, here the side lengths are 20 cm and 10 cm long
- 2x small pocket, here the side lengths are 15 cm and 7.5 cm long
- 2 bias binding 4 x 20 cm from cotton fabric remnants

This is how you can finish sewing the cutlery bag of the Advent calendar.
Place the bias binding around the slanted top edge of the small and the center cutlery pockets and sew it in place close to the edge.

Then align the two pockets with the bottom edge of a main part, as shown here. Place the other main part right side on right side on top..

Sew along all edges, leaving a small opening on one side to turn it inside out. Cut back the corners and the excess ends of the bias tape and turn the cutlery pocket inside out through the opening.

Narrow-topstitch the cutlery bag once all around.

Congratulations, your cutlery bag of the Advent calendar is finished!

Now you can fill it with the appropriate cutlery, a napkin and the menu card.

I wish you lots of fun making them and a blessed Advent season. Now I am eagerly awaiting the next posts in the Advent calendar together with you,
Yours sincerely,
Sara


0 Responses