 BERNINA Corporate Blog -
This time we will take a look a wreaths etc, what we can do with the leaf that is made in lesson 23: we can multiply leaves via Mirror-Merge, making a wreath with kaleidoscope effect. You can use any object, but I want to use my leaf in a wreath, making something for autumn. a
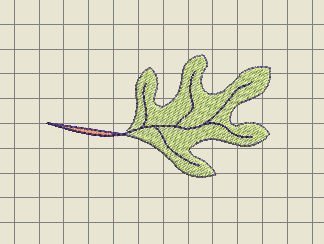
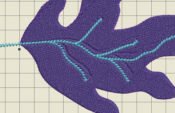
First I will place the leaf of my choice (lesson 23) on my workspace.
I can select it via ‘Select’, or by clicking on boxes in ‘Color Film’, the docker. If all boxes are turning blue at once, that means all objects are grouped. To Ungroup, go to the left toolbar ‘Toolboxes’, and use ‘Ungroup’ with ‘Arrange’ if you want to edit before using the leaf before using Mirror-Merge.
When you are ready, or if the leaf is just fine as it is, group all objects, because you need to be sure they are all included in the exercise. Drag a marquee around the entire leaf, and check if all boxes in ‘Color Film’ turned blue: your leaf is selected as a group.
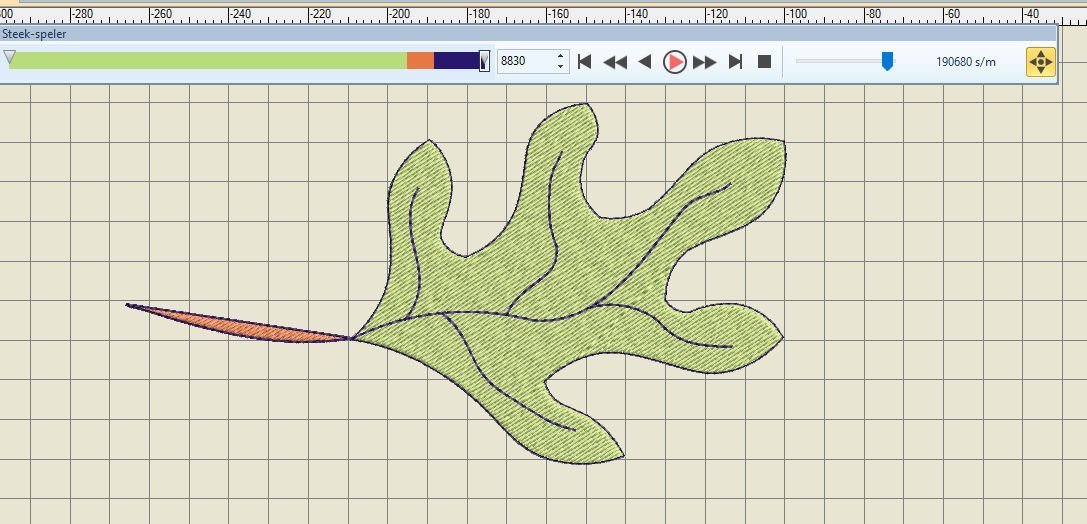
Because of the size of the original leaf, I will have to reduce it. At this time my leaf has a width of 16,6cm and a height of 9,1 cm, with a total of 8.830 stitches. Should I make a wreath with multiple leaves, the embroidery would be very large (and not fit in one hoop = Multi-Hooping, which will be explained in the next three lessons). For this exercise I need a smaller leaf, also because it will take less time to embroider, and less thread. I have reduced it to width 9.0 cm and height aprox. 5.0 cm. Stitch count is now 3.317. I have to say that details are reduced too: with larger objects, more details are showing, with smaller everything is more compact.

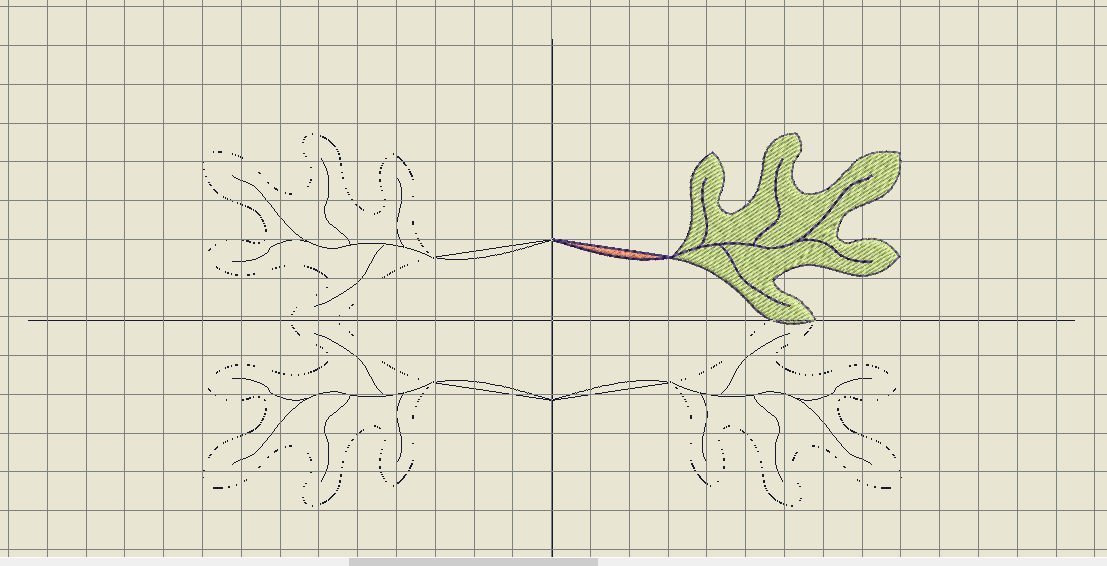
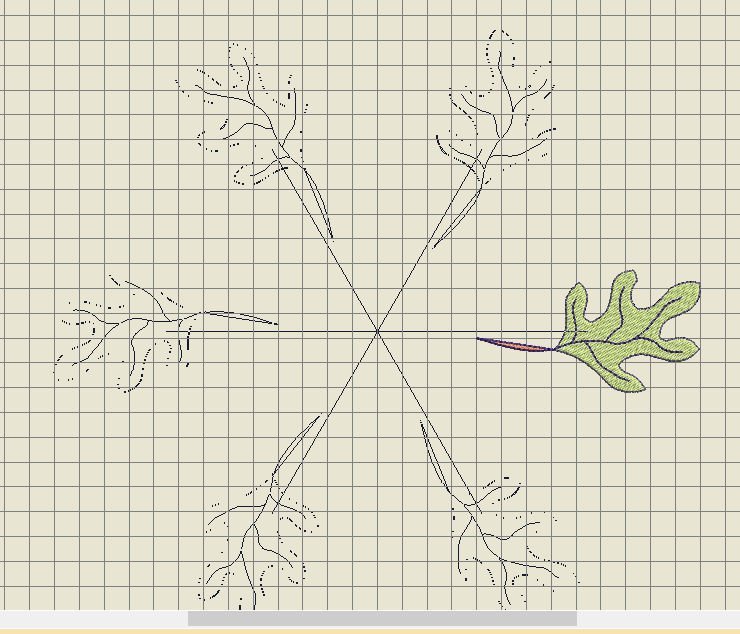
I have centered the leaf on my workspace: Working with a grid and guides, you can center your design, by selecting it and dragging it to a new position – while dragging, a cross-hair and line-drawing of your objects appear, until you release the mouse button to place it where you want to. I always center my objects on the grid, on the 0-0 cross section of the grid. Not the center of the design, but the end of the stalk was placed on the 0-0 cross section of the grid, because that’s what I like when making wreaths = my pivot point for rotating and mirroring should be centered.
If you have trouble positioning the end of the stalk, fine tuning it, use the arrows on your keyboard (up, down, left, right), with the design selected. Enlarge your design for better vision.
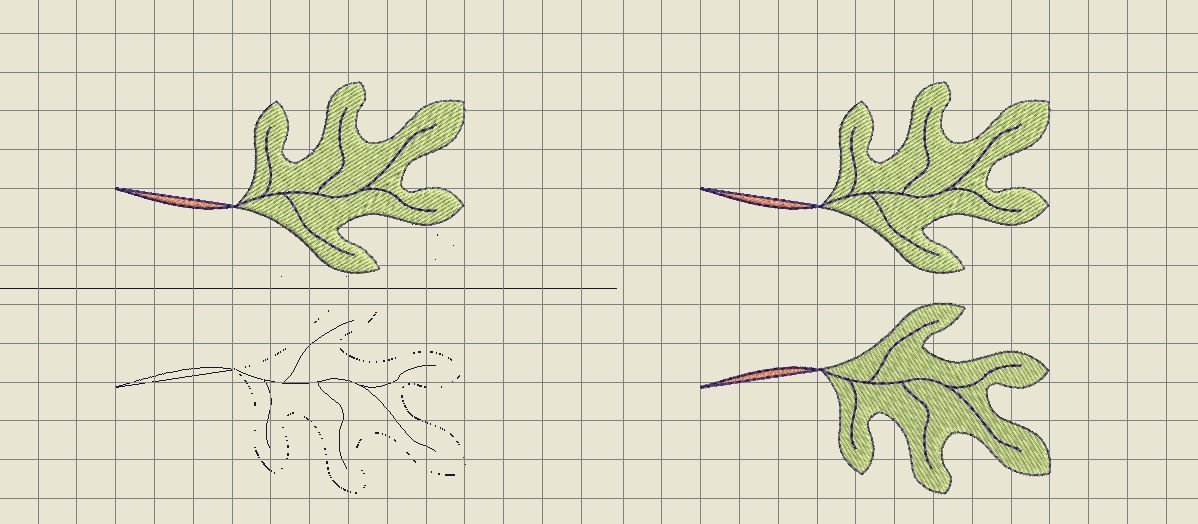
The first I want to try with ‘Mirror-Merge’ (left toolbar Toolboxes) is Mirror-Merge Horizontal. Duplicating, mirror horizontally and remove overlaps. The (grouped) leaf is selected.
Mirror-Merge Horizontal.
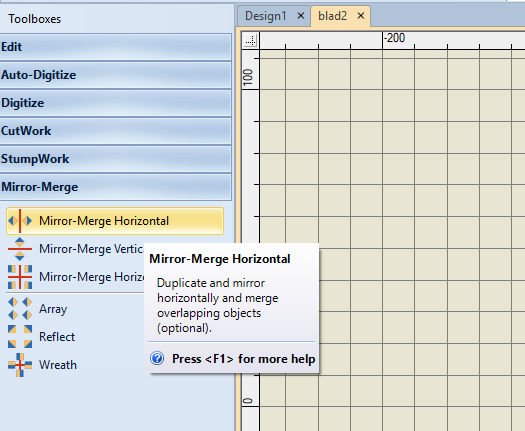
After selecting the design, the option ‘Mirror-Merge Horizontal’ is activated (as are the other options).

After clicking on this first option, a reference line can be used to position the mirrored objects. You will see a line drawing of the leaf = second leaf, which can be moved to the required position. You will find it to the left or right of the original leaf, depending where the position of the cursor of the mouse is.

Move the cursor of the mouse to the position of your choice = where both stalk ends meet, and click to set. The second leaf is placed to the left of the first with this exercise. The stalk ends (almost) meet in the middle.
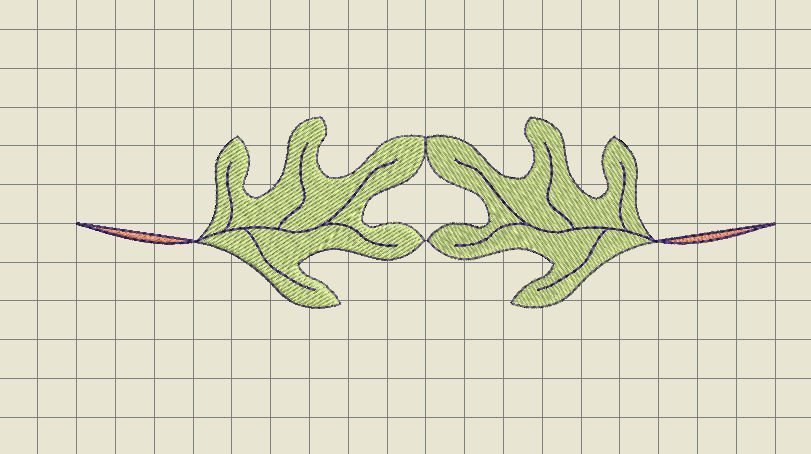
But you can also choose to place the mirror image of the leaf on the other side: leaves meeting, not the stalks. Because the first leaf was grouped, the second leaf is also grouped.
If you are placing the leaves on top of each other, some parts of the underlying objects are not visible, and therefore should not be embroidered, because this will give bulk and unnecessary use of thread.

Depending on your version of V8 (before or after the update), you can be prompted to merge objects. Choose yes, and check the Color Film docker to see if this is actually done. You won’t see the leaf twice as a group, but as one group, each color merged.
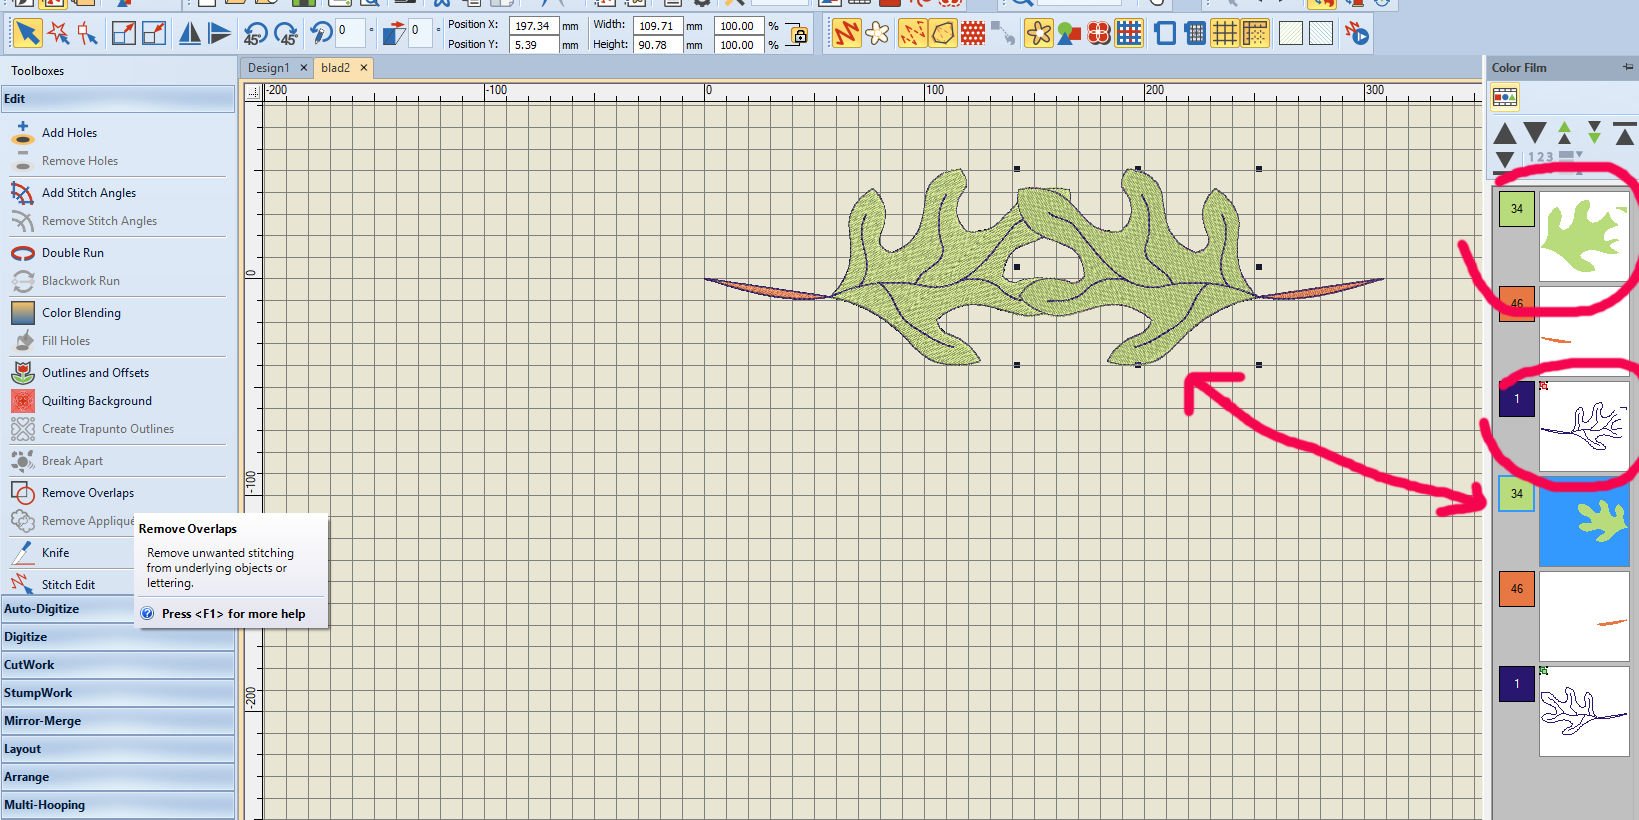
When placing leaves on top of each other, my V8 didn’t give me this option, so I’ve ungrouped both leaves, then selected the top leaf, and used ‘Remove Overlaps’ to reduce stitch count and bulk. Both the fill stitches of the underlying leaf and the outlines/veins are adjusted at once.
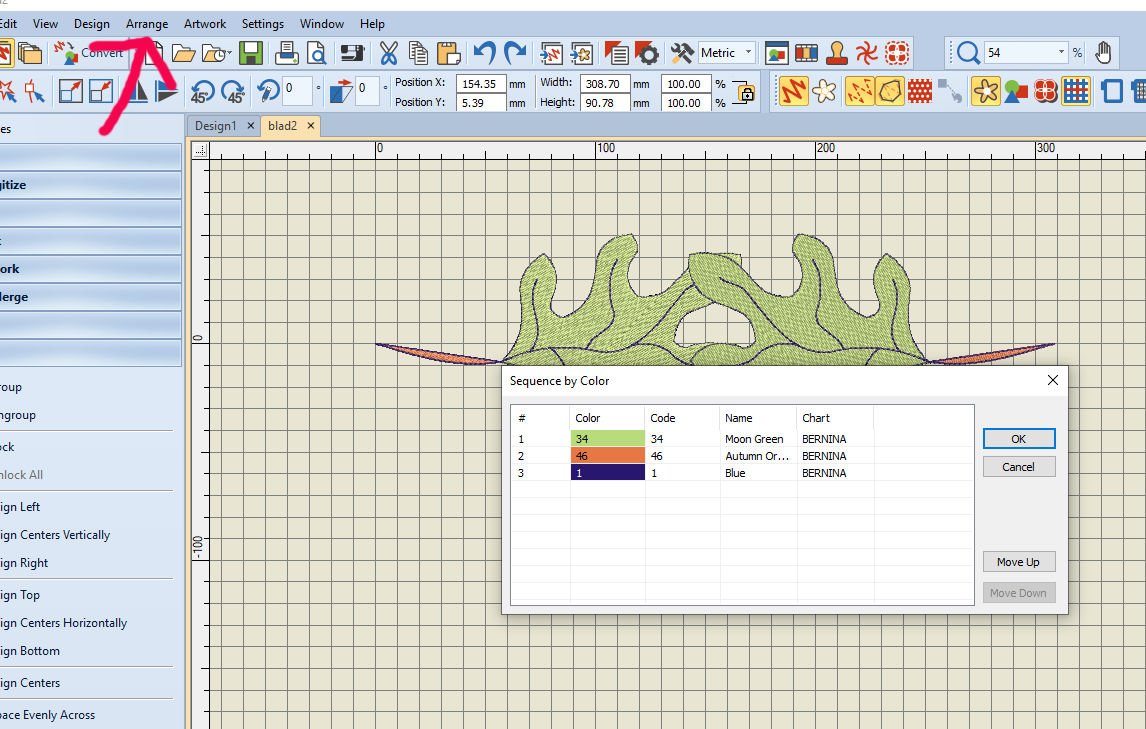
Then I’ve ungrouped it all, being sure every object = 6, can be adjusted separately. Selected the entire design, and via ‘Arrange’, Menu bar, I’ve used ‘Sequence’, and ‘by Color’ to group the color changes, then used ‘OK’ to set. Now both green fill stitches are made first, both orange stalks second and all outlines stitches and veins third.
Mirror-Merge Vertical.
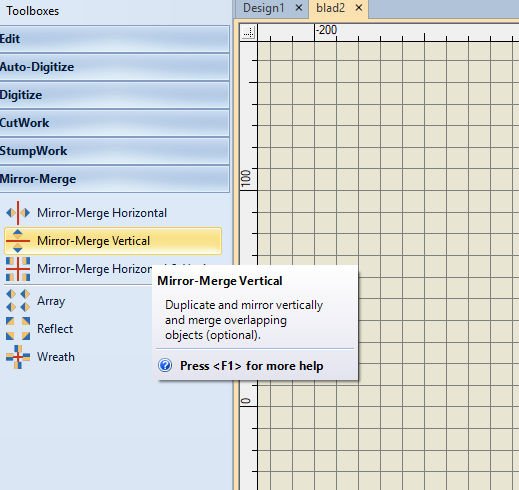
Duplicate and mirror vertically and merge overlapping objects (optional).
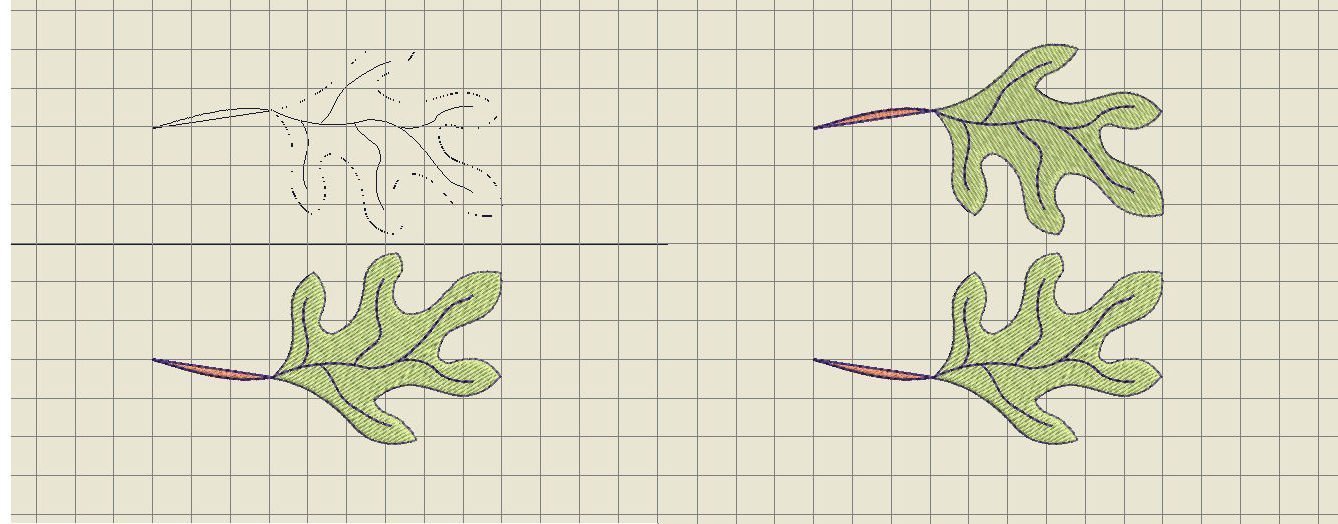
Again, choose to place the second object = mirror leaf above the original once,
or underneath. The reference line will guide you while finding the right spot.
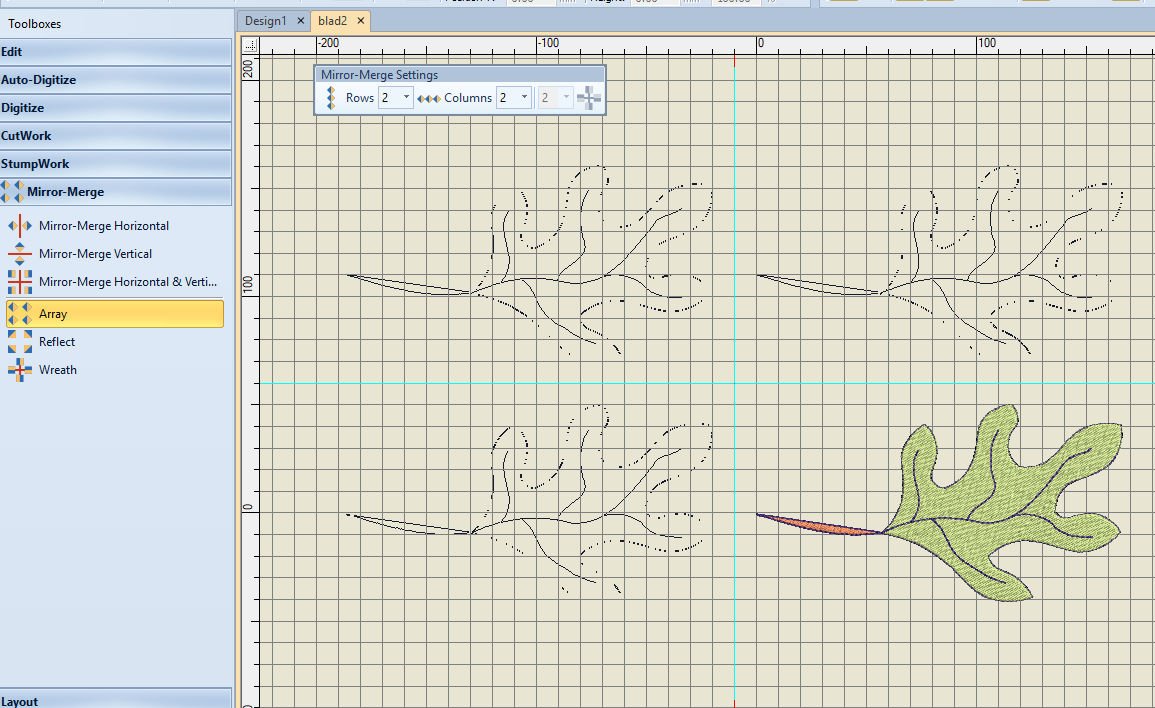
Mirror-Merge Horizontal & Vertical.
 Duplicate and mirror selected objects around a center point.
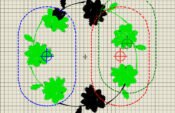
Using this option, both horizontal and vertical mirror images appear on your workspace, so after clicking to set, four images are places = the original plus 3 extra. You can place them somewhere along the horizontal line = move the reference line up until you will have four separate leaves, or place it more to the center of the 0-0 cross hair, to place them on top of each other. Either the vertical or horizontal reference lines can be aligned or just one.
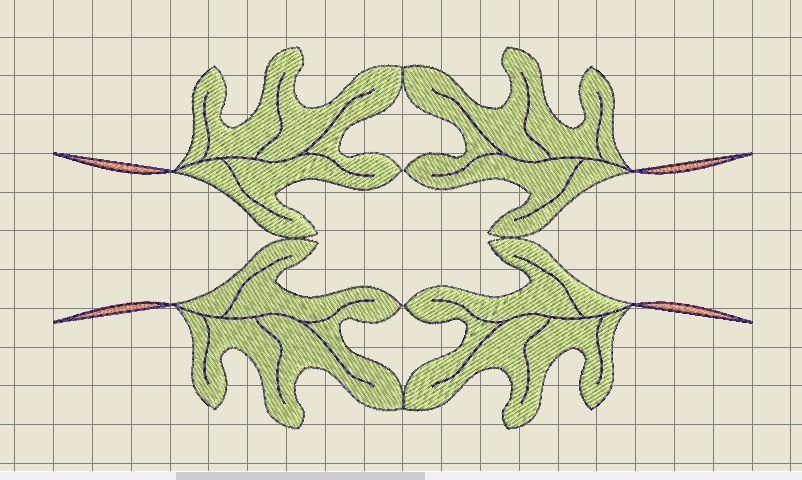
The picture above shows that I have placed the new objects to the right of the original leaf.
And here you can see I have placed them more apart. It all depends on the desired outcome.
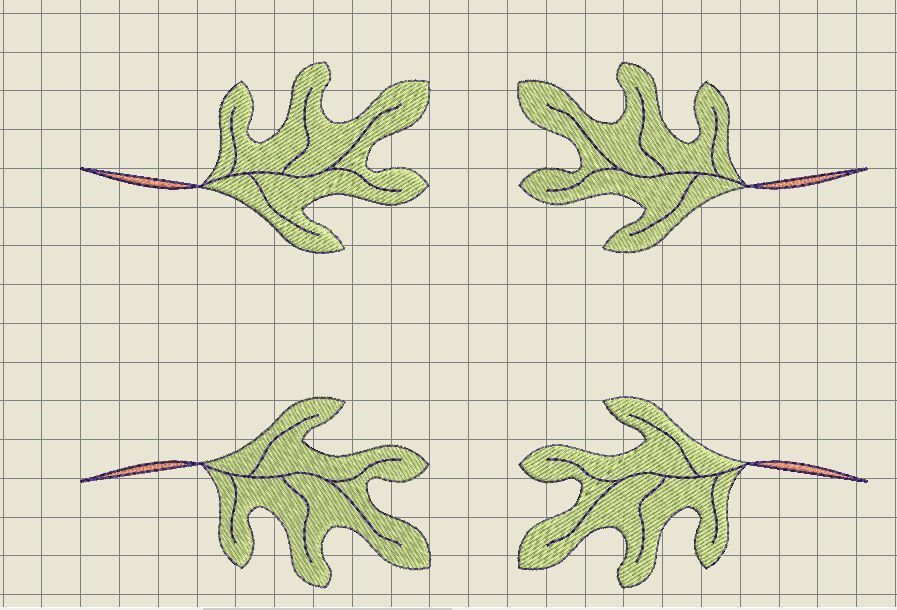
Array.
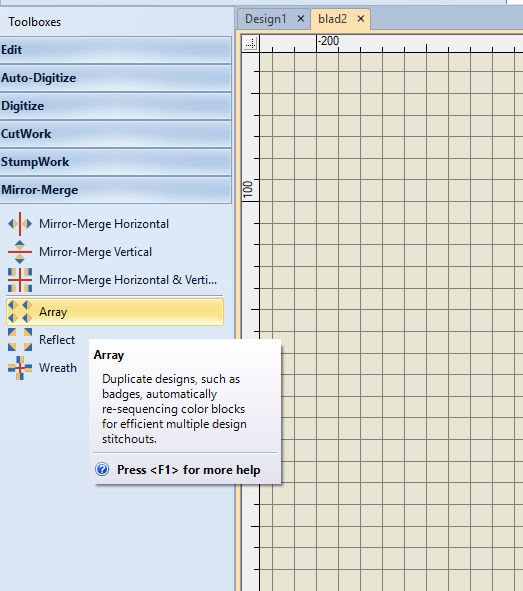
Duplicate designs, such as badges, automatically re-sequencing color blocks for efficient multiple design stitchouts.
This is convenient if you want to embroidery multiple designs at once. When ‘Array’ is selected, a small box appears: Mirror-Merge Settings’, which allows you to choose the number of rows and columns. You can choose a large number of rows and columns, to fit in the largest embroidery hoop.

The more rows and columns you choose, the longer it takes to place the designs on your workspace. The largest number of rows is 50, and the largest number of columns is also 50: this will require the utmost of V8 and will take a long time to place them all: it will be testing the abilities of V8 to the extreme.
Of course that’s not doable for actual embroidery, but for exercise purposes only: it is good to know sometimes, how far you can stretch an option. The picture above shows 16 rows and 16 columns: even that took over 2 minutes to place. 50 Rows and 50 columns will take much more time, and is almost impossible to choose (with the current size of my leaf, it will give me over 2.000.000 stitches!), when your objects are large. Making them very small will, you can choose this extreme option, but you will have to wait a very long time for it. It is even possible V8 will crash, having to restart this software.
While waiting for V8 to place all objects, the message ‘Building copies/reflections’ is shown at the bottom of my screen, with a progress bar to show…. progress, even how slow it went. So check this message, and wait for it: don’t change anything, until all is placed.
Reflect.

Duplicate and mirror objects or designs. Use to create decorative borders.

Again, you can choose to place multiple duplicates of the leaf to the left or to the right. I have set the rows to ‘3’, and the columns too. Here you can also set the rows and columns up to 50, but with this option, ask yourself if it is doable.
Wreath.
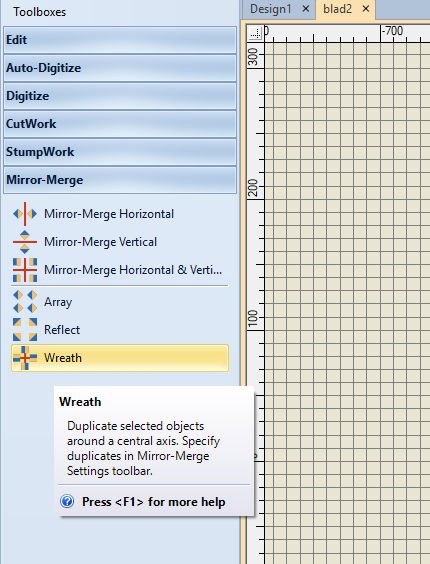
Duplicate selected objects around a central axis. Specify duplicates in Mirror-Merge Settings Toolbar.
Now this is a feature in V8 I am often using: I have designed many wreaths, because I like the possibilities. Adding different objects to make it more interesting, after creating the wreath.

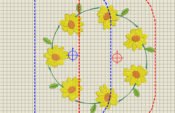
Via ‘Mirror-Merge Settings’ you can choose the number of copies (rows and columns are grayed-out, but the box with ‘2’ is a pull-down menu, using the down arrow to choose the number of copies of the leaf you want to have in your wreath.
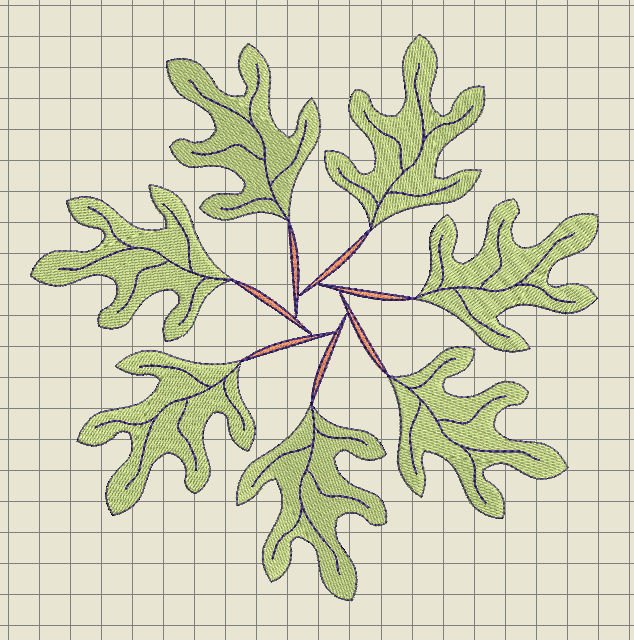
To make a wreath, choose the number of copies, and move the wreath that is formed to the right spot on your workspace. You can make the stalks meet in the center, or leaving some space there. I have off-centered them a bit, having the stalks touch each other, giving the wreath some ‘movement’. It will be your own choice how you place it all.
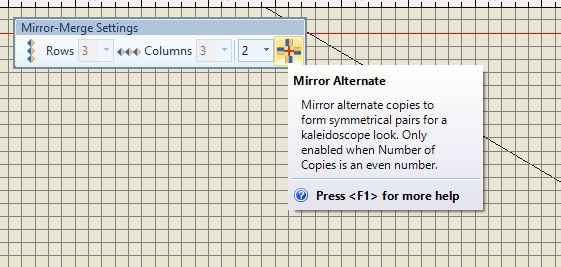
You can also click the icon: mirror alternates copies to form symmetrical pairs for a kaleidoscope look. Only enabled when Number of Copies is an even number.
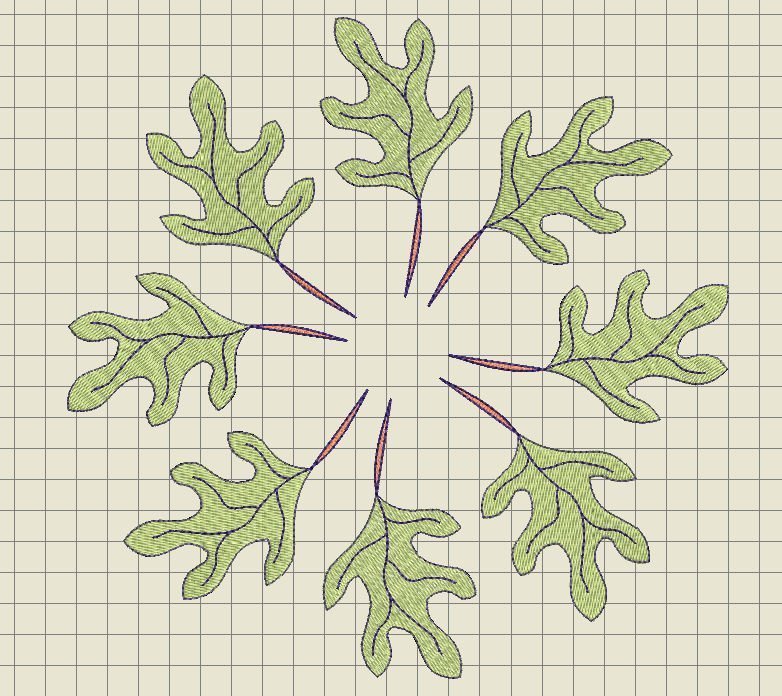
Choosing for a even number of leaves (8), gives me the opportunity to activate the mentioned icon. Every other leaf is placed the other way…
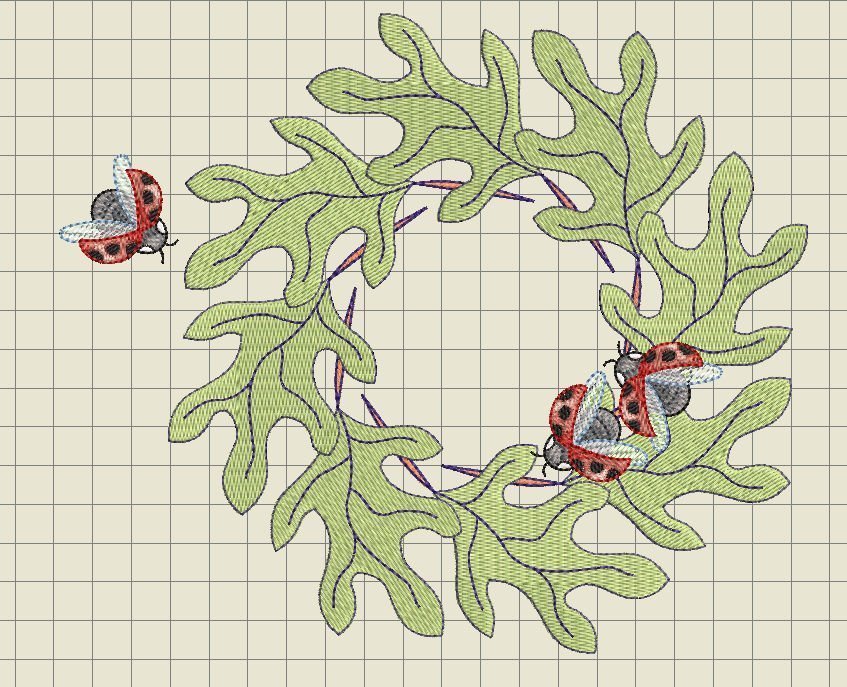
You can also use another object in the center, to place the wreath around that. I have added a bee as center object, placing the center of the wreath at the center of the bee…

and placed the wreath. Or…
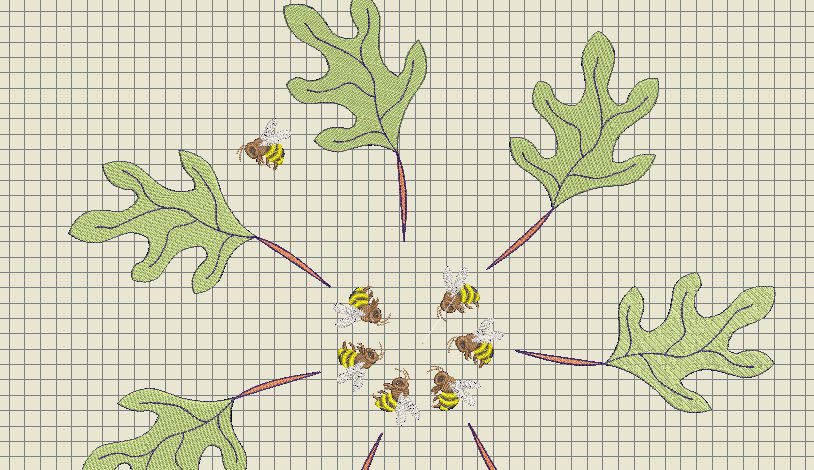
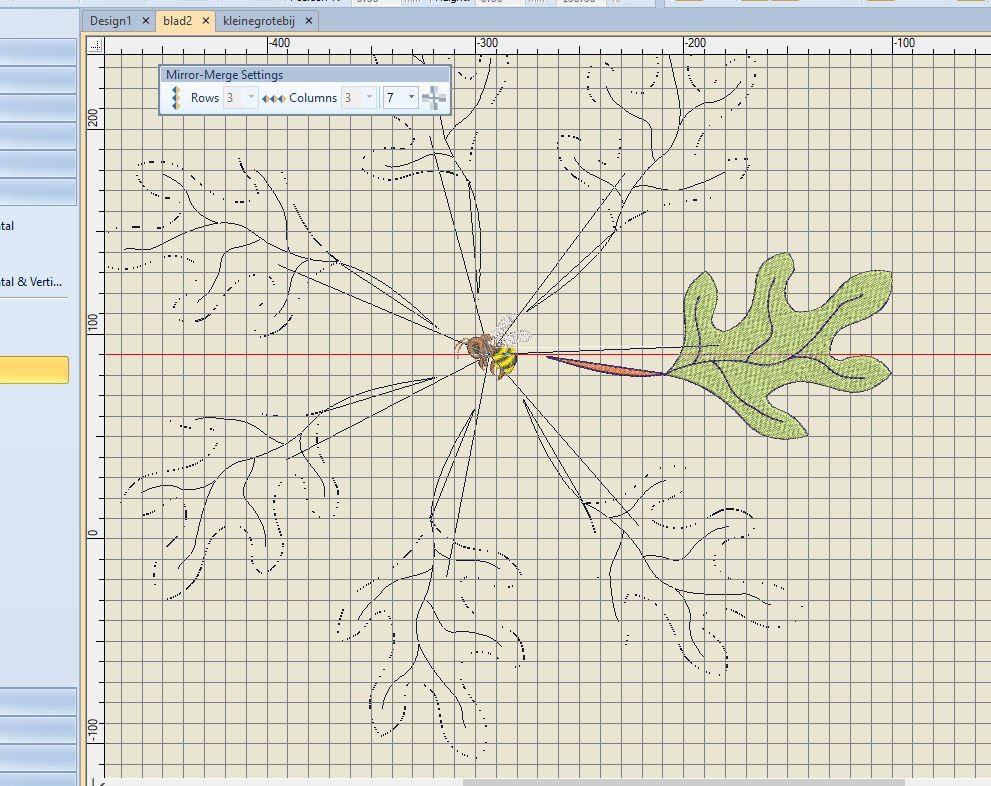
selecting both bee and leaf, and making the wreath with 7 copies = combining objects. Then – just for fun – I’ve selected one bee via ‘Polygon Select’, and moved it away from the center, as if just that single bee was flying away… Sometimes I cannot stop making different wreaths…
TIP: you can set your lines at a 45° angle, while holding the CTRL key, before clicking on the workspace. I have placed 6 leaves this way.
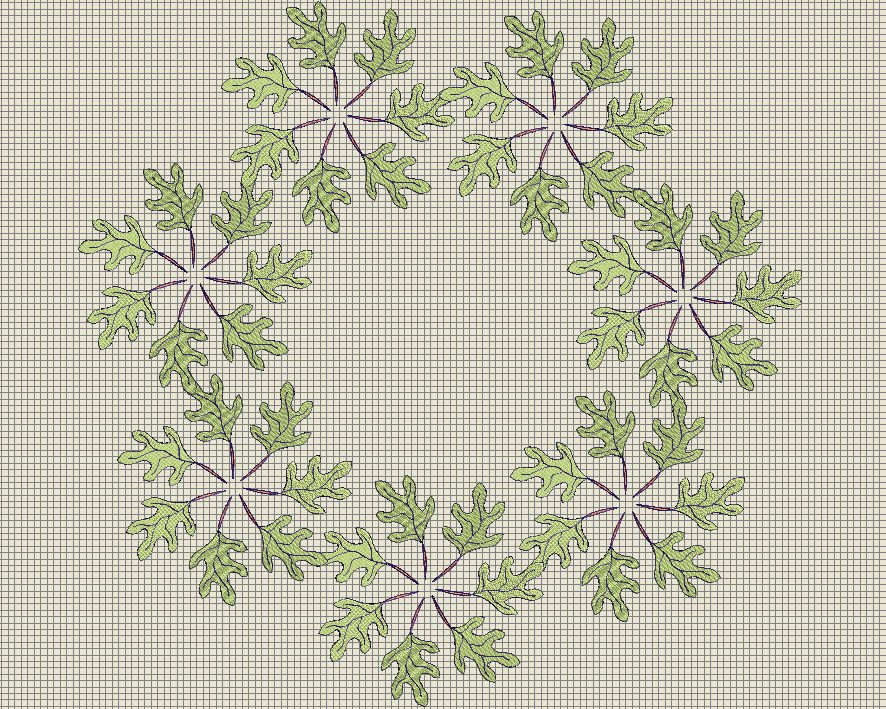
I have even made a wreath and used this option again, to make 7 wreaths out of one wreath with 7 leaves: again, just for exercise purposes, but this is fun! Making this entire design with 434.337 stitches impossible to embroidery at once, but will have to use Multi-Hooping to do so. Can you see how wonderful this will be with a tablecloth?
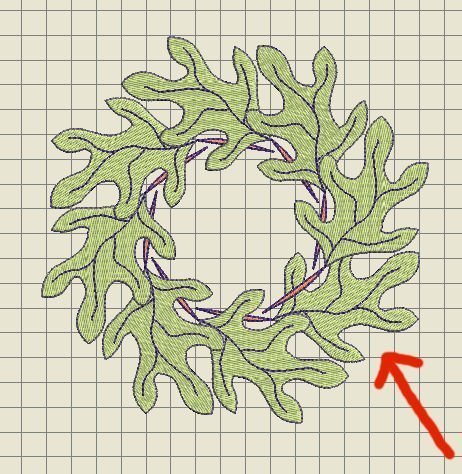
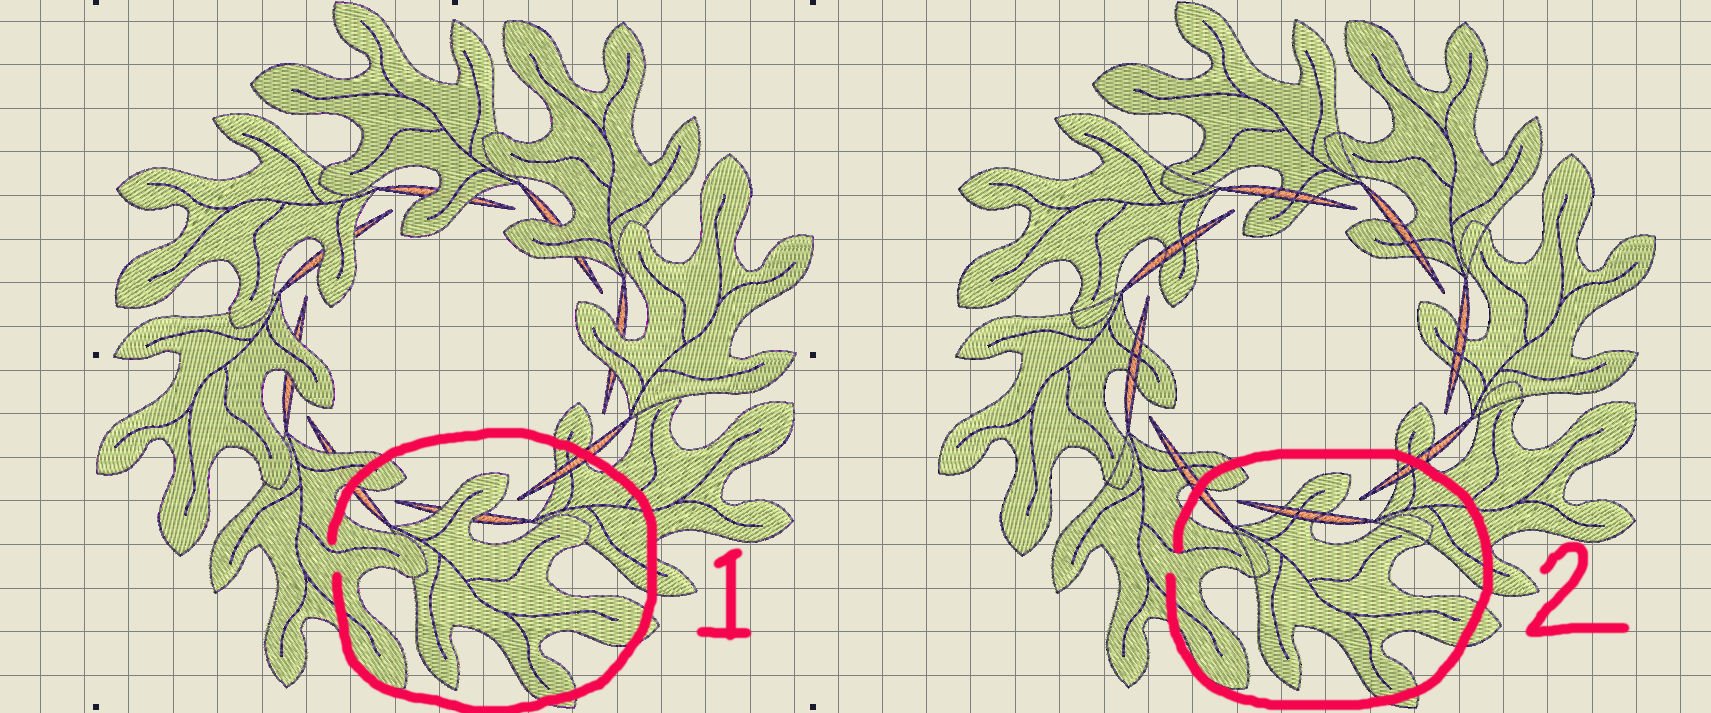
In the end, I have made a wreath of 8 leaves, overlapping the objects. The thing was, that one leaf didn’t overlap the other (arrow), and it is essential to imbricate all objects to create a continuous design: you will find the SOLUTION: at the bottom of this post, but a creative solution is placing some different objects over these points: to do so, I have opened FQ636_48.ART80 via the BERNINA Embroidery Library: they are placed under a different Tab.
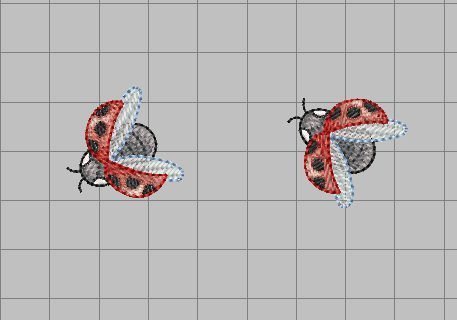
I have copied and pasted this Lady Bug to create two, rotated the second one 45° to the left, and another 20° to the left, to change the appearance.
Copied them per piece, pasted them onto the wreath, where the ‘ugly’ transition was showing, and placed another Lady Bug outside the wreath. Isn’t this a great solution? Remove overlapping stitches after editing. Stitch count at this time: 39.920, measurements 19,2×16,4cm, so it will fit in the Jumbo Hoop.
Solution for a continuous wreath.
Using the same option as with merging the leaves when overlapping, this will give you the right appearance: the pictures below will show the ‘before’ and ‘after’ wreath:
- Select the wreath
- Go to the Menu Bar
- Click ‘Arrange’
- ‘Click ‘Sequence’
- Click ‘By Color’
- With the dialog box opened, you will see all used colors in the correct order, adjusted via V8. Click ‘OK’
- And there it is: a smooth, beautiful wreath.
Next time I will start a 3-part lesson about Multi-Hooping, by popular demand (originally these would be Lesson 121, 122 and 123, but the demand was so great, I’ve decided to advance this subject.
See you then!
Happy Stitching
Sylvia Kaptein
Sylvia’s Art Quilts Studio
www.sylviasartquilts.nl
[email protected]

Thank You for all the lessons you have posted. Will there be any lesson on digitizing with the Bernina software so I can print them out.Margaret
Dear Margaret,
What exactly are you looking for regarding digitizing printing? If you want to print out your design and its information, I suggest you watch the following video:
Master BERNINA Embroidery Software 8 – Printed Templates
If that is not what you were looking for, maybe you can find a different video on the Youtube channel? Or explain your question further 🙂
Kind regards, Ramona from BERNINA International