 BERNINA Corporate Blog -
Sewing fascinates and inspires, it is the most beautiful hobby in the world. Starting off with sewing is not difficult and doesn’t require much. With this post, I am delighted to present the first part of the “Learning to Sew for Beginners” series, right here on the BERNINA Blog. In the ten articles in this series, we will show you everything you need to know when starting your new hobby. From A as in Anchoring stitches to Z as in Zigzag. First things first! You need some basic sewing equipment for your first sewing project and I will show you which ones are neccessary. 🙂
You have taken the first step – you have a sewing machine. Hopefully from BERNINA ;). If you still need a machine, I recommend the Sewing Machine Search on the BERNINA website: BERNINA Machine Search. As an entry-level machine, you may also consider a model from the bernette range.
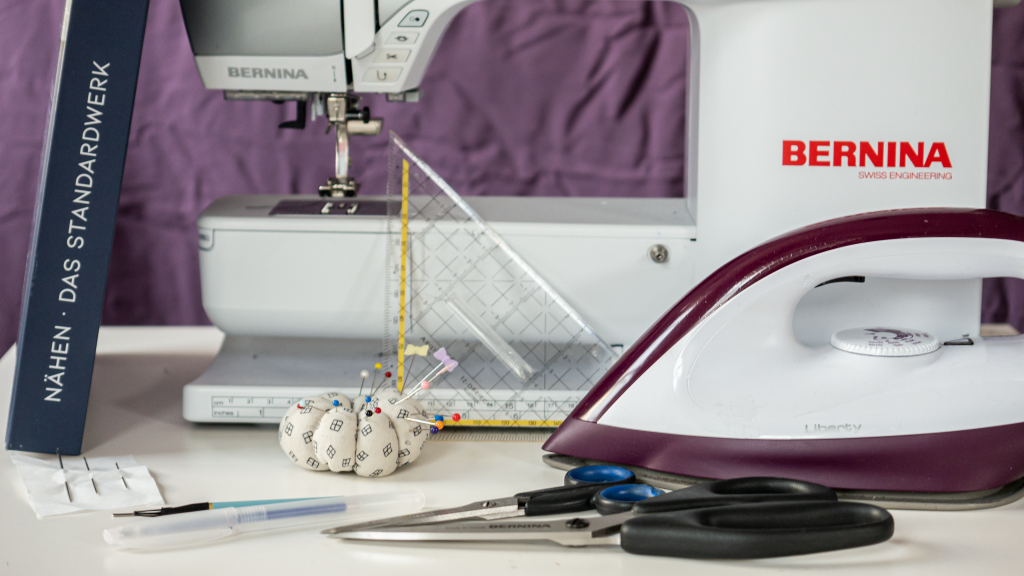
Today, we are looking at what else is needed besides the sewing machine. I will introduce you to seven things that, for me, form part of the basic sewing equipment.
There are so many sewing accessories, so many scissors and plastic pieces! But which of these are really necessary for starting your first sewing project? In my experience, it doesn’t require much at all. In the 15 years that I have been sewing, I have often bought and used a wide range of sewing accessories, but have also found that there are some things you don’t actually need. That’s why, today, I would like to introduce you to seven things that I can’t do without when sewing.
Basic Sewing Equipment: Good fabric scissors
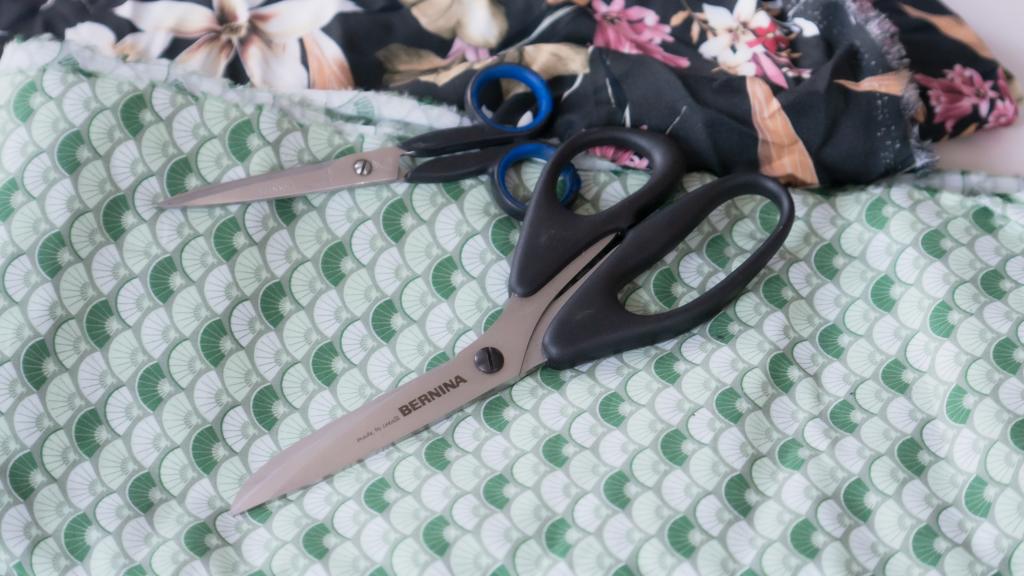
To sew something, you first need fabric and it has to be cut out.
The most important tool in the sewing room is therefore a good, sharp pair of fabric scissors. Yes, FABRIC scissors. With these, nothing other than fabric should be cut and, above all, no paper or cardboard. This quickly makes the scissors blunt and jagged. With blunt scissors, you cannot cut cleanly and, in the worst case, you will ruin your fabric.
In addition to the slightly higher weight compared to simple craft scissors, high-quality fabric scissors can be identified by the fact that the two parts are connected with a screw. The fabric scissors must be sharpened regularly and this can only be done by opening the screw and removing the two pieces. Simple craft scissors are often riveted together in the middle, so the parts of the scissors can no longer be separated and screwed together again.
Tailors’ scissors are available in different sizes and shapes. For starting out, I recommend a medium size, which feels good in your hand and is pointed at the front.
An iron
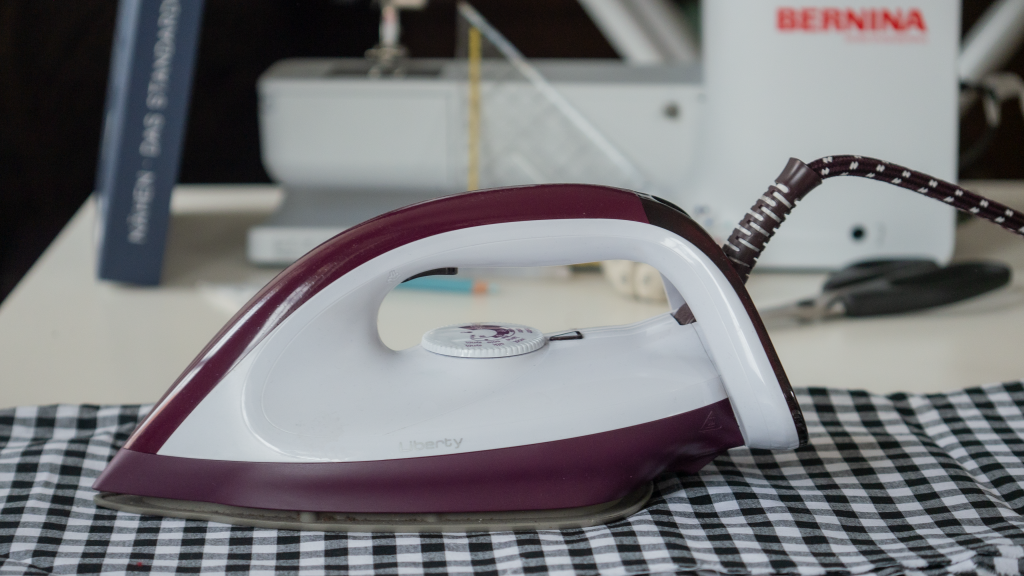
“Well ironed is half sewn,” states my great-grandmother, a master tailor. And that’s how it is. Far too many amateur sewers hate ironing and underestimate its significance. Whether seam allowances have to be ironed open, or a hem has to be smoothed – nothing can be achieved in sewing without a good iron. And with the iron, it is even easy to “iron out” small sewing errors.
It does not have to be an expensive steam system iron. However, the iron should have different settings for different materials, and, at least when sewing clothing, a steam function is also very useful.
Chalk pen or fabric marker
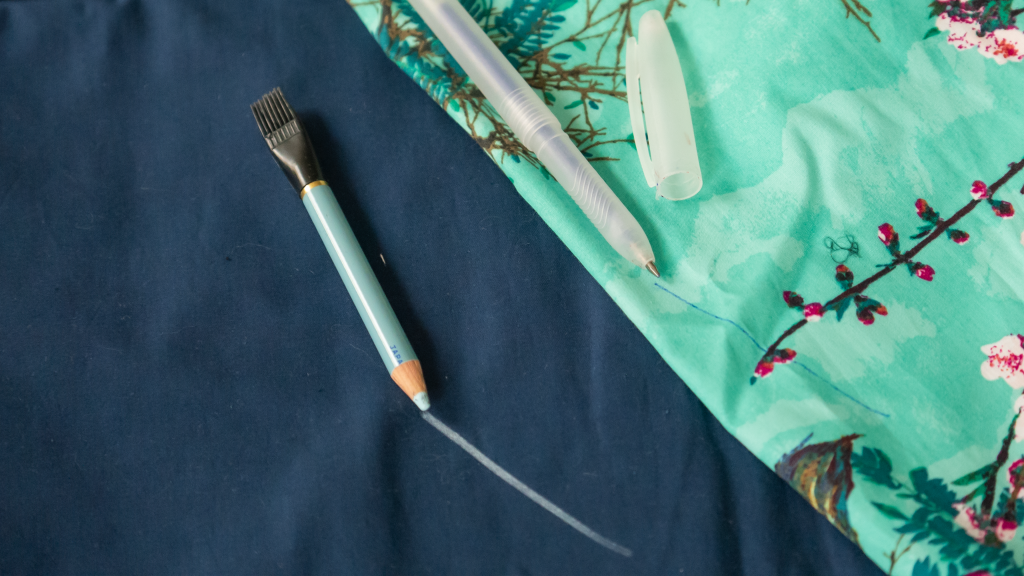
So that you also know where to cut with the new scissors, you must first draw the cutting line. You will need a fabric marker for this. I recommend a simple chalk pen and a fabric marker that disappears again when ironing. The chalk pen is practical for drawing the pattern onto the fabric. The marker is required if you want to make a mark on the outside of the fabric that must later disappear. Test the marker on some scraps of your original fabric first to make sure it completely disappears.
Pins
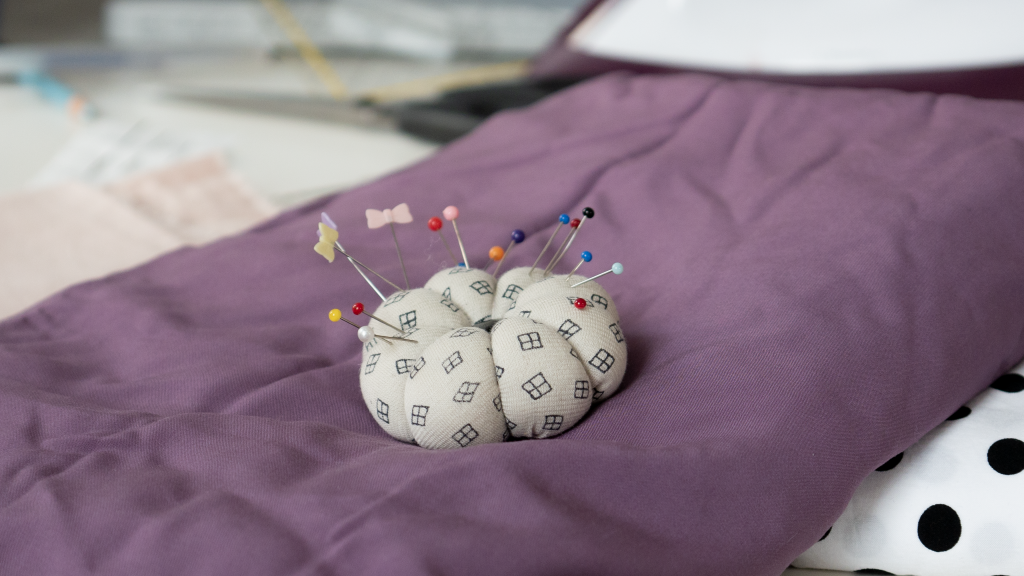
To ensure that the fabric does not slip apart before sewing, it must be pinned. This requires a set of good pins, preferably new! Why new? As with all needles, pins become blunt over time. Then they don’t go smoothly through the fabric and, in the worst case, leave running stitches or holes. Pins are available in an infinite number of colors, with bows, hearts, or simply clear. It is important that they are as fine as possible, i.e. thin and have a plastic or glass head. This means that the fabric stays in place later when sewing and you can clearly see where they are!
Clear ruler
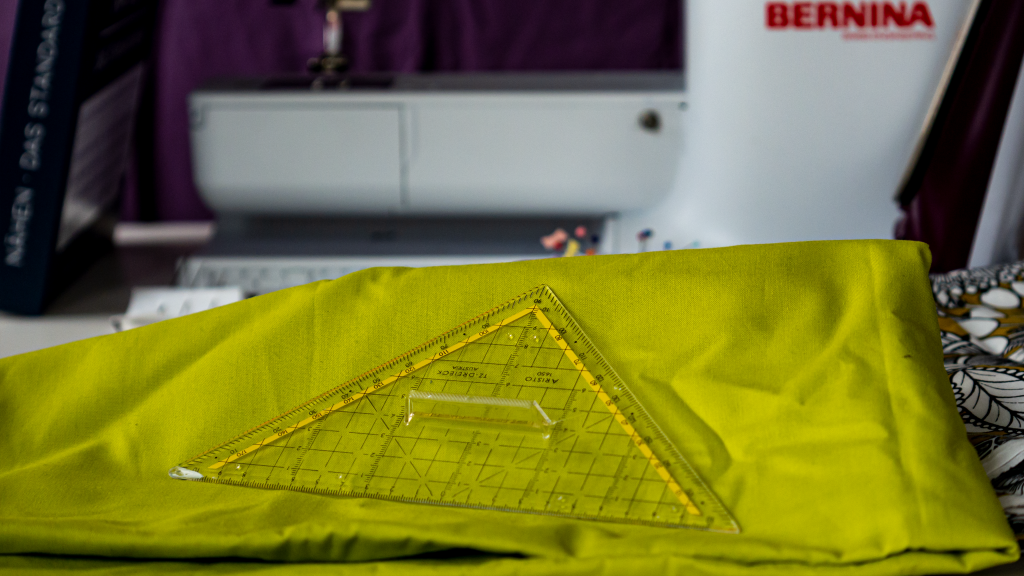
Had I already known about this useful sewing aid when I learned how to sew, it would have saved me so much time and effort! In fact, I only discovered the transparent triangle four years ago in a sewing class with a master tailor, and since then I have never sewn without it. Forget about having to measure the width of edges every 3 cm, or self-made templates.
The ruler helps you to draw markings of all kinds on the fabric. Since it is transparent, you can simply place the desired width – e.g. 1.5 cm for a seam allowance – directly on the fabric and draw a perfectly straight line. Due to its handy size and shape, it can be used for all sewing projects, from a bag to an evening dress.
A set of hand sewing needles
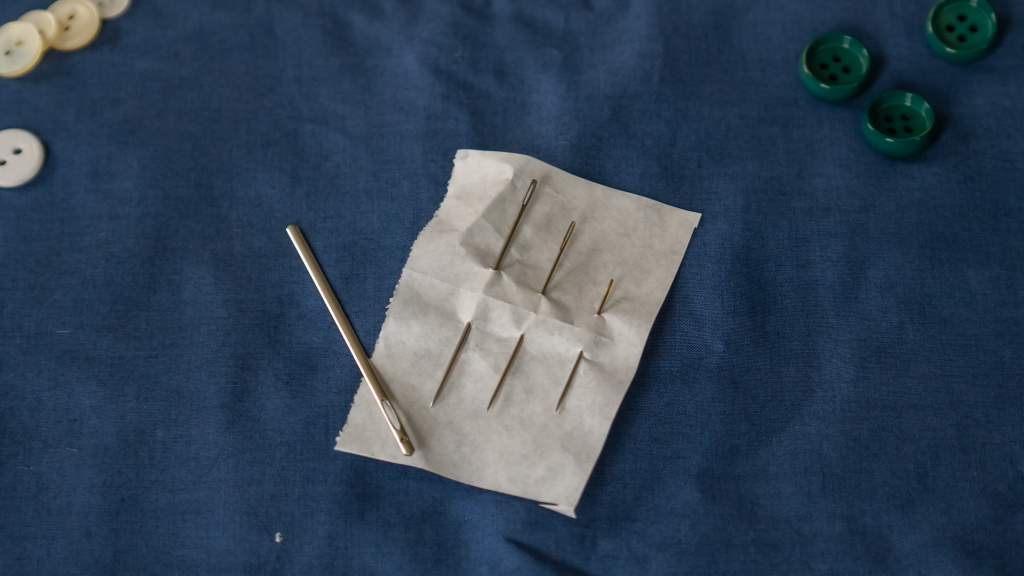
Naturally, we all prefer to sew with the machine rather than by hand. But you simply can’t avoid a few hand stitches now and then. Threads must always be sewn, buttons sewn on or opening turns closed. For this, you will need a set of hand sewing needles, preferably three or four in different sizes. This way, you are ready for every fabric. The different types of needles available and which you should own for your sewing machine will be explained by Stefanie the day after tomorrow, in her post regarding sewing needles and sewing threads.
You have all you need – the sewing adventure can start!
If you have this basic sewing equipment in your sewing box, along with fabric and thread, you can make a start! You can finally sew something! But how? Simply run the fabric under the machine and press the foot pedal? Or maybe you prefer to sew on a button first? Tomorrow, Janine will tell you about the most important basics, in her post about basic sewing techniques.
In conclusion, I can tell you this: learning to sew is well worth it! And even if you have been sewing for a while, there are always new things to learn and discover. After so many years, every sewing project always takes me a little further along the path to the perfect hand-made wardrobe.
For me, sewing is a journey in which I constantly discover new styles and ideas.
To do something with my hands, to feel the fabric and thread under my fingers and to hear the whir of the sewing machine brings me back to reality after any stressful day. To feel how ideas become a reality, to turn dreams from fabric into fashion, bags or home accessories, and to be my own designer, makes it the most beautiful hobby in the world, in my humble opinion.
To this end, I hope you have lots of fun sewing and learning to sew with the basic sewing equipment!
Thank you to all the contributors of this series of tutorials.
I have been teaching adult sewing at our local community college for over 20 years. We use Bernina 1008’s which I purchased at the beginning part of the 21st century. LOL. They have taken a beating, but most are still in working order. Every time one gets a hiccup I cringe – they cannot be replaced as a beginning sewing machine. I use some very old education flyers that Bernina put out many years ago. They are one-sheet info sheets on, threads, tension, needles, etc., and they are great! I have not been able to find them on any Bernina sight and wonder if you have ever replaced them. If you ever need a place to donate beginning sewing machines to – our adult program would love them.Bernina girl since 1976.Mary Ann Evanoff
Dear Mary Ann,
The education flyers sound lovely! I do not know what happened to them or if they ever were updated, but what I can say is, that Bernina of America has put together Mastery Workbooks for sewing, overlocking, embroidery and Longarm machines. You can find them here: BoA Mastery Workbooks
They are worth looking into!
Kind regards, Ramona
Hi, I visited your site. I can read your blog. Very useful information for basic sewing equipment. I like.
Hi this is fantastic opportunity to share my experience of sewing about 35 years . I think first thing to know about your machine should be neat and clean and always cover with dust cover when it is not in use. Having some knowledge about machine threading properly and accurately would be helpful. For beginners, work on small projects. Just like make some simple placemats using straight stitches and want to learn more try decorative stitches. I think all accessories should keep in a sewing box like scissors, chalk, ruler , thread and needles . When you decide to start your project always fabric cutting is first step. If you have any leftover fabric or a scarf which or not used anymore. Select it and press it . Make sure use a tabletop or any surface which you can use for pressing and cutting. Now first check your fabric lengths and width. And decide measurements of placemat. Suppos you choose 12”/17” . So first mark on paper both measurements and cut the paper this is your template now place this template on your fabric and with the help of ruler mark it and cut it . Fill machine bobbin and put it in machine properly and then thread the machine properly. This is very important. Now check the presser foot and now you are ready for sewing.
Dear Mehrun,
Thank you so much for adding your tips, I am sure other beginners will appreciate your comment a lot! I also think starting with small projects is the best, also because you get accustomed with the machine, the speed, controlling and moving the fabric… Furthermore, by doing small, easy projects, you get less frustrated and start out having more fun with what you created, gaining confidence in your first sewing skills. Starting out with less frustration because the project is too complicated makes a lot more fun 🙂
Very nice & usefully information you shar. Good idea. I like .