 BERNINA Corporate Blog -
Last week we made a start with quilting with rulers. You can read all about how to set up your machine and get started in this blog post. In that blog post you can also see how the first four rows (rows 5 to 8) were quilted.
Today I will show you how I quilted row 9 to 12 of the Sugaridoo Bernina QAL quilt.

In this weeks video you can see me quilt the patterns in the rows. Below in this blog post you’ll find pictures and some written instructions on how to make these patterns.
https://youtu.be/JpVaes-6Leo
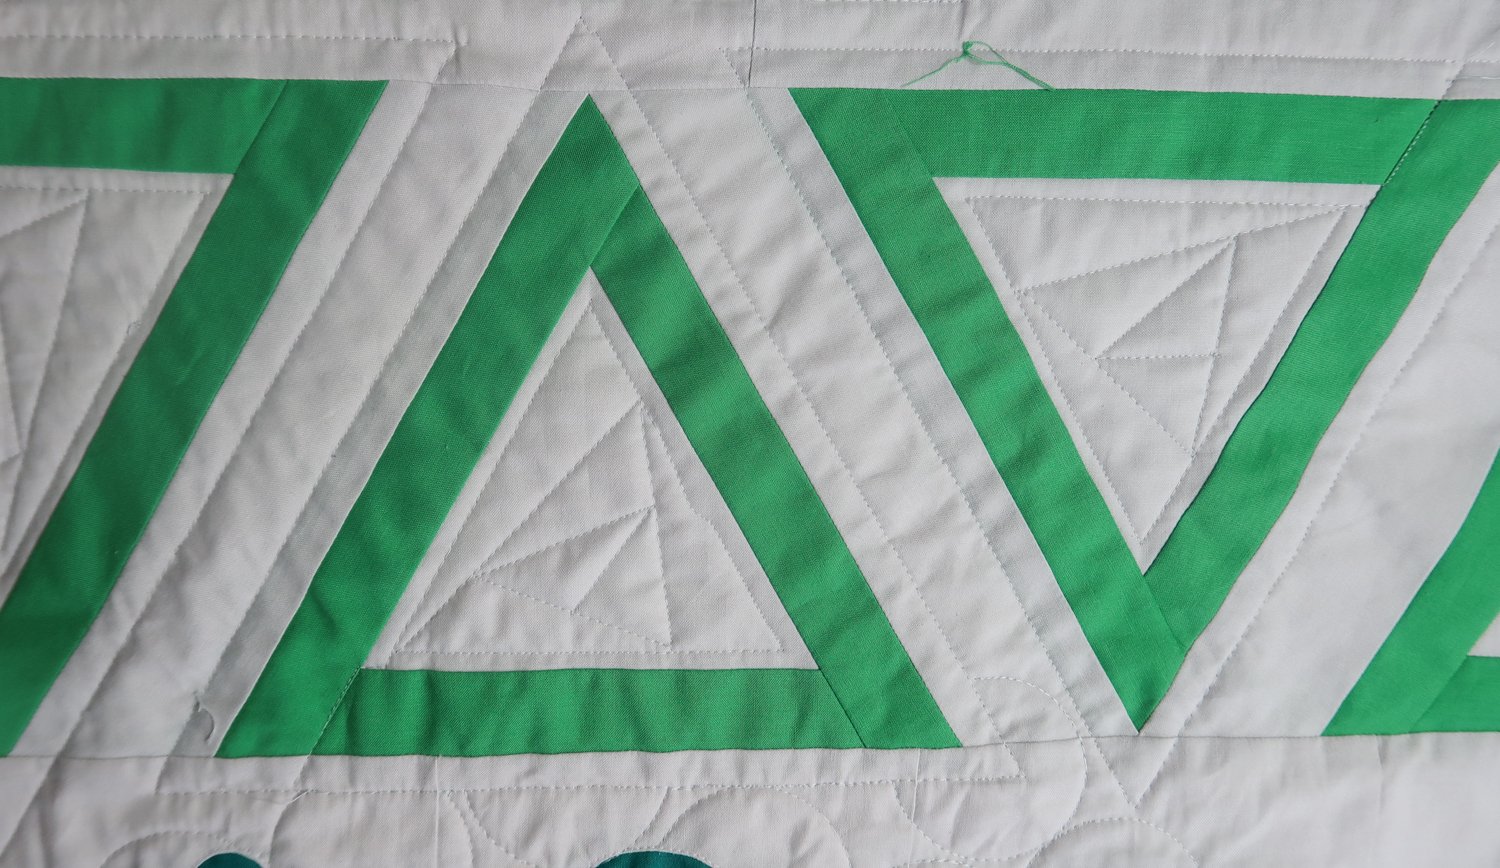
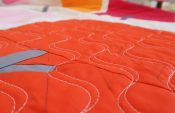
Row 9 – Delta
This row has nice open triangles. A perfect space to fill with some quilting. I quilted on the outside of the triangles, using my straight rulers. I quilted half an inch from the triangles on the outside.
On the inside of the triangles I first quilted a quarter inch from the edge. And then spiraled inwards, also using the straight edged ruler. Take a look at the video to see how I positioned the ruler to get this spiral effect.

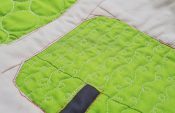
Row #10 – Dot dot dot
For this row I went for the improv version, so no perfect circles in my blocks, but wobbly shapes. In the quilting I did go for circles.
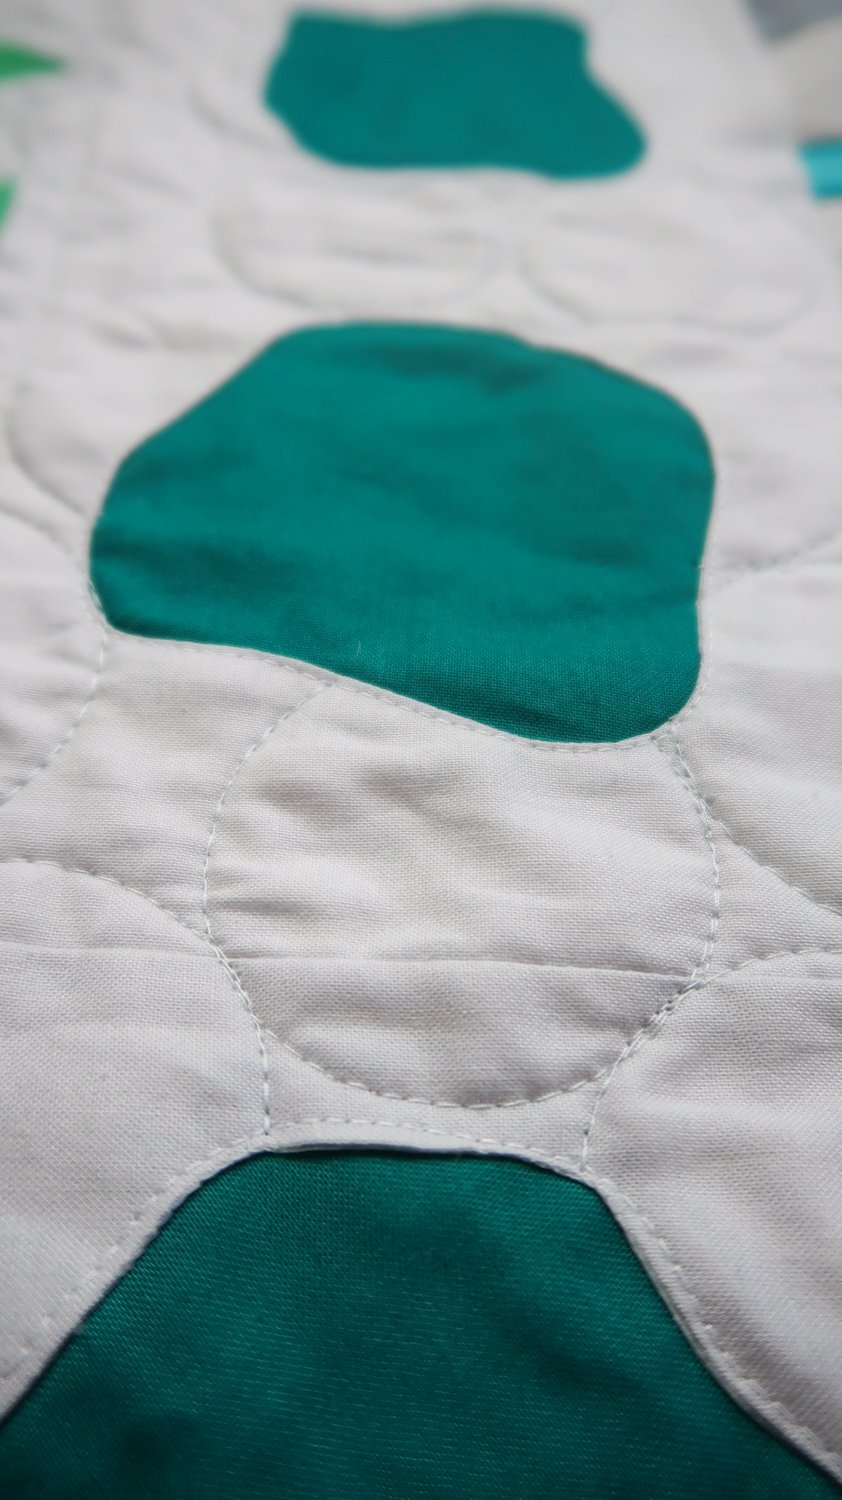
I used one of the BERNINA echo clips to make the circles. When you use this ruler to quilt around, please do take care of your fingers. They will be pretty close to the needle while quilting.
I added some grip to the rulers by spraying on Grippy spray. This will prevent your rules from slipping away. You will have to apply less pressure to keep your rules in place while quilting.
 I randomly placed the circle on my row and quilted around it. When I would run into a wobble shape I stitched around it until I could continue the circle, or start a new circle. You can travel on a circle to move on to a new circle. Check out the illustration below, or the video, to see what I mean.

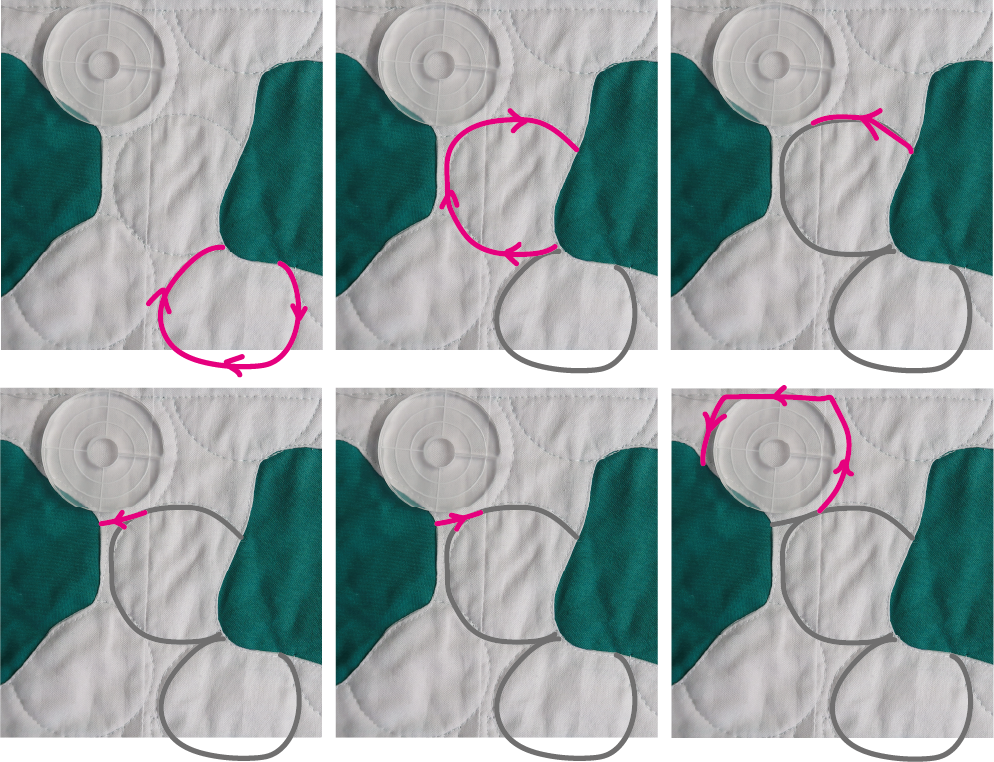 I really like how this design turned out. It gives a lovely texture to the row.
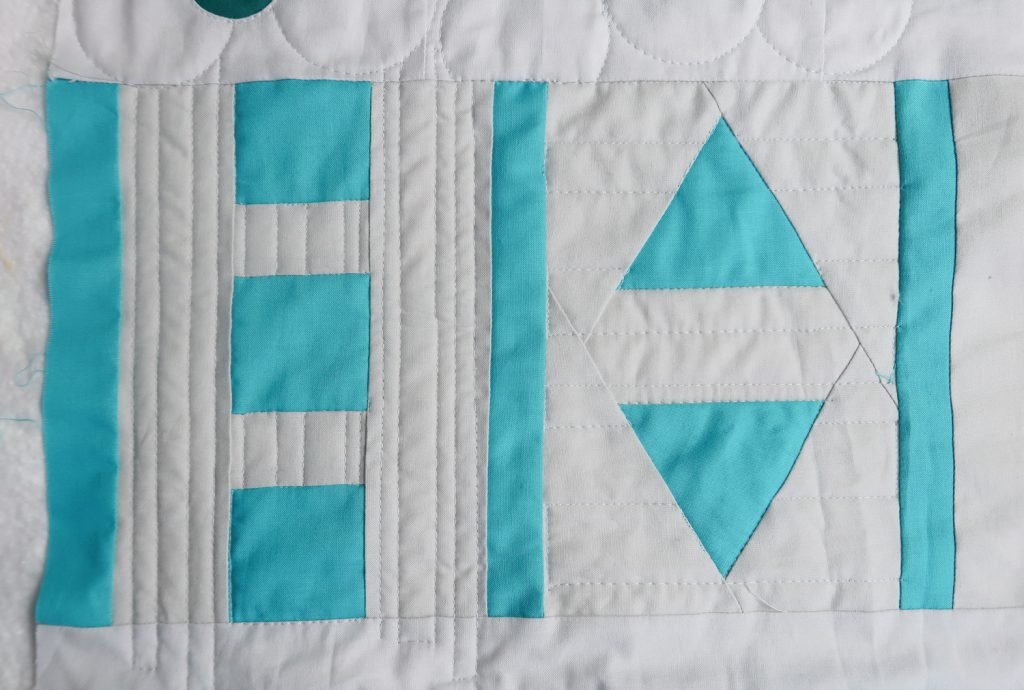
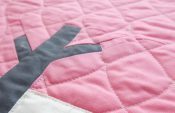
Row #11 – All together now
For this row I had a simple design in mind. Quilting straight lines in two directions. In the picture below you can see that I quilted the first block quite densely. All the lines are pretty close together. This was not exactly the look that I was going for.
In the second block I quilted the lines a bit further apart. That looked much more like what I wanted. So I will probably undo the first block and continue making the row in the style of the second block.
I do like how the alternating direction of the lines between the blocks in the row look.
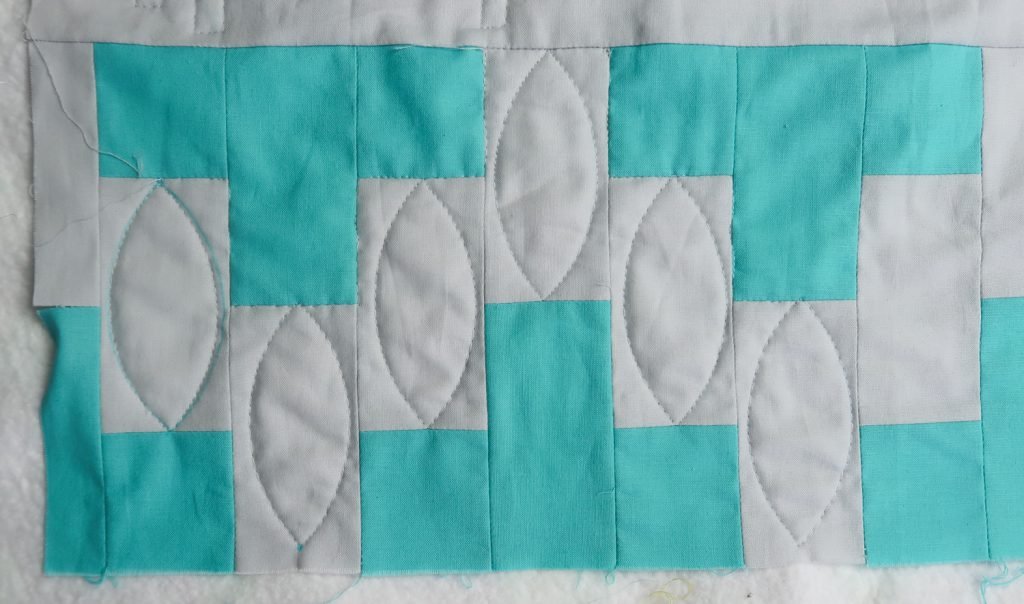
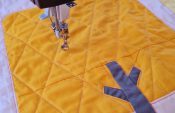
 Row #12 – Tetris

In this row I used a circle ruler again. A bigger one this time. And I did not use it to make circles, but to make leaf like shapes.
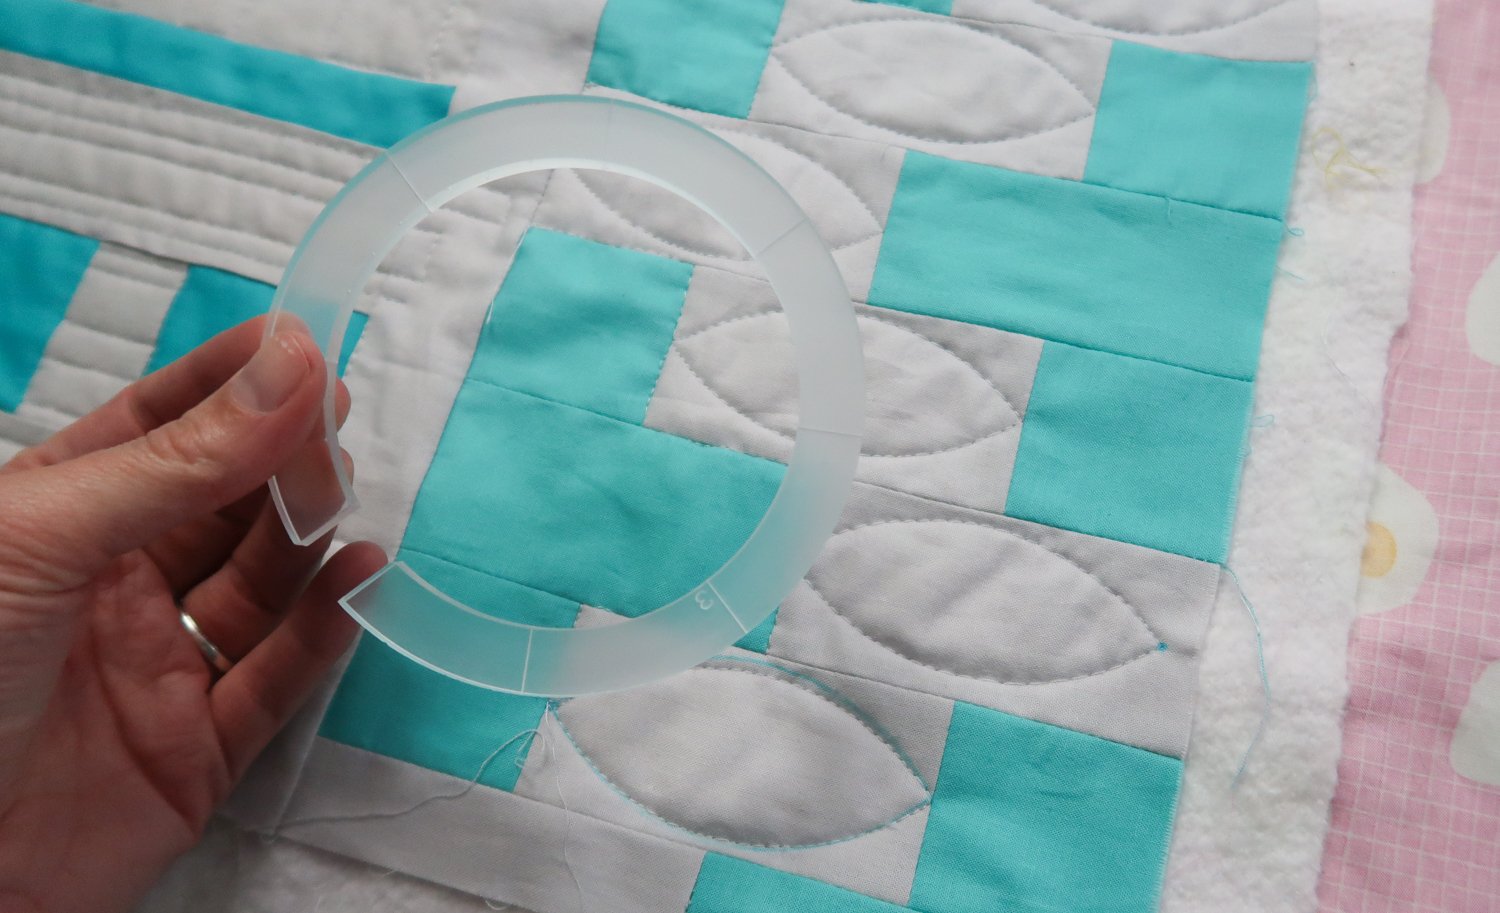
For this design you need to pay attention to the quarter inch space between your ruler and the needle. You can not place the rulers exactly where you want your line to be, like you would when drawing with a pencil along a ruler. The ruler always needs to be a 1/4″ away from where you want your line to be quilted.
These shapes are made by first quilting a half leaf from top to bottom. Then you move the ruler and quilt the other half or the leaf from the bottom to the top. So much fun to do!
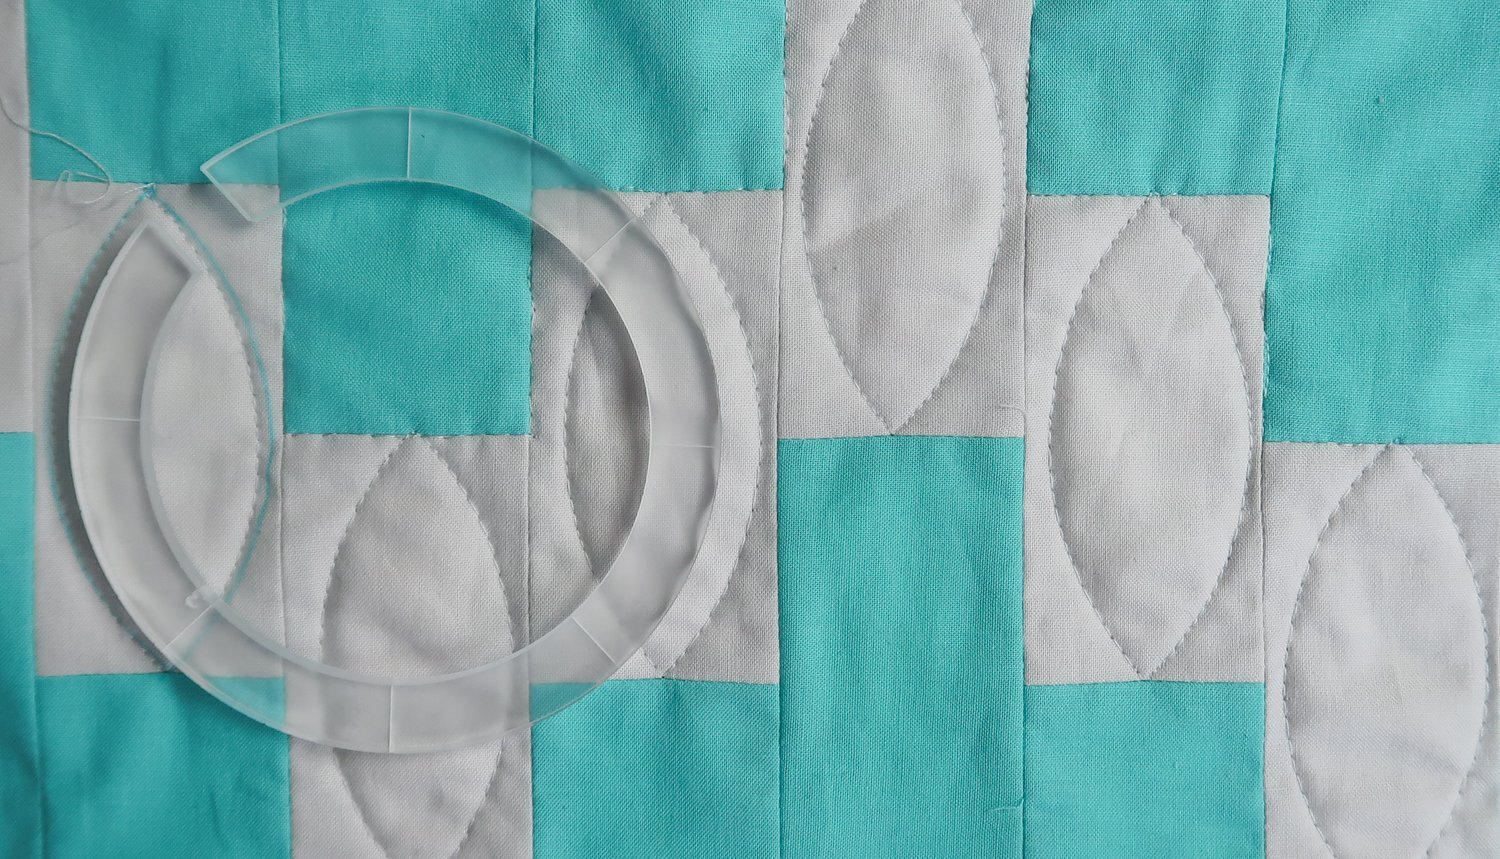
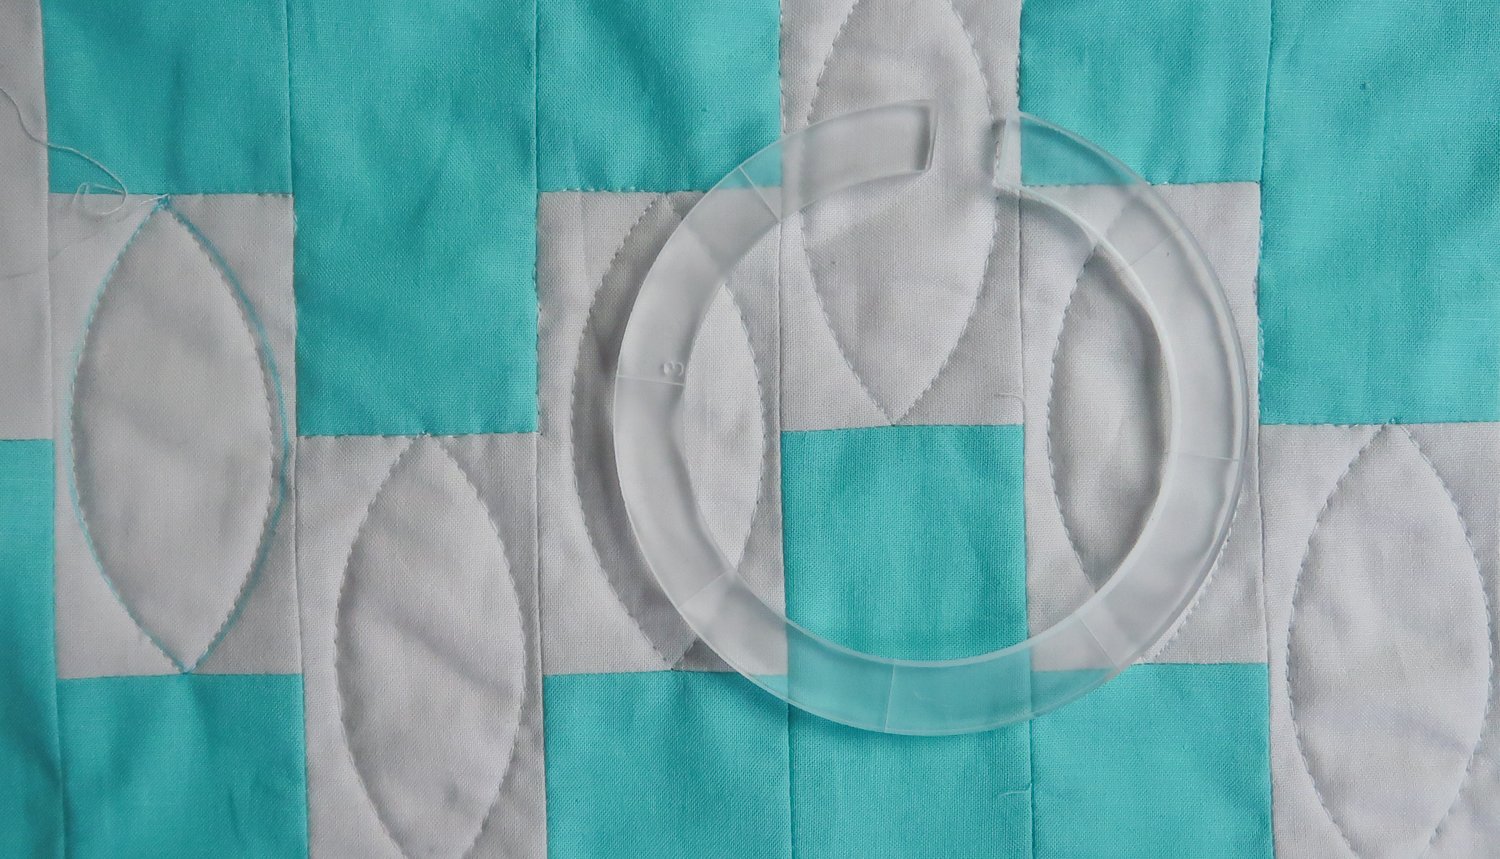 I think this row can use a little bit more quilting. So I will go back in and stitch in the ditch around the tetris shapes. As you can see in the video I already stitched around most parts of the top tetris shapes, to travel from one leaf shape to the next.
 Next week

Did you start quilting your quilt? Or still thinking on how to quilt it? Take your time. But also know that you are now as ready as you will be. This is such a great quilt to practice on, if you want to start with ruler work. You can try out a different design in each row.
It doesn’t have to be perfect. Each part of the quilt you stitch will give you more experience and learn you something new!
See you next week where we will quilt the final four rows.
Irene
One Response