 BERNINA Corporate Blog -
Whoohoo there we go! This week we finally start quilting our quilt! In this blog post you will find instructions on outlining our trees and quilting our first two trees. There is also an overview available of the quilt with the patterns sketched in. For each tree I will give some alternative designs, so everybody can quilt along no matter what machine or tools you have available.
At the end of this blog post you’ll find the winners for the half way give away!
Quilting, Part 1 – The video
In this weeks video I’ll show you how to outline our trees, how to fill in the first two trees and talk about getting started with your quilting. For more information on the setup and preparation you can also check last weeks blog post.
Trouble shooting
Our first step today is making some stitches on your test piece. Always quilt on a test piece first. That way you can check how your stitches look with your needle/thread combination and the settings on your machine. Here are some things you could check when you have issues with skipped stitches or breaking thread:
- re-thread you top thread
- check if your bobbin is placed correctly
- change your needle
- try a different type/size needle
- clean and oil your machine
- check if your feed dogs are lowered
- make sure to bring up your bobbin thread
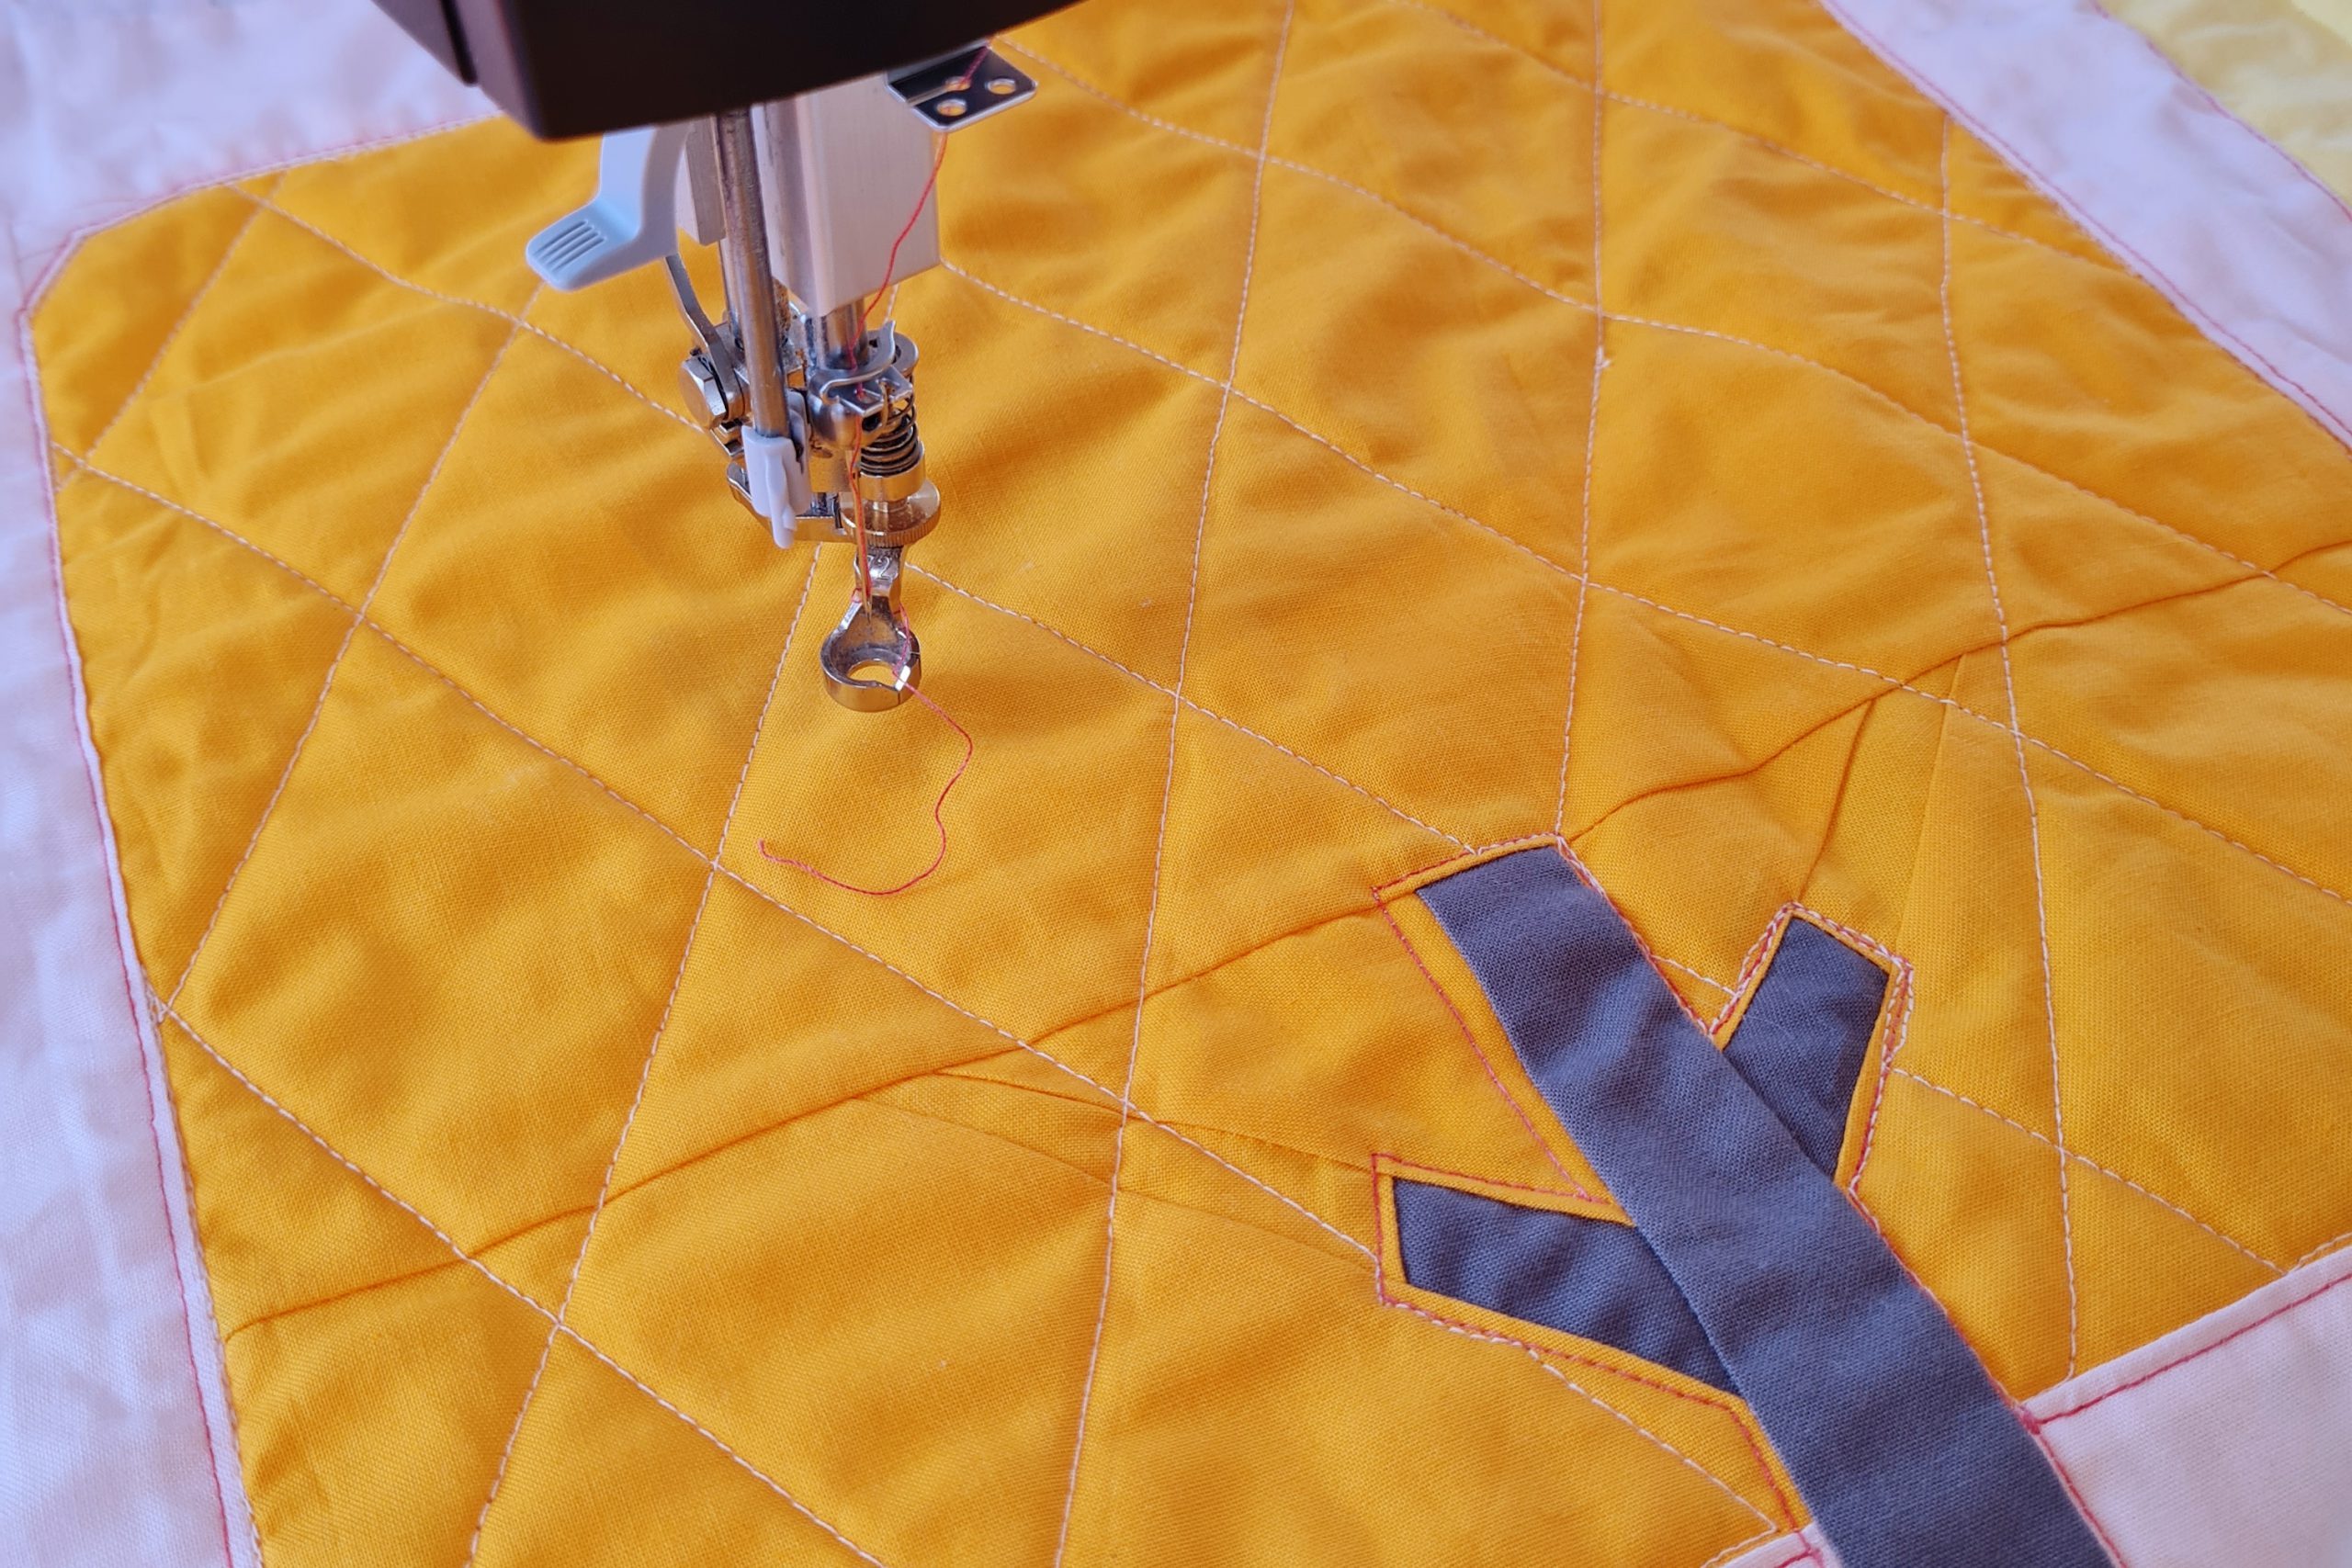
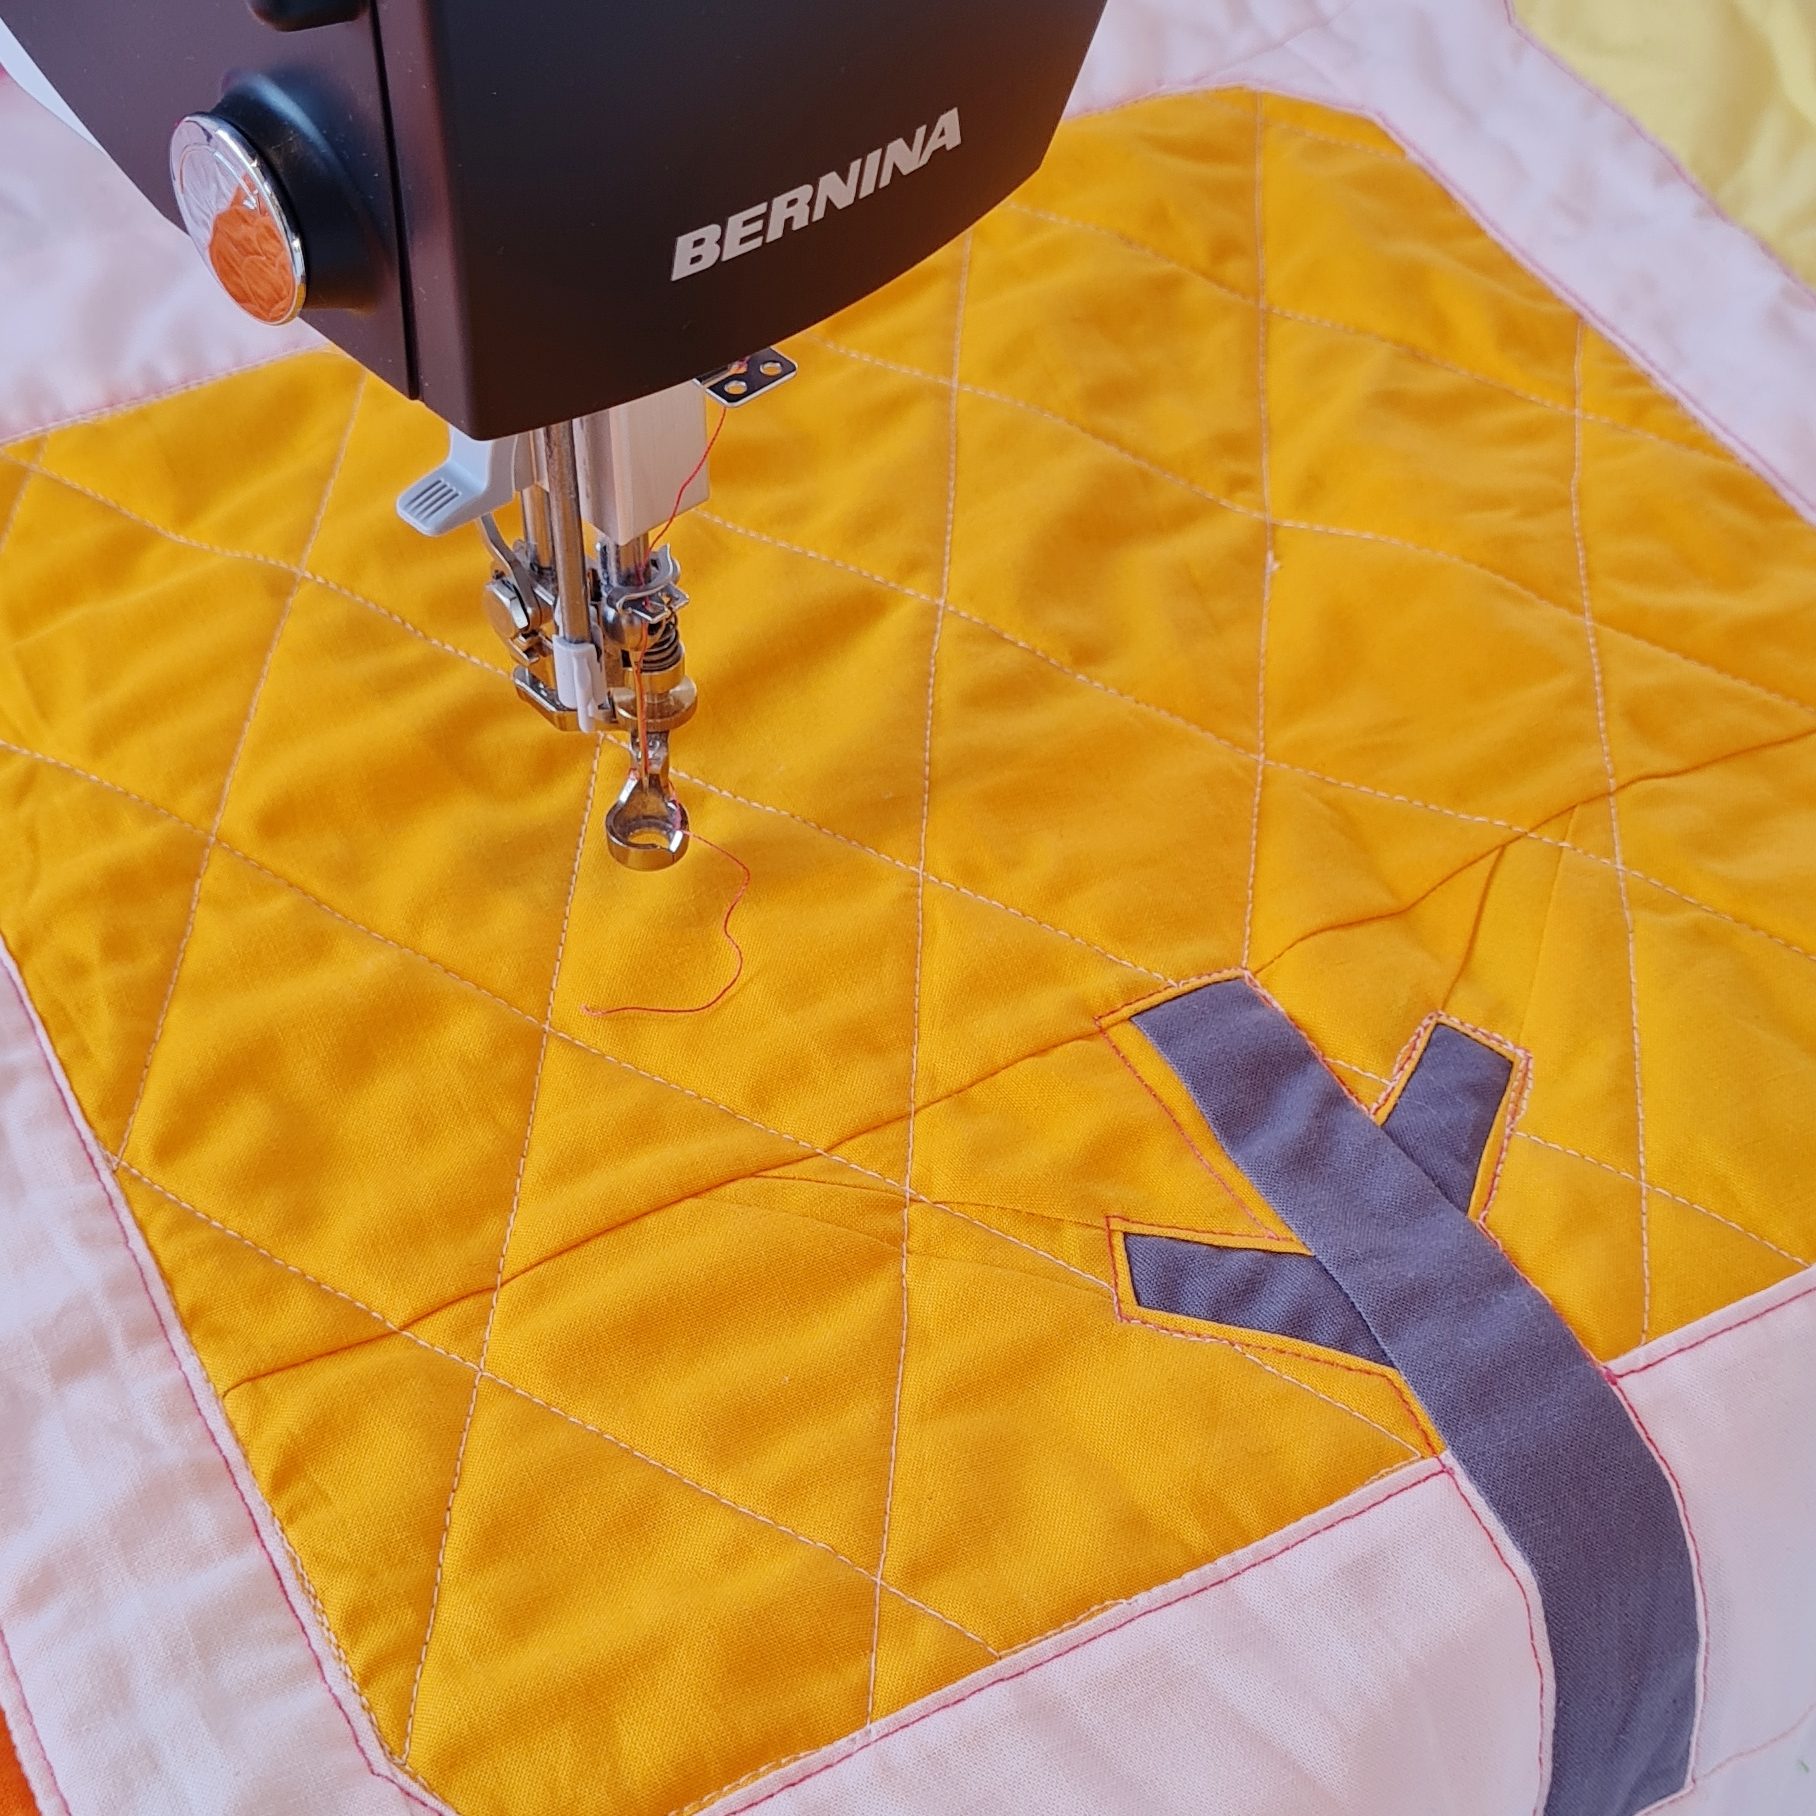
Outlining our trees
The first thing we are going to do is outlining our trees. We will quilt the big shapes in a quilt first, which are in this case the trees, and after that we can fill them in.
So go ahead, get out your straight ruler and your ruler foot, or use a walking foot to make some straight lines around the trees.
You can stitch in the ditch, in the seam between the fabrics. Or you could stitch just next to the ditch. In my video you see how I miss the ditch sometimes, and with the contrasting thread I use for the video that really shows. When you use a less contrasting thread you won’t really notice that your stitches aren’t always placed in the ditch perfectly.
We will start with outlining tree 1 to 4b. So we outline the center of the quilt. When you are done with the quilting for this week you could already go ahead and outline trees 5 to 16 if you’d like.

Travel stitching
In the quilting videos and the blog posts you will hear me talk about travel stitching. This is just a way of moving around in your quilt. You will stitch (travel) over already made lines, or stitch in the ditch, to get from one point to another.
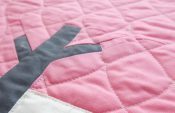
Tree trunks and birdies
When you run into a tree trunk or a bird when you quilting you have two options.
The easiest option is to just quilt through the trunk or bird. Just quilt over it and continue with your pattern. This won’t take any planning or travel stitching.
The second, a little more challenging option, is to quilt around the tree trunk or bird. When you run into a shape, you will stop and travel stitch over the edge of the trunk or bird, until you can continue your quilting line again.
In the videos you will see me take this second option for the trunks, I don’t have any birds in my quilts.
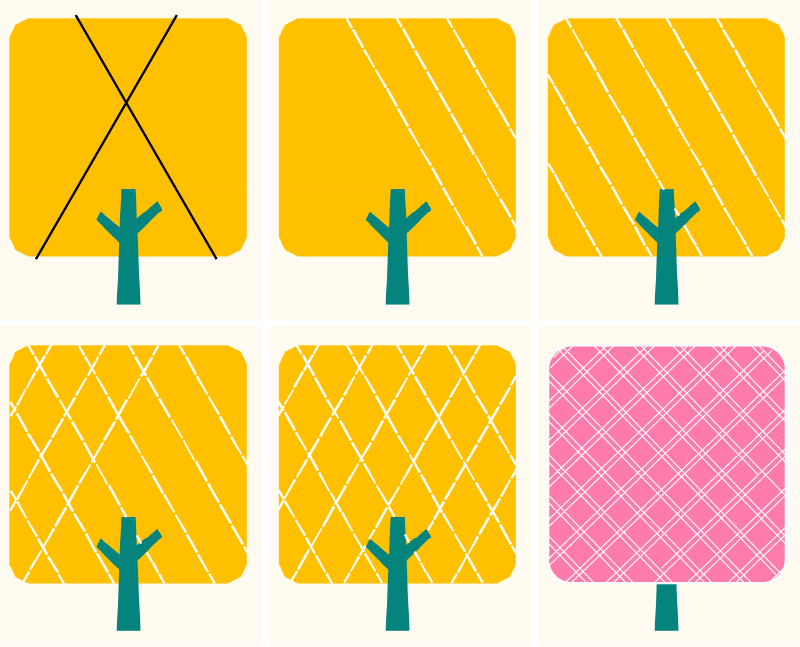
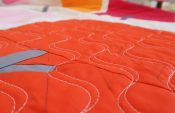
Quilting Tree 1
For tree 1 we are going to make organic straigth-ish lines. You can make them top to bottom, or left to right. Also you can play a little with how for apart you want to quilt the lines. The main focus for this tree is to get a feeling for your machine. You can practice on regulating your stitch length and to moving in straight-ish lines.
To make this design you start at one corner and stitch all the way to the other side. Then you travel stitch in the ditch, or over the outline of the tree, a little bit to the side. Then you can make a line all the way to the other side again.
Explaining this in words is way harder then showing it in a video. So even if English is not your first language, I would recommend watching me quilt this in this weeks video 🙂
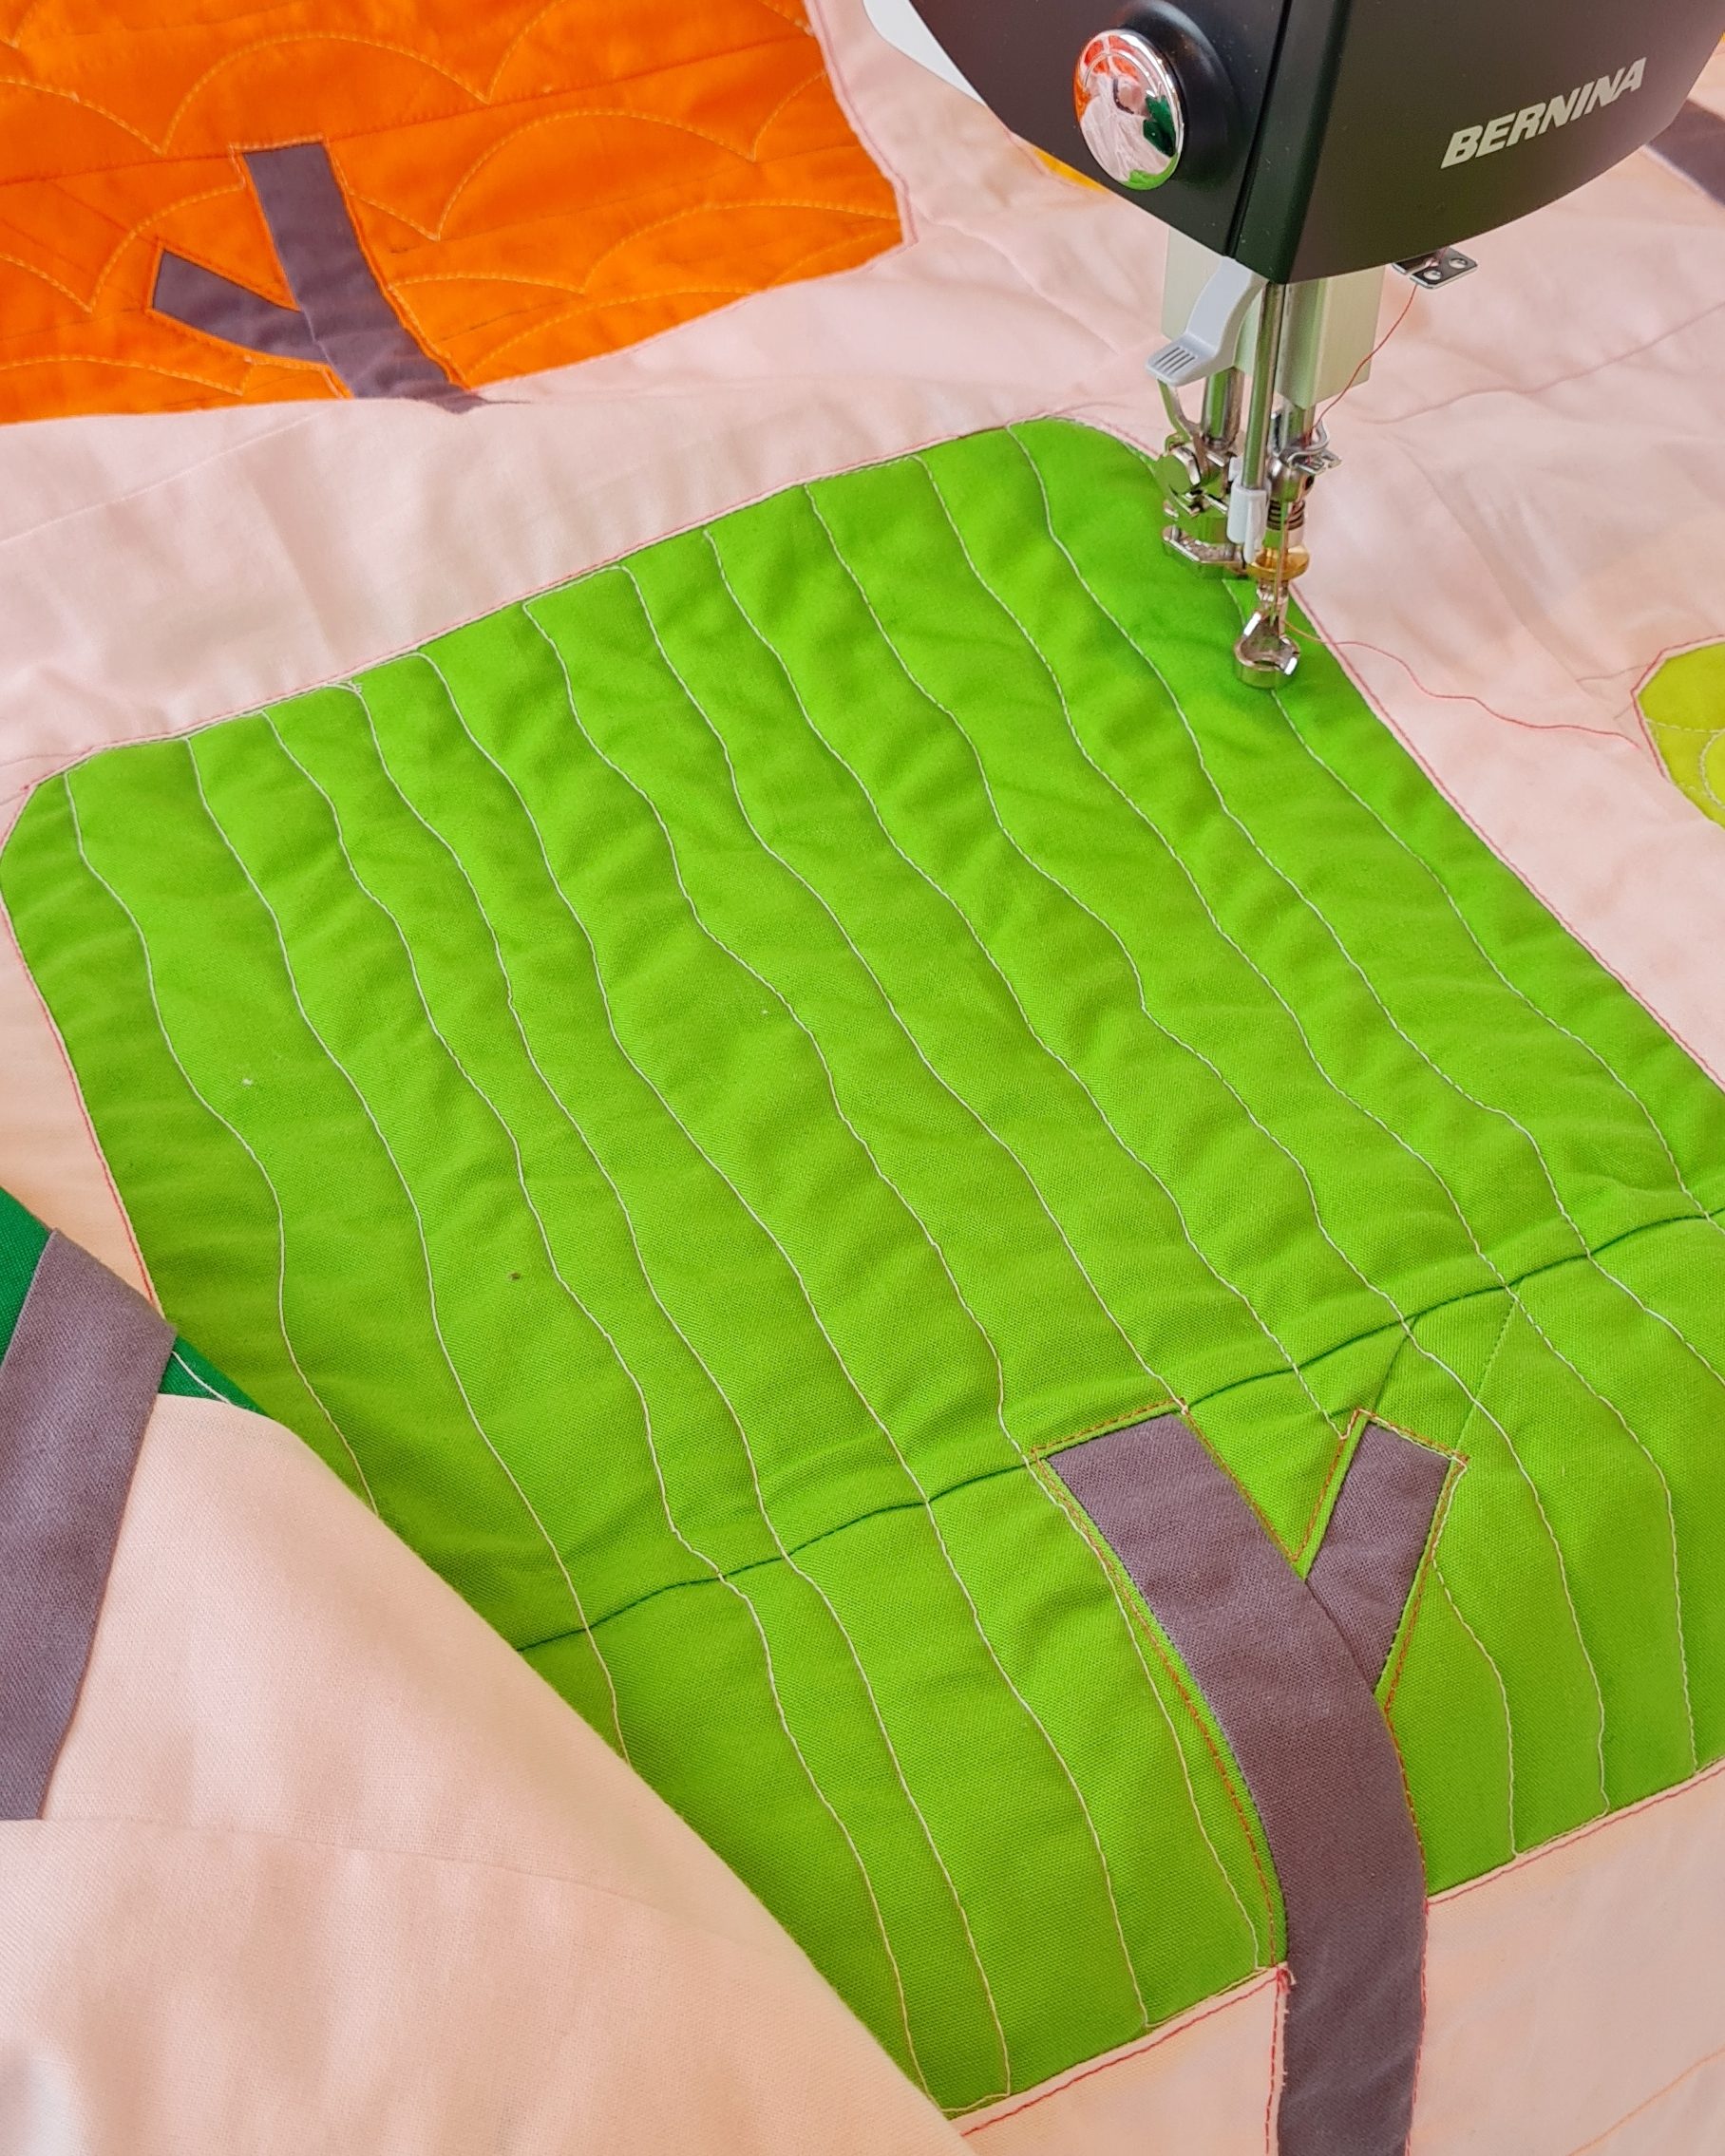
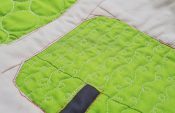
Quilting Tree 2
For tree 2 we are going to make a cross hatch pattern with a straight ruler. Let’s start with marking two lines at a 60 degree angle. You can use a Hera marker, or a water erasable pen, or you personal favorite way to mark your fabric. In the video you can see how I measure the 60 degree angle and mark my lines.
Now quilt lines parallel to you markings. First in one direction, and then in the other. I like to start in the center of the block, so that I have a nice long marked line, instead of a short marked line when I would start in a corner.
As a variation to this pattern you can change the angle to for example 45 degrees. Also you can make the lines closer together or further apart. Or how about making double lines to create a checkered feel to your pattern.
When you don’t have a ruler to work with,, you could create this look with a normal sewing foot or walking foot and just straight line stitching. It’s also possible to use free motion quilting the organic straight lines from tree one to make the lines for this design.
Preparing for next week
Next week we will use our circle rulers. To get ready for next week you can go ahead and outline trees 3, 4a and 4b. (Feel free to outline all the trees if you want.) You can also quilt some circles on a test piece to get a feeling of how different that feels from quilting along a straight ruler.
And the winners are …
here are the names of the six winners in the halfway giveaway:
Mettler yarn kit
- @wienerdog.wiesje on Instagram
- @andreasstitchcraft on Instagram
- Blog-reader madebymel on the English BERNINA Blog
Sugaridoo fabric bundle
- @btinagallina on Instagram
- Blog-reader hofschniiderei on the German BERNINA blog
- Blog-reader aeidej on the Dutch BERNINA blog
Congratulation to all of you!!
You will be either contacted by BERNINA, or by me, when you won on Instagram, to get your shipping address. Feel free to leave a comment down below when it’s your quilt listed above and you haven’t heard from us. Then we will be in touch soon.
See you next week!
Irene
Where can i get this pattern? Would love to try!!
Dear JiYoon,
You can find all articles and patterns related to the One Two Tree QAL here: https://blog.bernina.com/en/tag/one-two-tree/
Have fun catching up!
Kind regards, Ramona
No need to reply. Re read and yes 👍🏻
Quick question Irene, have we to outline all the trees first, then do the Ruler work?
Hi Irene, I have been doing needlework for over 50 years thanks to my grandmother who taught me how to knit and my mother who taught me how to use a sewing machine. I am still learning thanks to blogs including yours. I am enjoying the quilt along very much and was very surprised and excited to see my name (@andreasstitchcraft) among the winners. I am looking forward to getting into the quilting. Thanks, Andrea
Hello, I live in Quebec in Canada and my passion is quilting. Thank you Irene, I really like your videos and it’s fun to see all the quilts of all these people from all over the world.Ginette
Hi Irene, I’m in Yorkshire, England and I’m using my late mother-in-law Elsie’s Bernina Record 730 which is at least 50 years old but still going strong. I learnt to sew from my grandma Irene (pronounced eye-reen) which is a happy coincidence so I’m hoping to do her proud with my first quilt project!
Oh my God! I can’t believe it!! My quilt was listed above, I’m @btinagallinaI’m leaving my email adress right here, because as it was an instagram post, I suppose you don’t have the e-mail.The most exciting part is already here! Thank you Irene.
Can’t wait to start quilting the trees!! Great tutorial Irene! Thank-you
Hi,I have a new B79 i will be using to quilt. Which foot do I use to quilt with rulers please?Thank you
Hy Louisa,
Do you mean a B 790? In that case, you should use either the adjustable ruler foot #72 or adjustable ruler foot with slit #72S. I would buy the one with slit, since it will allow you to switch between ruler work and another quilting technique (for example using the bsr to quilt) withouth having to cut the thread.
Both feet are not included in the machine.
It is of utmost importance that you use a foot with a thick sole. If you use the included drop-shaped embroidery foot #26, then the foot is way too thin and could get under your ruler. Meaning the needle would sew into the ruler, break, and worst case either hurt you, your quilt, or break the syncronisation of the machine and you would need to repair it.
Hope this helped!
Kind regards, Ramona from BERNINA International
Or did she mean the bernette B79?
Hi There,
Apologies i have the Bernette b79. Are the feet the same? Thank you 🙂
Hy Louisa,
Ah, the b79. In that case, you wont be able to use the BERNINA pressure feet, they have a different connection system. There’s also no rulerfoot for bernette machines, so you wont be able to do rulerquilting like Irene is showing in her tutorials.As an alternative, you could draw the lines with the rulers, and then use the Free Motion Embroidery Foot or Hopper Embroidery Foot for quilting along the lines.
Thank you for all your help. I wish I had realised this before my purchase!
I was surprised to see there is no ruler foot too. I hope this won’t stop you from quilting though 🙂