 BERNINA Corporate Blog -
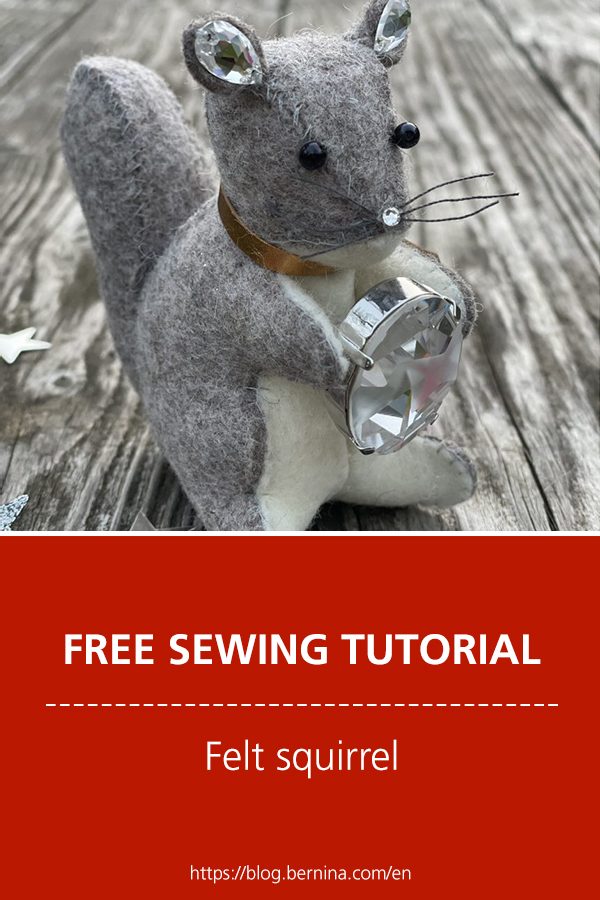
Welcome to the BERNINA Advent Calendar 2021, which this year has the theme of “Time to Shine” to add some glittery sparkle to the winter season! I am especially delighted to be able to get the ball rolling with my sewing project here in the first window! We will be sewing squirrels out of wool felt. Further down in the post you will find the detailed sewing instructions with a free sewing pattern.

You can use these cute animals in many different ways! For example, to decorate your Christmas table or as a Christmas tree decoration, as a pincushion for your sewing room or, if you put a little bell in the stomach, maybe as a baby’s rattle. You can give free rein to your creativity! I am curious to see what you will do with them!
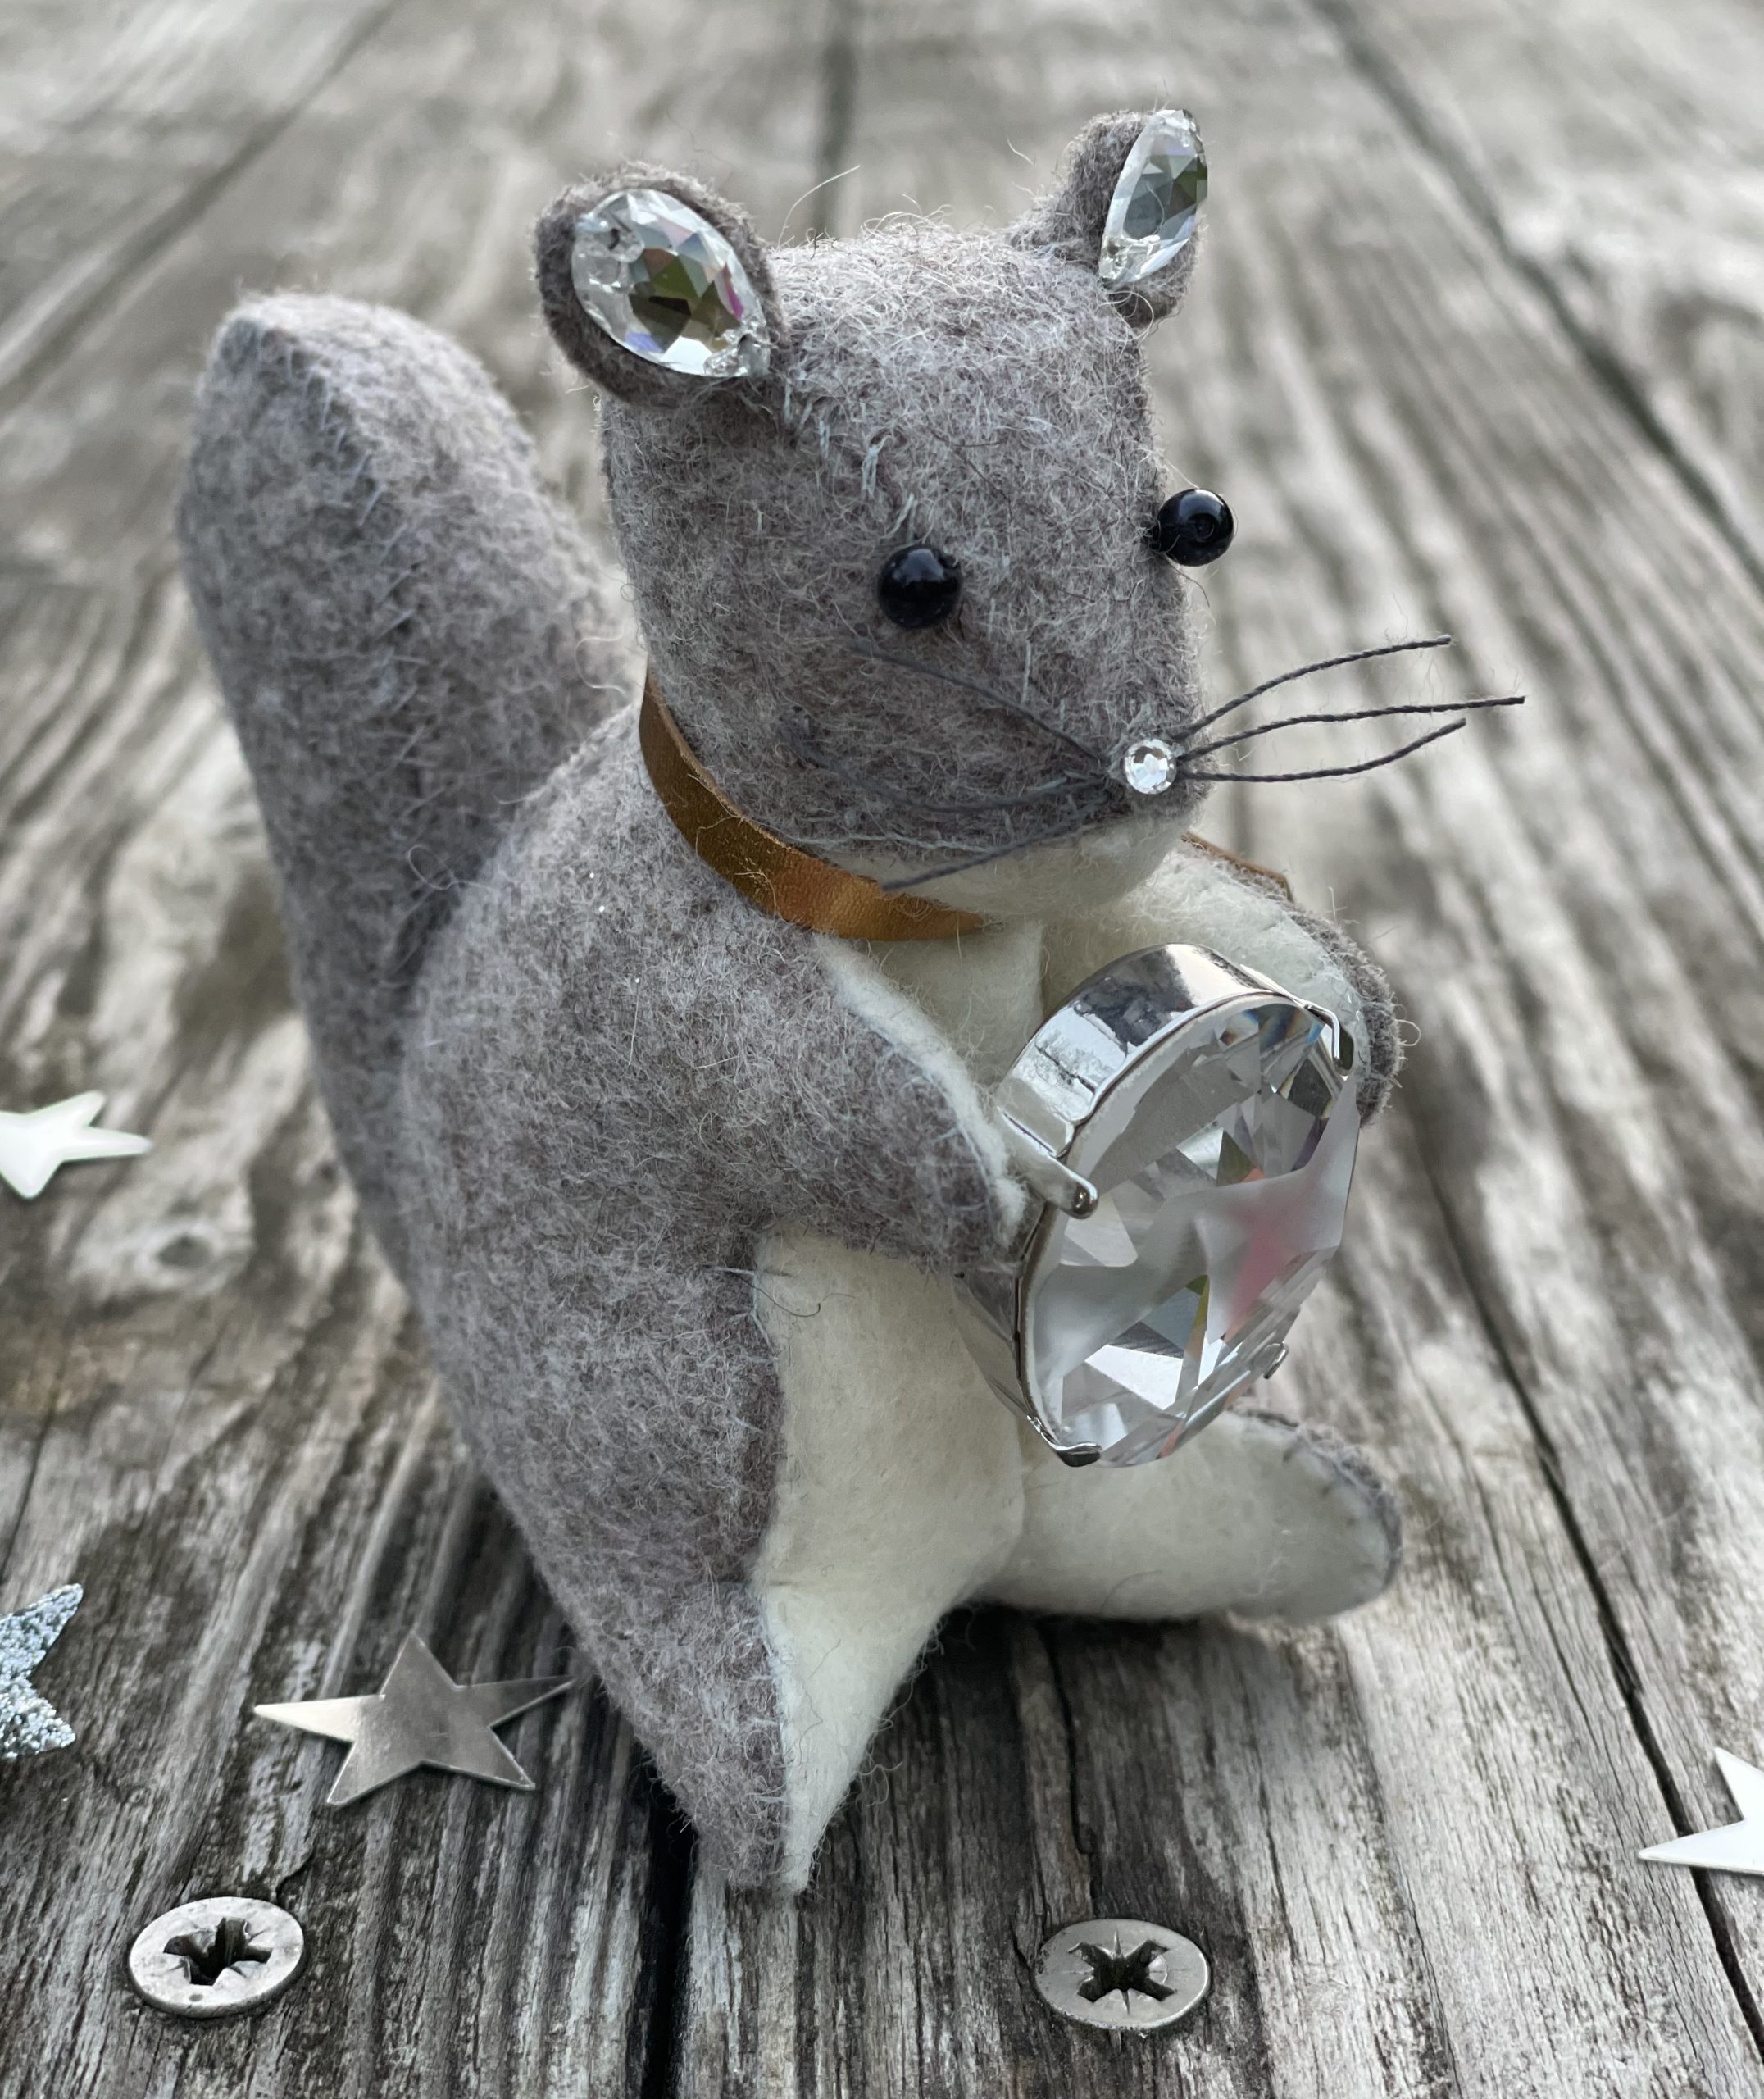
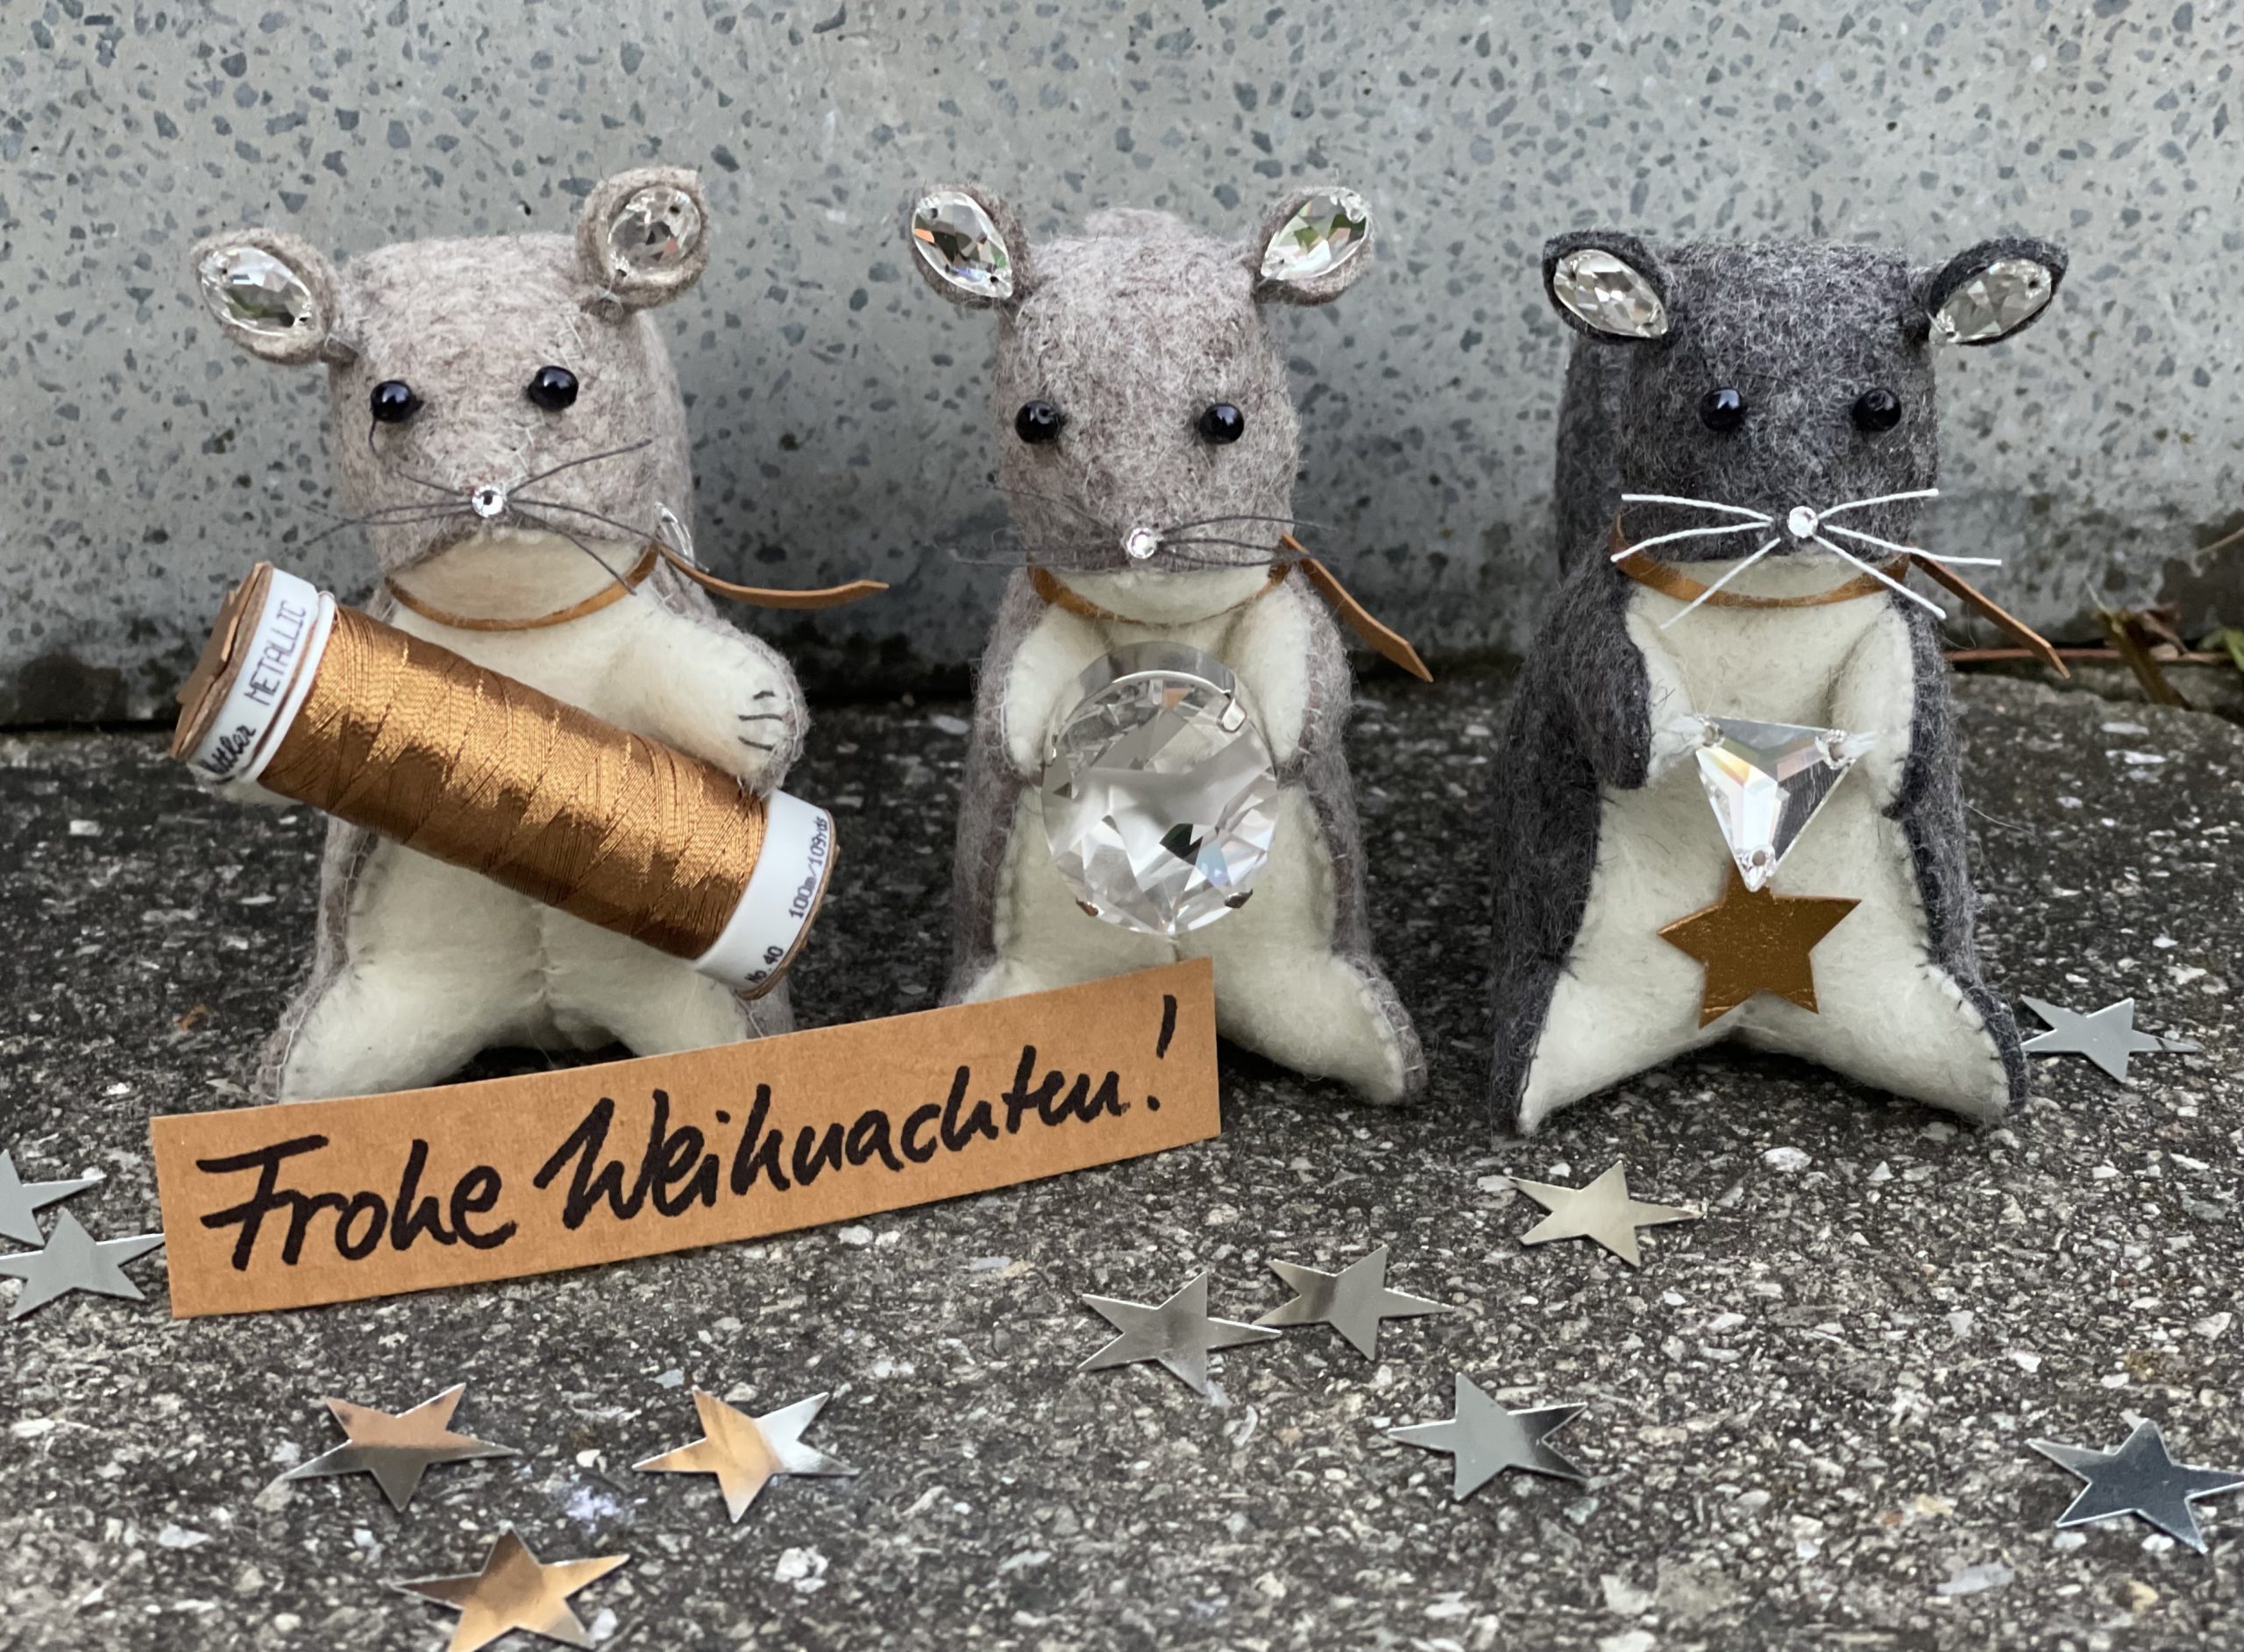
The two little guys in the picture above are out and about looking glamorous – in keeping with the motto “Time to Shine”. The squirrel on the right is carrying a big Swarovski crystal to his den. They are definitely going to sew something nice there because the left squirrel is carrying the sparkling thread they need!
And here is a new member of the team!
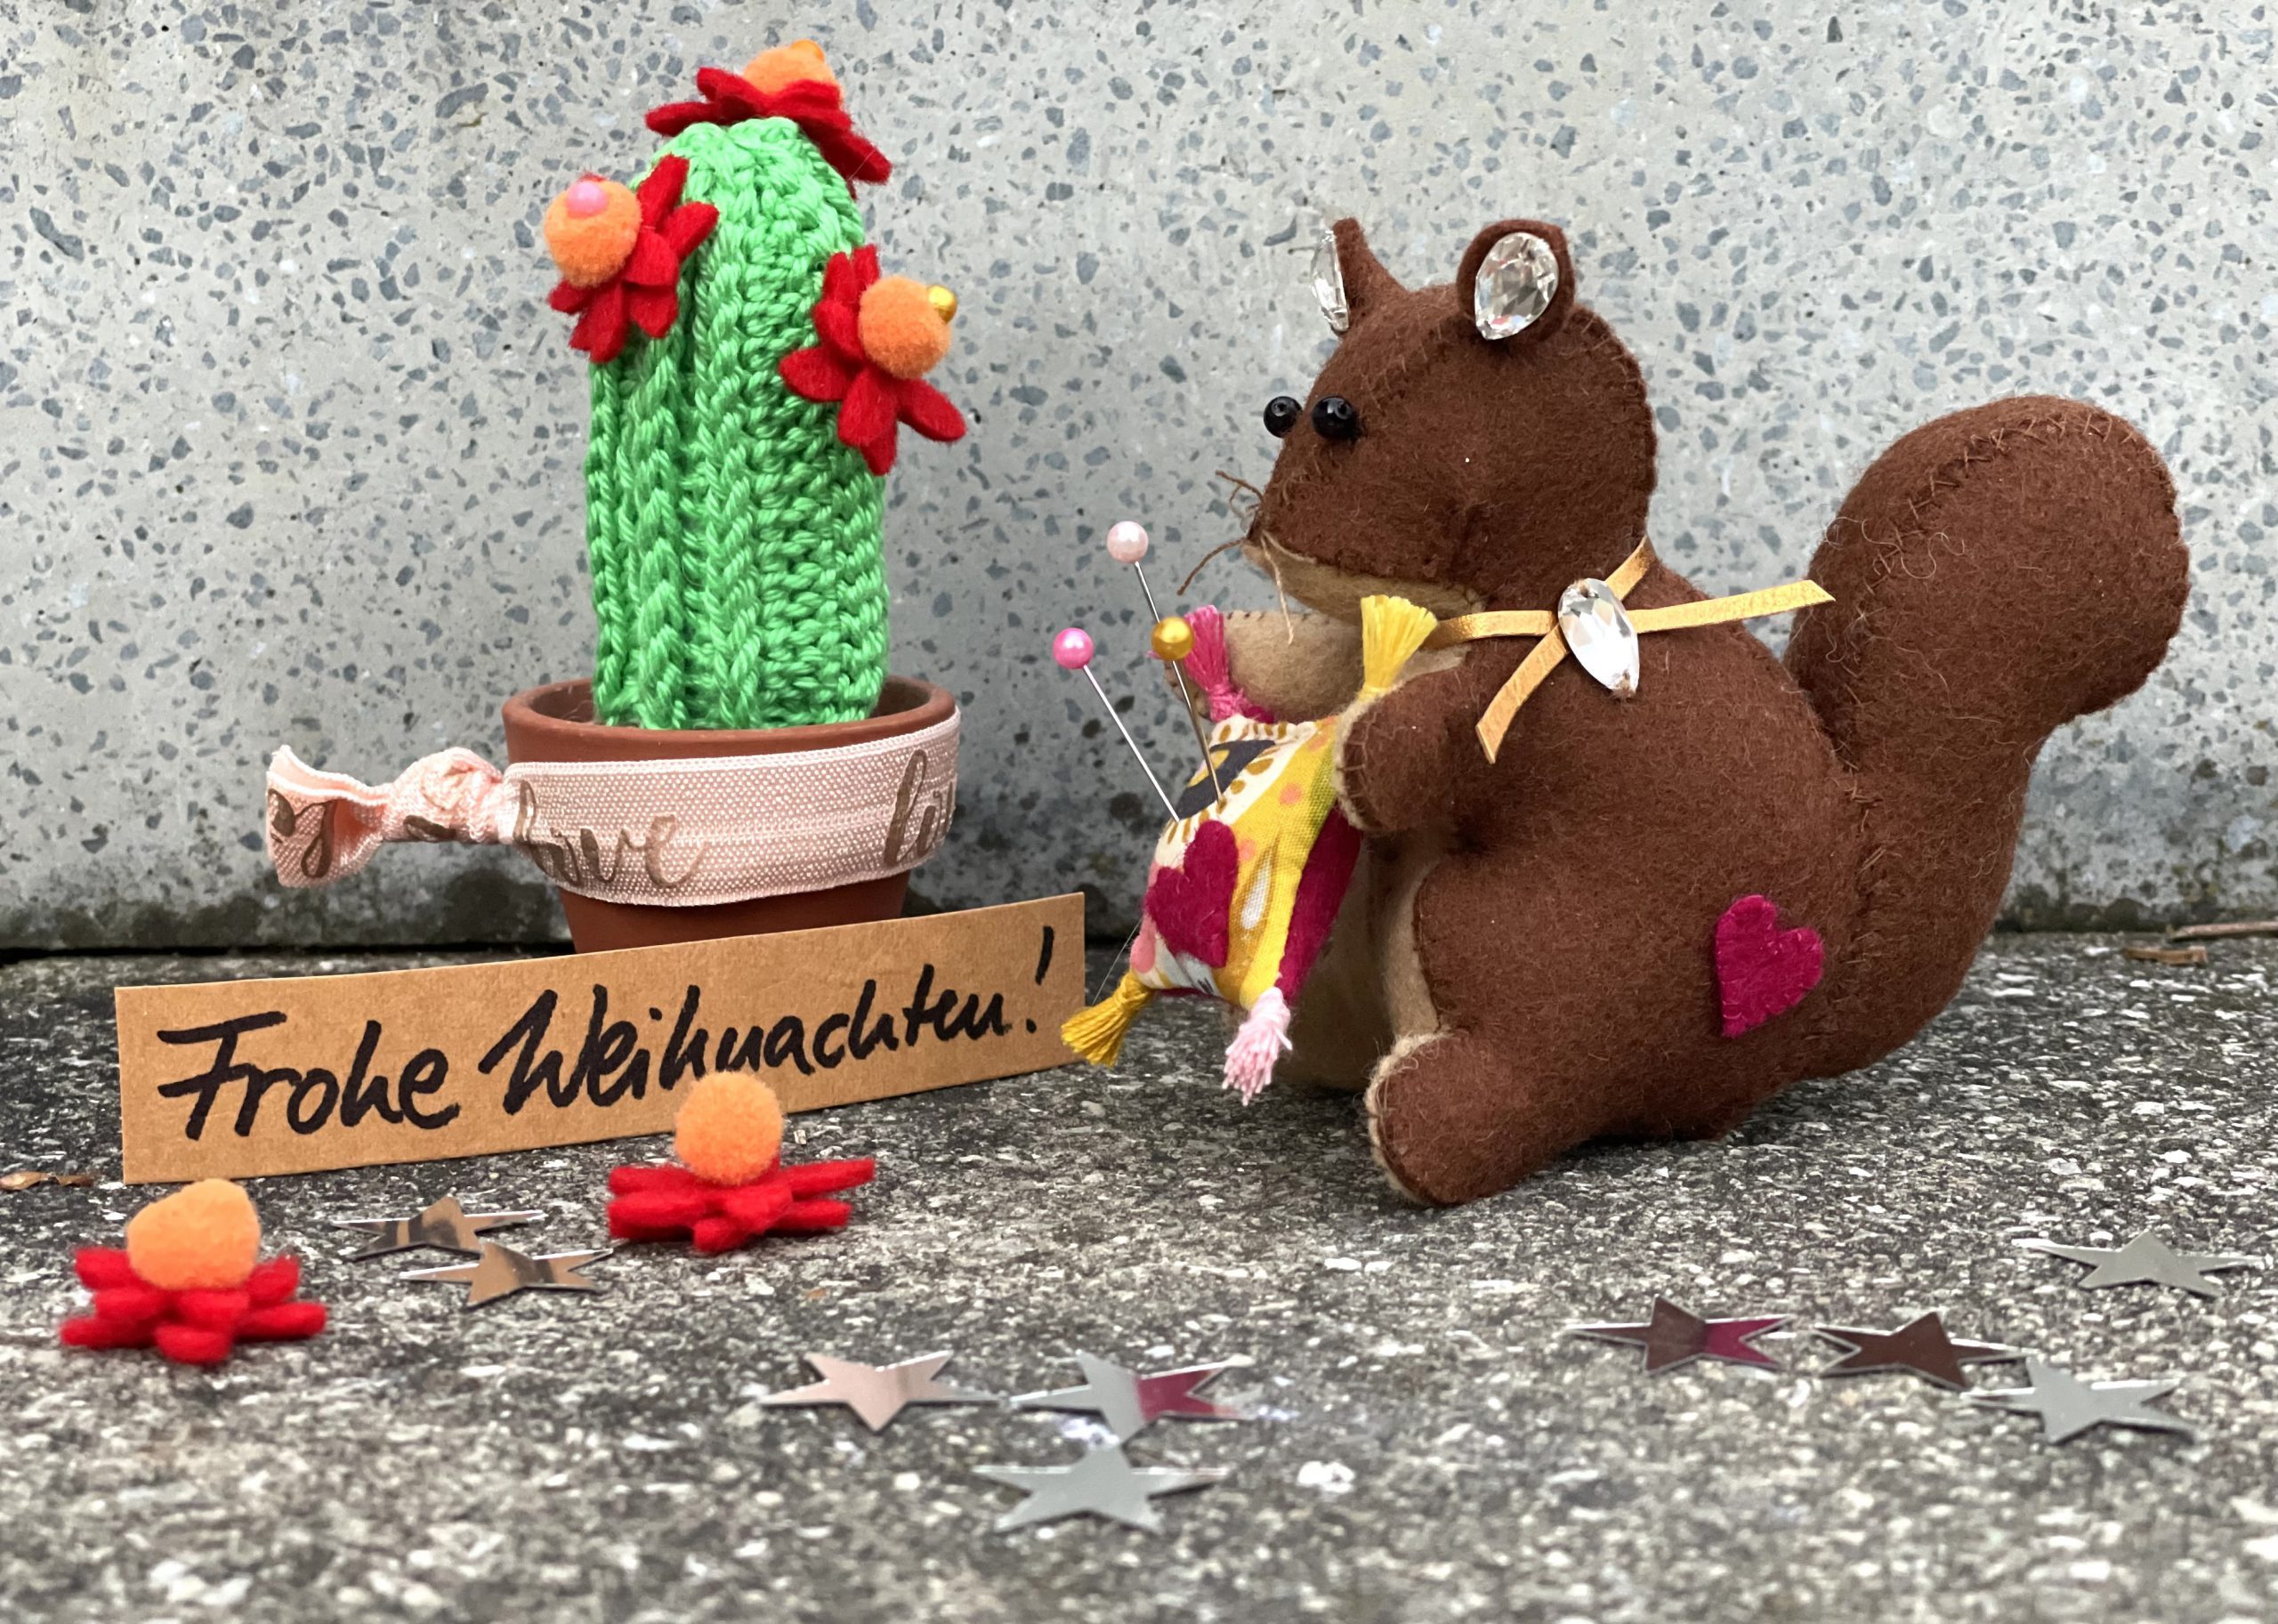
This squirrel has made itself cozy in the wintertime in the place where the Christmas cactus blooms. Of course, sewing also goes on here as you can see. The pins are already stuck in the pincushion!
I will now show you how to make these cute little animals, with the aid of lots of pictures.
Sewing squirrels – materials
To make a squirrel you will need:
- Wool felt remnants for the body in gray or dark brown | approx. 2 mm thick
- Wool felt remnants for the stomach in white or light brown | approx. 1.3 mm thick
- Universal sewing thread, e.g. SERALON from Mettler
- Fiberfill as required
Plus the following optional items for decoration:
- Swarovski crystals, e.g. from the box that comes with the BERNINA 790 PLUS Crystal Edition
- Small black glass beads for the eyes
- Gold foil or leather remnants
- Fabric or felt remnants
- Extra Strong thread from Mettler for the whiskers or tassels on the pincushion
- Small iron-on Swarovski crystals
- Star-shaped iron-on studs
Free pattern for the squirrel
You can find the pattern as a PDF at the following link. When printing out, make sure the printing is set to original size. Alternatively, you can of course adjust the size of the squirrel as you like.
All the pattern pieces are edgestitched together by hand edge-to-edge. This means that you do not need to leave a seam allowance when cutting out. If you prefer to use your sewing machine, you’ll have to add the appropriate allowance for an edgestitched seam when cutting out. I recommend approx. 2-3 mm. If you decide to use your BERNINA, the Edgestitch foot #10 is perfect for the job.
Cutting out
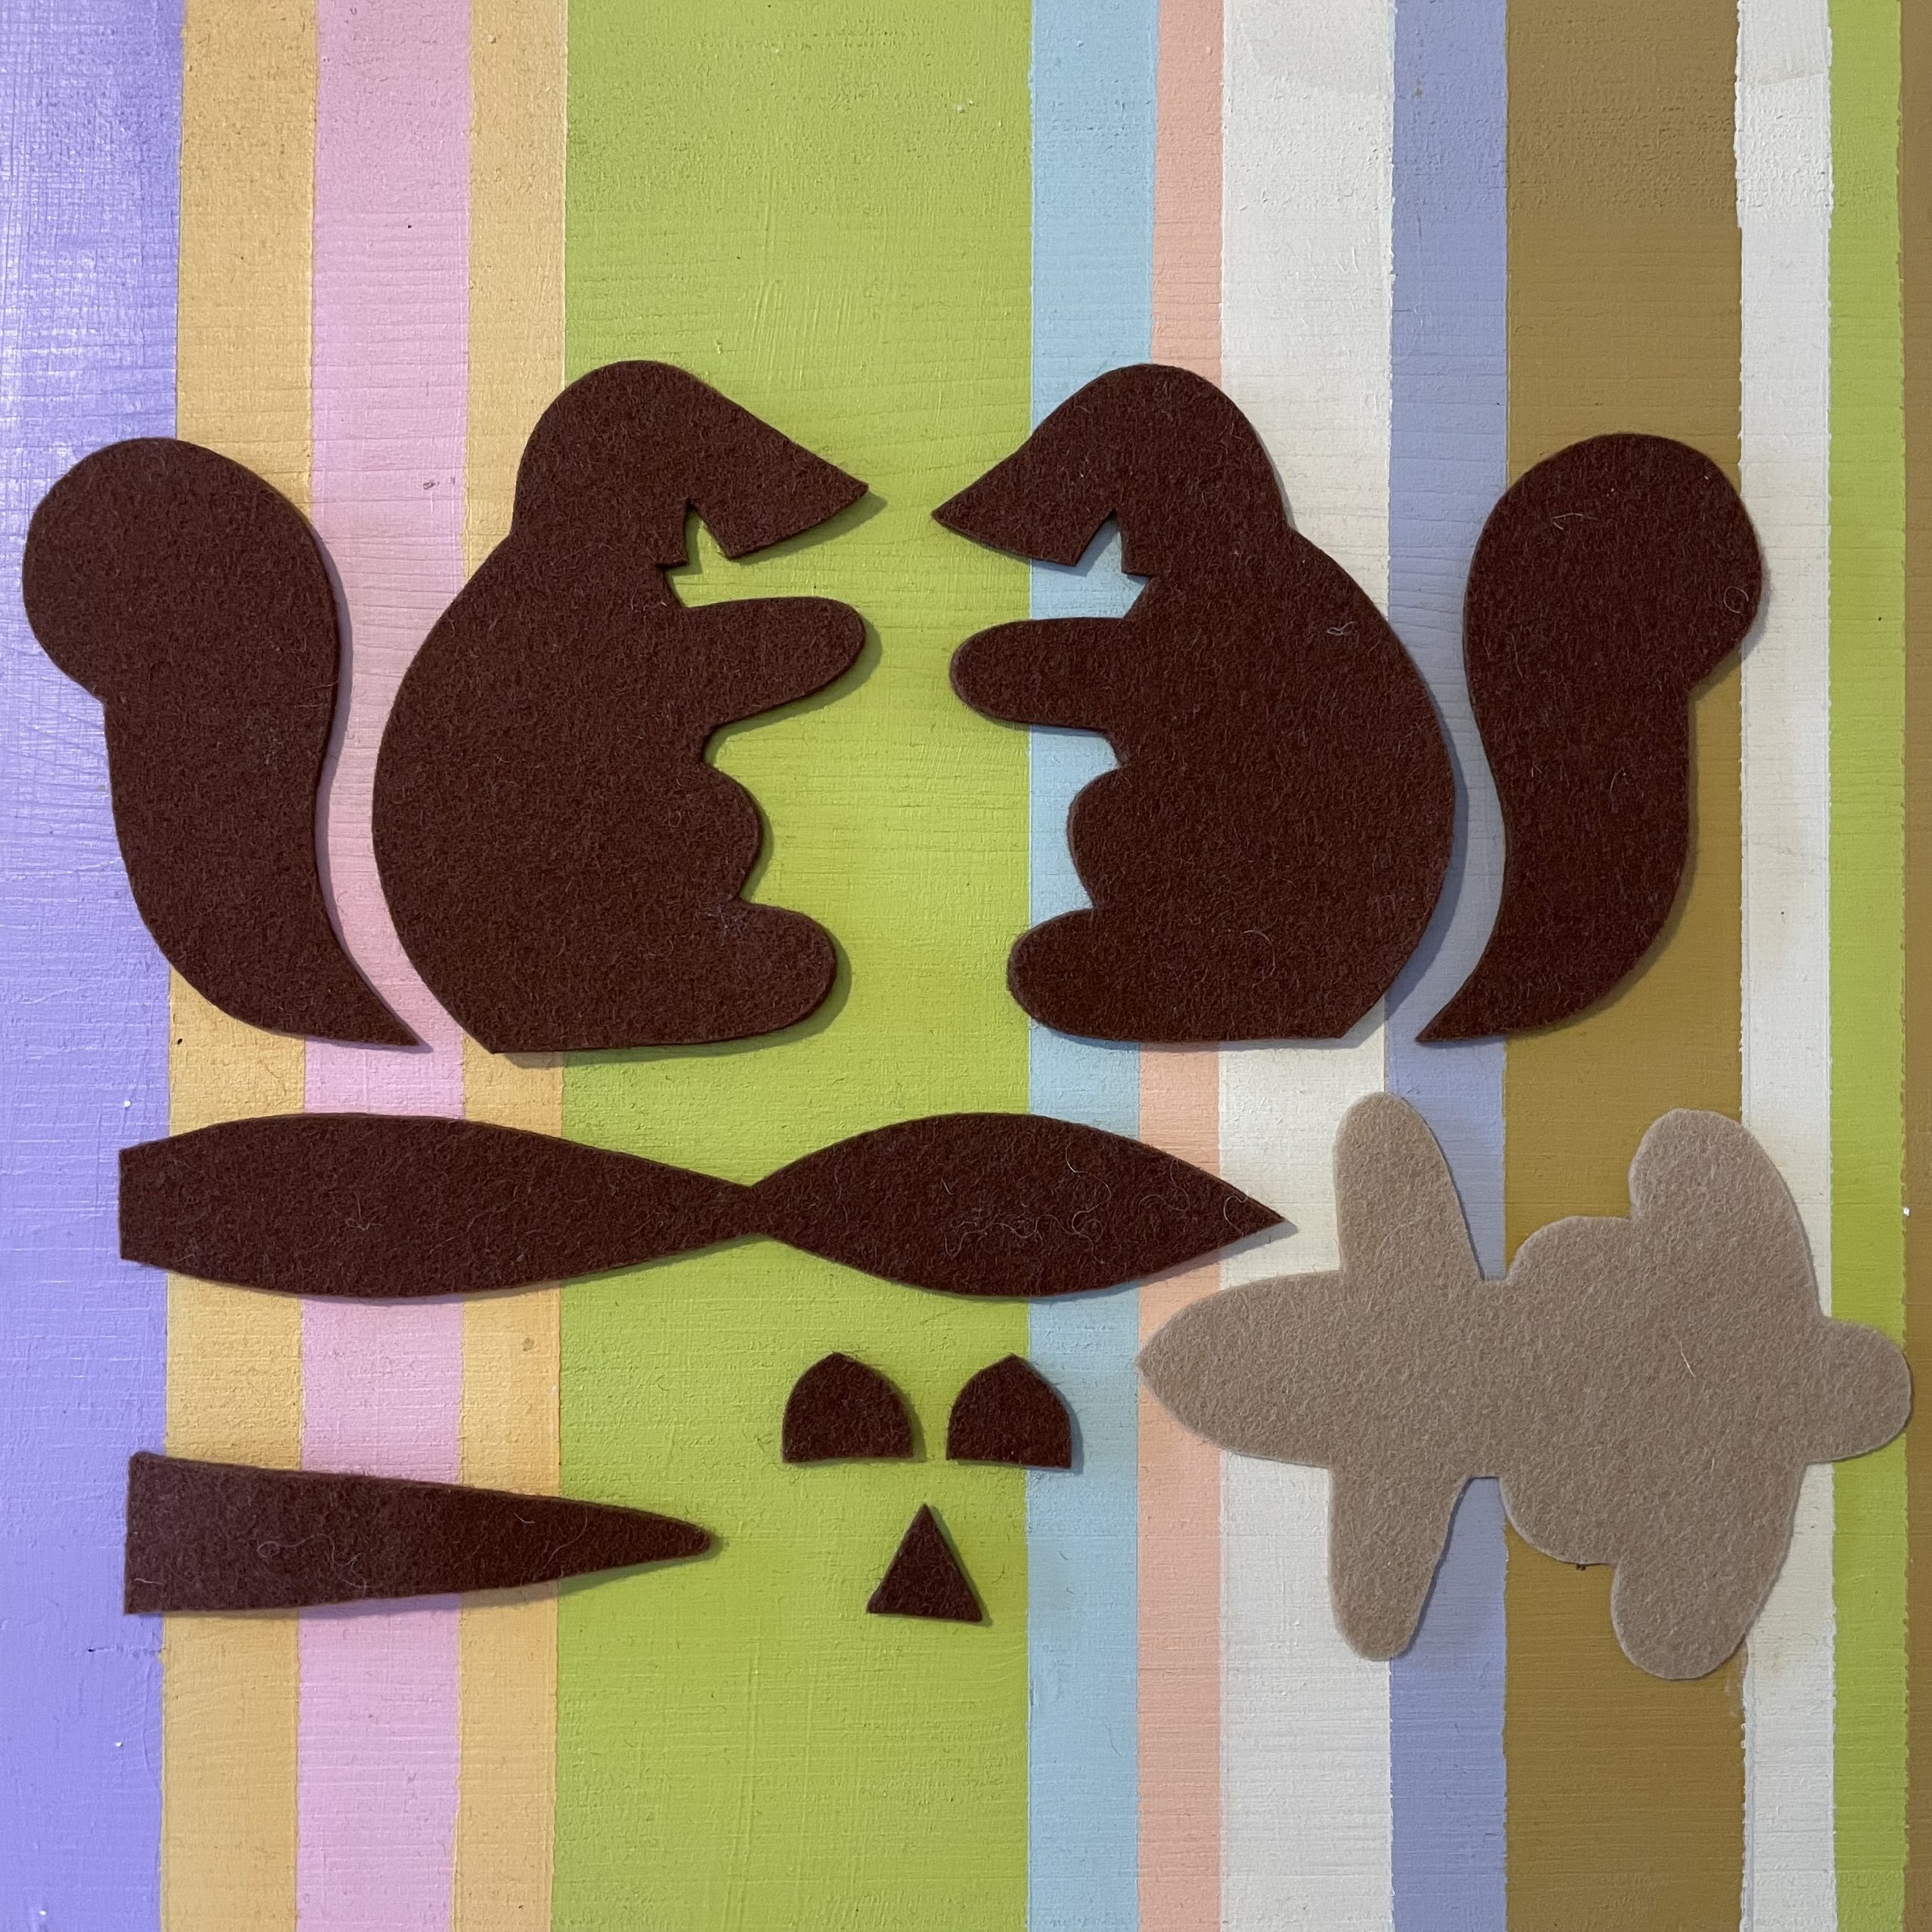
Cut out the pieces as follows:
In brown or grey:
- Piece 1: Body 2x mirror image
- Piece 2: Tail 2x mirror image
- Piece 3: Back of head and back 1x
- Piece 4: Middle tail piece 1x
- Piece 5: Ear 2x
- Piece 6: Bottom tail piece 1x
In beige or white
- Piece 7: Stomach 1x
You now have the following pattern pieces:
Sewing the squirrel
Now let’s start sewing the squirrel! First, close the darts on the two head pieces using small slip stitches.
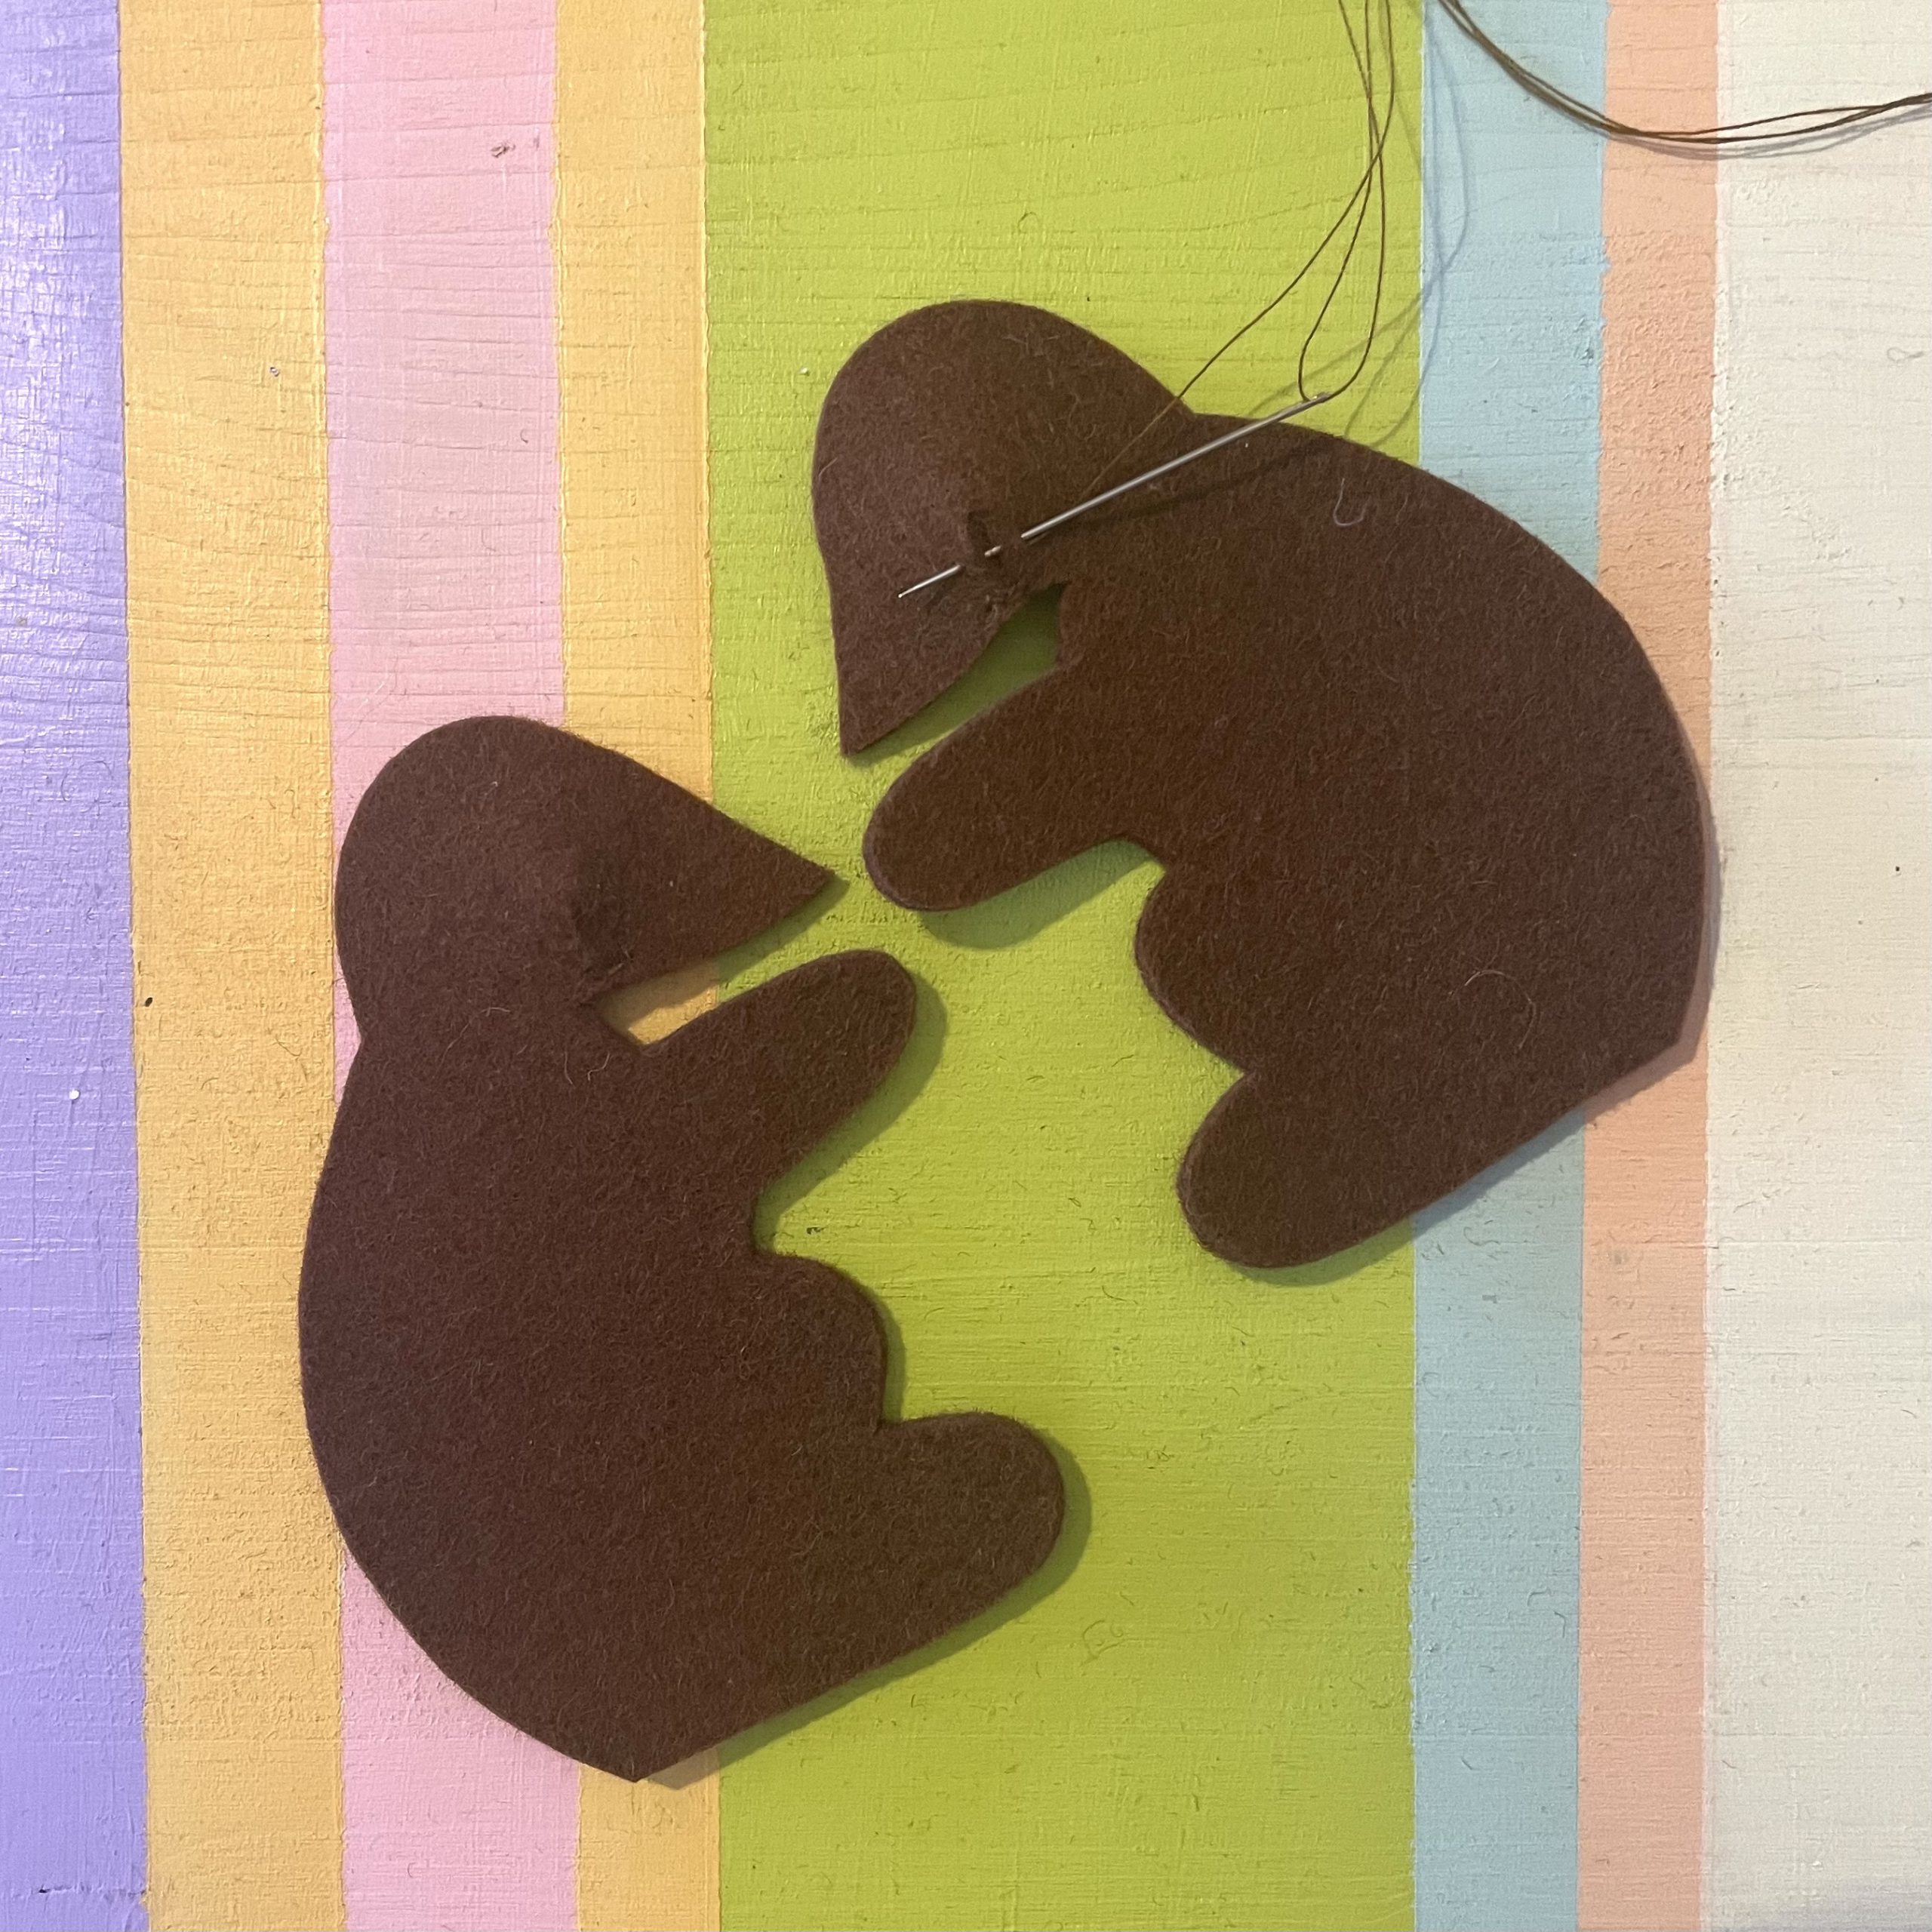
Now sew piece 3 onto the first piece 1. Start at the tip in each case (dot marking)
The tulip markings meet at the back of the head.

At the end of piece 3, the diamond markings come together.
Then insert the opposite body piece in the same way.
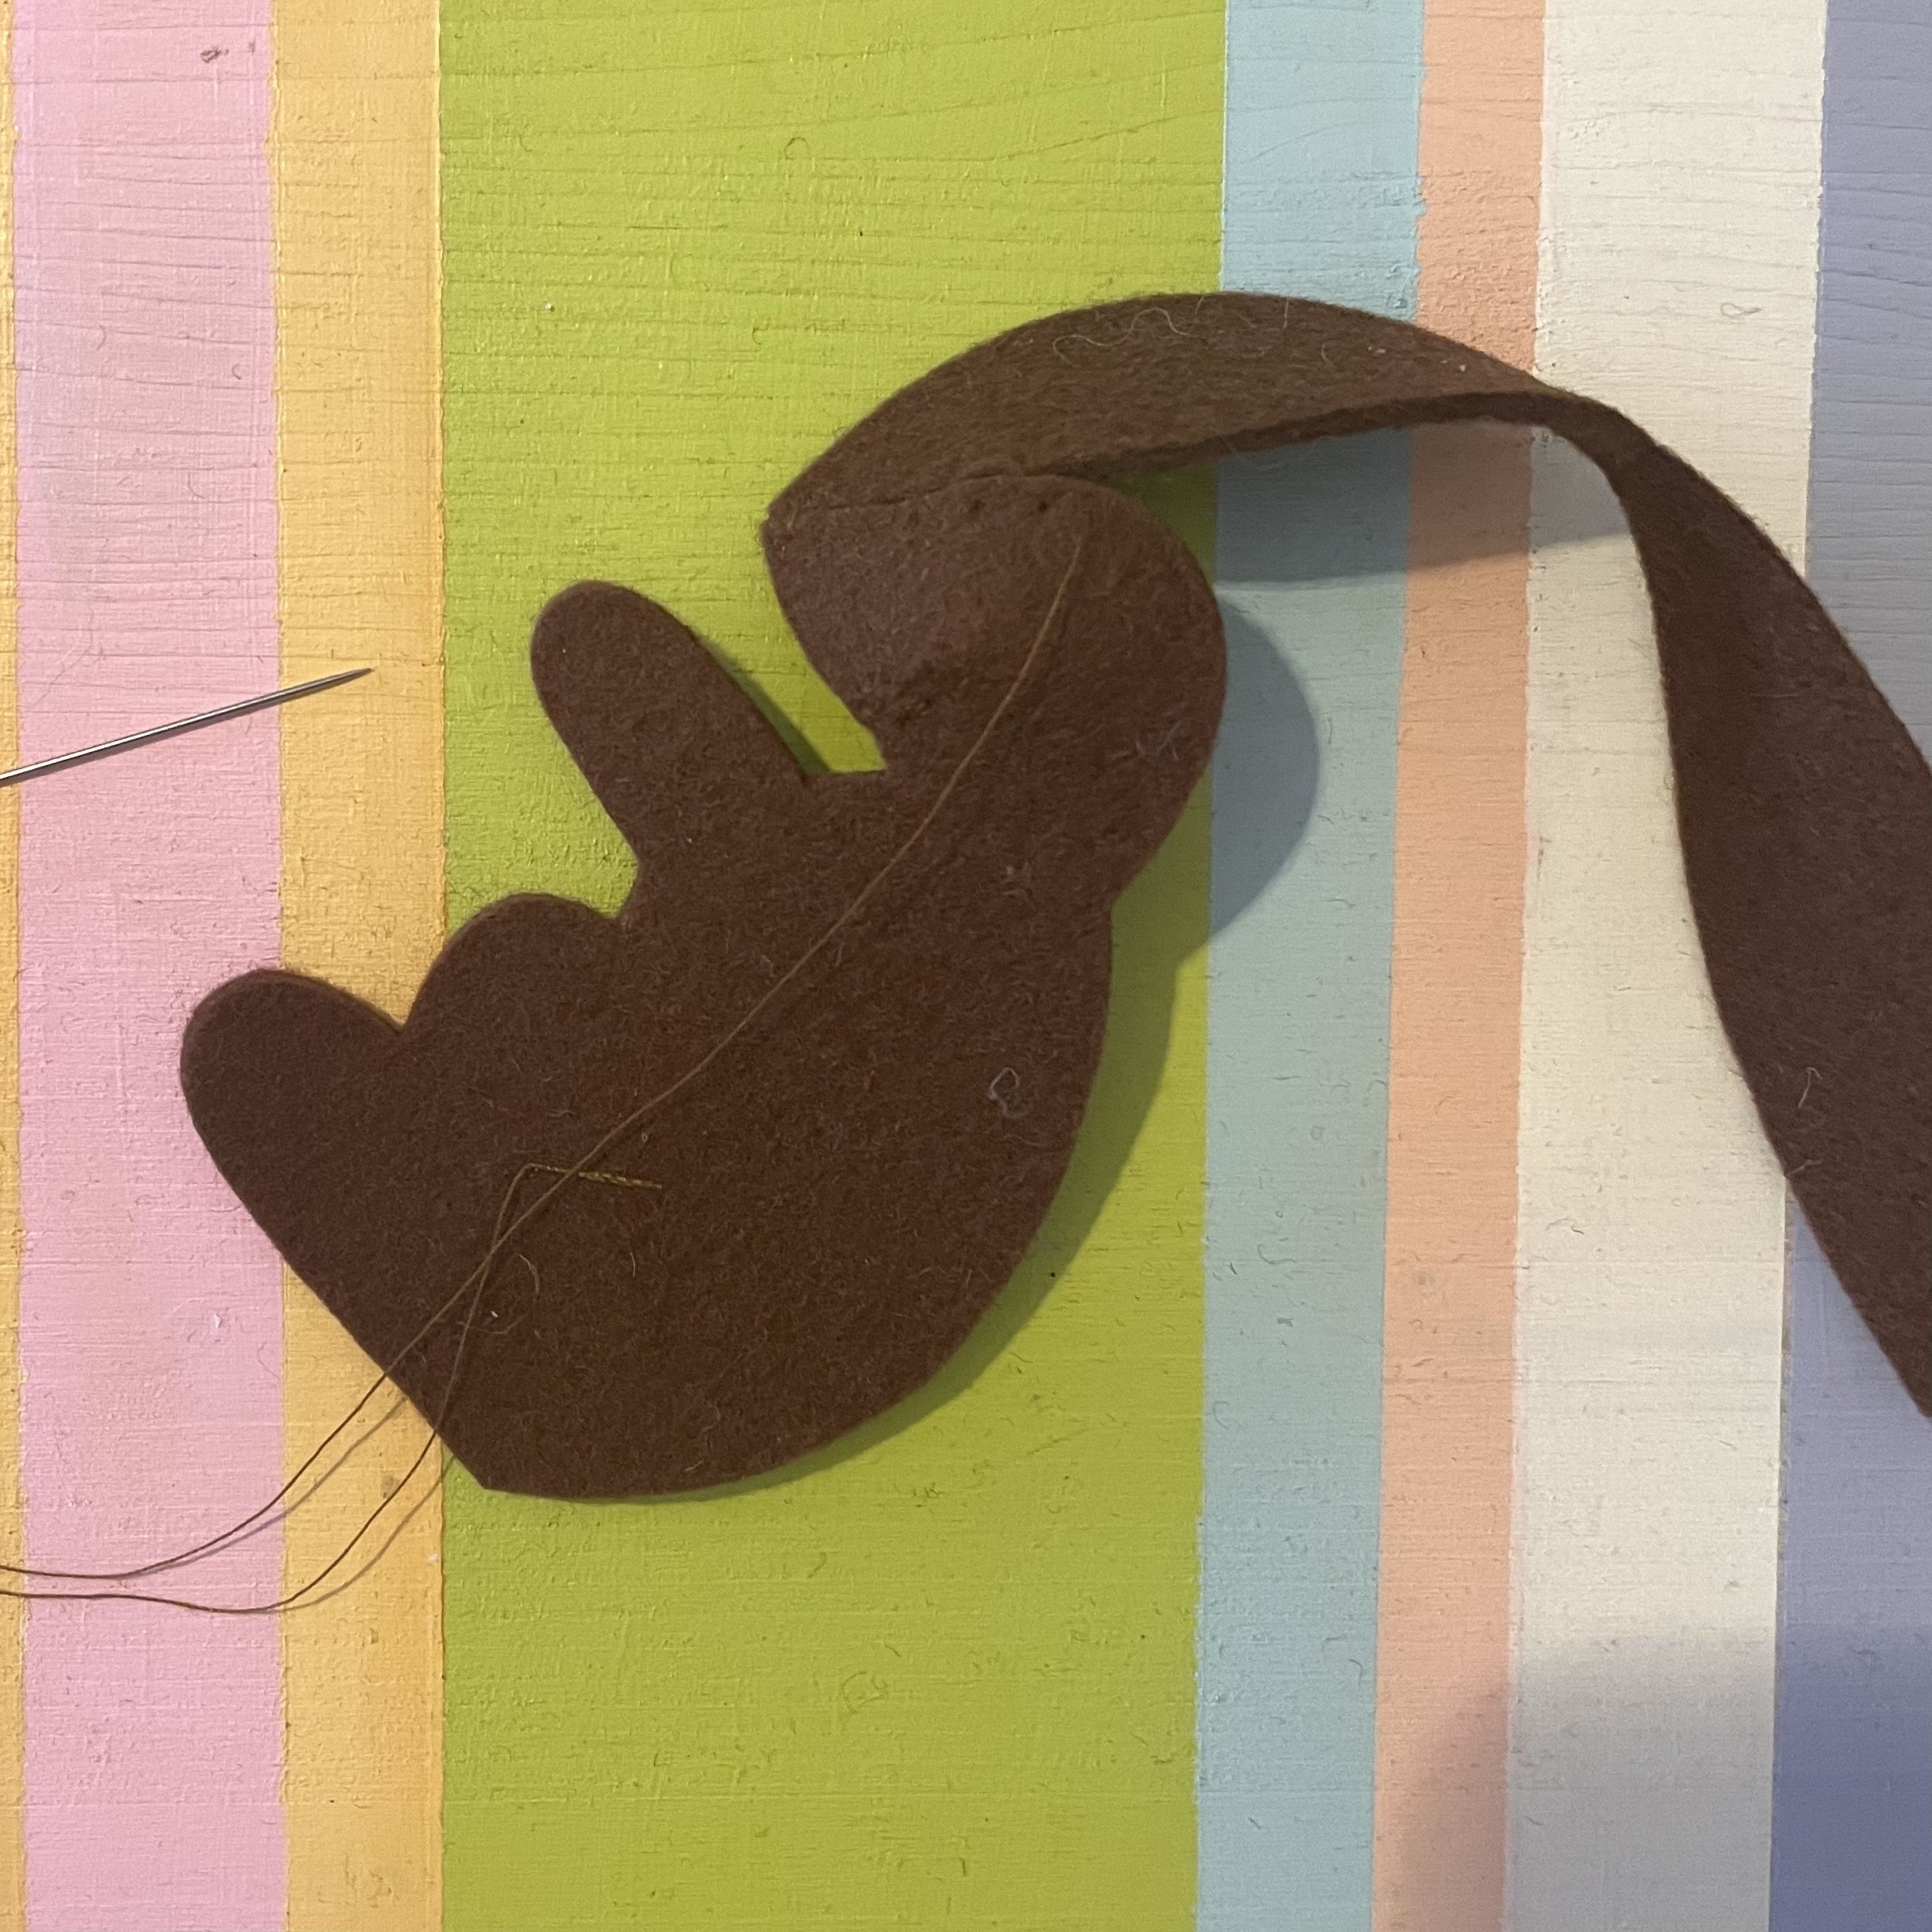
Now sew the stomach piece (piece 7) onto the body. The (dot) markings meet exactly at the tip at the start.

The heart markings meet up above the arm.
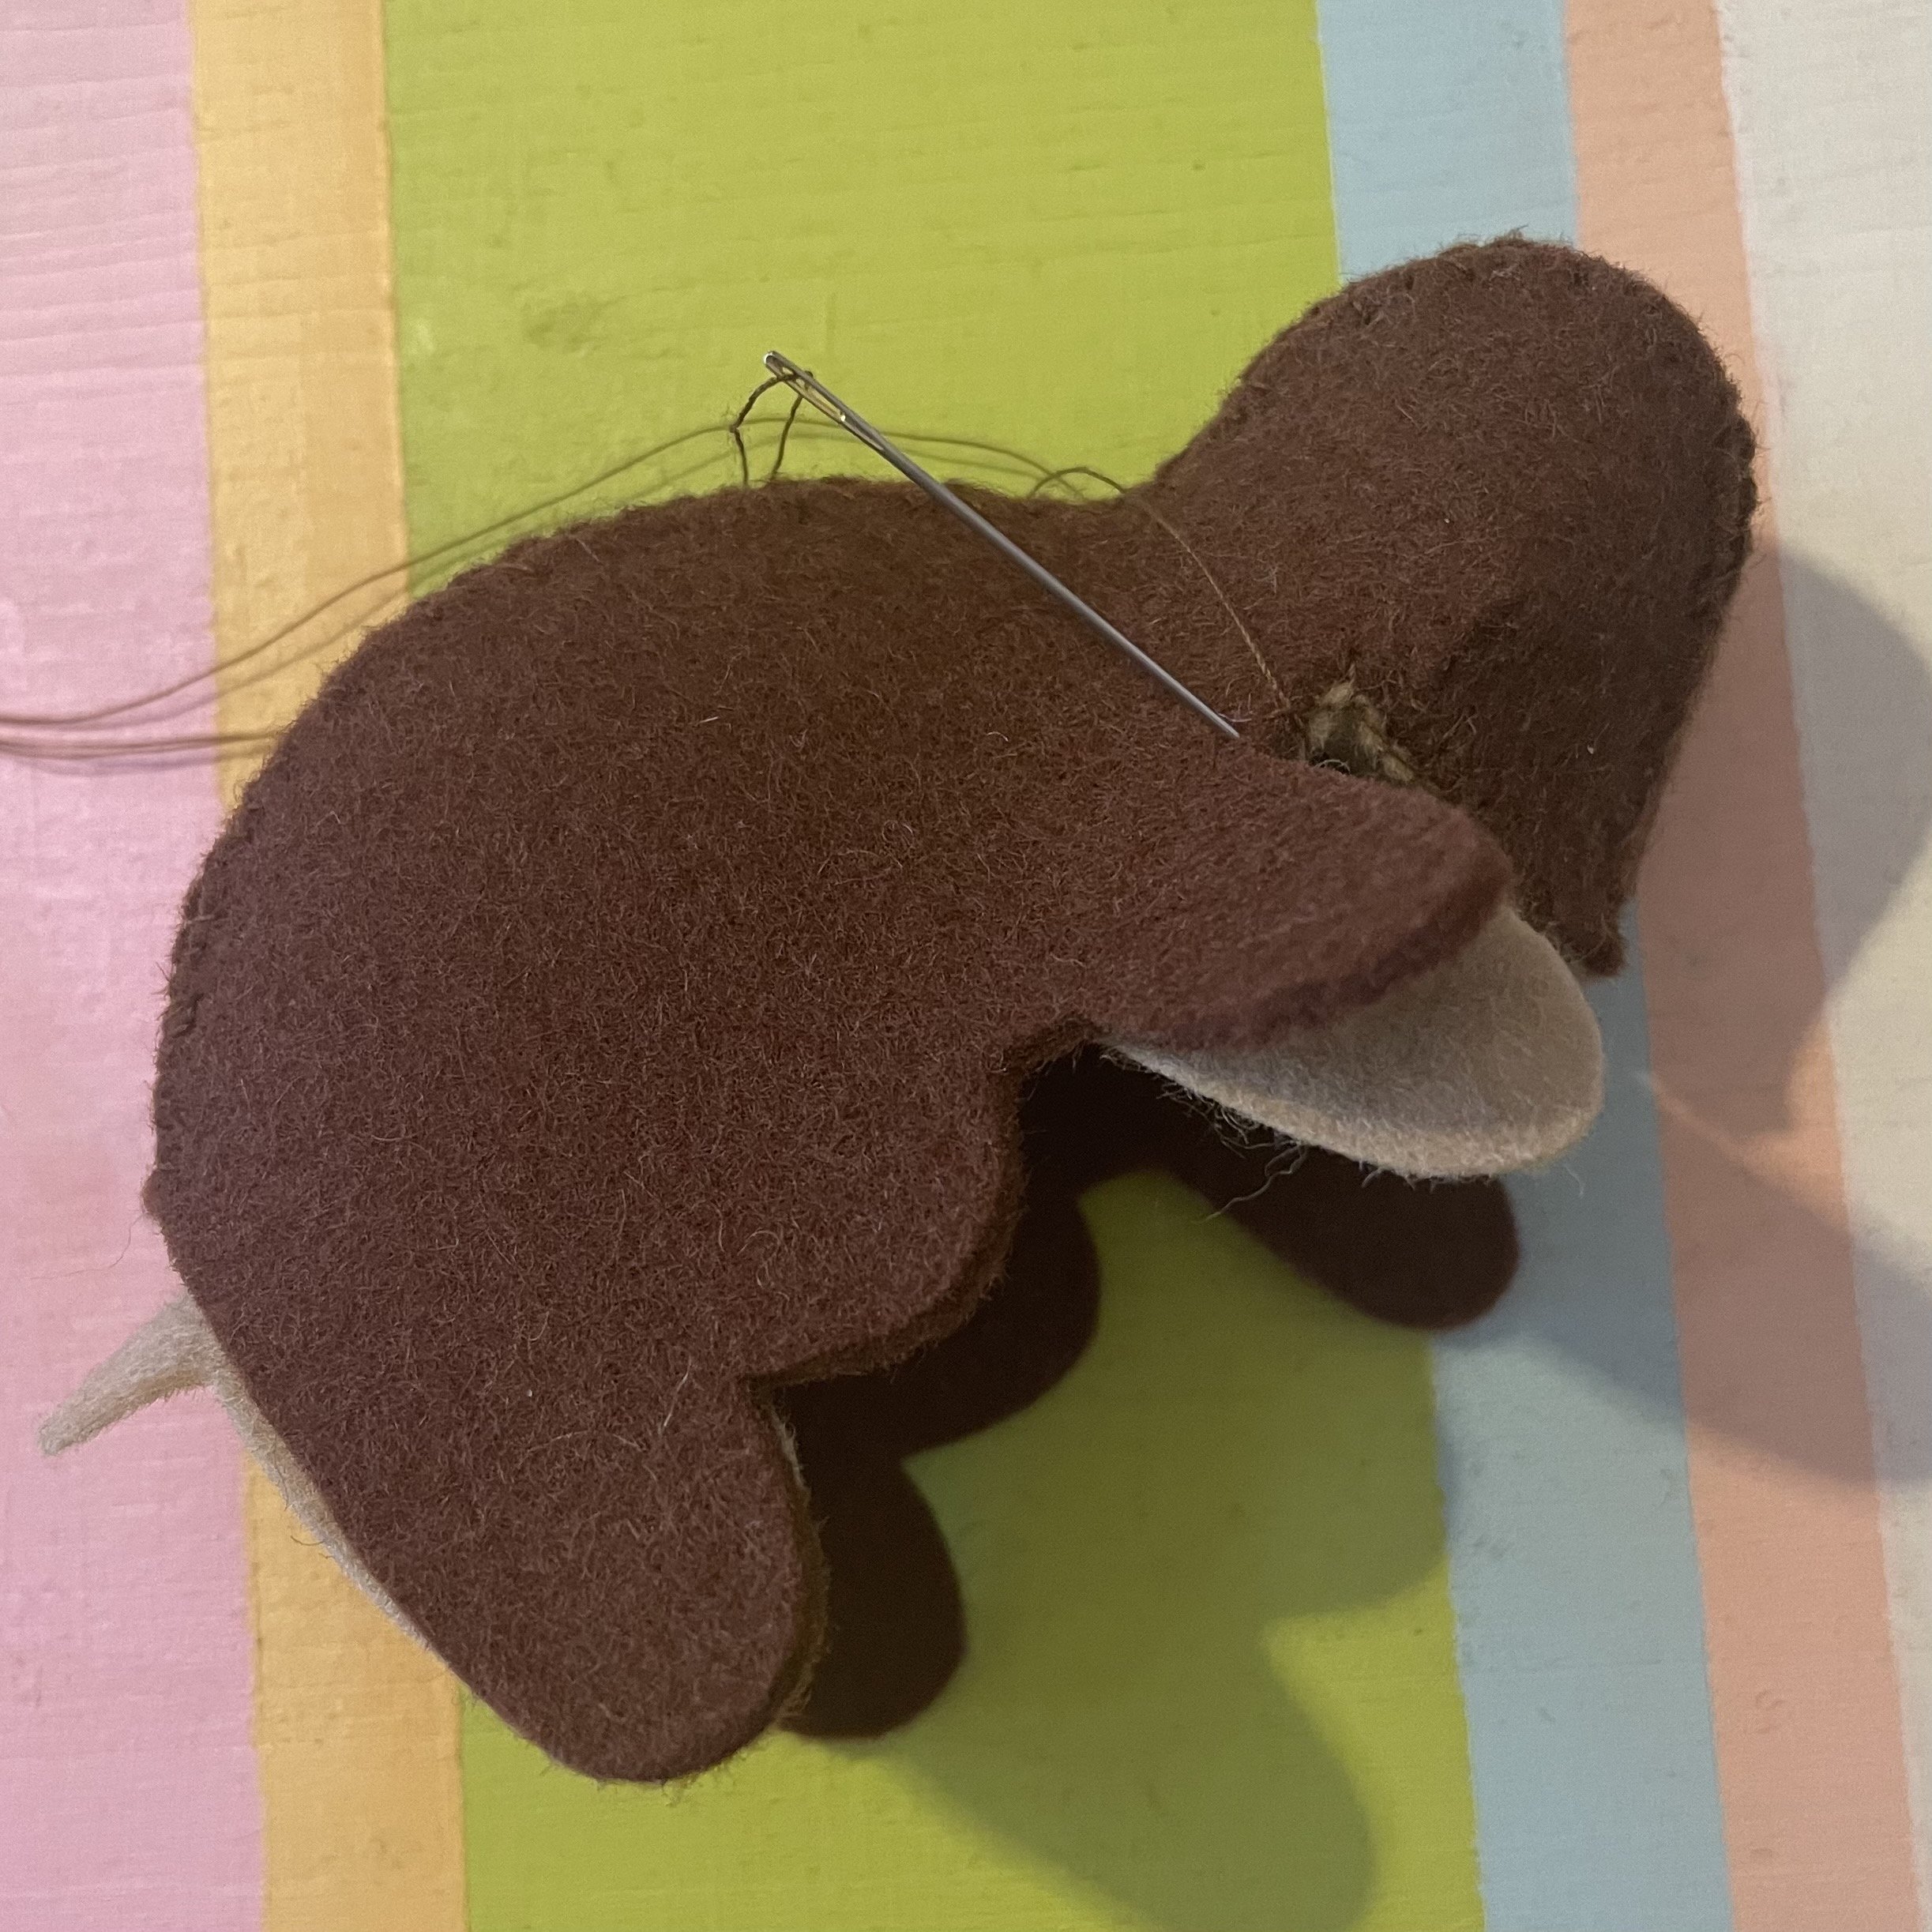
Now continue sewing until the triangle markings meet above the lower foot.

Do the same on the opposite side.
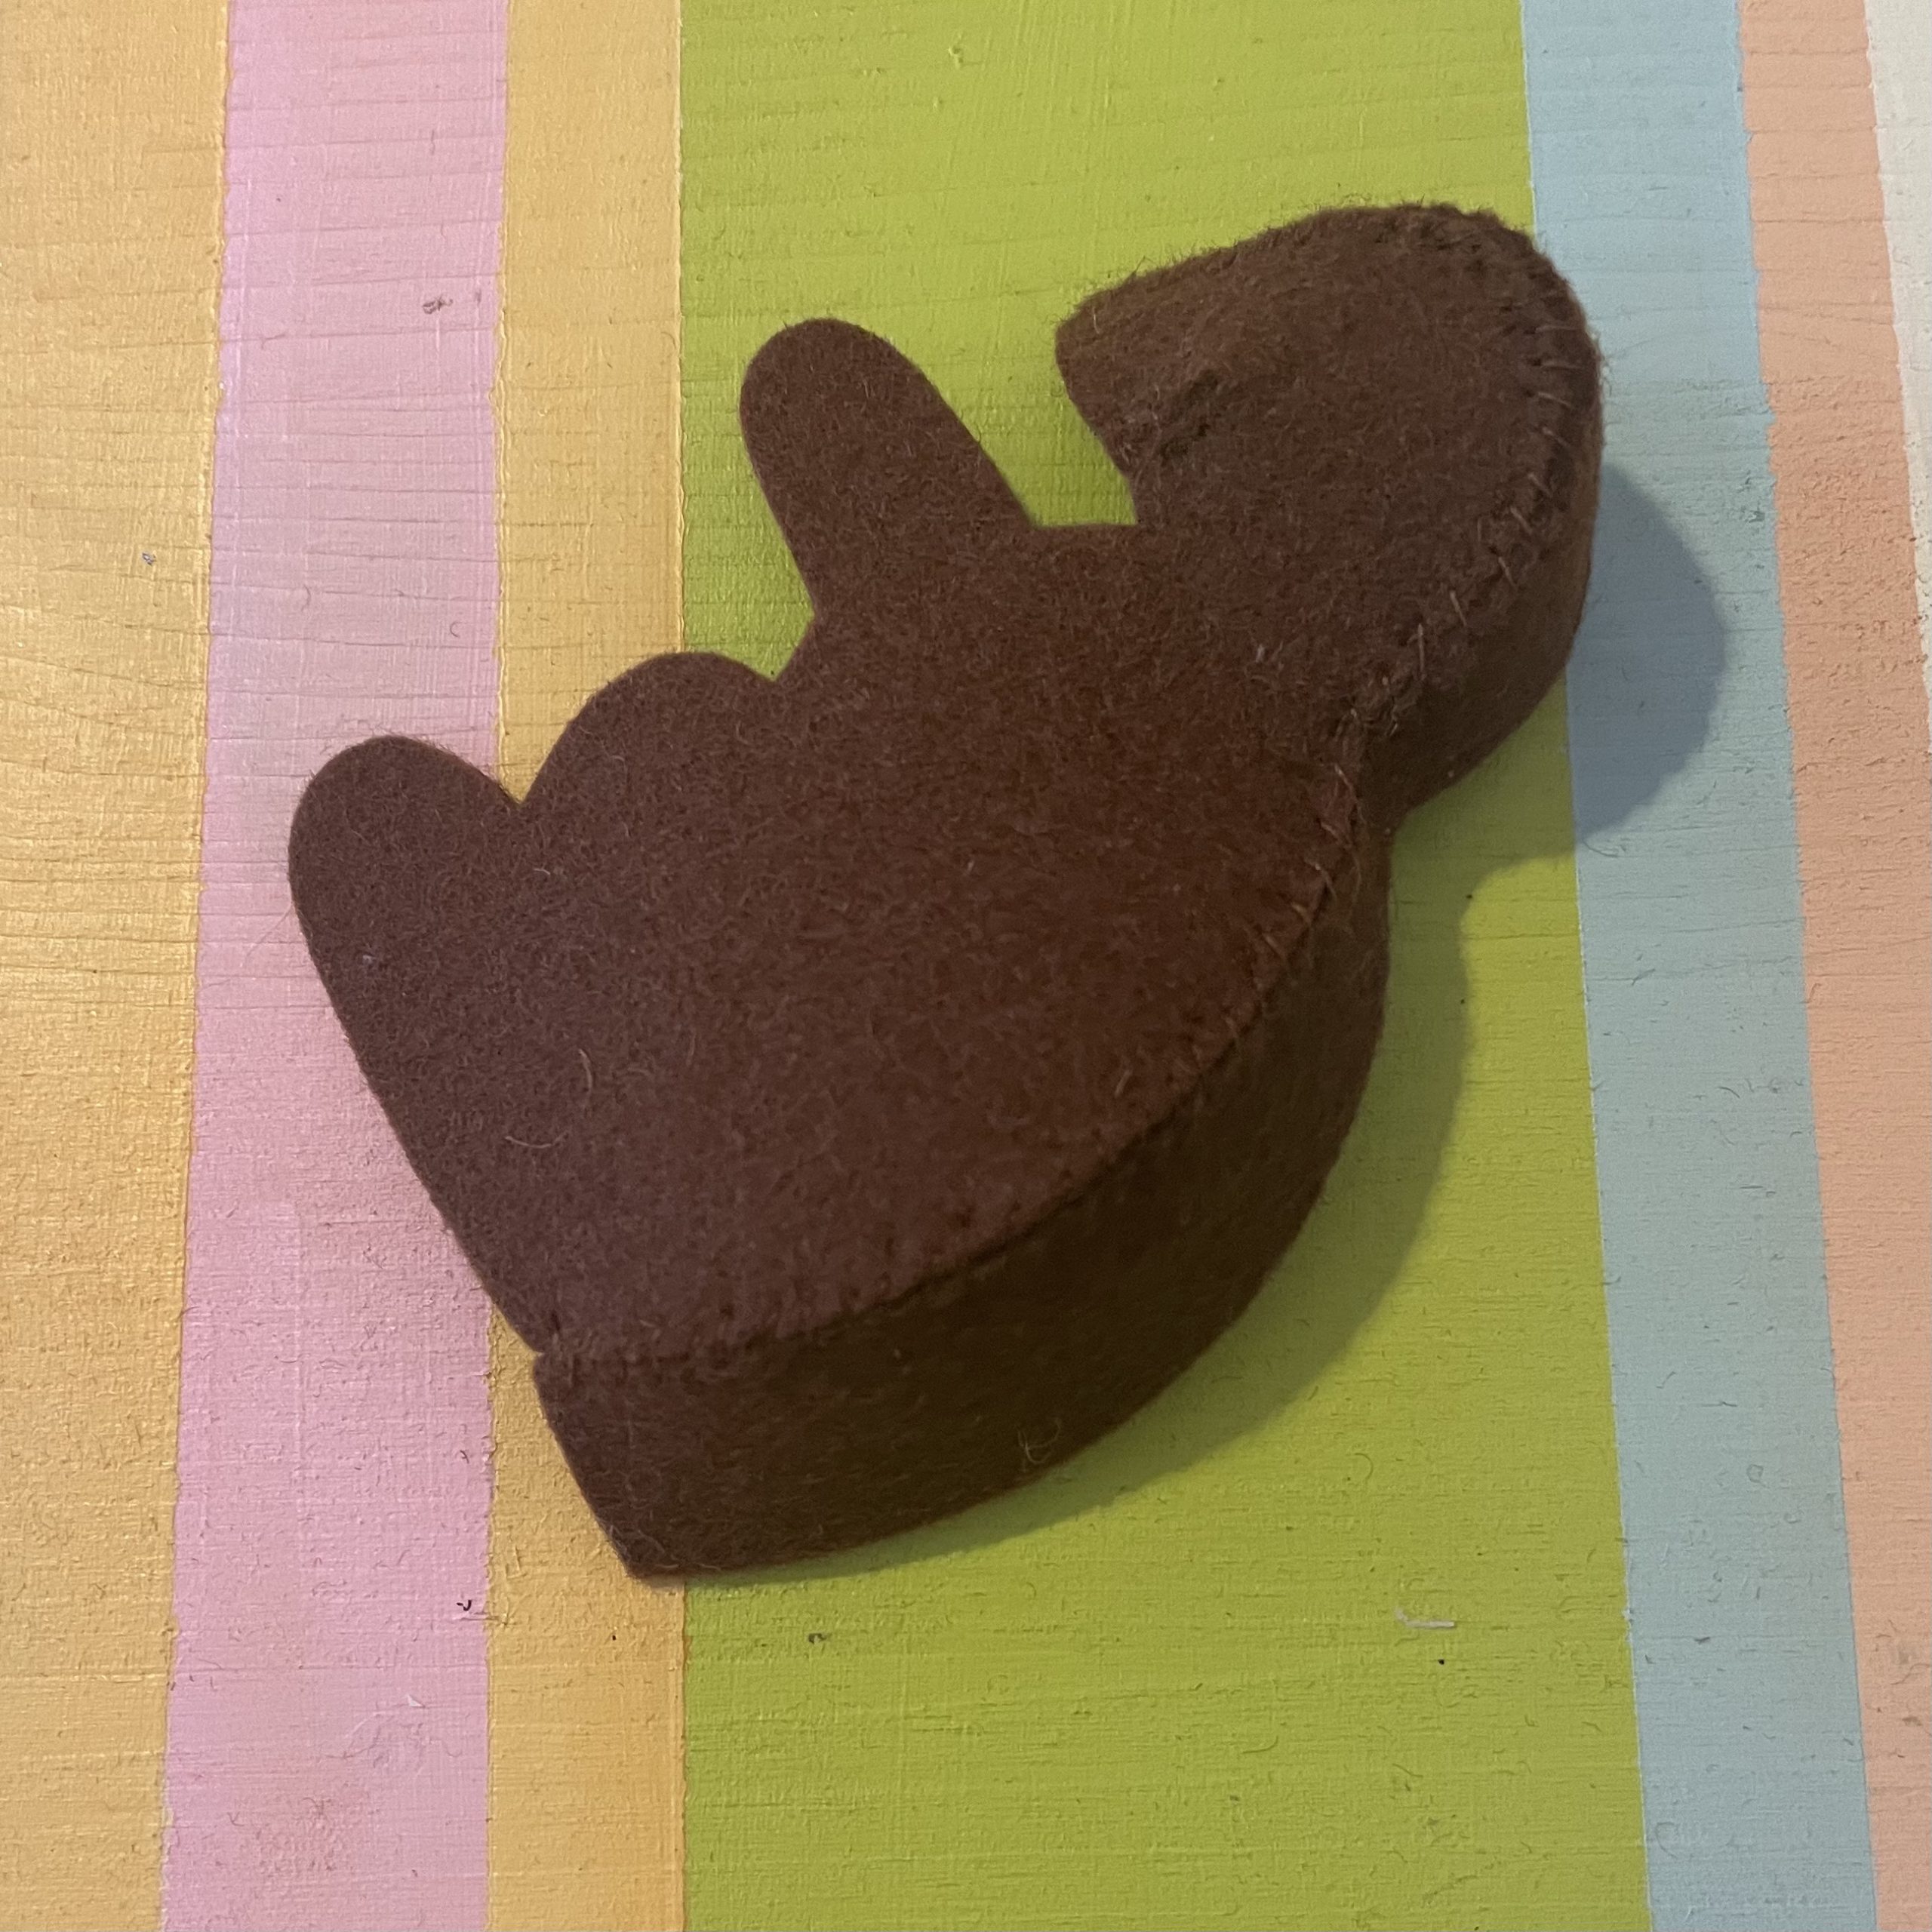
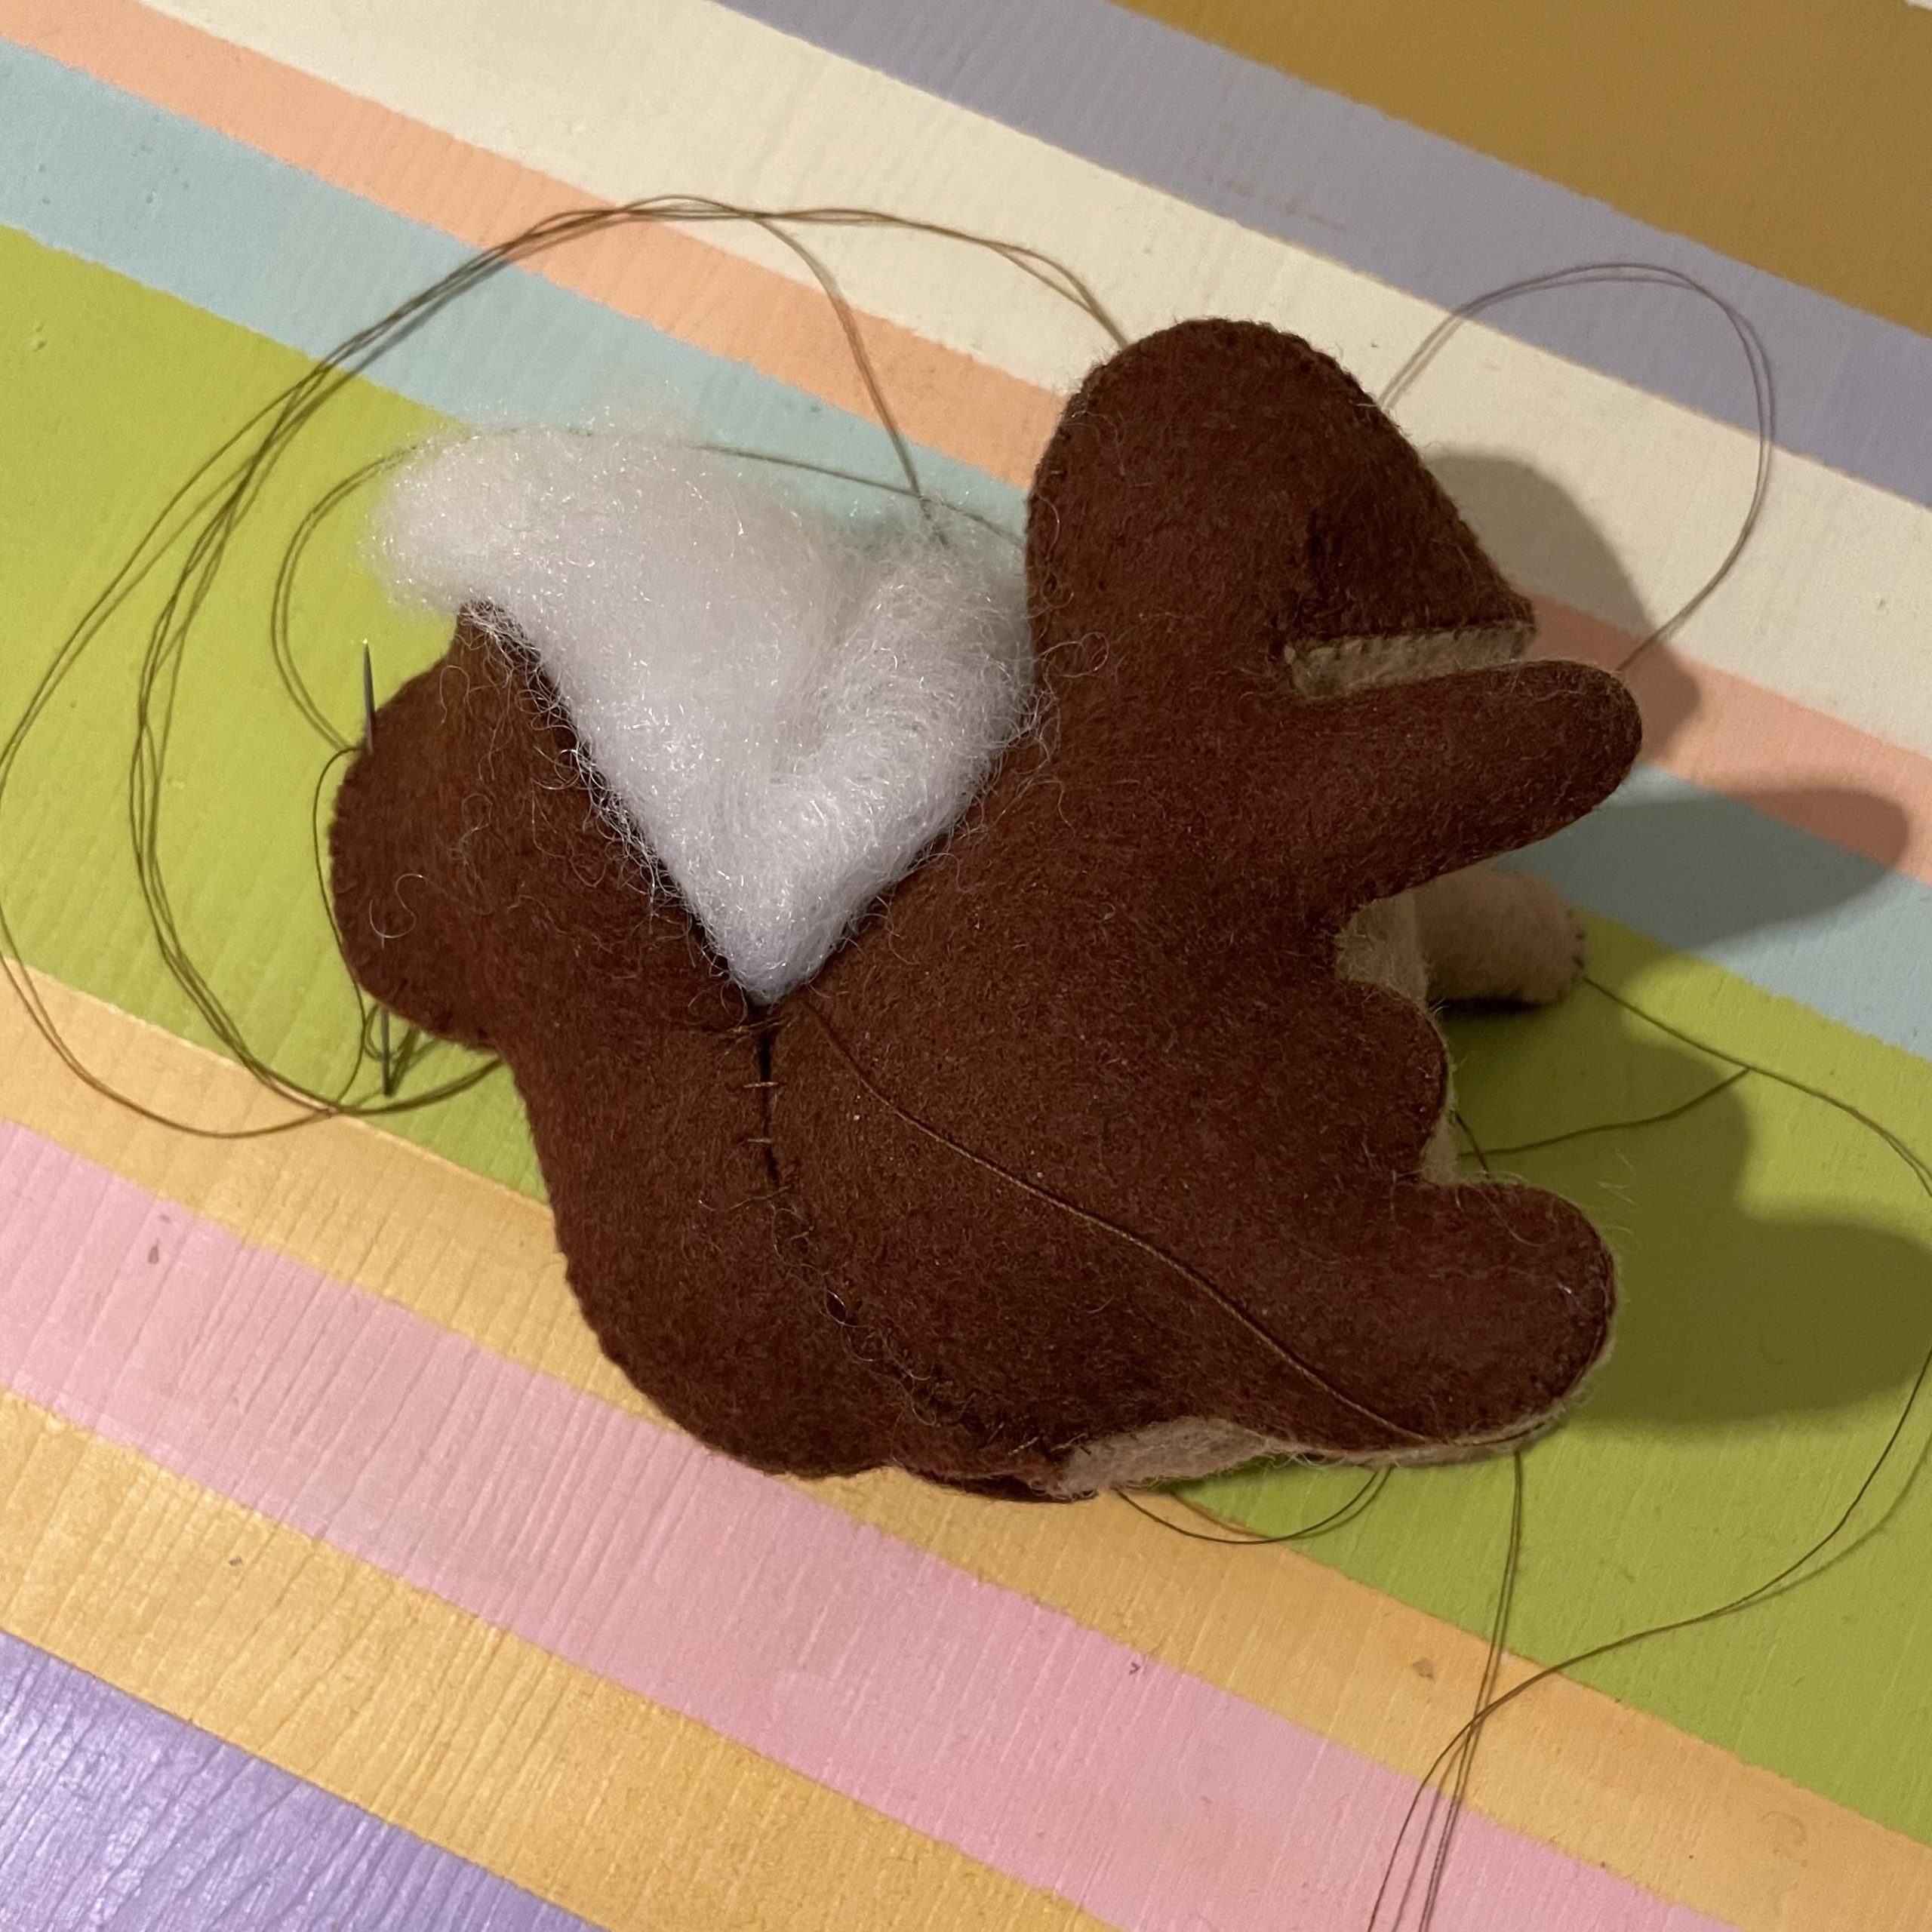
Then stuff the squirrel well, especially the head and the arms. To make it stand up well, you can put a stone inside. Alternatively, to make a baby’s rattle, insert a rattle ball or bell. If you want to hang your squirrel on the Christmas tree, just use fiberfill.
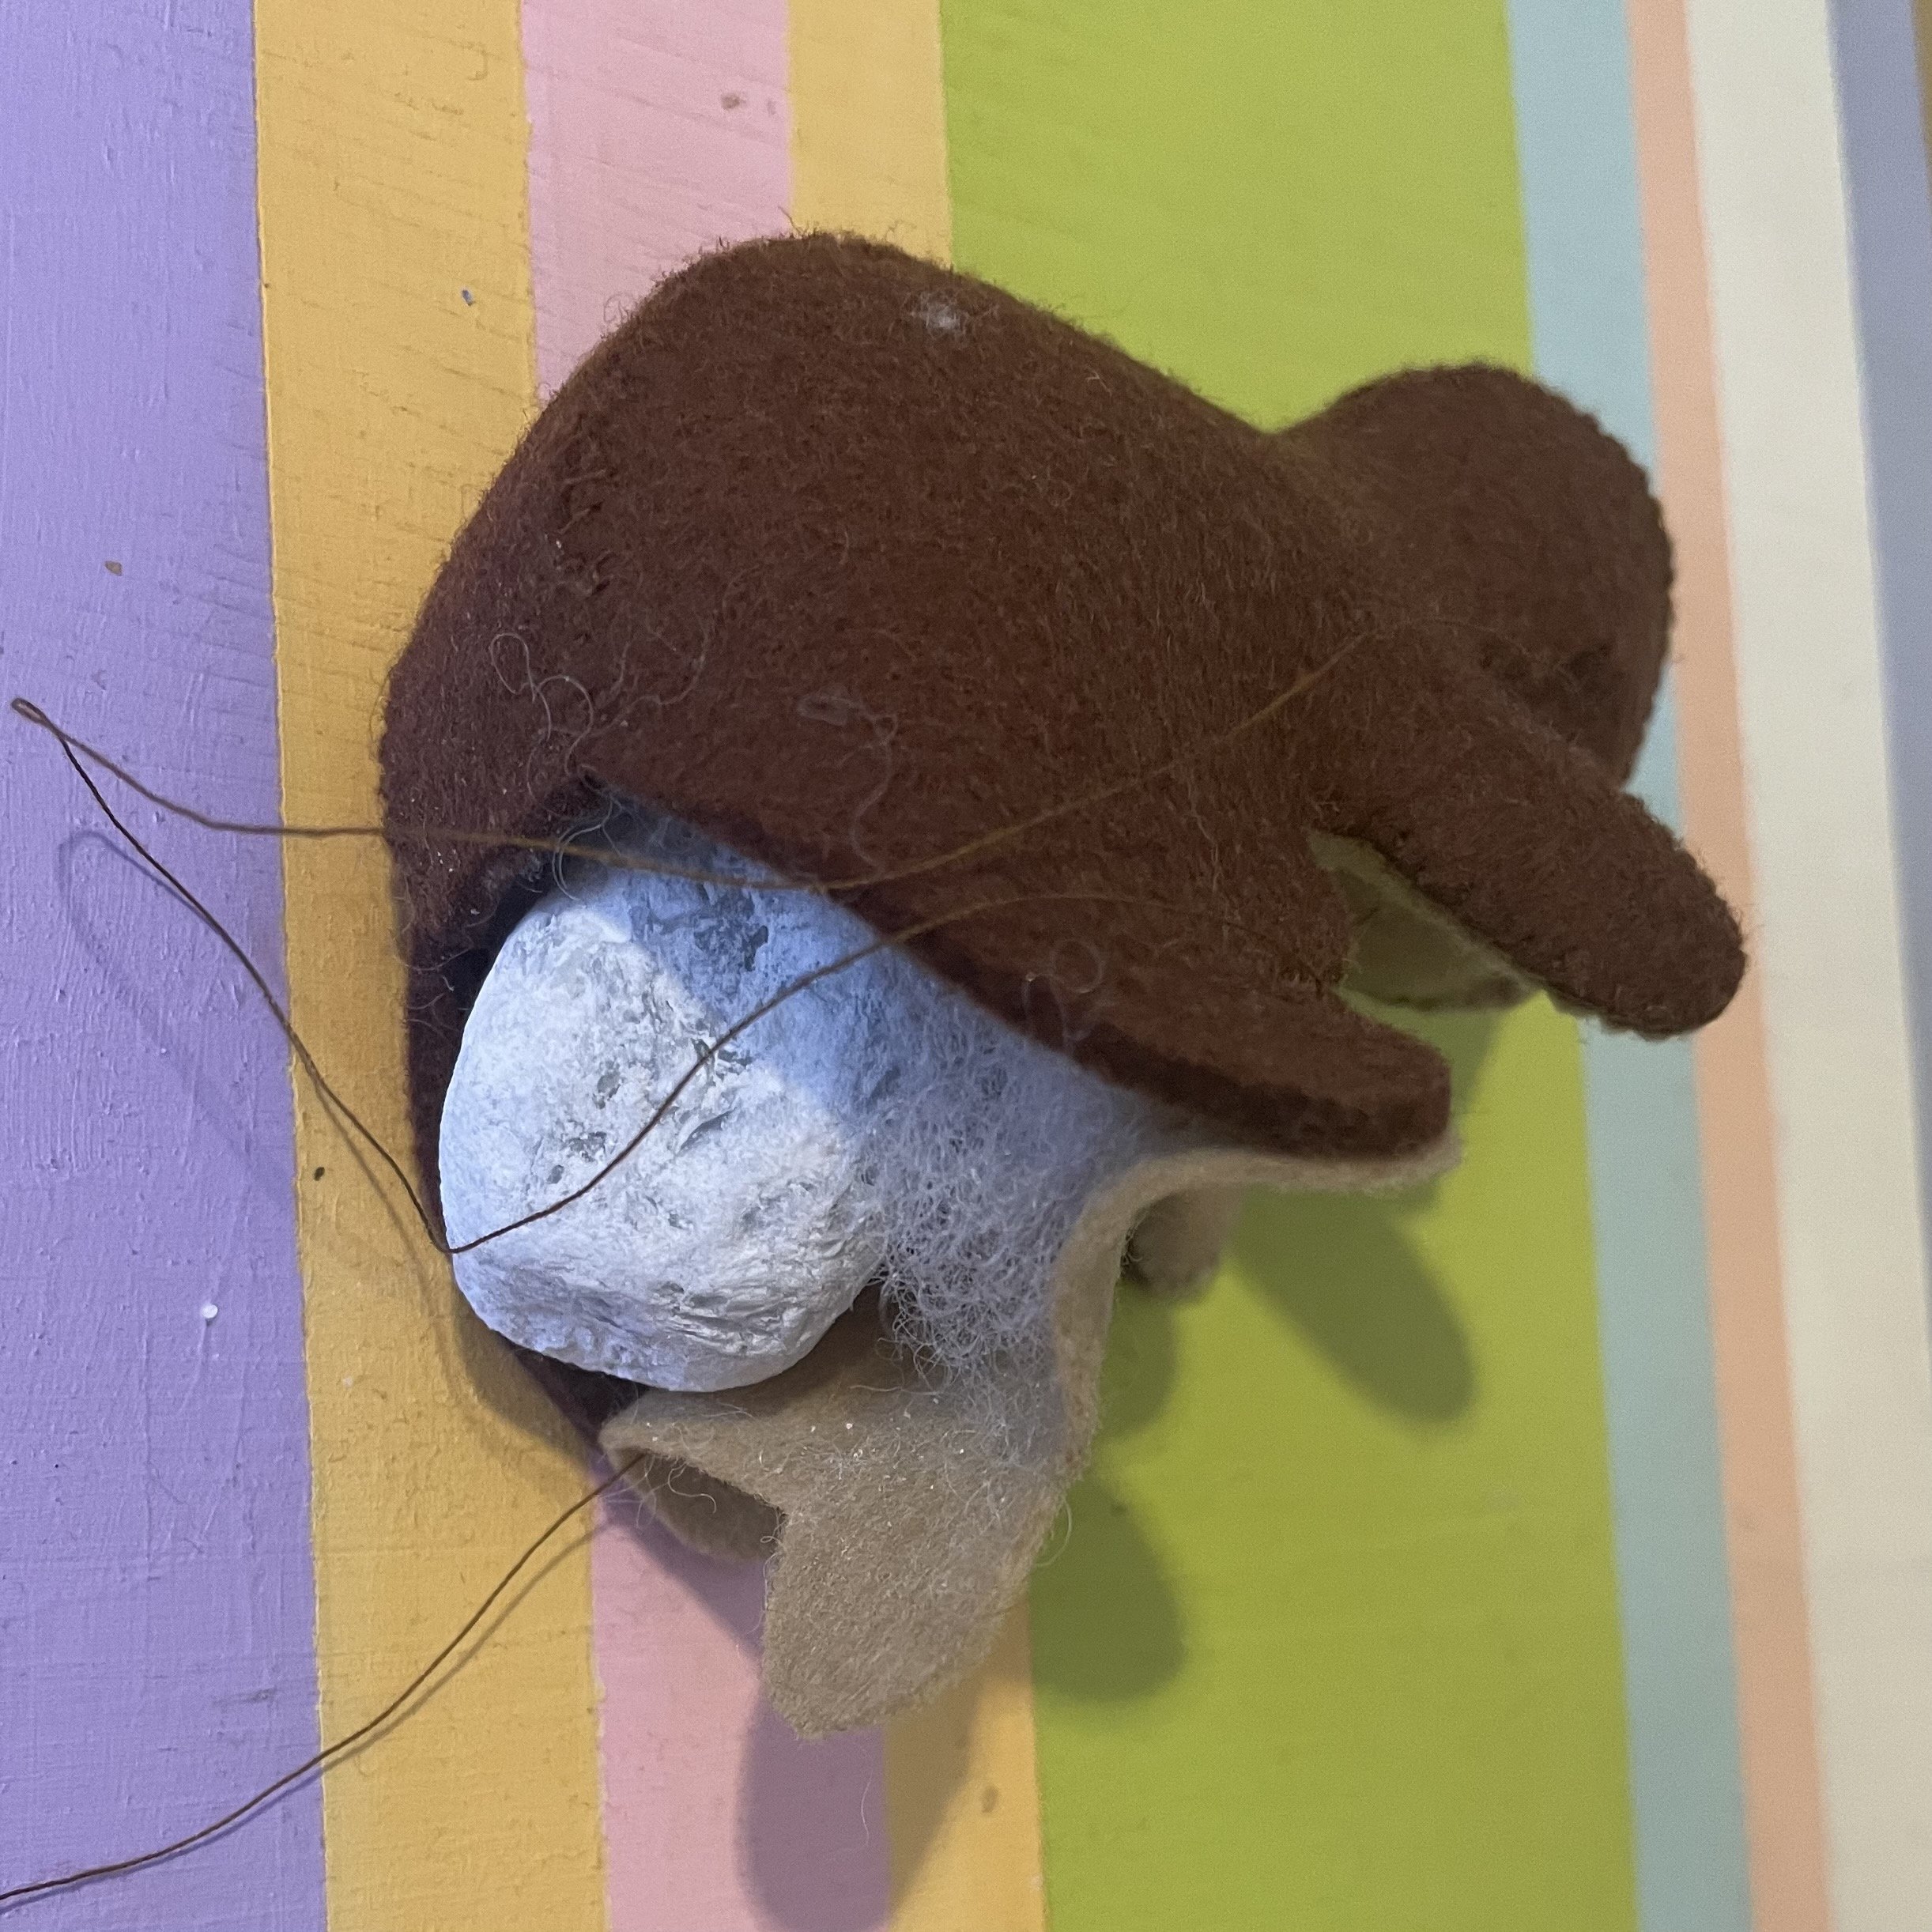
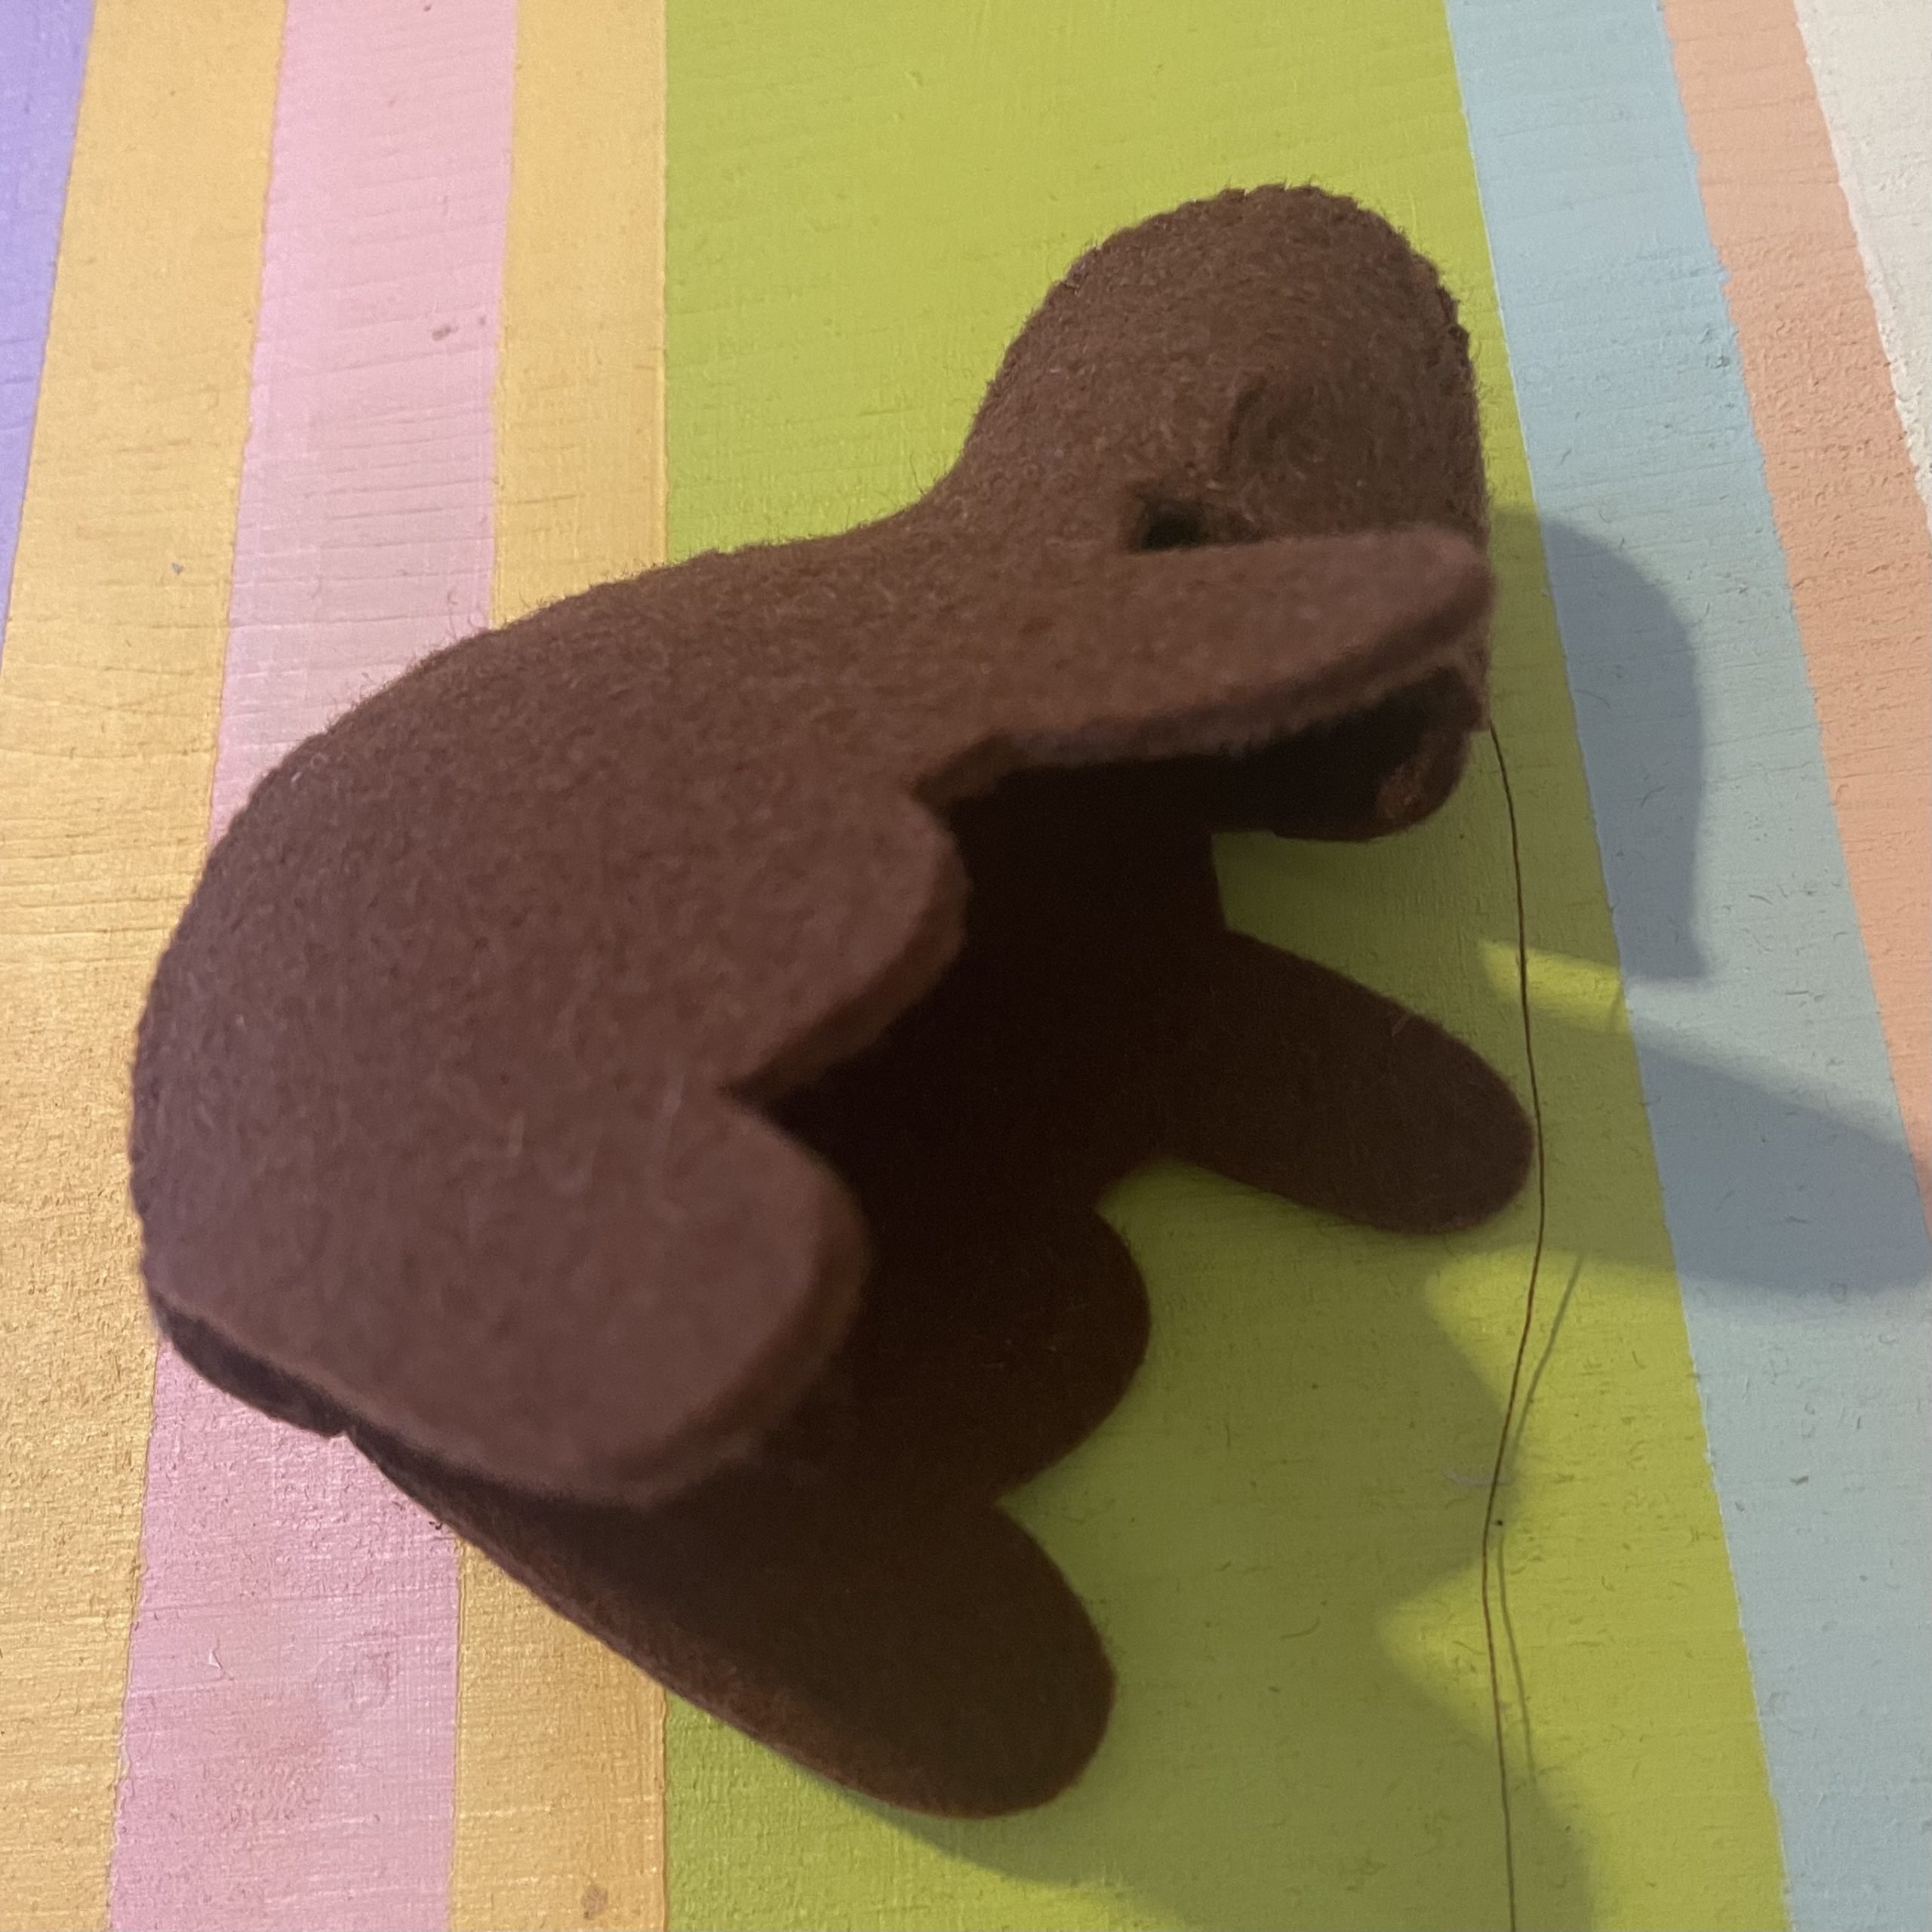
Now close the bottom seam halfway. Start at the wave marking so the wave markings on the two pieces come together.

Then stuff the rest of the squirrel well and close the opening. Now at least it can stand up. But the squirrel still looks a bit big around the stomach.

So I pushed a little excess fabric inside (e.g. with the back of a knife) to shape the legs. This fold was secured in place with some blind stitches in the felt. The squirrel now has legs… This step is optional if you like the more rounded squirrel better.

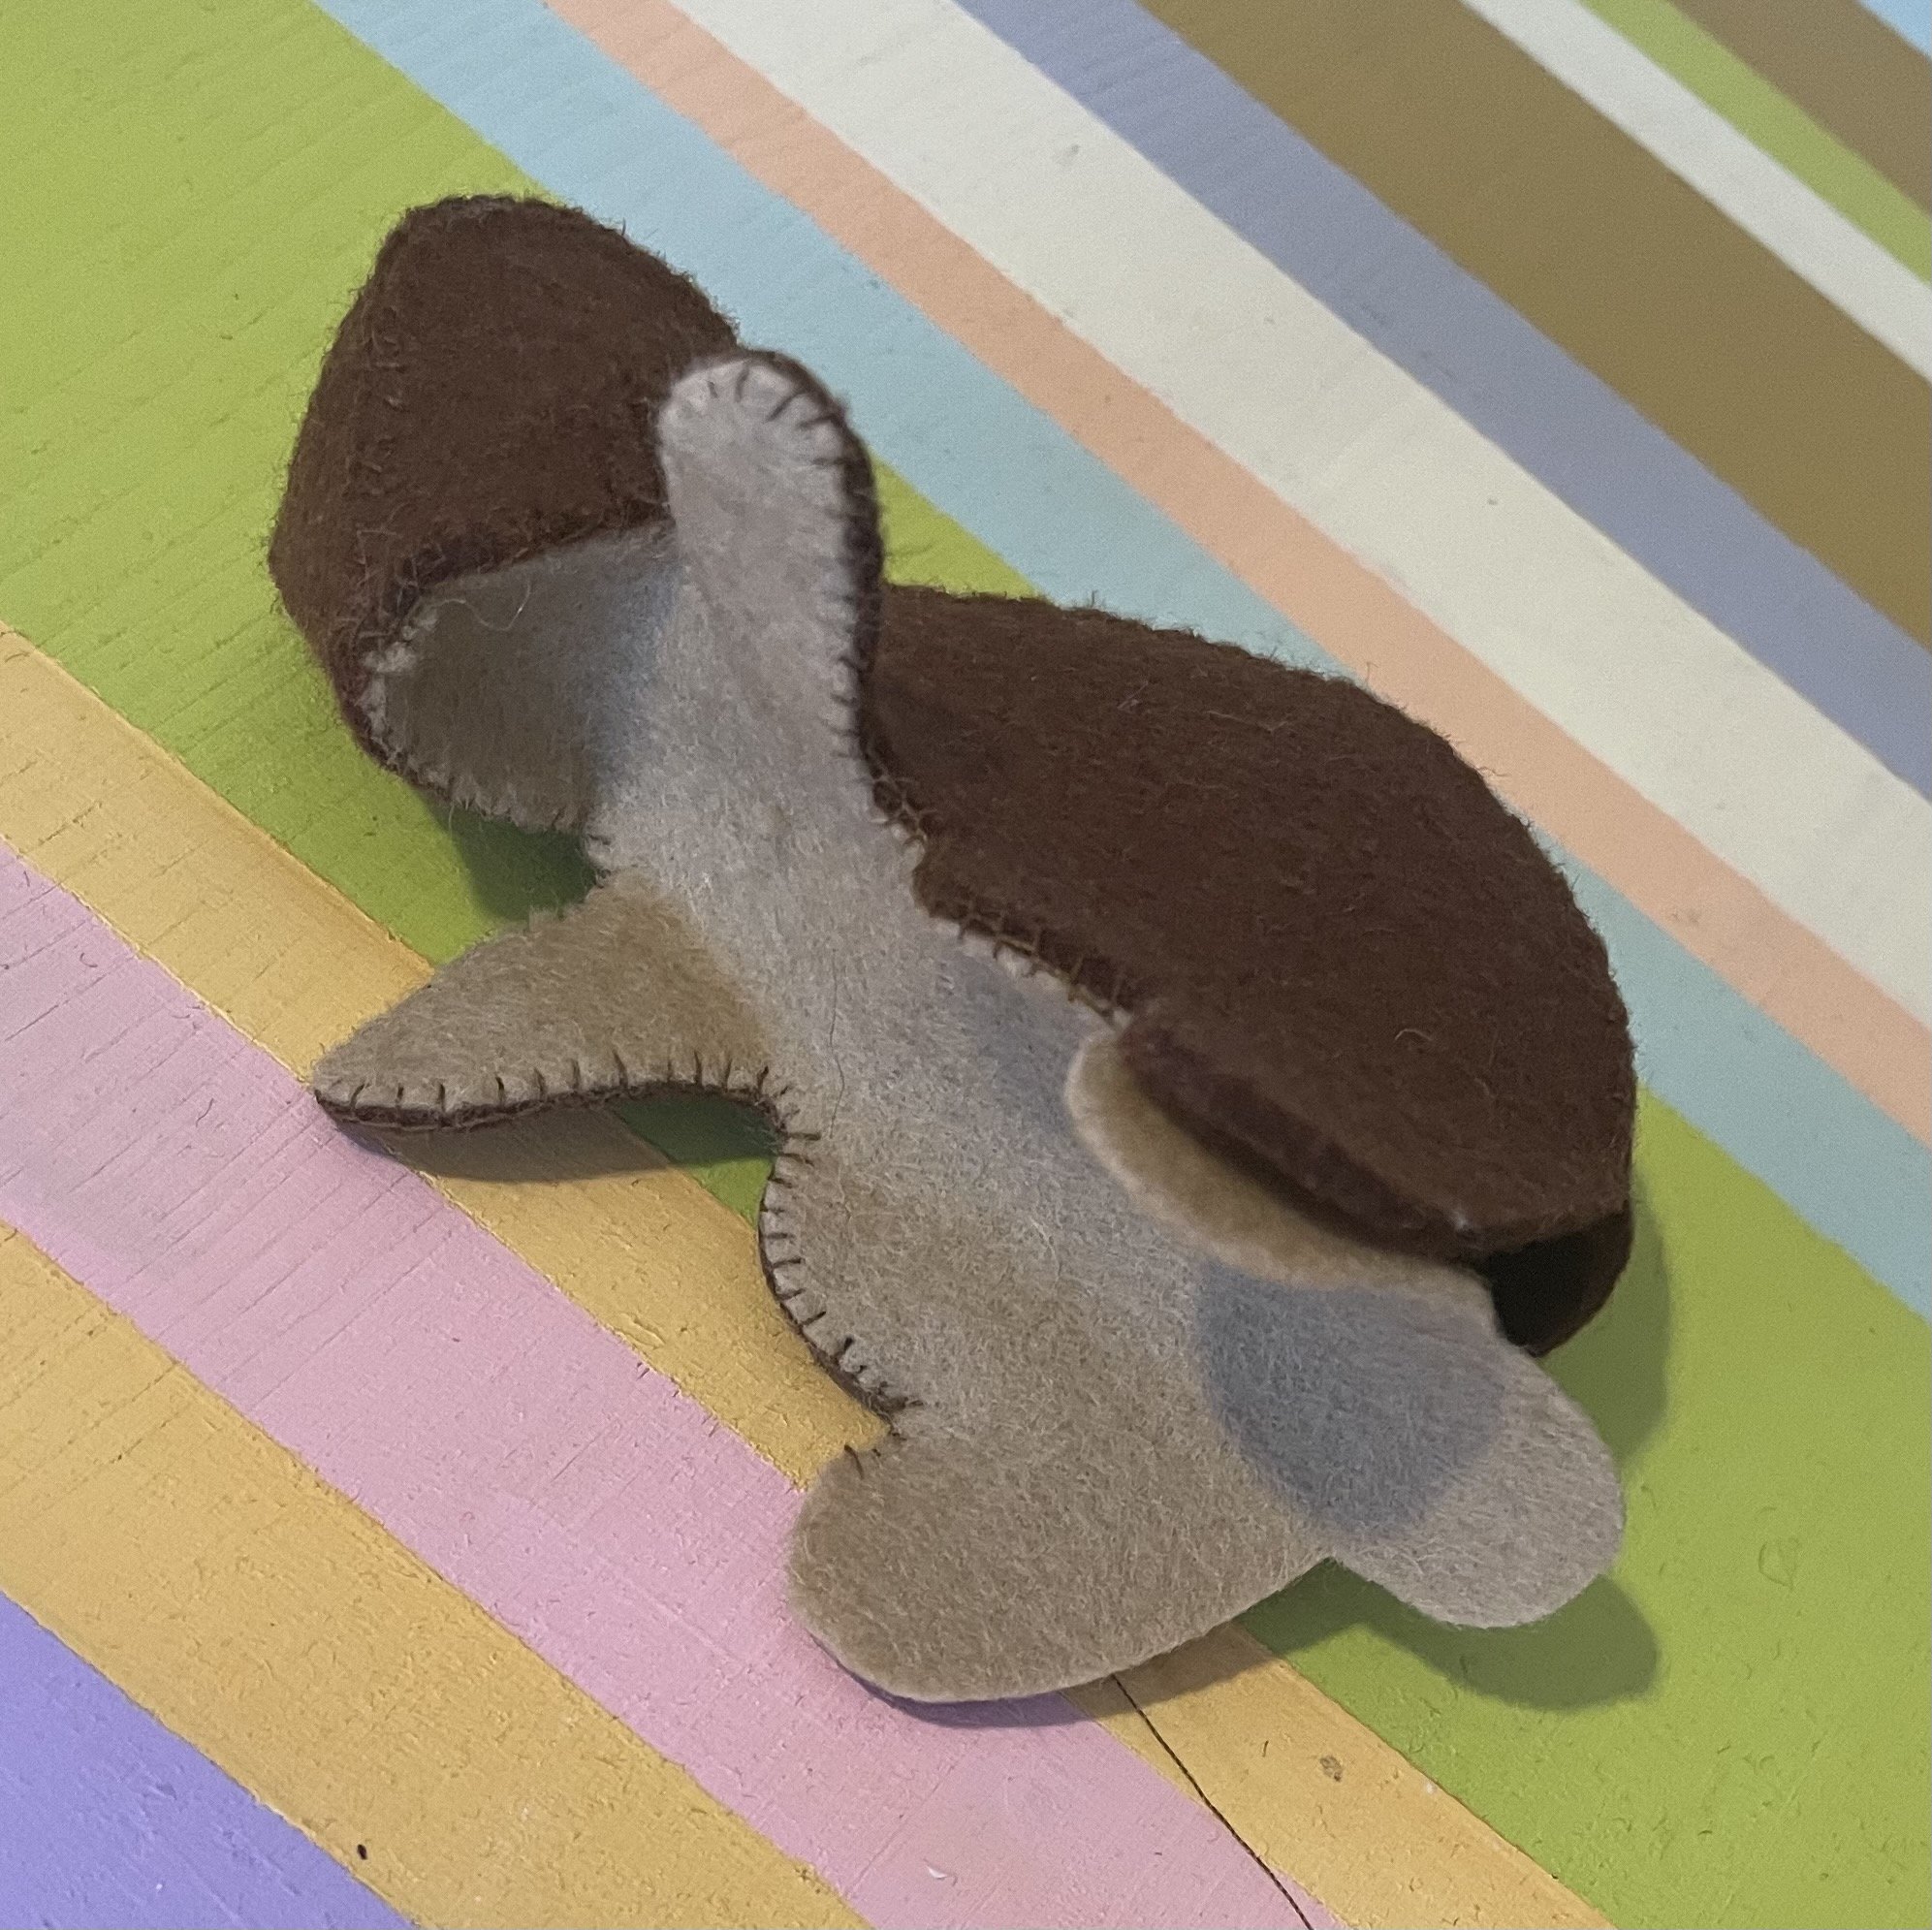
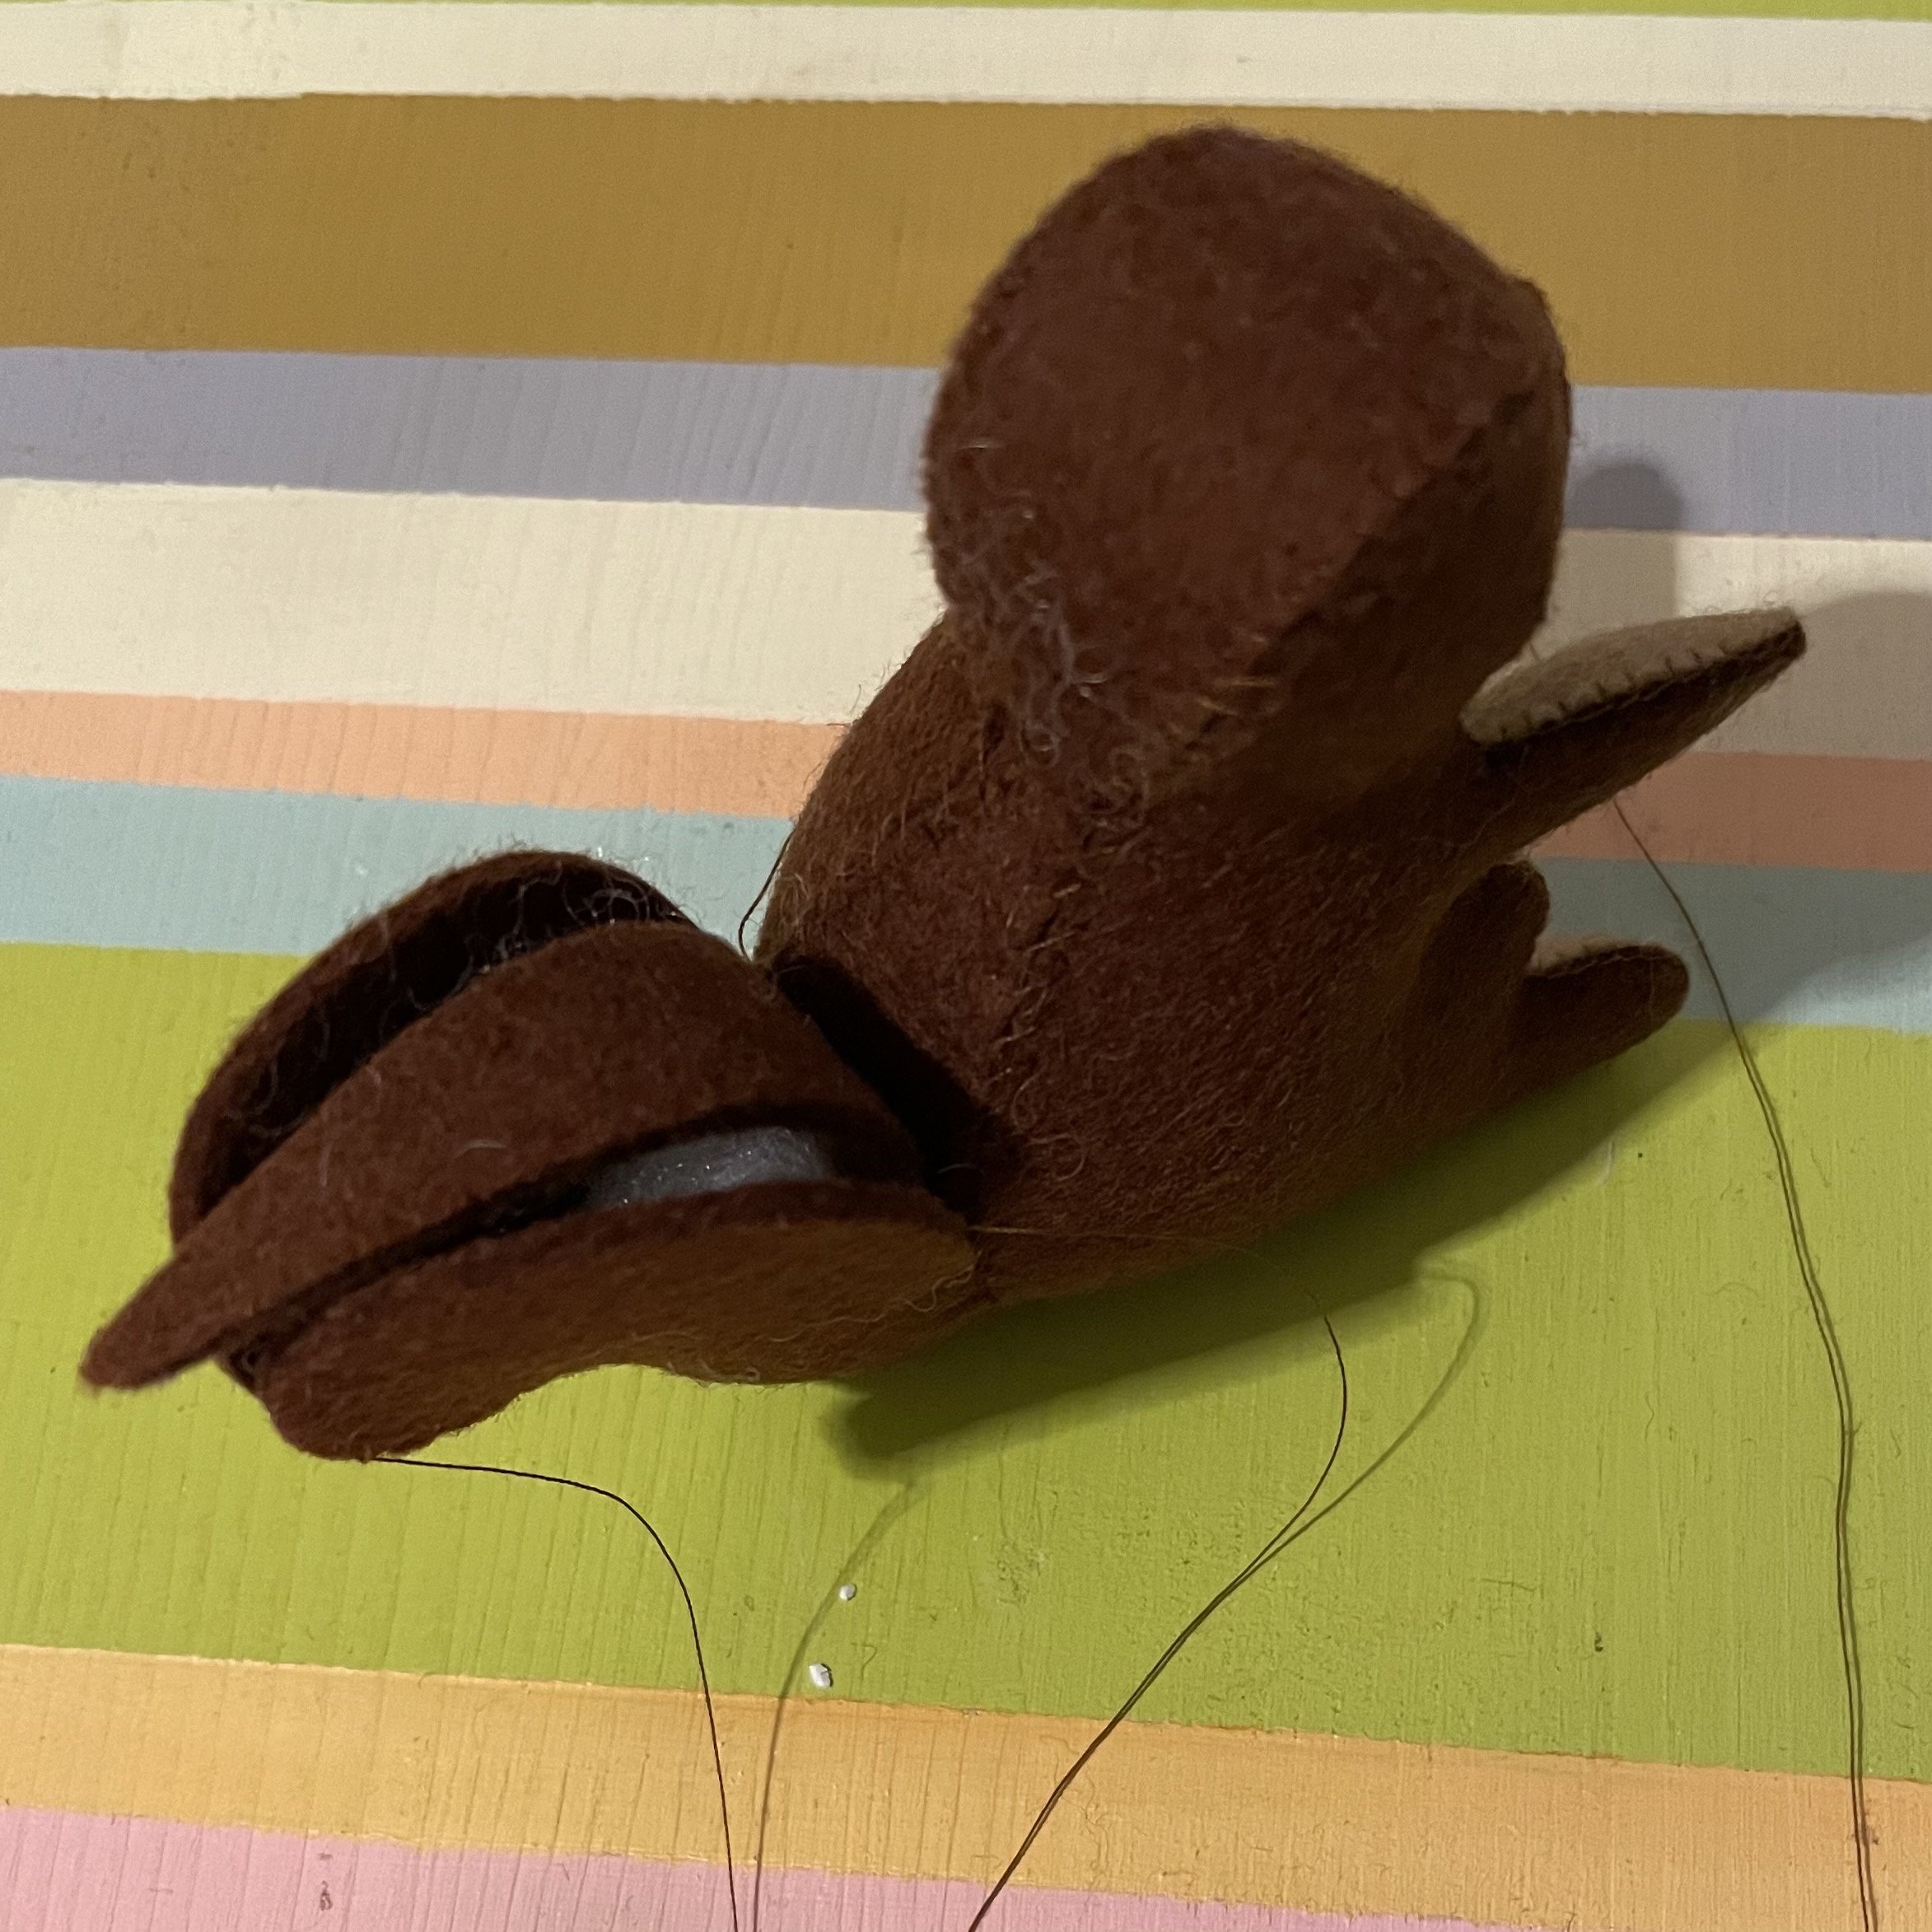
Then sew the first tail piece (No. 2) onto the body from the diamond to the flower. The seam lies exactly on top of the one created between the body and back pieces. The diamond and flower markings on the tail and body pieces meet exactly on the respective side. Do the same with the opposite tail piece 2.
Then sew the two tail pieces together starting at the bottom. Leave a small triangle open initially, as shown in the illustration.

Sew approximately to the middle of the upper curve of the tail. Then stuff the bottom part. Now pin the remaining piece 4 in between the felt from the body and the fiberfill. Then close the remaining open edges of the tail. At the tip of piece 4, the square markings come together.
Fill the tail with fiberfill before closing it up fully.
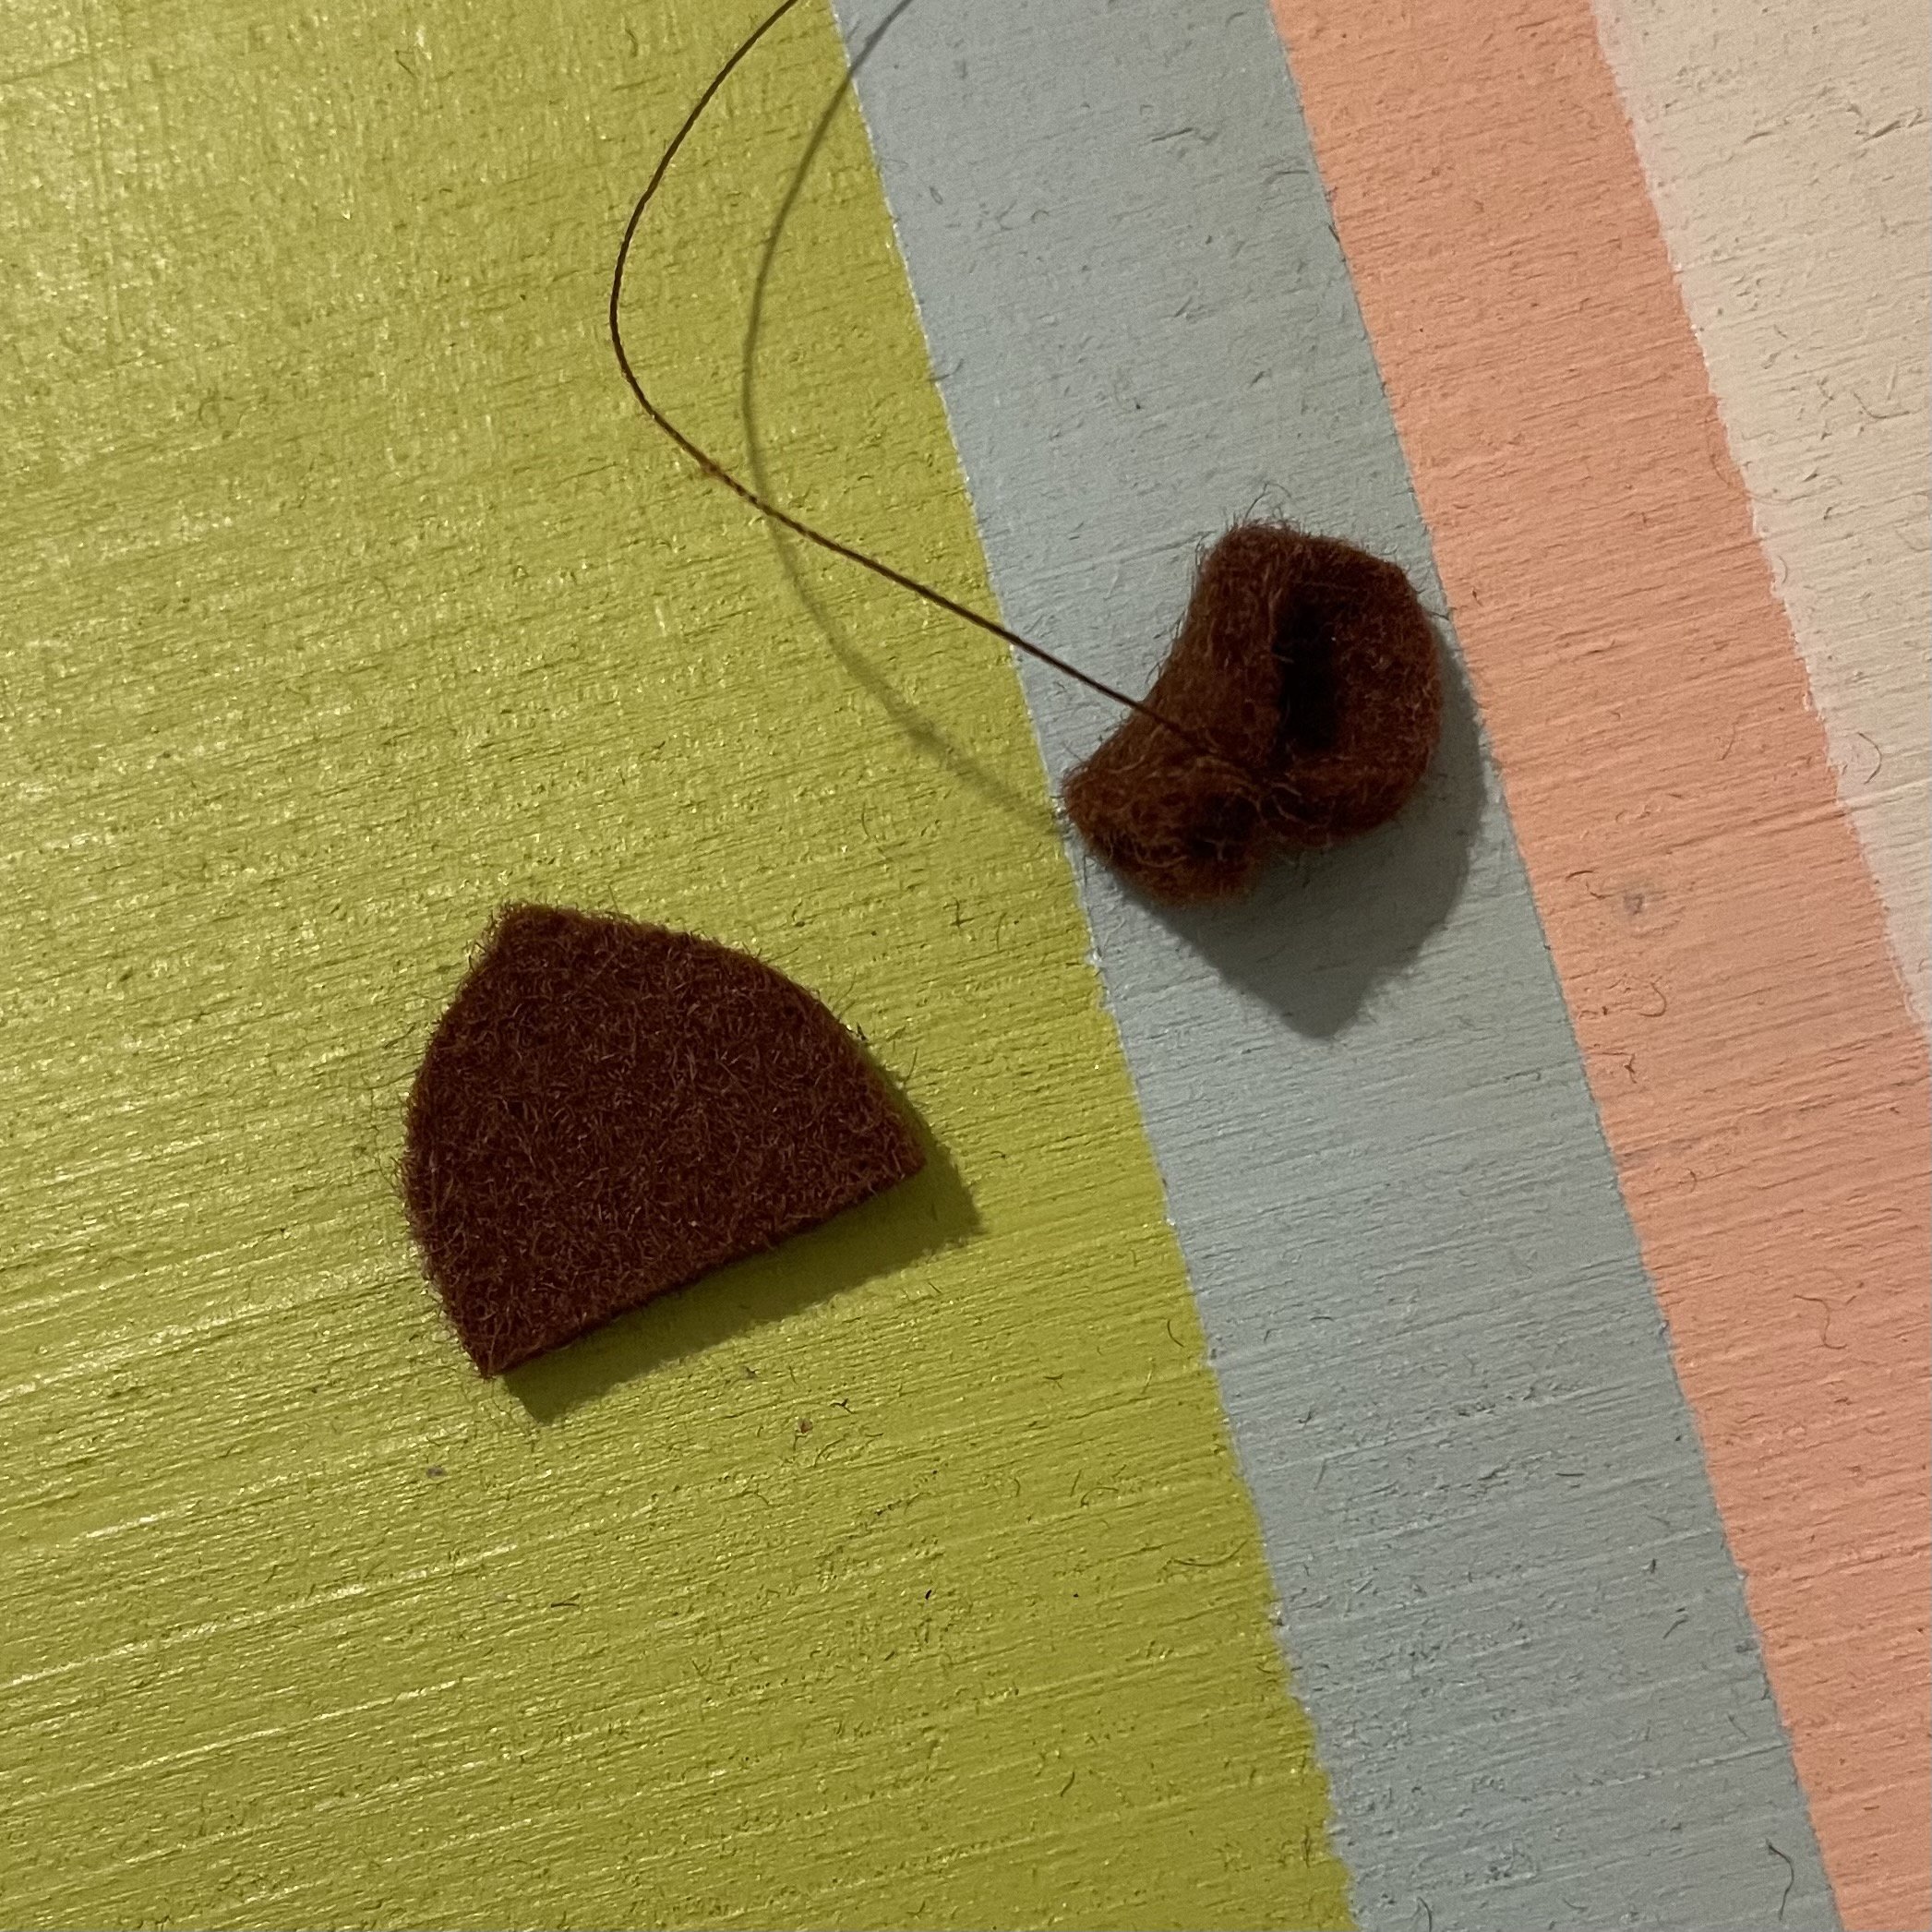
The small triangle (No. 6) is inserted into the opening at the bottom.
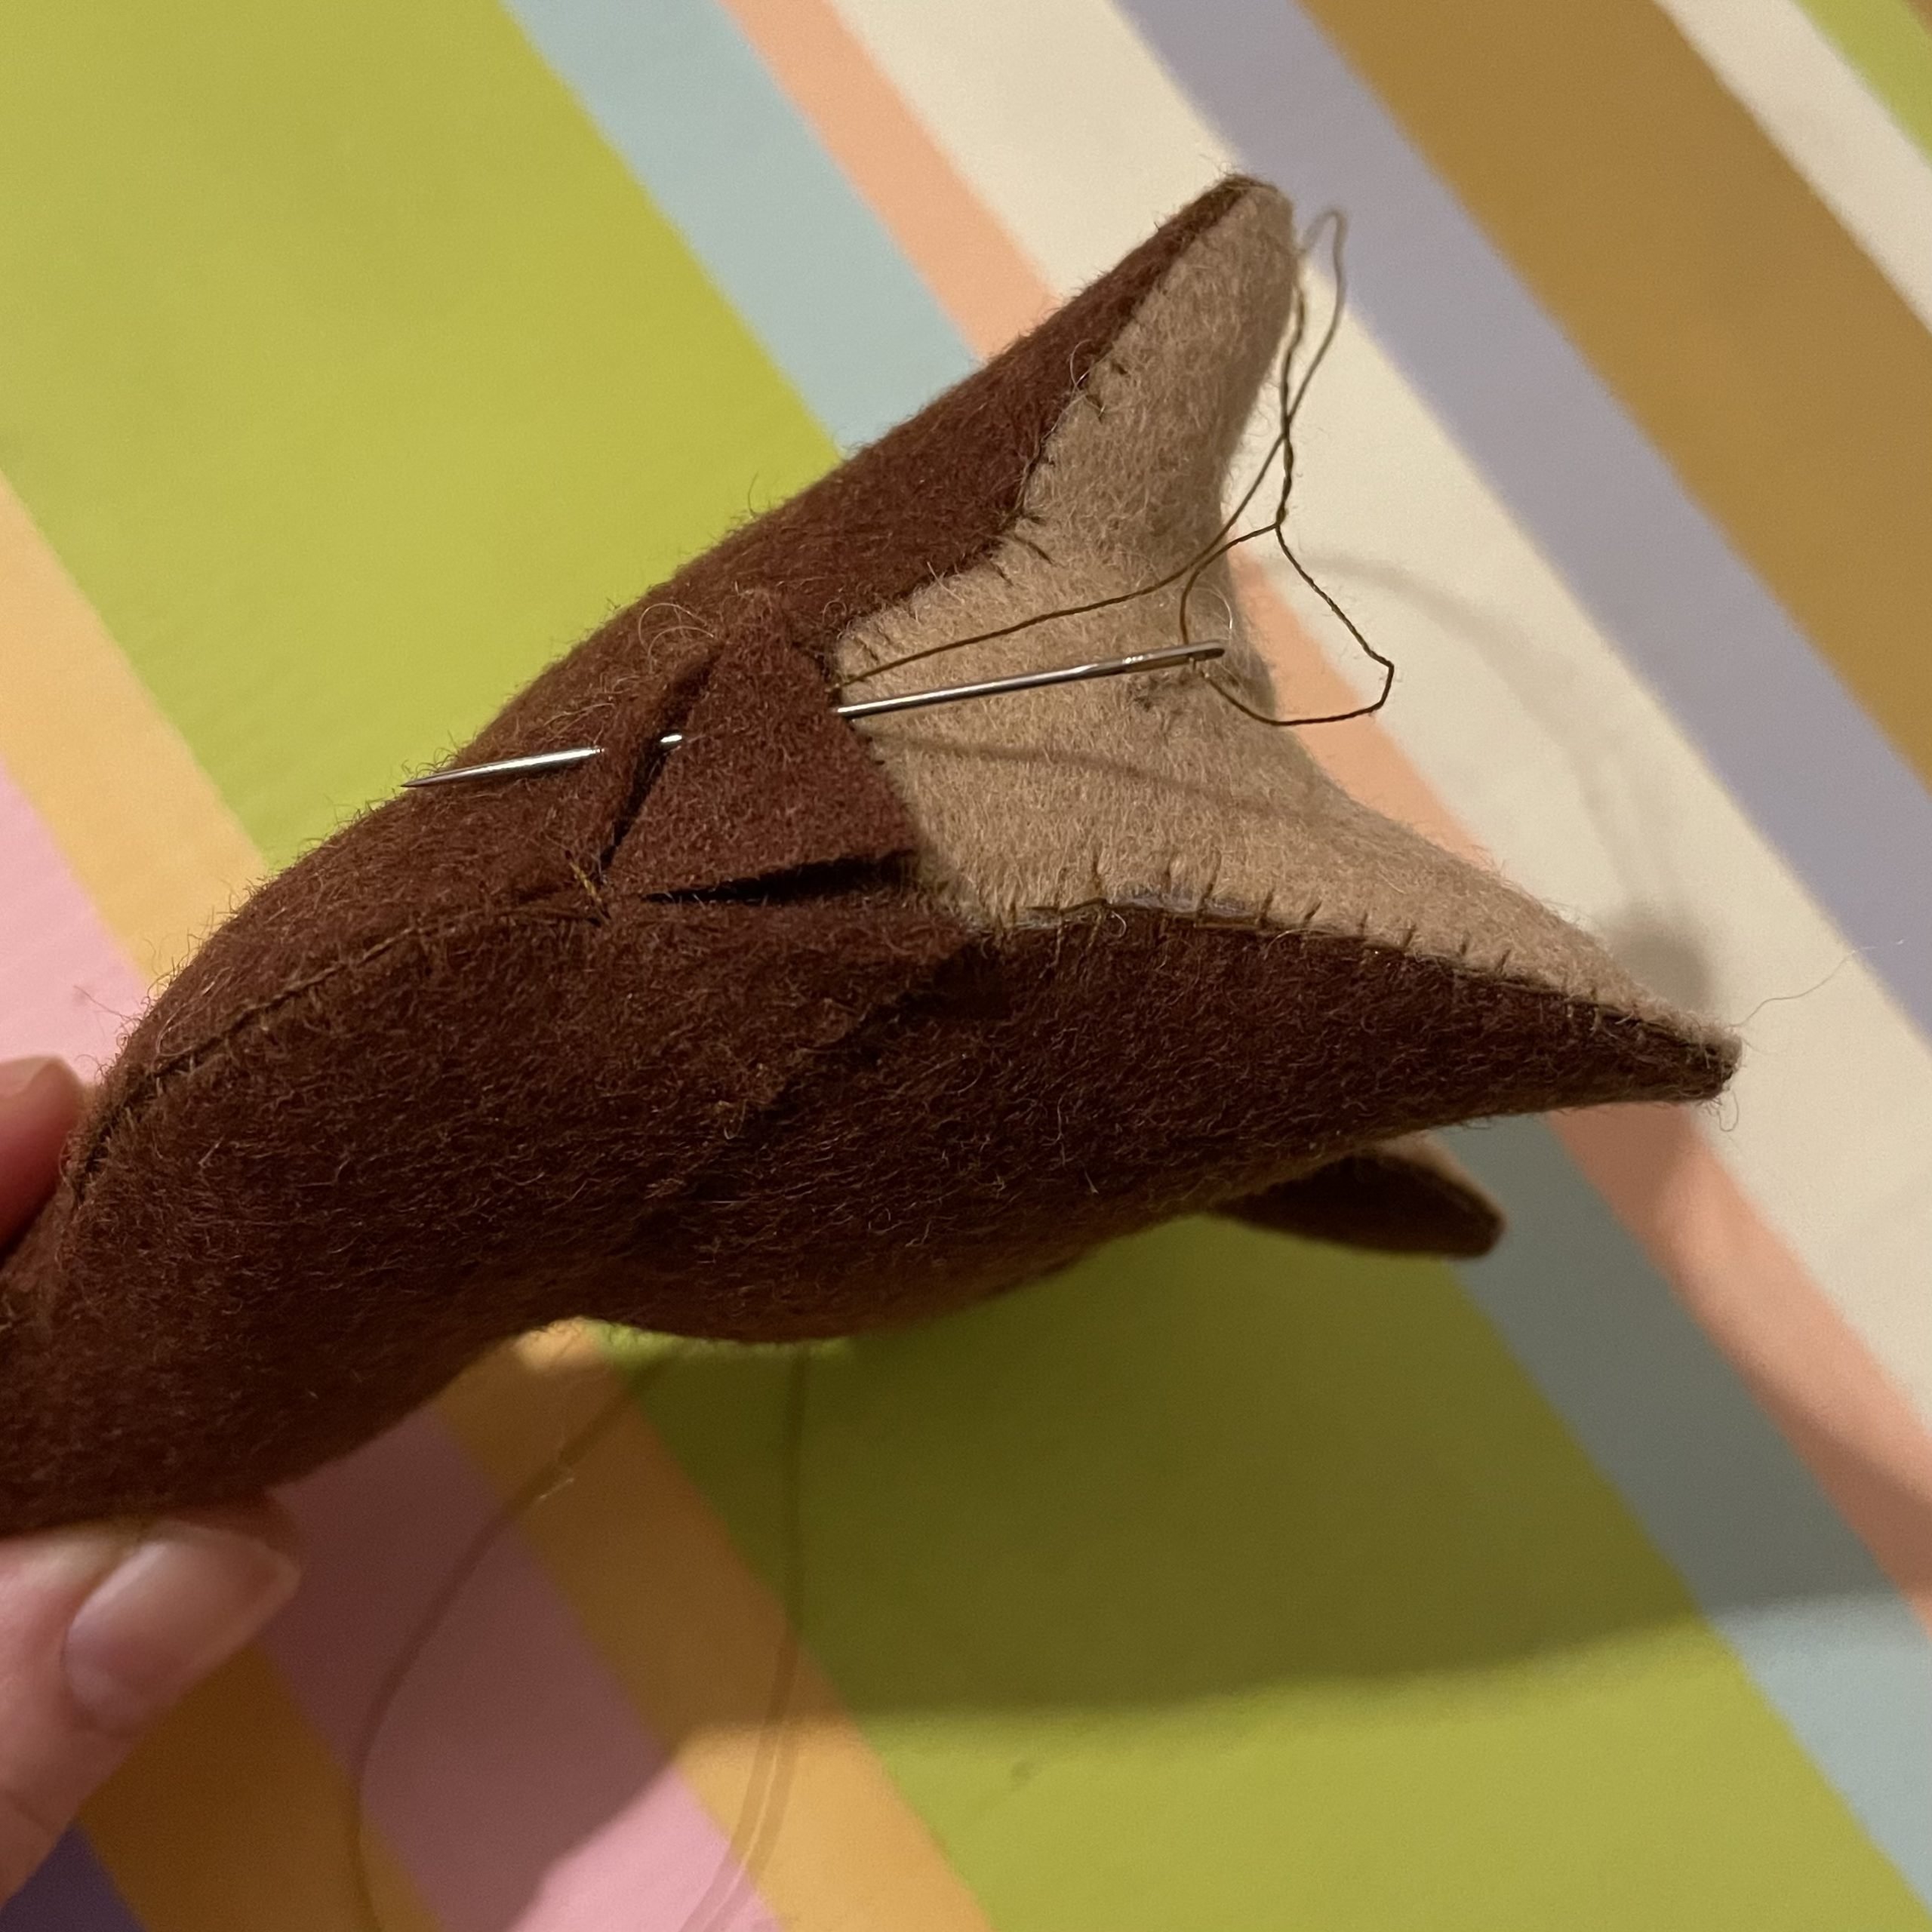
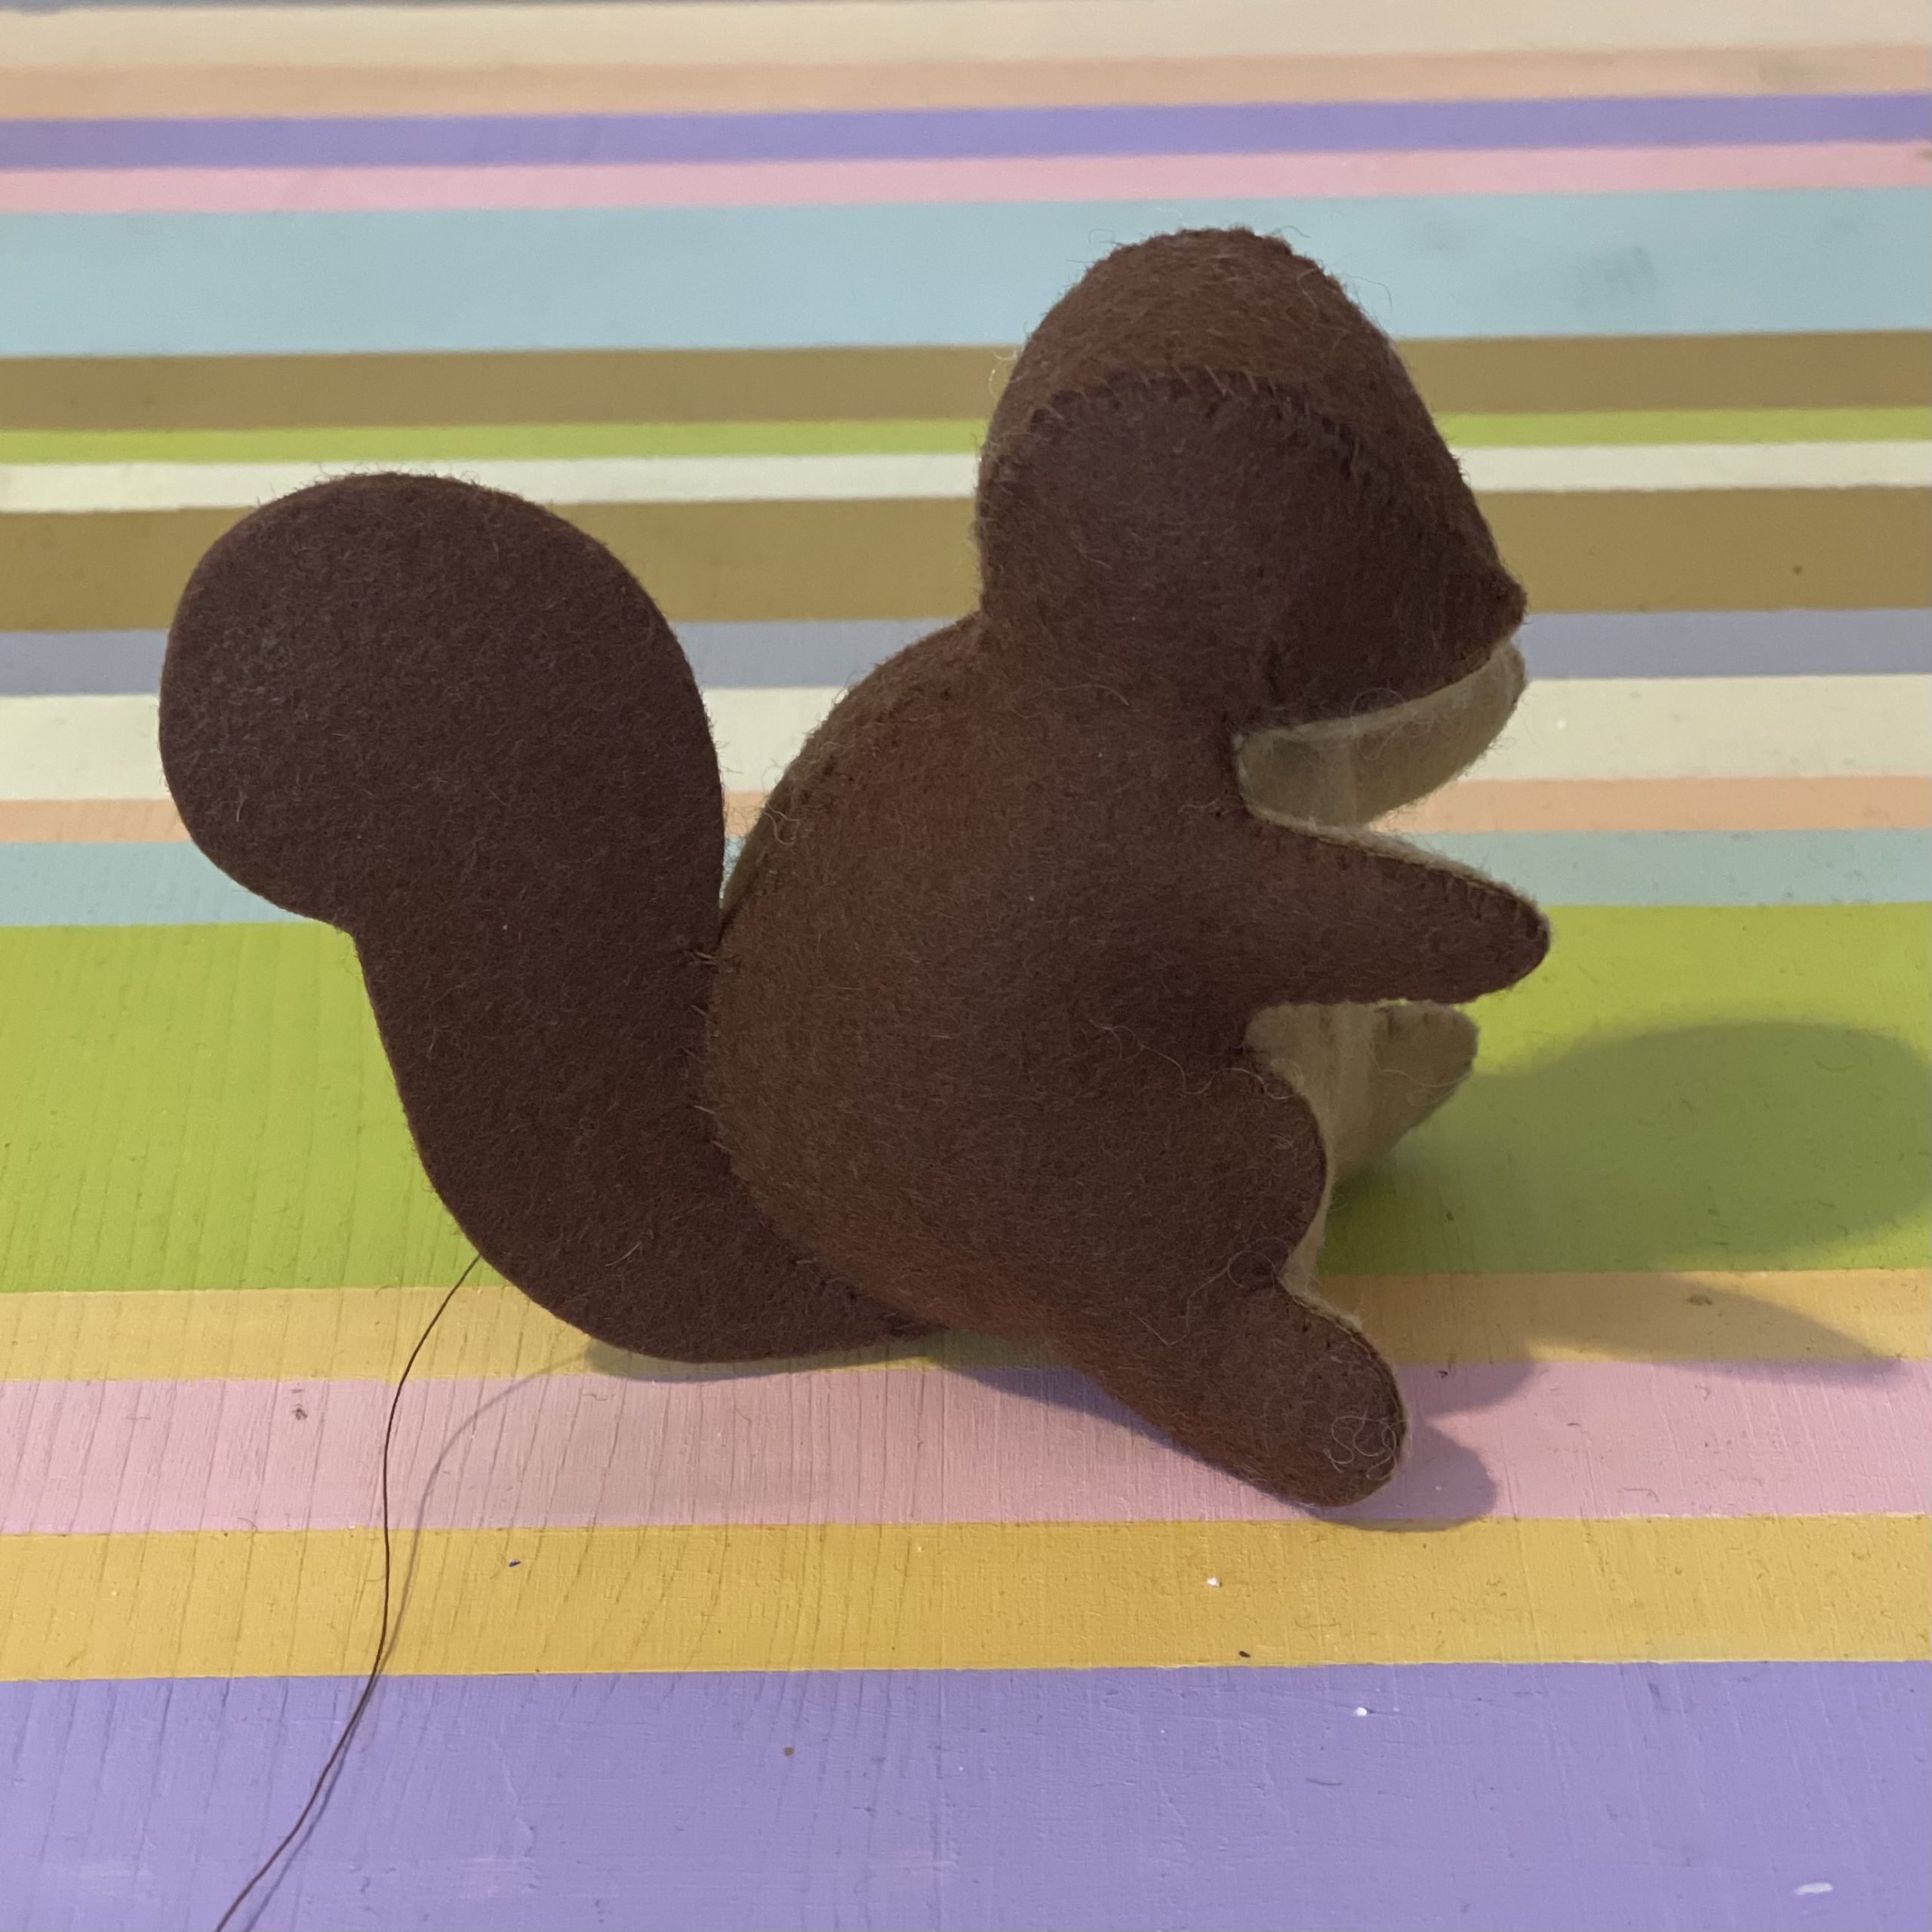
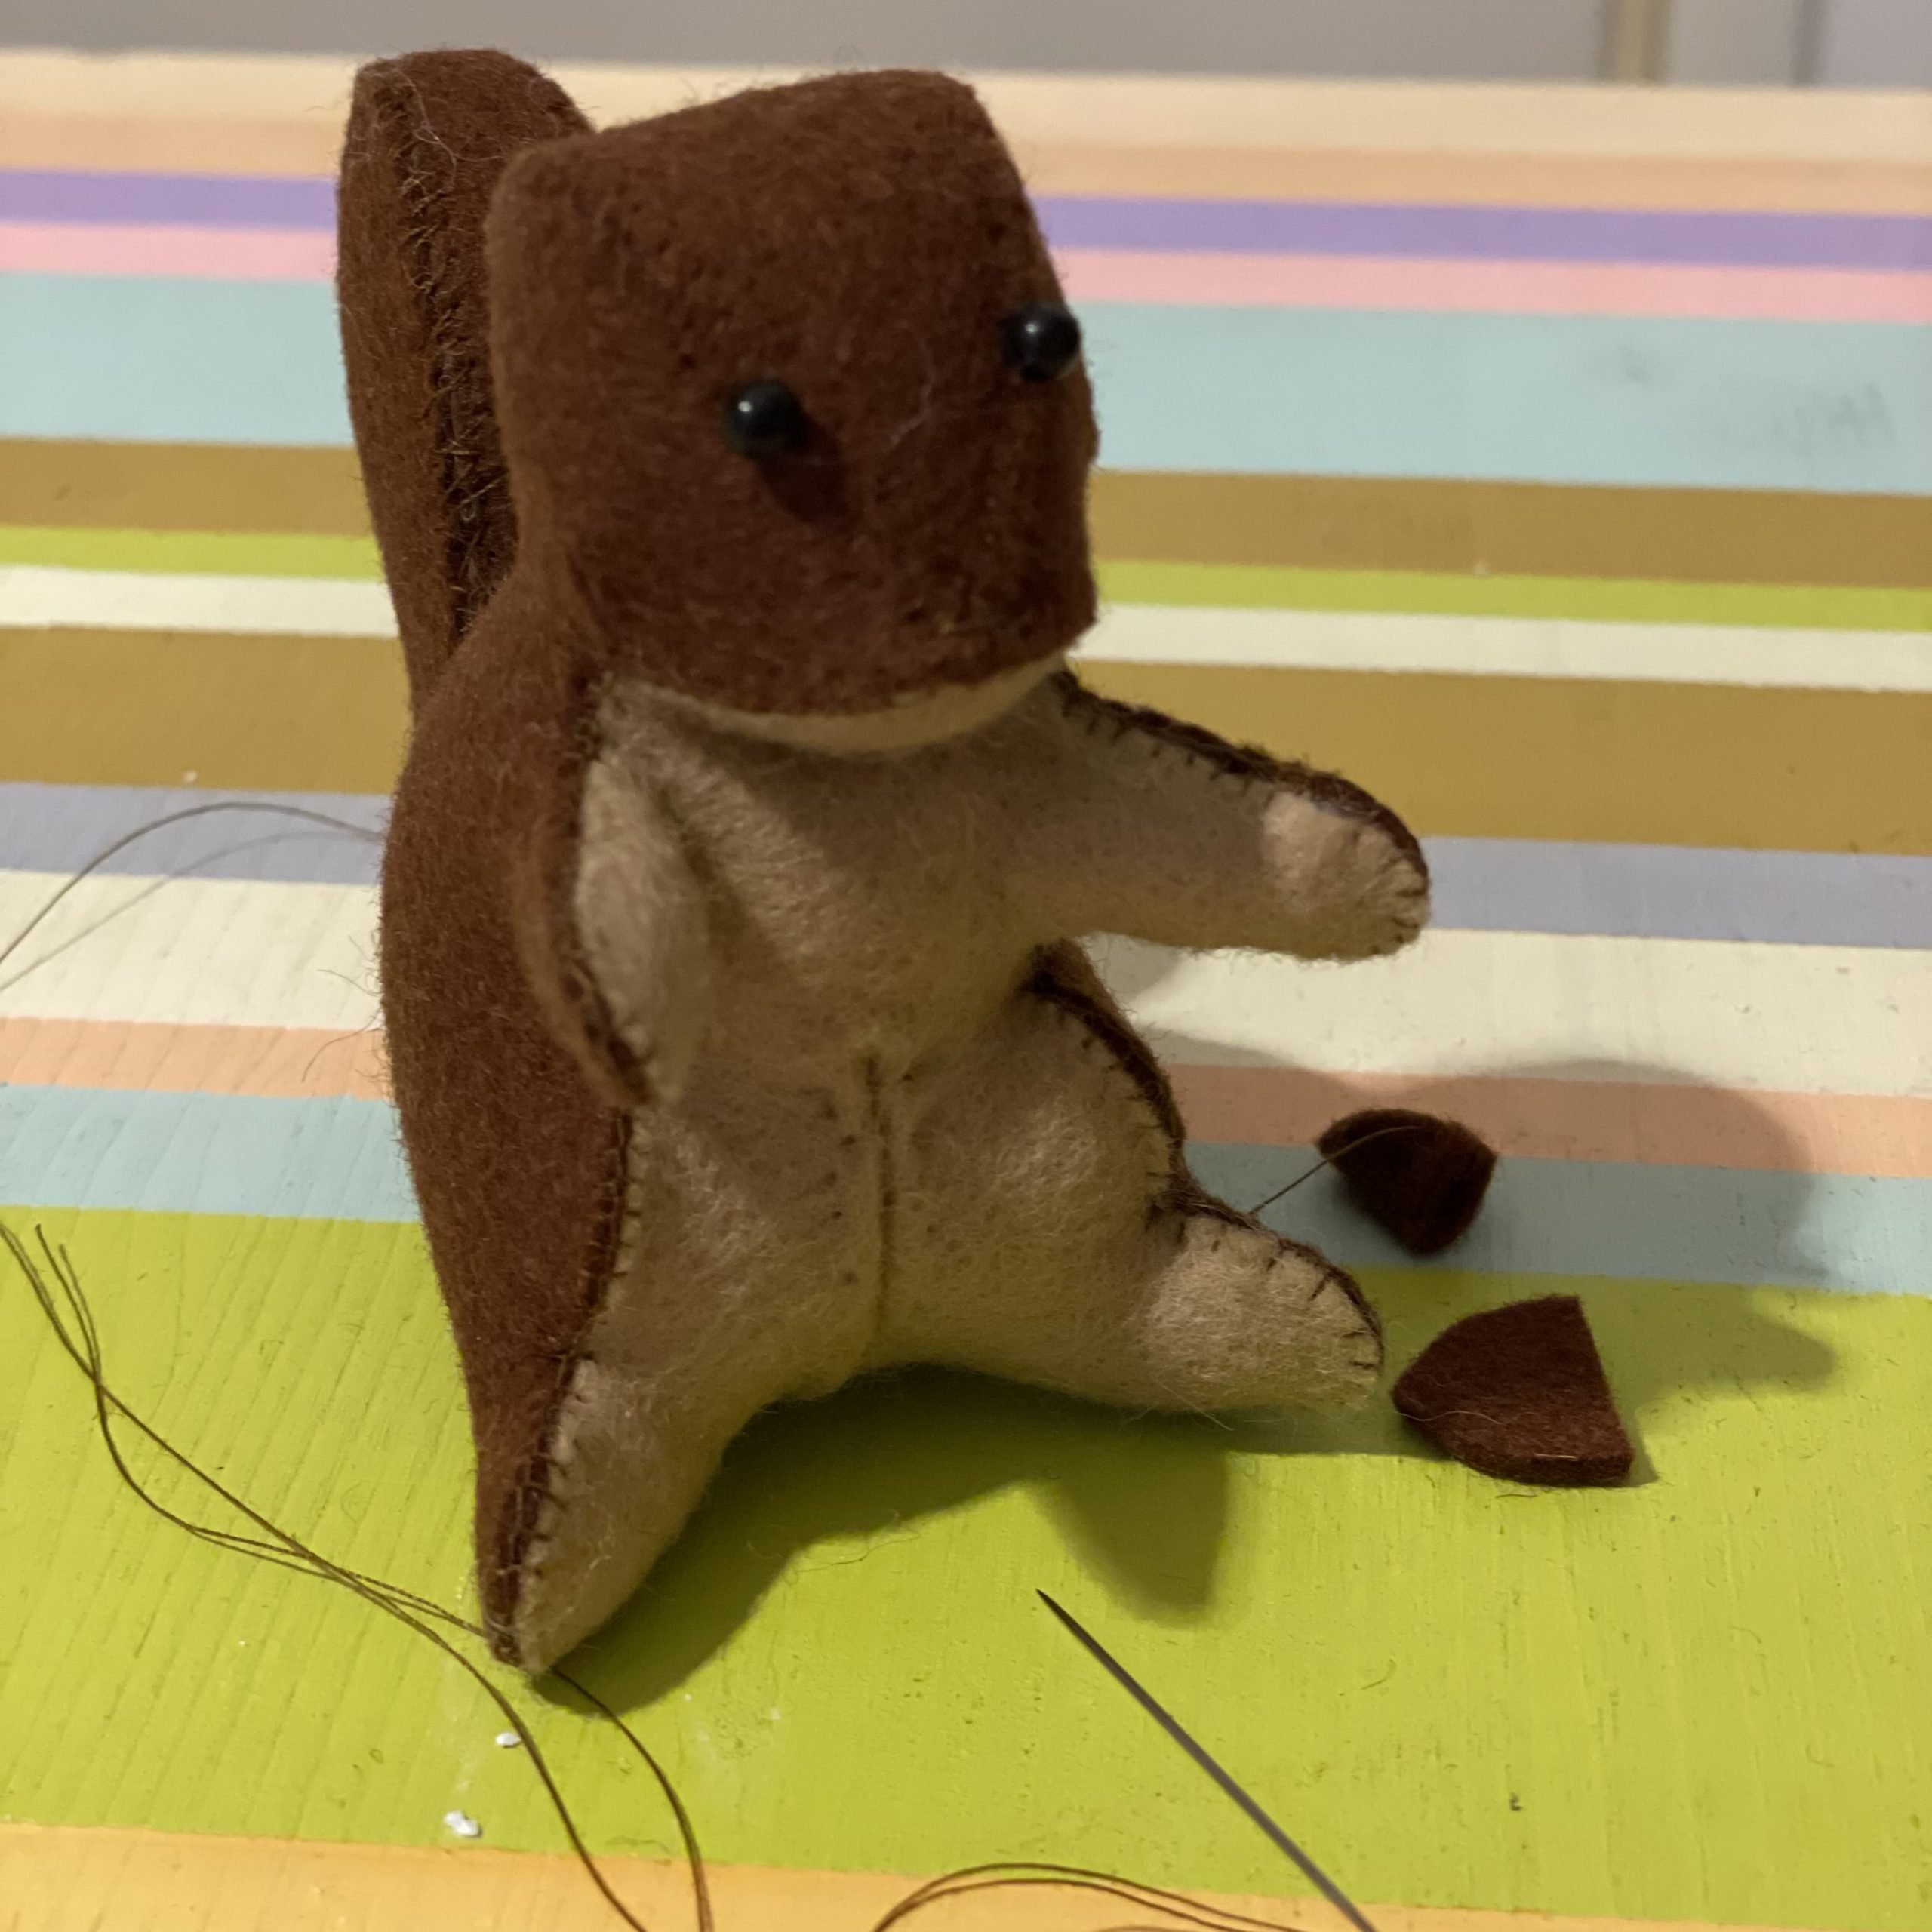
I folded the ears in the middle and sewed them together with a few stitches.
I first used pins to find the correct position of the eyes. Then I sewed the ears in the desired place on the head.
Details & embellishments
Finally, you can decorate your squirrel to your heart’s content. I sewed teardrop-shaped Swarovski crystals into the ears.

There is a small ribbon around the neck, which is also fastened with a teardrop-shaped crystal.

The nose is indicated by a small iron-on rhinestone. If you want, you can insert a few pieces of Extra Strong thread from Mettler underneath the nose for the whiskers.

The brown squirrel is holding a pincushion in its hands.
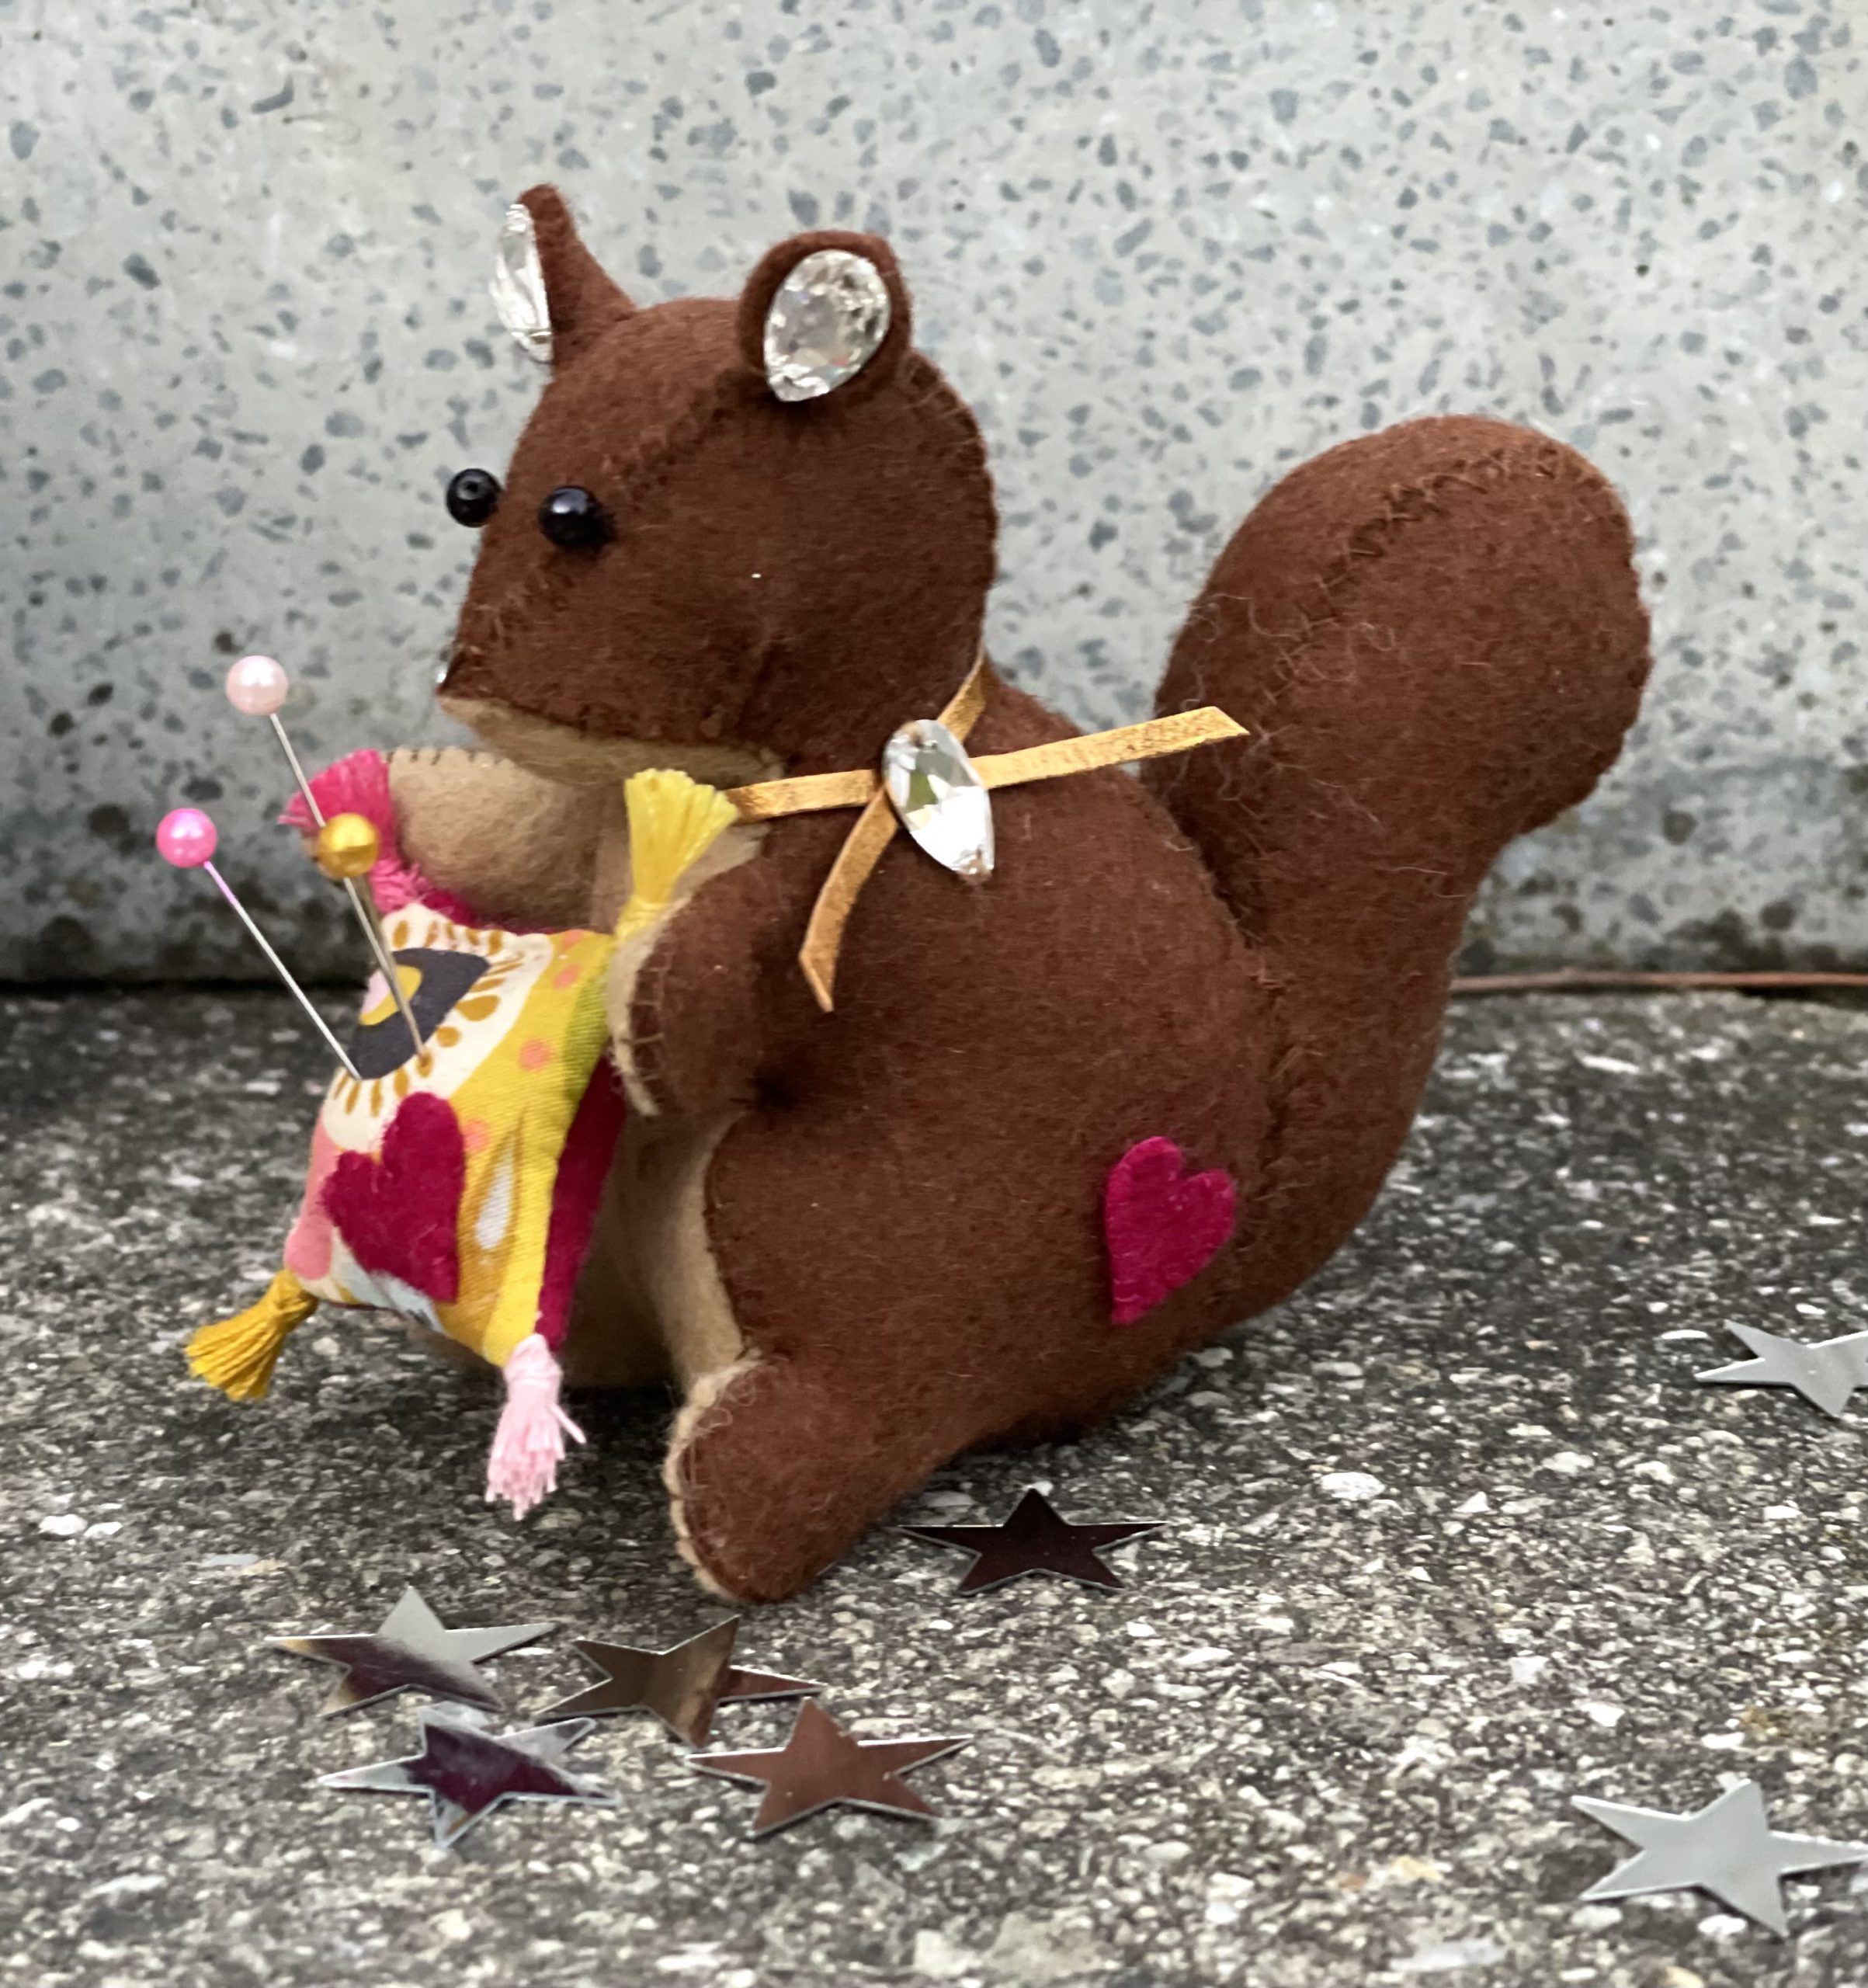
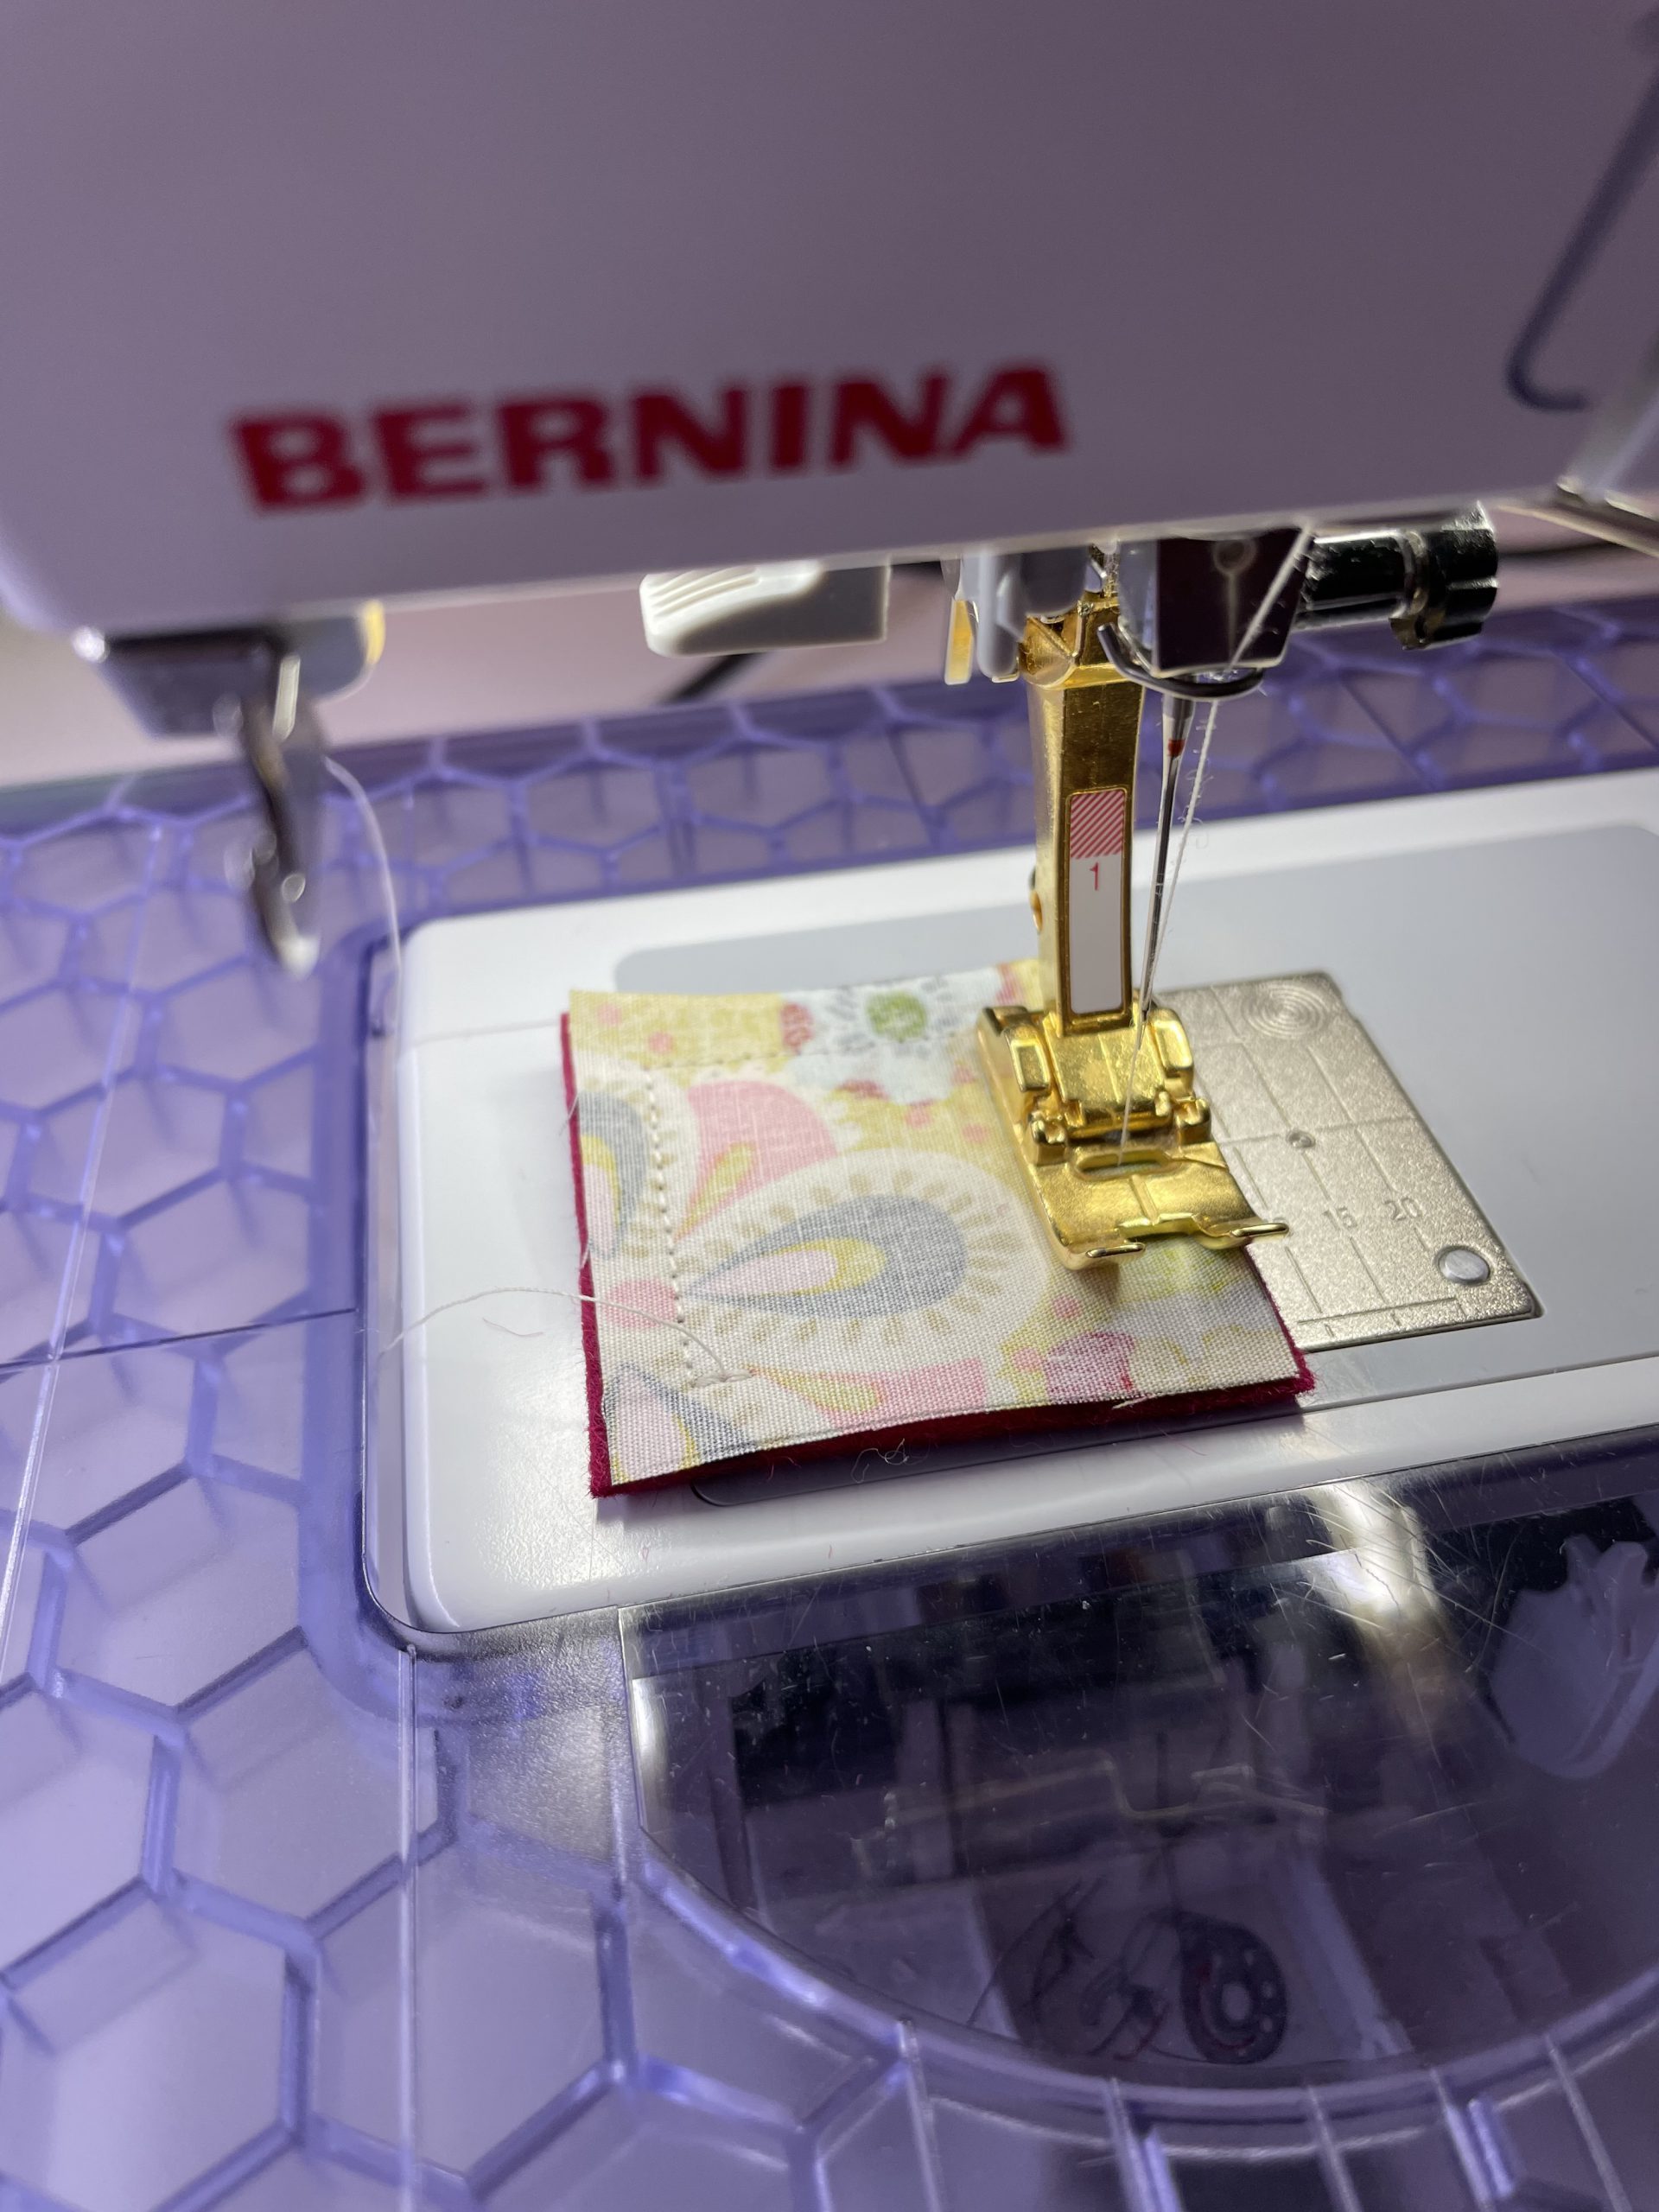
For this, I sewed together a piece of cotton fabric and a piece of wool felt with the right sides together, turned it the right way out and stuffed it with fiberfill. I closed the opening by hand. In keeping with this glamorous time of year, I unpacked the golden presser foot specially!
I also made the tassels at the corners from Extra Strong thread from Mettler.

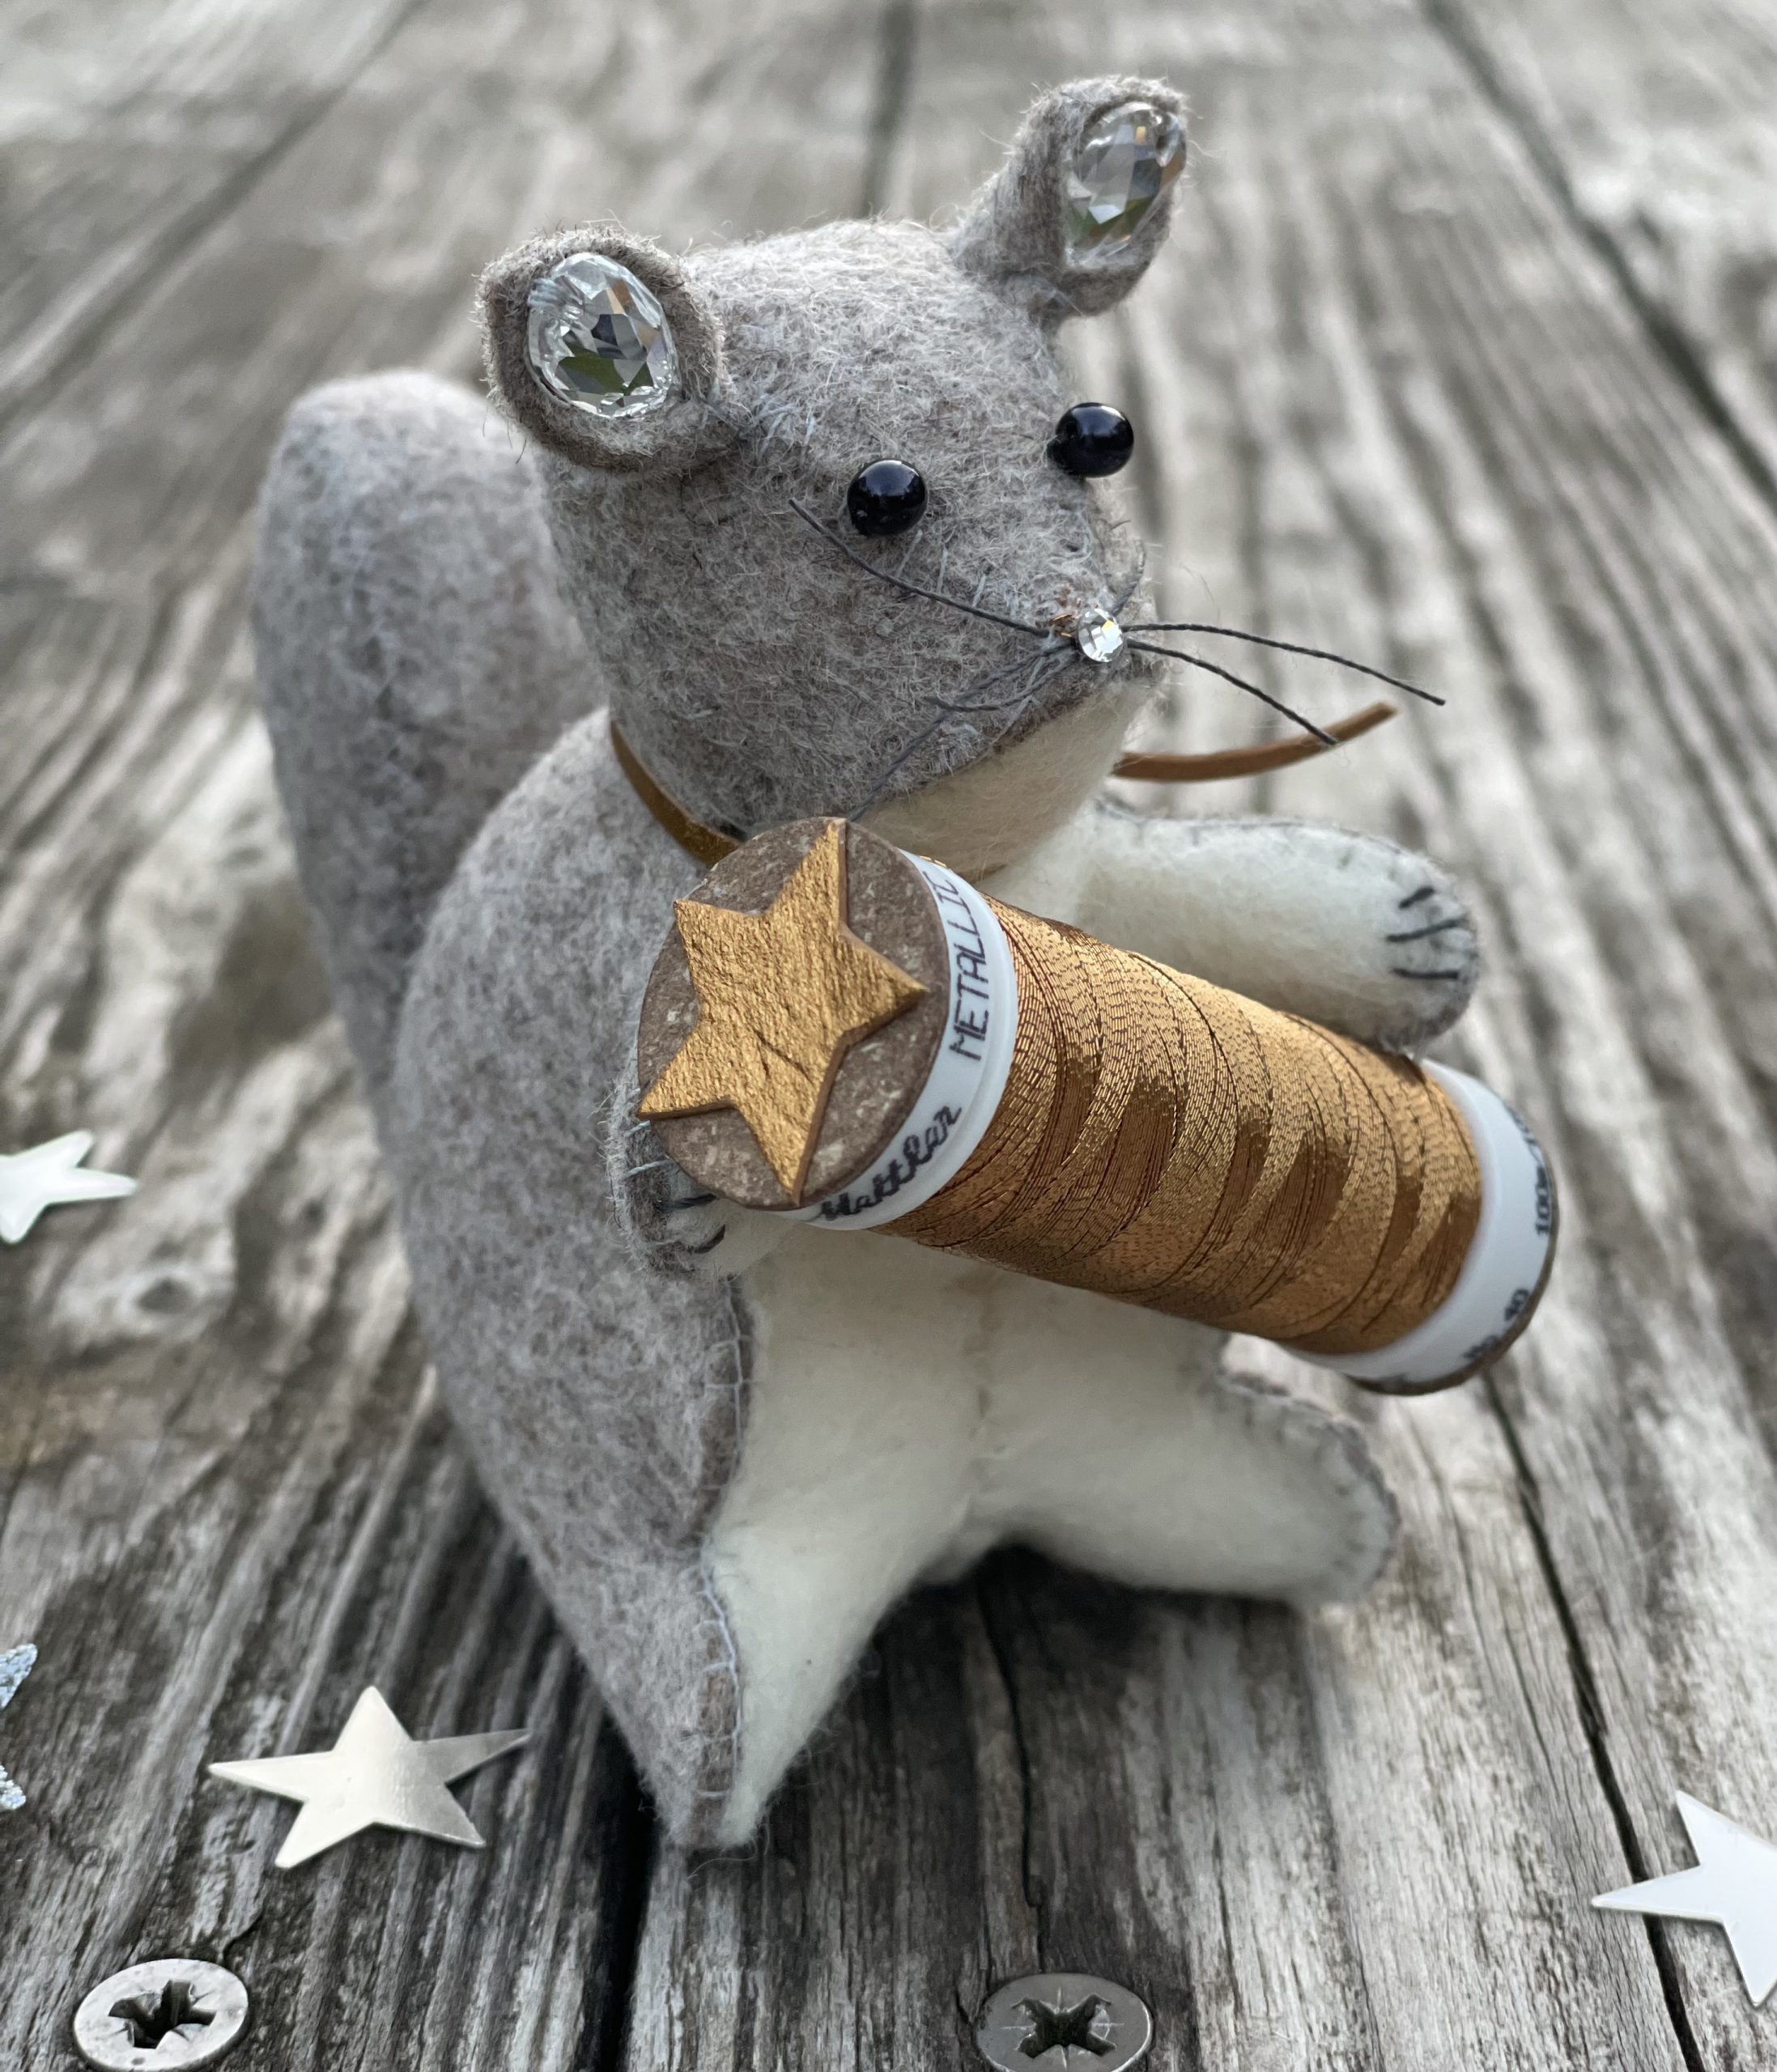
This squirrel is carrying a heavy reel of sparkling thread that I sewed onto its arms. I decorated the top and bottom of the reel with decorative leather remnants and some star-shaped gold paper.
Yes… and this squirrel has to carry the heaviest thing of all! In his hands is a big crystal, which also comes from the Swarovski box accompanying the current BERNINA 790 PLUS Crystal Edition. Maybe this squirrel collects crystals?

Would you like to sew a little squirrel too? I am already very excited to see your creations soon! Share them with us here on the blog or on the social networks. We can’t wait!
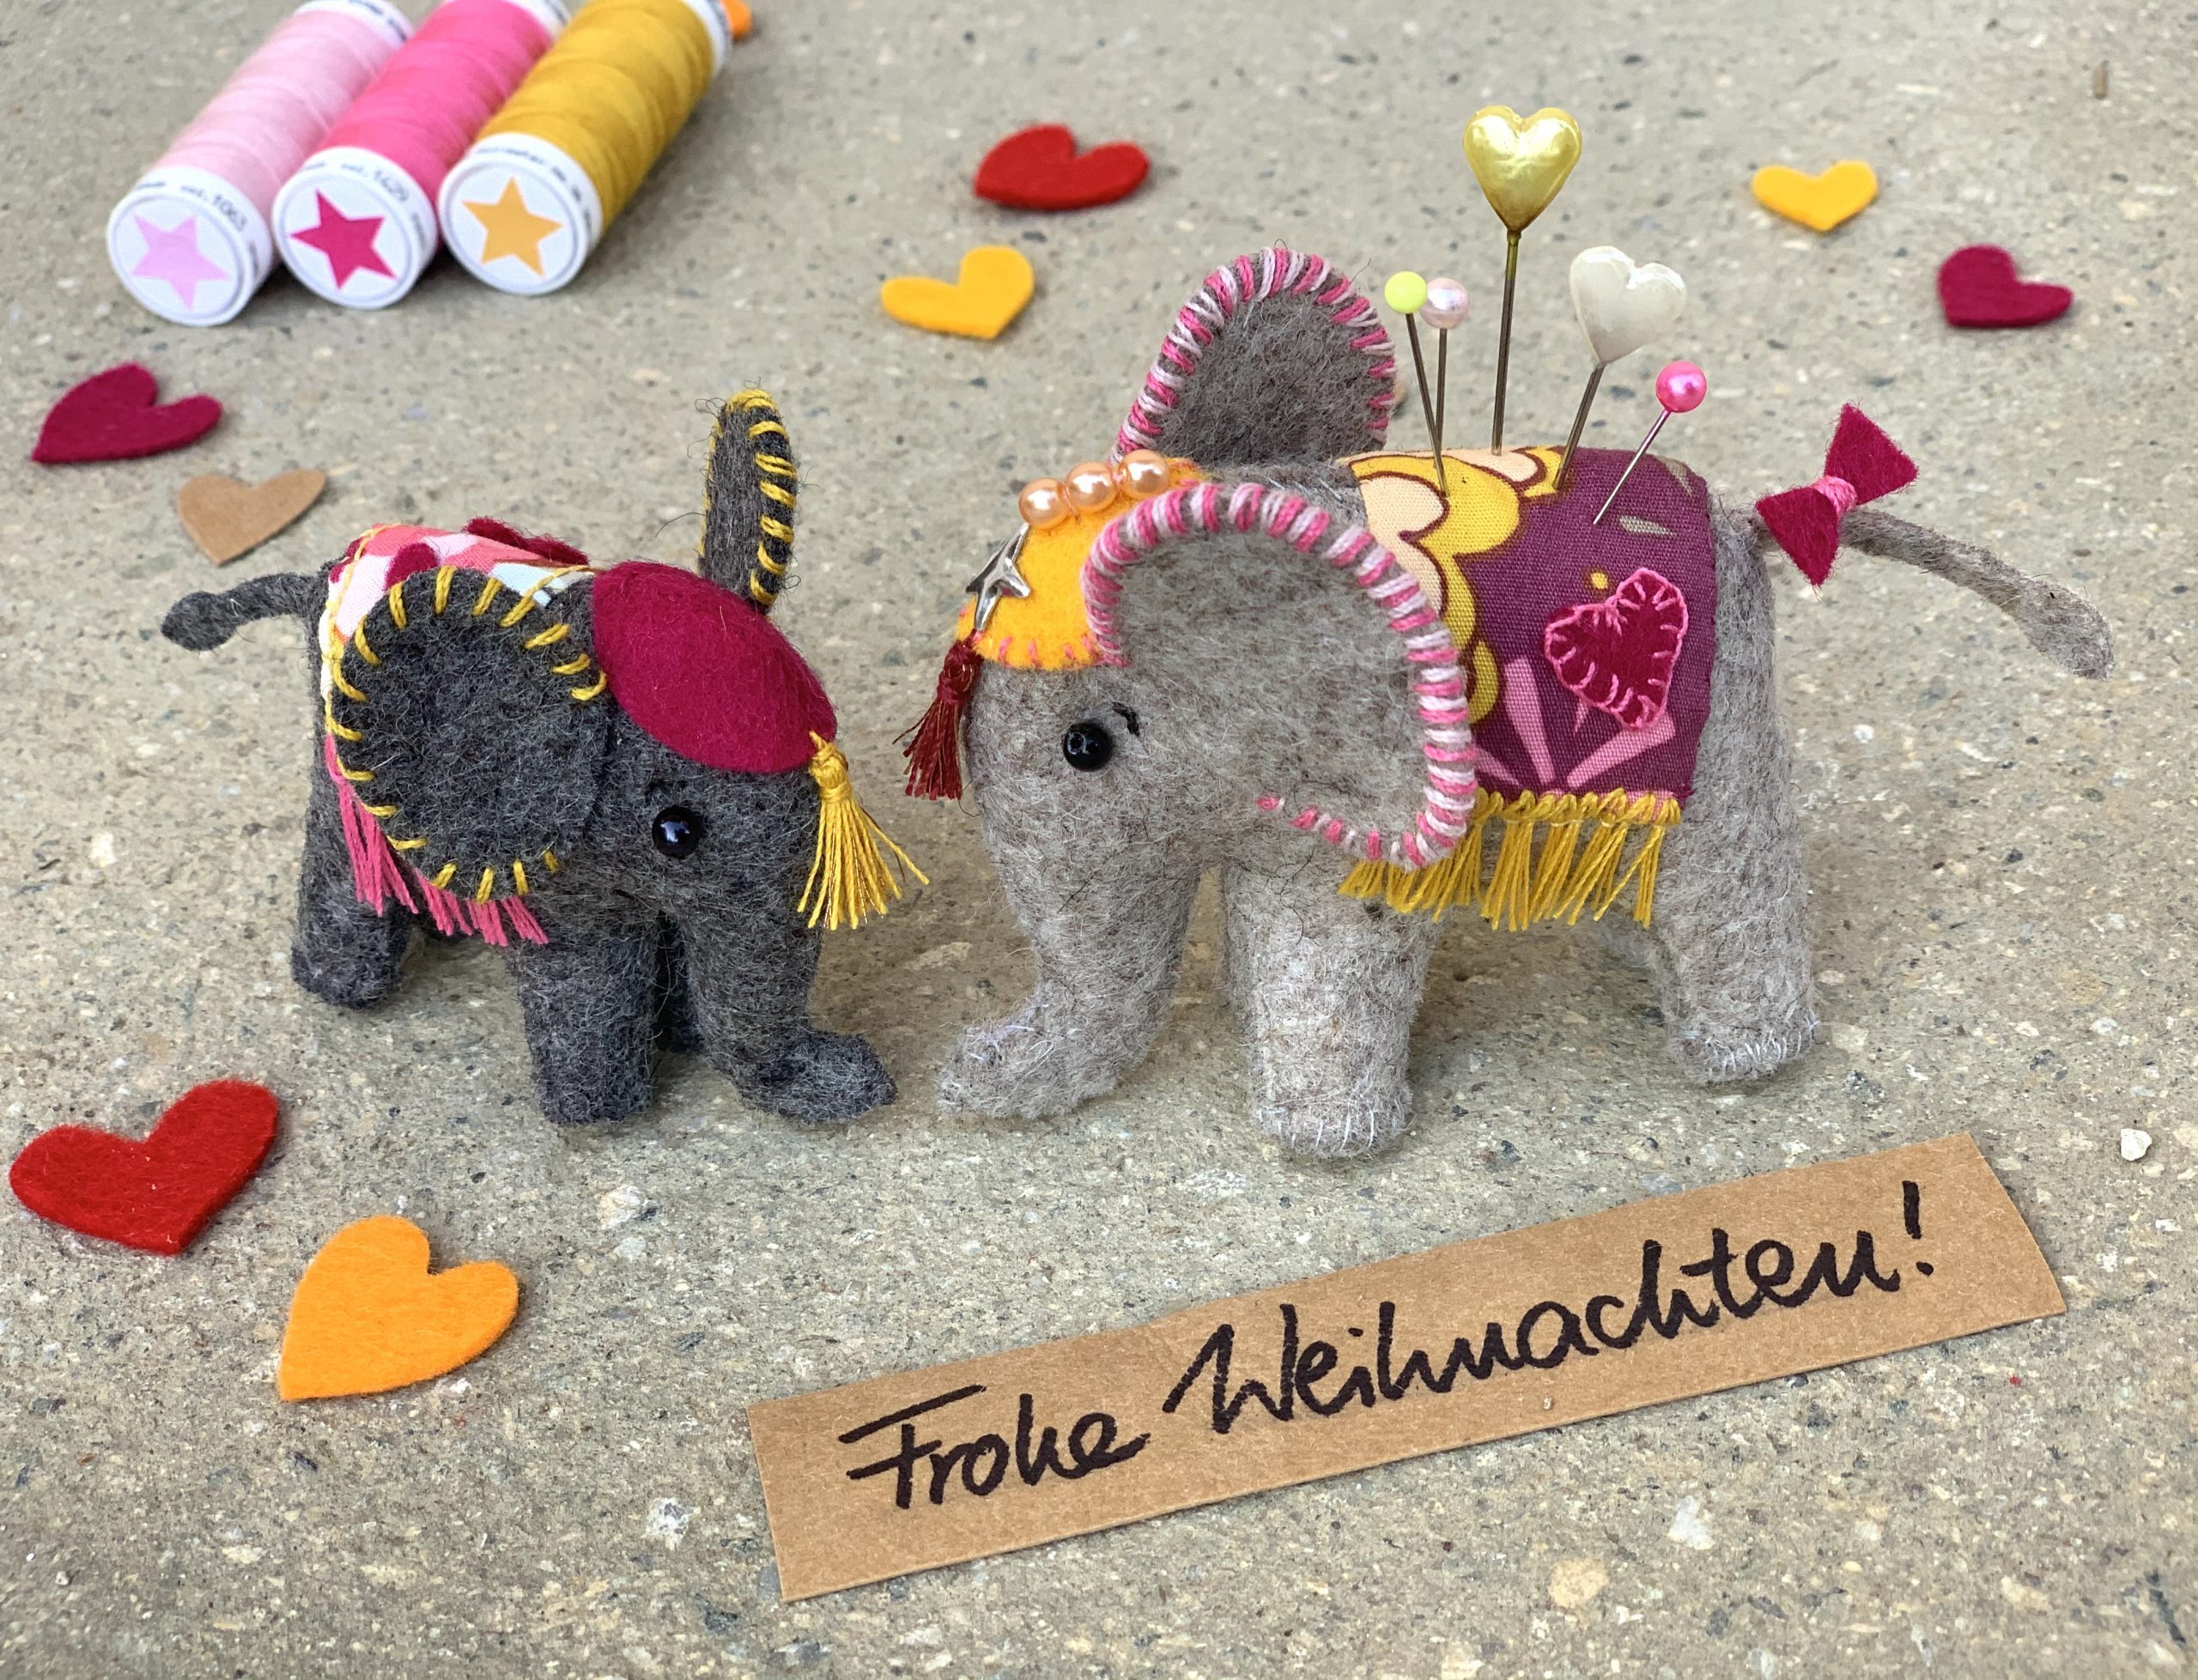
Do you remember the instructions for the elephants from the 2020 Advent calendar? We received so many pictures of your creations and of course I’ll be delighted if you have as much fun and enjoyment with the instructions for the squirrels!
I wish you a peaceful Advent season from the bottom of my heart and I hope you find a few quiet, creative hours to enjoy our favorite hobby!
I also wish you a wonderful Christmas with your loved ones, relaxing holidays and all the best for a happy and healthy 2021! Stay healthy!
Best wishes for the Advent season,
Claudia
0 Responses