 BERNINA Corporate Blog -
Tutorial: lining a vest
In this previous blogpost, I showed you how to add sleeves to the Junna vest pattern for kids and women.
In that tutorial, I only made the unlined version,, the one you need to finish with bias tape all around the edges.
Since then, I have been asked several times if it’s also possible to add the sleeves to the lined version, and how that would work.
So I am happy show you how with a full tutorial and lots of pictures.
Happy sewing!
Requirements:
-Junna vest pattern for kids and/or women
-sewing machine
-main fabric (see pattern for fabric requirements)
-lining fabric (same amount as main fabric)
-matching thread
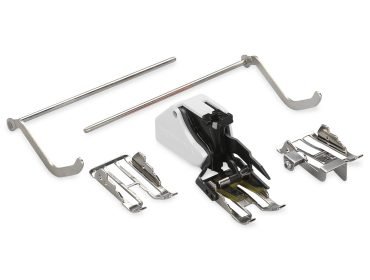
My machine: BERNINA 480 with the Three-Sole Walking Foot with Seam Guide #50 installed.

Tutorial
1.Cutting your fabric
Cut your front pieces, back piece and sleeves from outer fabric and from lining fabric.


2.Stitching shoulder seams and side seams
Pin shoulder seams and side seams of front piece and back piece right sides together.
Stitch.
Repeat for the lining pieces.


3.Sleeves
Pin side seams of your sleeve from outer fabric right sides together.
Stitch and repeat for the other sleeve.

Press seams open, just like the side seams and shoulder seams of your front/back pieces from outer fabric.

Repeat for the sleeves from lining fabric, leaving an opening of 20 to 30cm in 1 of the sleeve seams.


Insert the sleeves in your vest from outer fabric and your vest from lining fabric following the instructions from the pattern’s tutorial.

You now have 2 vests, one made of outer fabric and one made of lining fabric.

4.Sewing the vests together
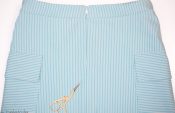
Place your vest from outer fabric on the table in front of you, as shown in the picture below.
Make sure your sleeves are pulled inside out.

Repeat for your vest from lining fabric:

Turn your vest from lining fabric over and place on top of your vest from outer fabric.
This way, the edges of front piece and back piece will be facing right sides together.

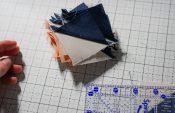
Pin the edges right sides together, all the way around.

Stitch all the way around.
Trim the seam allowance and give small clips in the curves.


5.Stitching sleeves together
We’re going to attach the sleeve hems of main fabric and lining fabric together.
Fold 1 sleeve from main fabric and 1 sleeve from lining fabric towards each other over the side seam of the jacket.
Make sure they are sleeves from the same side of the jacket and that they’re not twisted.

Fold over 4cm at hem of sleeve from lining fabric.

Insert the sleeve from lining fabric into the sleeve from main fabric.
The right sides of the hems are now facing each other.

Pin hems into place all the way around and stitch into place.


6.Turning your vest
Turn your jacket by pulling it through the opening you left in 1 of the lining sleeves.

Push out all corners and push lining sleeves into outer sleeves.
Press your vest.
Topstitch all the way around, at 2mm from the edge and close the opening you left in the sleeve.

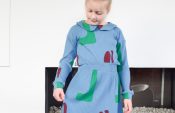
Your lined Junna vest with sleeves is finished, great job!
Love, Isabel


0 Responses