 BERNINA Corporate Blog -
Collar for Lux dress: tutorial
I love adding extras to existing patterns or changing little things that make each piece even more unique.
This time I’m happy to take you through a tutorial to add a collar to the Lux dress.
You can also download the extra pattern piece for this collar for free, no need to start drawing yourself ;-).
Download the pattern piece here!
For sizes 80 – 92: print page 1
For sizes 98 – 116: print page 2
For sizes 122 – 140: print page 3
For sizes 146 – 164: print page 4
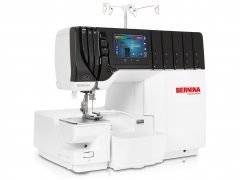
I sewed the sample dress with my sewing machine BERNINA 480 AND overlocker BERNINA L 890, my perfect match!
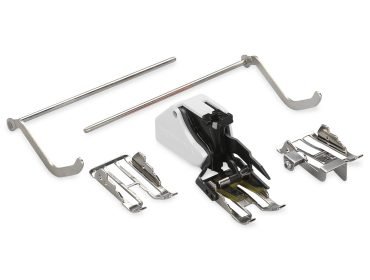
As always, I used the Three-Sole Walking Foot with Seam Guide #50 on my machine for the best result.

Requirements
-sewing machine and (optionally) overlocker
-fabric (see pattern for requirements) and matching thread
-pattern Lux dress and extra collar pattern piece
-30cm interfacing (eg. vlieseline H180 of G785))
-button or hook/eye closure
Tutorial
1.Cutting the pattern pieces
Cut out the necessary pattern pieces for your dress with this adjustment:
copy the facing you see at the top of the jumpsuit to the center back seam of your back piece, and don’t forget to add a seam allowance.
This will look like this:


Cut the pattern pieces of the collar 2 x 2 mirrored.
You get a total of 4 collar pieces, 2 for the outer collar and 2 for the inner collar.

2.Preparing the collar pattern pieces
Apply interfacing to 2 mirrored collar pieces.

Trim 2mm from the outer edges of the non interfaced collar pieces.

3.Sewing the collar
Pin an interfaced and non interfaced collar piece right sides together.

Stitch the outer edge at 1cm.

Cut off half of the seam allowance and give small clips in the rounded edges.


Turn the collar right side out and press flat.

At the back, you will see that the seamline is slightly turned inwards.
That way you won’t see that seam when the collar is sewn to the dress.

Topstitch the collar at 5mm from the edge.

Repeat for the 2 remaining collar pieces.

4.Preparing the dress
Place the 2 back pieces right sides together and pin the seam.

Stitch from the marked point to the bottom at 1cm from the edge.
Backstitch well when you start.

Press the center back seam open and the facings flat.

Pin and stitch the shoulder seams of front piece and back piece, right sides together.
Press the seam towards the back piece.

We’re ready to attach the collar to the dress.
5.Sewing the collar to the dress
Pin the collar pieces to the neckline of the dress, the under collar is facing the right side of the dress.
Start pinning at the center front mark and continue towards the center back mark.


Make sure the collar pieces touch each other at center front.

Stitch into place at 5mm from the edge.

Fold the facing at the back over the collar, right sides together and pin in place.
This will place the collar between the neckline of the dress and the facing.


Press the neckband in half along the long side, wrong sides together.

We are going to pin the neckband over the right side of the collar.
To do this, start by pinning the neckband to 1 of the facings at the back, placing the neckline 1cm over the facing.


Go all the way around and finish at the other facing.

Stitch the neckline at presser foot width (7.5mm) from the edge, all the way around.
Start and finish at the ends of the facing.

Fold your neckline upwards, over the seam allowance of the neckline.


Topstitch the neckline (you also stitch through the seam value allowance) at 2mm from the edge.
Start and finish stitching at the facing, you are not stitching into the facing itself.


Then fold and press the neckline inwards.
Turn the facings right sides out.

Stitch the neckline into place, all the way around at 2mm from the edge, you will also go along the slit in center back.
Stitch this seam at the inside of the dress.


6.Closure at back neck
Sew a loop and button at the back of the neckline or use a hook/eye closure.

Finish the dress following the instructions of the pattern.

You’re done, great job!
Can’t wait to see your versions 🙂
Kind regards,
Isabel


0 Responses