 BERNINA Corporate Blog -
Andrea from Quiltmanufaktur and author for the German BERNINA blog is your guide for this fantastic quilt-along over the next 12 months. Together, you will sew classic patchwork blocks and combine them into a sampler. The completed quilt will be traditional, yet modern! The next part has been written and we are delighted that you join this quilt project.
We are continuing with the sixth block of the Old Block Quilt-Along! Today’s block is called “Mill and Stars”:
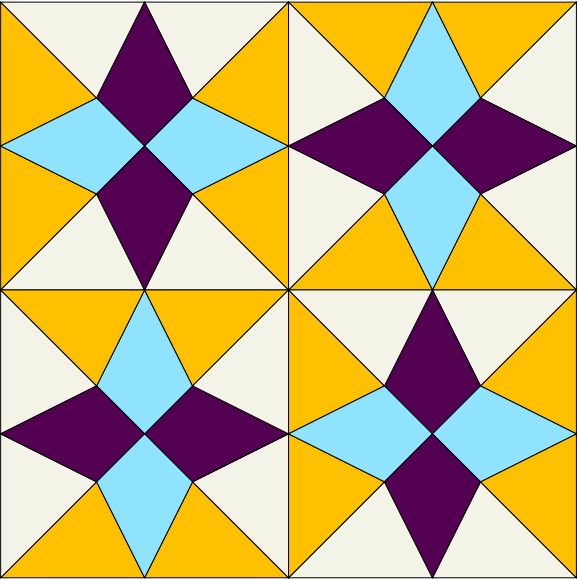
This block is also known as “Periwinkle”, “Hummingbird”, “Arkansas Snowflake” or “Michigan’s Pontiac Star”. Most of the blocks mentioned differ only in the way they are sewn – they look the same.
This is actually a block that you see quite often. I liked the many possibilities created by the clever arrangement of the colors. The example shown in the picture above is a traditional version and is attributed to Nancy Cabot. However, it seems to have been mentioned for the first time in 1897 in the “Ladies Art Company Catalogue”. There it appeared under the name “Four Point”.
In the middle of this block perhaps you can see the windmill, which is flanked by the four stars?
Cheryl Arkinson presented a really lovely, modern quilt with this pattern on her blog: Modern Mills and Stars from Perfectly Pretty Patchwork
It will be exciting to see what you do with this block!
We are sewing the “Mill and Stars” patchwork block
The “Mill and Stars” patchwork block measures 10.5″.
It is easy to make using foundation paper piecing, but I have also provided you with a PDF with pattern templates.
Download the patchwork templates
For cutting out, I have created three PDF documents to download:
- The first is a coloring sheet. This allows you to try out colors and designs for this block to see what they look like.
- On the second PDF you will find the templates for the foundation paper piecing
- and on the third you will find the pattern templates.
On the PDFs with the FPP templates and the pattern templates, I have put a control square with a side length of 1 inch so that you can check whether your printout of the templates is the right size. It is important to set your print options to “Actual size”.
Here are the downloads:
“Mill and Stars” coloring sheet
“Mill and Stars” FPP templates
“Mill and Stars” pattern templates
Cutting out the pattern pieces
If you are working with the pattern templates, you will need to cut out the following number of pattern pieces:
A: 16 pieces
B: 16 pieces
C: 16 pieces
I have not provided any information abowedut which should be background or patterned fabric because it depends on how you arrange the colors on this block.
Sewing the “Mill and Stars” patchwork block
It is up to you whether you prefer to work with the pattern templates or with the FPP.
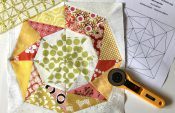
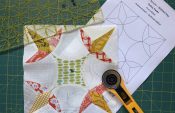
The picture below shows what mine looked like initially. I gathered all my scraps and then, using the templates, I was able to determine whether the scraps were big enough for each piece. I worked with the FPP templates. First I pinned all the middle pieces onto the paper template. I then sewed on the side pieces. Finally, when all the templates were sewn, I trimmed them.

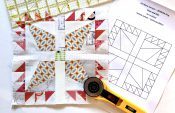
I then laid out the trimmed FPP templates according to the pattern.

First, sew the diagonals between two triangles together. To make sure that the seams lined up with each other, I secured them by inserting pins at a 90° angle. This allows you to easily – but slowly – sew over them.

The next step is to close the longer diagonals.

To make the three converging seam lines meet up precisely, I also used pins again here.

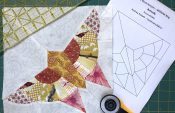
You now have four squares. Incidentally, these sections are also shown as a single block in some books and instructions.

The next step is to join the two block pieces in each row.

Finally, sew the two rows together.

That wasn’t difficult, was it? Blocks don’t always have to be complex, with a thousand pieces… I can’t wait to see what you do with this block! And when you’re done with your block, show it to me and everyone else as always here in the Community section of the Old Block Sampler or on Facebook and Instagram using the hashtag #BERNINAOldBlockSampler. It’s always exciting to see what stunning blocks everyone is making!
New here?
Have you only just discovered the quilt-along? No problem! You can join at any time. Registration is not required, and you can win a BERNINA 570 QE! All the posts will remain permanently available at the following link: Old Block Quilt-Along – overview of all the posts
In the first post, which was the invitation to participate in the quilt-along, you will find the important initial information about our joint project:
Old Block Quilt-Along – who’s in?
You can find the rest of the blocks from the quilt-along that have already been published here:
Old Block Quilt-Along, Part 1: “Bride’s Bouquet”
Old Block Quilt-Along, Part 2: “Quilter’s Delight”
Old Block Quilt-Along, Part 3: “Bird’s Nest”
Old Block Quilt-Along, Part 4: “Cross and Star”
Old Block Quilt-Along, Part 5: “Morning Star”
That was quite an easy task today, wasn’t it? I hope you still had fun and we’ll see you again for the next block!
Enjoy your sewing,
Andrea
How do I join please?
Dear Paula,
You are welcome to join the Old Block Quilt-Along! Its best if you check the very first post for this Quilt-Along. Go to this article: https://blog.bernina.com/en/2021/03/sewing-old-patchwork-blocks-instructions-quilt-along/
– The Old Block Quilt Along is coming to its end, so you have lots of beautiful blocks to choose from! In order to join the prize draw next month, you will have to choose at least 12 different blocks out of the 30+ Old Blocks and sew them together into a quilt top. You can make more and increase the size of your Quilt block if you want, but 12 is the minimum.
– When choosing the Blocks, be aware that they have different sizes. In one of the Posts from Andrea she shows possible layouts you could do with the different sizes. You might want to check this article to choose which blocks and sizes you want to use:
– You do not have to quilt the whole quilt – A picture of your finished quilt top on either Social Media (with the correct tags) or in this Blogs Community Section is enough to join the prize draw! How to join the prize draw is also described in the first article.
– As I said the Old Block Quilt Along is coming to its end, so you might have to rush a bit to be finished in time for the prize draw. You have one month left – the prize draw is on the 30th of April!
Have fun sewing!
Kind regards, Ramona
I used the teimplates rather than doing the FPP method as I wanted to be sure that I had the straight grain edges on the outside of the block. I’m not really adept at the FPP method yet!
Thank you, I am enjoying making all these lovely blocks and knowing their names.
I am very frustrated distinguishing between each piece on #5. The size for patterns are so much larger than then listed small size block on a 8×10 page example. I still have not been able to tell where to put A:s and B’s. Email me if I just confused you more.
Dear Janet,
Destinguishing between A and B is indeed tricky. I found the correct placement by cutting out the pattern, hold up the FPP paper against a light source and then align the thick lines of the pattern with the FPP. This way, I was able to mark where the pieces have to go. Hope this helps!