 BERNINA Corporate Blog -
Andrea from Quiltmanufaktur and author for the German BERNINA blog is your guide for this fantastic quilt-along over the next 12 months. Together, you will sew classic patchwork blocks and combine them into a sampler. The completed quilt will be traditional, yet modern! The next part has been written and we are delighted that you join this quilt project.
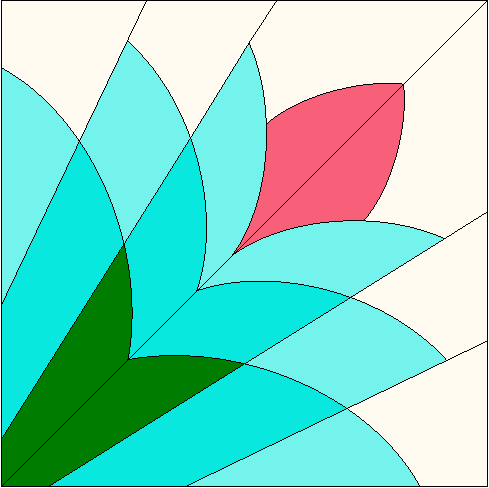
Hi, it’s great that you could join us again! Today, I’m going to show you the ninth patchwork block for the Old Block Quilt-Along, “Cleopatra’s Fan”.
The block was published for the first time on October 5th, 1934 in the “Cincinnati Enquirer” by “Laura Wheeler Designs”. The block was apparently inspired by the palm leaves that would have been used to fan Cleopatra, and that’s also where it gets its name. I managed to find two old newspaper clippings online illustrating how these blocks were published at the time:
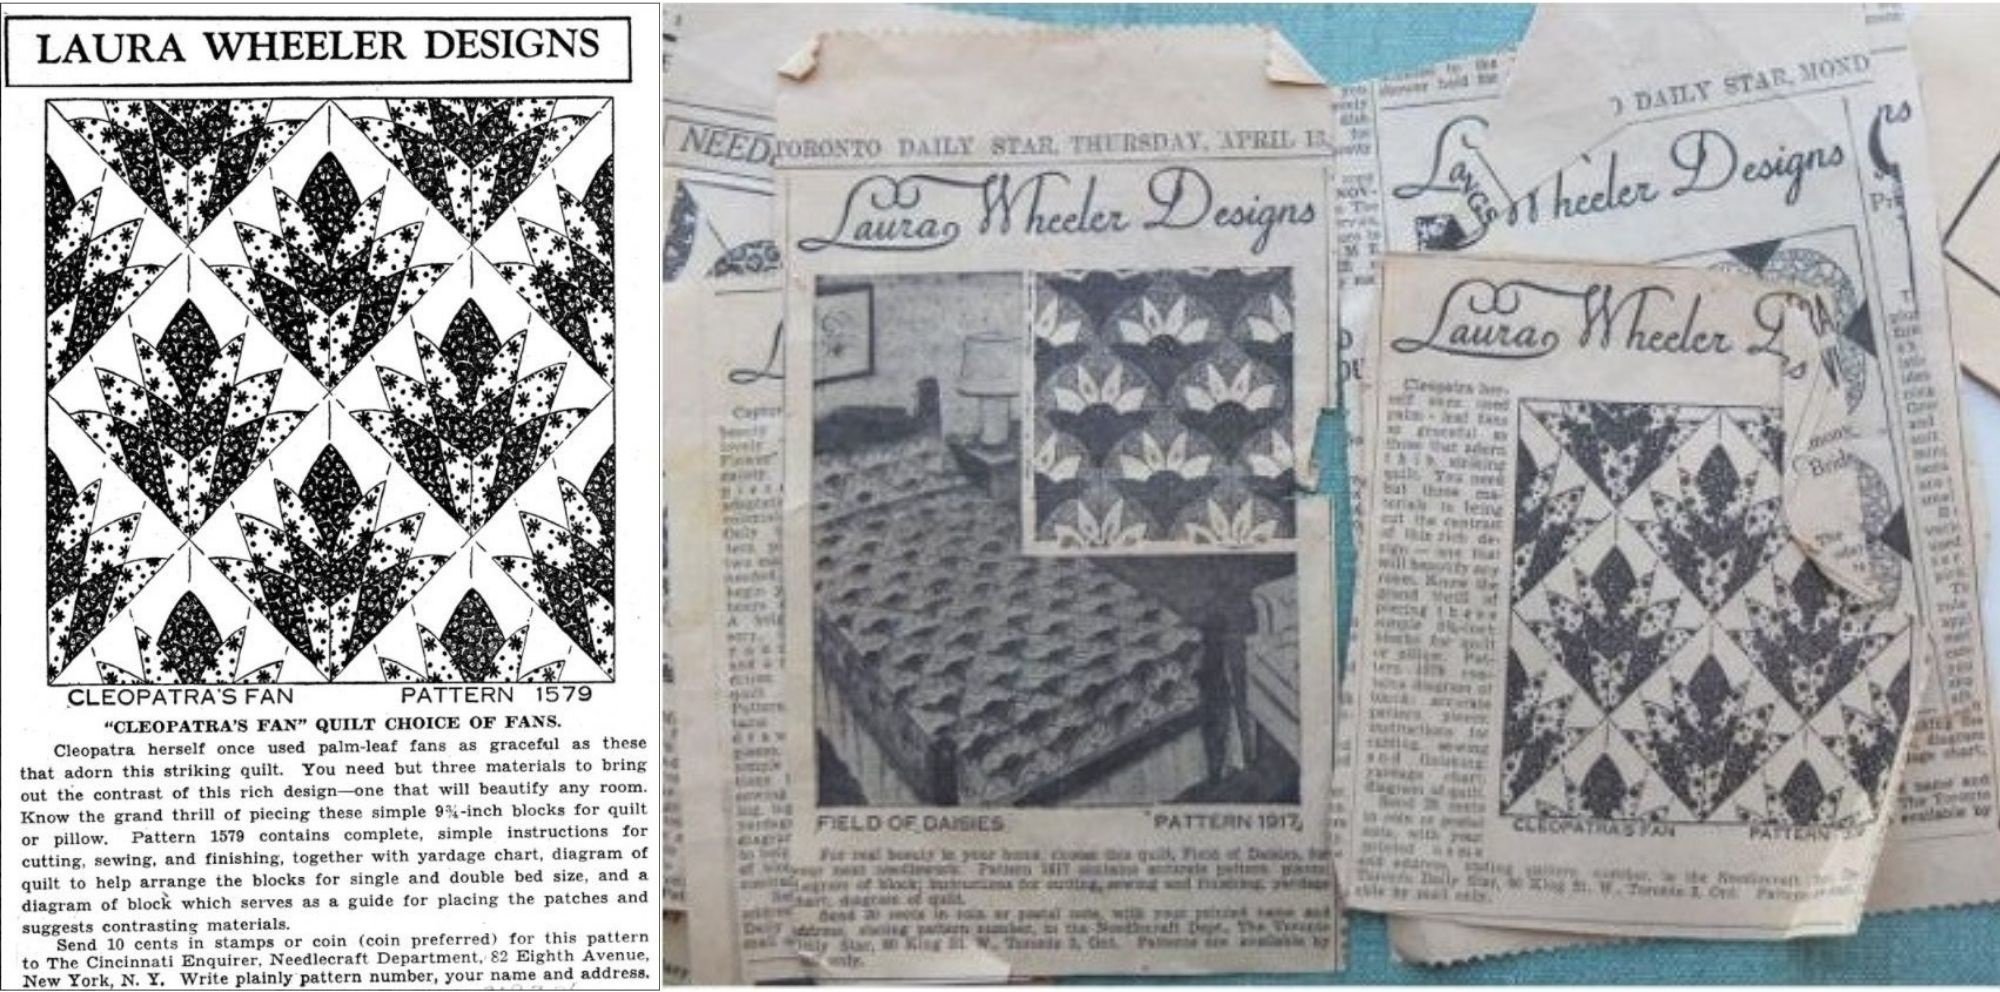
(Source: Picture 1 Martha Dellasega Gray, www.qisforquilter.com / Picture 2. Kate Smalley, www.tracingthreads.com)
We are sewing the “Cleopatra’s Fan” patchwork block
Cleopatra’s Fan is a 10″ block that is made using templates. This block involves sewing several different curves, which I will explain in more detail with pictures and tips! The block has a diagonal axis of symmetry, so the PDF printout only provides the templates for one side (see picture under ‘Cutting out the pattern pieces’).
Download the patchwork templates
For cutting out, I have created two PDF documents to download:
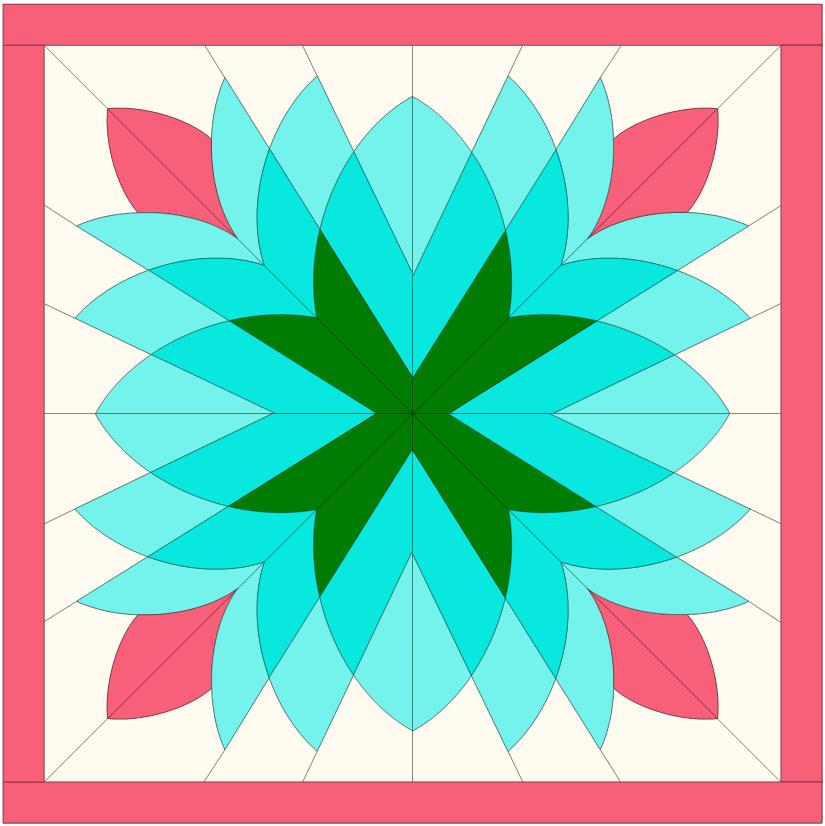
- The first is a coloring sheet. This allows you to try out colors and designs for this block to see what they look like.
- On the second PDF you will find the templates.
On the PDF with the templates, I have put a control square with a side length of 1 inch so that you can check whether your printout of the templates is the right size. It is important to set your print options to “Actual size”.
Here are the downloads:
“Cleopatra’s Fan” coloring sheet
Cutting out the pattern pieces
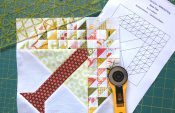
The picture below shows how the templates are assigned and laid out. The templates are cut out as mirror image pieces.
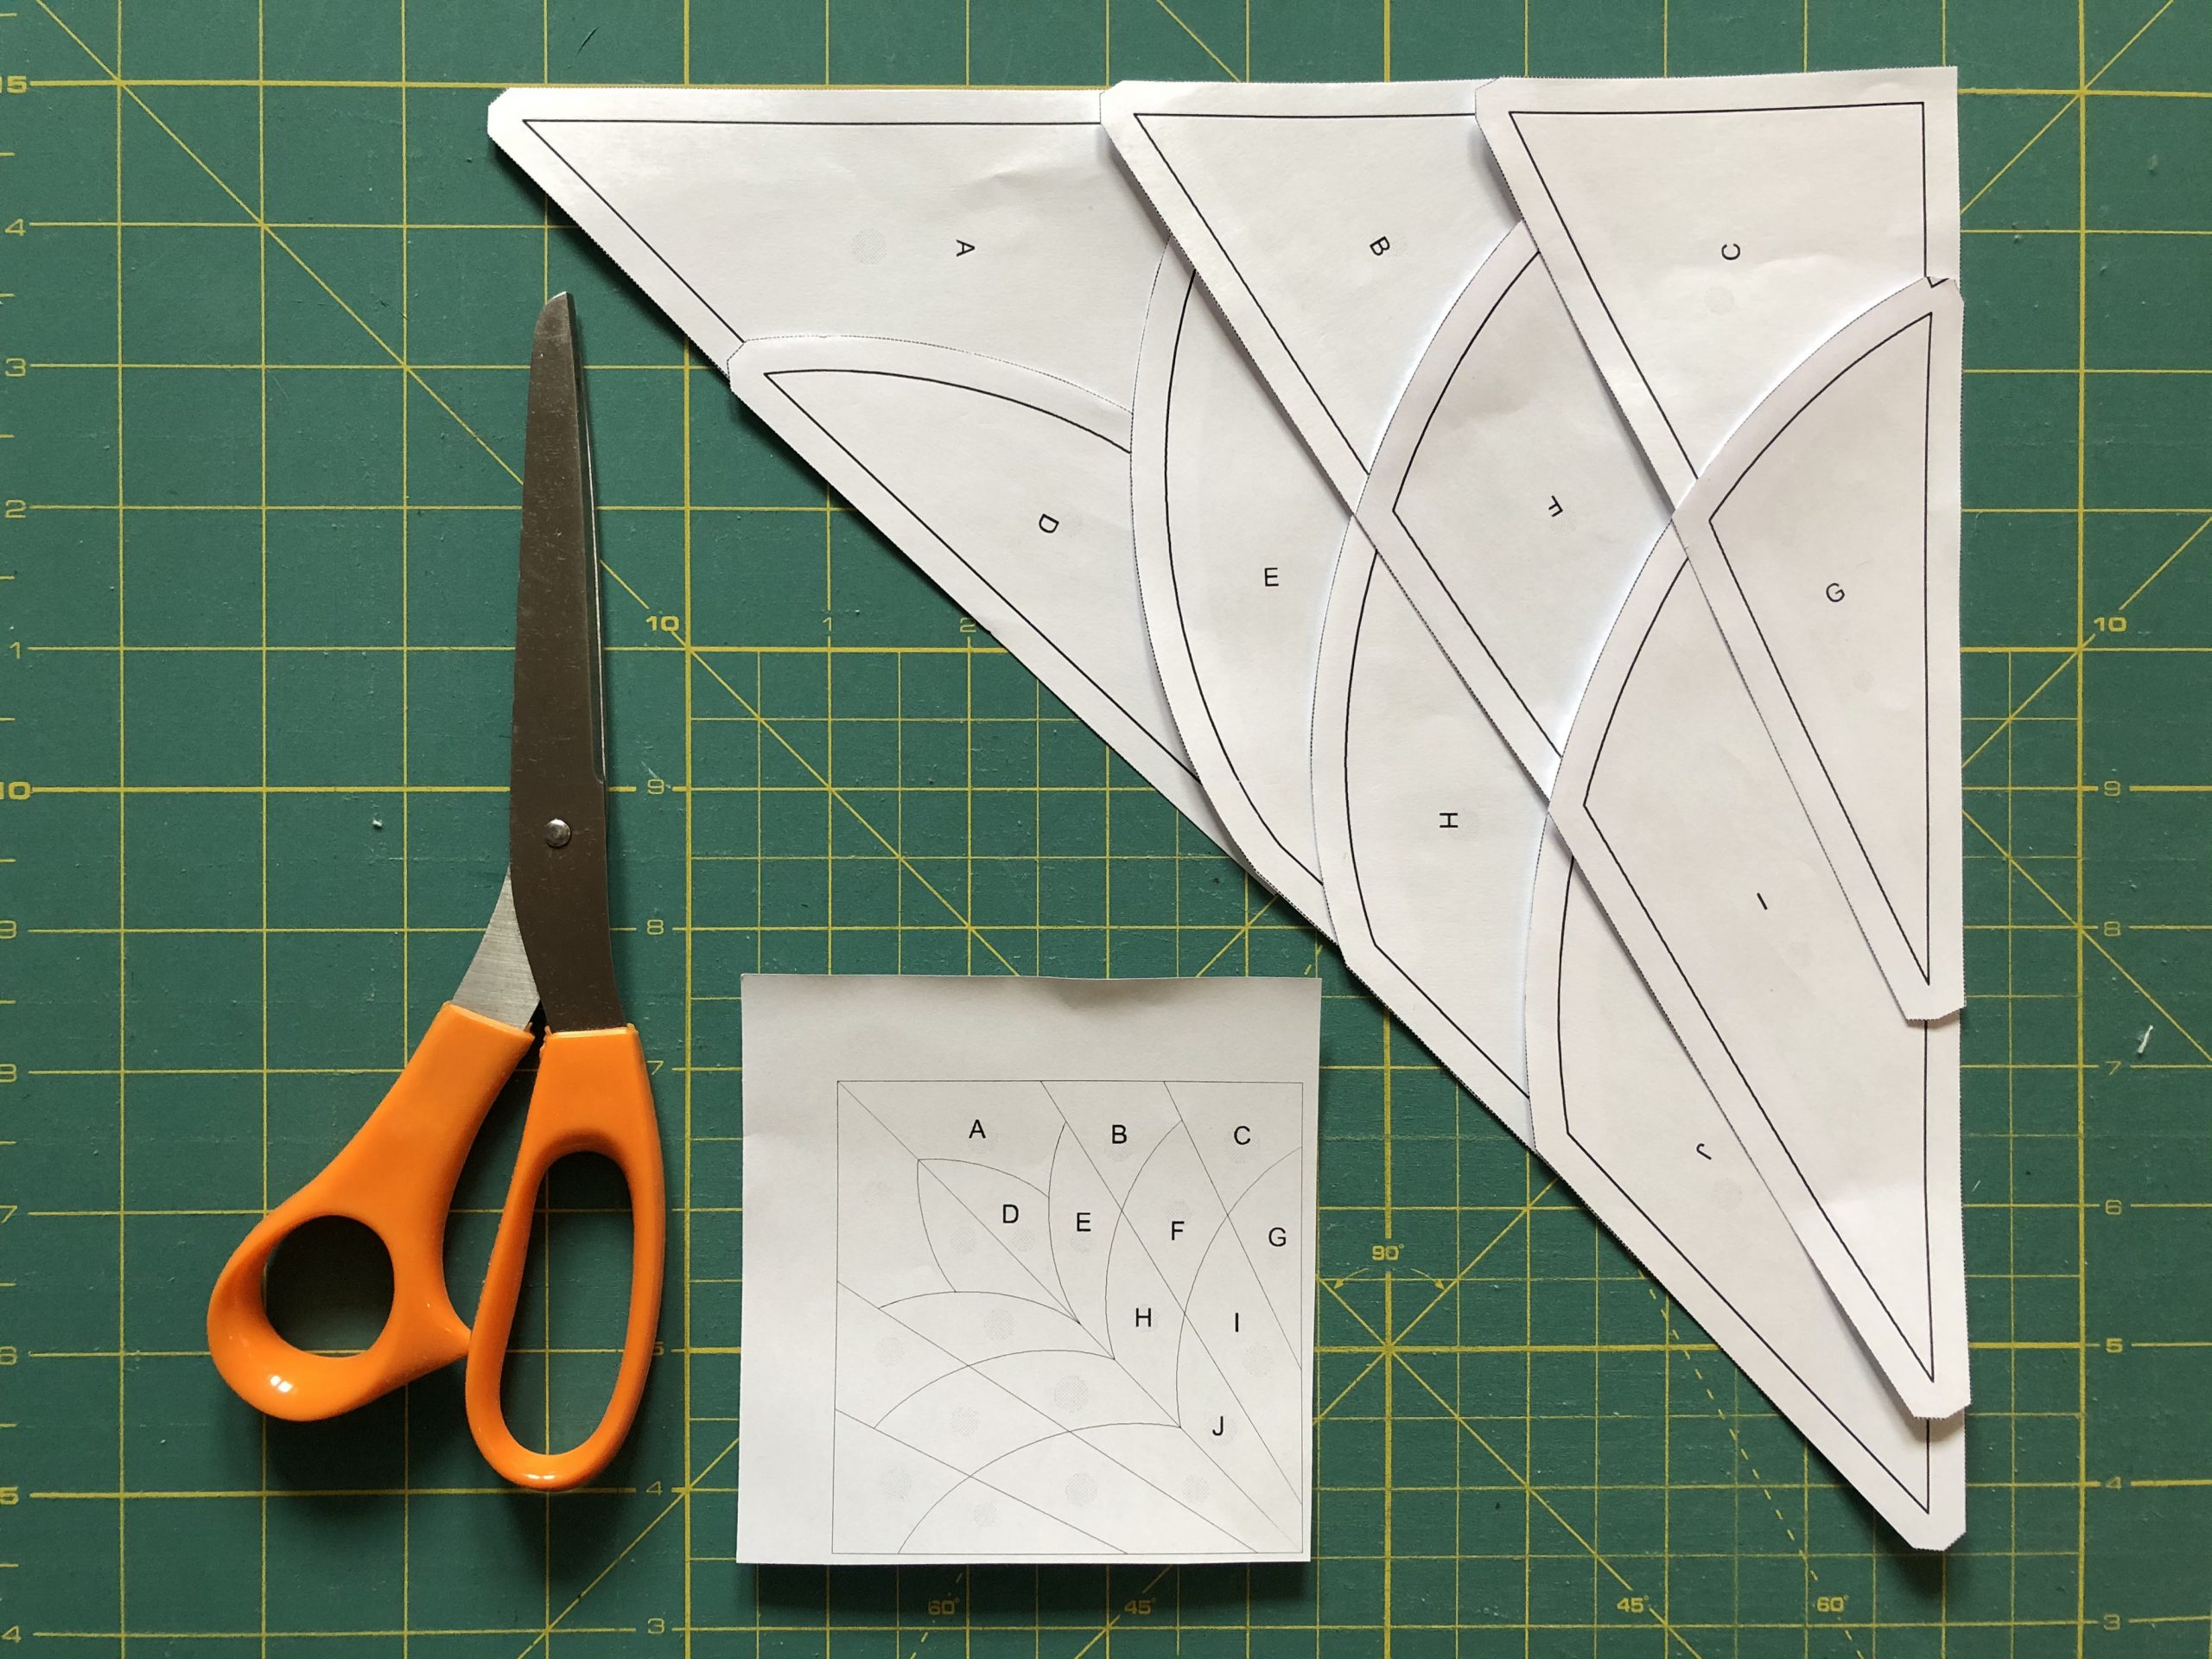
You will need to cut out the following number of pieces:
- Template A: 2 x background fabric
- Template B: 2 x background fabric
- Template C: 2 x background fabric
- Template D: 2 x patterned fabric
- Template E: 2 x patterned fabric
- Template F: 2 x patterned fabric
- Template G: 2 x patterned fabric
- Template H: 2 x patterned fabric
- Template I: 2 x patterned fabric
- Template J: 2 x patterned fabric
Sewing the “Cleopatra’s Fan” patchwork block
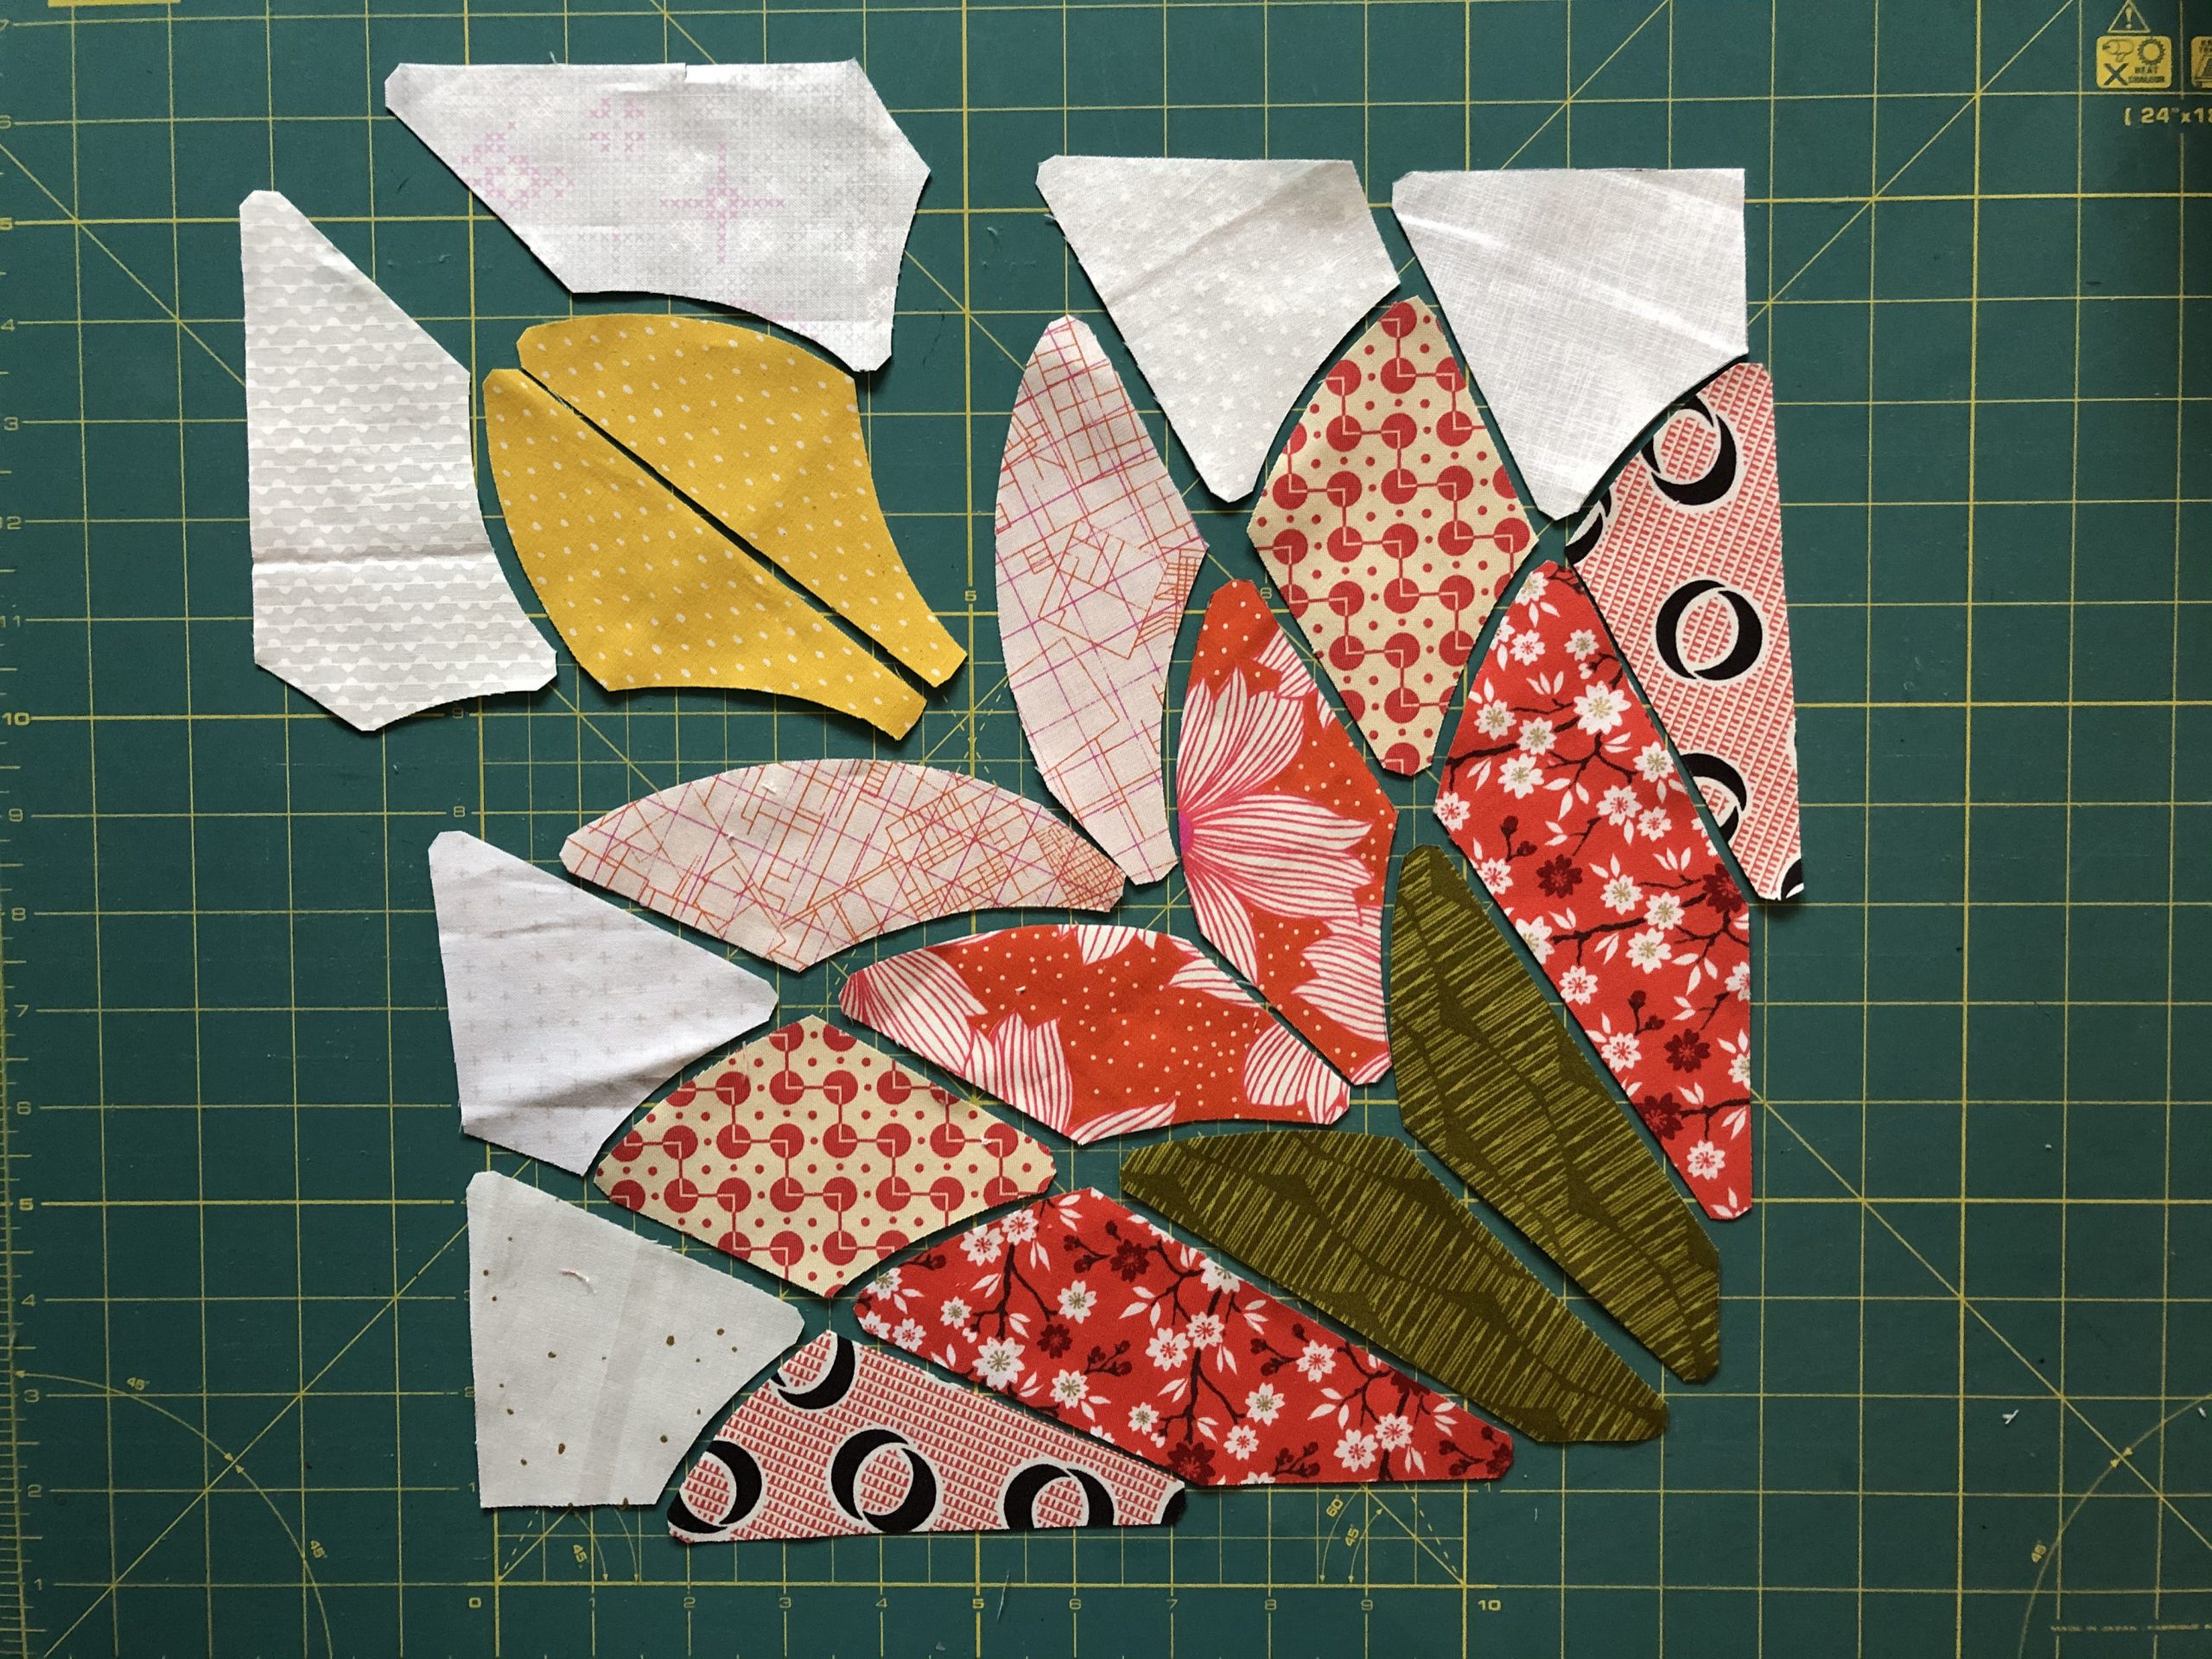
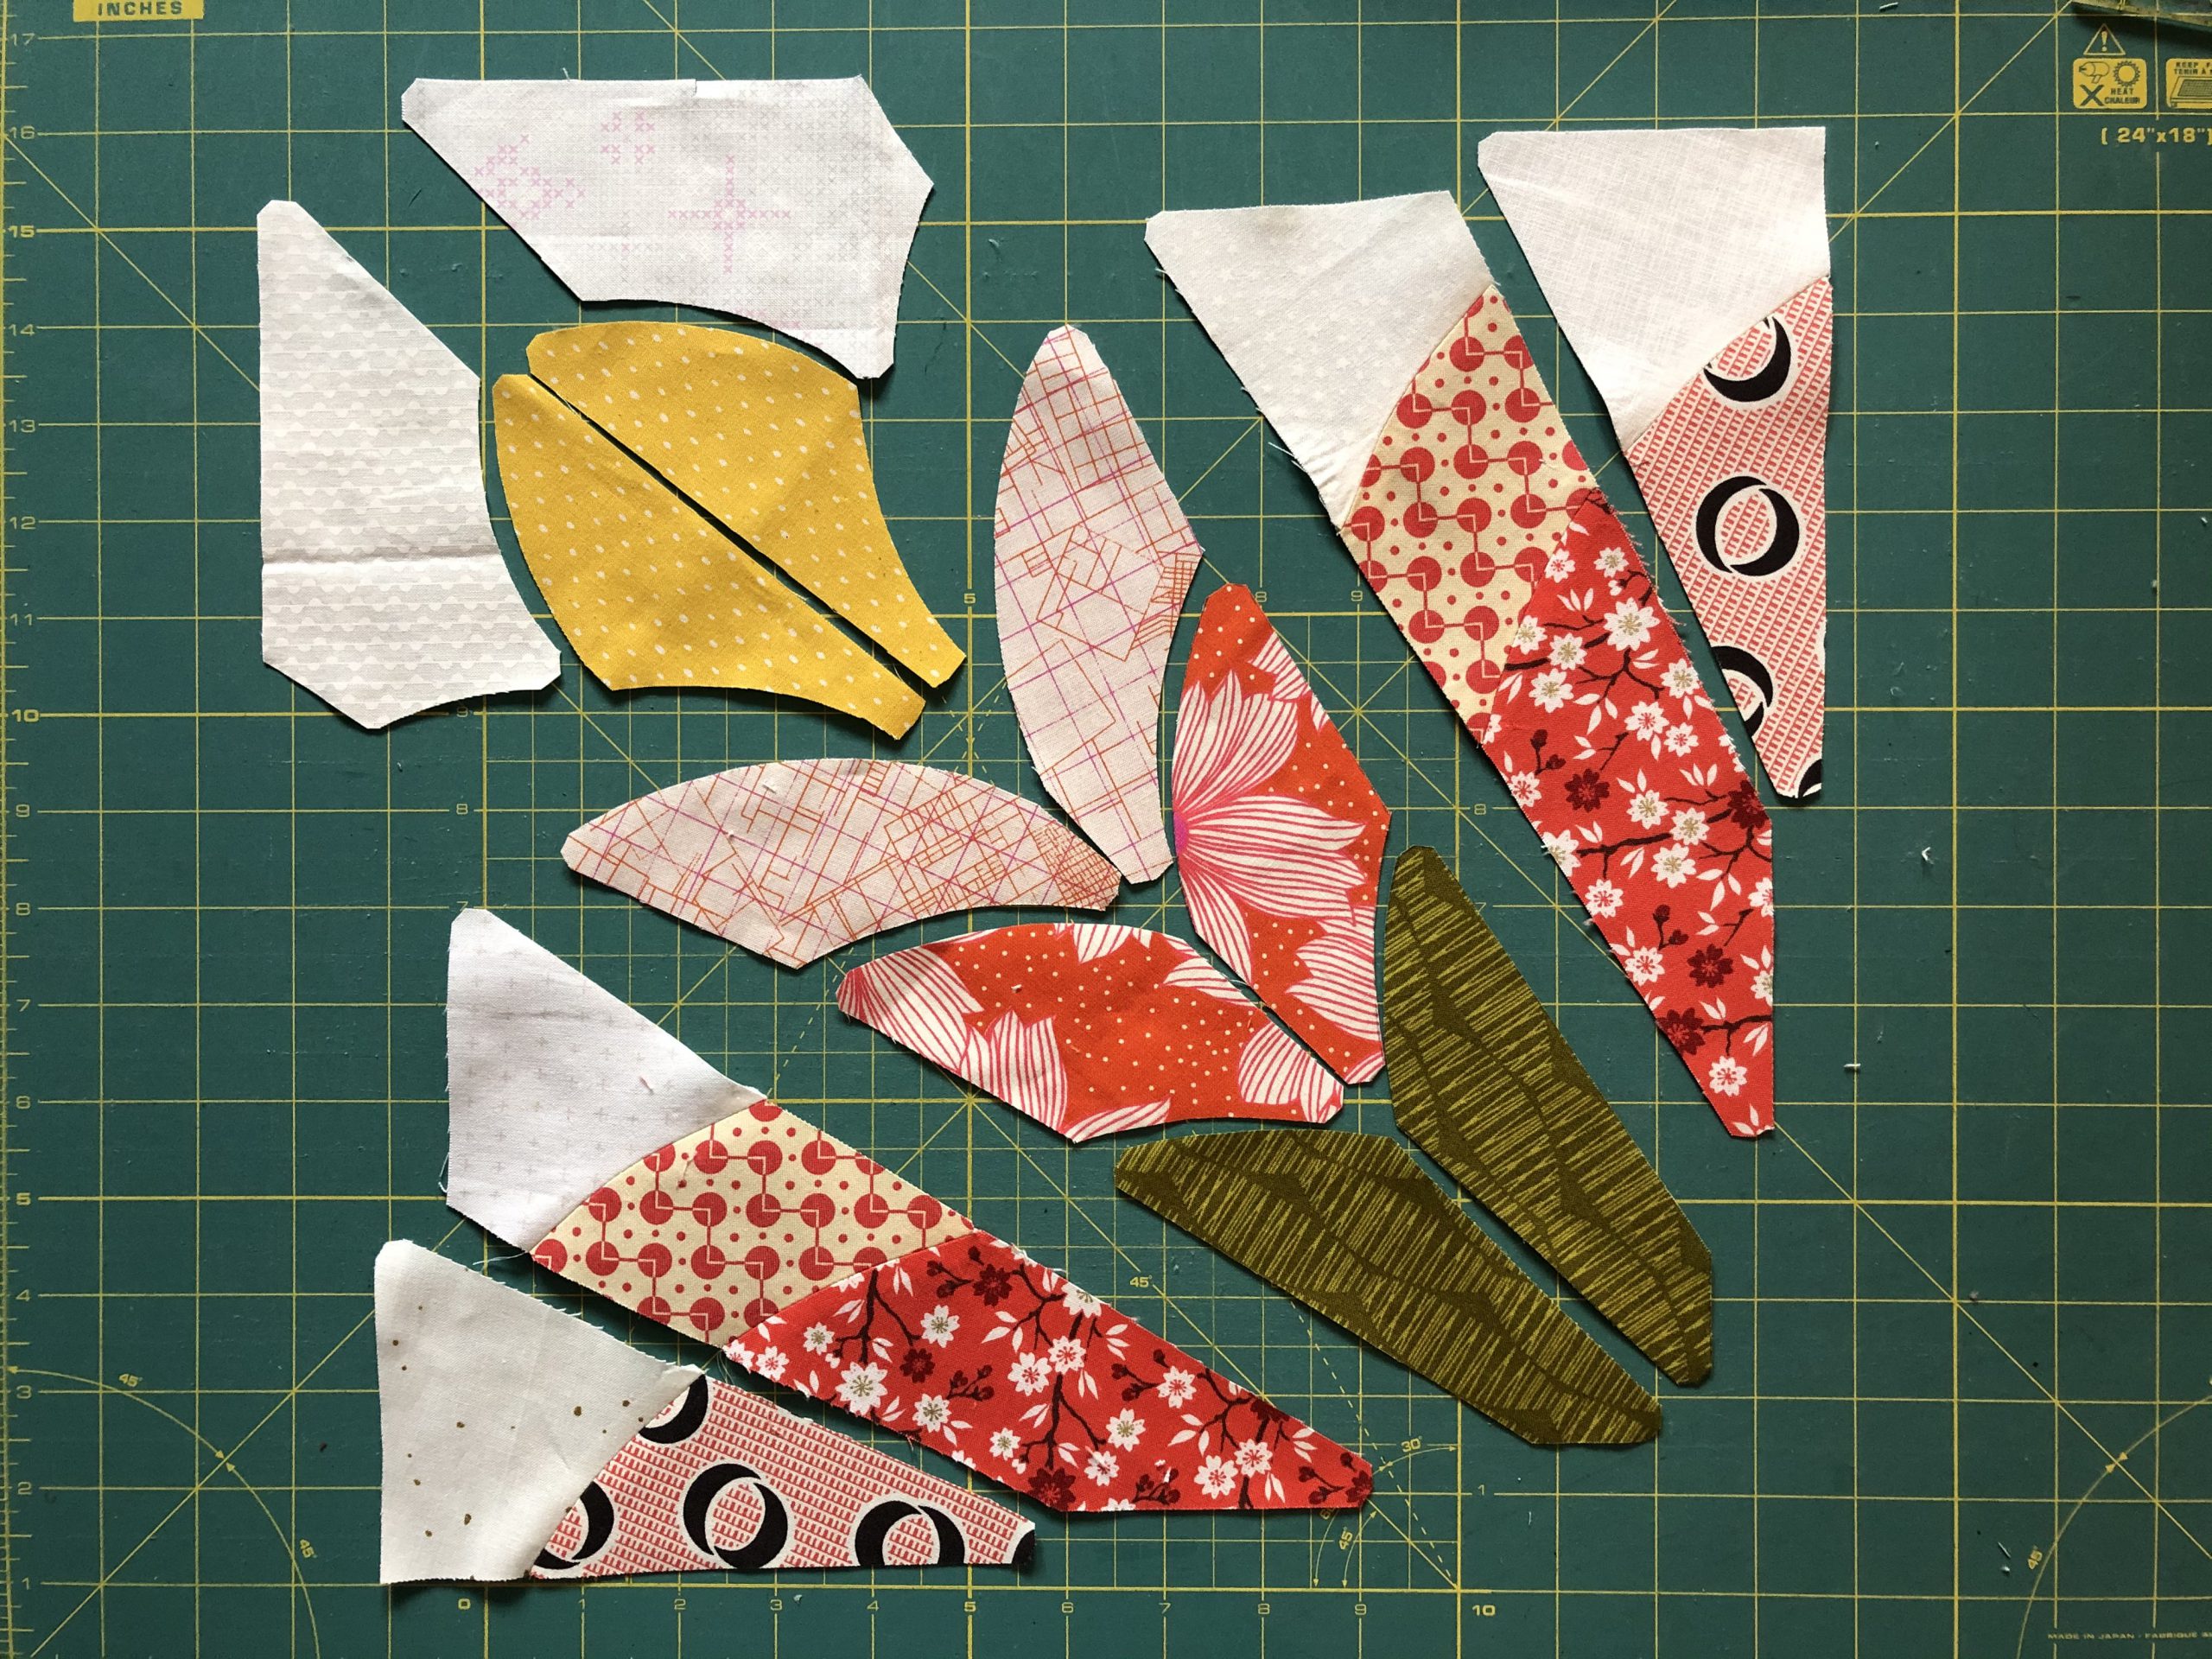
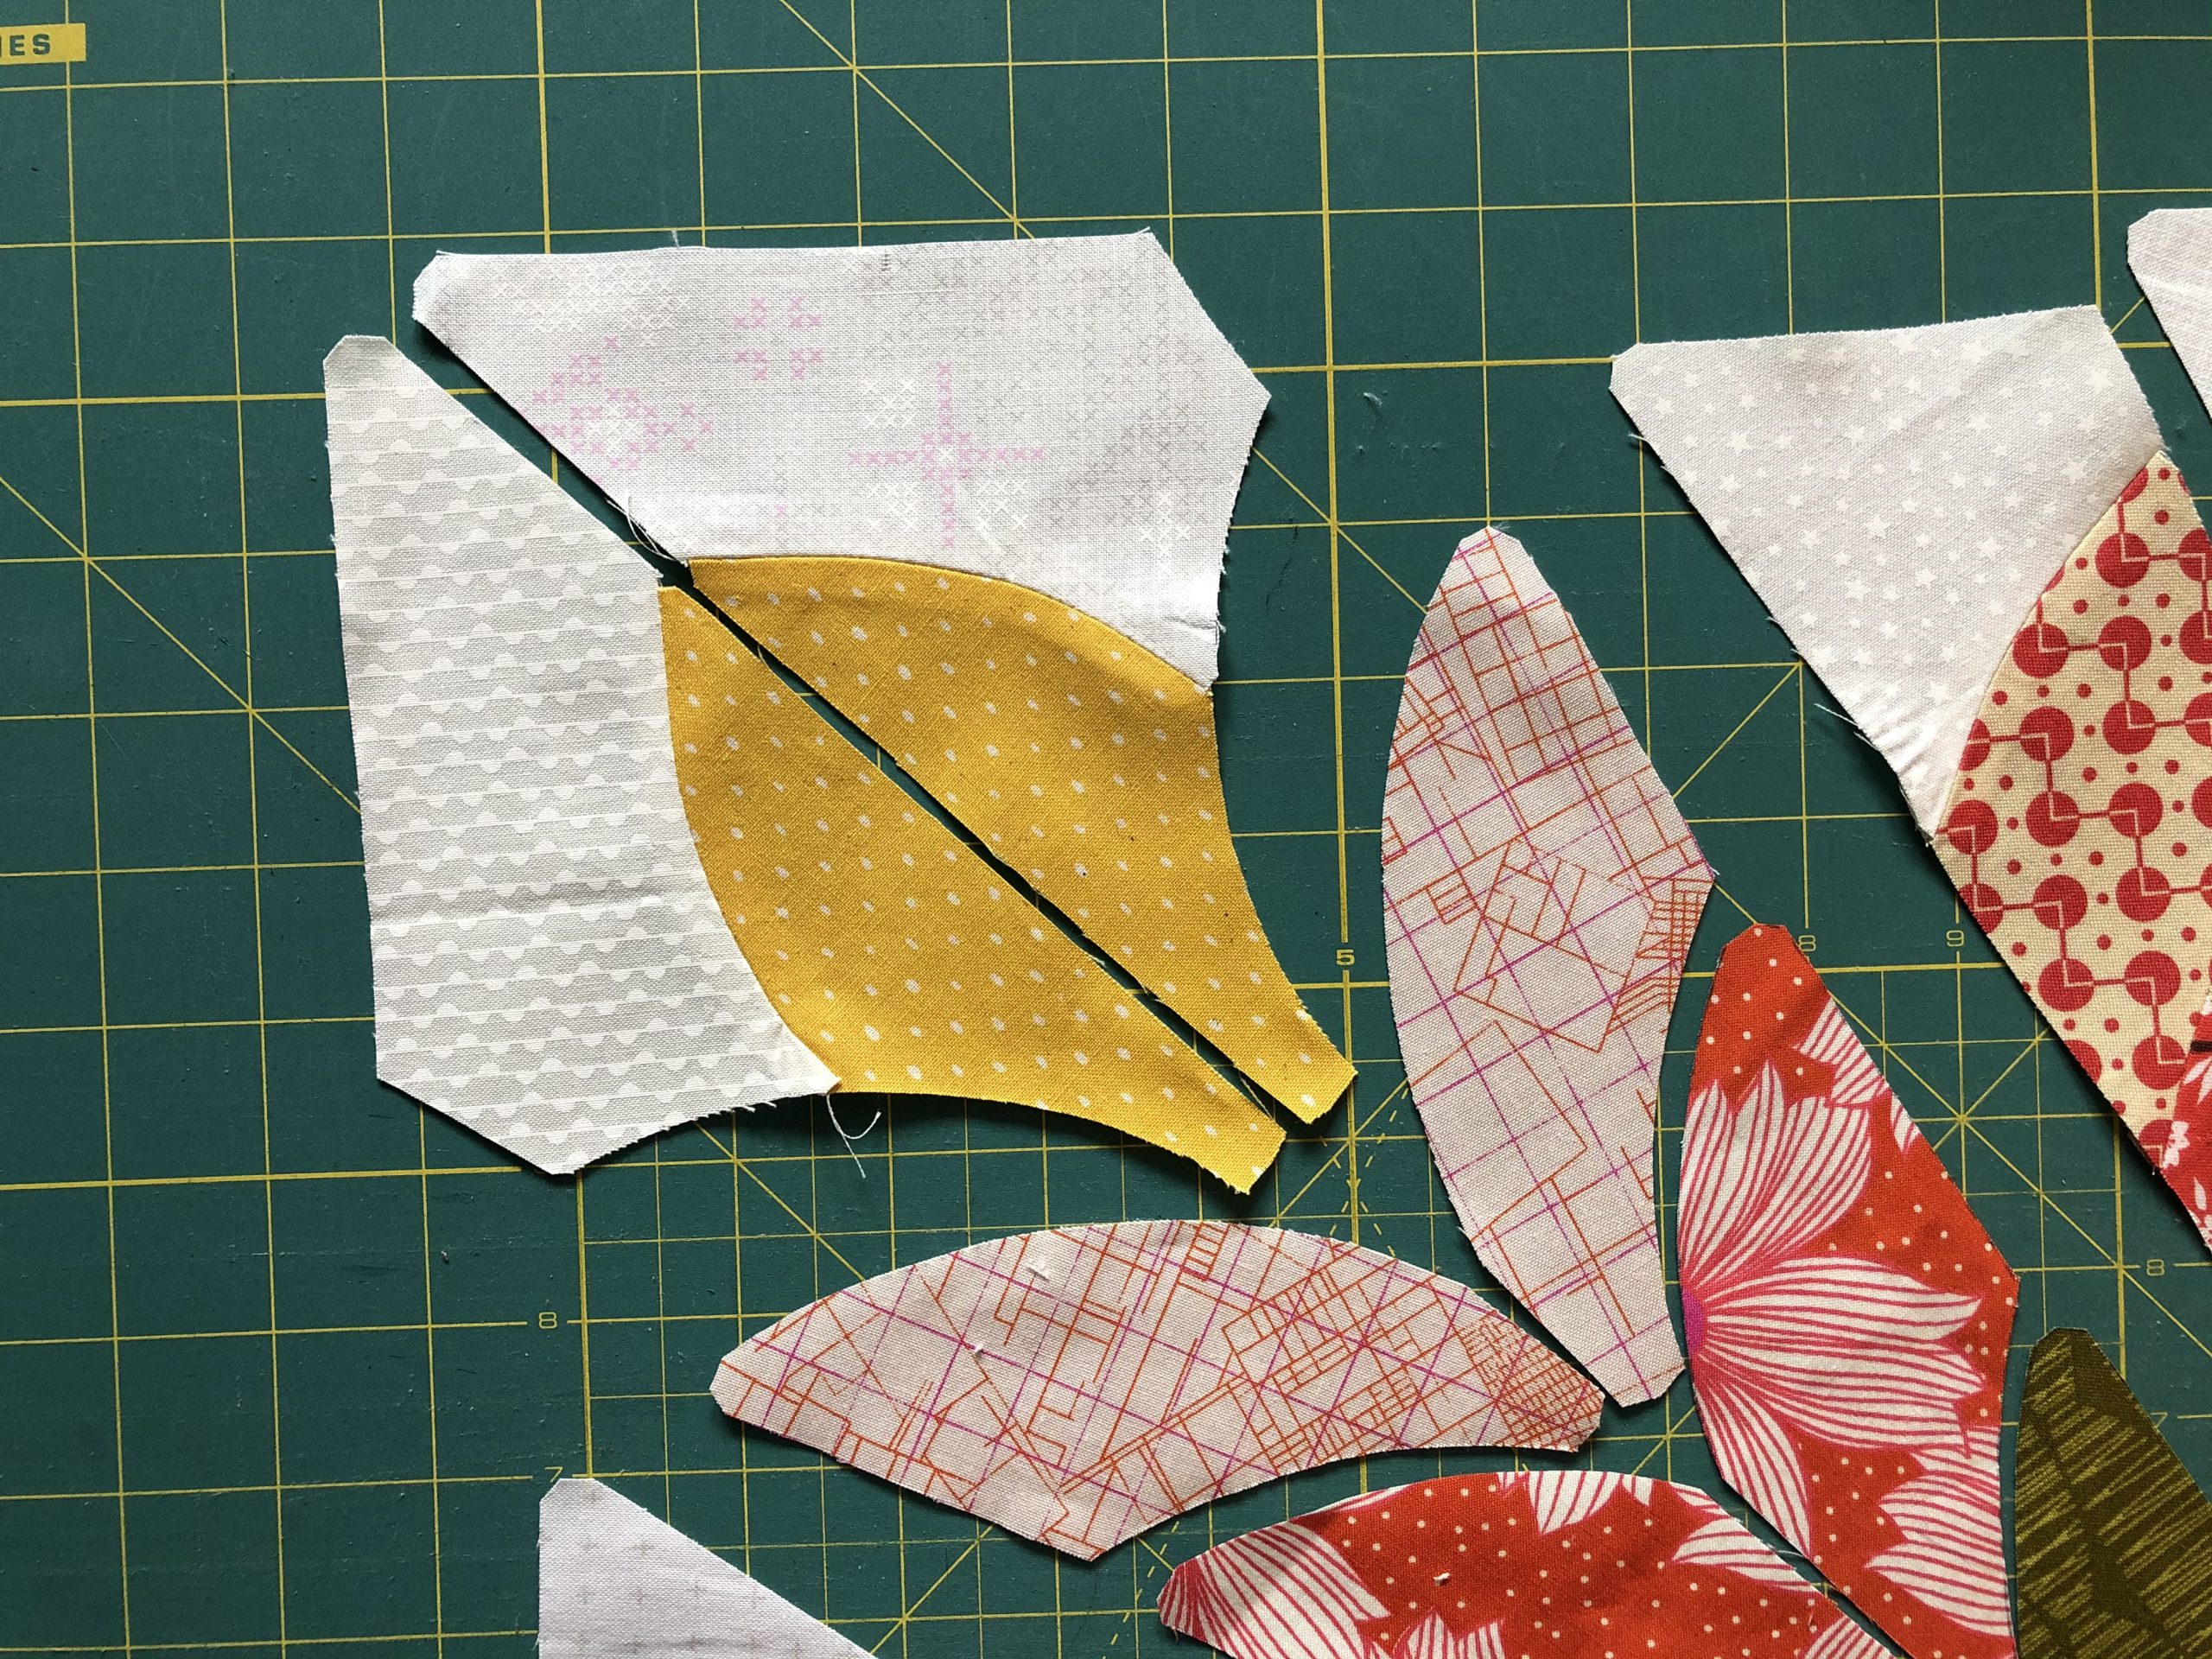
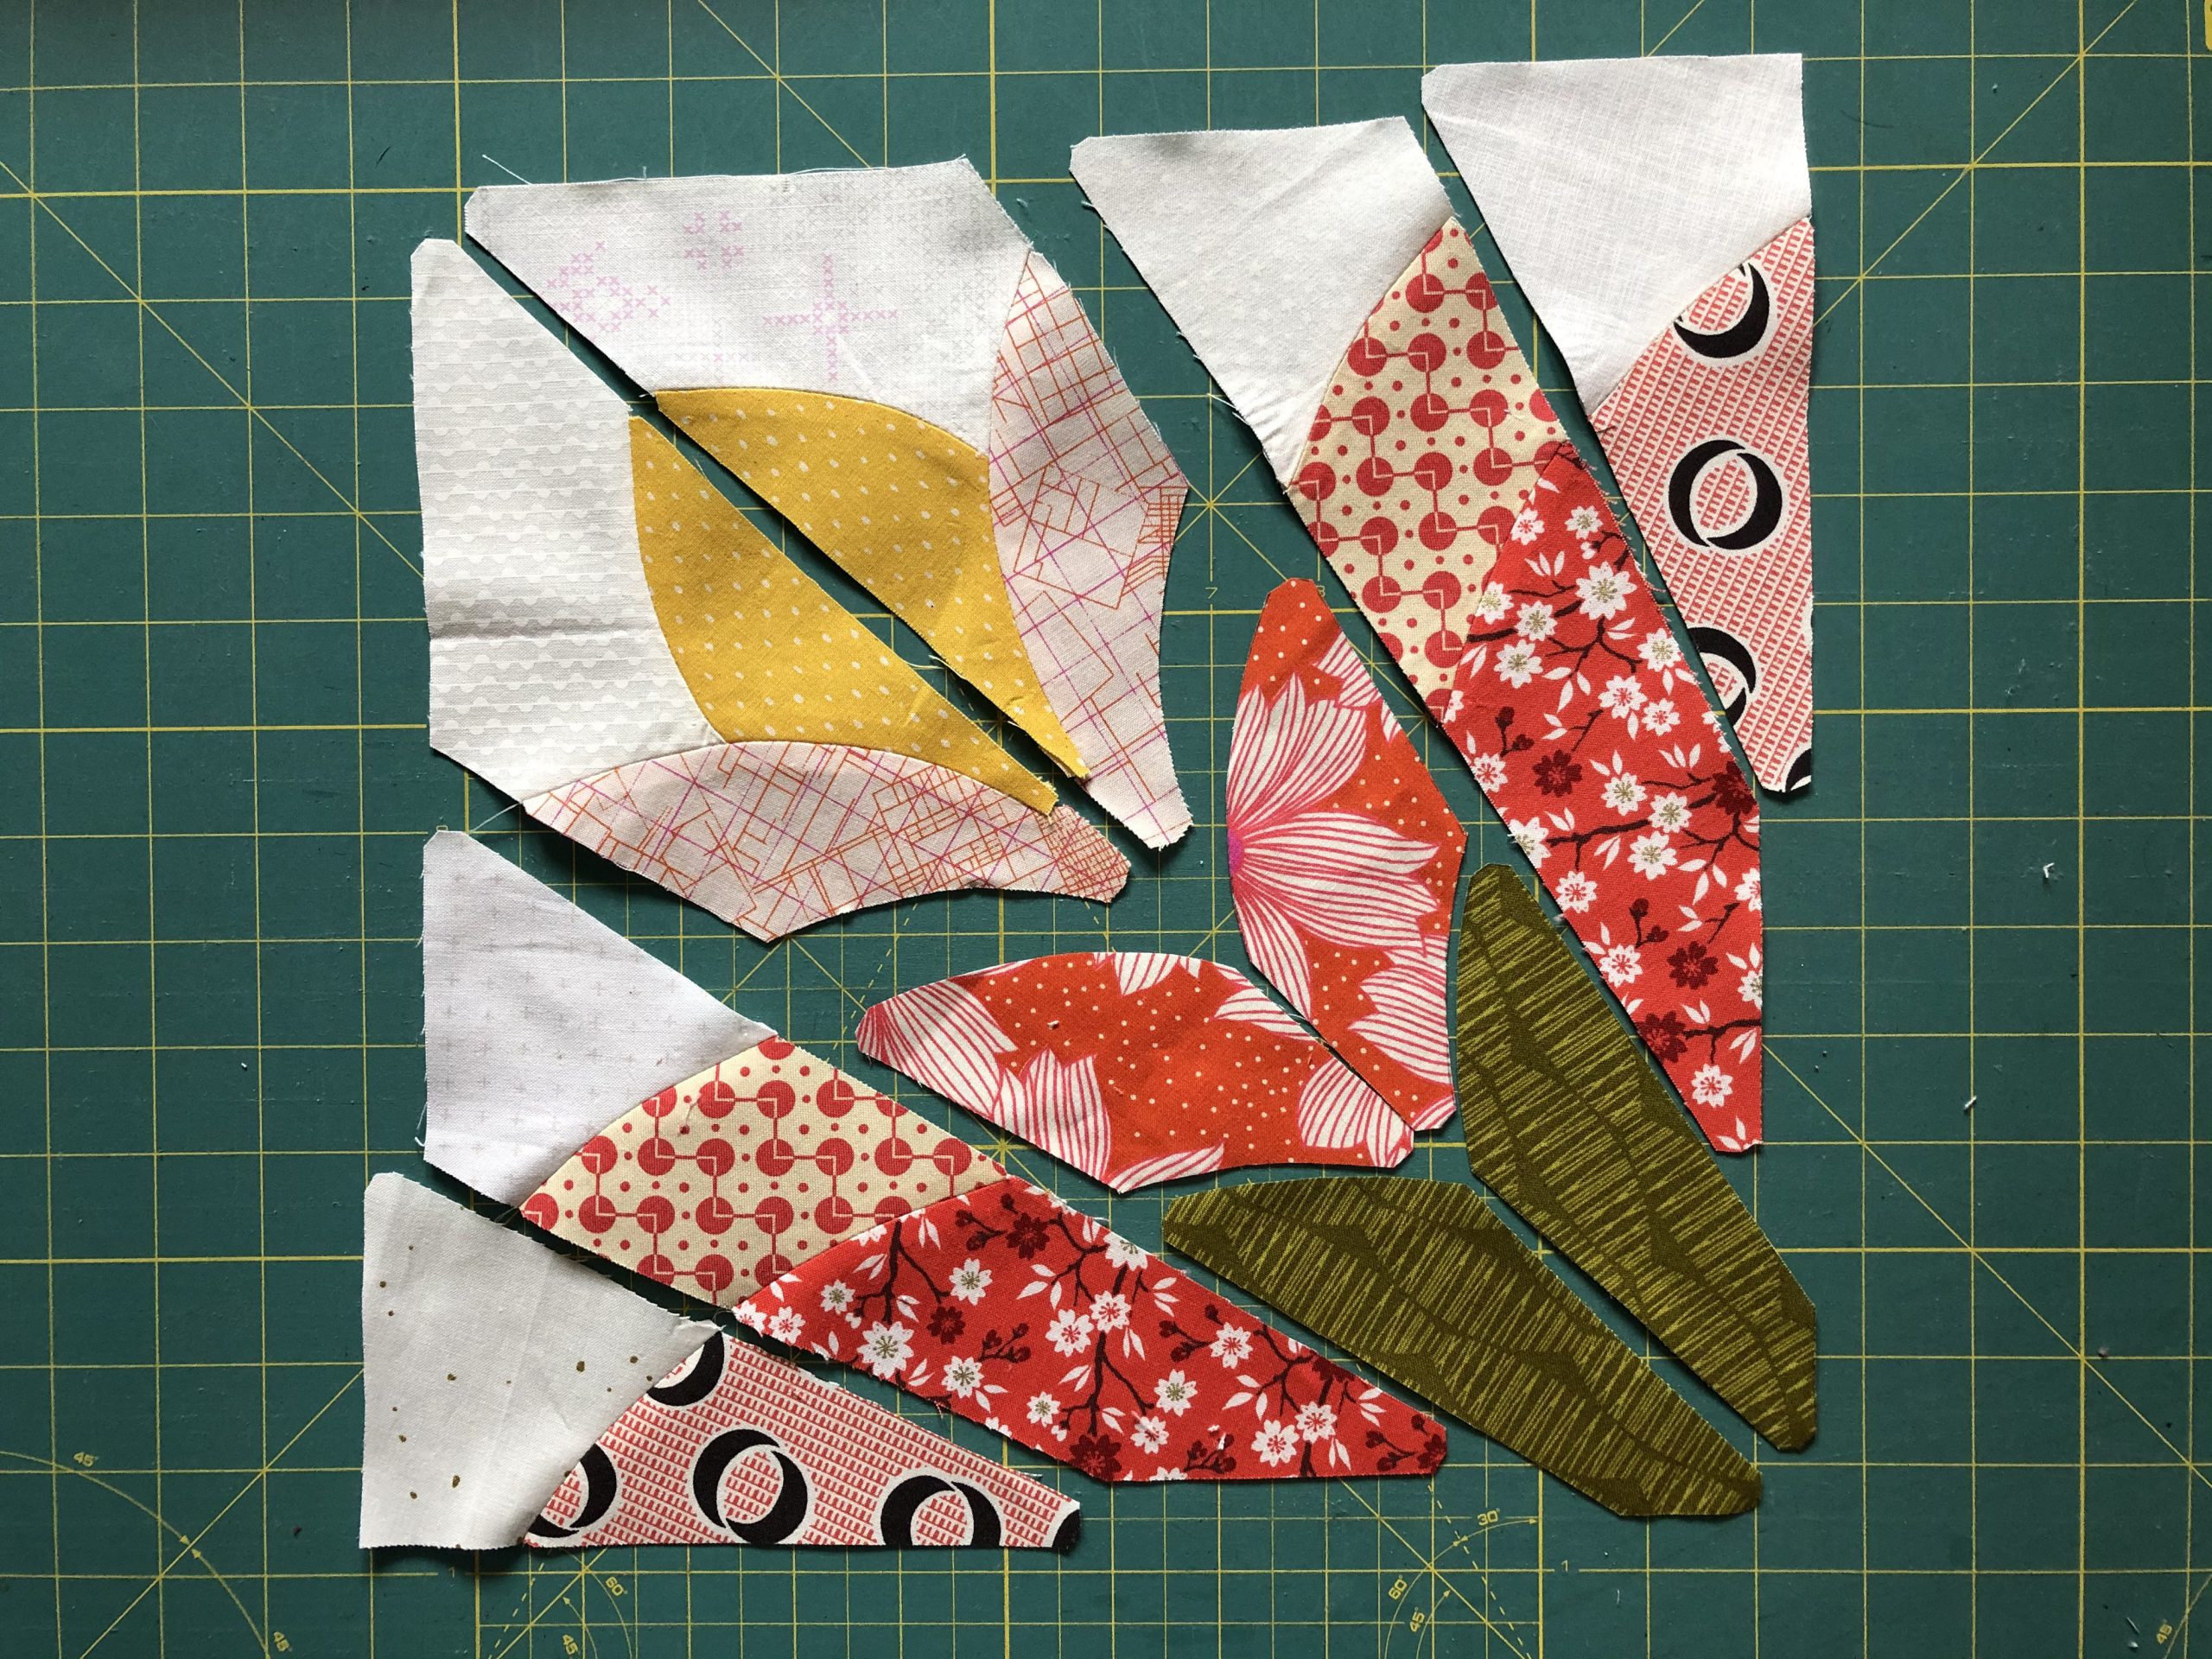
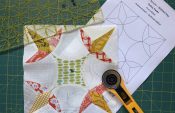
It all looks pretty confusing and complex at first! But maybe you can already see how this block will be constructed? The individual rows of the fan are worked from the outside in towards the middle, finishing off by closing the axis of symmetry, i.e. the diagonal seam.
As always, lay out your pattern pieces as they will be positioned in the block later.
The first panel seam is between pattern pieces C and G, and between pieces B, F and I.
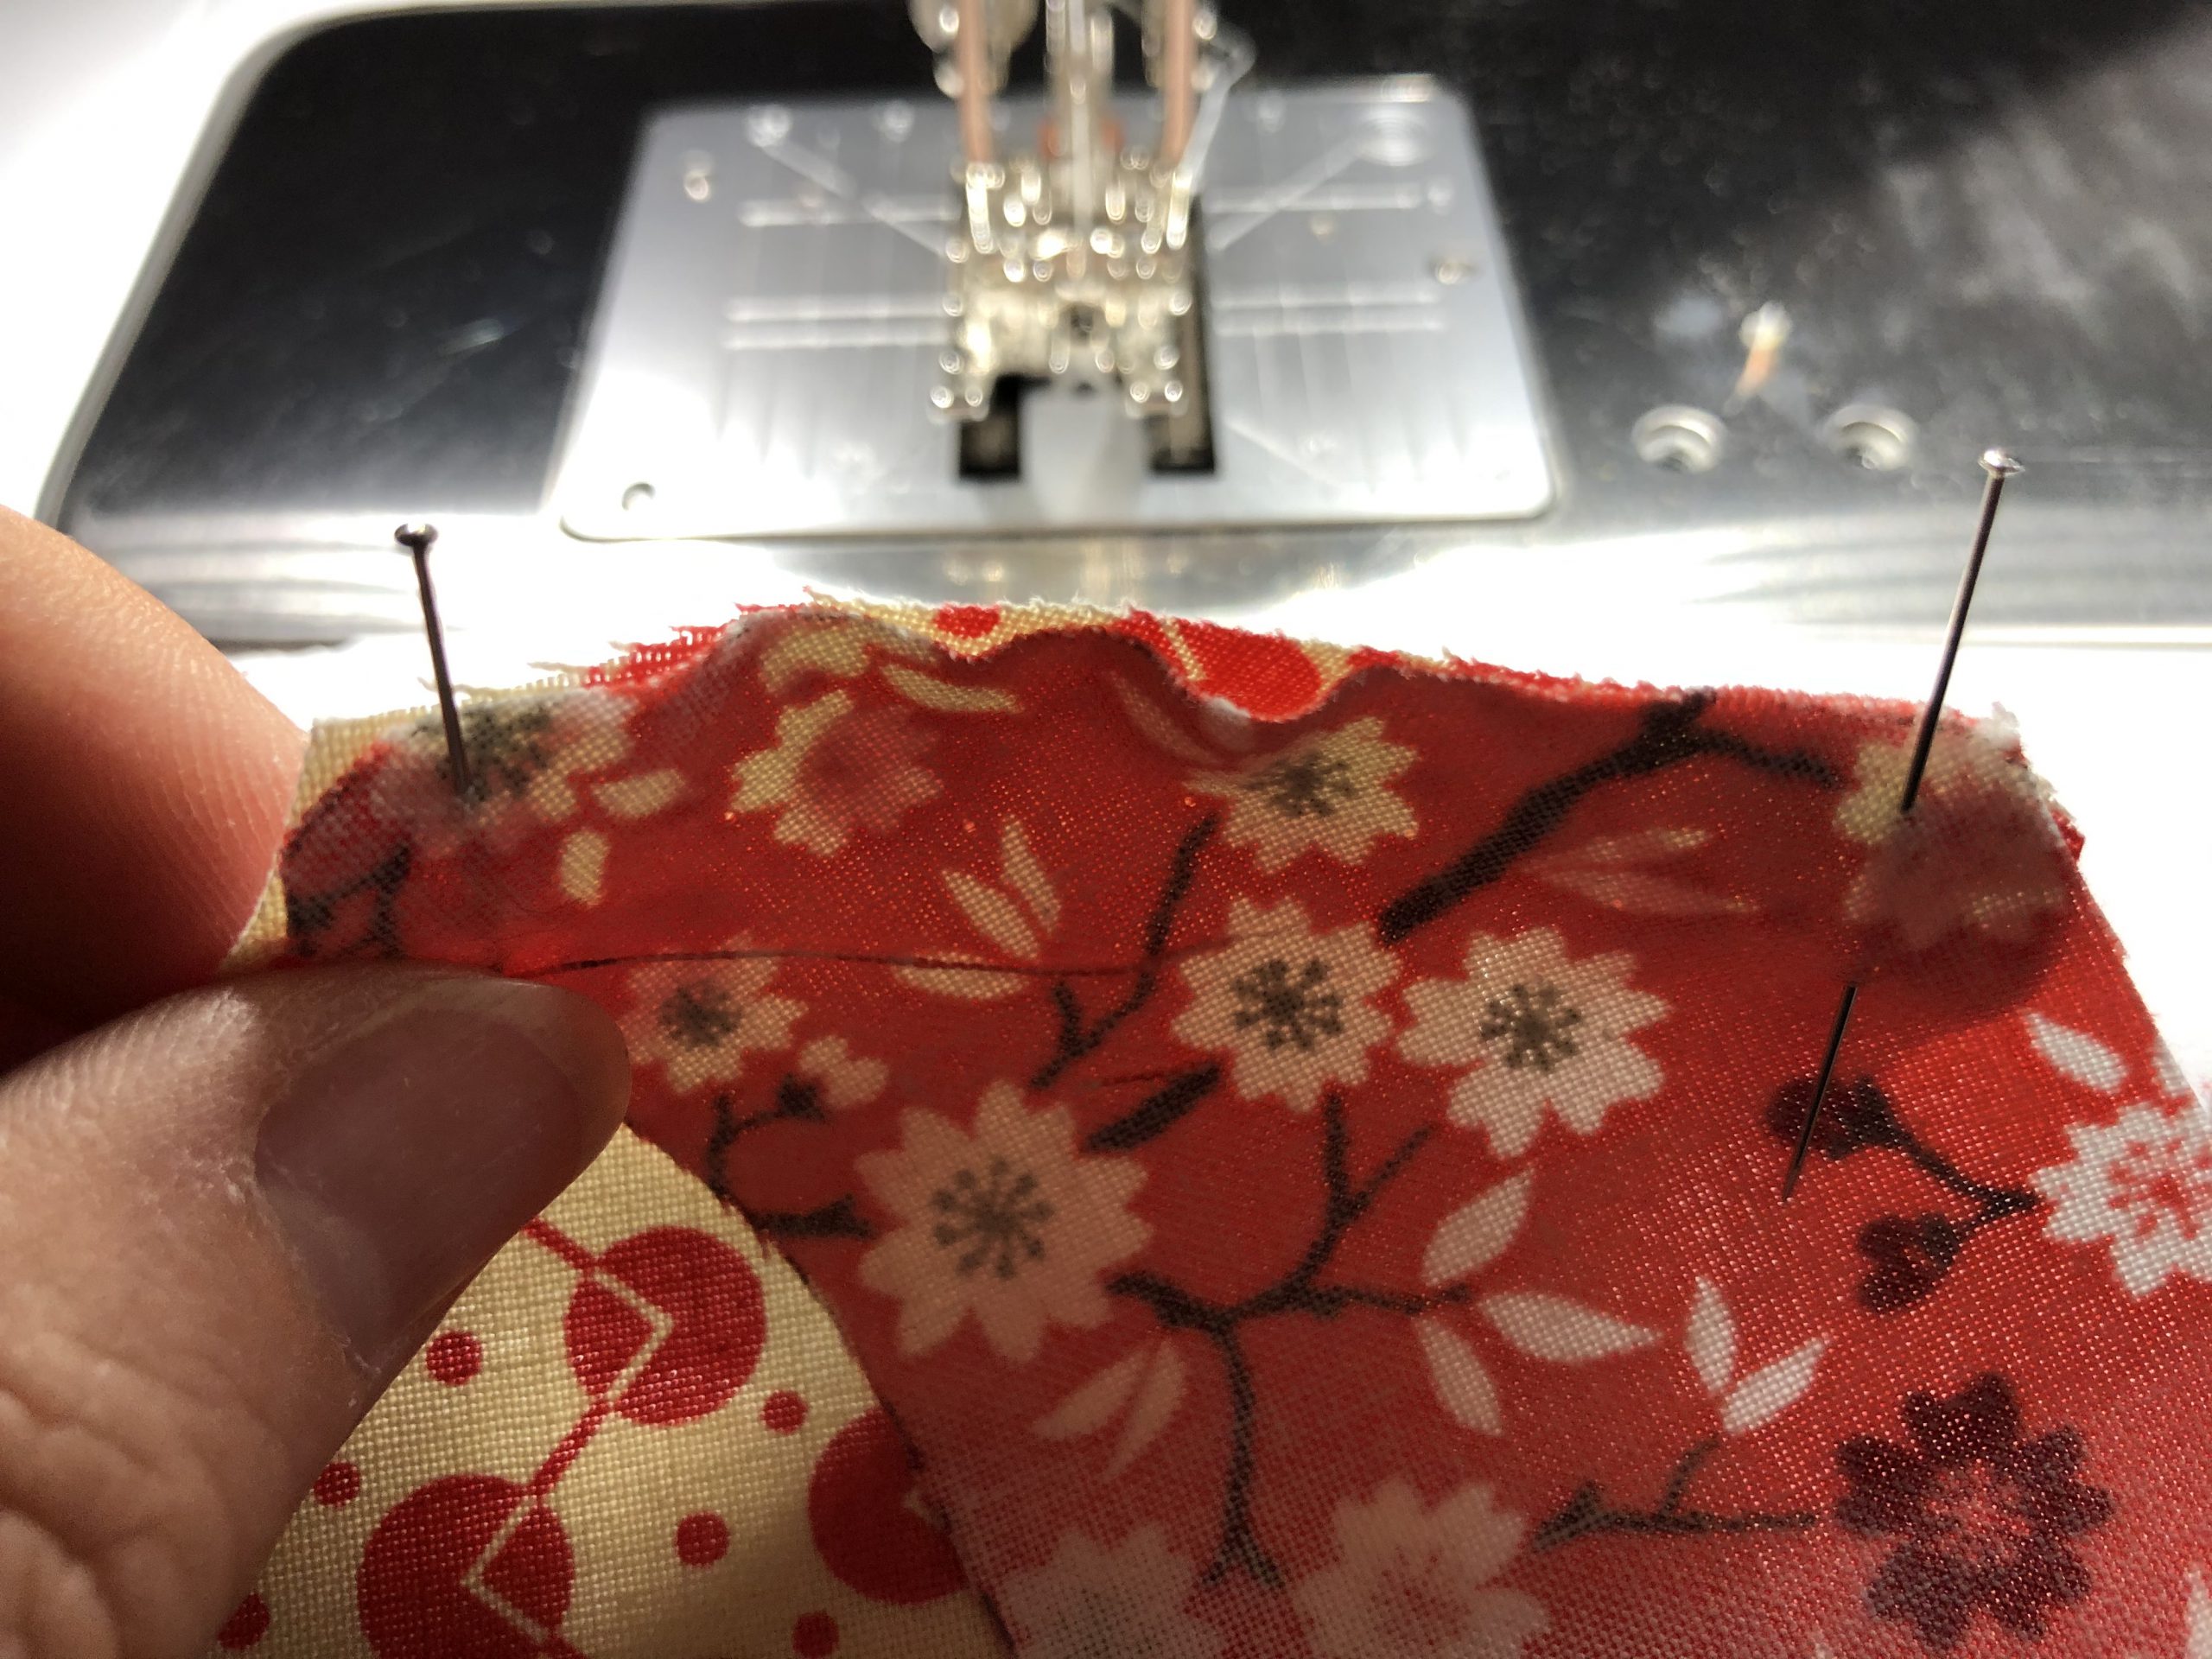
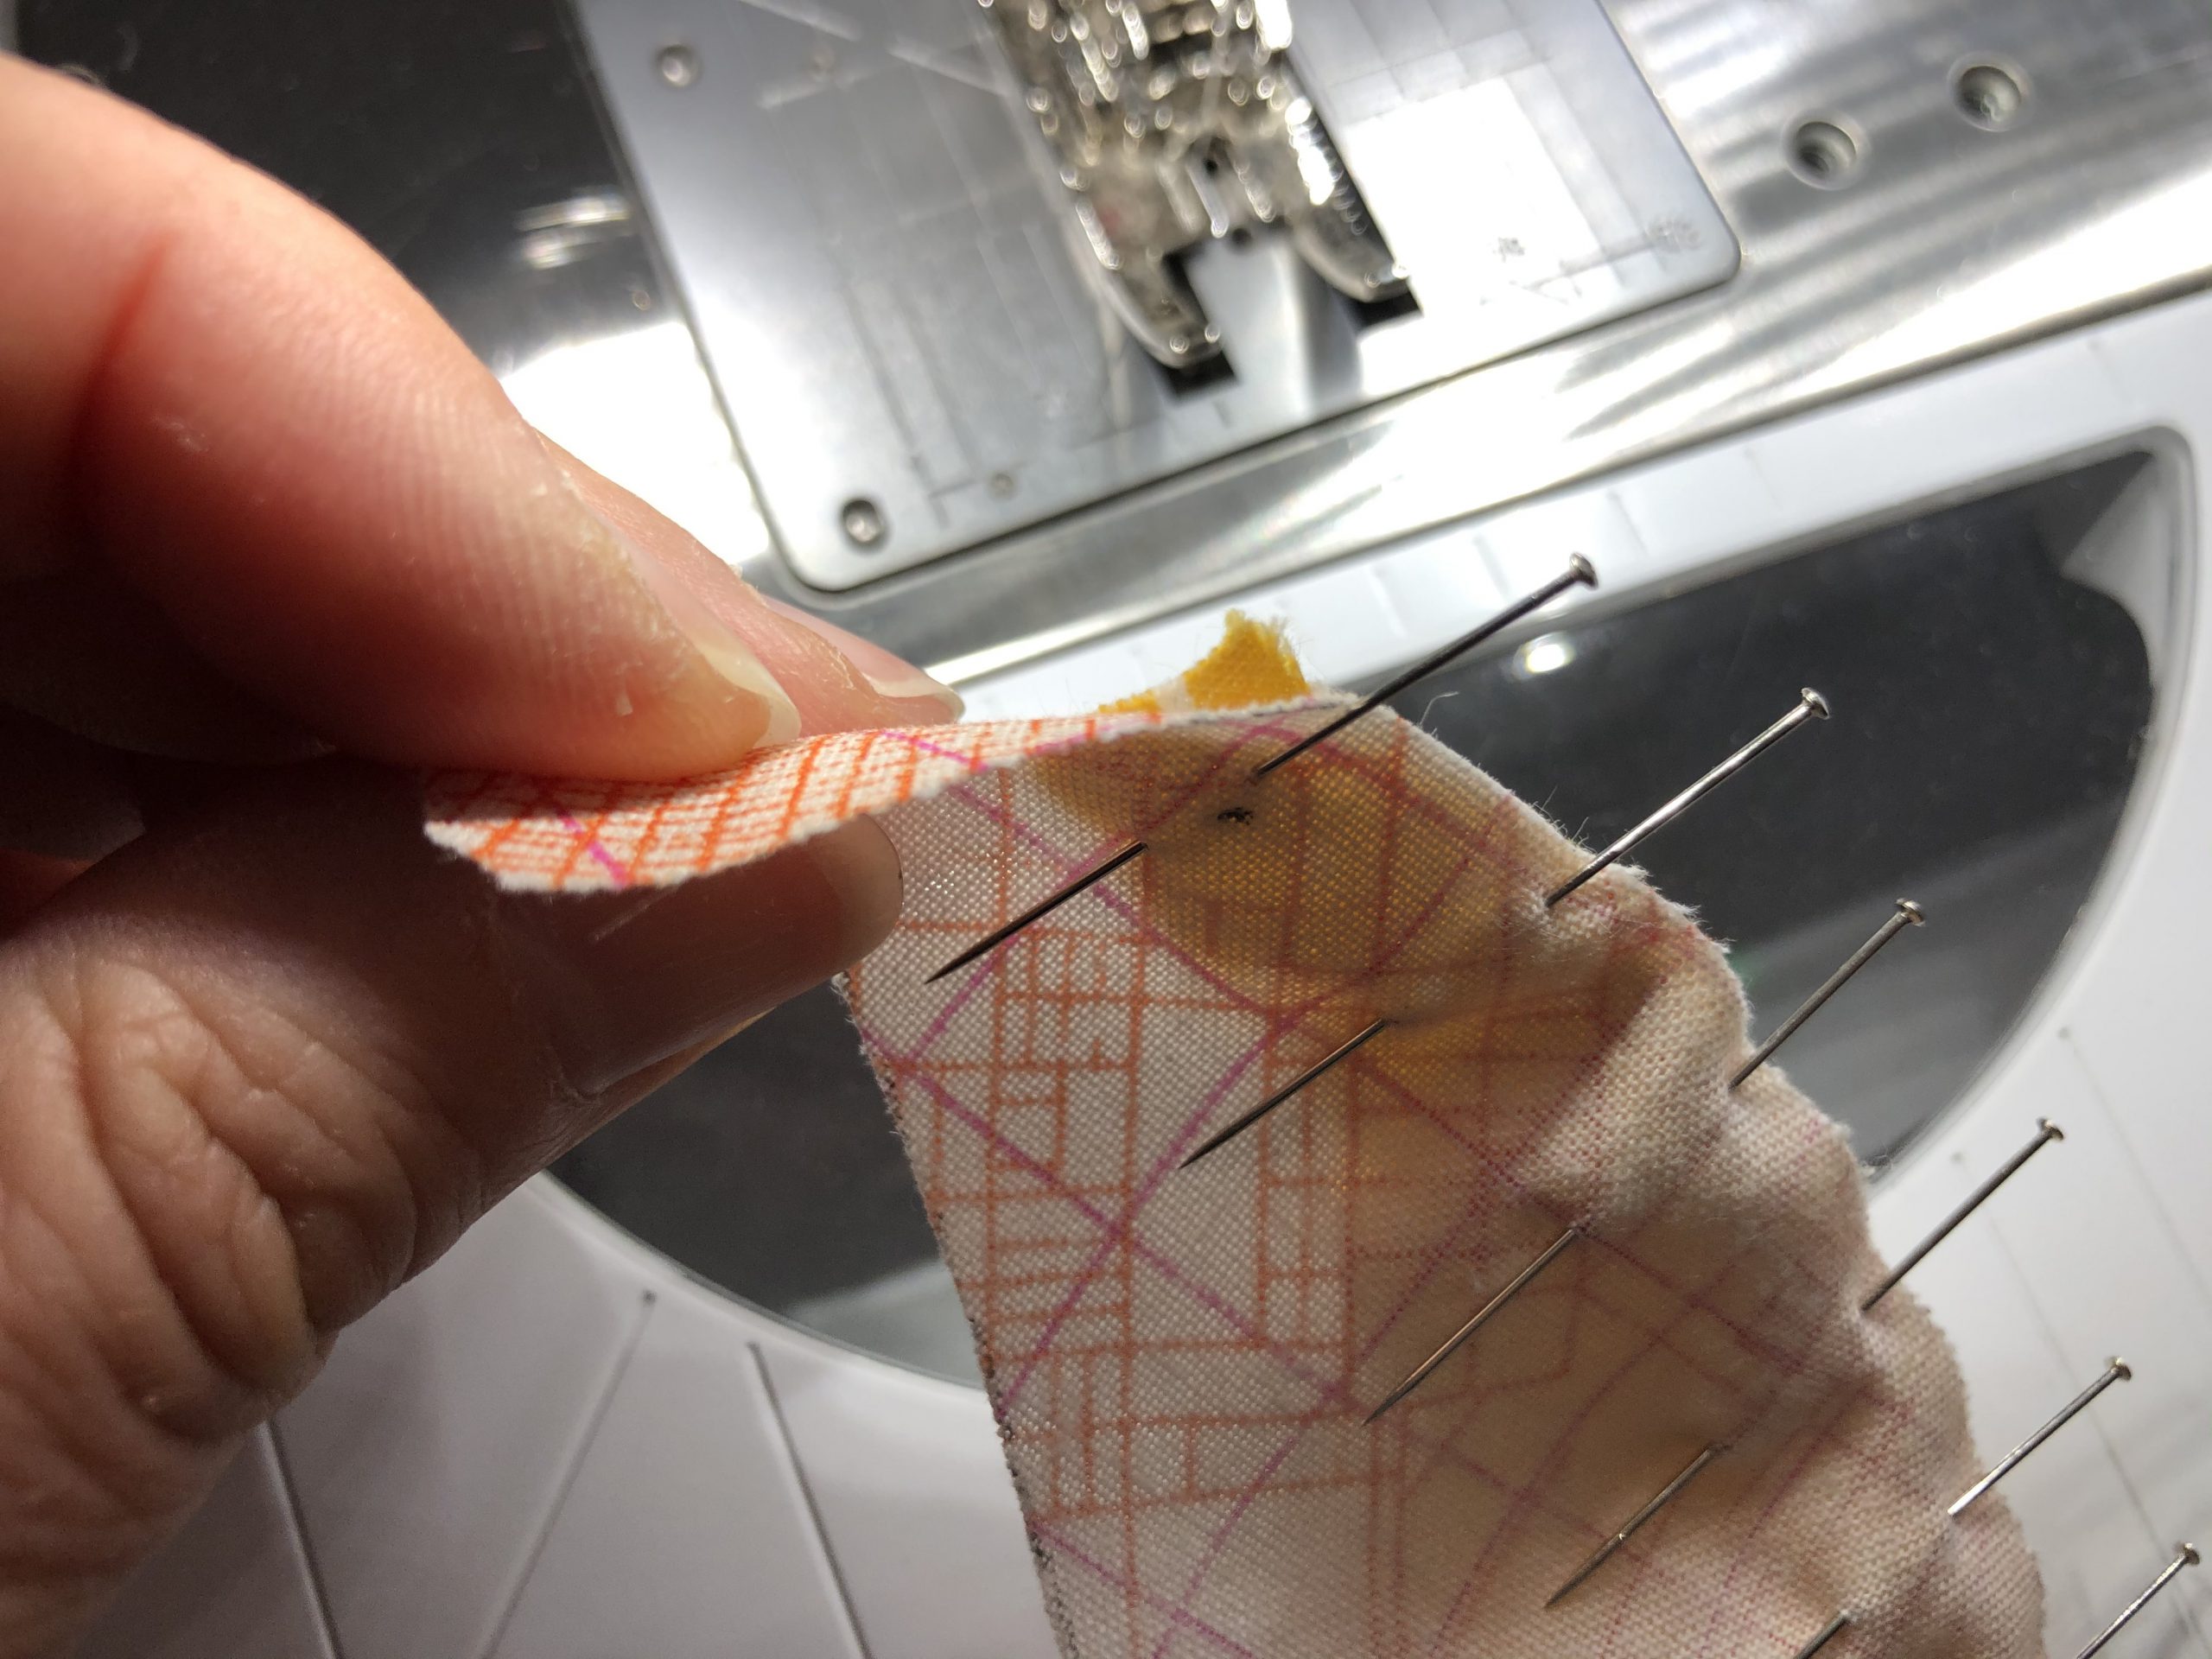
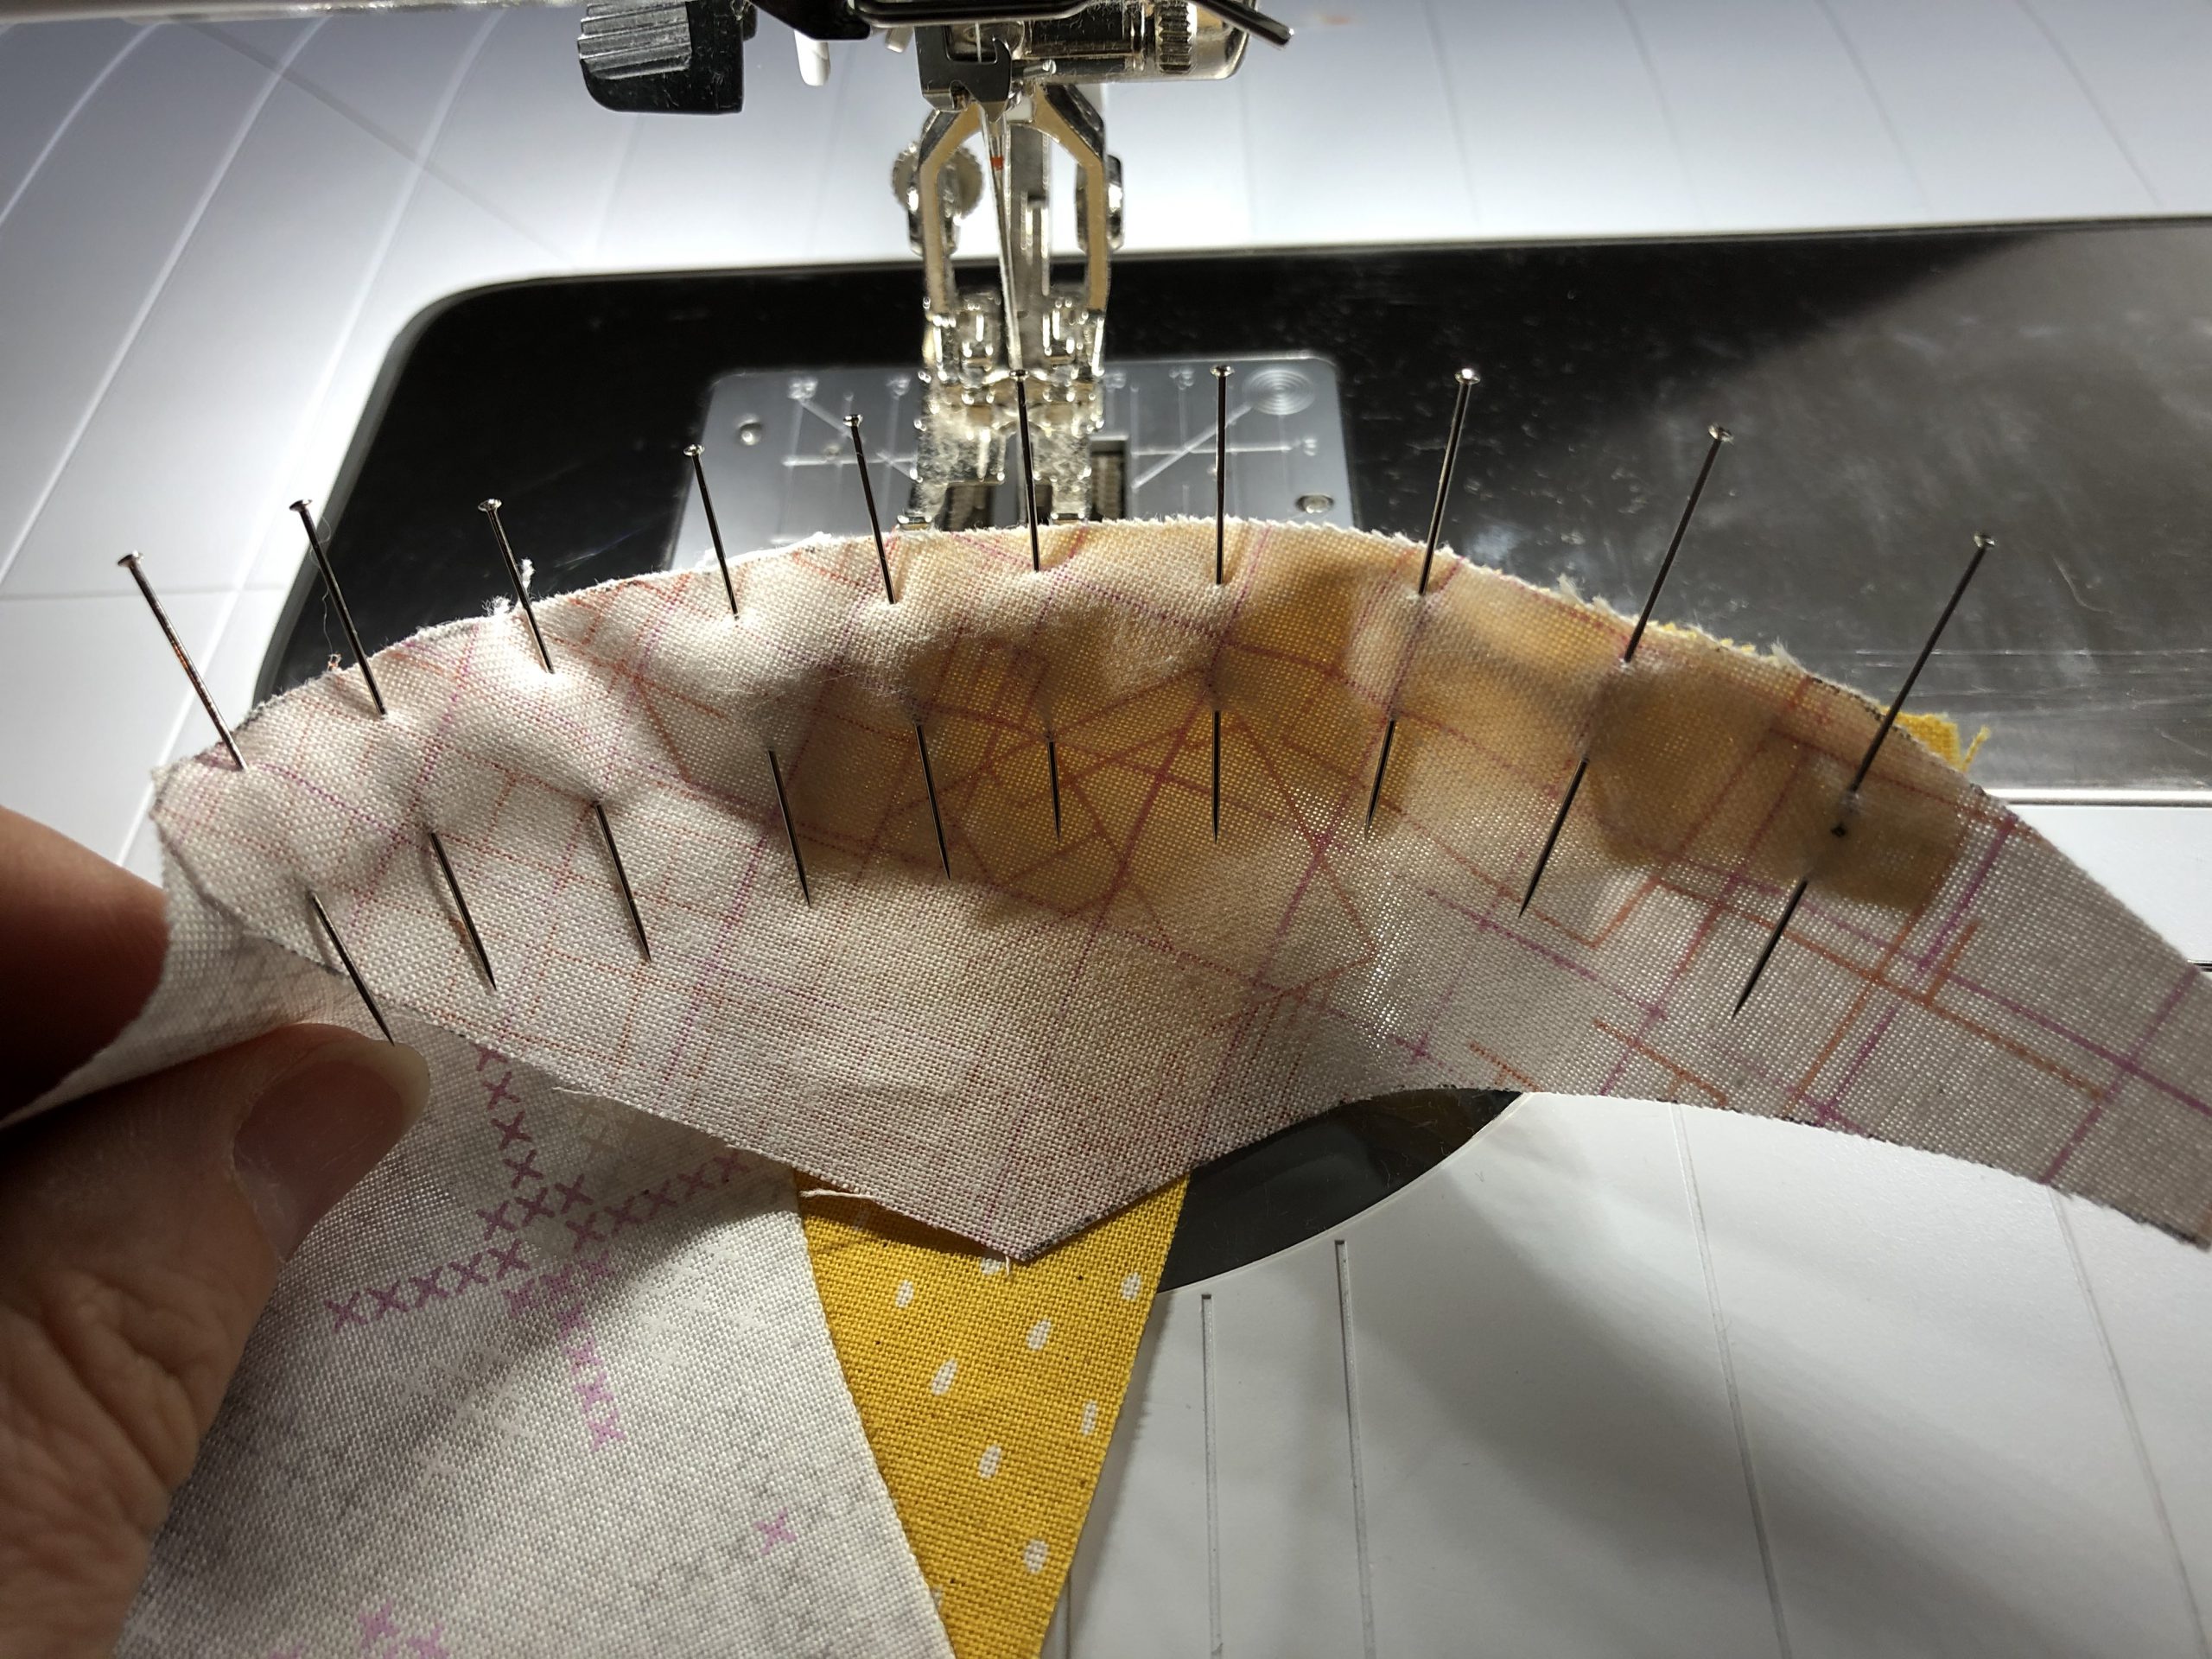
In order to sew the curves nice and evenly, you can use pins inserted at a 90° angle to the seam you are going to sew. This allows you to sew over the pins and only remove them once you’ve sewn the seam. Please do not sew over them at 100 miles an hour, just take it nice and slow…
I like to pin the left and right edges first. That way I know how much fullness I have to distribute evenly over the rest of the curve.
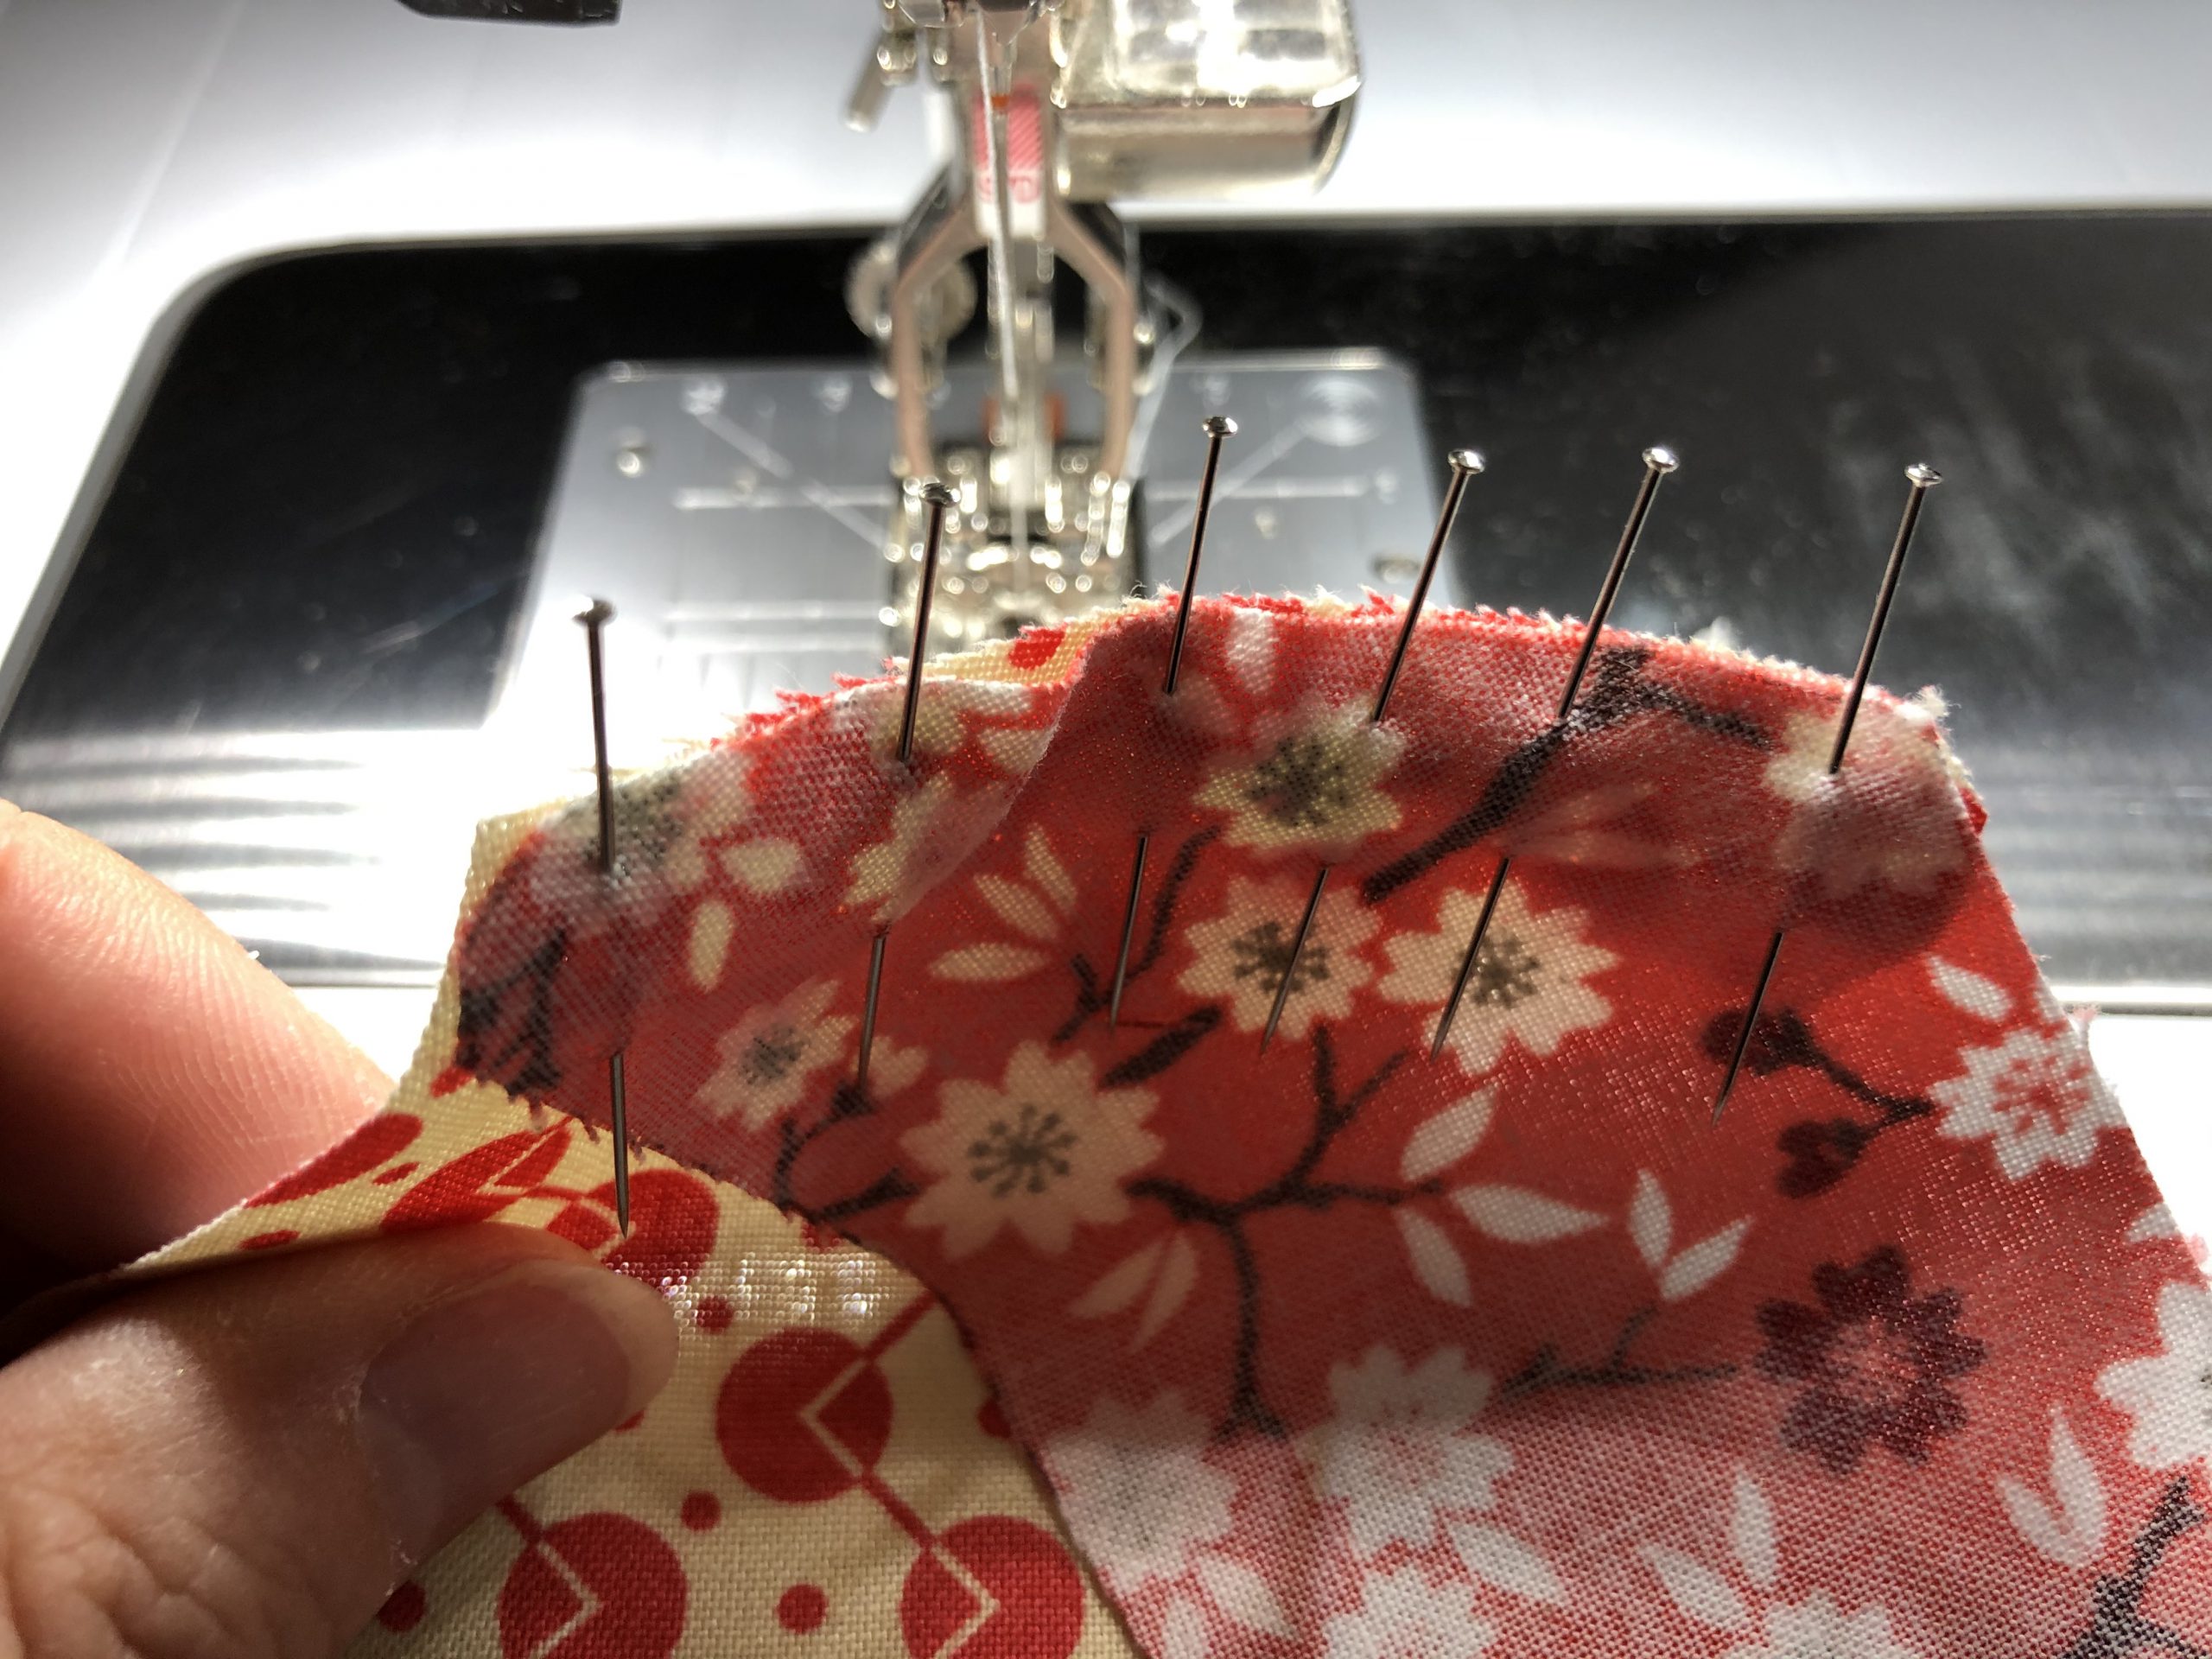
I then pin the rest of the section, so that the fullness of the fabric, which is red in this case, is evenly distributed.
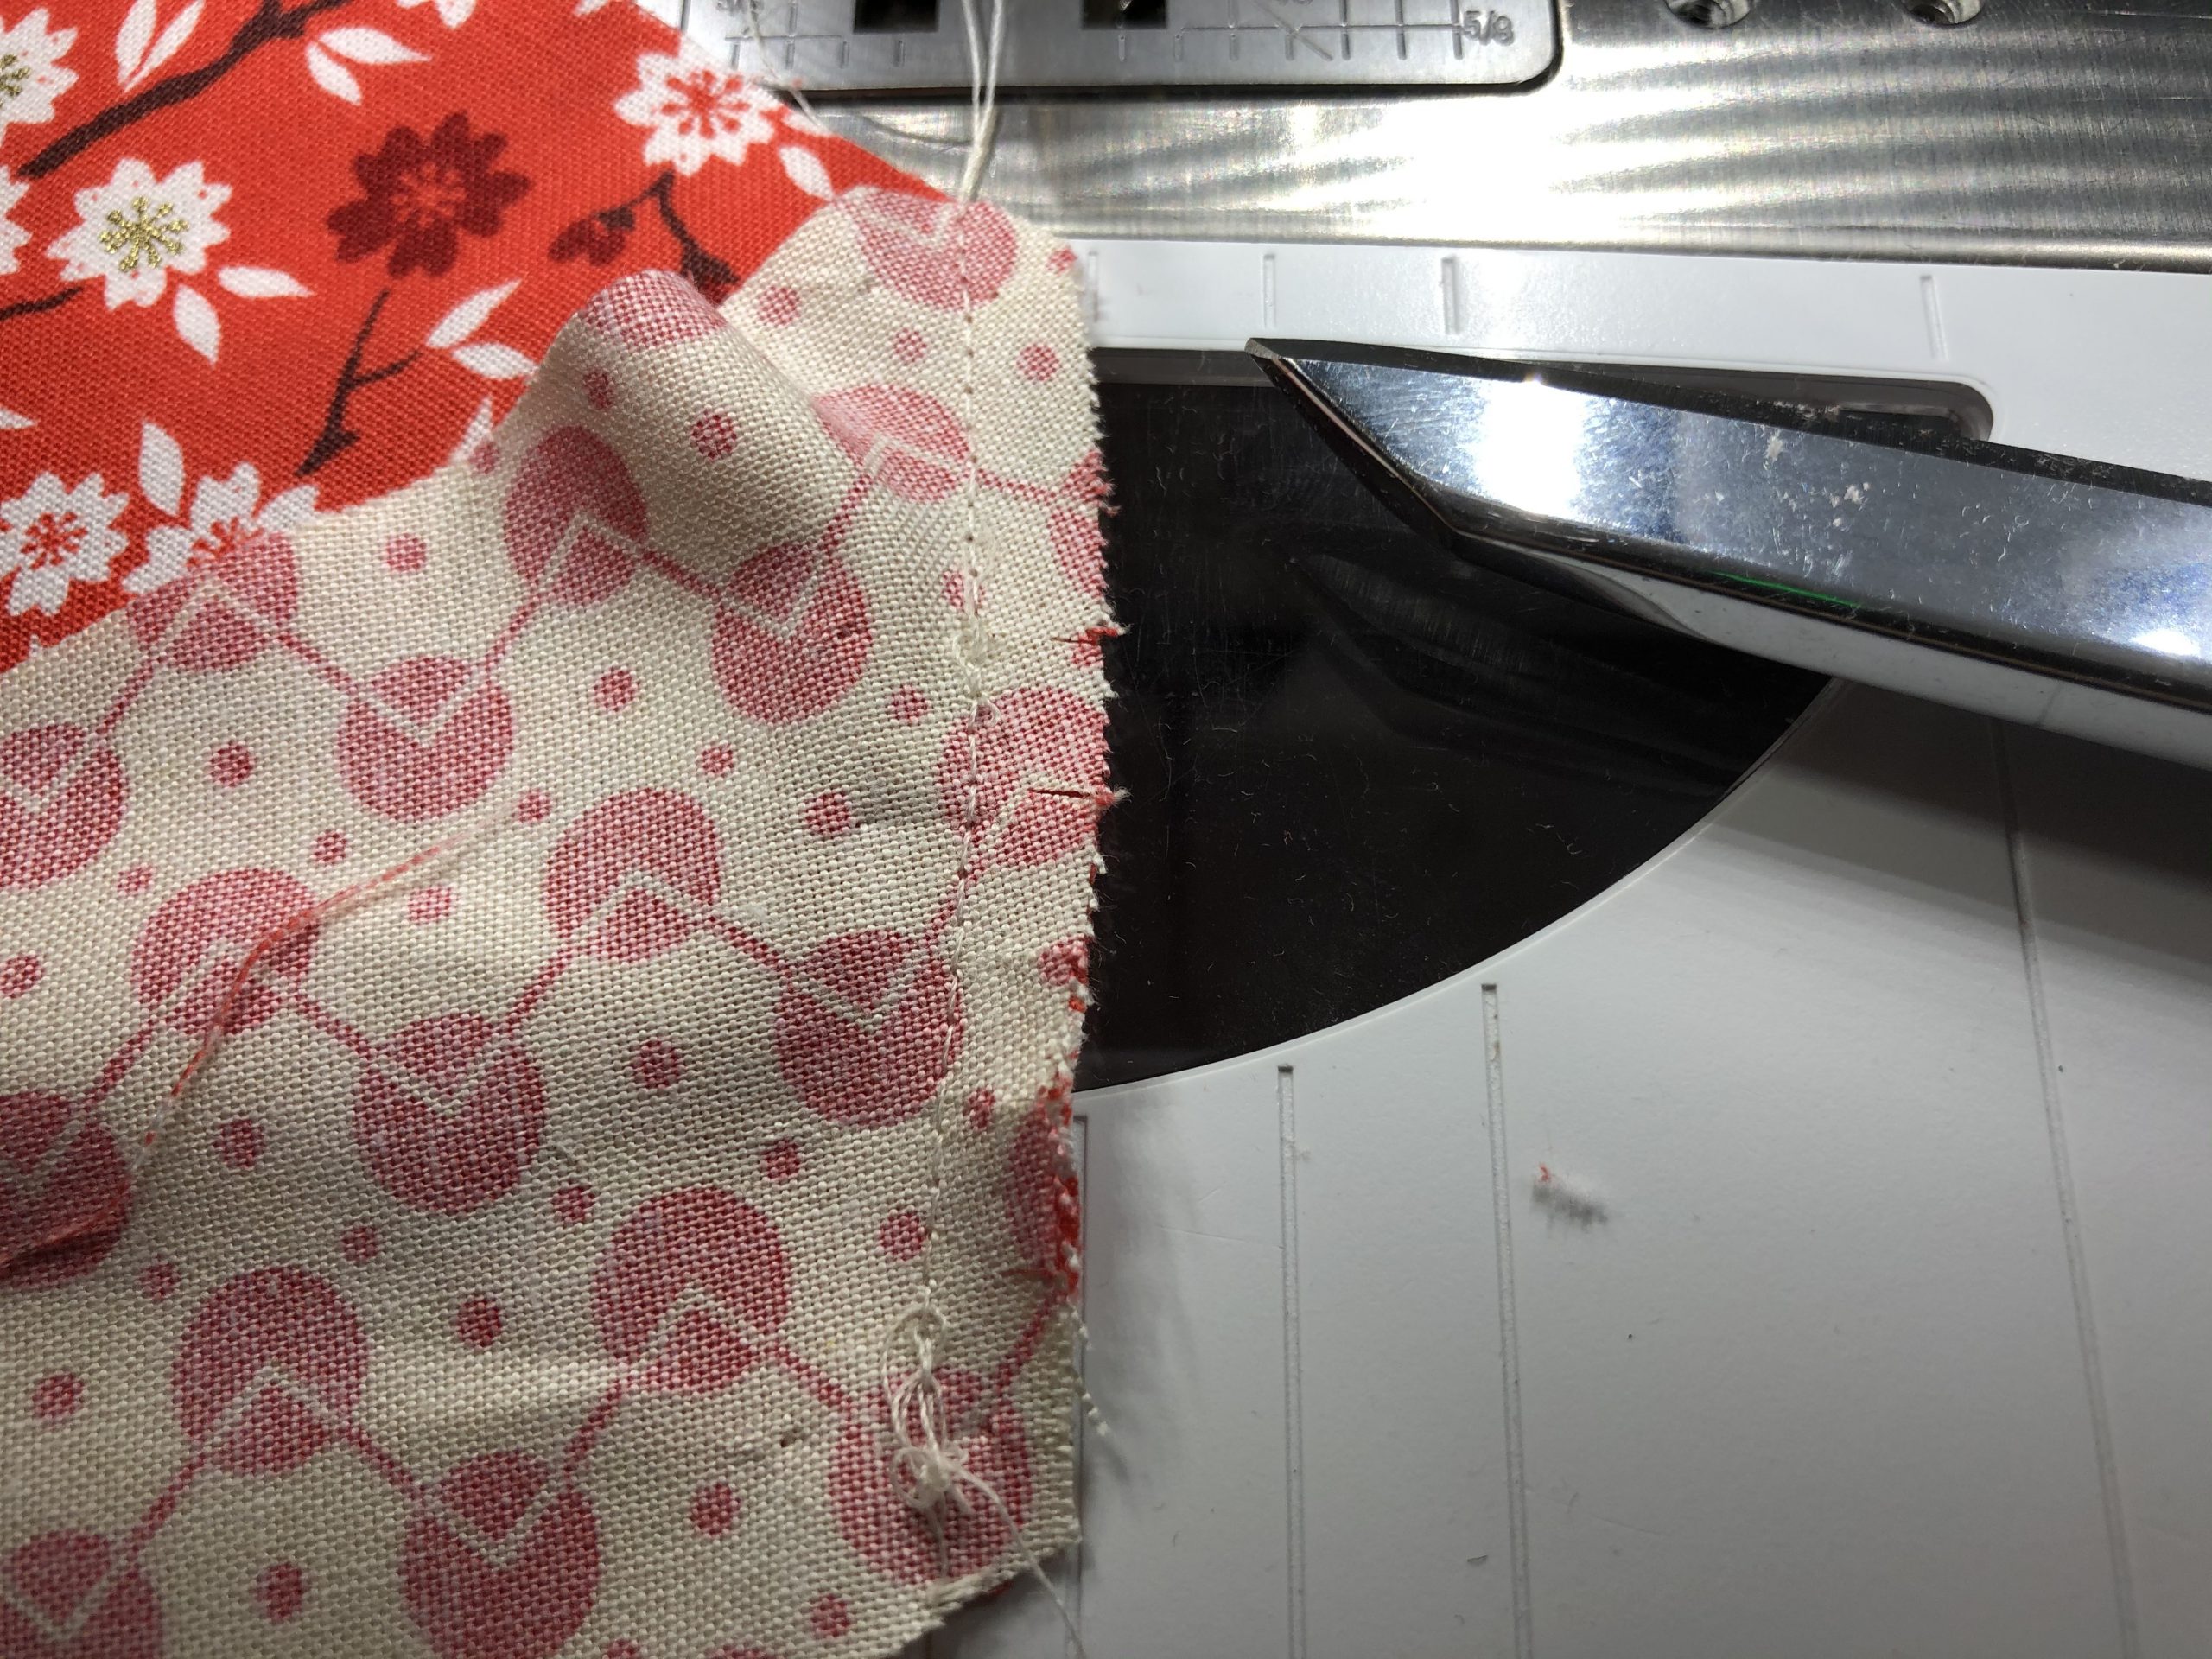
As I iron my seam allowances open wherever possible, I make little cuts into the seam allowance at regular intervals. In this way I compensate for the smaller width of the white fabric that results from ironing the seams on this piece open.
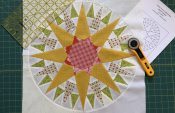
The two outermost parts of the fan are now complete!
Next, sew piece A onto piece D, and also make little nicks in the seam allowance here and iron it open.
Now comes a slightly more complicated procedure: on piece D, mark the bottom point of the seam in each case on the back of the fabric. To do this, you can make a hole at the point of the seam on your template, then place it on the fabric and draw through the hole with a marker. Now make a mark on piece E in the same way at the point where the line is marked.
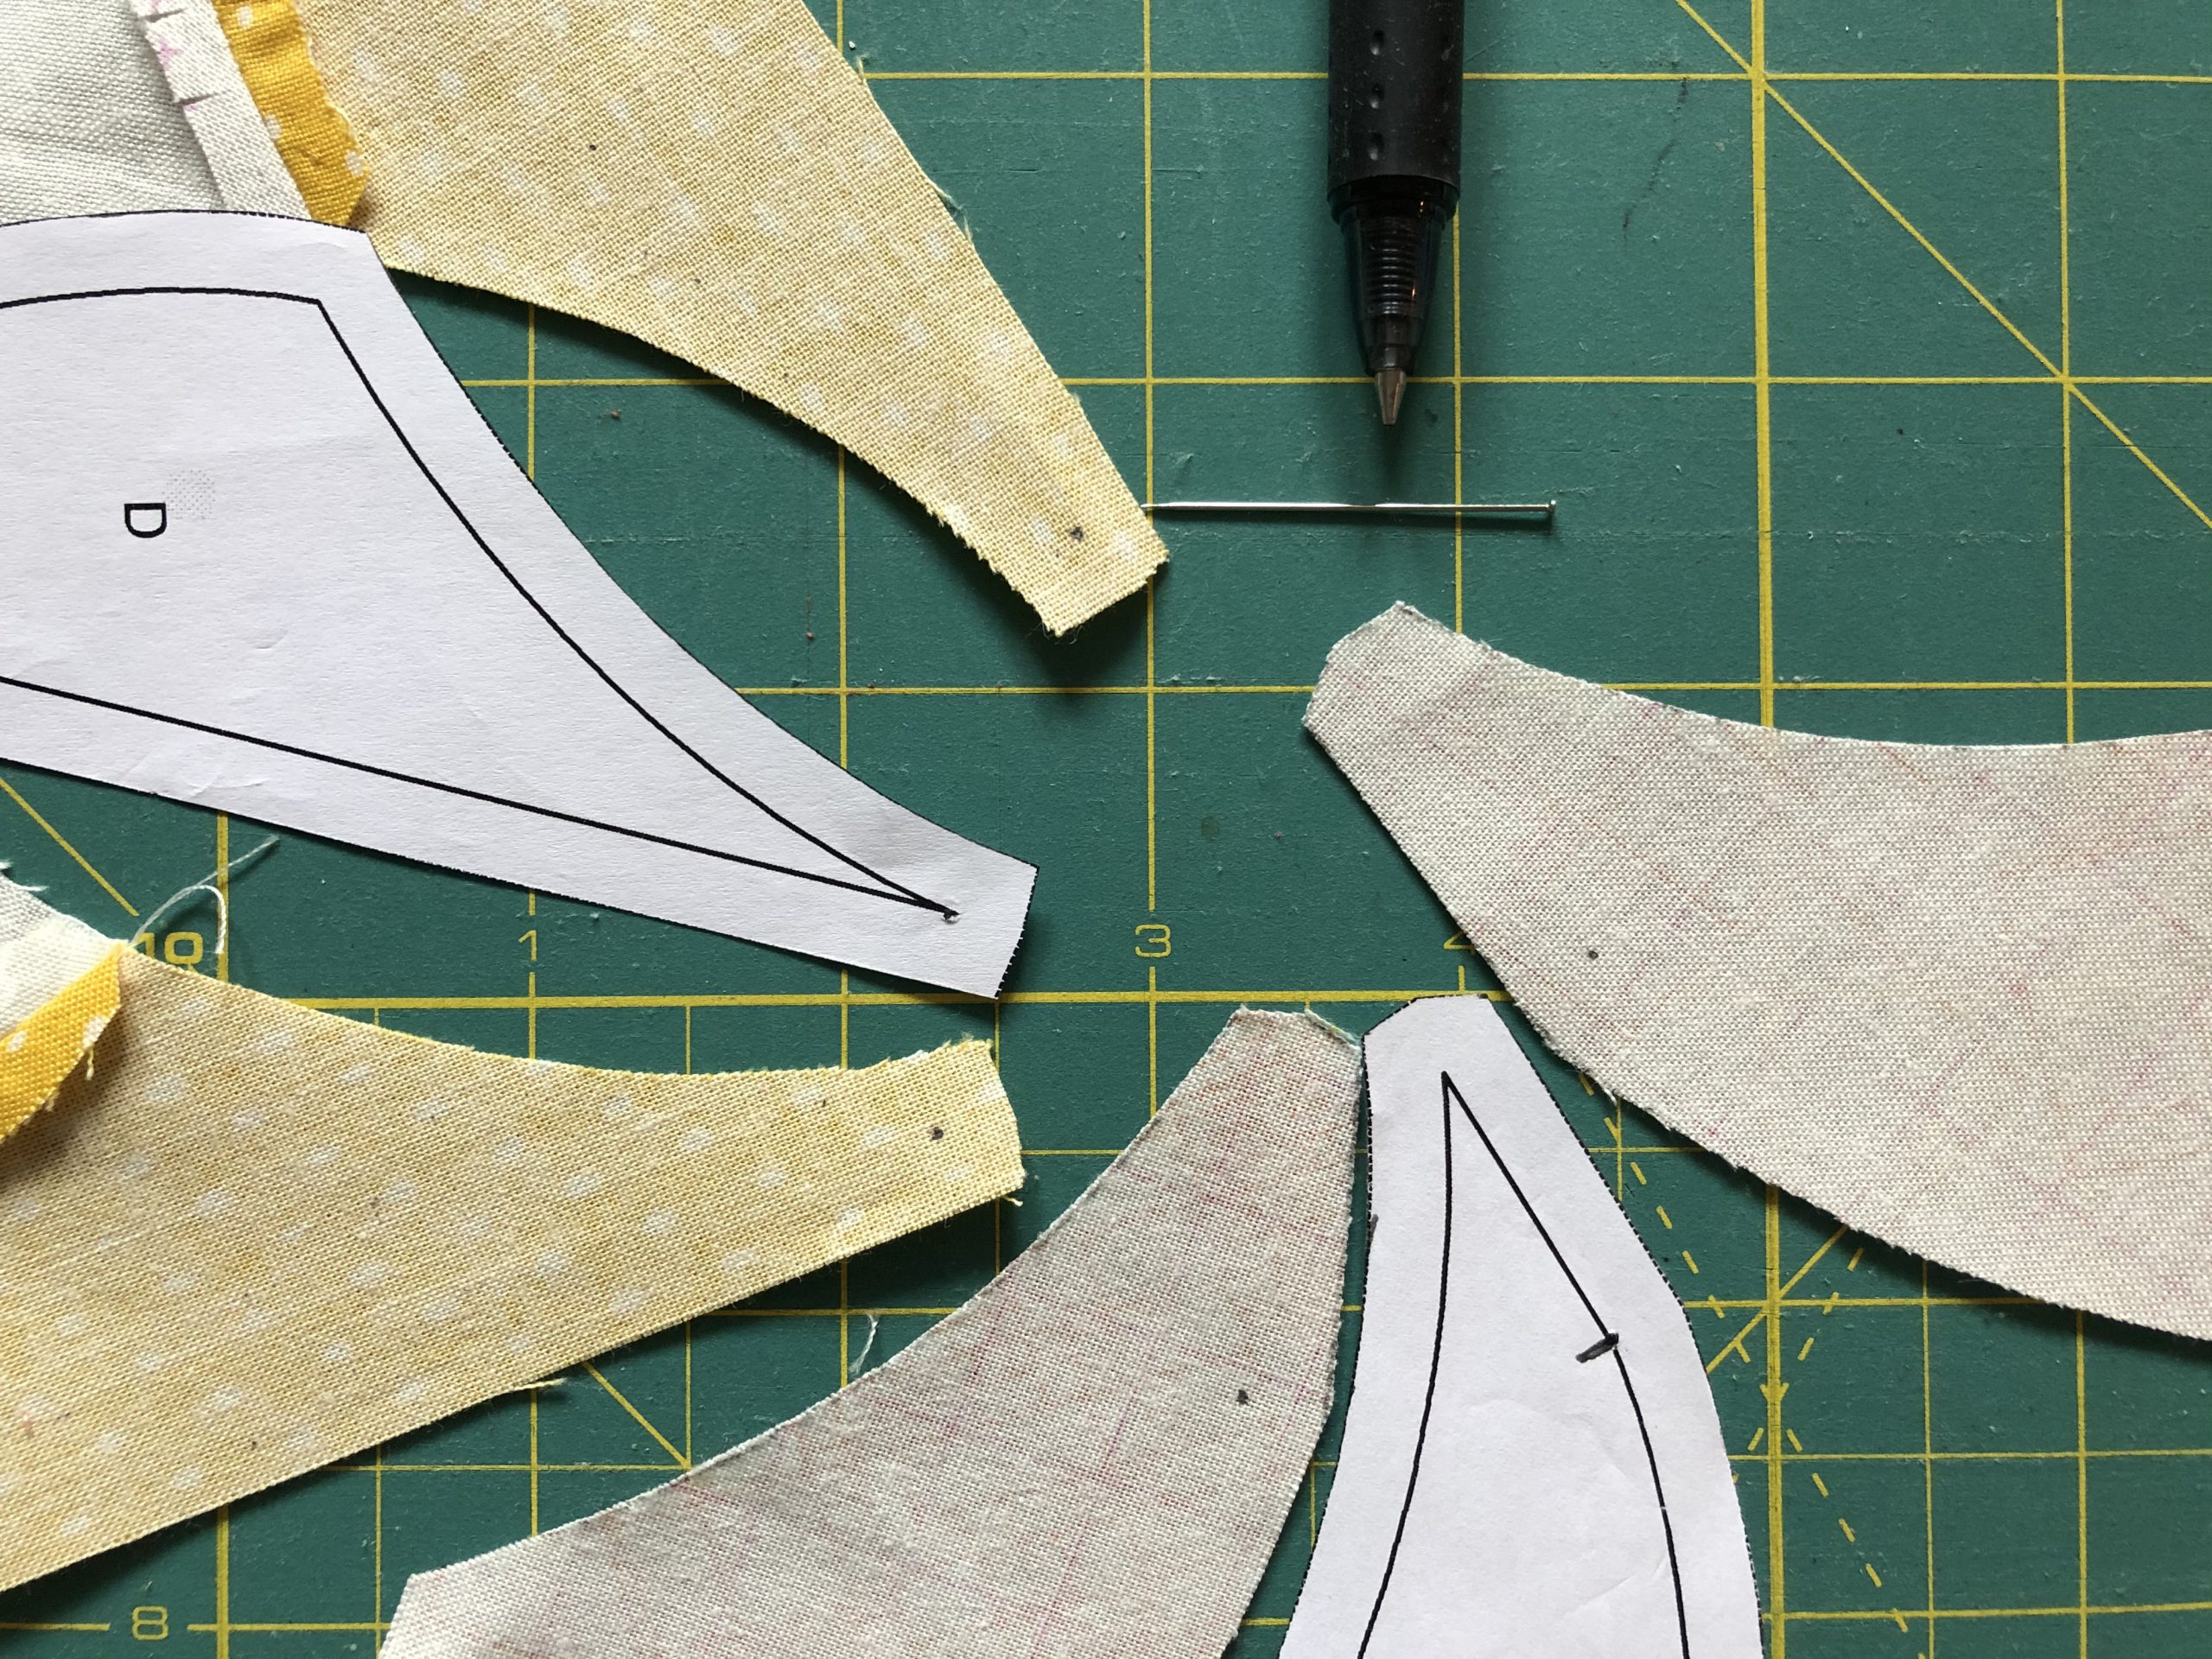
Pin together the two marked points on the different pattern pieces.
Then pin the curve using the same method as before.
Sew the seam from the outside up to the marked and pinned point of the seam and then secure the end of the seam.

You have come so far! But it’s not quite finished yet…. You still have to close the two other curves of this fan piece.
So let’s do it now! You can see where the individual strips of the fan are supposed to go.
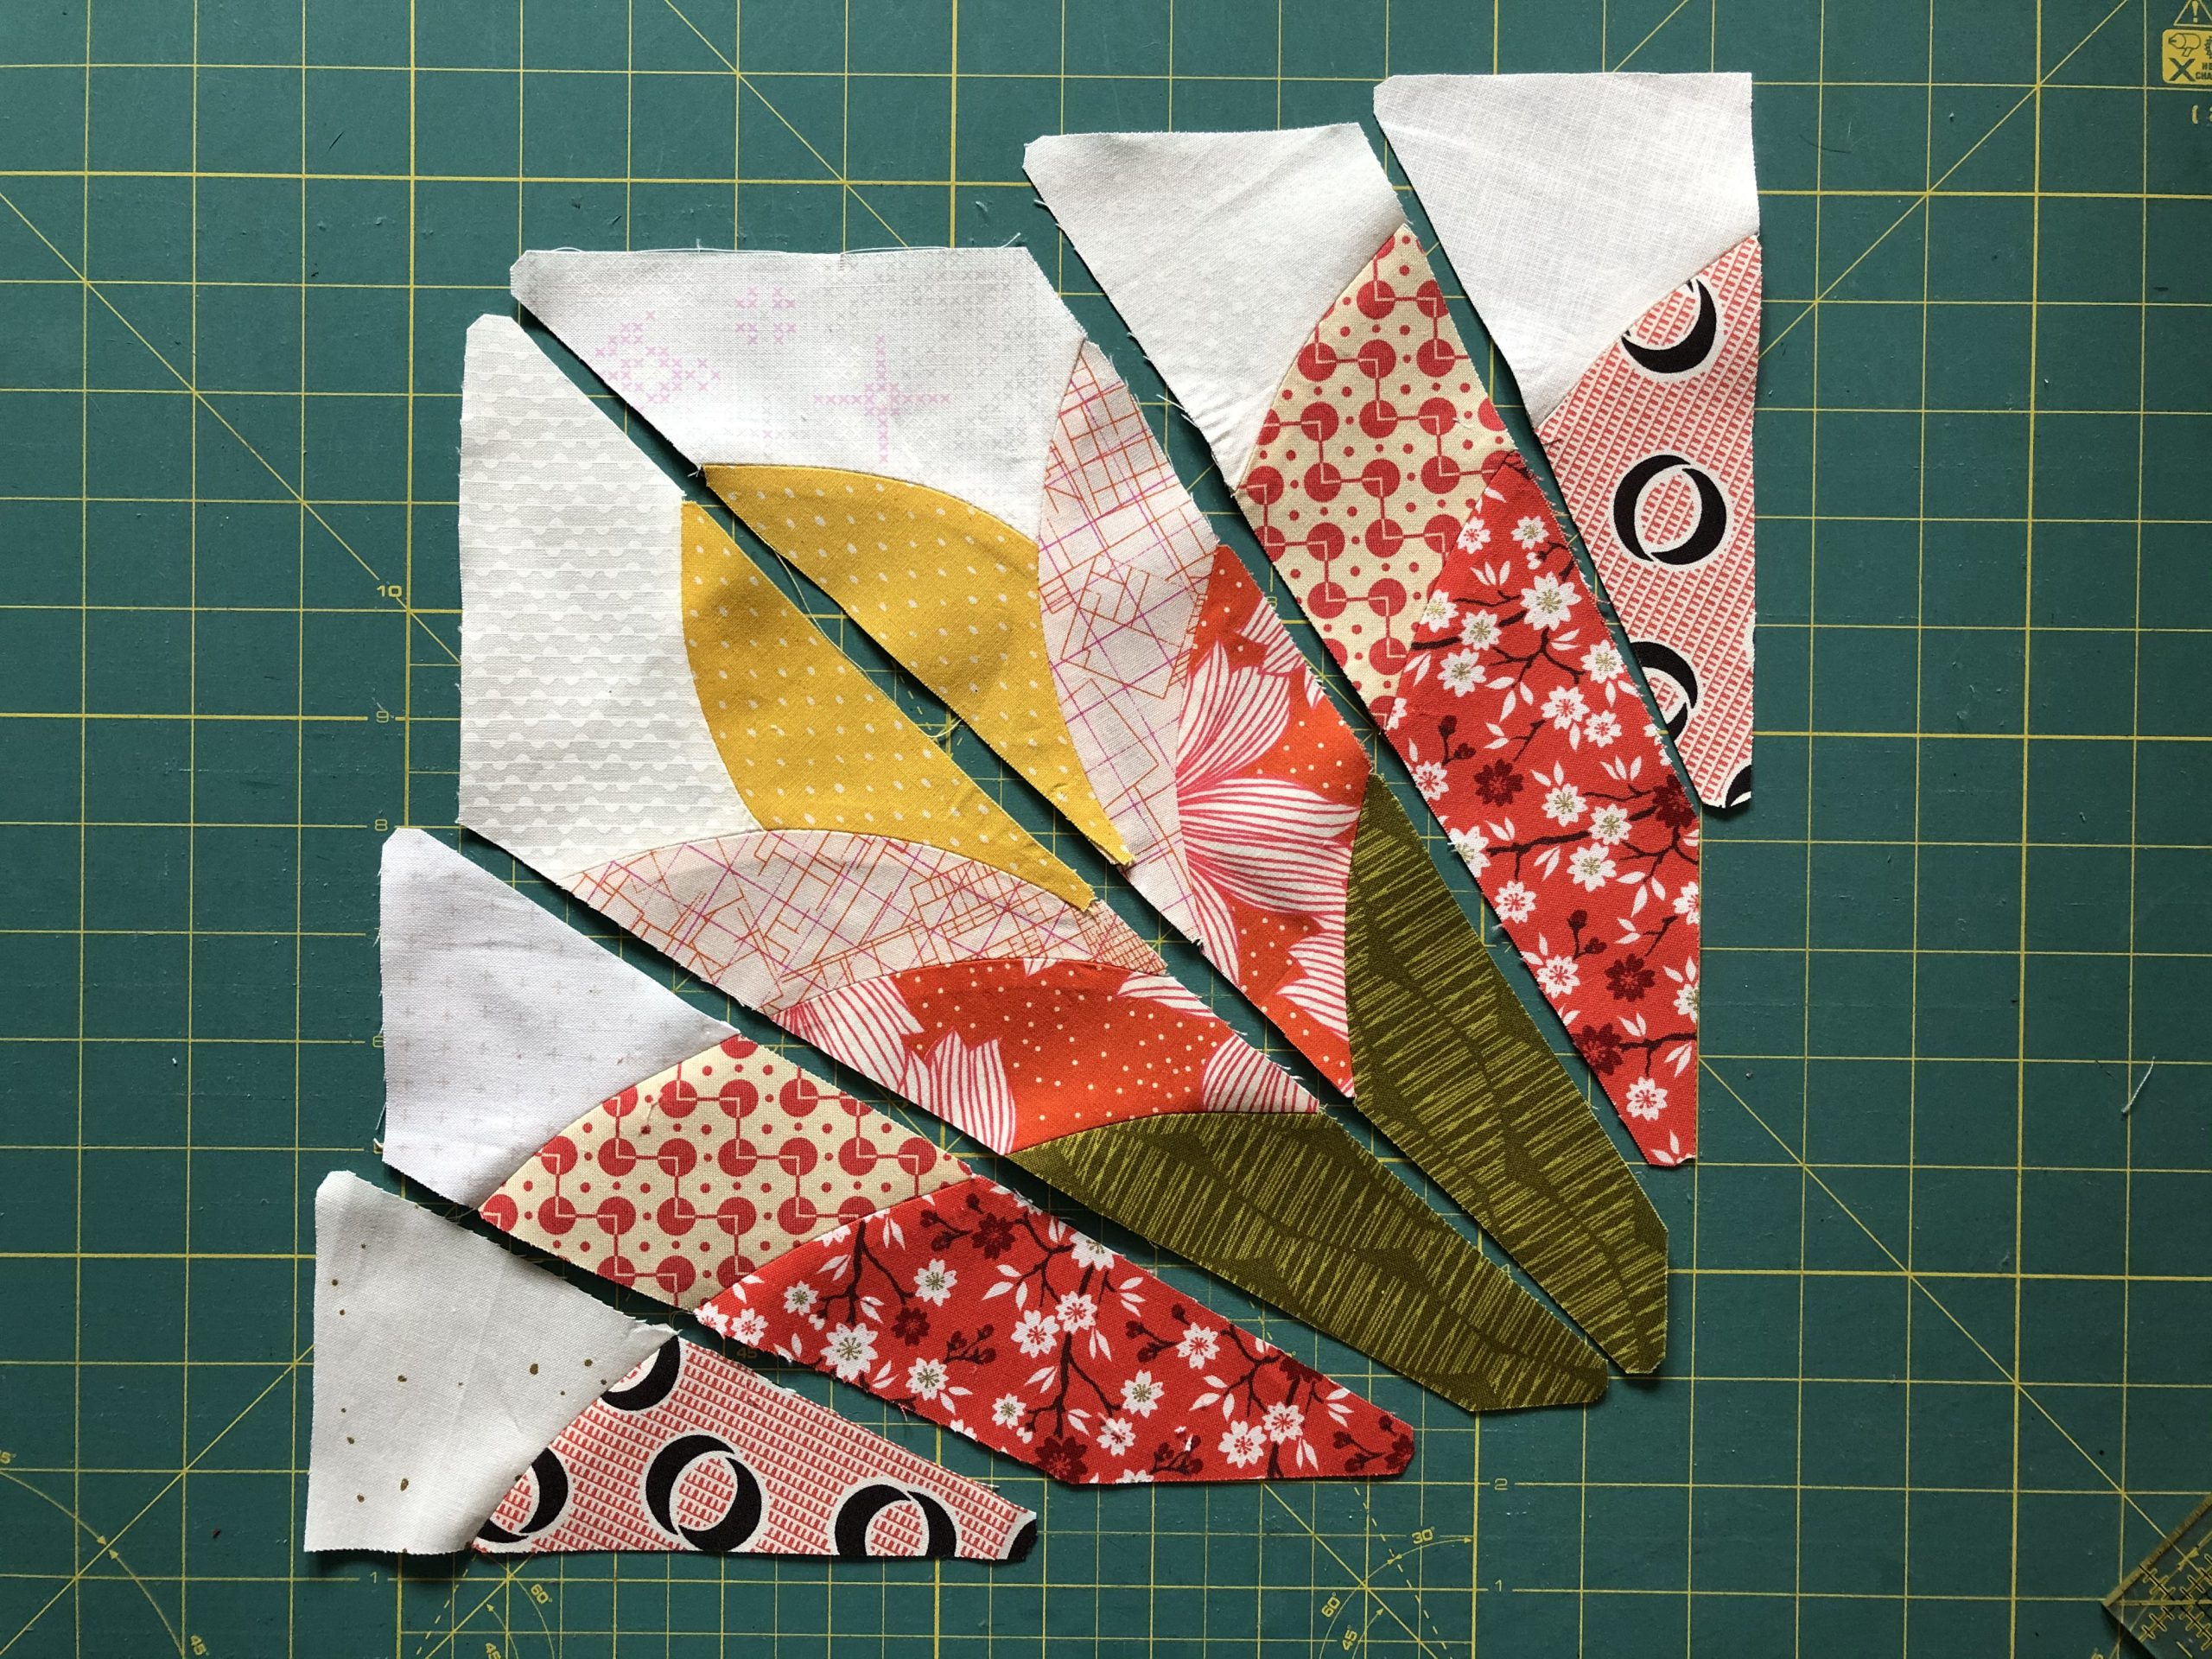
Join the strips by starting from the outside and working inwards.
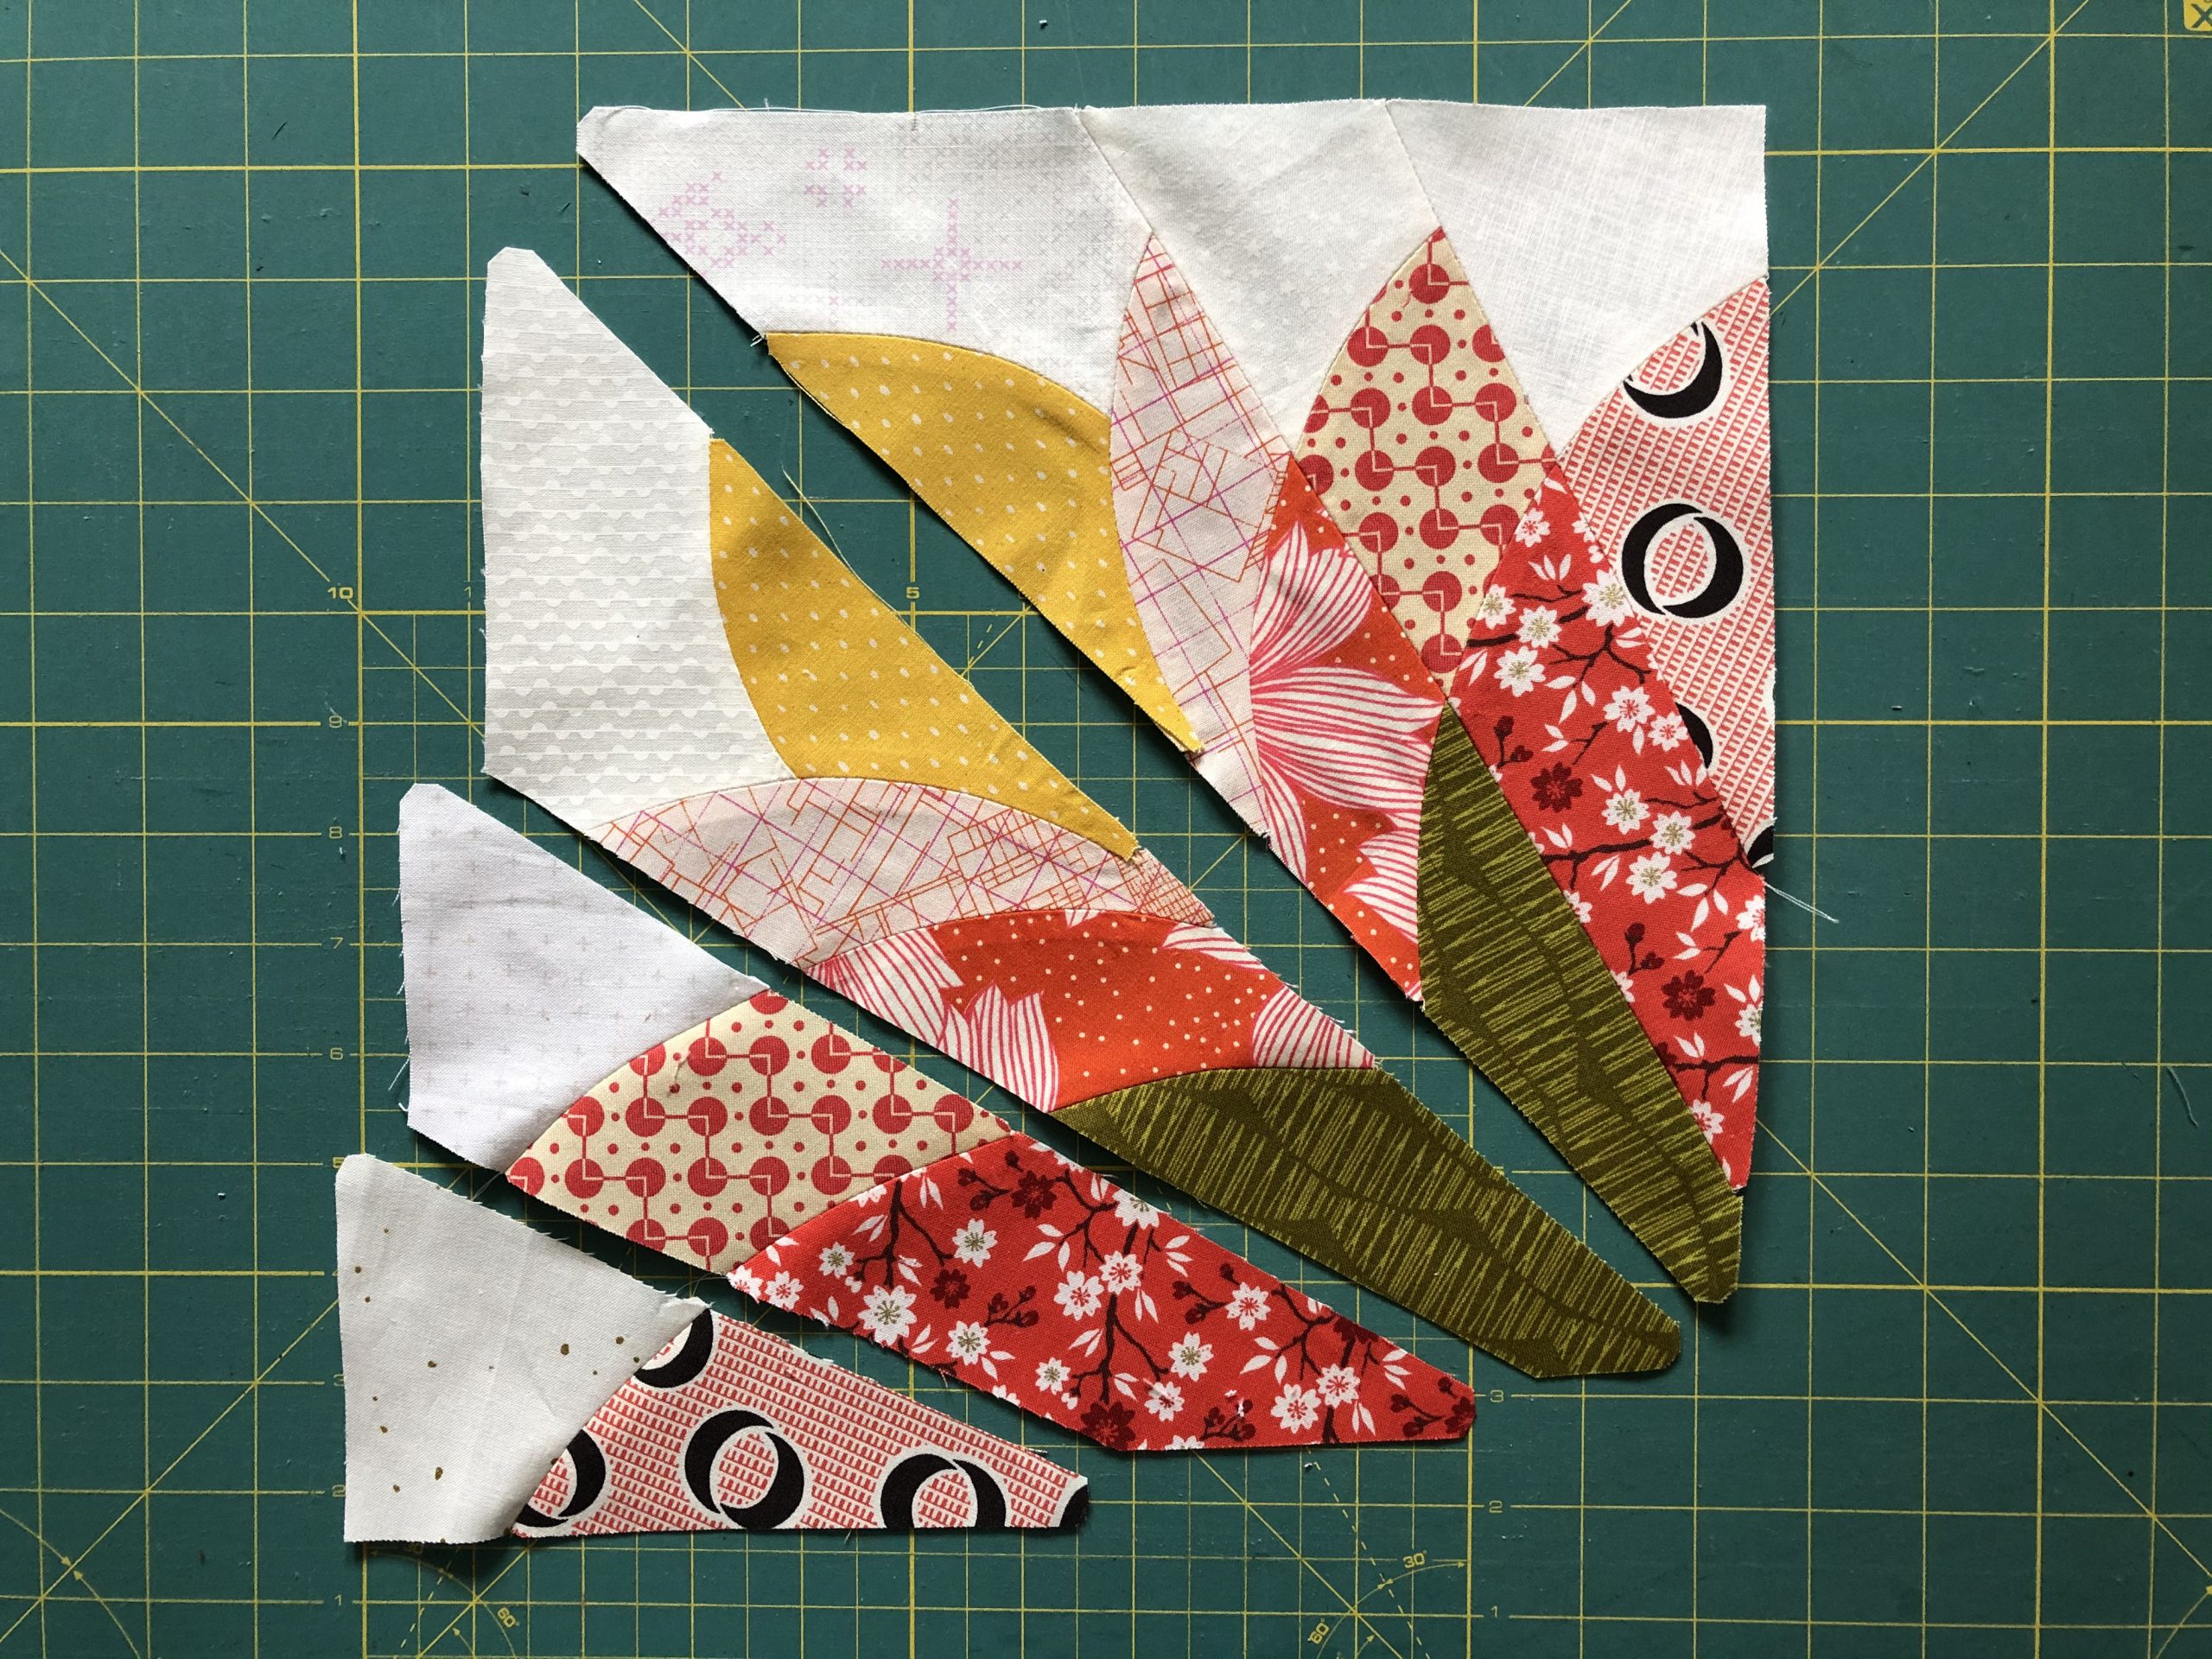
As we have already seen, the last seam is the diagonal between the two halves of the block.
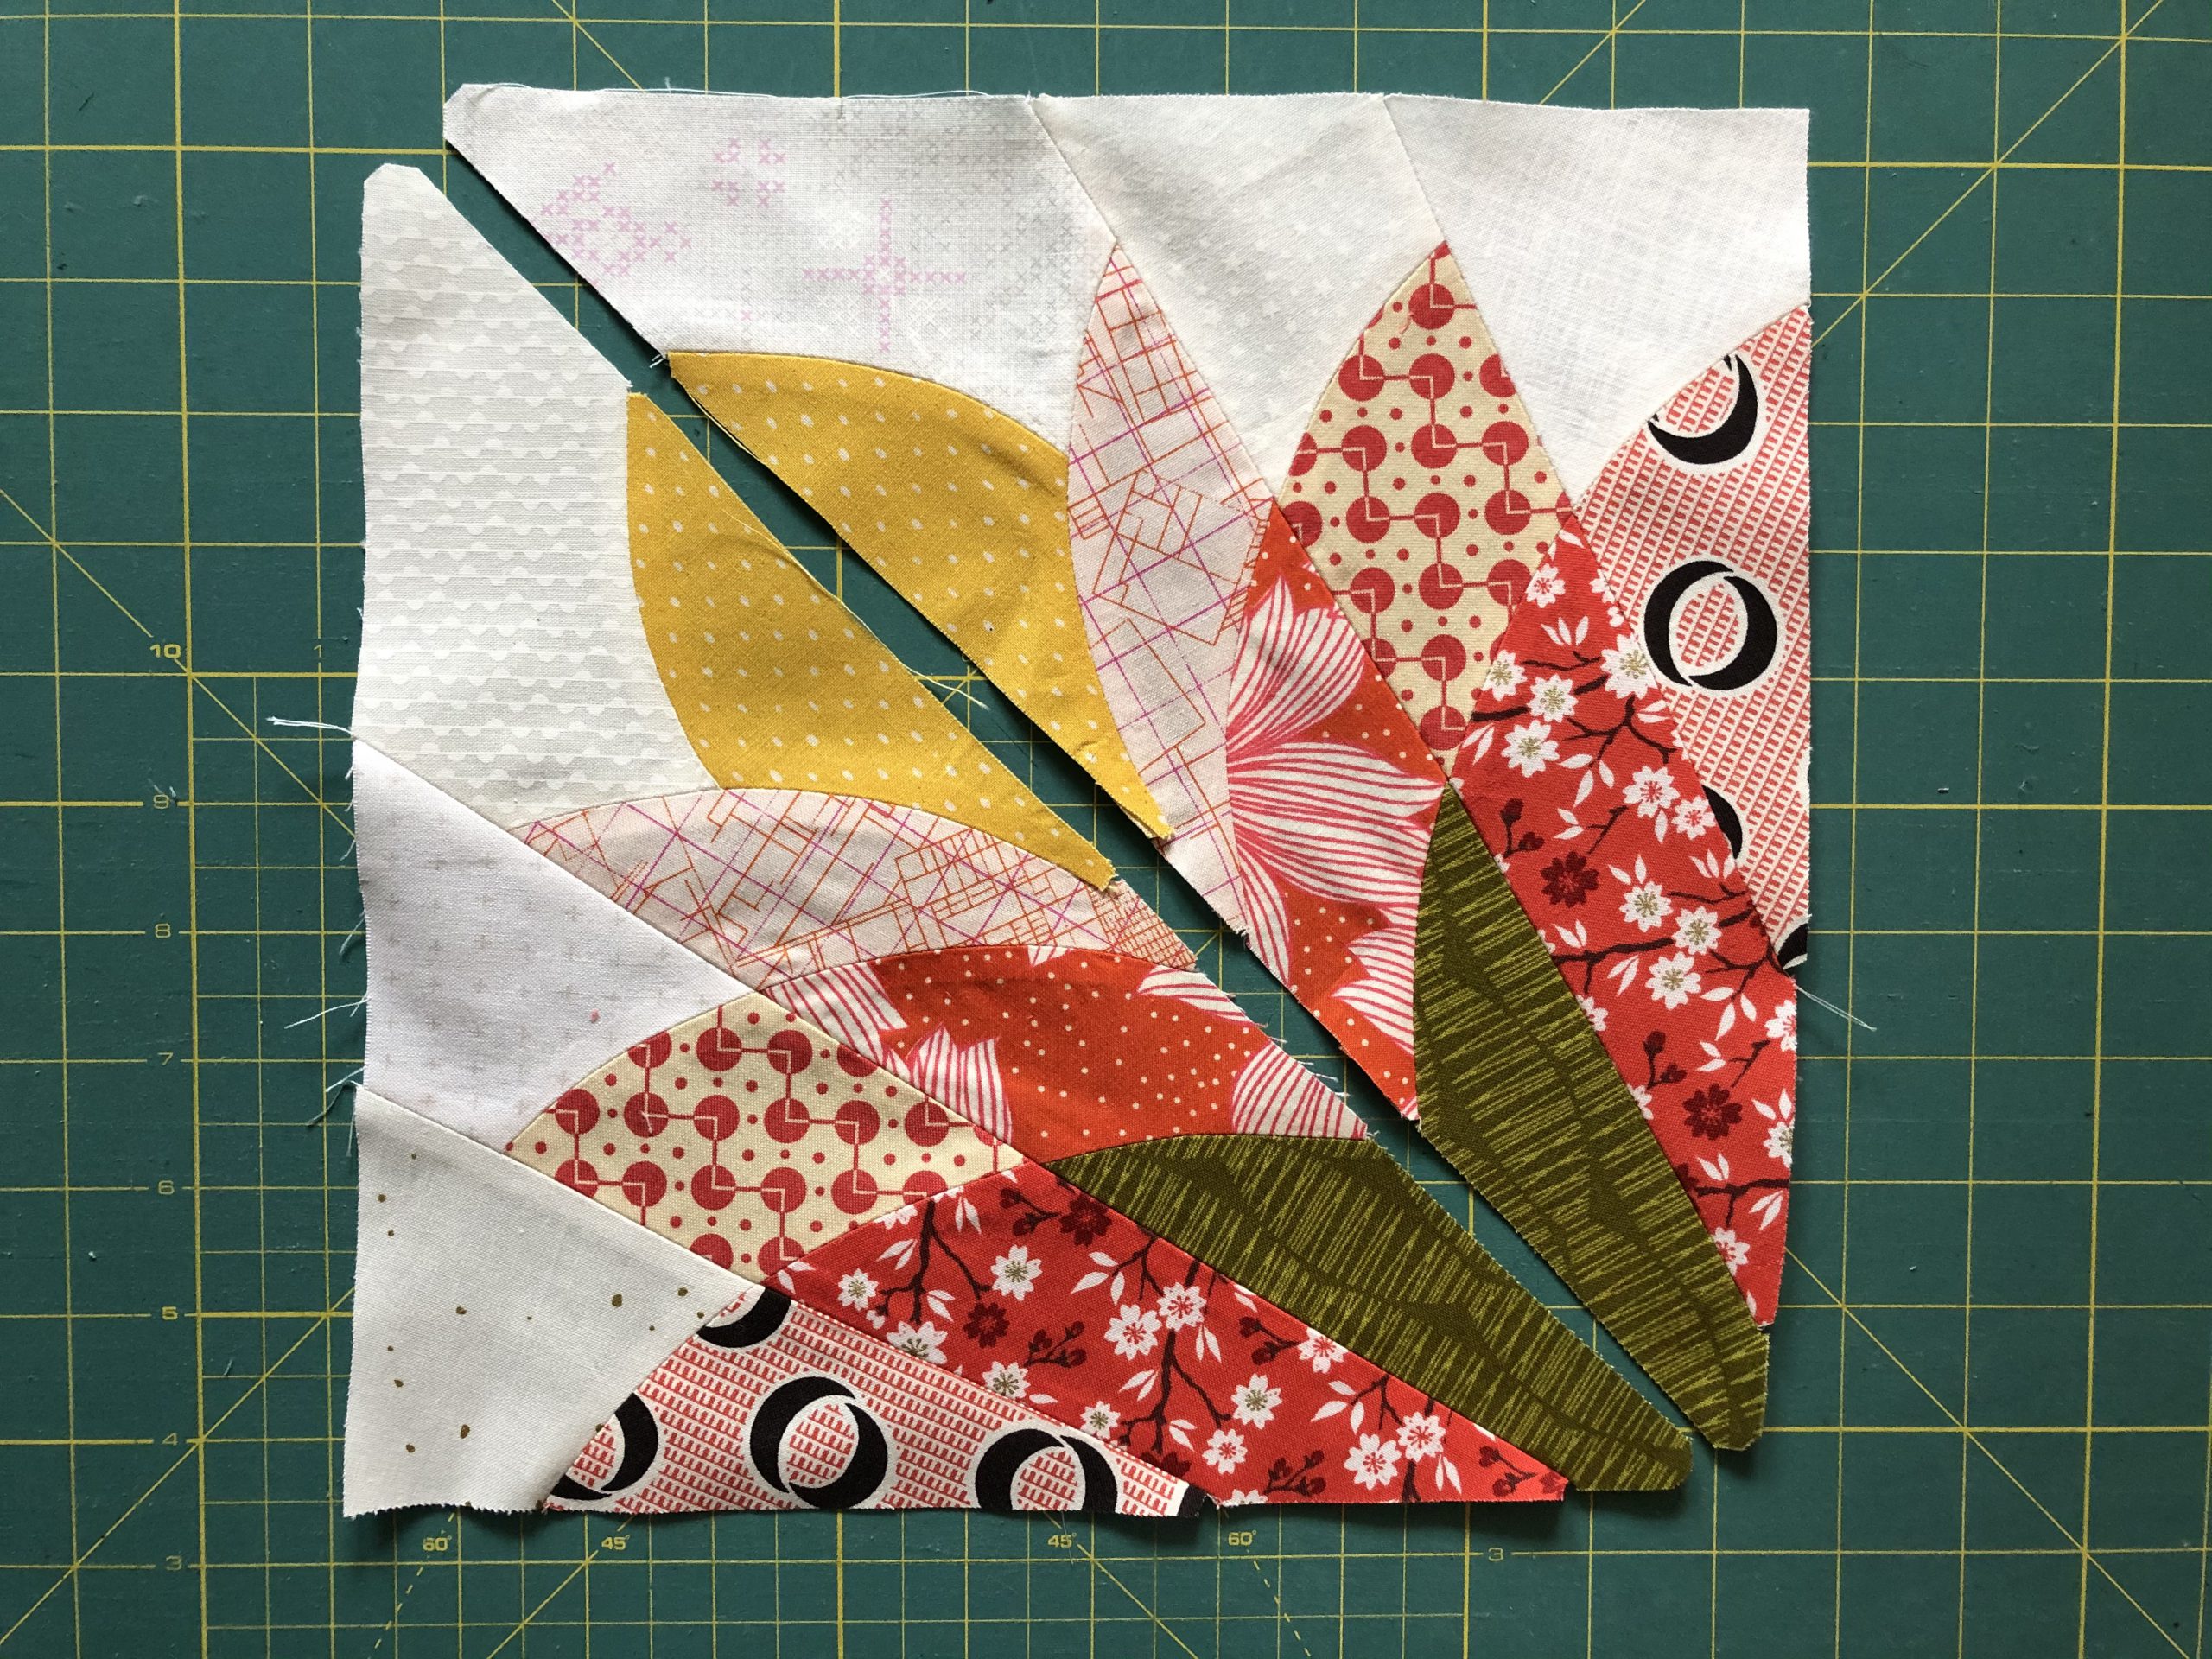
Why I took the last picture of the block from the other direction, I have no idea…. But it’s finished!
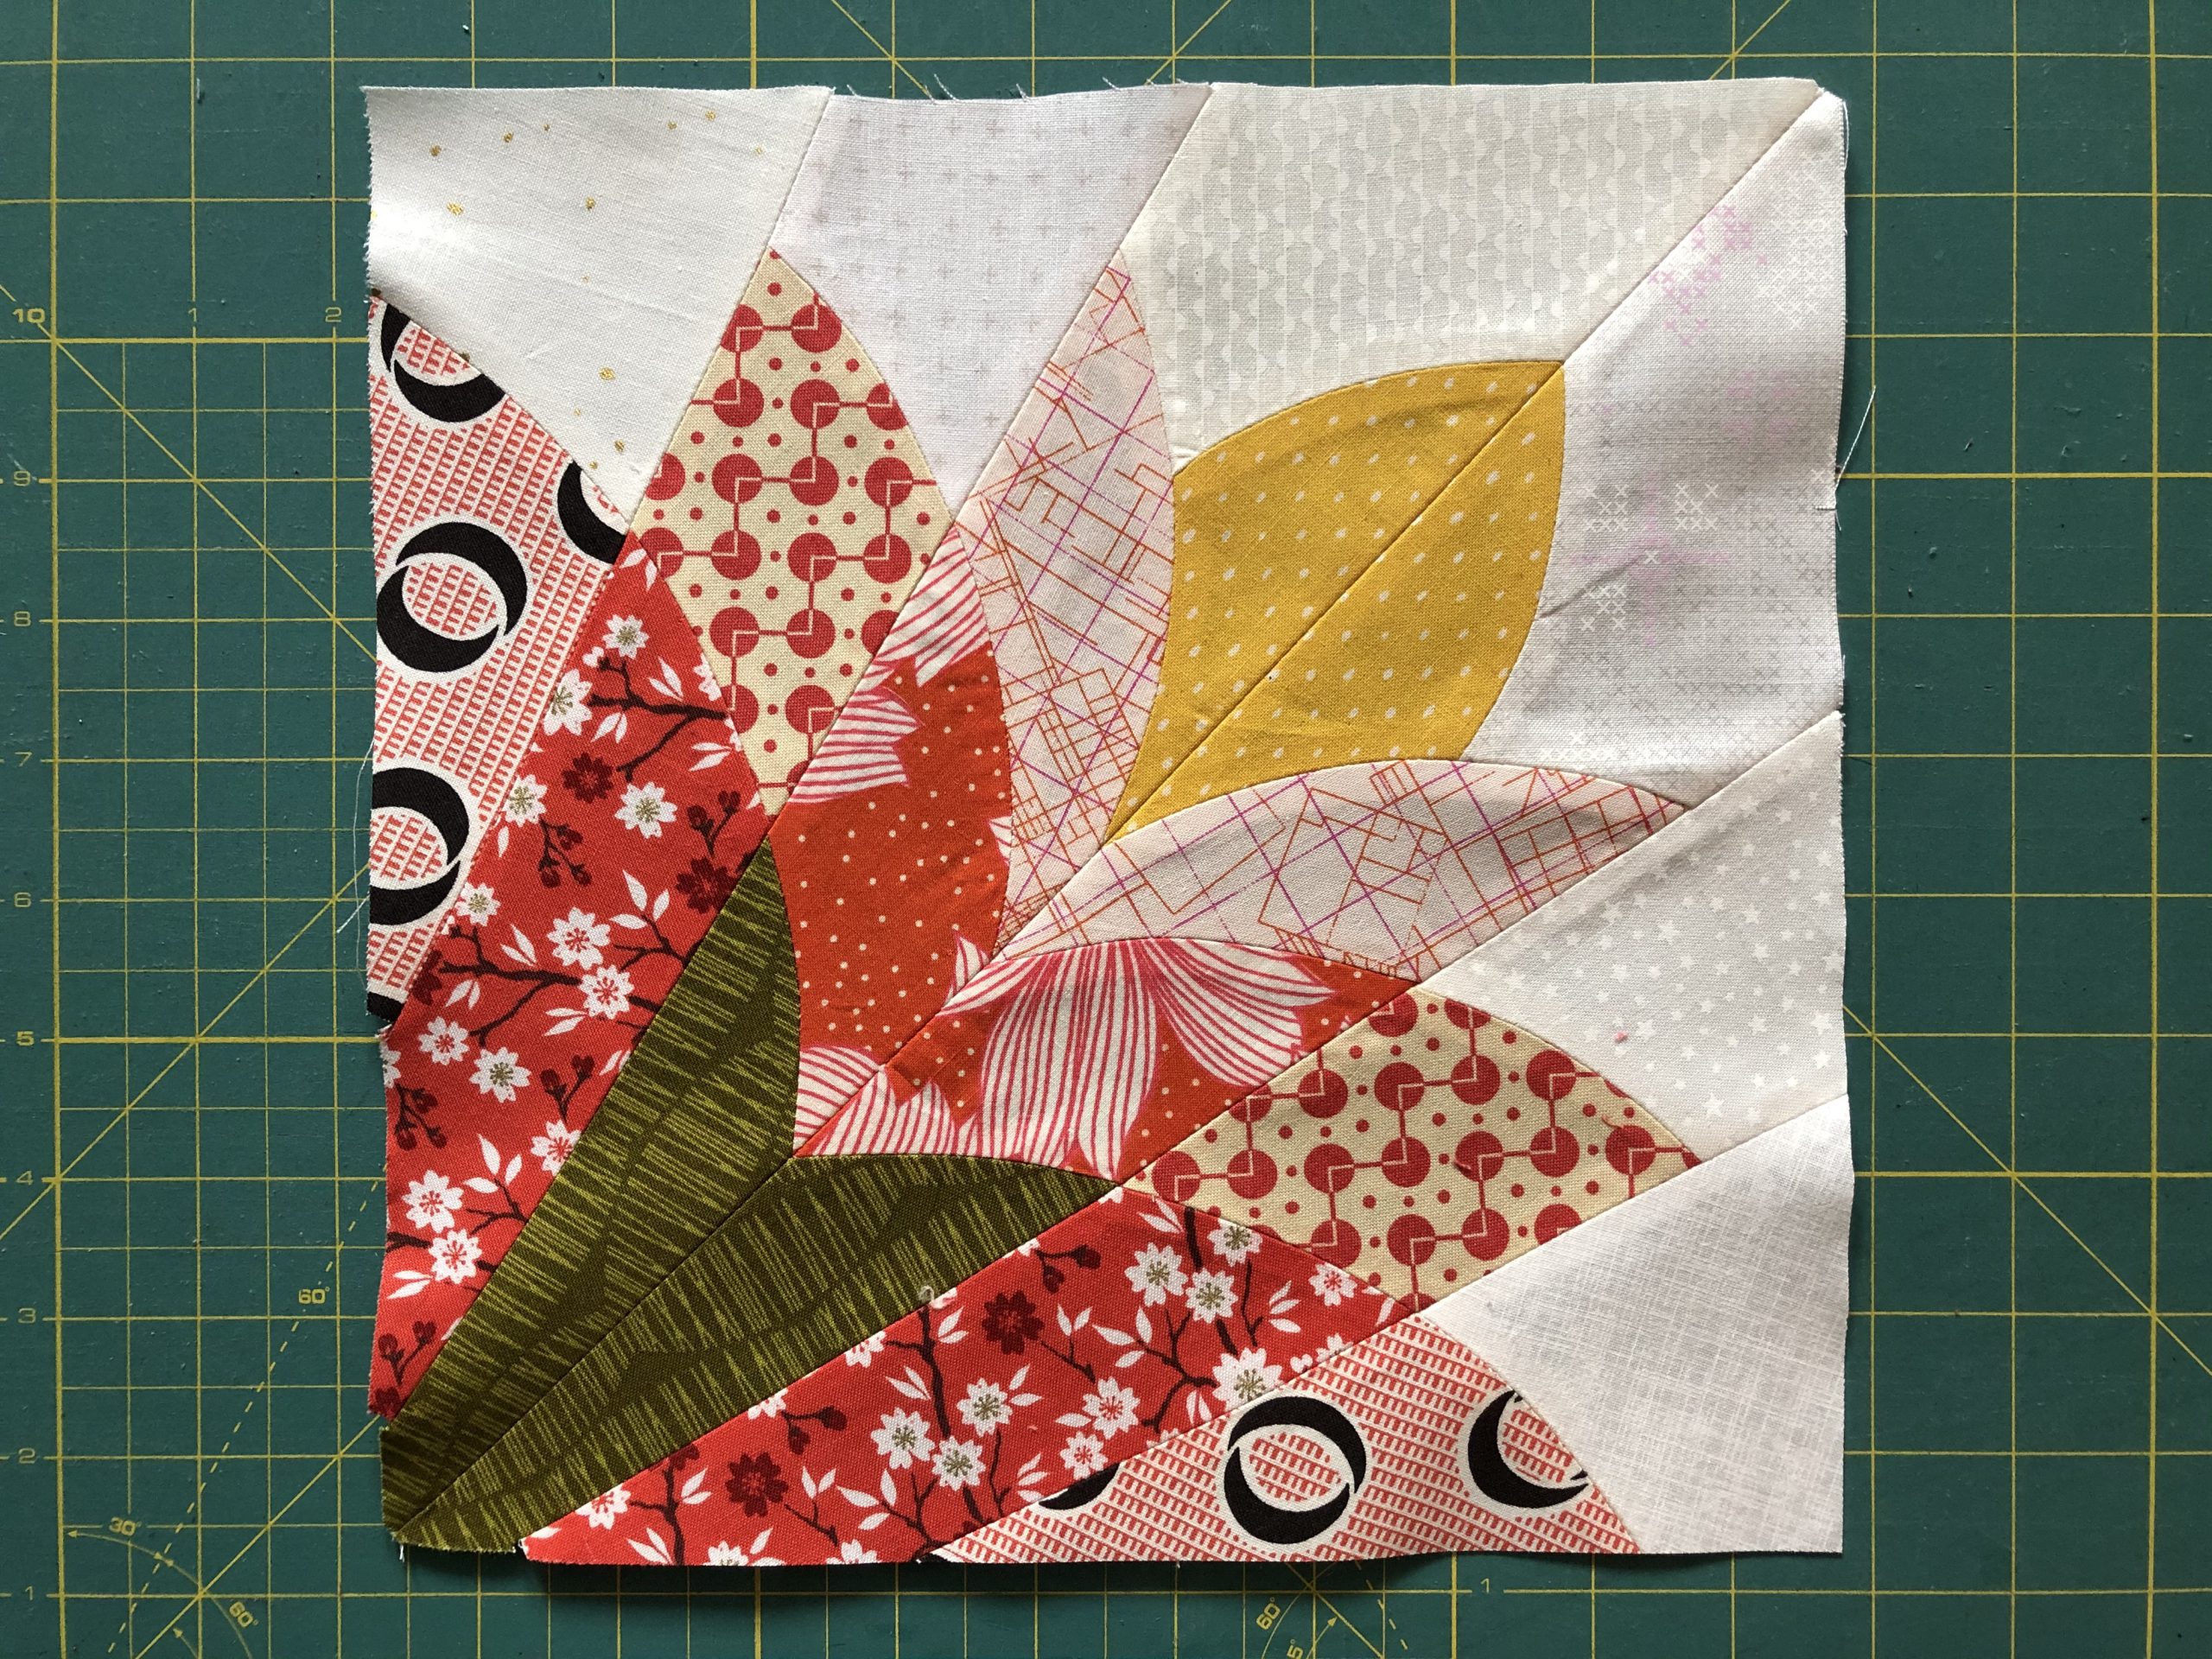
If you take your time with all the steps and work carefully, this block will work out fine.
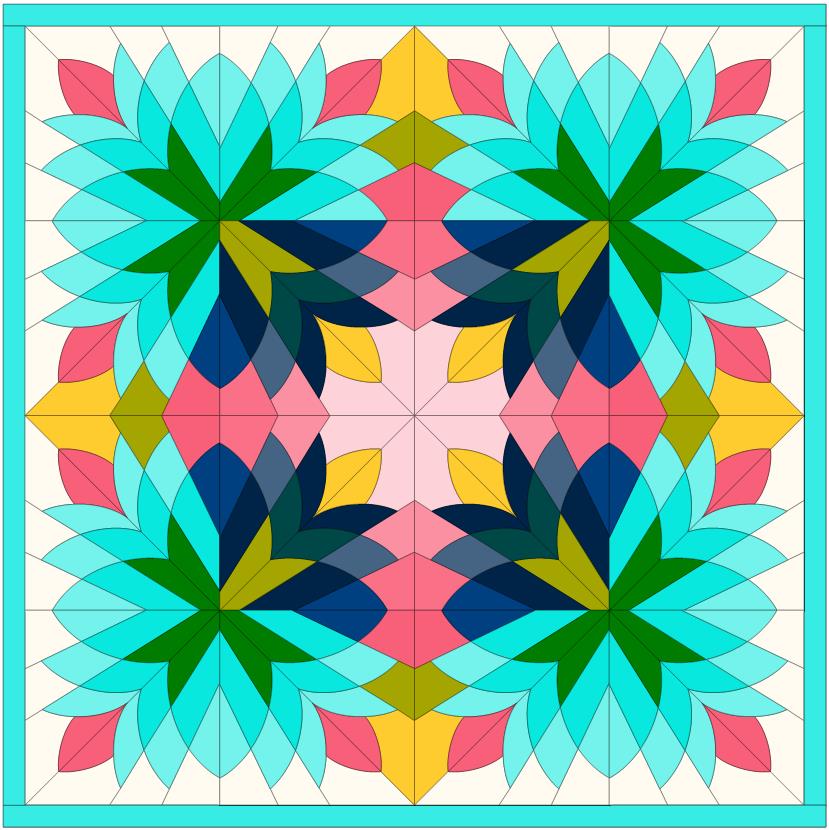
And to give you an idea what else you can do with this gorgeous block, here are a few ideas to inspire you:

Make sure you post a picture of your block! It’s really fun to admire all your different pieces in the Community section of the blog, on Facebook or Instagram. On Facebook and Instagram, please use the hashtag #BERNINAOldBlockSampler.
New here?
Have you only just discovered the quilt-along? No problem! You can join at any time. Registration is not required, and you can win a BERNINA 570 QE! All the posts will remain permanently available at the following link: Old Block Quilt-Along – overview of all the posts
In the first post, which was the invitation to participate in the quilt-along, you will find the important initial information about our joint project:
Old Block Quilt-Along – who’s in?
You can find the rest of the blocks from the quilt-along that have already been published here:
Old Block Quilt-Along, Part 1: “Bride’s Bouquet”
Old Block Quilt-Along, Part 2: “Quilter’s Delight”
Old Block Quilt-Along, Part 3: “Bird’s Nest”
Old Block Quilt-Along, Part 4: “Cross and Star”
Old Block Quilt-Along, Part 5: “Morning Star”
Old Block Quilt-Along, Part 6: “Mill and Stars”
Old Block Quilt-Along, Part 7: Altar Steps
Old Block Quilt-Along, Part 8: The Corner Star
That was quite an easy task today, wasn’t it? I hope you still had fun and we’ll see you again for the next block!
Enjoy your sewing,
Andrea
I think this block is born to be paper-pieced! That would greatly simplify production…
I’ve just made this up and I have two numb fingers after surgery,no pins as can’t hold them and yours looked like hedge stakes ,! and 1/4 in foot but a curve foot would be easy too . And I won’t make another . ?
Dear Jan,
To quilt with no pins sounds like a huge challenge indeed! But the Old Block Quilt Along is still going for half a year, so you can always continue when your fingers are better again or get someone to help you pin things 🙂 There is no rush!
Happy sewing, Ramona from BERNINA International
I am having trouble at this block to the block. I have resized it 4 times and the last one was as small as I could get it and it still is not accepted, saying the site is busy or the picture size is too large. Do you have any suggestions.Thank You, Dianne
Dear Dianne,
I am sorry, I do not understand the issue. Are you having troubles with printing the pattern in the correct size? What do you mean with “it still is not accepted”?
Kind regards, Ramona from BERNINA International
This is such a fantastic and “not to be missed ” QAL. I am deeply disappointed that I just became aware of it at block 5. My time at present is over commited already to the point of being a health hazard. I’m a 4+ decades Bernina user! Is there any way that you could run this project again, or just announce (where?) it and republish it for all of us out there who want to complete this very essential project? Please, please, please? Old blocks are the very foundation of why we quilt, and they are so difficult to find and construct without theses wonderful tutorials that you are making available. I’d love to be contacted at [email protected]. Wow! What a Treasure this sampler project is!
Dear Patricia,
I am very happy to hear your excitement for this QAL, and thank you for staying with BERNINA for several decades!
I cannot say if this project will be repeated in the future, but since the Quilt Alongs are very popular, other QAL’s will probably follow! Which themes these QAL’s are going to have and if someone will plan another QAL with old blocks is unclear, but I am sure we have some other exciting themes awaiting us in the future.
Are you already subscribed to the Blog Newsletter? There we will always notify you if a new QAL Block is available, so you wont miss the start of the next one. You can subscribe here:
https://www.bernina.com/newsletter-subscription-blog-en
Otherwhise, these posts will stay published after the QAL is finished, so if you want to make all the fantastic blocks Andrea is showing us, you can always get back to them once you are ready to tackle a new project. You can find them on this complete overview:
https://blog.bernina.com/en/tag/overview-patchwork-old-block-quilt-along/?filter=date
Kind regards,
Ramona from BERNINA International