 BERNINA Corporate Blog -
Andrea from Quiltmanufaktur and author for the German BERNINA blog is your guide for this fantastic quilt-along over the next 12 months. Together, you will sew classic patchwork blocks and combine them into a sampler. The completed quilt will be traditional, yet modern! The next part has been written and we are delighted that you join this quilt project.
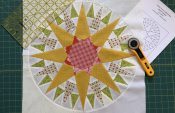
Hello everybody and welcome to the tenth block of the Old Block Quilt-Along! The new block is called “Constellation”.

I didn’t get the “Constellation” patchwork block from an old newspaper article, but from the book “The Quilter’s Album of Patchwork Patterns” by Jinny Beyer. This book is a bible of patchwork blocks. It contains illustrations and diagrams of almost 5,000 blocks. It also has information about their creators along with the publication date. In some cases, historical information about the blocks is also provided.
This block came from the pen of Nancy Cabot, who I have already reported on in previous posts. It was published in the Chicago Tribune in 1936.
I think this block goes perfectly with the Old Block Sampler. It is a challenge and very complex, but when it is finished, it is a real eye-catcher!
We are sewing the “Constellation” patchwork block
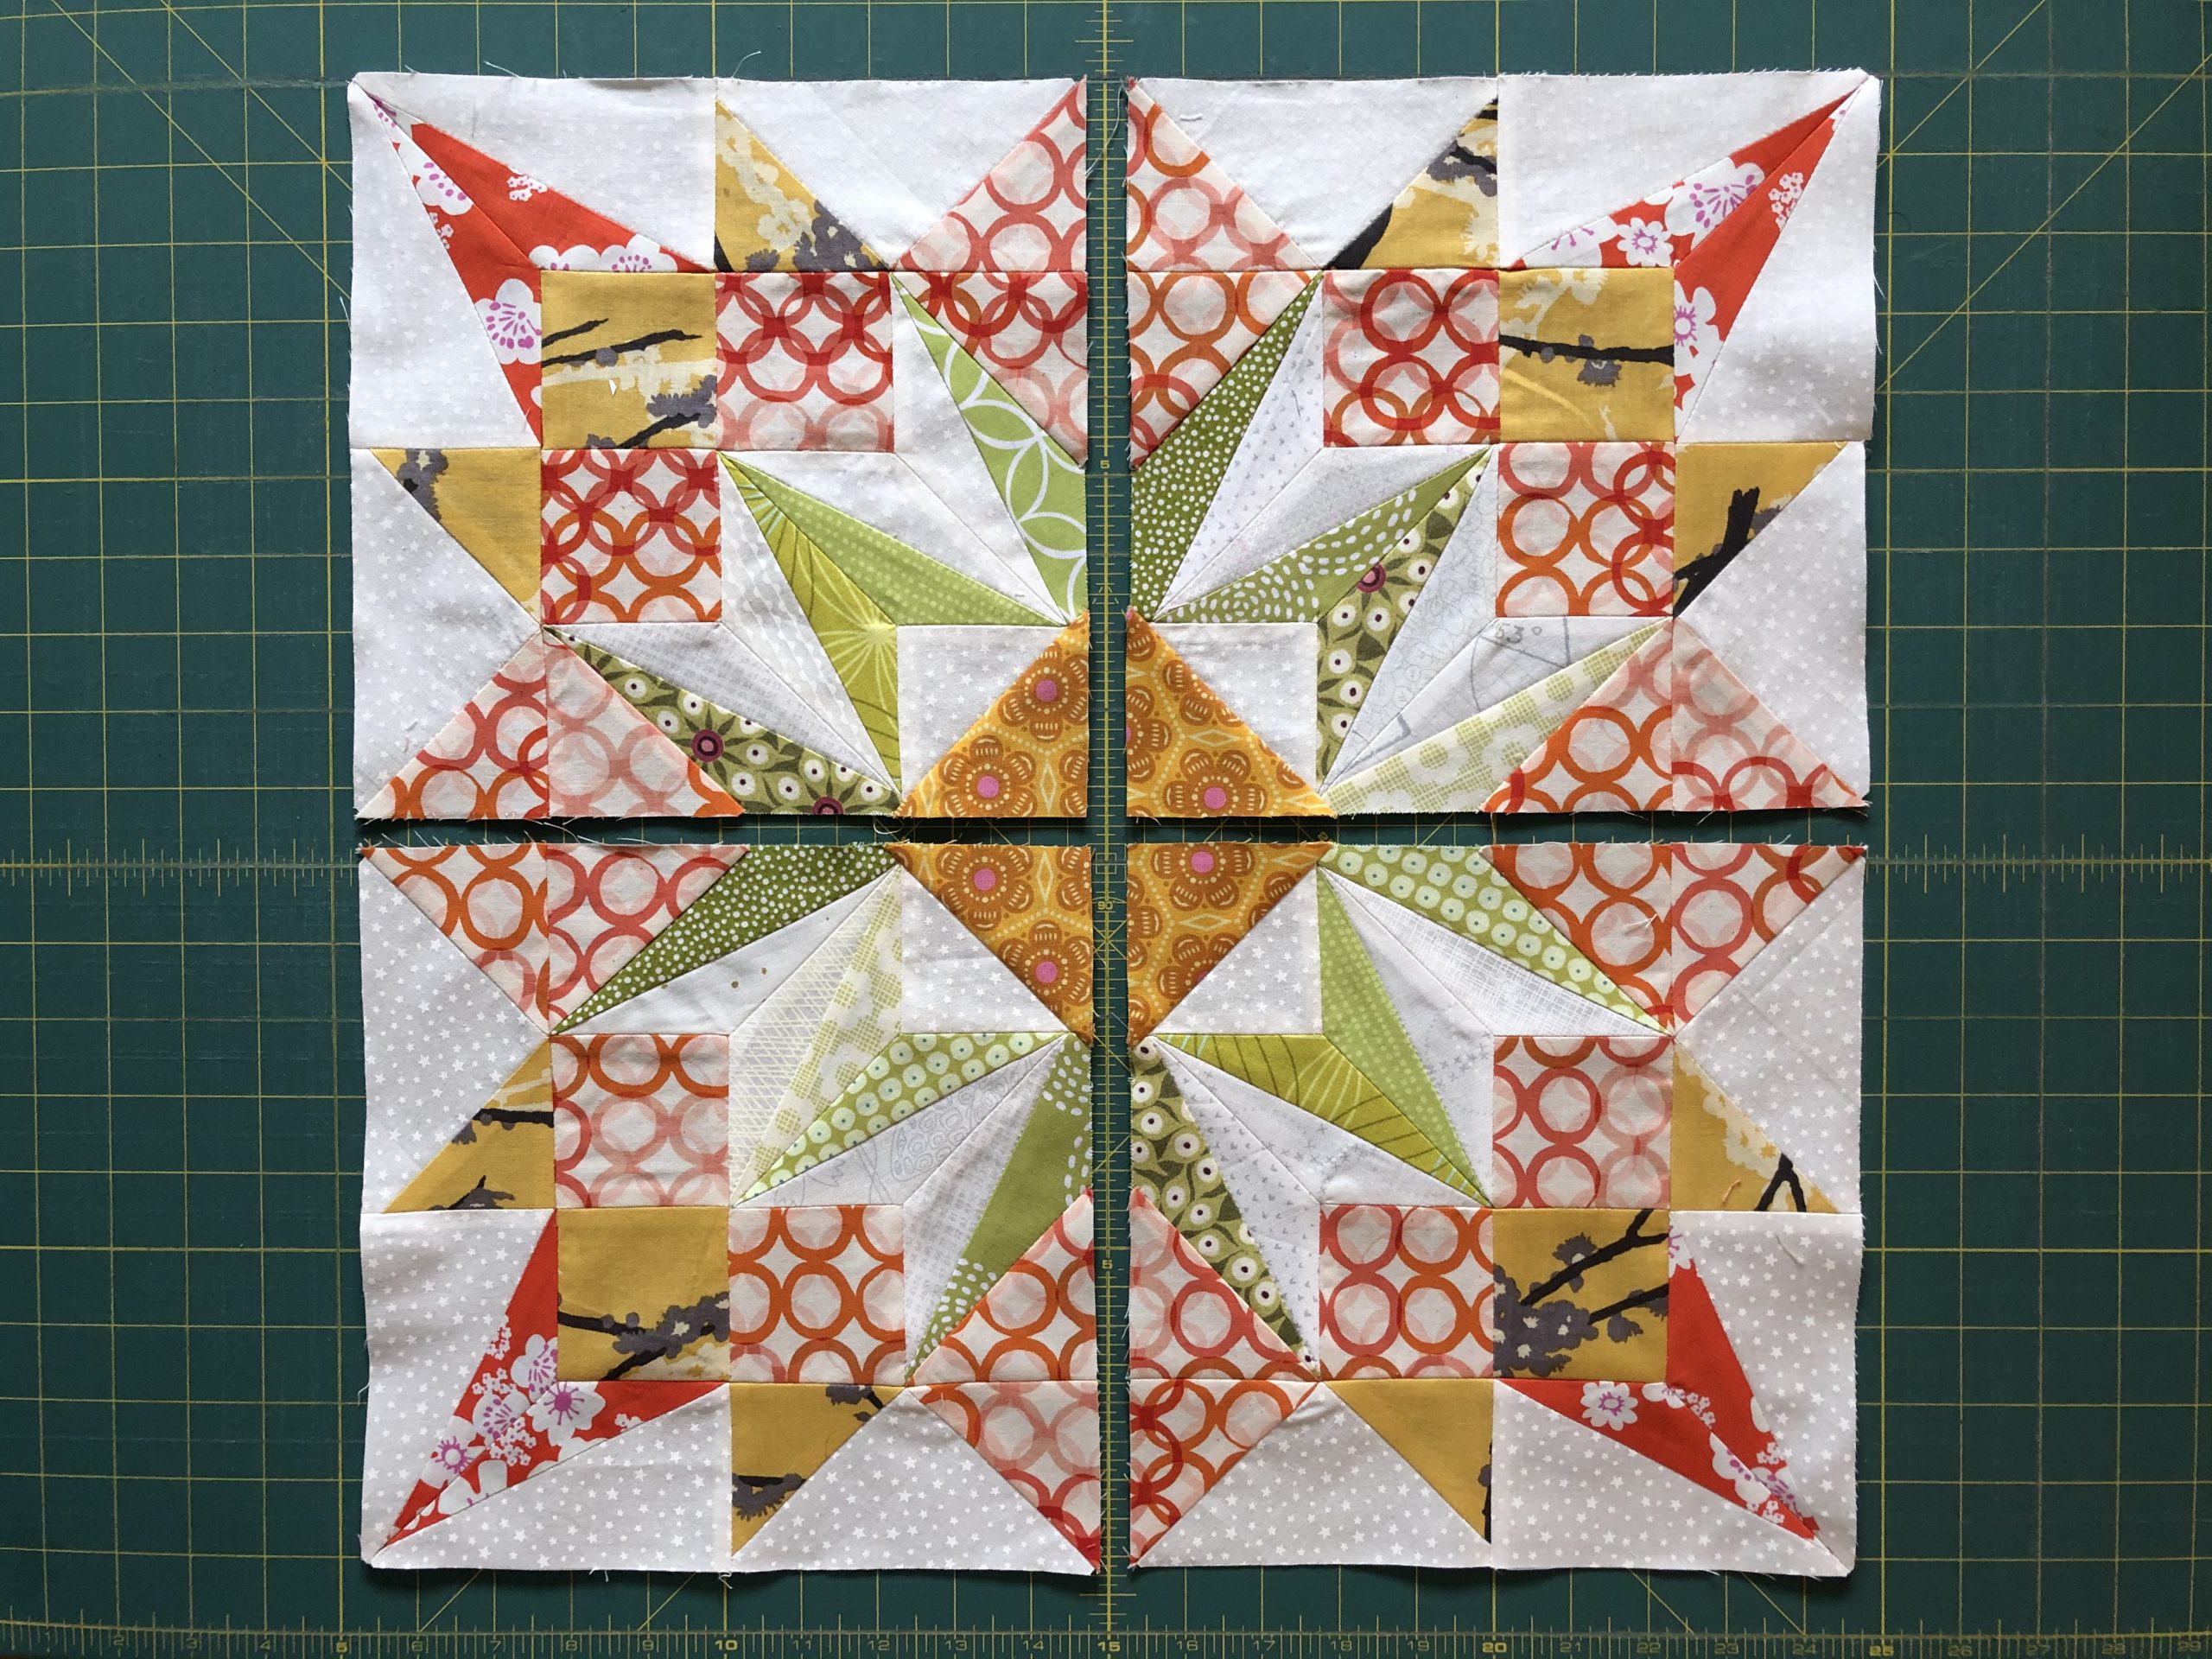
“Constellation” is an 18″ block (with seam allowance it is 18.5″). It can be made either using foundation paper piecing or with pattern templates. It is made up of four identical segments, so I will only show you how to sew one of the segments in the illustrated instructions.
This block is not easy to sew, so I suggest you take your time on it and pay close attention to what you are doing. Trying to speed things up won’t work here…
Download the patchwork templates
For cutting out, I have created three PDF documents to download:
- The first is a coloring sheet. This allows you to try out colors and designs for this block to see what they look like.
- On the second PDF you will find the templates for the foundation paper piecing
- and on the third you will find the pattern templates.
On the PDFs with the FPP templates and the pattern templates, I have put a control square with a side length of 1 inch so that you can check whether your printout of the templates is the right size. It is important to set your print options to “Actual size”.
Here are the downloads:
“Constellation” coloring sheet
“Constellation” pattern templates
Cutting out the pattern pieces
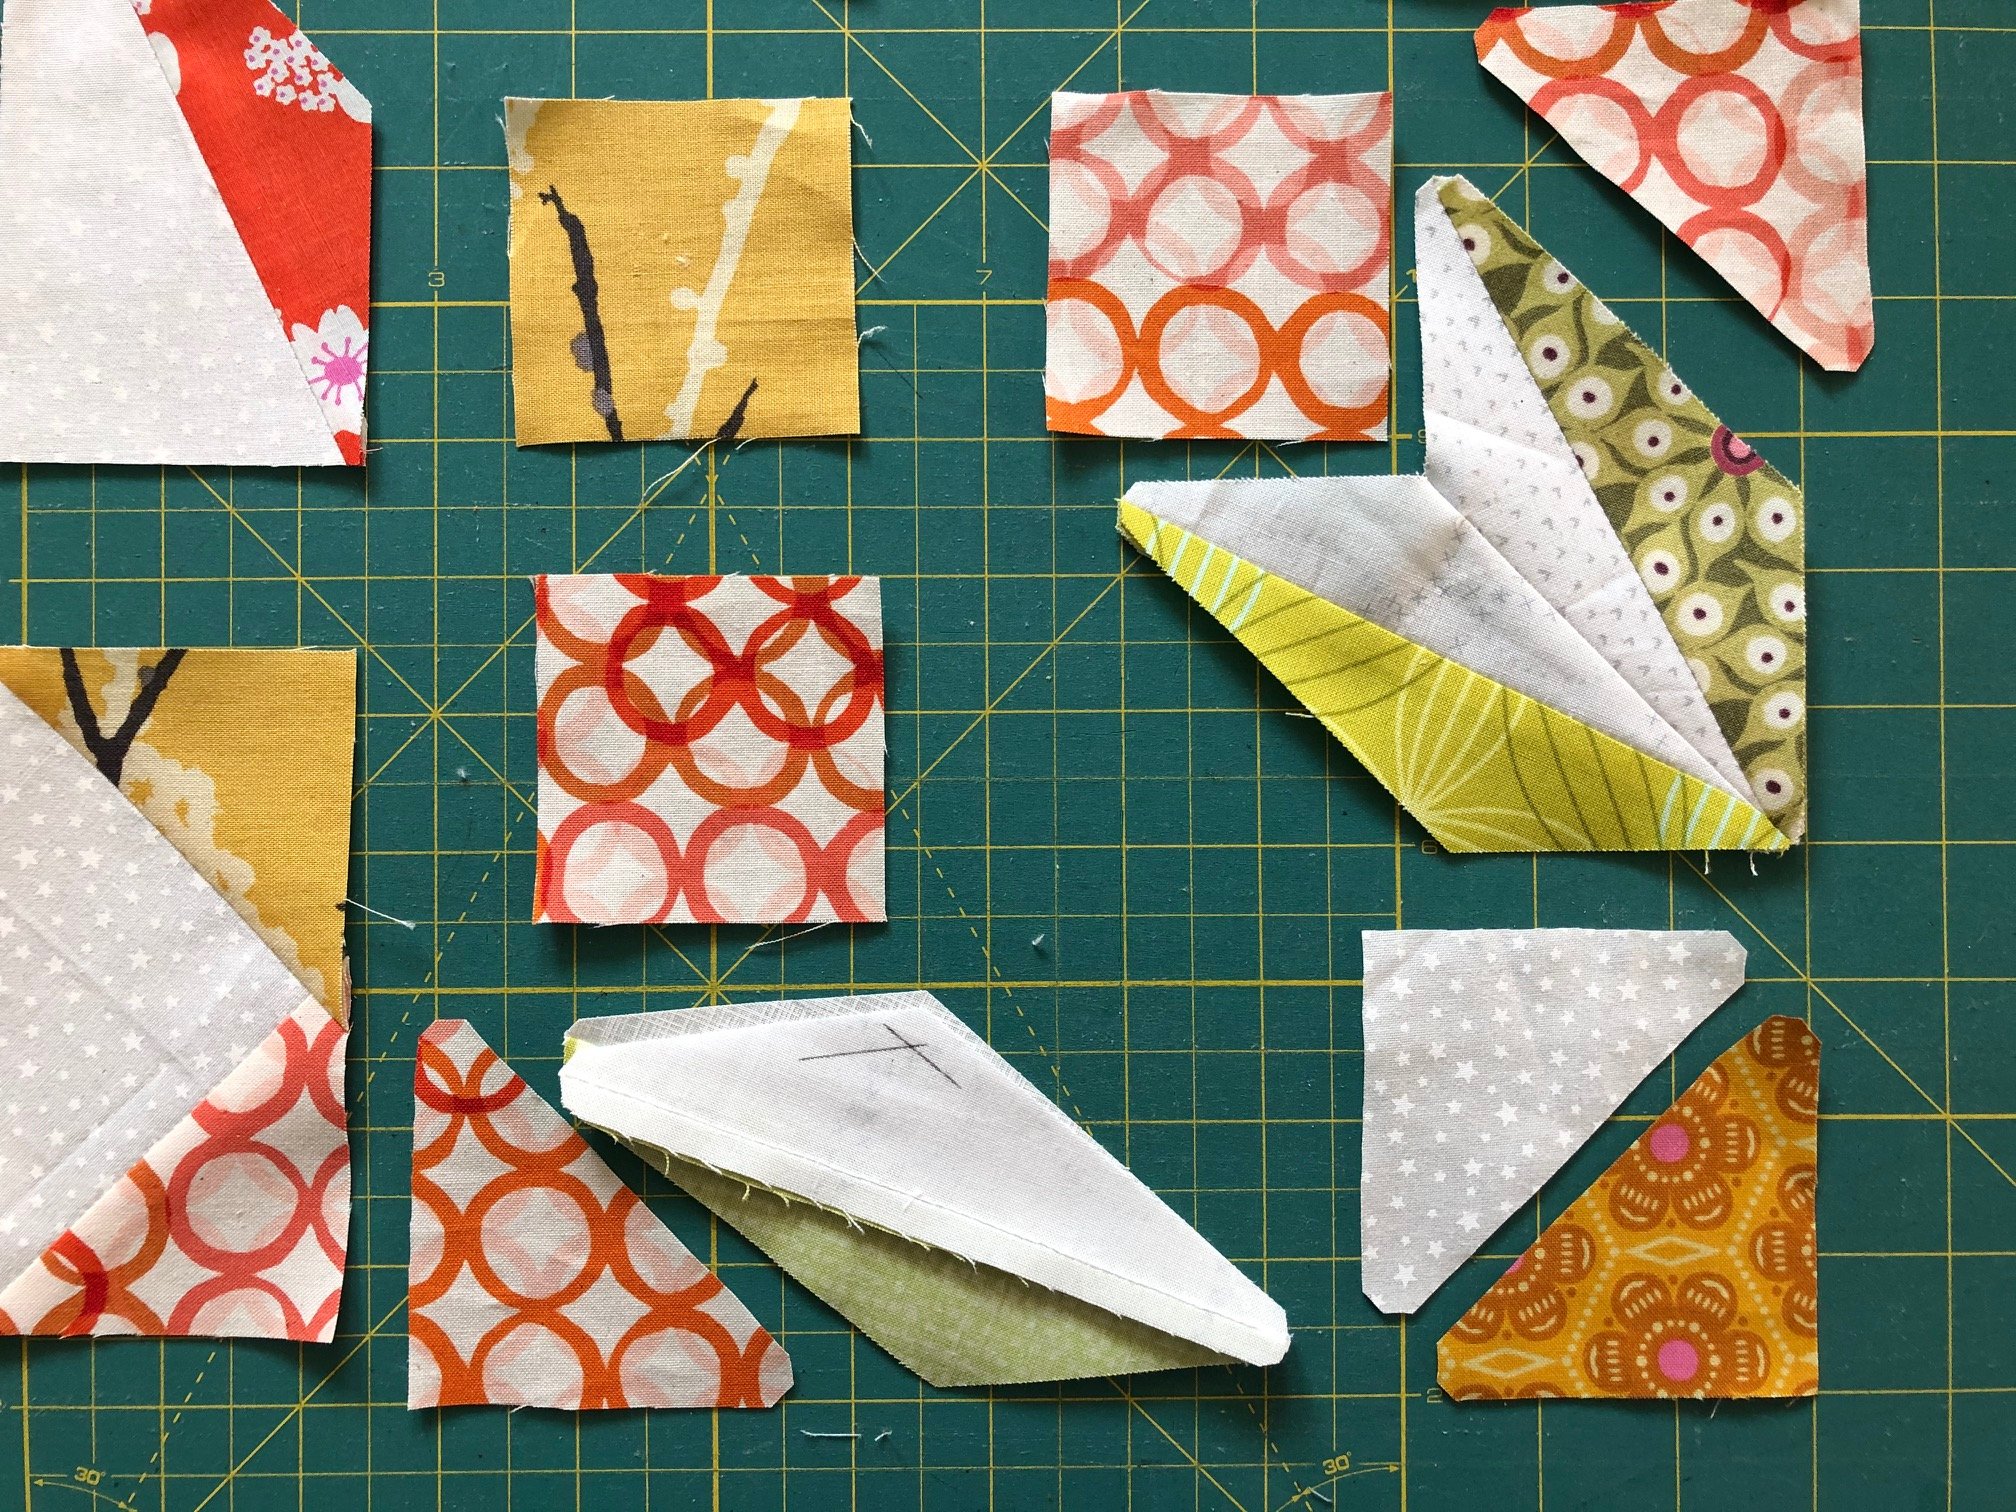
Cut out the following pieces if you are using the FPP technique:
- Piece C: 8 pieces
- Piece D: 8 pieces
- Piece E: 4 pieces
- Piece F: 4 pieces
- Piece G: 8 pieces
For the pattern templates, cut out the following quantities:
- Template A: 12 pieces
- Template B: 16 pieces
Sewing the “Constellation” patchwork block
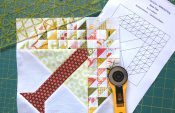
To give you a better overview of the position of the different foundation paper piecing pieces, I have created this pattern diagram:
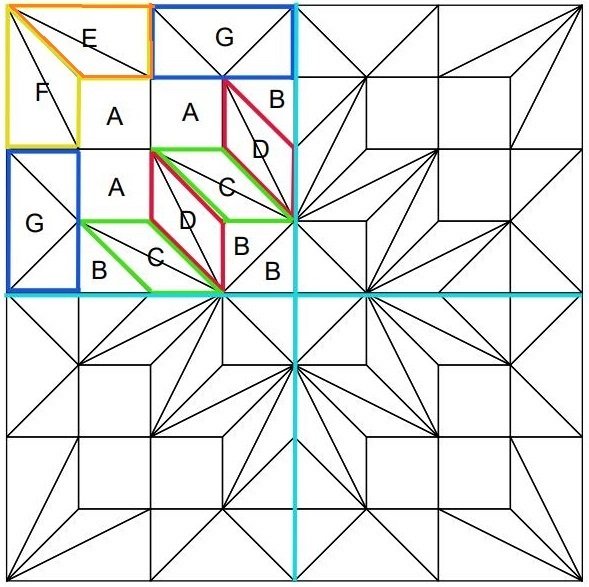
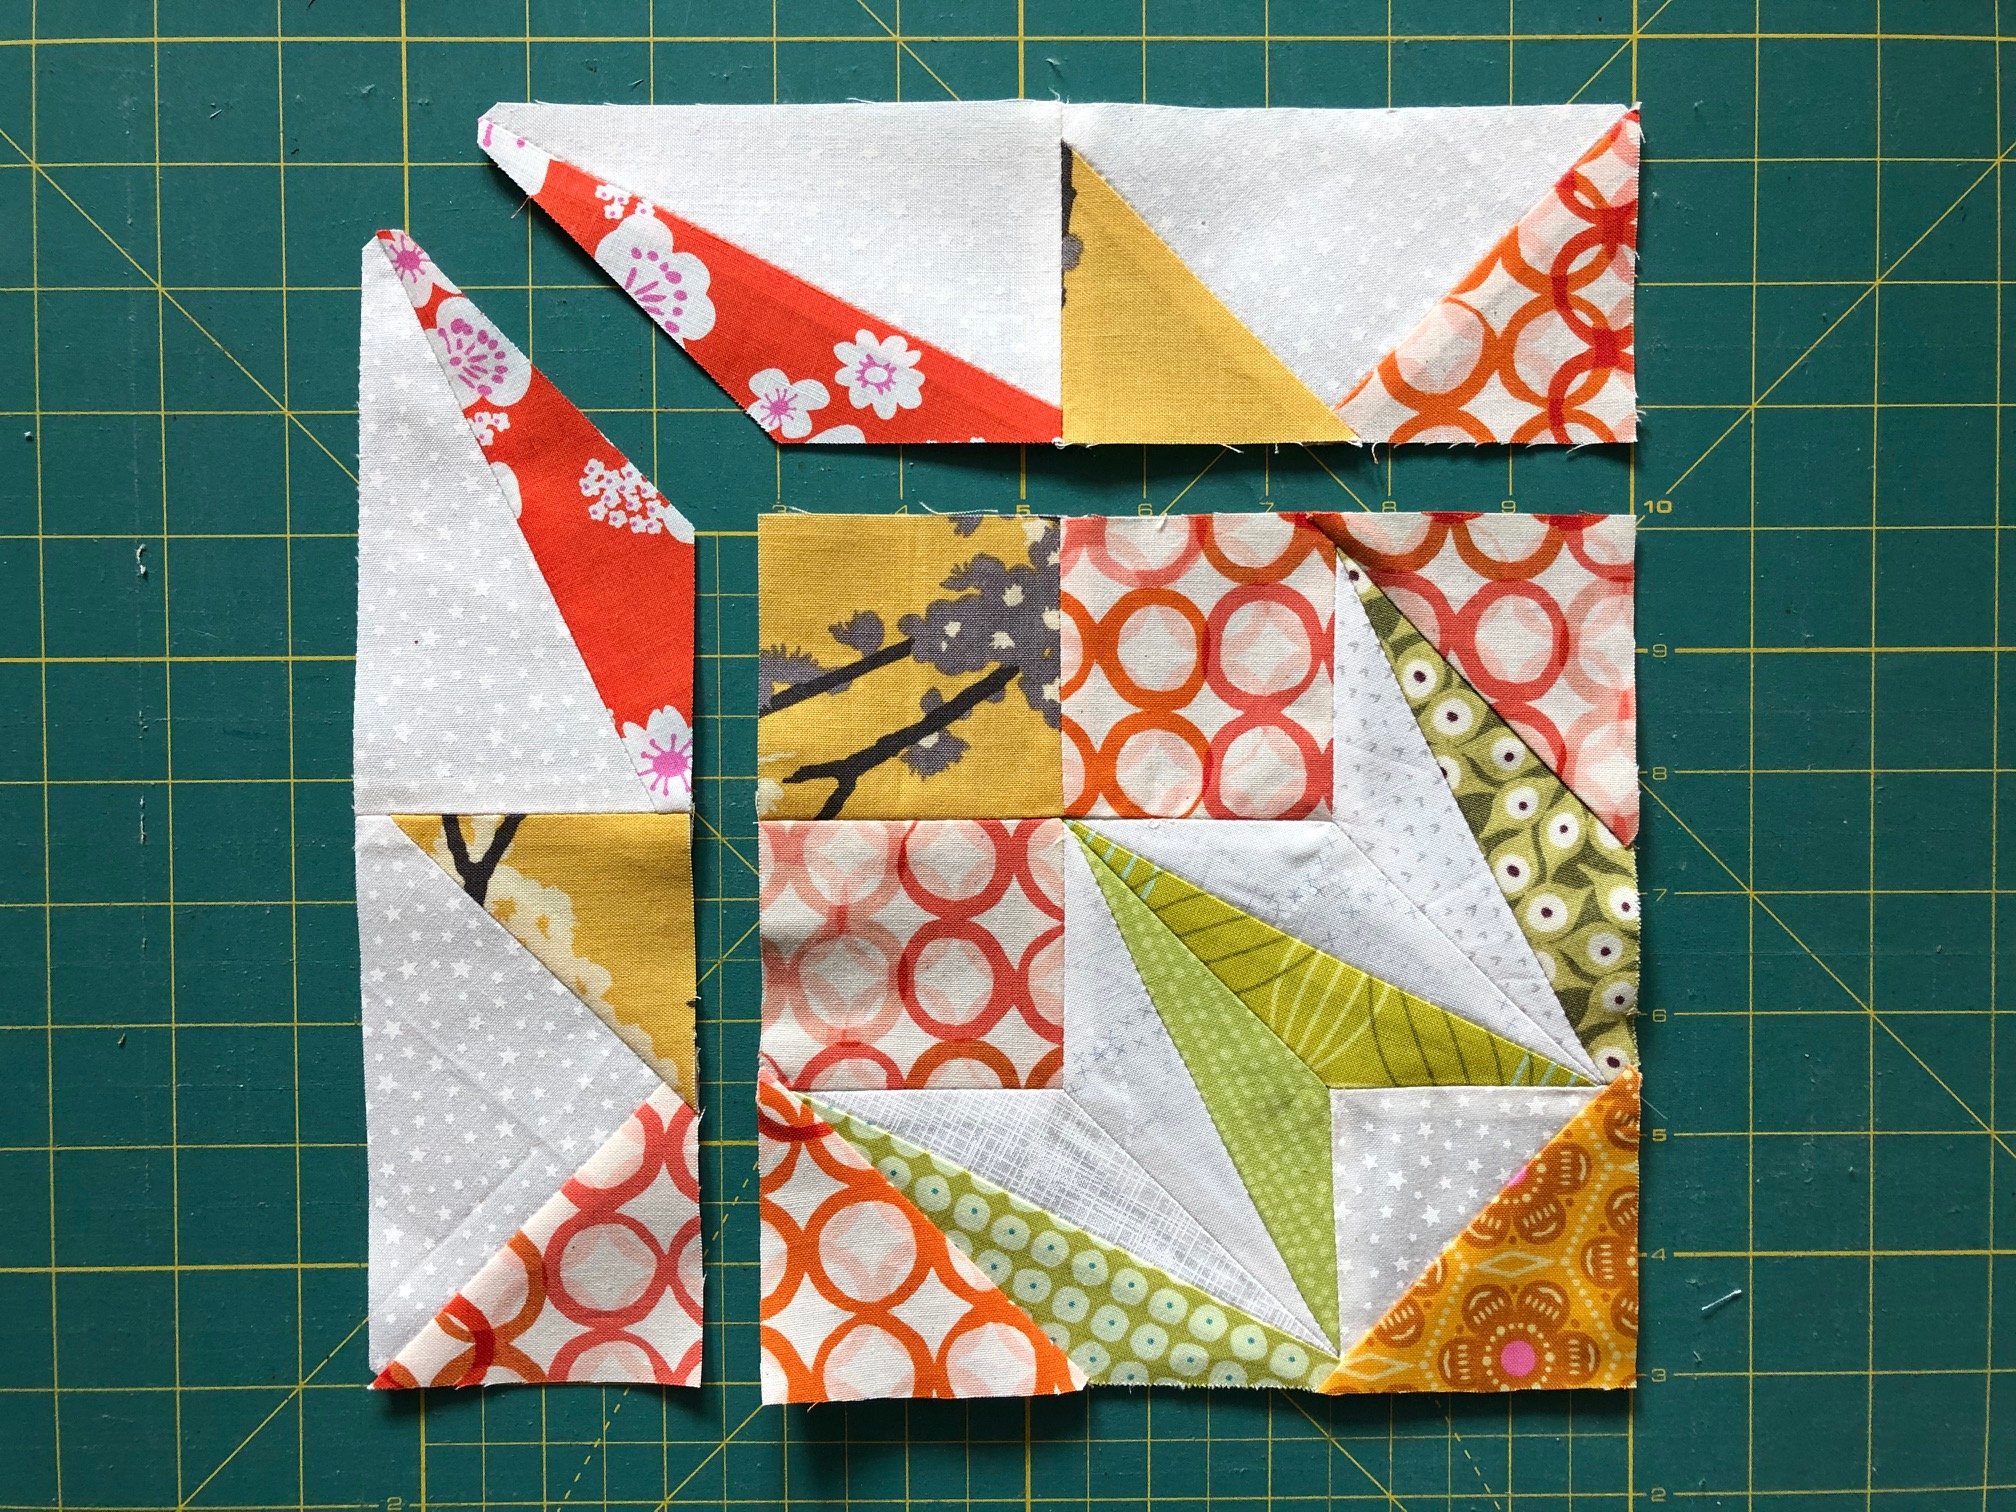
You should only start sewing once you have cut out all the FPP pieces. Lay out the pieces according to the diagram and divide the layout into the four sections.
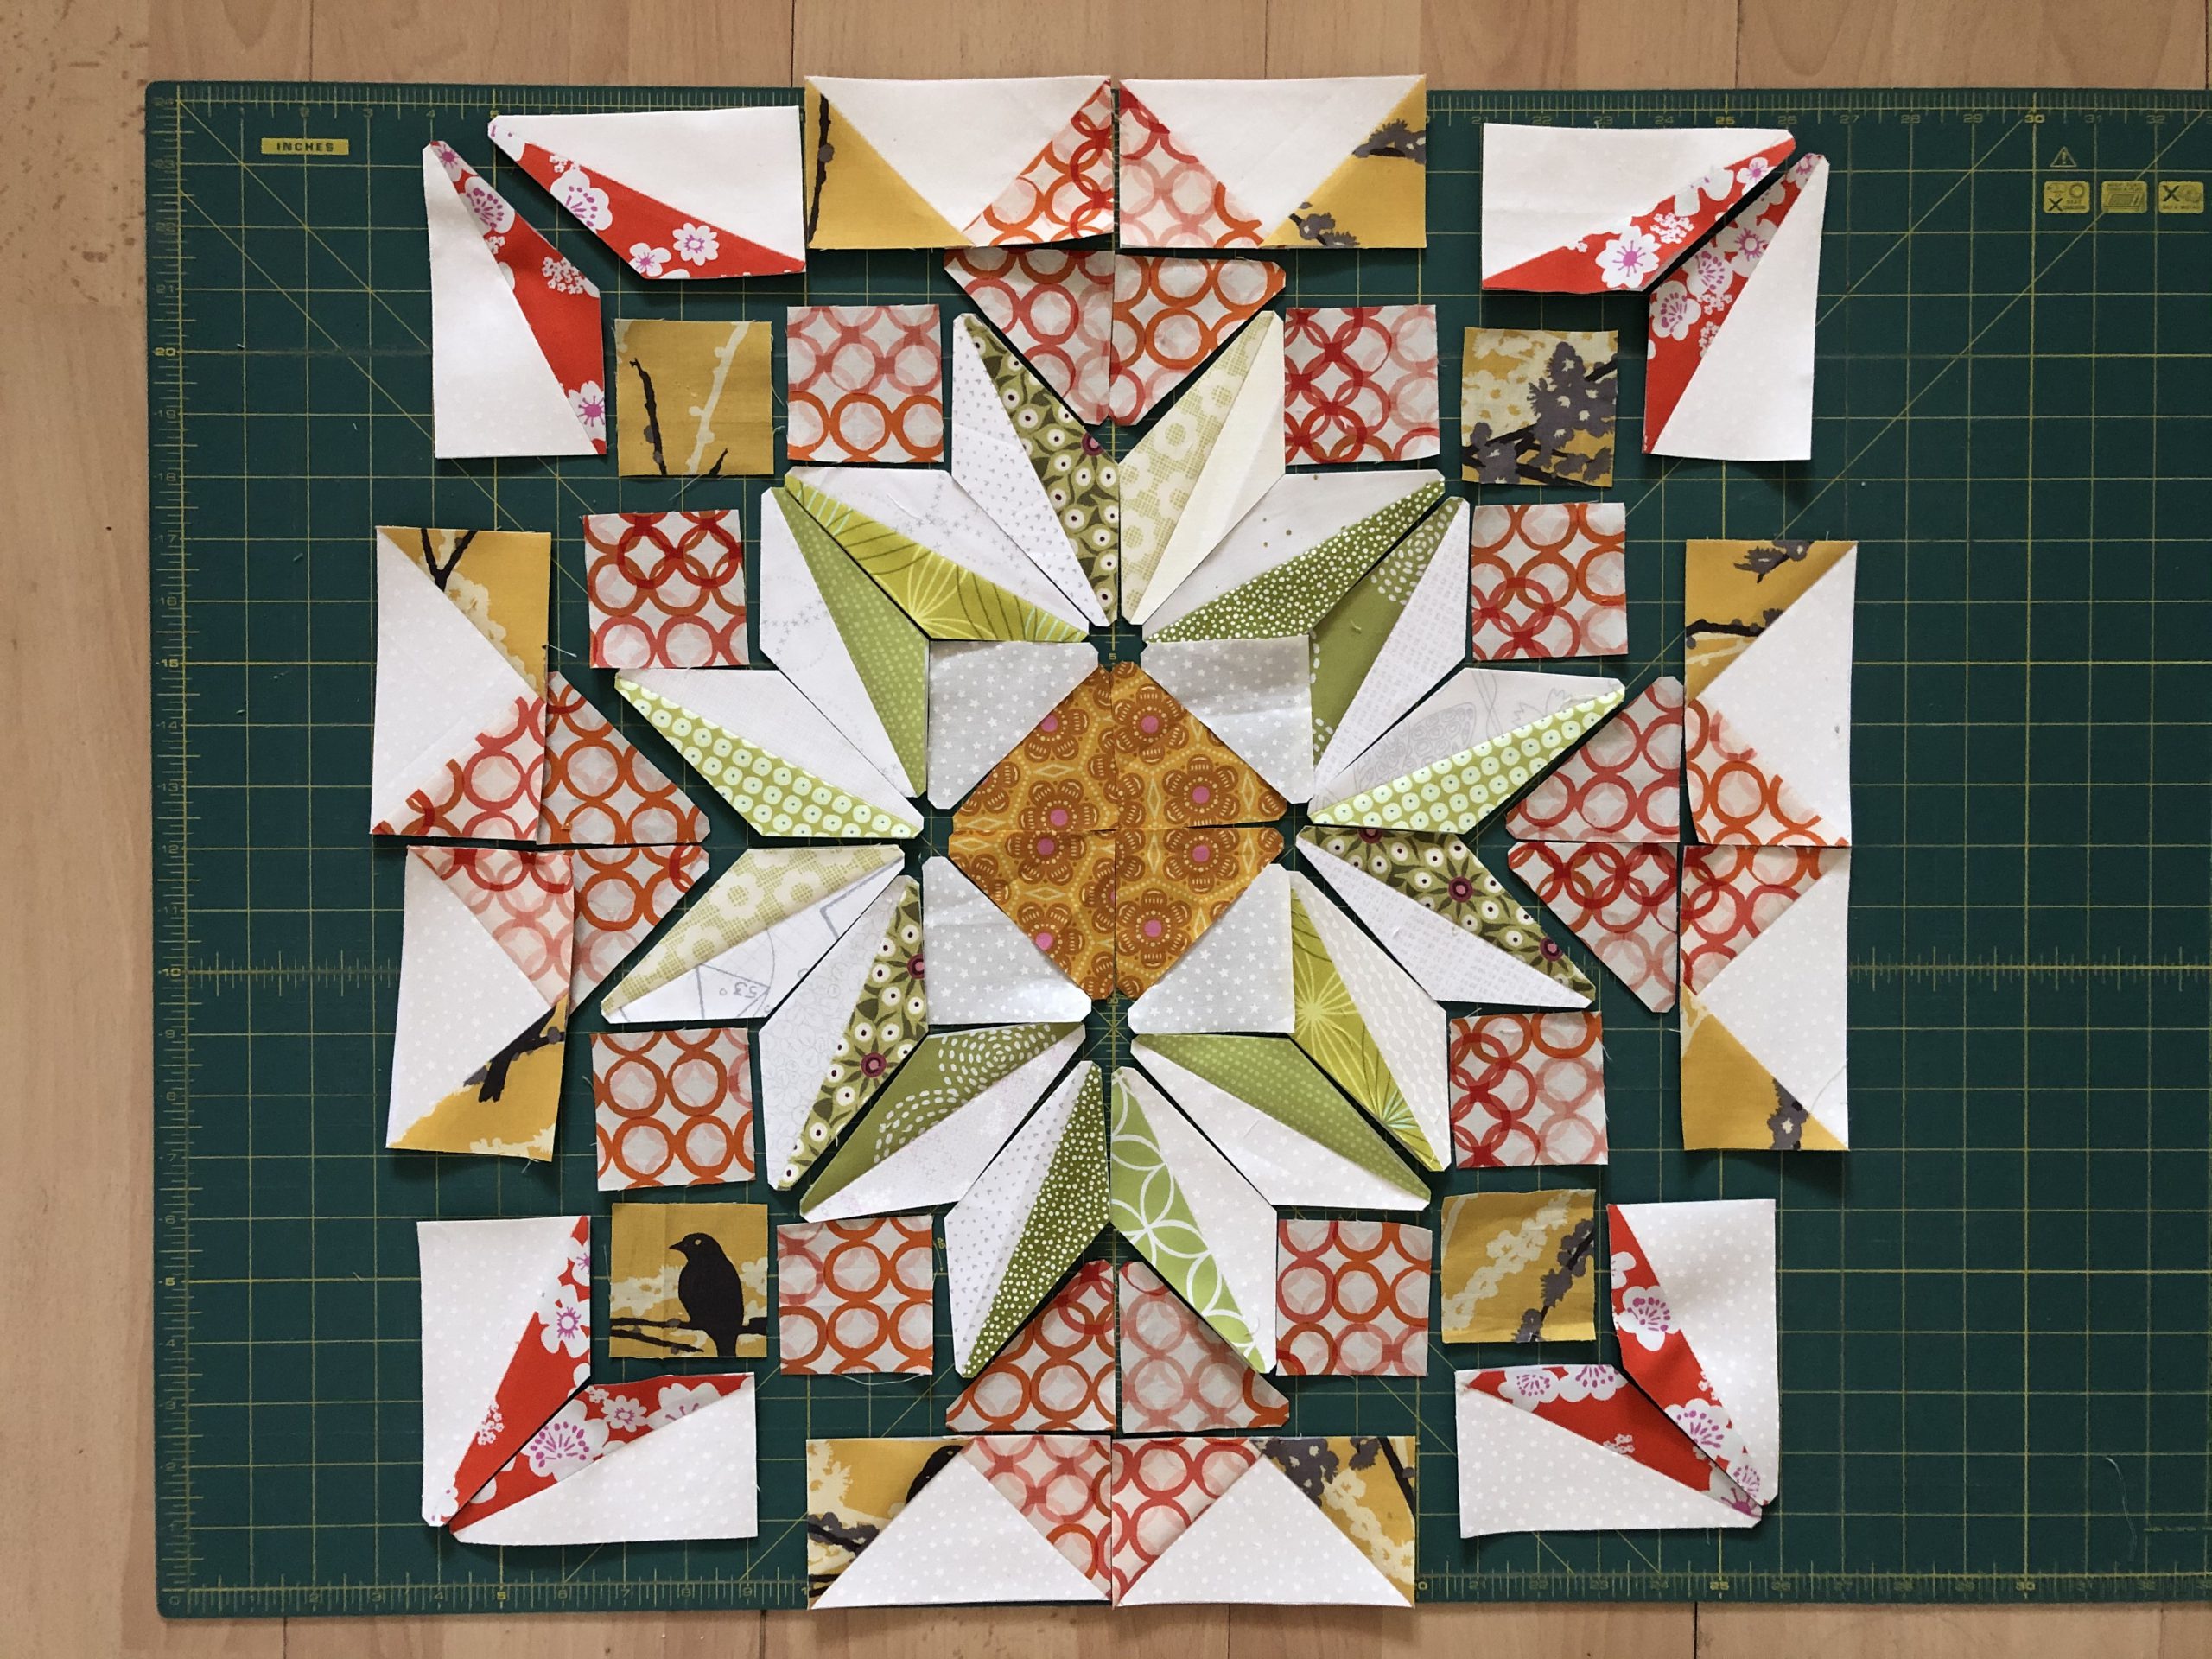
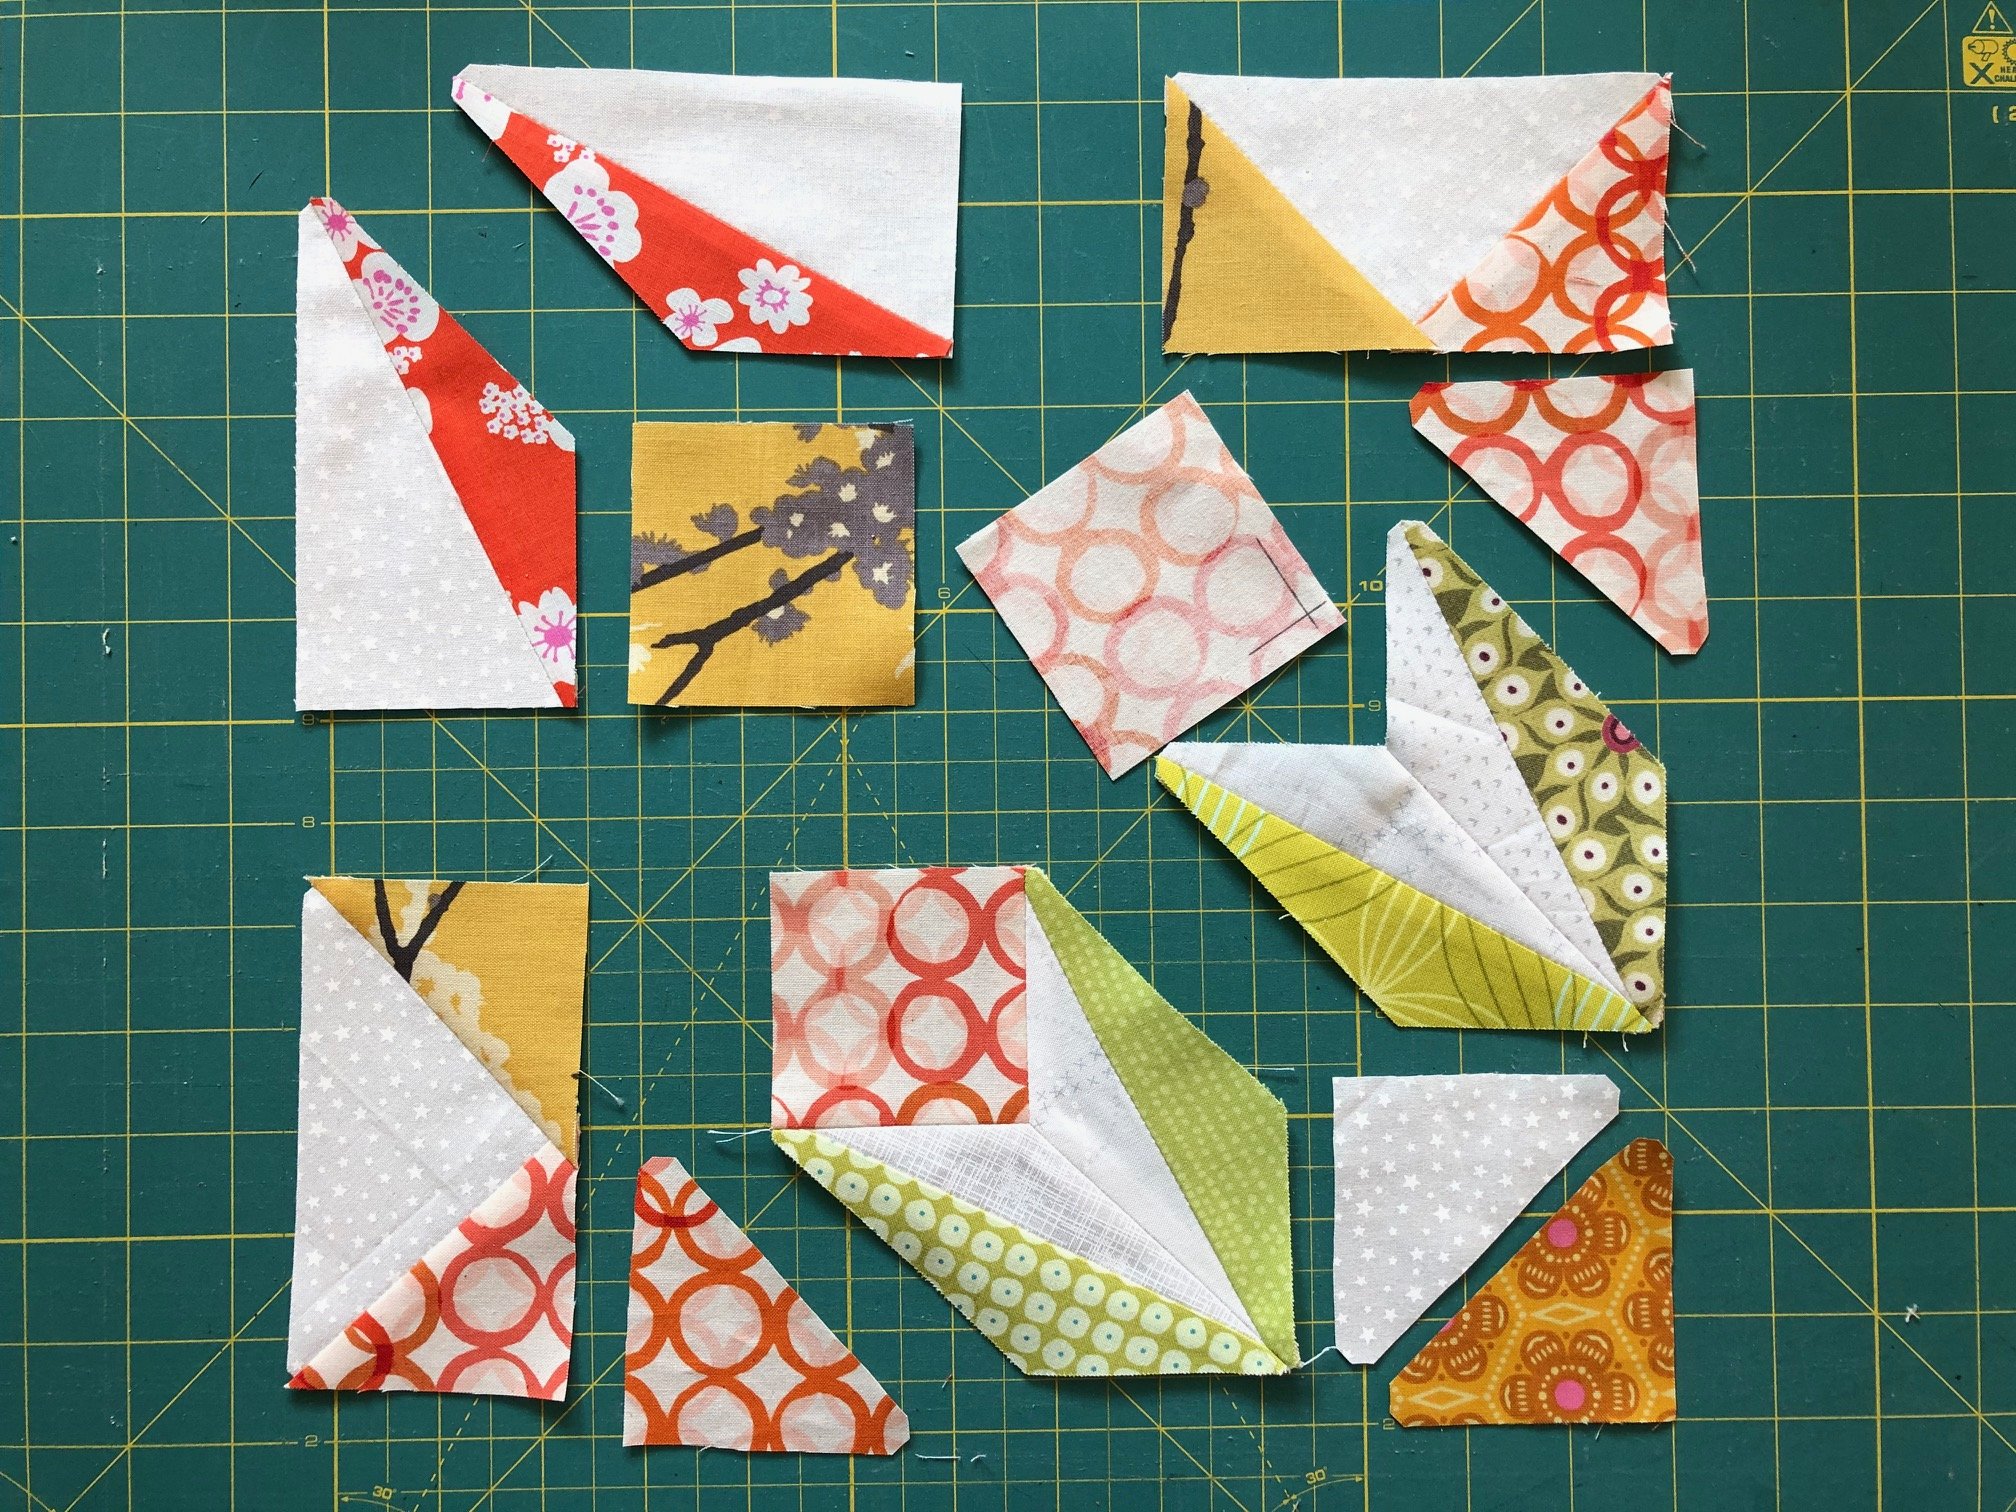
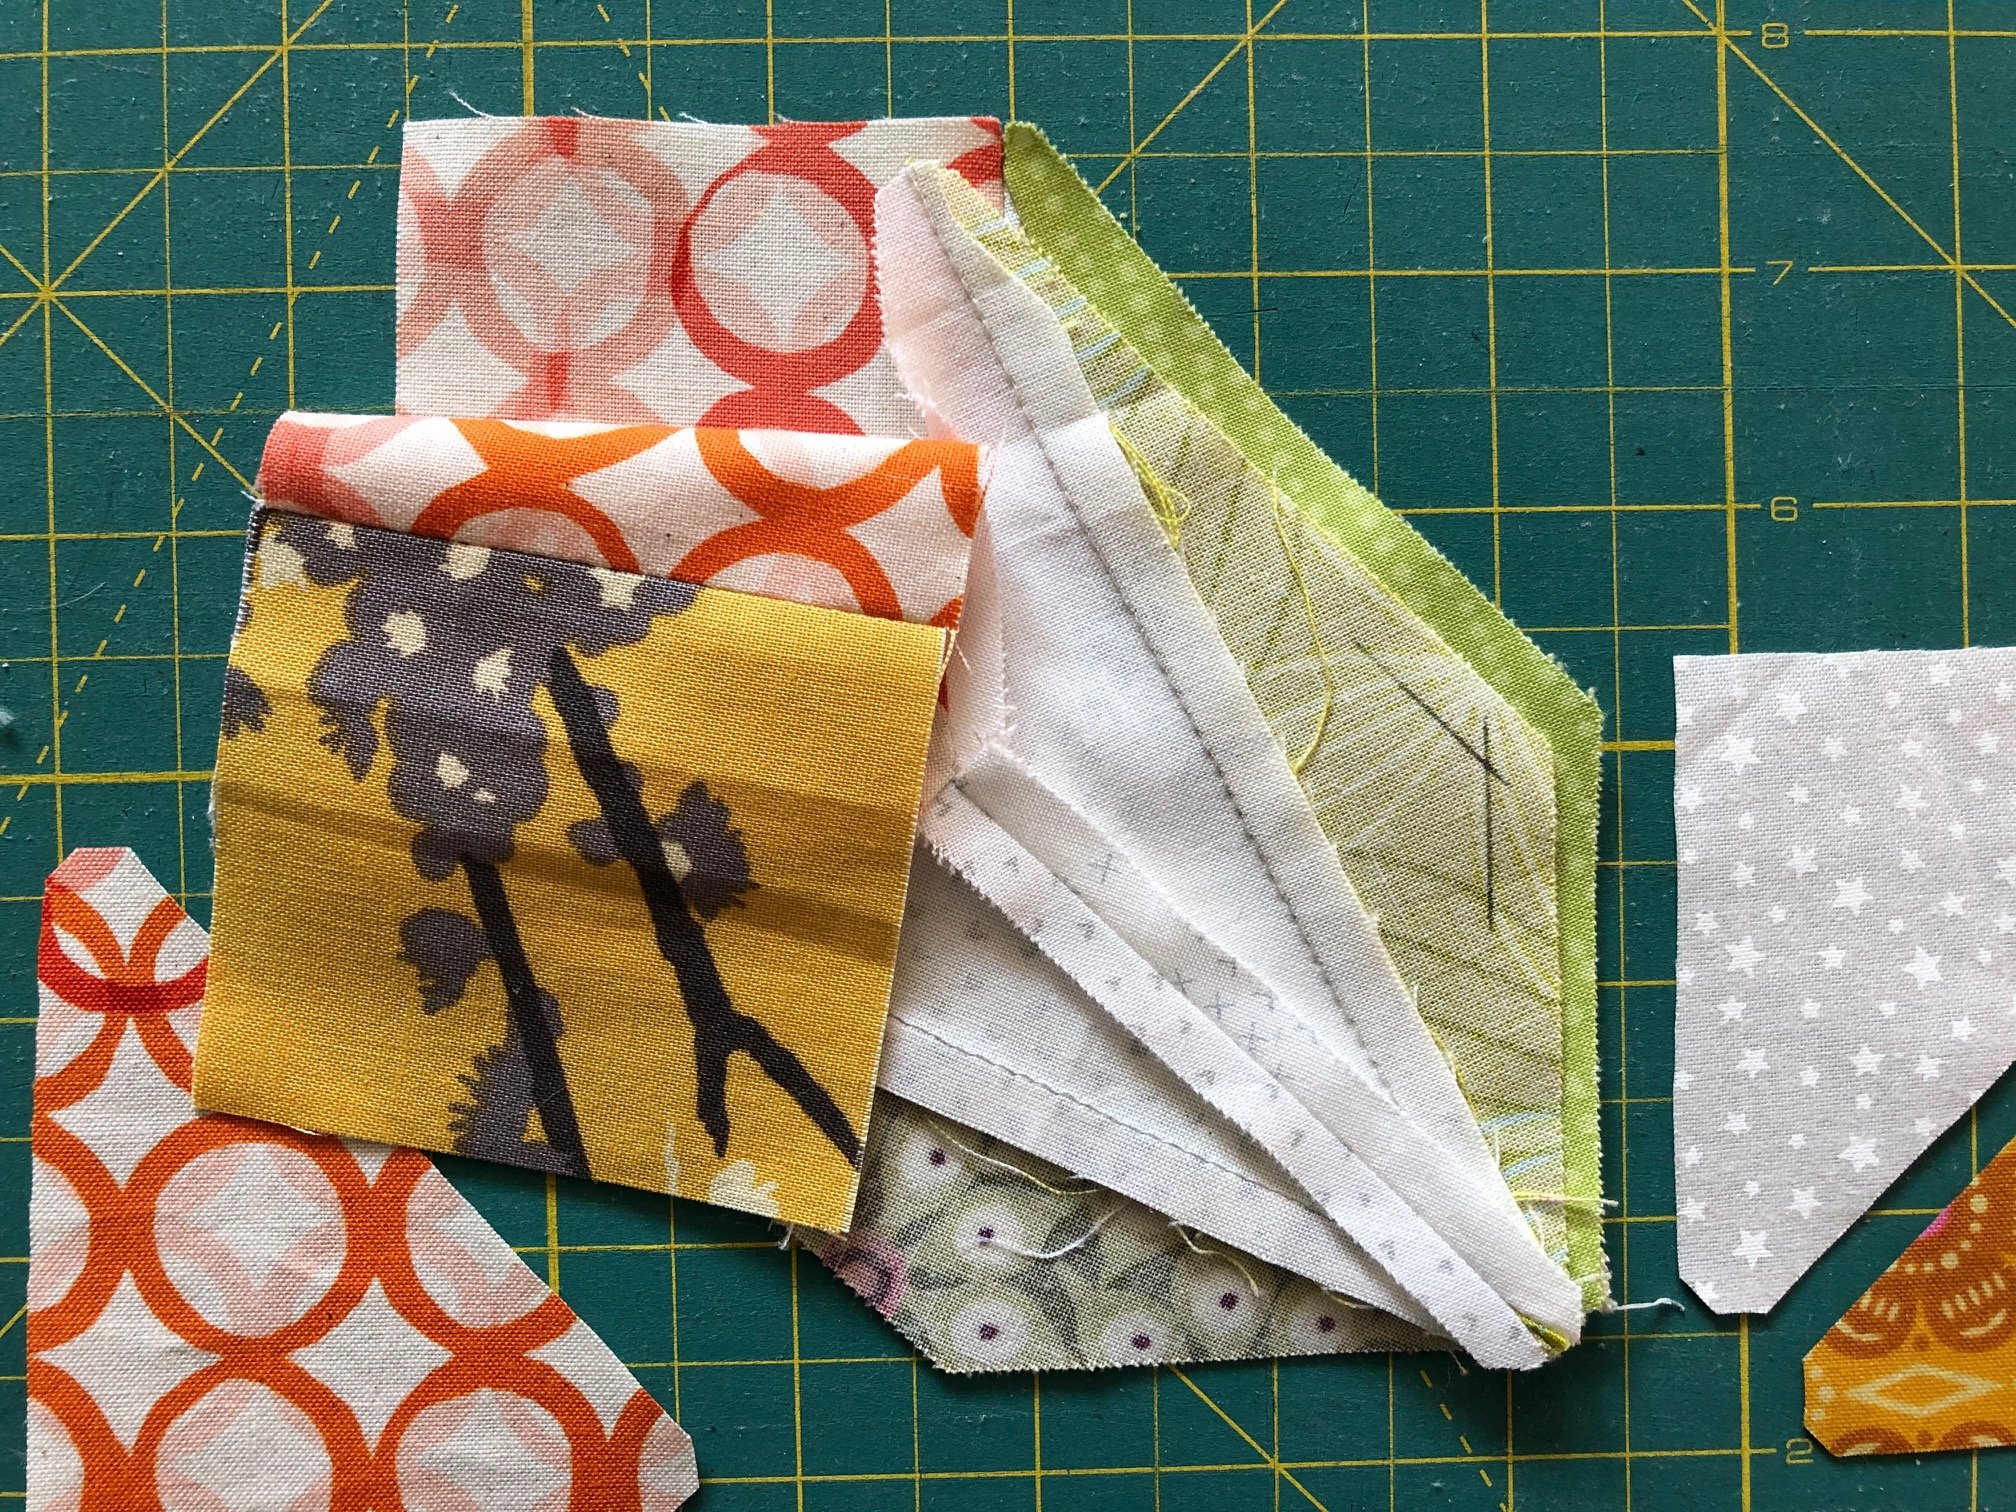
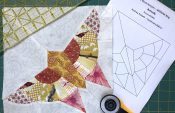
As I mentioned above, I will describe the assembly based on one quarter of the block. Here is a picture of all the pattern pieces for a quarter block:

First, join together the four diamonds from pieces C and D, in each case along the two longer sides and only up to the marked point (see picture below). Due to the large number of seam allowances that come together, I recommend that you trim them back beforehand.
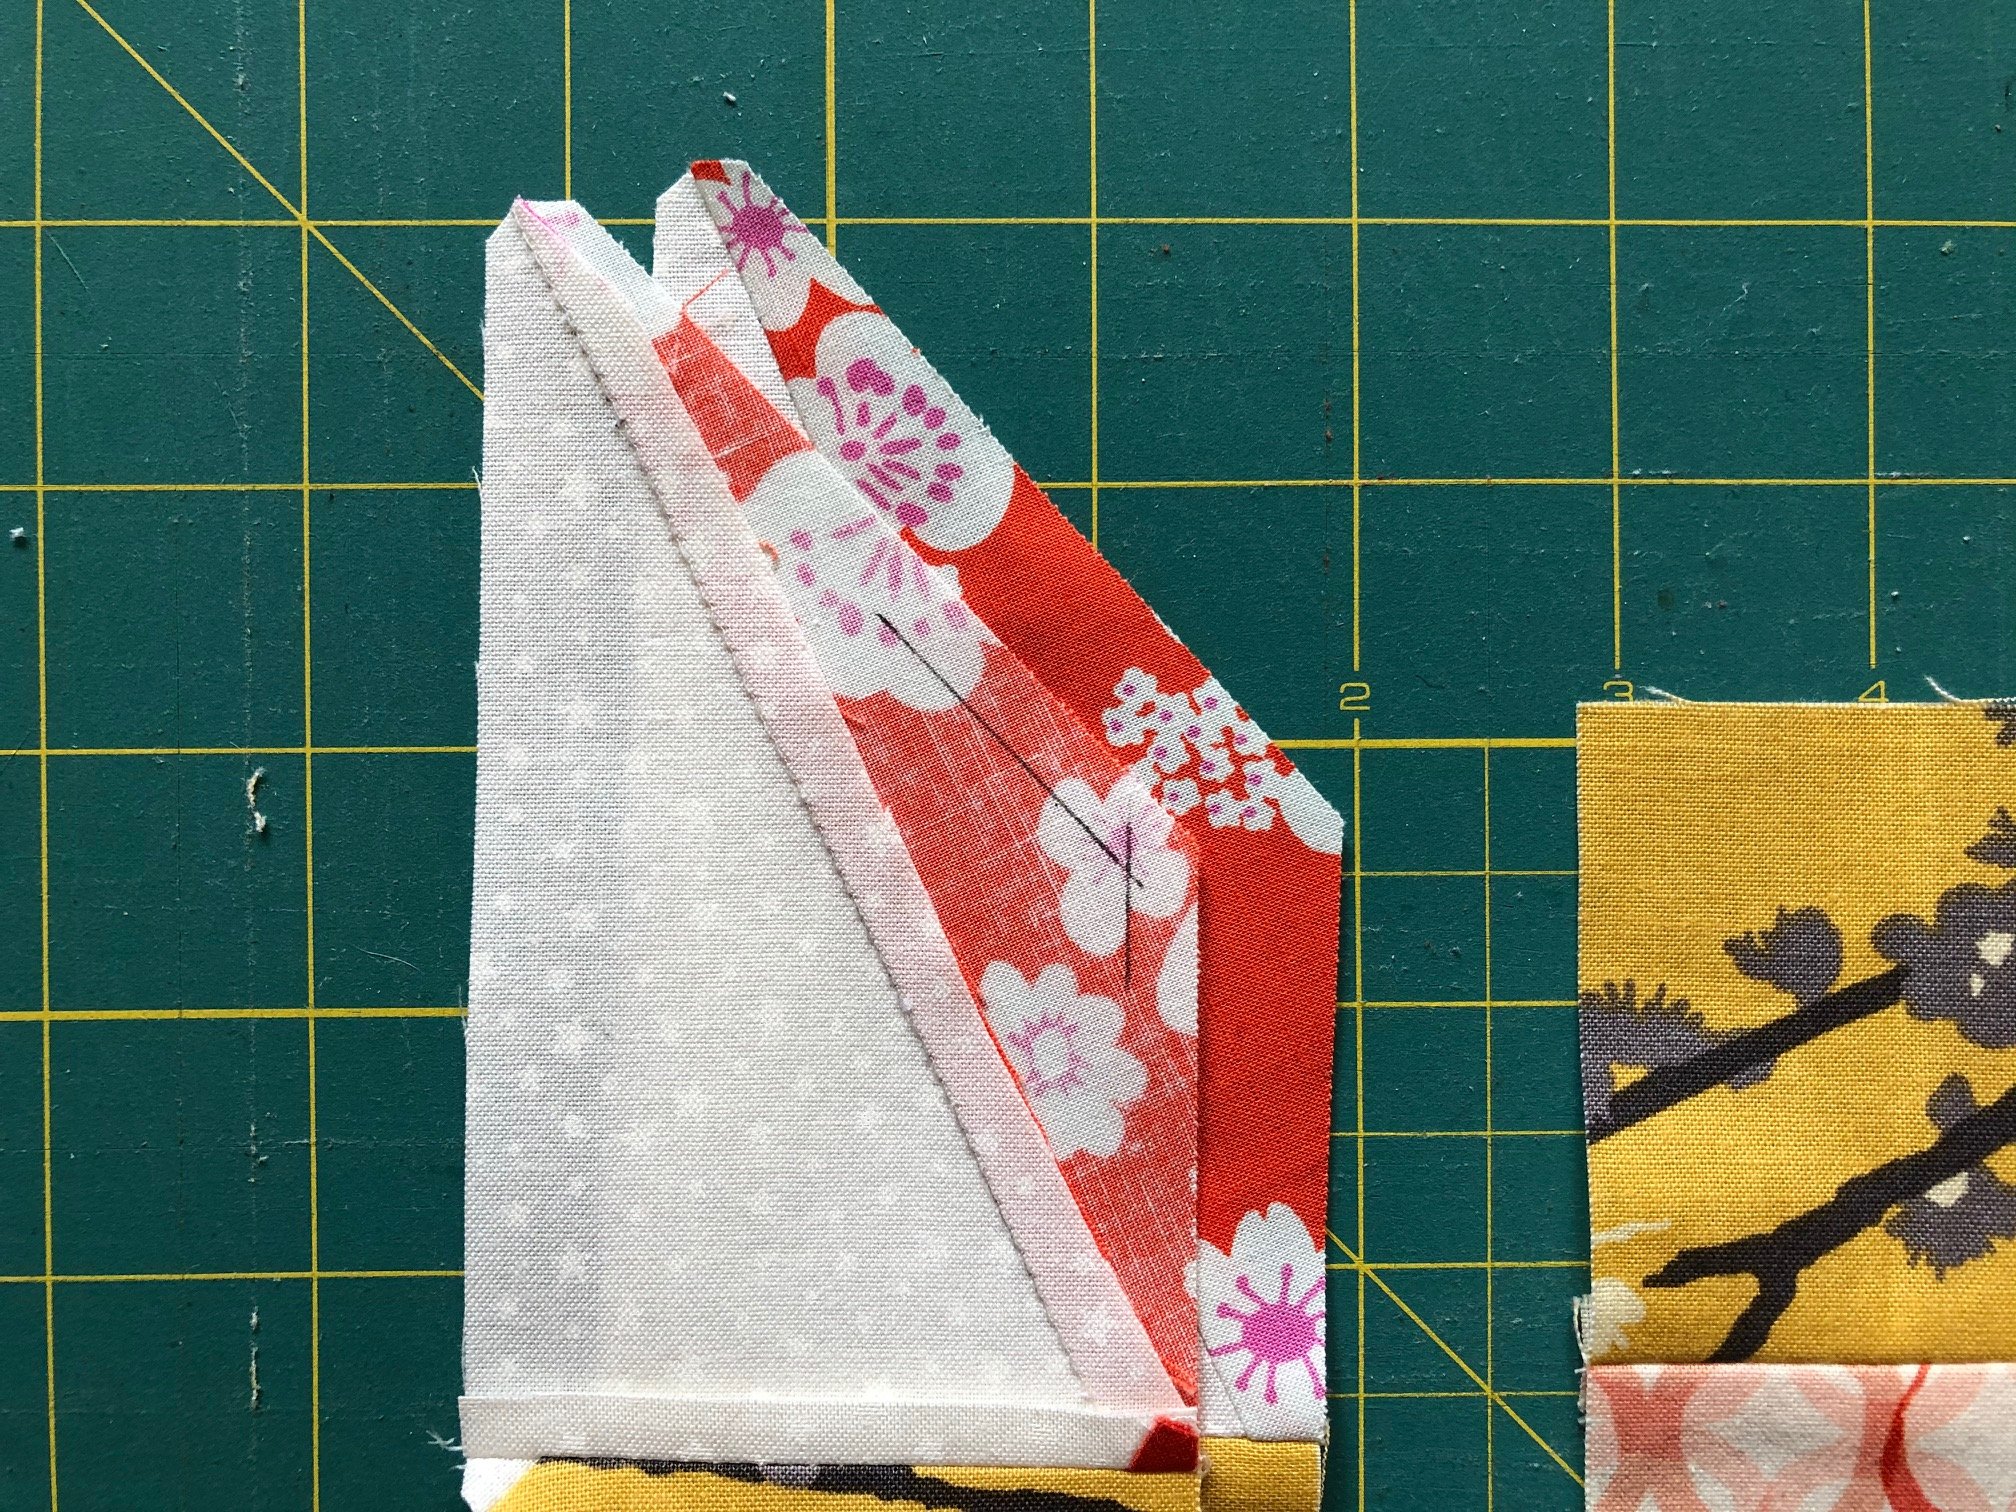
Once you have sewn the diamonds, mark the corner points on the squares above. And you’ve probably guessed already: we’re going to be making Y-seams again! On the upper diamond, leave some of the seam open on the bottom edge. You can see more clearly which seam I mean in the picture after the next one.
Now it gets a little tricky… As described, you should leave part of the seam open. First, sew the next upper square onto the upper diamond piece (the orange square and the yellow square).

Next, join the two diamonds along the long side. Close the seam flush from above up to the corner point. Secure the end of the seam.
Now the upper seam on the squares can also be sewn together.

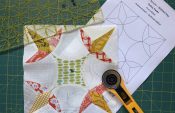
Then sew on the two triangles that point towards the center of the block. I first inserted the triangle that points towards the diamond seam and only then the other triangle that points towards the center. But you can also join the two triangles first and then insert the resulting square.
In each case, the two triangles are joined to the outsides of the diamonds, so you now have one large square overall.
As shown in the picture below, it is now time to sew together the outer strips, consisting of pieces G + E and F + E.
At places where several seam allowances come together, remember to trim them back.
To finish one quarter of the whole block, first close the seam between pieces E + F. Only close the seam up to the marked point (shown in the picture) and then secure it.
Here too, you cannot avoid using a Y-seam. But you should all be able do them in your sleep by now, right?
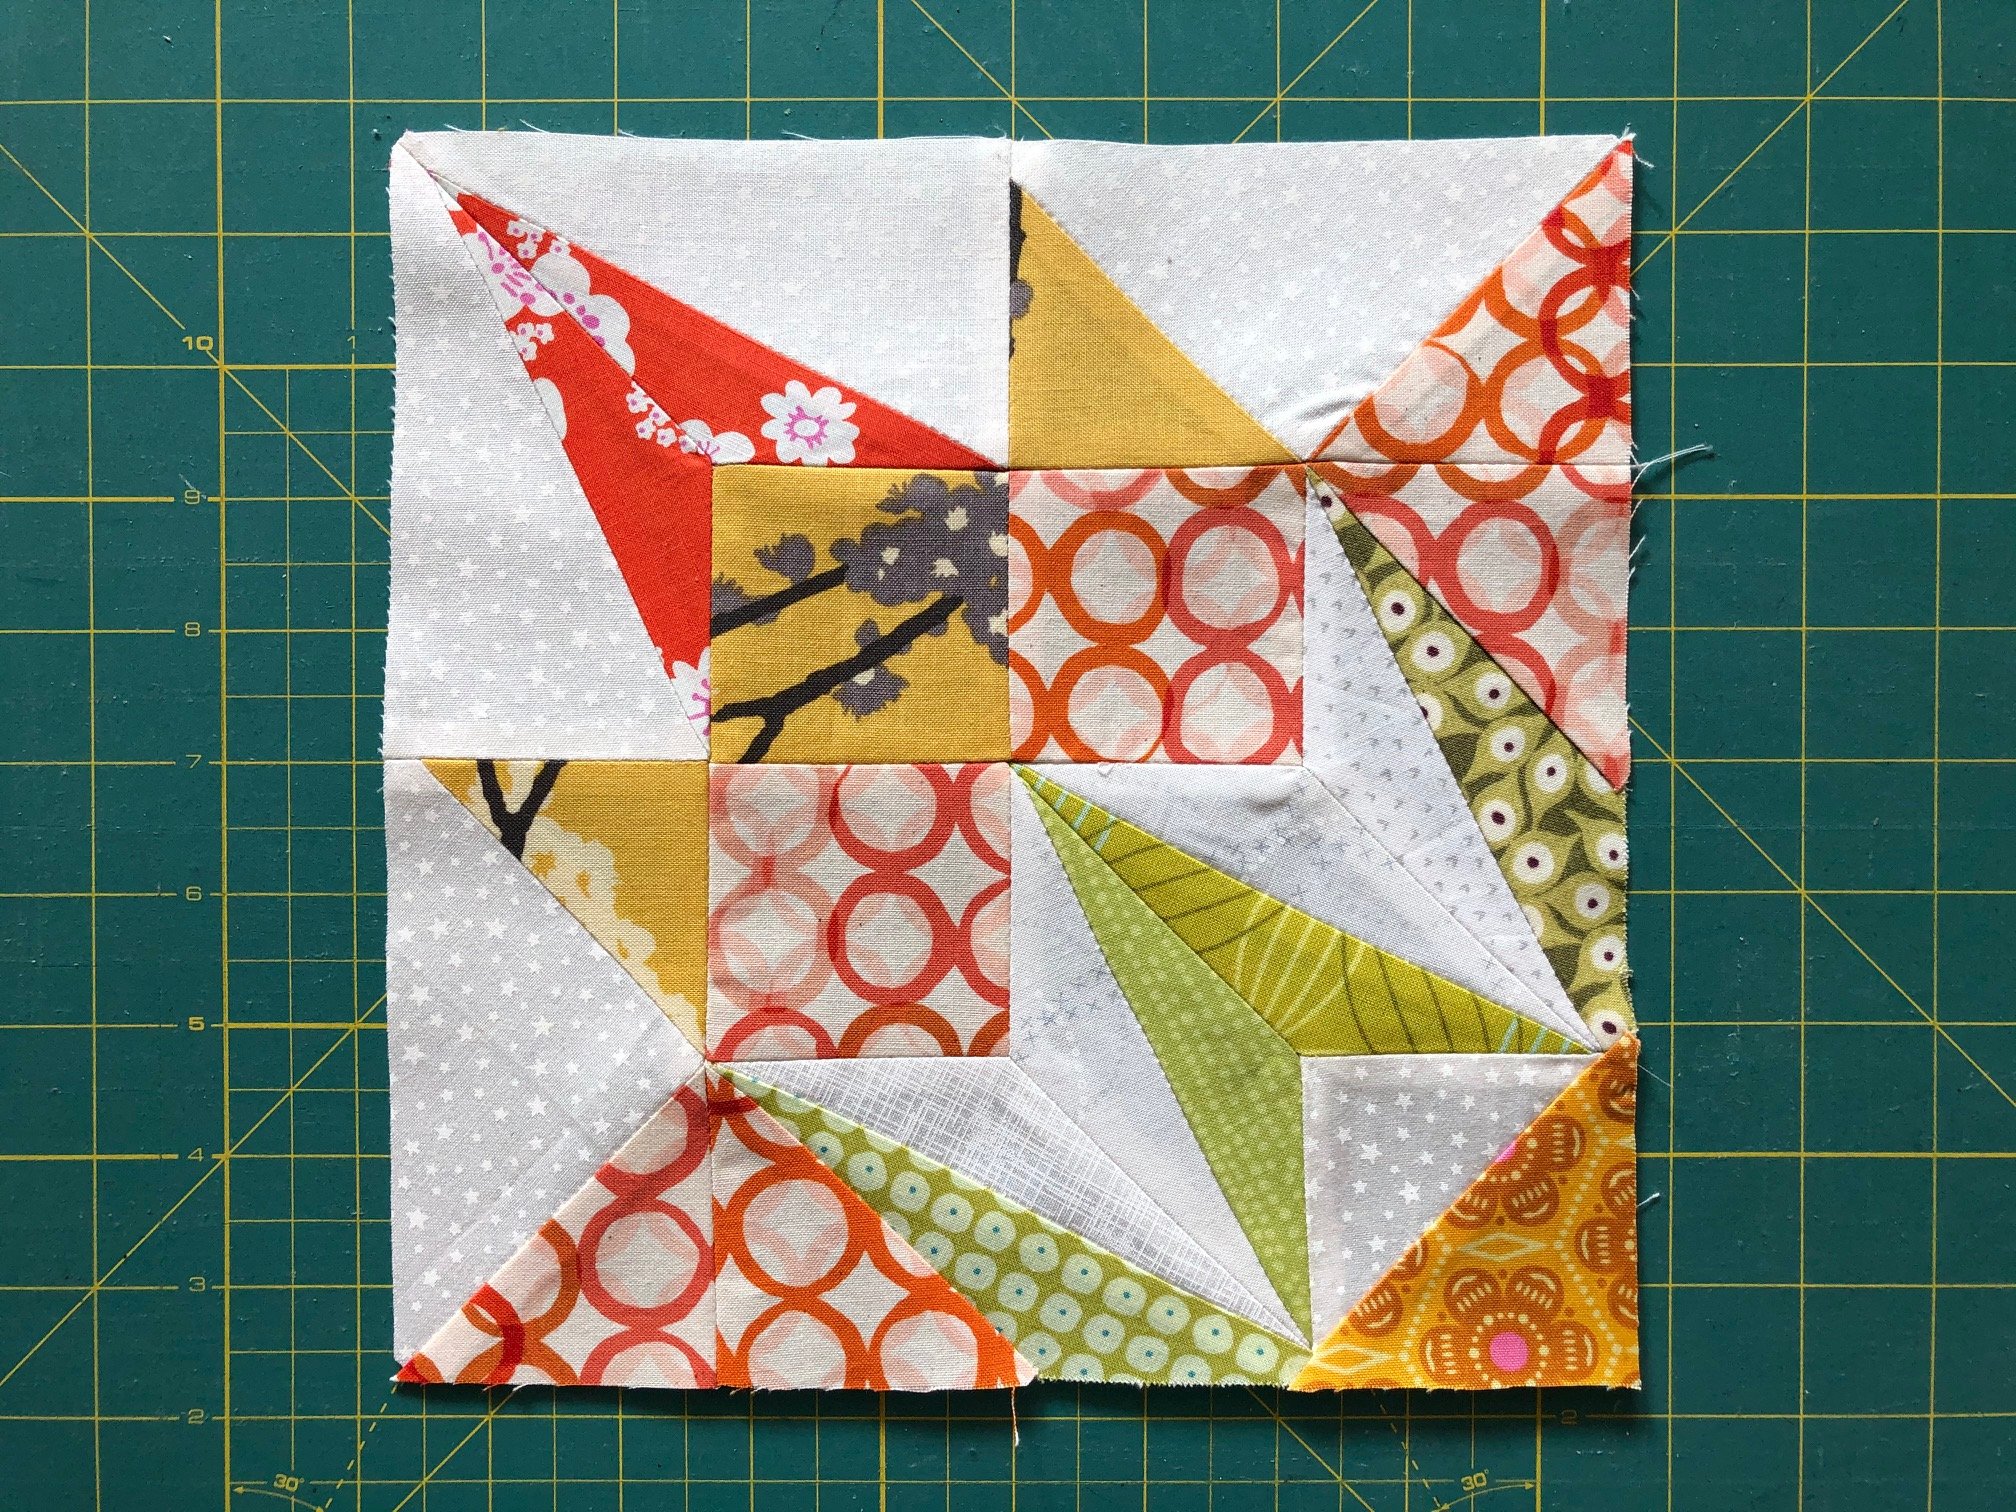
And you’re done! Well, one of the four block pieces at least :-).
I am sure you had to think a lot when you were sewing the first quarter… and the fourth quarter definitely went much more smoothly!
Admittedly this block was not easy! But once it is lying there finished, it looks superb and you can really be pleased with it!
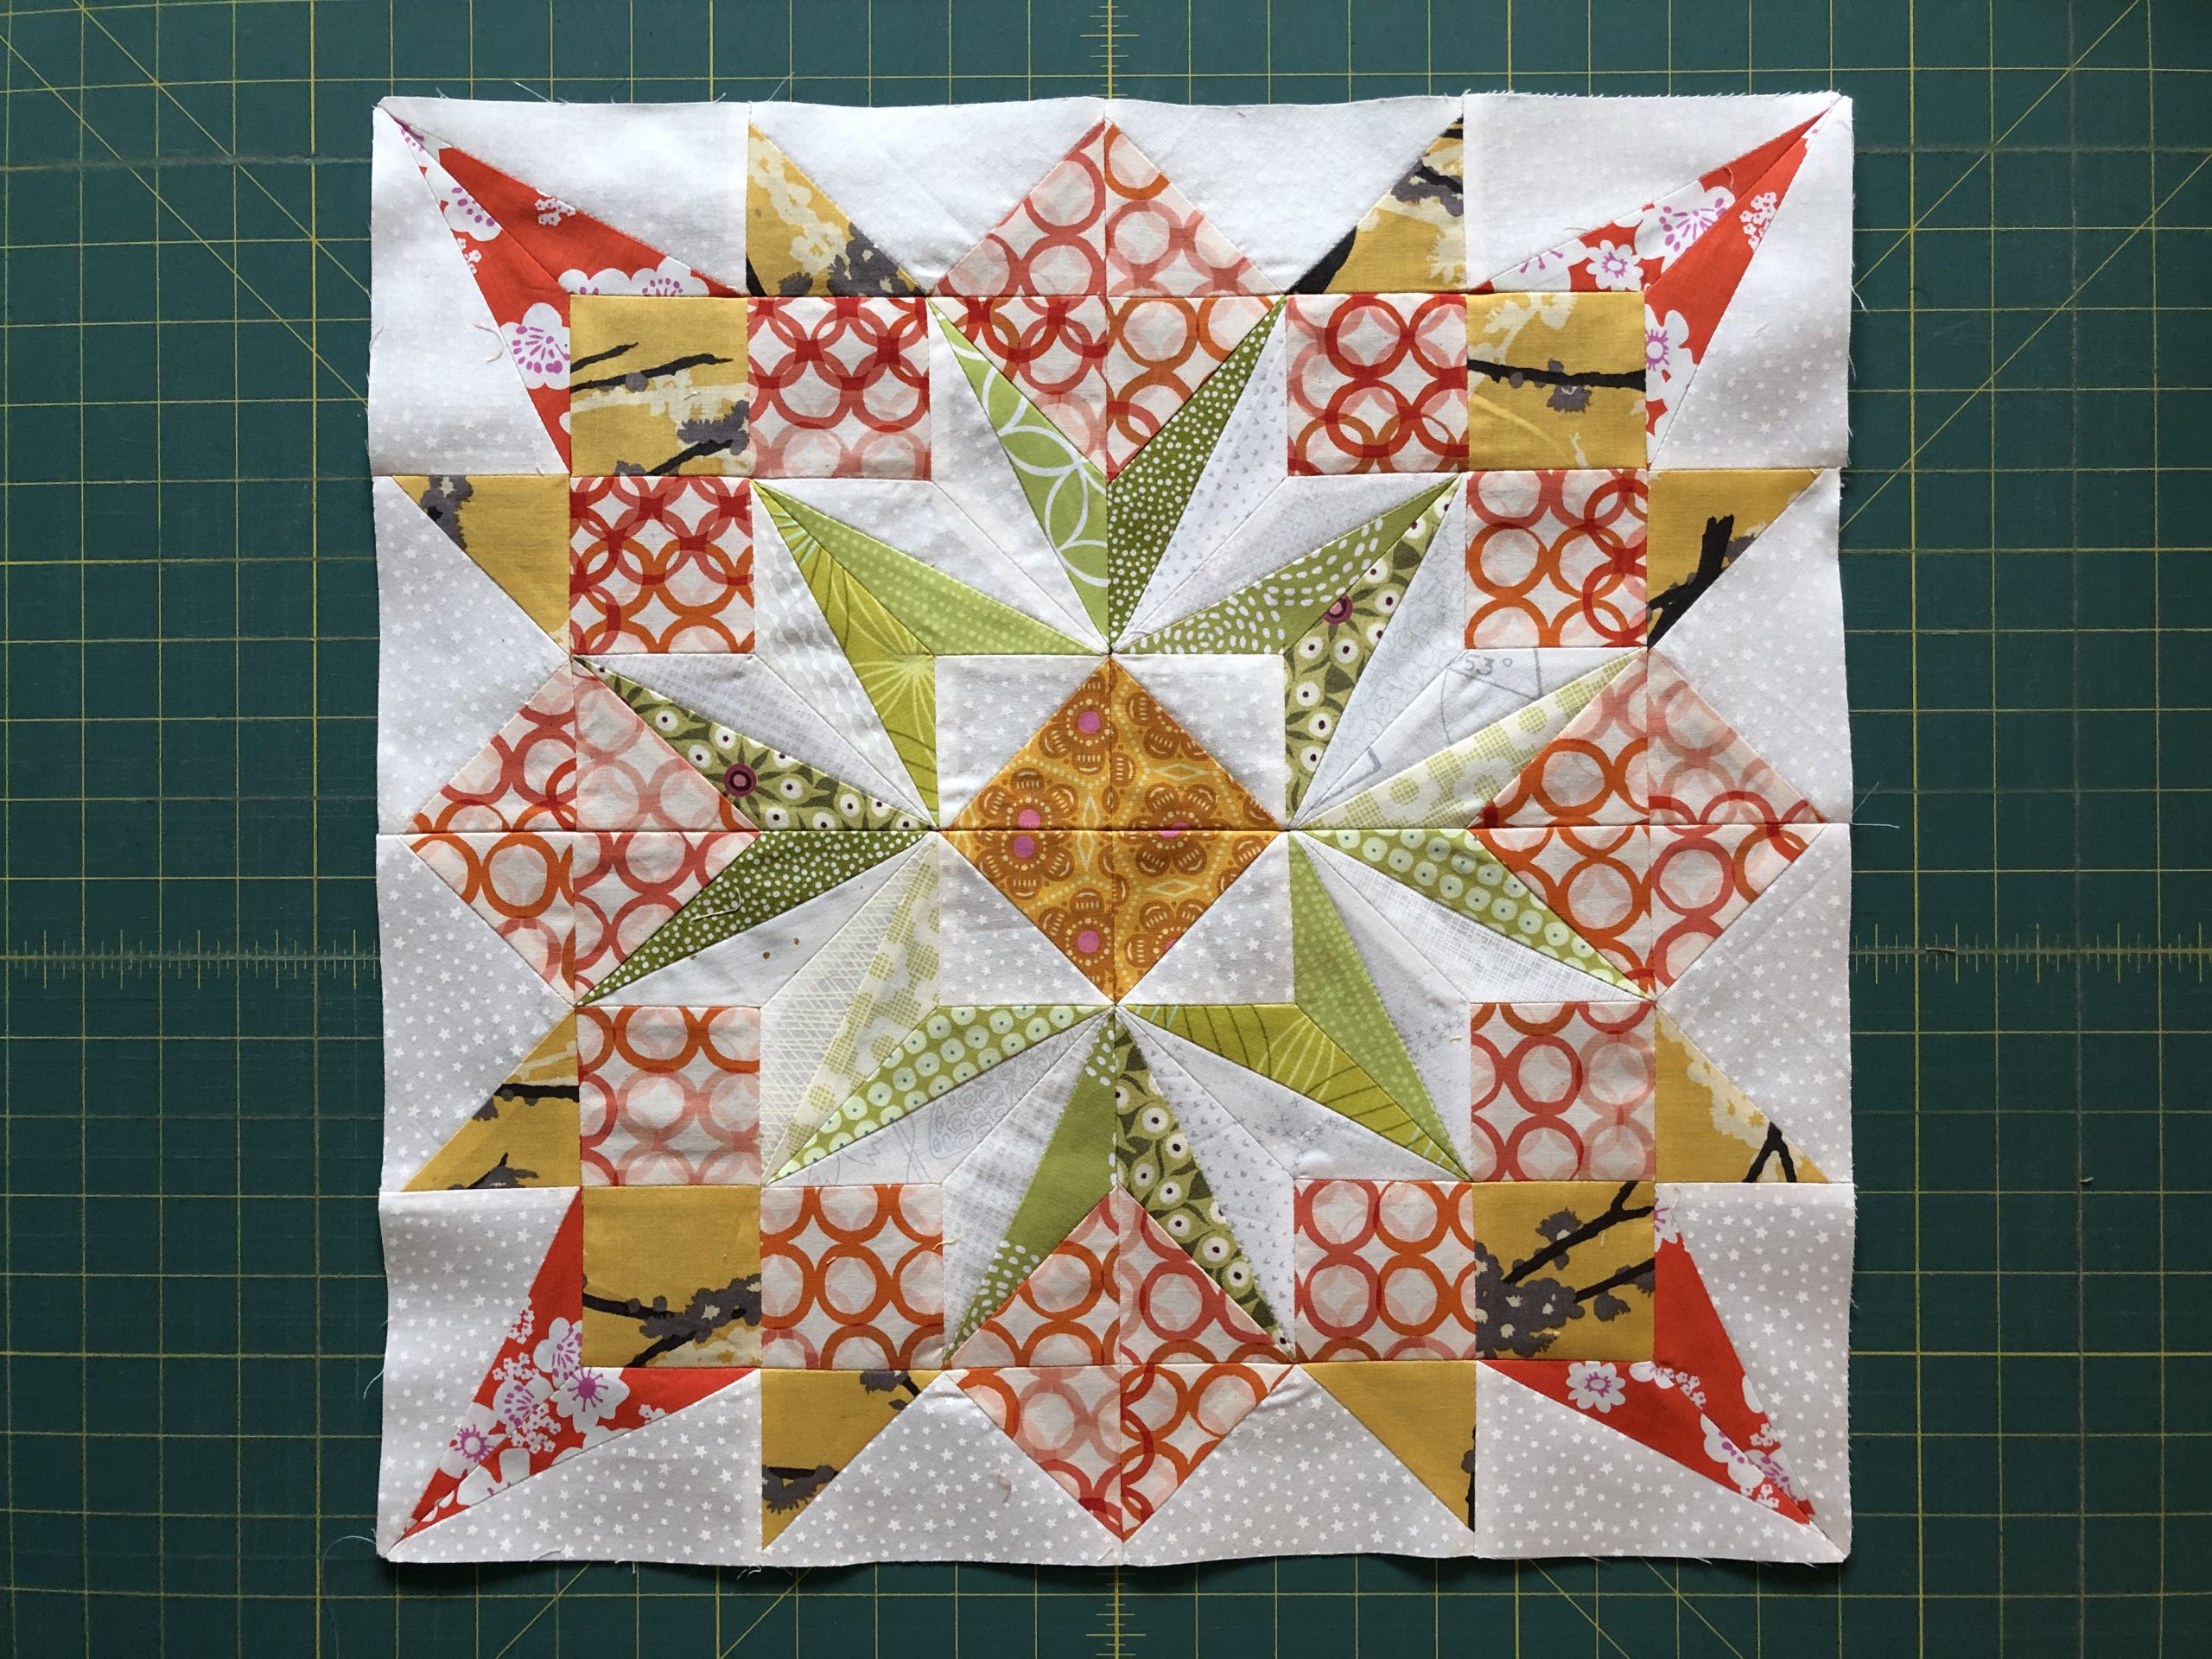
I really hope you have fun making this block and you are then proud of your big beautiful block!
It will definitely be a while before we get to see the first Constellation blocks… Or maybe I am wrong and one of you will do it again in lightning speed!
Regardless of how or when, please share your finished blocks with us here in the Community area of the Old Block Sampler, or on Facebook or Instagram – making sure you use the hashtag #BERNINAOldBlockSampler!
If you want to stay up-to-date with the new blocks that appear on the BERNINA blog, there are several options:
- You can regularly drop by the blog.
- Or you can sign up for the BERNINA Newsletter, which is published at least once a week.
- You can also follow my “Quiltmanufaktur” feed on Instagram or Facebook. I post there simultaneously with the publication of each new block of the Old Block Sampler.
New here?
Have you only just discovered the quilt-along? No problem! You can join at any time. Registration is not required, and you can win a BERNINA 570 QE! All the posts will remain permanently available at the following link: Old Block Quilt-Along – overview of all the posts
In the first post, which was the invitation to participate in the quilt-along, you will find the important initial information about our joint project:
Old Block Quilt-Along – who’s in?
You can find the rest of the blocks from the quilt-along that have already been published here:
Old Block Quilt-Along, Part 1: “Bride’s Bouquet”
Old Block Quilt-Along, Part 2: “Quilter’s Delight”
Old Block Quilt-Along, Part 3: “Bird’s Nest”
Old Block Quilt-Along, Part 4: “Cross and Star”
Old Block Quilt-Along, Part 5: “Morning Star”
Old Block Quilt-Along, Part 6: “Mill and Stars”
Old Block Quilt-Along, Part 7: “Altar Steps”
Old Block Quilt-Along, Part 8: “The Corner Star”
Old Block Quilt-Along, Part 9: “Cleopatra’s Fan”
Enjoy the “Constellation” block!
Enjoy your sewing,
Andrea
Thankyou for another great block! I am getting better with the techniques, and enjoying the process.
I was unable to download the constellation paper pieced pattern
Dear Kathleen,
Im not sure why the download did not work for you. Did you click on these downloads?
Did the download not start or is there another problem?
Kind regards, Ramona from BERNINA International